
Rear Windshield Wiper Removal


Thread Starter
Senior Member
Utah Scions
SL Member
Joined: Jul 2004
Posts: 557
From: Salt Lake, Utah
CREDITS: This article was written by a dedicated Scion Life member. Please let Pimpe_Ok know if this article was helpful to you!
DISCLAIMER: Scionlife.com does not take any responsibility in what you do to your car. This FAQ could be filled with incorrect information. You could be voiding your warranty if not installed or uninstall by a certified mechanic or dealership. It is quite possible that you can totally mess up your car by using this as a guide to install or uninstall anything. This can result in serious bodily injury, death, dismemberment, sexually transmitted diseases and so forth to you and anybody else in case of an accident resulting from failure to take safety precautions and/or following the instructions in this write-up.
For this install, you will need:
~ A Fare amount of time
~ Some amount of "Know How" &/or Mechanical Skills
~ 10mm socket wrench
Ok so first off let me start by saying it was fairly easy to remove the wiper. Second i will not be held responsible if you screw this up.... Take Your Time! Watch what your are doing.
Ok, this is my first "Big Wright Up" So Enjoy!
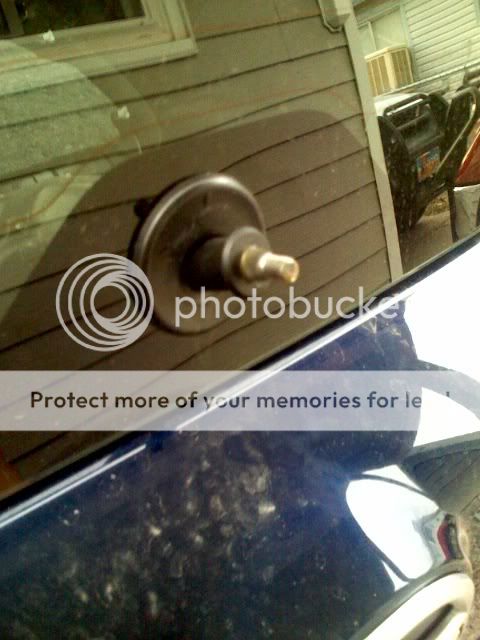
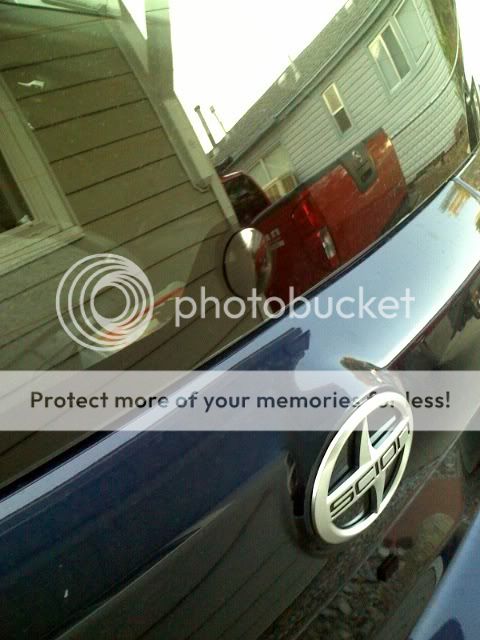
Start by removing the rear wiper arm, to get to the 10mm nut you need to take this cap off,
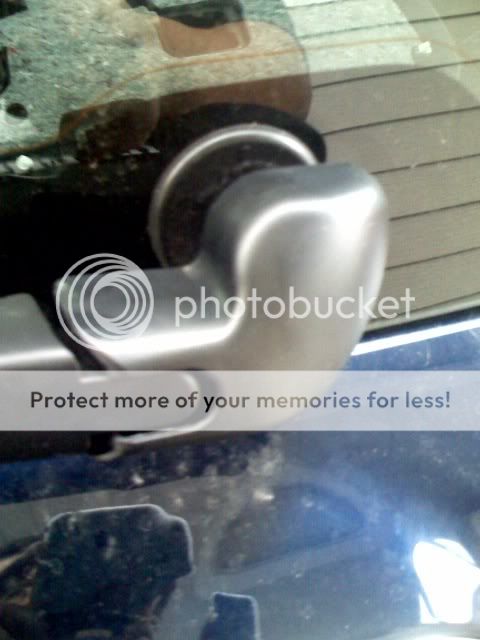
There is a latch Here.....
 please ignore the reflection of the sexy man taking pictures with his iPhone.
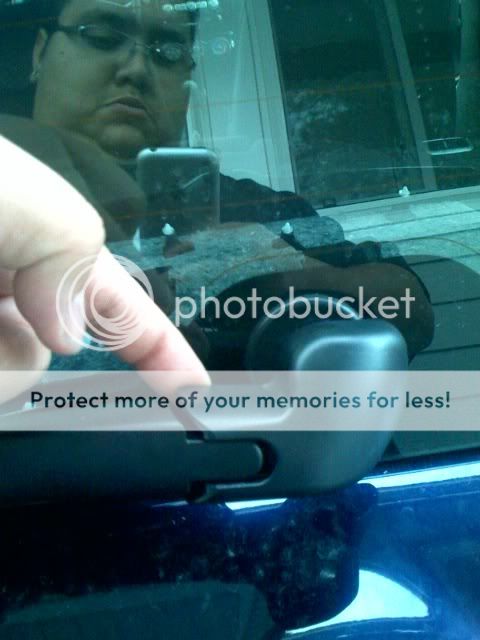
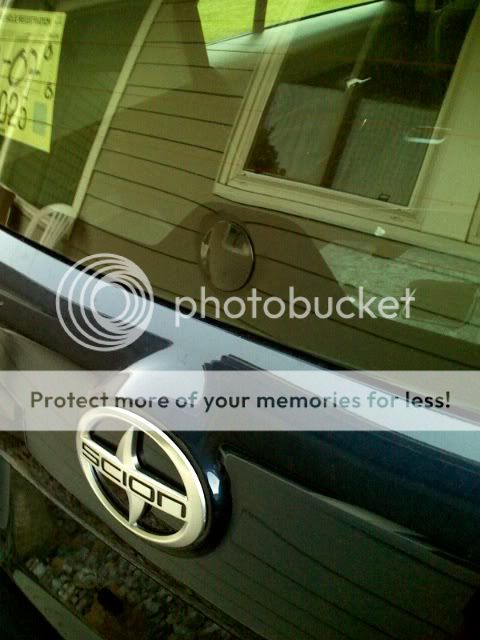
and here..... its easier if you pull them one at a time.
***Note*** It might want to latch back up when you free on side and try unlatching the other, just hold the unlatched side while trying to unlatch the other side.
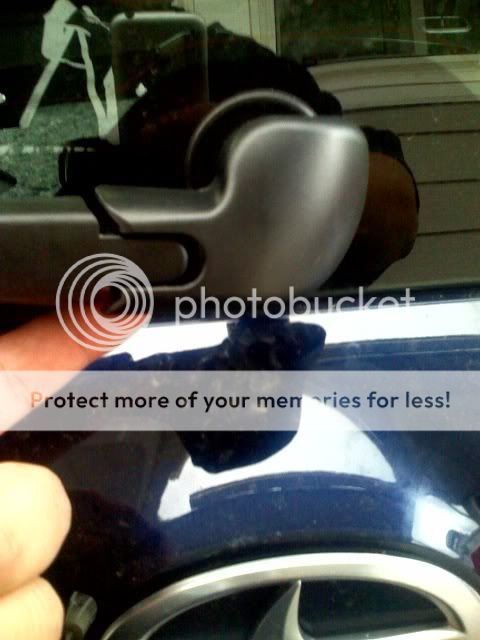
 lol don't pull to hard it should only swing open to reveal the nut not come all the way off.
***Note*** if it dose come off no need to worry you can pop it back on after your done removing the wiper arm.
Now Remove The Nut and wiper arm. ~Remember~ its a 10mm Nut/Job.
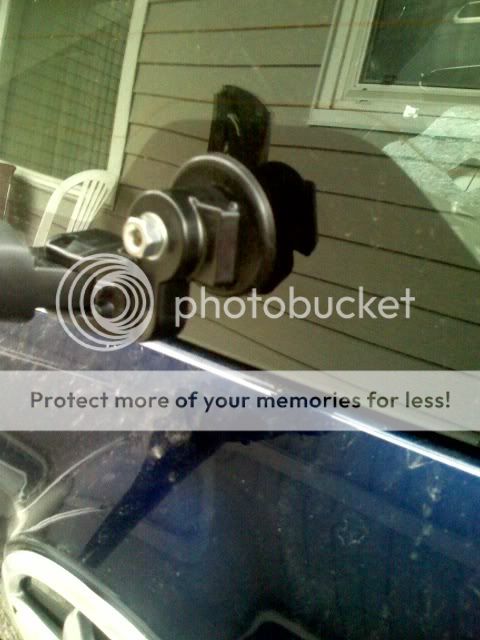
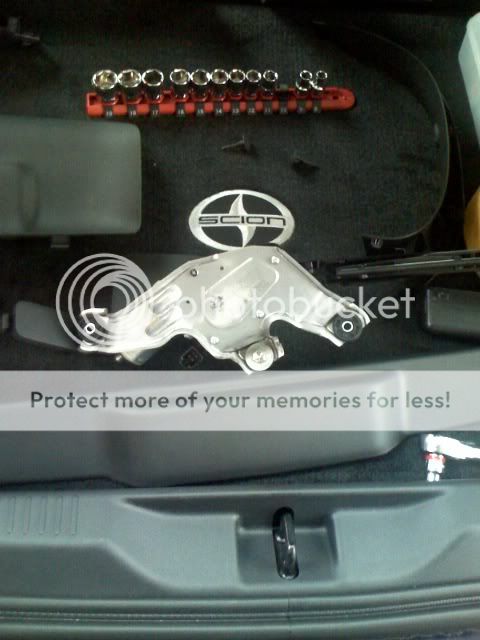
Ok thats was easy right? Here's what you should have.
Lets move on to the inside of the car now to remove the wiper motor.
Ok, in here take off all 3 of this small covers to revel the guts off your xD these also give you good place to look inside to find all the plastic "Latches/Hook's/Bolts". Also remover the hach hand hole. just pop it off with a flat head screw driver.
***Note*** this is were it can start to get some what "Scary" if you have never taken the paneling off of a car. No need to worry if you take your time it should all just pop off with a little amount of brute force.
  ~ Remember~ Pull hard but be gentle. don't over "Bend" the plastic it can and will break

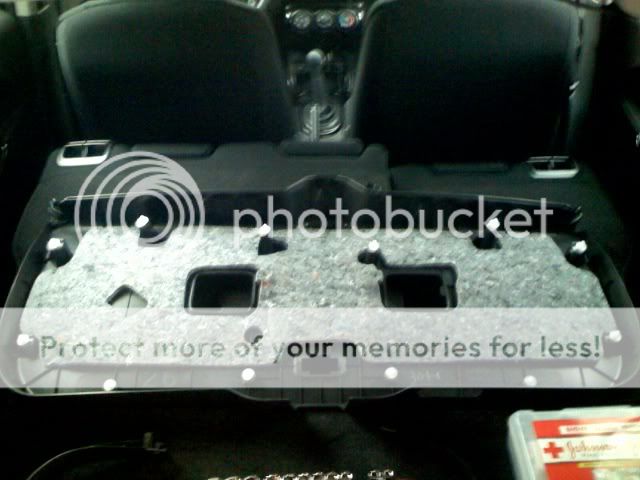
Here is an image of the hatch panel removed, note all the white plastic Bolts/Hooks/Latches. Look where you might want to get your hands in to pull the panel off.
Now, remove the "power" from the motor just unclipped the connection...
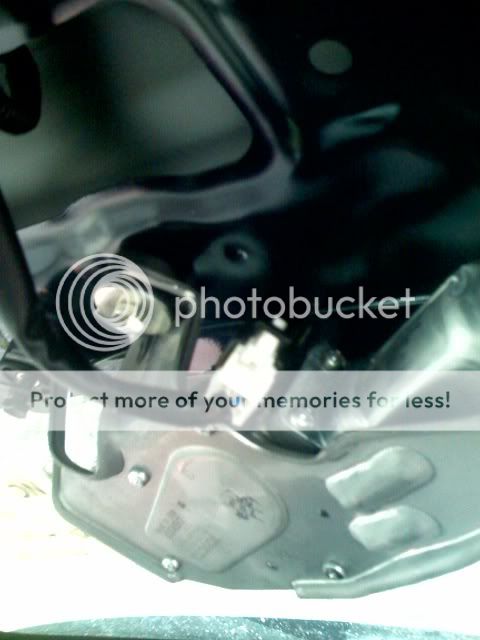
Now unbolt that bad boy! its that easy! they are 2 Black Bolts & 1 Golden Bolt.
***Note**** There are only 3 bolts holding it in place. ~ Remember ~ this are 10mm Bolts.
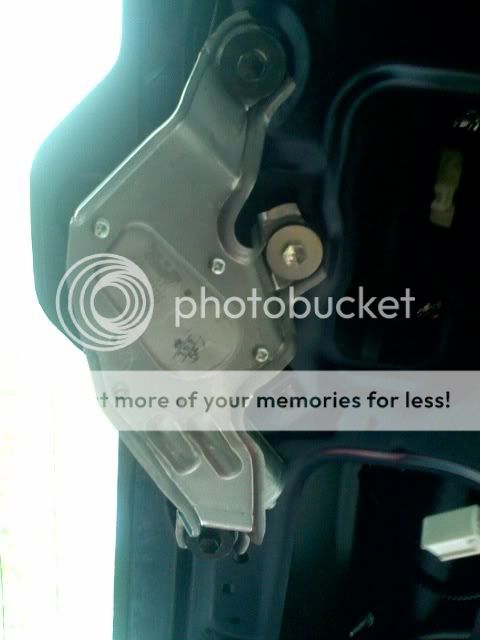
Once its all unbolted just pull it away from the hatch its no longer attached to anything its only in the rubber grommet not stuck in there though. Lay the motor some were.
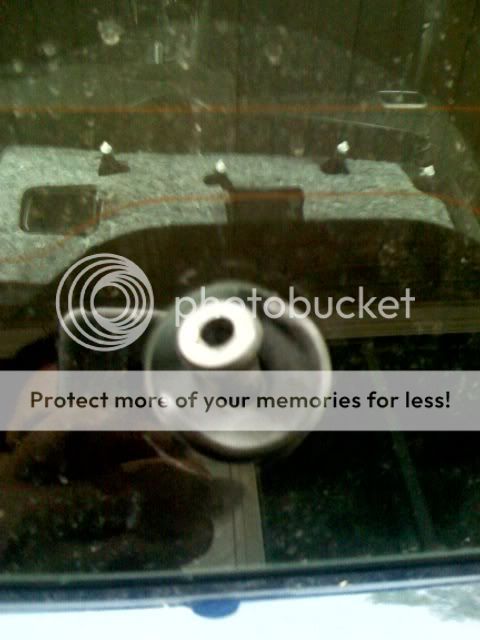
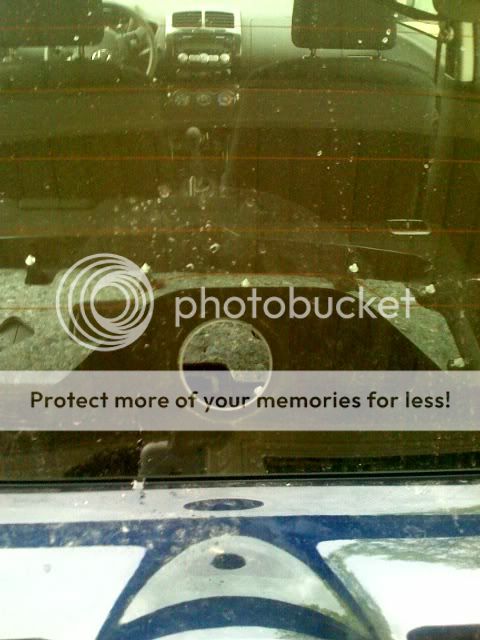
Now remover the rubber grommet with the hatch closed, just get your nail under one of the edges and push the grommet into the car. Not much to this its not glued in or anything.
Here is were you should be at. All removed and ready to cover up.
But what to use?????
Time to take a trip to your locale Hardware store "A.K.A, HomeDepot, Lowes"
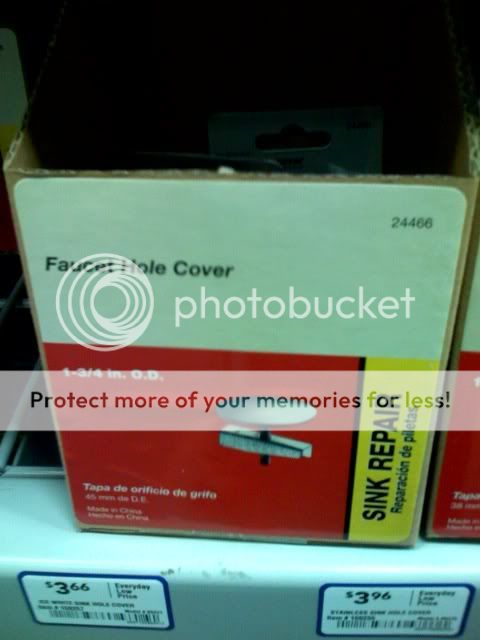
Go to the sinks and plumbing section or ask someone to tell you were you can find sink hole covers. Explain that you are looking for the covers that go in the extra holes in the top of the sink. They should look something like this. Note the size on the box it's the size you should buy it fits very nicely and its the right size, not to big not to small. Side Note its not $3-$4 i move the box to take a picture its like $1.50
***Note*** you will also need to buy some Clear Window Silicon. I forgot to take a picture of it.
Here is the rubber window grommet and the sink hole cover side by side.

Now just finish up by placing some silicon on the back side of the sink hole cover and putting it over the hole and bolting it to the glass. then just fill the back of the glass gape with more silicon to prevent any water leakage.

Once You Have that all put together just start putting all the plastic paneling back on and presto your done. ***Note*** I took some extra steps to finish mine up. Nothing you can't figure out by experimenting though. I painted my sink hole cover glossy black to match the black glass.
Hope you all had fun! if you have any questions please PM me to let me know I will get to your question A.S.A.H.P - As Soon As Humanly Possible.
***Note*** I will hopefully be putting more of these "xD - How To's" up in the coming months. Anything i do to my car i will share with my good Scion Friends here on Scion Life.
Enjoy!
DISCLAIMER: Scionlife.com does not take any responsibility in what you do to your car. This FAQ could be filled with incorrect information. You could be voiding your warranty if not installed or uninstall by a certified mechanic or dealership. It is quite possible that you can totally mess up your car by using this as a guide to install or uninstall anything. This can result in serious bodily injury, death, dismemberment, sexually transmitted diseases and so forth to you and anybody else in case of an accident resulting from failure to take safety precautions and/or following the instructions in this write-up.
For this install, you will need:
~ A Fare amount of time
~ Some amount of "Know How" &/or Mechanical Skills
~ 10mm socket wrench
Ok so first off let me start by saying it was fairly easy to remove the wiper. Second i will not be held responsible if you screw this up.... Take Your Time! Watch what your are doing.
Ok, this is my first "Big Wright Up" So Enjoy!
Start by removing the rear wiper arm, to get to the 10mm nut you need to take this cap off,
There is a latch Here.....
and here..... its easier if you pull them one at a time.
***Note*** It might want to latch back up when you free on side and try unlatching the other, just hold the unlatched side while trying to unlatch the other side.
***Note*** if it dose come off no need to worry you can pop it back on after your done removing the wiper arm.
Now Remove The Nut and wiper arm. ~Remember~ its a 10mm Nut/Job.
Ok thats was easy right? Here's what you should have.
Lets move on to the inside of the car now to remove the wiper motor.
Ok, in here take off all 3 of this small covers to revel the guts off your xD these also give you good place to look inside to find all the plastic "Latches/Hook's/Bolts". Also remover the hach hand hole. just pop it off with a flat head screw driver.
***Note*** this is were it can start to get some what
Here is an image of the hatch panel removed, note all the white plastic Bolts/Hooks/Latches. Look where you might want to get your hands in to pull the panel off.
Now, remove the "power" from the motor just unclipped the connection...
Now unbolt that bad boy! its that easy! they are 2 Black Bolts & 1 Golden Bolt.
***Note**** There are only 3 bolts holding it in place. ~ Remember ~ this are 10mm Bolts.
Once its all unbolted just pull it away from the hatch its no longer attached to anything its only in the rubber grommet not stuck in there though. Lay the motor some were.
Now remover the rubber grommet with the hatch closed, just get your nail under one of the edges and push the grommet into the car. Not much to this its not glued in or anything.
Here is were you should be at. All removed and ready to cover up.
But what to use?????
Time to take a trip to your locale Hardware store "A.K.A, HomeDepot, Lowes"
Go to the sinks and plumbing section or ask someone to tell you were you can find sink hole covers. Explain that you are looking for the covers that go in the extra holes in the top of the sink. They should look something like this. Note the size on the box it's the size you should buy it fits very nicely and its the right size, not to big not to small. Side Note its not $3-$4 i move the box to take a picture its like $1.50
***Note*** you will also need to buy some Clear Window Silicon. I forgot to take a picture of it.
Here is the rubber window grommet and the sink hole cover side by side.
Now just finish up by placing some silicon on the back side of the sink hole cover and putting it over the hole and bolting it to the glass. then just fill the back of the glass gape with more silicon to prevent any water leakage.
Once You Have that all put together just start putting all the plastic paneling back on and presto your done. ***Note*** I took some extra steps to finish mine up. Nothing you can't figure out by experimenting though. I painted my sink hole cover glossy black to match the black glass.
Hope you all had fun! if you have any questions please PM me to let me know I will get to your question A.S.A.H.P - As Soon As Humanly Possible.
***Note*** I will hopefully be putting more of these "xD - How To's" up in the coming months. Anything i do to my car i will share with my good Scion Friends here on Scion Life.
Enjoy!

Thread Starter
Senior Member
Utah Scions
SL Member
Joined: Jul 2004
Posts: 557
From: Salt Lake, Utah
Originally Posted by mcd
Why would you want to remove the rear wiper? I wish my tC had one.
Thats what i thought anyway. so i just took it off. i can always put it back on if i wanted to. i live in Salt Lake City and as dirty as our cars get out here on the salted roads in the winter i think this mode helps me out more the actual cleaning it dose.
My $0.02

Member
SL Member
Joined: Aug 2007
Posts: 58
From: To the left of there
I agree the area the wiper cleans doesn't really do anything, unless your back window was covered with mud or something and you couldn't see out of it at all, but I don't plan on letting my car getting that dirty.


Thread Starter
Senior Member
Utah Scions
SL Member
Joined: Jul 2004
Posts: 557
From: Salt Lake, Utah
I did it, love it and it helps me... I am glad this helps some one....
i will post more write ups soon...


Senior Member

OhioScions
SL Member
Joined: Oct 2004
Posts: 364
From: Columbus, OHIO
Originally Posted by LiTtLeDeViAnT
I agree the area the wiper cleans doesn't really do anything, unless your back window was covered with mud or something and you couldn't see out of it at all, but I don't plan on letting my car getting that dirty.
i think any little bit of help i can get will be worth it.
just my .02 tho
good clean install


Senior Member
SL Member
Joined: Jul 2007
Posts: 261
From: TX
scion owners are the only owners who remove functional equipment from their car.. lmao. next post will be how to disable the side blinkers. 
to each his own, but i love having a rear whiper. my xa whiper has served its purpose. of course, the xd whiper looks like it belongs on a kids Tonka truck
the mod does have a nice, finished look to it, though. just from looking at the pictures, it looks clean. probably clears up the back a bit, too.

Senior Member
SL Member
Joined: Jul 2007
Posts: 168
I got the optional spoiler on my xD... lets just say I have used the rear wiper once... to be sure it worked... the spoiler makes it so the rain doesn't hit the window... I think I will end up doing this mod as well...

Senior Member
SL Member
DelMarVa
Joined: Dec 2005
Posts: 618
Nice write up Jr.! I didn't know you had DIY skillz. I knew about the bow staff skillz and the computer hacking skillz, but not these skillz. I'm gonna be doing this to my xB2 here in a week or two, but I won't be using a sink plug. I'll be using a back up camera, then I won't even need to see out the rear window I'm thinking about tinting it even more than it is 


Senior Member
SL Member
Joined: Aug 2007
Posts: 3,504
From: SoCal
Originally Posted by Pimpe_Ok
Now just finish up by placing some silicon on the back side of the sink hole cover and putting it over the hole and bolting it to the glass. then just fill the back of the glass gape with more silicon to prevent any water leakage.
He did put some silicon on :3