
How To: Clearing your xA's Headlights. (With Pics)


Thread Starter
Senior Member

DeepSouth Scions
SL Member
Joined: Aug 2004
Posts: 671
From: Gulf Coast
A couple of People have asked so here goes my best shot at a DIY.
Note: I will post more pics this weekend I got into a rush because it started to rain so I didnt get all the pictures taken when I did it. I will re-do it this weekend and post all the Pics.
Click a thumbnail for the fullsize Pics.


WARNING: Neither I nor ScionLife is responsible for you doing this. This may be illegal in your state it is your responsibility to find out. If you break it you are the one who did it. If your dog eats your parts shoot it.
Seriously be very careful doing this. you can damage your headlights or even your bumper if you are not careful.
Materials Needed:
1) Remove your Grill by popping 4 plastic rivets out and pulling up and out.


2) Remove bumper
First remove the screw connecting the bumper to the front quarter panel located behind the plastic in each wheel well

Crawl underneath and remove six(6) screws connecting the bottom of the bumper to the plastic underbody panels. Using a 10mm Socket remove the two(2) bolts attaching the bumper to the undercarriage.
3) Starting on one side firmly pull the bumper off. Set aside.
4) Preheat your oven to 250 degrees
5) Remove the 4 screws holding your headlight on. Gently pull off and disconnect your bulbs.
6) Set your bulbs and the rubber seal aside.
7) Place the headlamp facedown on your work surface (carpet works nice) Using your long Screwdriver and the hammer gently tap the yellow lens loose from its place. Softly shake the headlamp until the yellow lens falls all the way to the driving light area.
8 ) Place the headlight assembly on a piece of cardboard and place in the oven (I performed this step on an Electric Oven. Be very carefull in a Gas stove as to not light the cardboard on fire) The cardboard is to help prevent the headlight assy from melting on the metal oven rack
9) Leave in the oven 5-10 minutes. (Try not to melt it)
10) Using oven mitts remove headlight assy.
11) Gently pry the driving light end of the headlamp assy apart and shake the yellow lens free (This is harder than it sounds, you may need some help)
12) Squeeze the lens back together put bulbs back in and replace on body.
13) Repeat Steps 5-12
14) Reverse the steps to put everything back together.
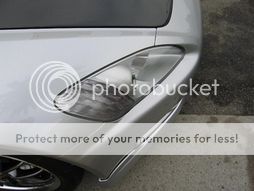
Final Product


Note: I will post more pics this weekend I got into a rush because it started to rain so I didnt get all the pictures taken when I did it. I will re-do it this weekend and post all the Pics.
Click a thumbnail for the fullsize Pics.


WARNING: Neither I nor ScionLife is responsible for you doing this. This may be illegal in your state it is your responsibility to find out. If you break it you are the one who did it. If your dog eats your parts shoot it.
Seriously be very careful doing this. you can damage your headlights or even your bumper if you are not careful.
Materials Needed:

1) Remove your Grill by popping 4 plastic rivets out and pulling up and out.


2) Remove bumper
First remove the screw connecting the bumper to the front quarter panel located behind the plastic in each wheel well

Crawl underneath and remove six(6) screws connecting the bottom of the bumper to the plastic underbody panels. Using a 10mm Socket remove the two(2) bolts attaching the bumper to the undercarriage.
3) Starting on one side firmly pull the bumper off. Set aside.
4) Preheat your oven to 250 degrees
5) Remove the 4 screws holding your headlight on. Gently pull off and disconnect your bulbs.
6) Set your bulbs and the rubber seal aside.
7) Place the headlamp facedown on your work surface (carpet works nice) Using your long Screwdriver and the hammer gently tap the yellow lens loose from its place. Softly shake the headlamp until the yellow lens falls all the way to the driving light area.
8 ) Place the headlight assembly on a piece of cardboard and place in the oven (I performed this step on an Electric Oven. Be very carefull in a Gas stove as to not light the cardboard on fire) The cardboard is to help prevent the headlight assy from melting on the metal oven rack
9) Leave in the oven 5-10 minutes. (Try not to melt it)
10) Using oven mitts remove headlight assy.
11) Gently pry the driving light end of the headlamp assy apart and shake the yellow lens free (This is harder than it sounds, you may need some help)
12) Squeeze the lens back together put bulbs back in and replace on body.
13) Repeat Steps 5-12
14) Reverse the steps to put everything back together.
Final Product


Senior Member
SL Member
Joined: Aug 2003
Posts: 372
From: Glendale, CA
If anyone wants to send me their used amber lenses, I'll try to have some clear ones manufactured. Without a diffuser over the bulb, it looks kind of ghetto.
I took out the amber turn signal diffusers in my S2000 headlights and replaced them with tinted ones, and I also painted the inside of the housing to match the body.
I want to do the same to my xA, but I want the replacement lenses first.
-Pete
I took out the amber turn signal diffusers in my S2000 headlights and replaced them with tinted ones, and I also painted the inside of the housing to match the body.
I want to do the same to my xA, but I want the replacement lenses first.
-Pete
Thread Starter
Senior Member
DeepSouth Scions
SL Member
Joined: Aug 2004
Posts: 671
From: Gulf Coast
I'll try and get a closeup of the bulb inside the Assemby. Replaceing the assemby would be a bit more difficult but not horribly so.
PM me and I'll see about sending you mine out when I get a chance
PM me and I'll see about sending you mine out when I get a chance


Junior Member
Joined: Nov 2004
Posts: 2
i do not advise anyone to atempt this unless they are experienced and can afford a new headlight if something goes wrong, i seriously messed up my headlight, i knocked the indicator lens out but wen i took it out of the oven i couldnt get it apart. now i got a yellow lens lying at the bottom of my headlight. if it wasnt for the lens lying there, i would say it lookd really nice. i guess i need to see some more pics.....
Thread Starter
Senior Member
DeepSouth Scions
SL Member
Joined: Aug 2004
Posts: 671
From: Gulf Coast
The trick is to heat it up until the glue gets melty, I left mine in for about 10 minutes at 350. after that its all about prying the end apart. you will only be able to pry it open from one end,the driving light end, pop the tabs there and pull, if you need to get a smal knife and "Cut" the glue where you can near the bottom, the sooner you can do this after removing from the oven the better and easier. it takes an effort but as long as you dont hear cracking/crackling you wont break anything.
Member
Joined: Dec 2004
Posts: 38
Originally Posted by Ashe_WCM
Heres the Closeup I promised. I'll try and get some night pics soon.


Senior Member
SL Member
Scinergy
Team ScioNRG
Joined: Oct 2005
Posts: 430
From: North Easton, MA
im really conserned about getting everything back together.. i dont want my headlights to fog. Plus not that i really care.. but i dont think its legal in MA. to do this..


A bit frustrated. I had these done by some one who used a heatgun. I have bad condensation on my right hradlight. I figure put in in the oven at 350 for 10 min. (watching it carefully), take it off and try and spread the glue around a bit before putting it back on.