
**DIY** NST Pulley Install w/pics! **DIY**


Thread Starter
Senior Member
Scikotics
SL Member
Joined: Feb 2008
Posts: 271
Ok, so after doing some research, I installed it.
Here is my version of installing it.
If you don't think you can do this, DON'T!! I don't take responsibilty for anything that you do to your car! Just throwing that out there.
1. Loosen wheel lugs on passengers side wheel.
2. Jack car up, take wheel off. (make sure to pull the ebrake so your car doesn't roll back)
3. Turn your wheel as far as you can to the right so you can have some room to work with around your hub.
4. Remove plastic shield covering the crank pulley with a small flat head screwdriver, making sure not to break the plastic things that are holding it on. I just moved mine to the bottom and didn't remove it all the way.
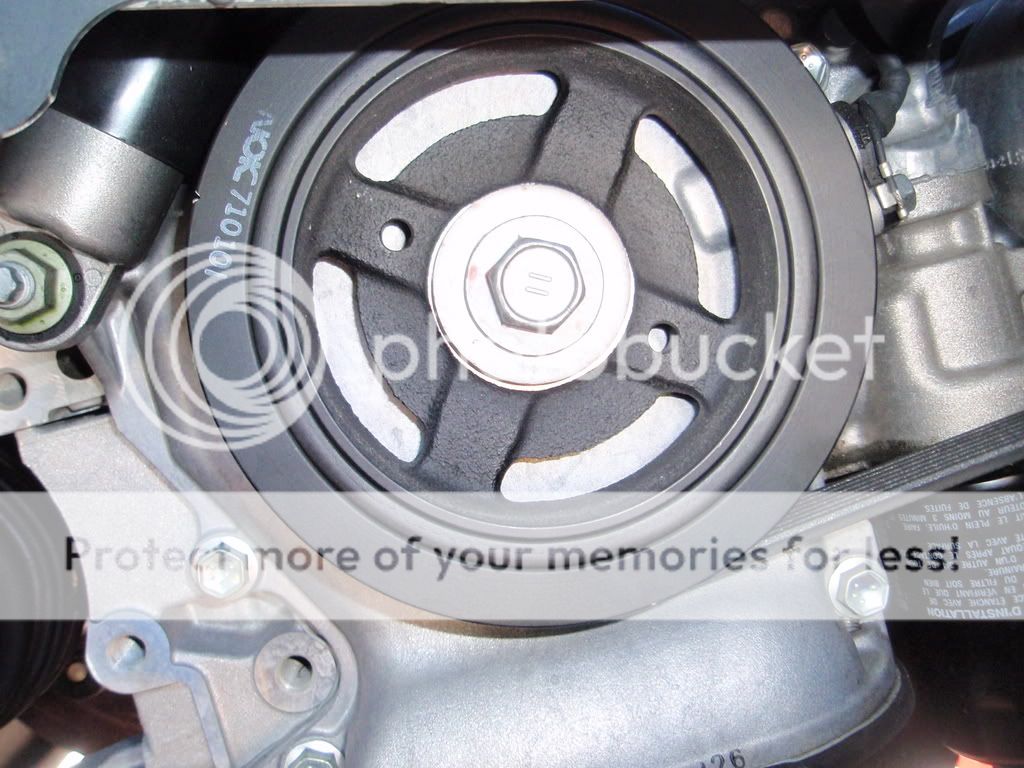
5. Using a high ft/lb impact gun and a 19mm socket, remove the crank bolt.
6. Once the bolt is completely out, go loosen the belt using the tensioner mechanism found in a very tight spot by the alternator and the idler pulley. I used an extended rachet with a 19mm socket. This can be quite tricky without someone helping you. My friend was on the ground and removed the belt from the crank while I pushed down on the tensioner. Worked perfect. Please make sure to draw out the layout of the belt before you take it off. This comes in handy when reinstalling it.
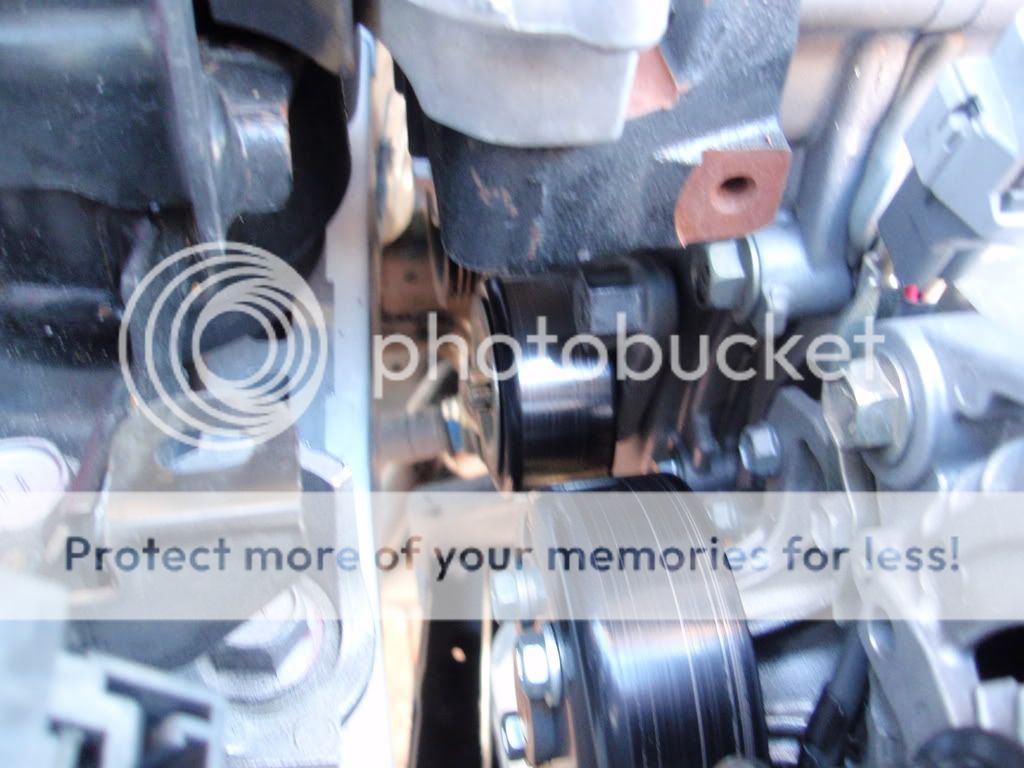
7. After the belt is off, wiggle the crank pulley around until it pops off. Some people have said you need a special tool to remove it. I didn't need it and you may not. Depends.
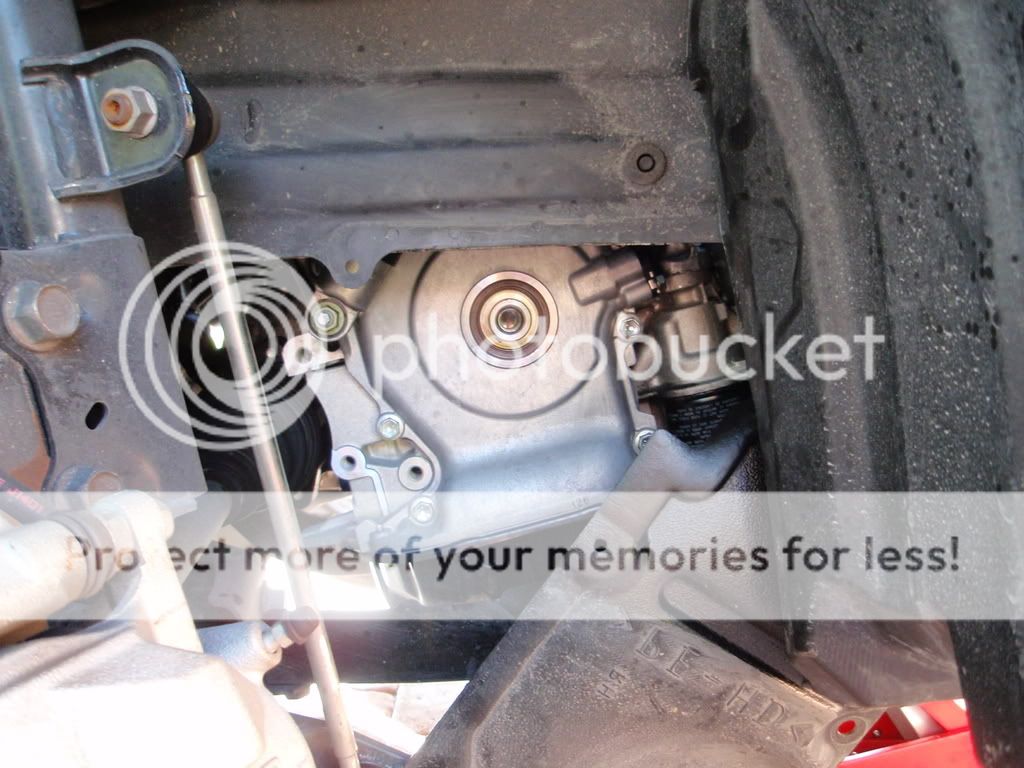
8. Once the pulley is gone, throw some anti-seize on the crank bolt and clean the area around the crank bolt hole. Install the new pulley, making sure to align the keyway with the key mark on the pulley.
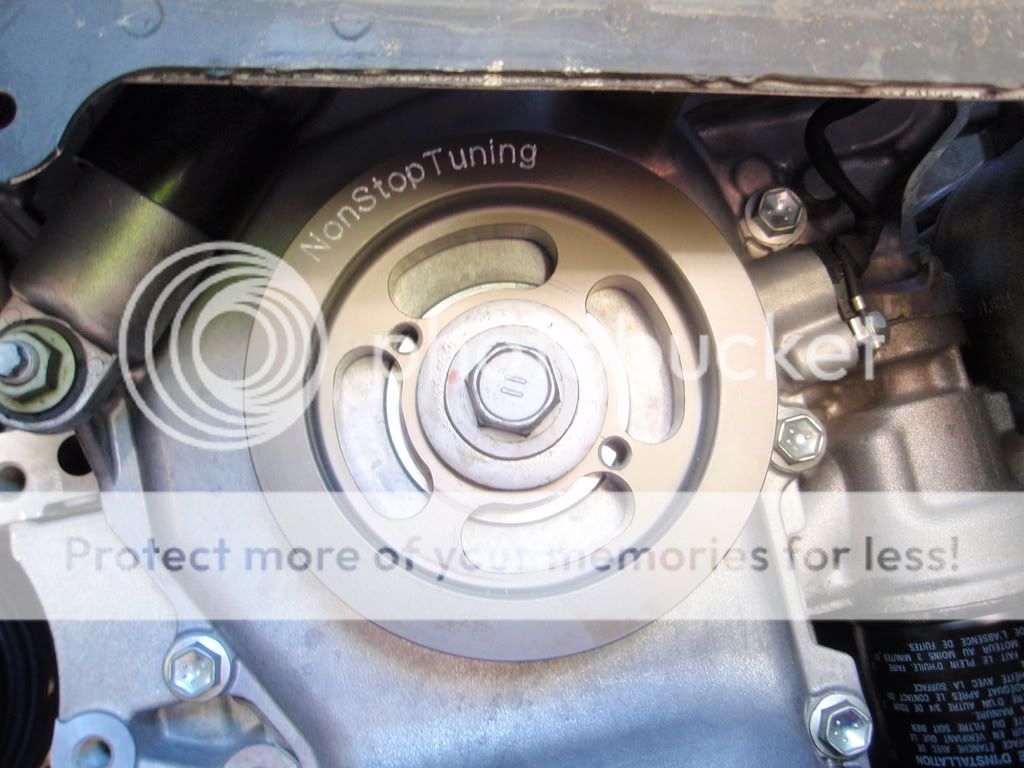
9. Take a rubber mallet or a piece of block wood and tap the pulley on till its snug.
10. Reinstall the crank bolt and tighten the bolt down using the impact gun or similar. The crank bolt will squeeze the pulley into its final resting spot. Some people use a torque wrench to tighten the crank bolt to 110 ft/lbs, but since I couldn't get the pulley to stay still while I torqued it, I just turned down my impact gun and tightened. If your using a impact gun, turn it on a low setting. If you screw that part up, you might need to rethread the crank bolt hole or worse, strip the bolt all together.
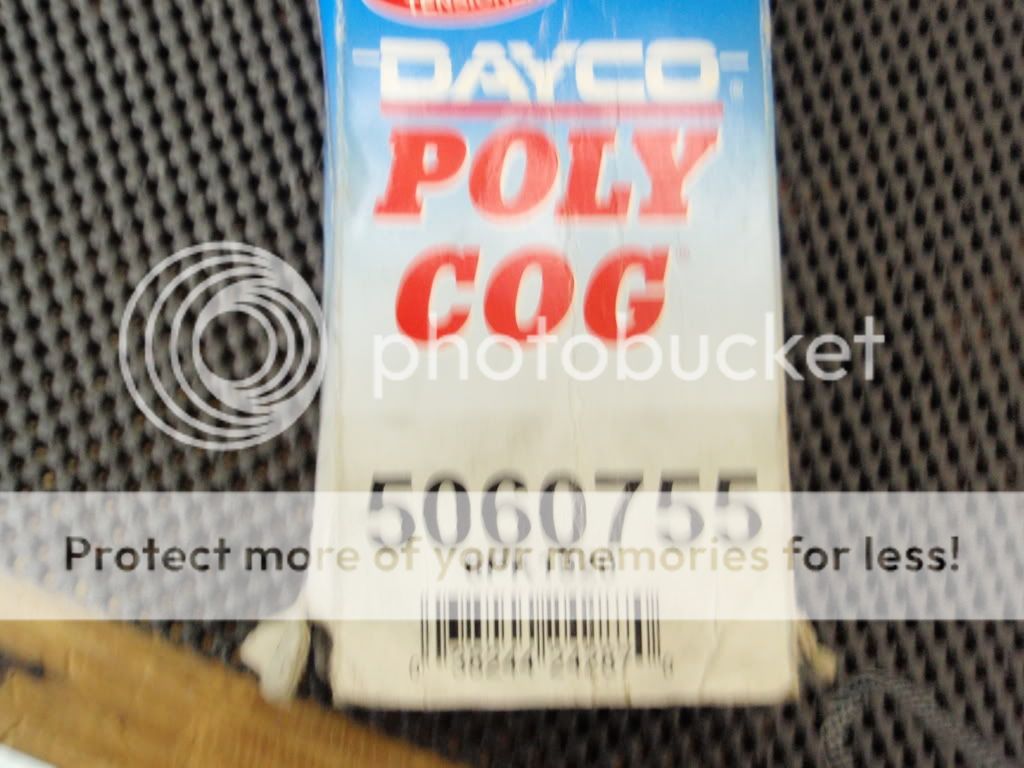
11. Reinstall the belt using the drawing that you made in step 6. Start up top and work your way down to the crank when reinstalling. Makes things alot easier. I used a Dayco Poly Cog 5060755 belt from Advanced Auto Parts. It fits perfectly, but for some people it might not. Don't ask me why, but it might not. The belt I was told to get wasn't anywhere near being close to fitting, so I had to go back and troubleshoot till I bought this one. Also, please note, when reinstalling the belt; you should notice that the NST pulley is only a 6 rib pulley but our other pulleys are 7 rib. Please be sure to align the belt in the grooves furthest to the motor (right side if looking directly at the motor from the front of the car).
12. Reinstall the plate cover, the wheel and everything else that you did and start her up.
13. Don't look right at the belt as it might slip off (unlikely, but you never know). Make sure there are no squeeks cracks whistles or whatever else. Give her a few revs to make sure everything is good to go and take her for a spin.
All in all, the mod was worth the money. Definately an increase in acceleration and up top pulling. It might not seem faster, but from looking at the speedo as I was driving, the numbers really start to go up alot faster.
Enjoy!
Here is my version of installing it.
If you don't think you can do this, DON'T!! I don't take responsibilty for anything that you do to your car! Just throwing that out there.
1. Loosen wheel lugs on passengers side wheel.
2. Jack car up, take wheel off. (make sure to pull the ebrake so your car doesn't roll back)
3. Turn your wheel as far as you can to the right so you can have some room to work with around your hub.
4. Remove plastic shield covering the crank pulley with a small flat head screwdriver, making sure not to break the plastic things that are holding it on. I just moved mine to the bottom and didn't remove it all the way.
5. Using a high ft/lb impact gun and a 19mm socket, remove the crank bolt.
6. Once the bolt is completely out, go loosen the belt using the tensioner mechanism found in a very tight spot by the alternator and the idler pulley. I used an extended rachet with a 19mm socket. This can be quite tricky without someone helping you. My friend was on the ground and removed the belt from the crank while I pushed down on the tensioner. Worked perfect. Please make sure to draw out the layout of the belt before you take it off. This comes in handy when reinstalling it.
7. After the belt is off, wiggle the crank pulley around until it pops off. Some people have said you need a special tool to remove it. I didn't need it and you may not. Depends.
8. Once the pulley is gone, throw some anti-seize on the crank bolt and clean the area around the crank bolt hole. Install the new pulley, making sure to align the keyway with the key mark on the pulley.
9. Take a rubber mallet or a piece of block wood and tap the pulley on till its snug.
10. Reinstall the crank bolt and tighten the bolt down using the impact gun or similar. The crank bolt will squeeze the pulley into its final resting spot. Some people use a torque wrench to tighten the crank bolt to 110 ft/lbs, but since I couldn't get the pulley to stay still while I torqued it, I just turned down my impact gun and tightened. If your using a impact gun, turn it on a low setting. If you screw that part up, you might need to rethread the crank bolt hole or worse, strip the bolt all together.
11. Reinstall the belt using the drawing that you made in step 6. Start up top and work your way down to the crank when reinstalling. Makes things alot easier. I used a Dayco Poly Cog 5060755 belt from Advanced Auto Parts. It fits perfectly, but for some people it might not. Don't ask me why, but it might not. The belt I was told to get wasn't anywhere near being close to fitting, so I had to go back and troubleshoot till I bought this one. Also, please note, when reinstalling the belt; you should notice that the NST pulley is only a 6 rib pulley but our other pulleys are 7 rib. Please be sure to align the belt in the grooves furthest to the motor (right side if looking directly at the motor from the front of the car).
12. Reinstall the plate cover, the wheel and everything else that you did and start her up.
13. Don't look right at the belt as it might slip off (unlikely, but you never know). Make sure there are no squeeks cracks whistles or whatever else. Give her a few revs to make sure everything is good to go and take her for a spin.
All in all, the mod was worth the money. Definately an increase in acceleration and up top pulling. It might not seem faster, but from looking at the speedo as I was driving, the numbers really start to go up alot faster.
Enjoy!

Thread Starter
Senior Member
Scikotics
SL Member
Joined: Feb 2008
Posts: 271
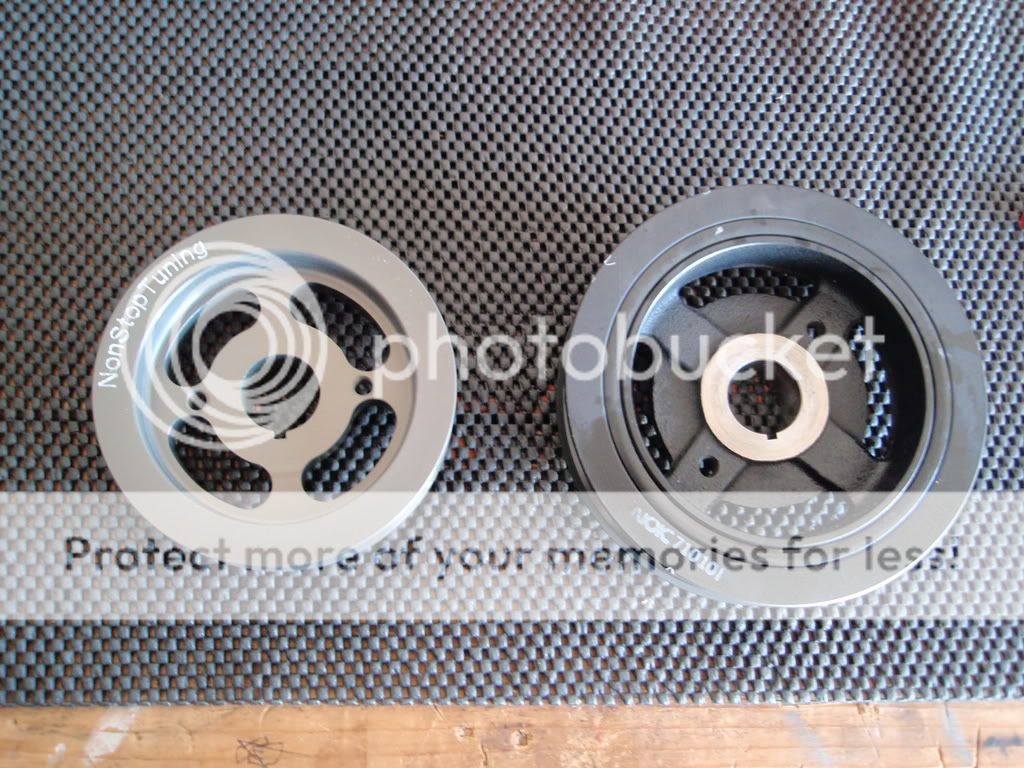
NST makes a lightweight stock size crank pulley and a lightweight 20% underdrive.
Agency makes a lightened one, but I know if they make an underdrive.
There is another brand that I forgot the name of. They don't have a big selection.
Then there is one that someone sells with a TB spacer.
Out of all of them, I heard NST was the highest quality product out there for a good price. When I installed it, it looked and felt like a quality product.

Senior Member
SL Member
Joined: Apr 2007
Posts: 417
From: Honolulu, HI
i got mine as a packaged deal with a lightened pulley and tb spacer from www.fastscions.com
the size is the same as stock, just a lot lighter. one error on the DIY steps. you need to remove the passenger side tire, not the driver side. good DIY and nice mod.
the size is the same as stock, just a lot lighter. one error on the DIY steps. you need to remove the passenger side tire, not the driver side. good DIY and nice mod.

Thread Starter
Senior Member
Scikotics
SL Member
Joined: Feb 2008
Posts: 271
I feel a good difference in accerlation and pull. Definately alot quicker than before. As far as horsepower, don't really know. I know it frees up power, but doesn't add any.
My gas milage from what I have observed so far is an improvement and a good one at that. I was averaging around 120miles at half a tank, now I am getting around 140miles at a half tank.
Definately worth the $120 shipped.
My gas milage from what I have observed so far is an improvement and a good one at that. I was averaging around 120miles at half a tank, now I am getting around 140miles at a half tank.
Definately worth the $120 shipped.
Senior Member
SL Member
Joined: Apr 2007
Posts: 417
From: Honolulu, HI
Originally Posted by SiZzOuRcE
How do you like your setup? Are you running your TB spacer? How do you like that?
Good looking out, fixed now.
Good looking out, fixed now.

Excellent installation guide! Glad you like your new pulley. Please be sure to post your impressions with us in our comprehensive pulley thread if you have a moment...
https://www.scionlife.com/forums/viewtopic.php?t=248746

https://www.scionlife.com/forums/viewtopic.php?t=248746
Originally Posted by SiZzOuRcE
Link?
https://www.scionlife.com/forums/viewtopic.php?t=248746

Senior Member
SL Member
Joined: Jul 2007
Posts: 462
From: Anaheim Hills, CA
Originally Posted by SiZzOuRcE
Updated the guide. Added an important note about how to align the new belt when installing.
Great write up what was the exact kit that you got from NST i saw that they have different ones o the website?
I have been wanting to get this done but I have heard from different sources that a pulley kit messes with your engine timing ?
Question for NST; what are the differences in horse power increases between an automatic and a standard vehicle?


Originally Posted by SiZzOuRcE
Also, please note, when reinstalling the belt; you should notice that the NST pulley is only a 6 rib pulley but our other pulleys are 7 rib. Please be sure to align the belt in the grooves furthest to the motor (right side if looking directly at the motor from the front of the car).
Thanks. One more question if i may. Do you think a 75" belt would fit as well as your 75.5" belt? In some other threads I saw recommendations ranging from 74.7" to 75.5" so I ordered a 75" belt.
Thread Starter
Senior Member
Scikotics
SL Member
Joined: Feb 2008
Posts: 271
Honestly. I really couldn't tell you. The reason is that I've heard of different people being able to fit different sized belts than I have. Pretty much each time I find a belt size, someone else says it wrong and then they offer a different size. Honestly, just trial and error on this one. A 75 should be ok, MAYBE a bit small, but I think it will work with the tensioner.
Originally Posted by SiZzOuRcE
Honestly. I really couldn't tell you. The reason is that I've heard of different people being able to fit different sized belts than I have. Pretty much each time I find a belt size, someone else says it wrong and then they offer a different size. Honestly, just trial and error on this one. A 75 should be ok, MAYBE a bit small, but I think it will work with the tensioner.