xB2 Short shifter D.I.Y.
 11-17-2010, 08:00 AM
#1

2008-2011 xB 5spd Short Throw Shifter
Product by: Trevor
DIY By: Andrew A.K.A. The_Butcher
Product by: Trevor
DIY By: Andrew A.K.A. The_Butcher
Tools needed:
1: 12mm deep socket
2: Philips head screwdriver
3: ratchet with 3” extension
4: broad tip standard (flat blade) screwdriver
5: rags for grease cleanup (you’re gonna get some on your hands)
6: 5.0 mm allen wrench
PRE INSTALL TIPS:
- Install should take under an hour depending on your level of experience. If you can replace your stereo and change your tires then this should be a breeze. Specialty tools are a plus but not necessary. I did it in 30 minutes. (minus picture taking)
- As with ANY project where you will be removing screws, nuts and bolts have a few containers handy for fastener and clip storage.
- I did it the “shade tree mechanic” way so every one can follow along.
PRE INSTALL CHECKS:
- ~*Make sure your parking break (E-break) is set*~ THIS IS A MUST!
- Make sure your car is on a flat level surface, if not accessible use wheel chalks (something to place behind the wheel to prevent rolling)
- Now you are ready to begin the install.
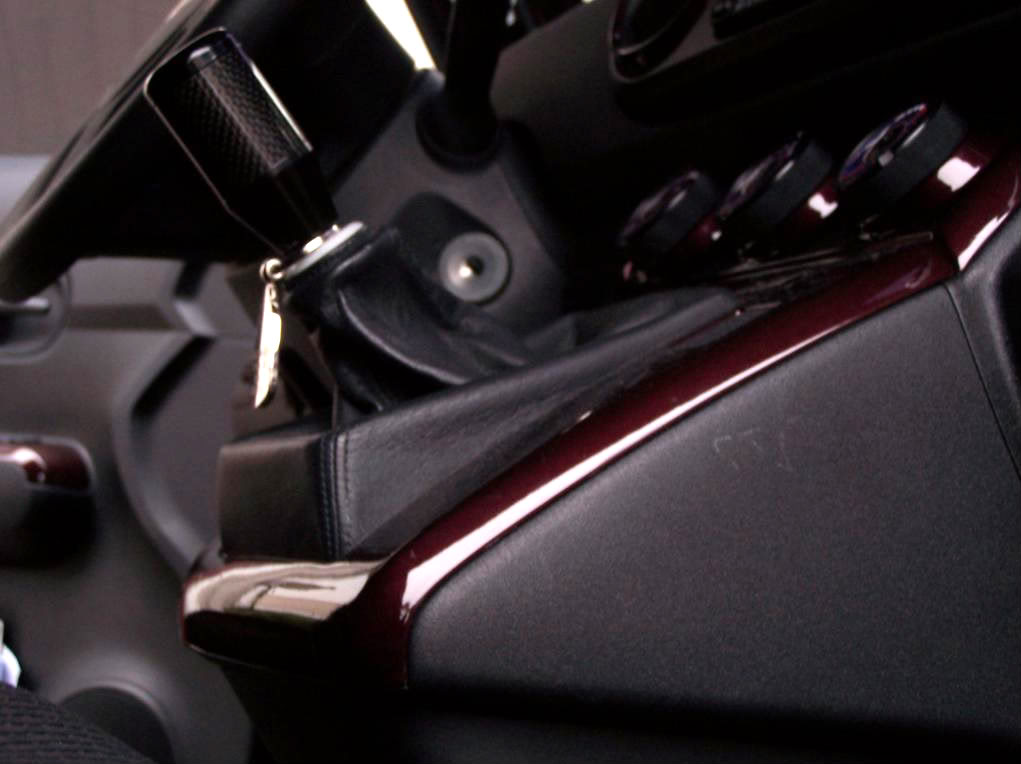
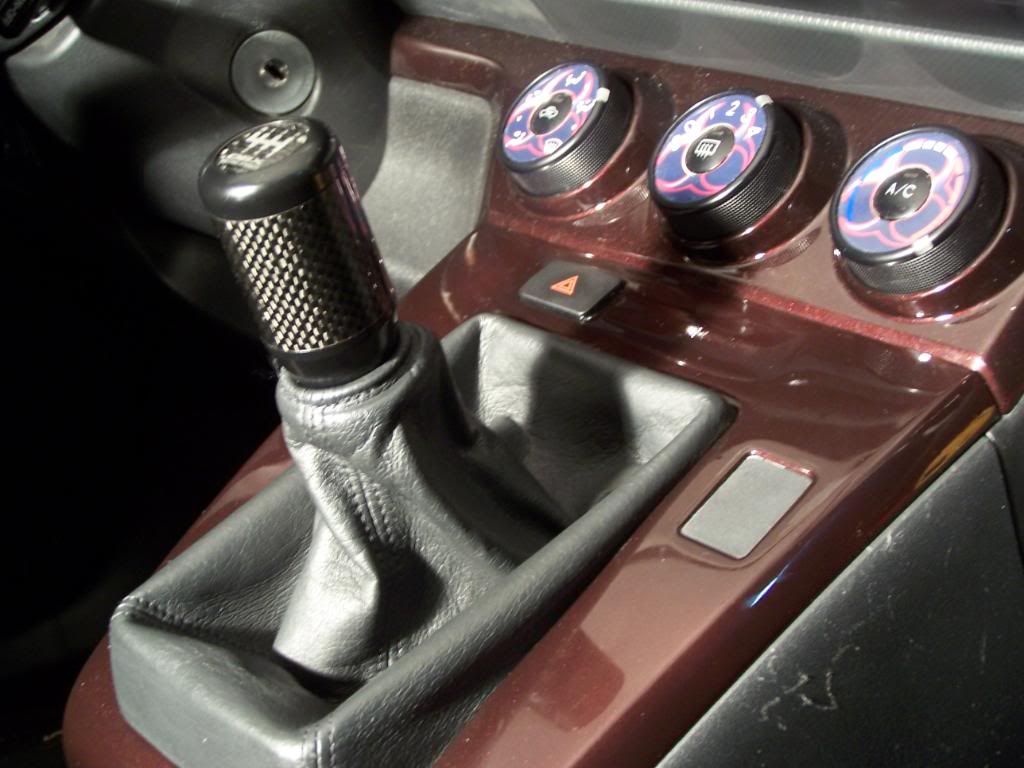
STEP 1: Remove shift ****
- Remove the shift ****. just grab a hold and unscrew it.
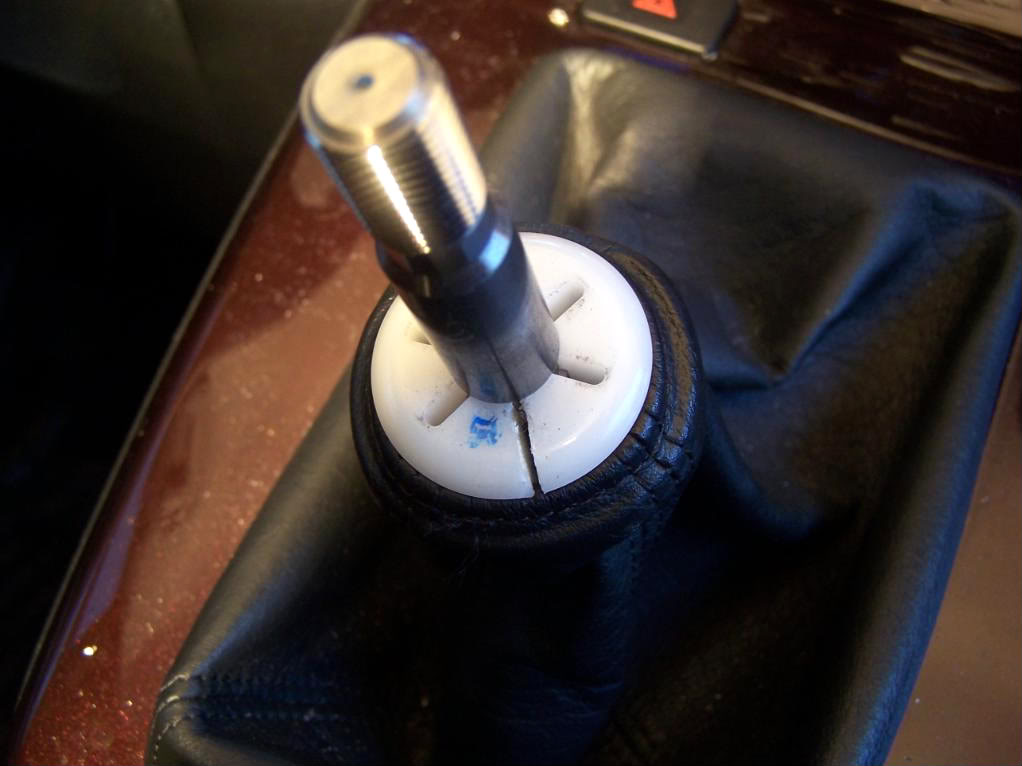
STEP 2: Release shift boot retainer ring
- Locate the white ring holding the shift boot to the shaft.
- Insert the broad tip standard screwdriver into the slit of the ring and gently twist. this will separate the ring from the shaft.
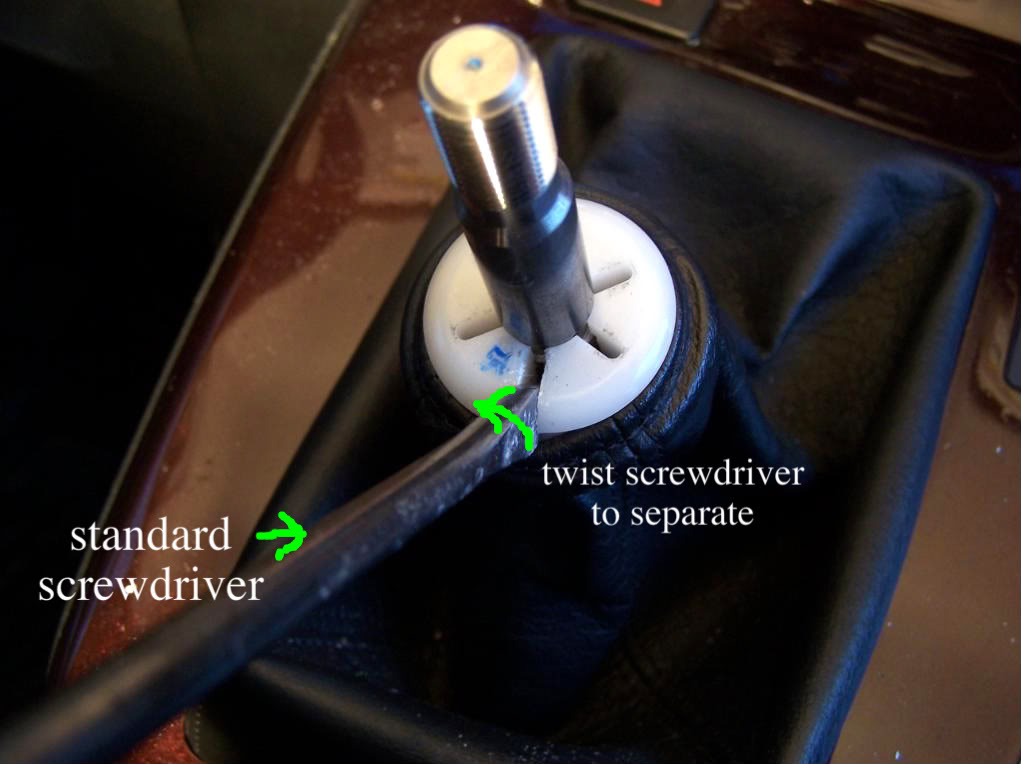
- Gently lift the ring up shifter shaft but not completely off. this will help make sure that you don’t accidentally put a hole in the boot.
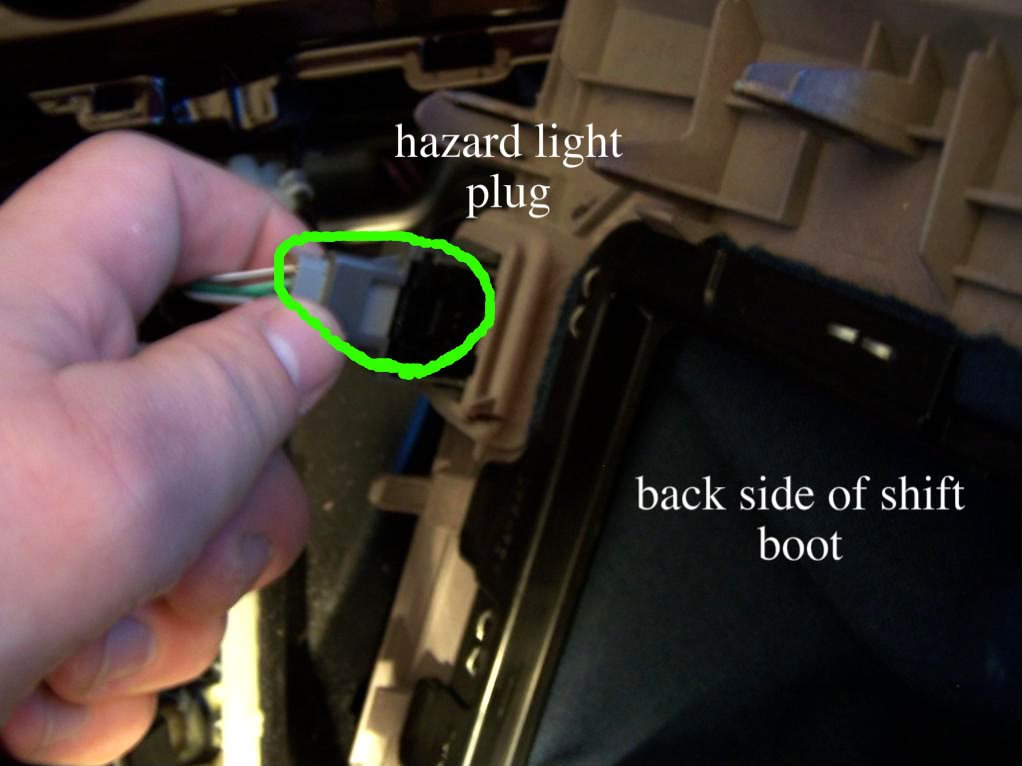
STEP 3: Remove the shifter bezel.
*NOTE* DO NOT use tools for this step.
- Using your fingertips, grip the bottom of the shift bezel and firmly but gently and slowly pull upward. there are a total of 4 clips holding the bezel in place.
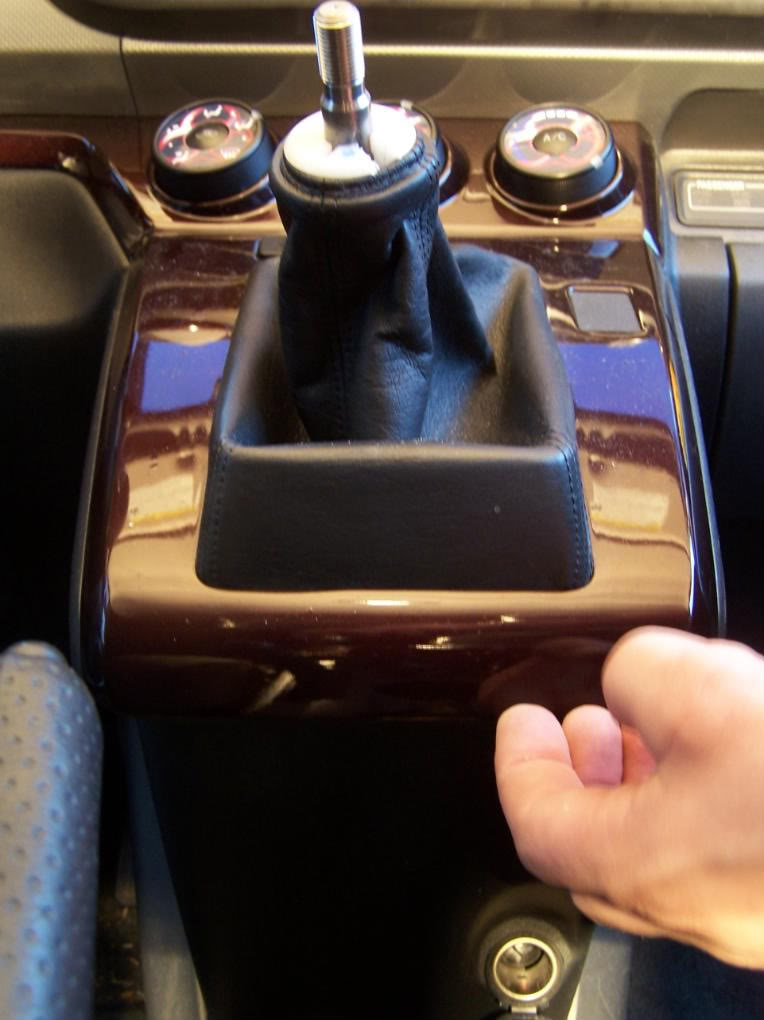
- Disconnect the hazard light plug (squeeze latch)

STEP 4: Remove shifter console.
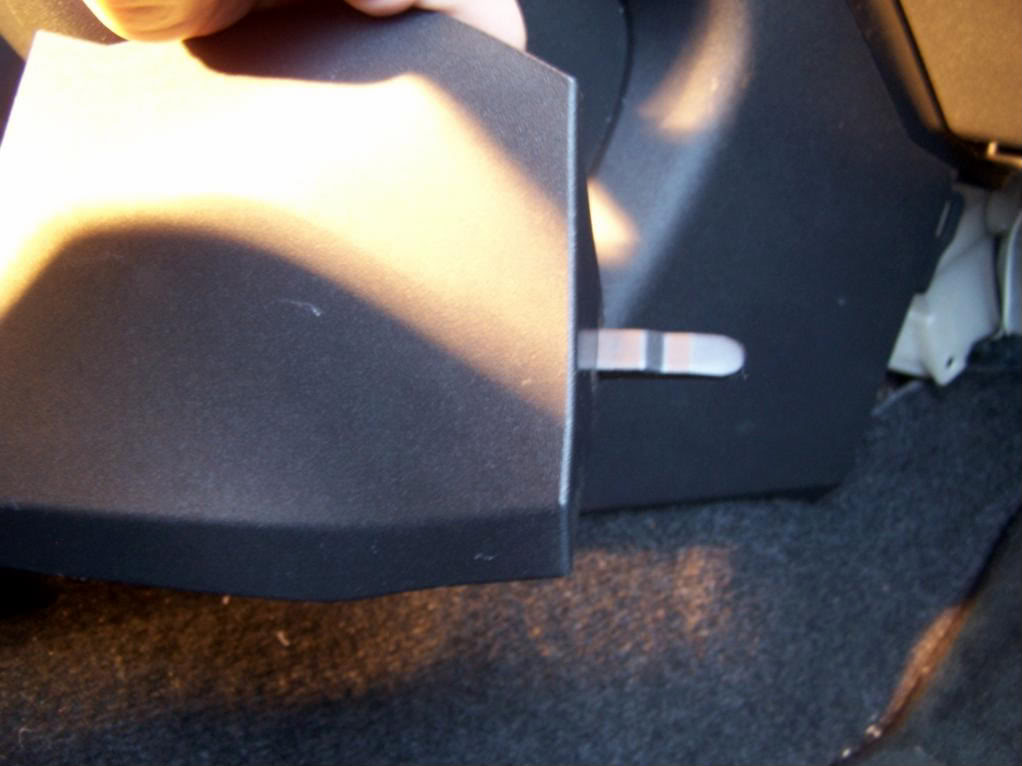
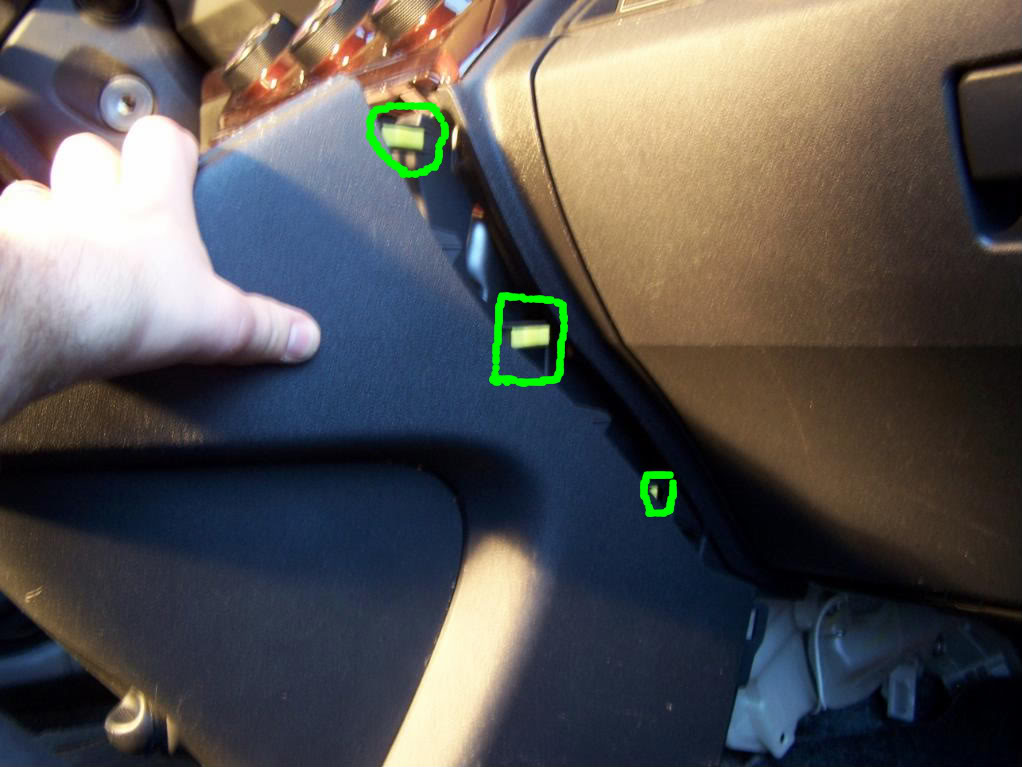
- Locate the side panels in both driver and passenger side foot wells. They have guides that slide into openings. remove these panels (1 on each side).
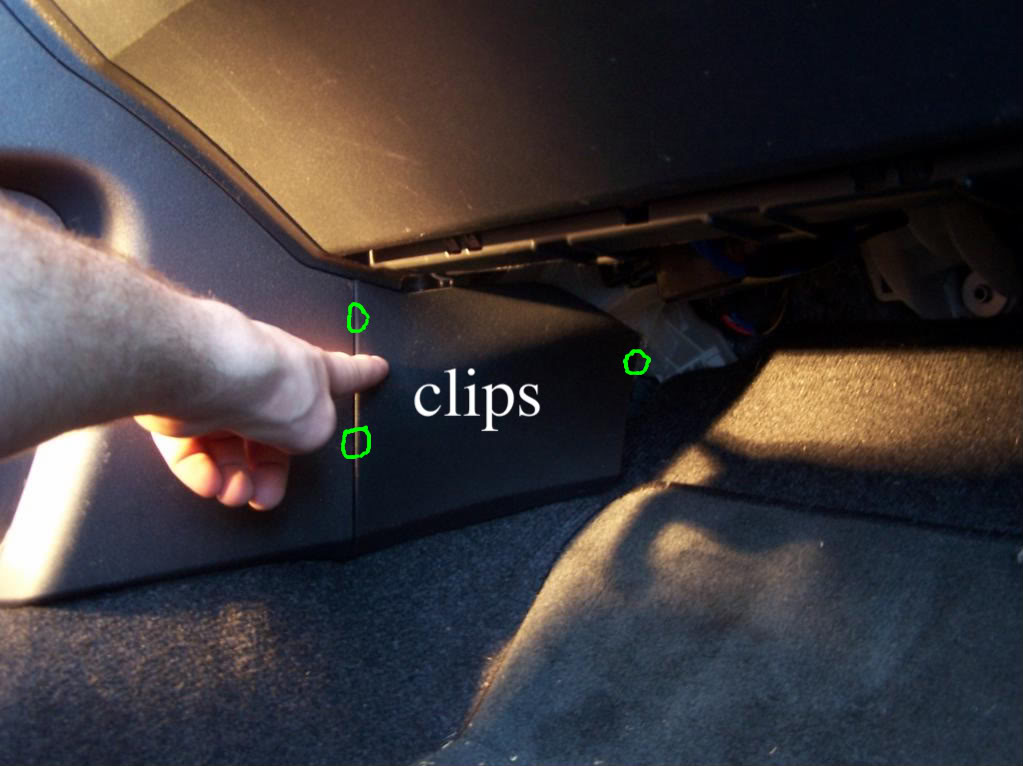
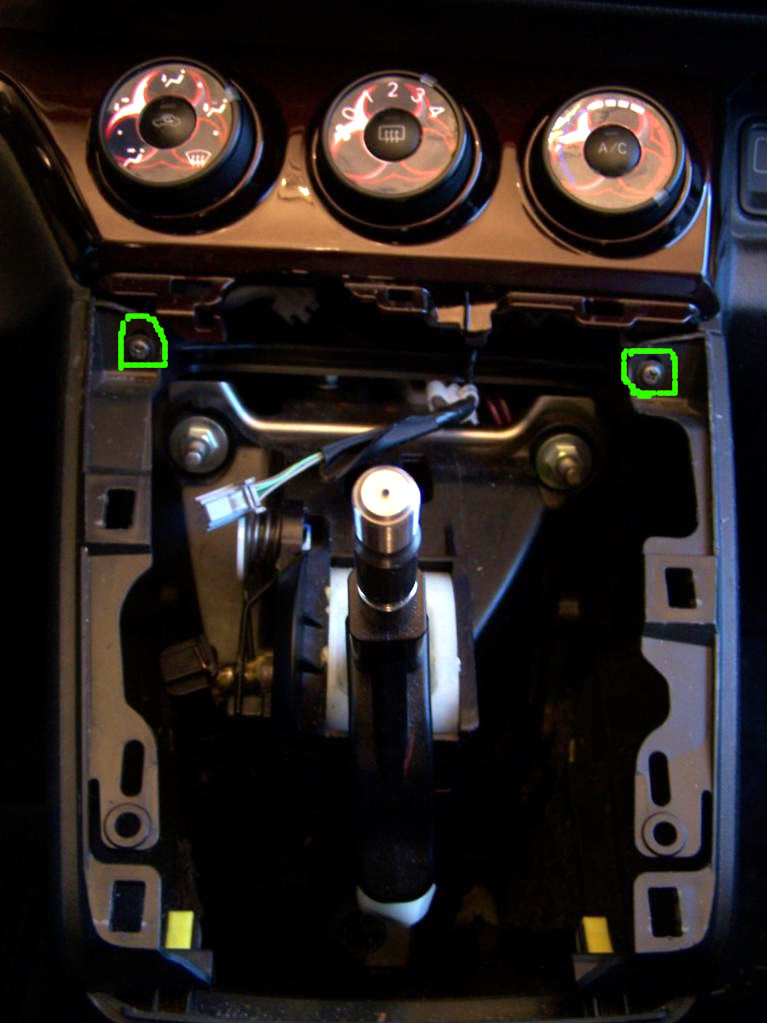
- Locate and remove the 2 screws at top left and right.
- Unplug the 12v power outlet at the bottom right (squeeze latch again).
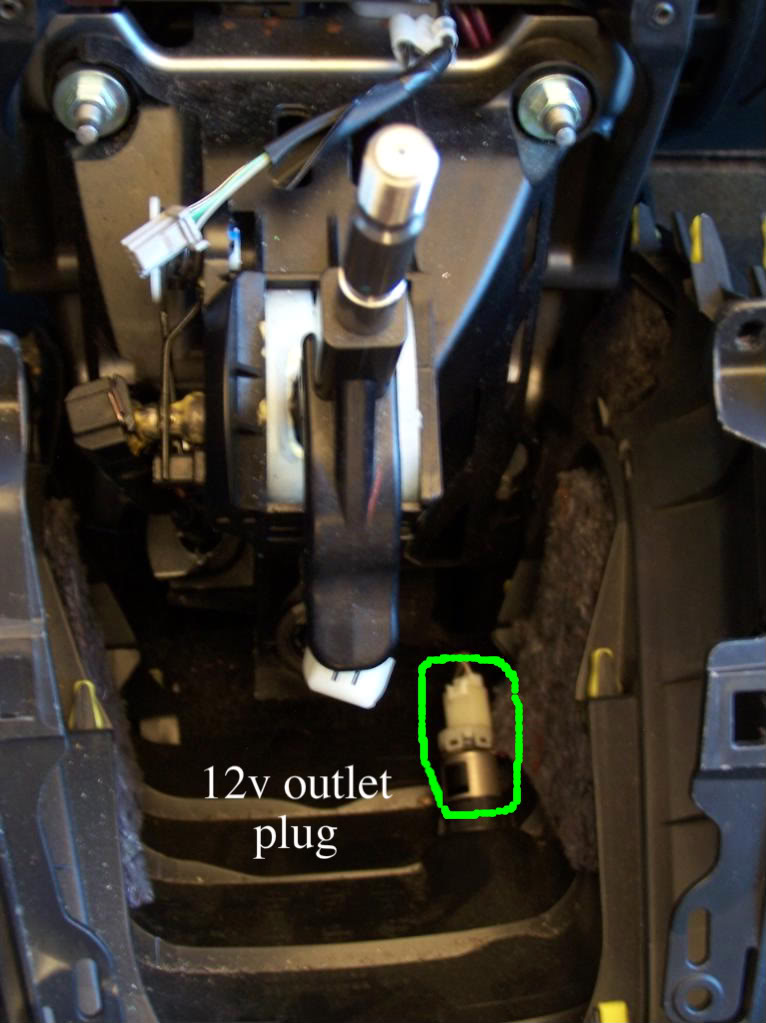
- Firmly pull the console back towards you. there are 3 clips on each side holding the console in place.
- After all wires have been disconnected from the console it is free to remove.
STEP 5: Locate and remove shift cables from top of housing.
- There are 2 cables that connect to the shifter housing. One on the driver’s side and one right in back.

- 1st the one on the driver’s side: This is where the rags come in handy.
- You should notice 2 little wire like ends holding this clip in place.
- Using a standard screwdriver insert between the clip and slowly twist. the metal clip should separate and the end moving towards the middle.
- Pull the cable away from the shifter housing.
- You should notice that this cable connector is different than the 1st one.
- for this clip use a standard screwdriver or your fingers and separate the ends of the clip outwards.
- pull the cable away from the housing.
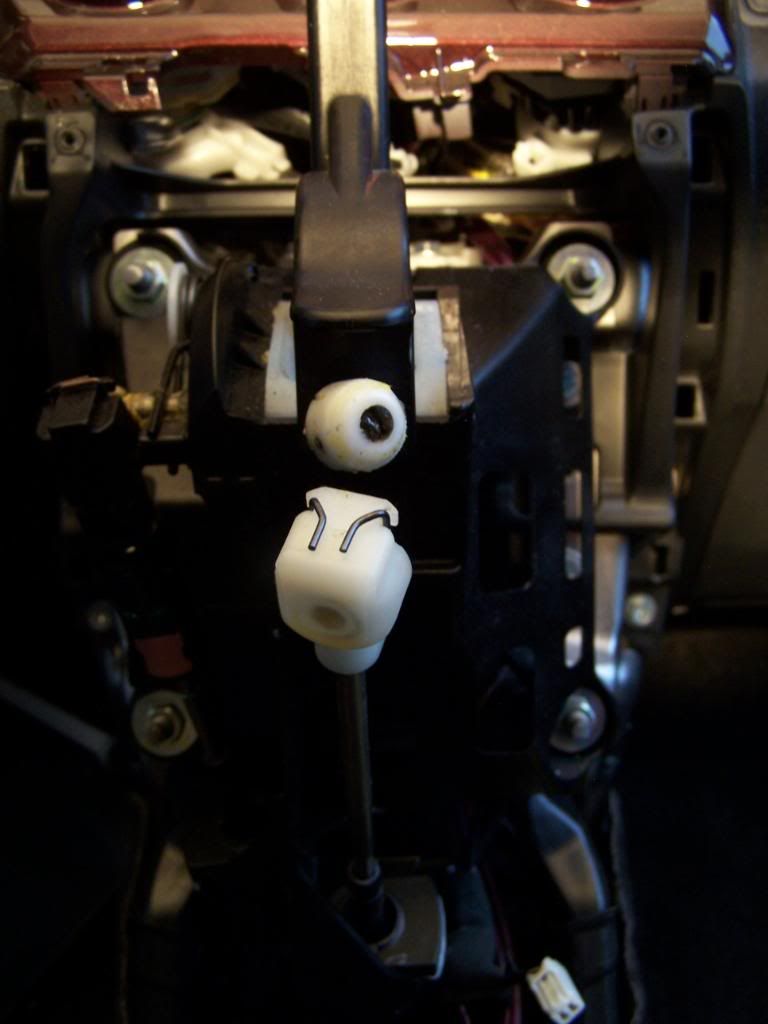
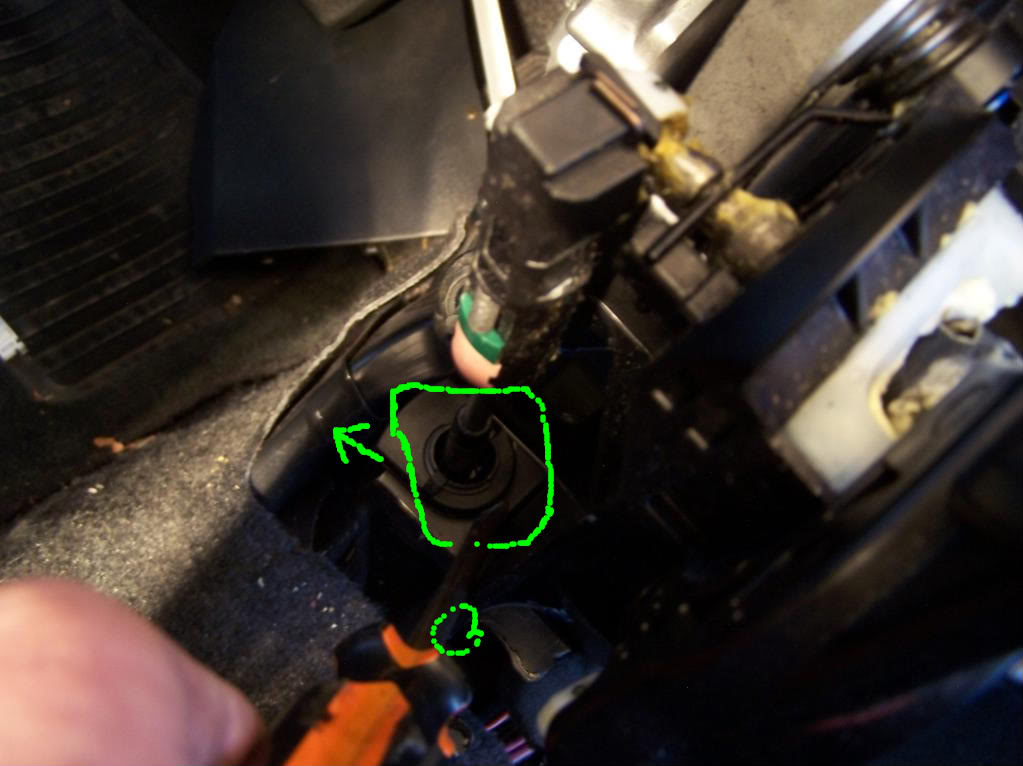
STEP 6: removing shift cables from bottom of housing.
- follow the cables down to the bottom of the shifter housing.
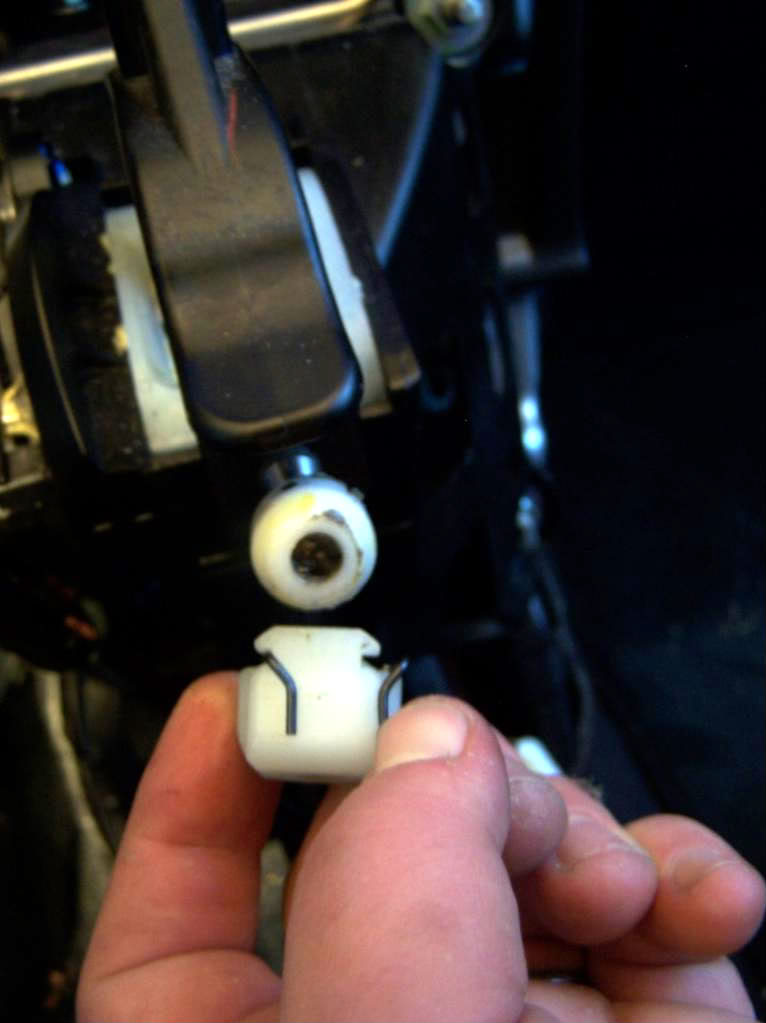
- you should notice a white colored plastic retainer clip.
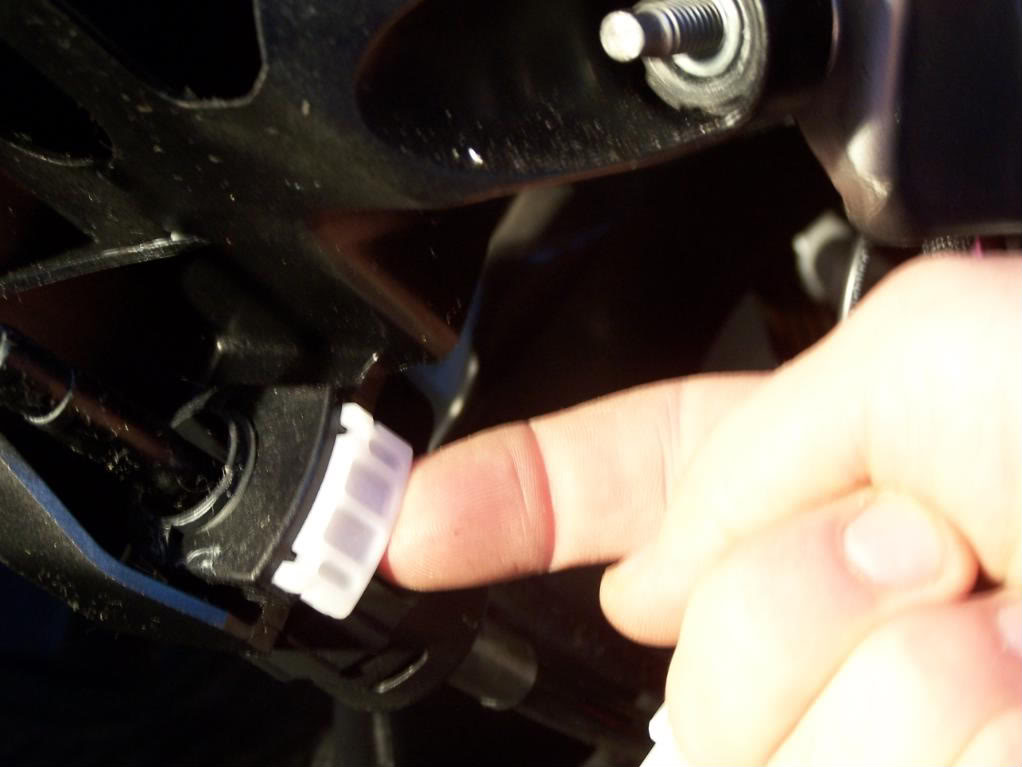
- using your fingers pull this retainer clip out. You might have to use some force. DO NOT use a screwdriver. this could damage or break the clip. *If you are having trouble with the clip using a pair of small pliers might work.
- repeat this step on the other cable.
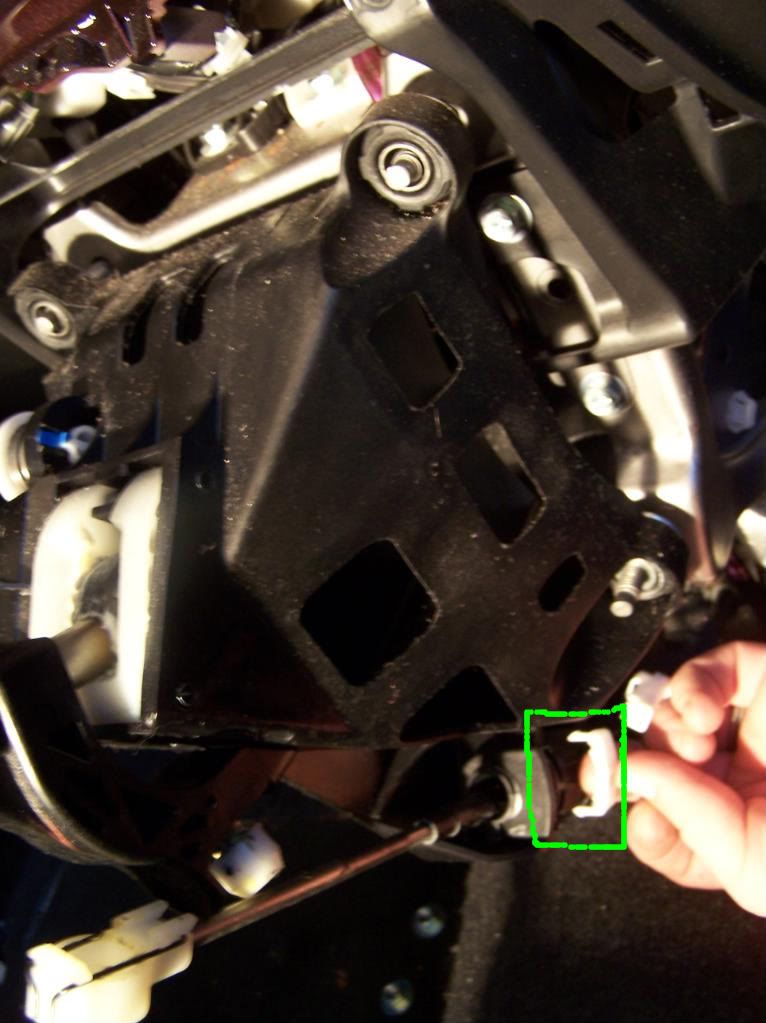
- Pull the cable away from the bottom of the housing. If you cannot do this by hand the use of a standard screwdriver will come in handy. Use the screw driver to pry the cable from the housing. *SEE PICTURE*
- move the 2 shift cables to the side away from the housing.
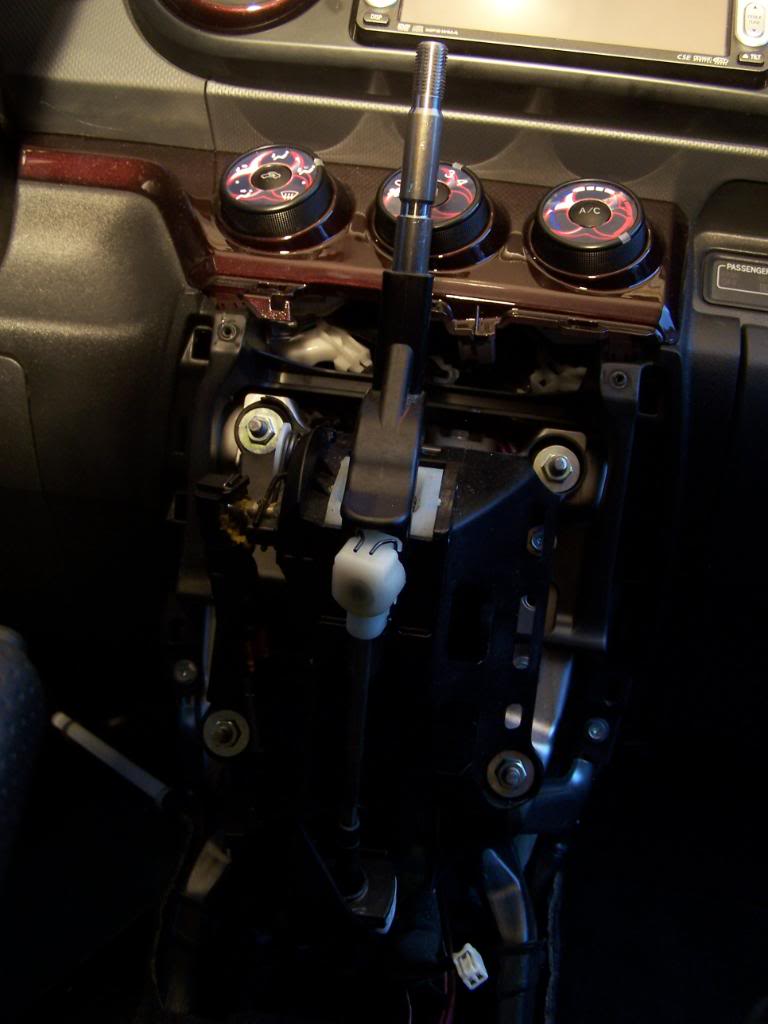
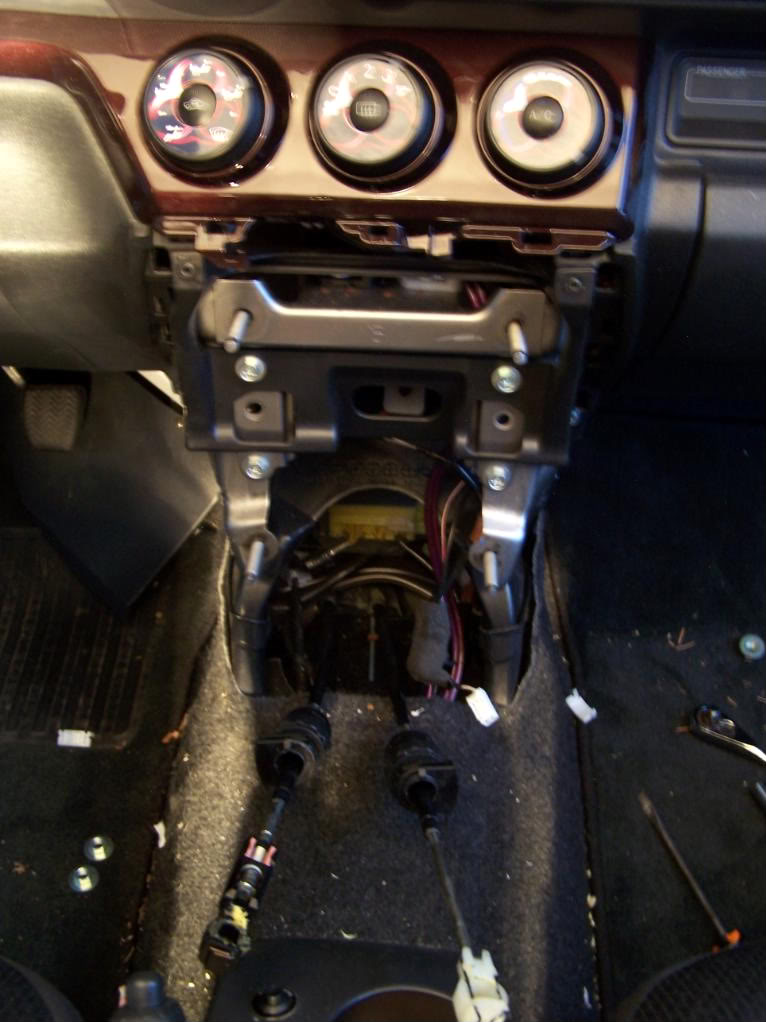
STEP 7: Unbolt housing from vehicle.
- Locate the 4 12mm bolts holding the shifter housing to the vehicle.
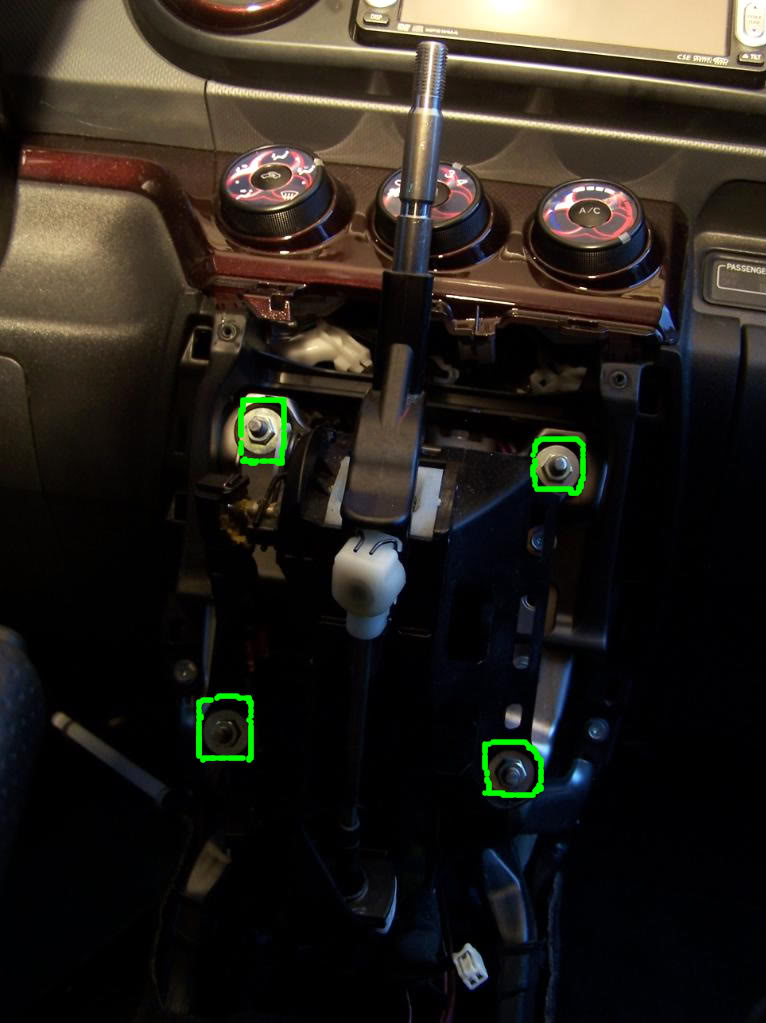
- using the 12mm deep socket and ratchet loosen all 4 bolts before removing them.
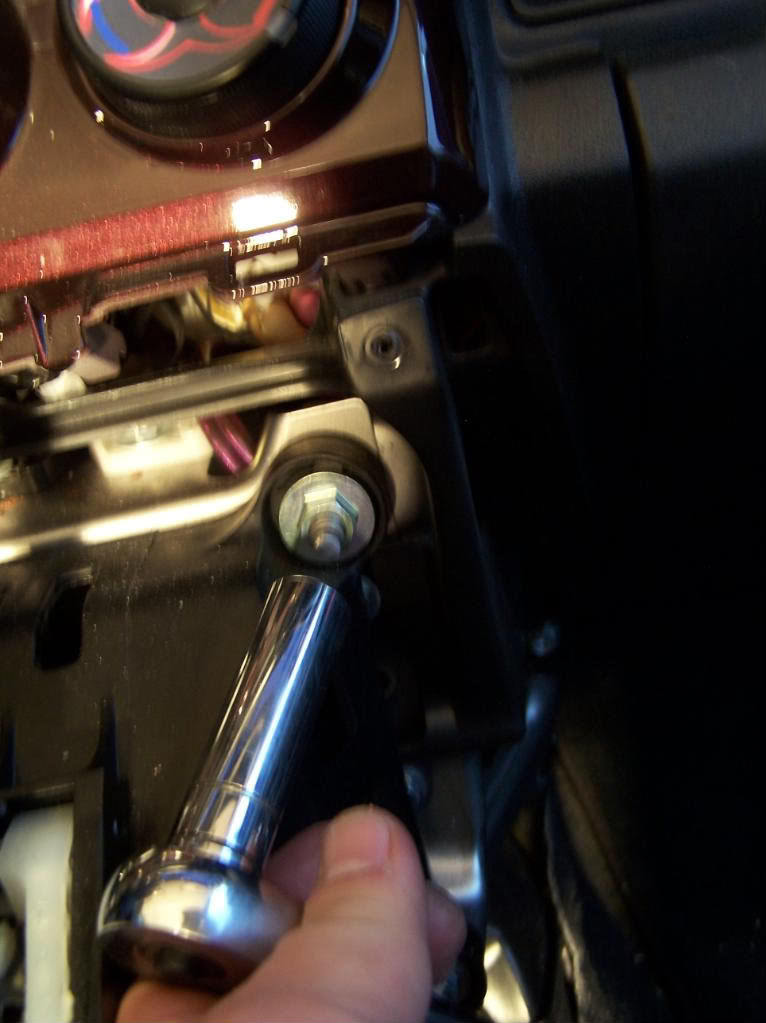
- Remove all 4 bolts.
- Pull shift housing away from vehicle.
- It should look like this now
Last edited by A-snell; 11-21-2010 at 06:49 AM.
 11-17-2010, 08:00 AM
#2
This next step is optional:
STEP 8: Remove return spring.

STEP 9: Install new shifter. basically reverse the steps.
*At this time take a look at the install so far. Double check everything*
BEFORE YOU GO OUT AND DRIVE DO THE FOLLOWING:
Predrive checks.
I hope you enjoyed this DIY and if you are wanting to pick one of these short throws up then please contact Trevor at this email address: boxstuf@verizon.net Please let him know that I sent you. either Andrew, or The_Butcher. either name will work.
Thank you for talking the time to read this.
-Andrew
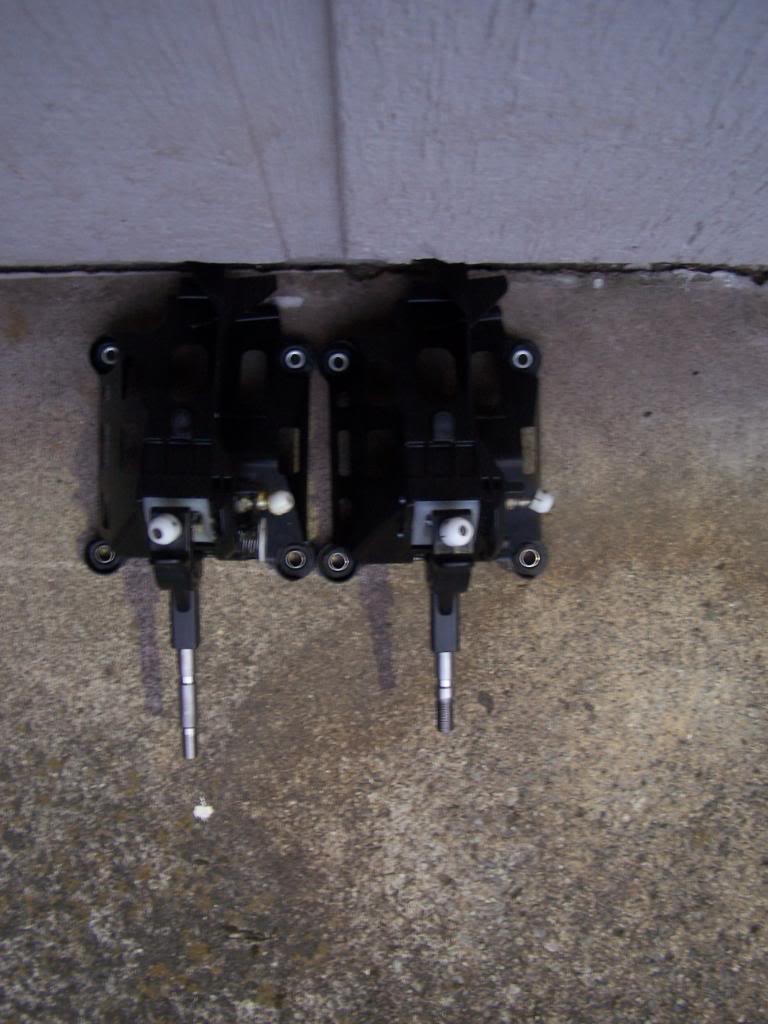
FINISHED PRODUCT:
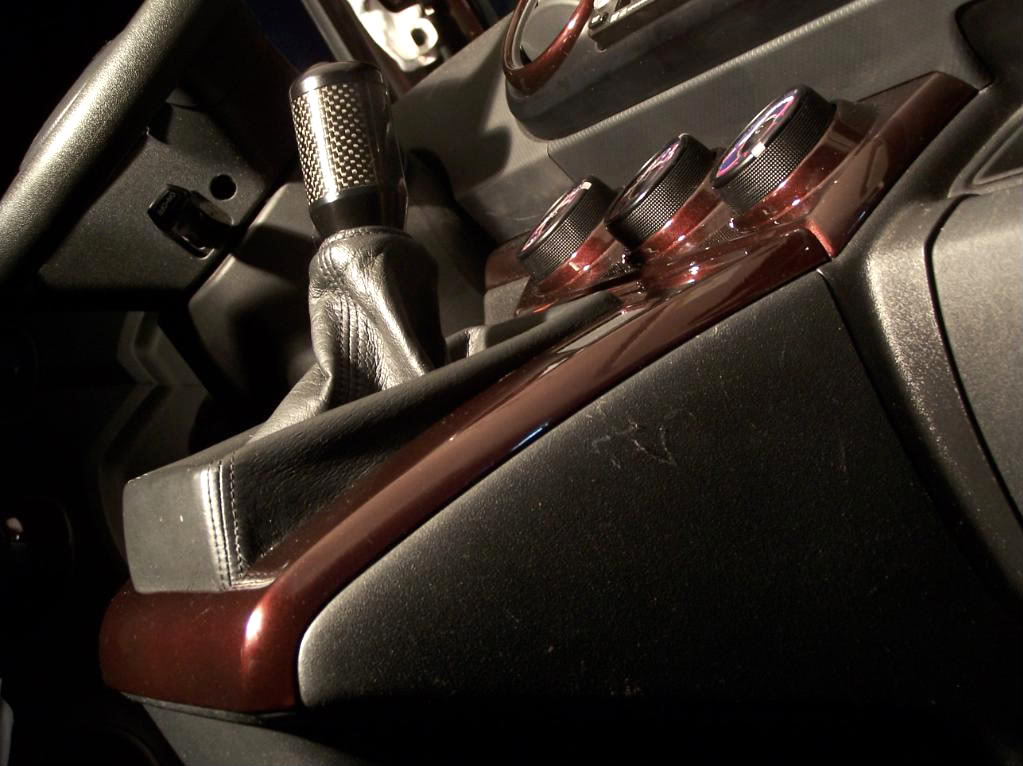
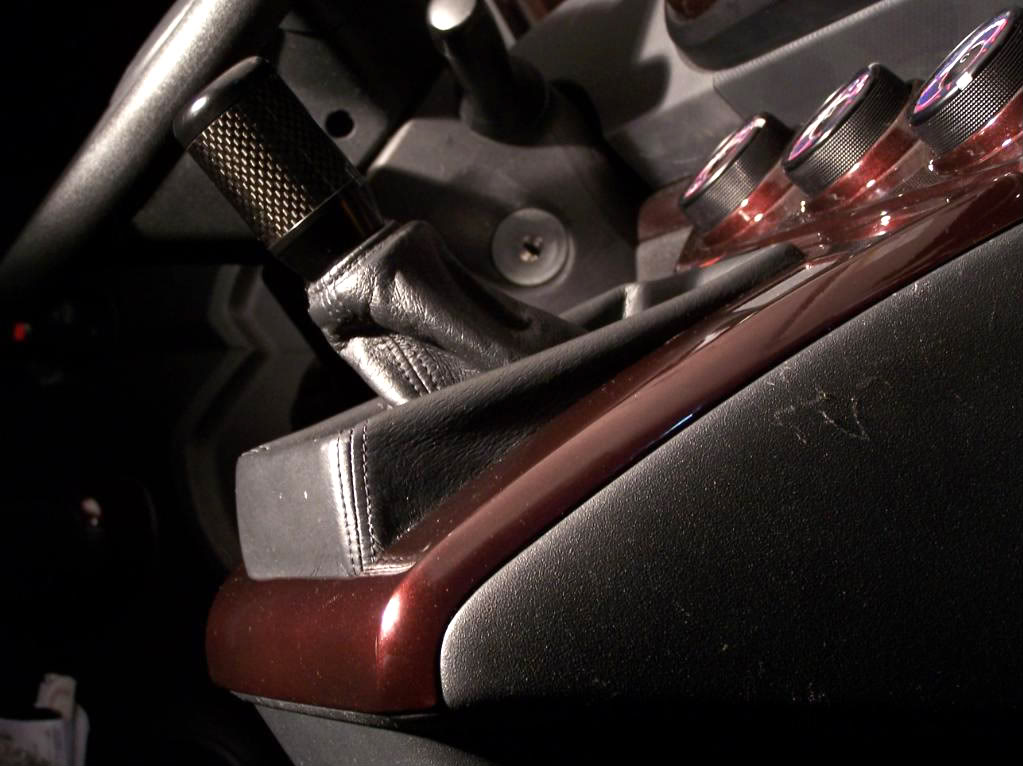
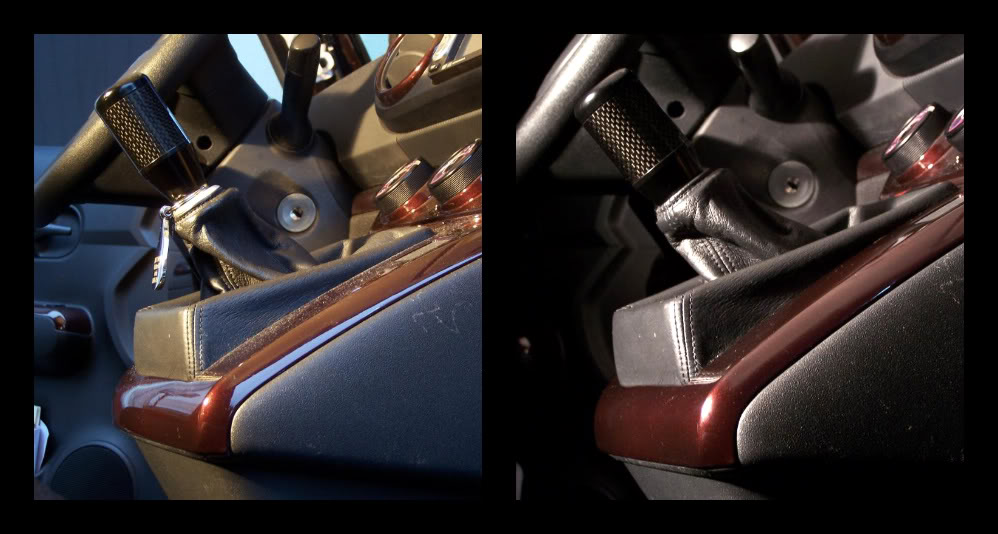
Before and After:
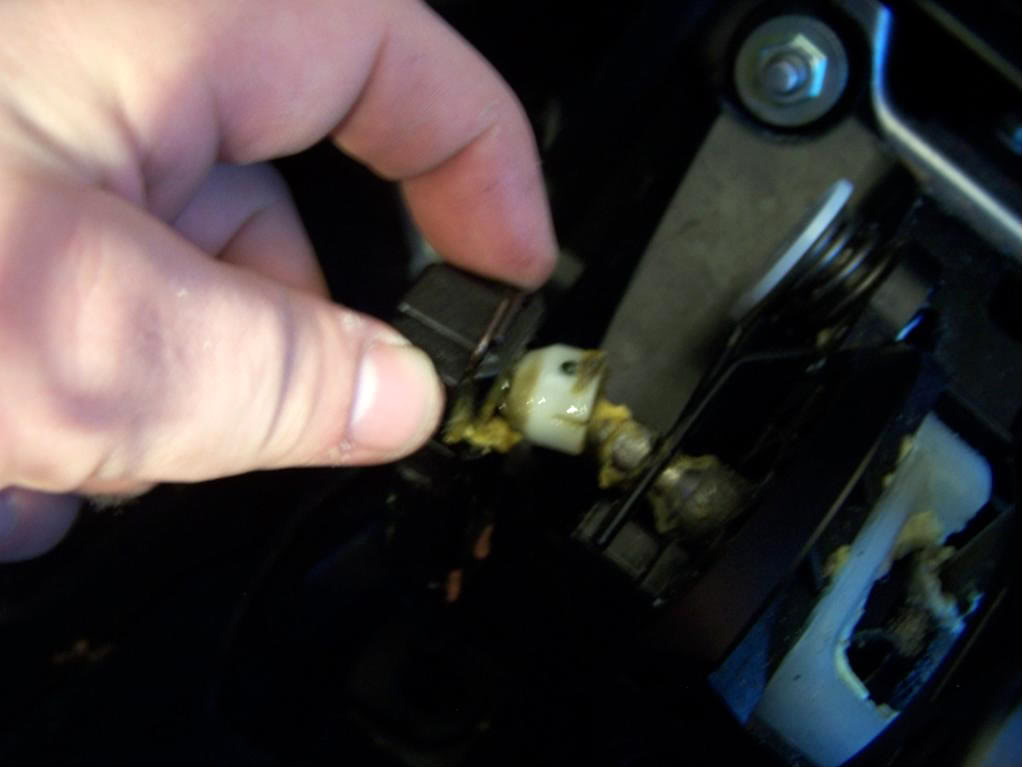
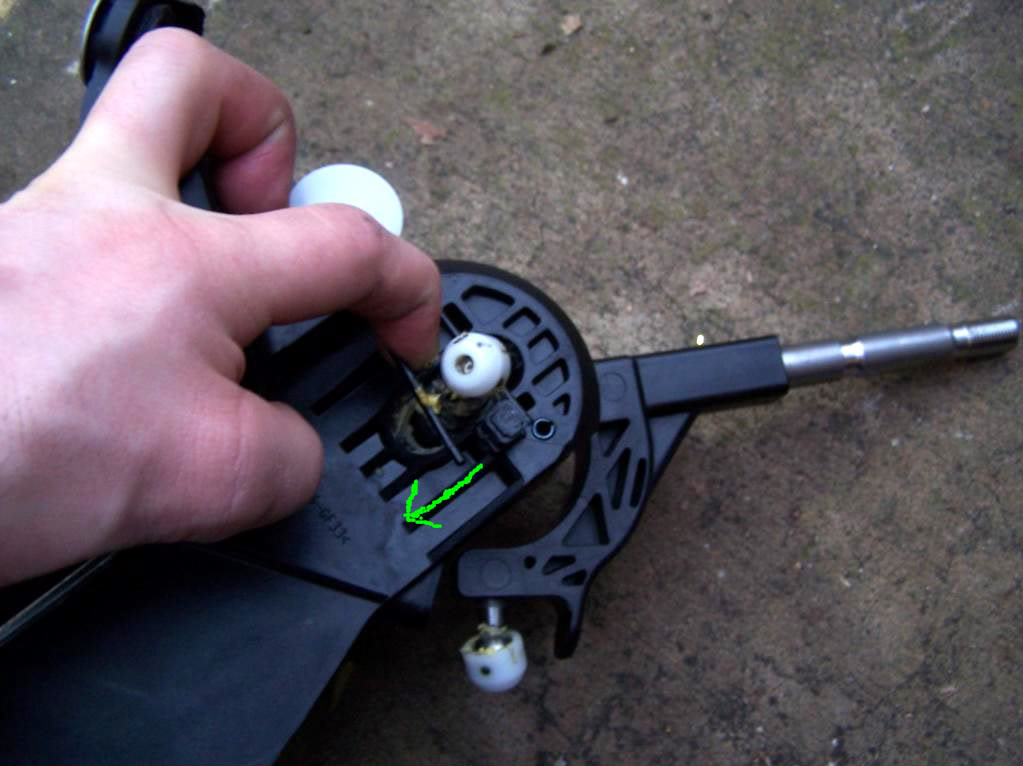
STEP 8: Remove return spring.
- With the shift housing out of the car you can either use the return spring from your original housing or not.
- I chose to install it cause I like the extra side to side resistance on the shifter.
- The new short shifter does not require it and Trevor recommends not to use it.
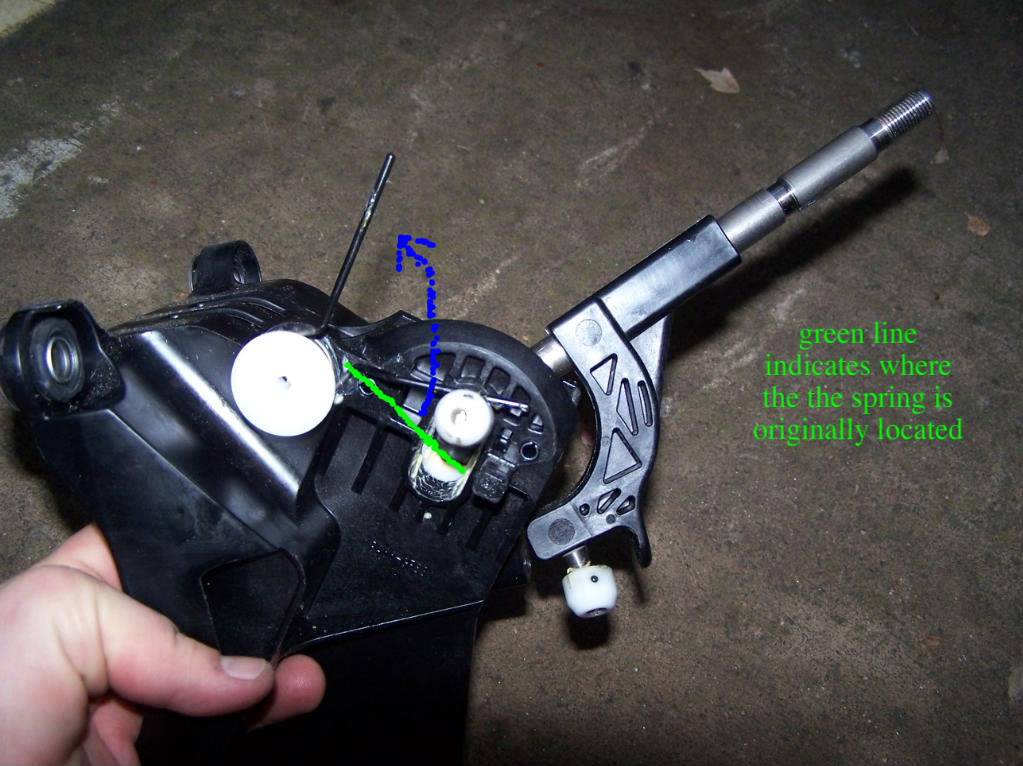
- Using your finger pull the bottom arm of the spring down and then over the bump stop. *see picture*
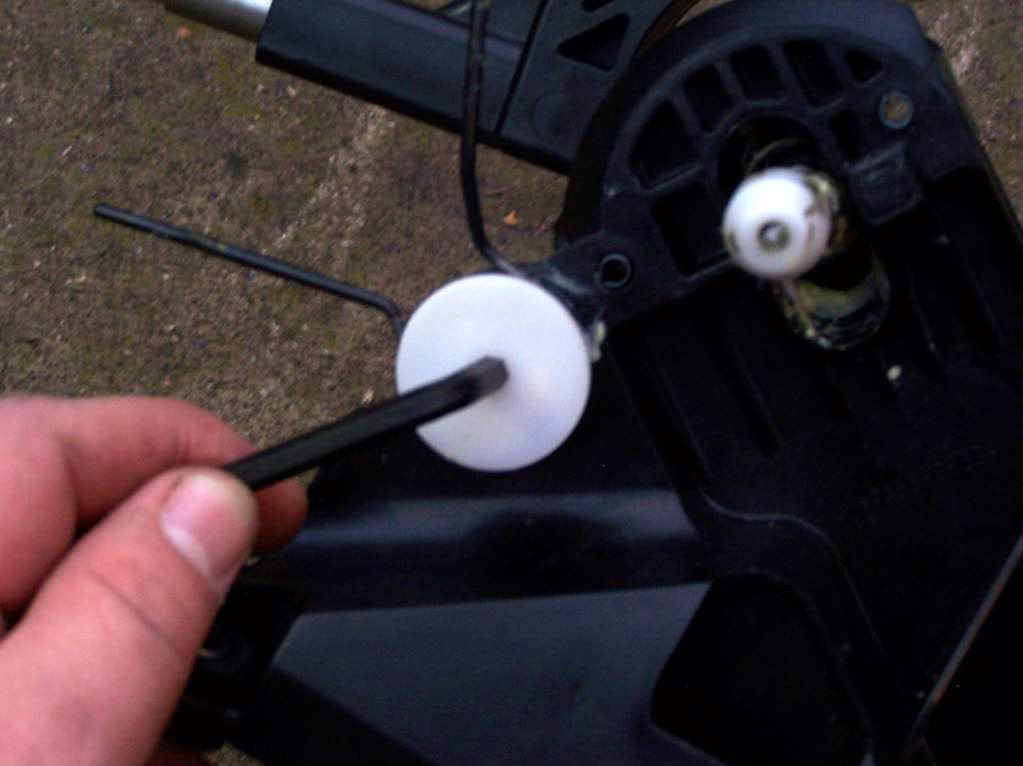
- Next use the allen wrench and turn the white round retainer clip counter clockwise 90 degrees to remove the spring
- install the spring and clip onto the new shifter.
STEP 9: Install new shifter. basically reverse the steps.
- Bolt in the new shifter housing. make sure it is tight but don�t over tighten them.
- Reinstall the shifter cables by pushing the cables back into the bottom of the housing first.
- Reinstall the white retainer clips on the bottom of the shifter cables.
- Reconnect the cables at the top to the shifter. Just push them back on. they should click right on.
*At this time take a look at the install so far. Double check everything*
- Reinstall the shifter console.
- Connect the 12v power outlet wire
- Replace the 2 screws at the top of the console.
- Reinstall the 2 side foot well panels.
- Connect the hazard button wire.
- Reinstall the shifter bezel.
- screw on shift ****.
- take a step back and marvel at your handy work.
BEFORE YOU GO OUT AND DRIVE DO THE FOLLOWING:
Predrive checks.
- Shift through ALL gears making sure nothing binds, rubs or anything else out of the ordinary.
- Spend at least 5 minutes doing this.
- Take a SHORT test drive. Don�t go out and start racing or driving erratically until you do a proper test drive.
I hope you enjoyed this DIY and if you are wanting to pick one of these short throws up then please contact Trevor at this email address: boxstuf@verizon.net Please let him know that I sent you. either Andrew, or The_Butcher. either name will work.
Thank you for talking the time to read this.
-Andrew
FINISHED PRODUCT:
Before and After:
Last edited by A-snell; 11-20-2010 at 03:16 AM.
 11-18-2010, 04:18 AM
#5
thank you for that. 
check out my other DIYs..
4 piece grill kit install:
http://www.scionxbforum.com/forum/showthread.php?t=54
shark fin antenna install:
http://www.scionxbforum.com/forum/showthread.php?t=50
Also, Scion City www.scionowners.com feature my DIYs on their main page under the 411 section. Everyone should go check out that site. it's a Scion ran, OWNERS ONLY site.
11-18-2010, 10:20 PM
#6

Really great DIY Andrew -- nice job !
Regarding the optional step 8 in the DIY -- the short shifter assembly ships without the extra side-to-side return spring in order to keep the side-to-side resistance closer to stock. This works just fine because the manual transmission provides a robust center return all by itself.
Of course, nothing prevents you from moving the spring from the stock shift assembly, but your arm may not thank you for it ! As Andrew points out, I recommend not installing that spring.
BTW -- The short shifter is available at an introductory price of $99 with free shipping within the contiguous U.S. states and I'll pay $25 for a good condition original shifter assembly.
!Regarding the optional step 8 in the DIY -- the short shifter assembly ships without the extra side-to-side return spring in order to keep the side-to-side resistance closer to stock. This works just fine because the manual transmission provides a robust center return all by itself.
Of course, nothing prevents you from moving the spring from the stock shift assembly, but your arm may not thank you for it
! As Andrew points out, I recommend not installing that spring.BTW -- The short shifter is available at an introductory price of $99 with free shipping within the contiguous U.S. states and I'll pay $25 for a good condition original shifter assembly.
 11-19-2010, 05:21 PM
#8
^^
I hope you enjoyed this DIY and if you are wanting to pick one of these short throws up then please contact Trevor at this email address: boxstuf@verizon.net Please let him know that I sent you. either Andrew, or The_Butcher. either name will work.
Thank you for talking the time to read this.
-Andrew
Thank you for talking the time to read this.
-Andrew
11-20-2010, 05:40 PM
#11
Senior Member
Scikotics
SL Member

Join Date: Feb 2009
Location: Hampstead, MD
Posts: 318
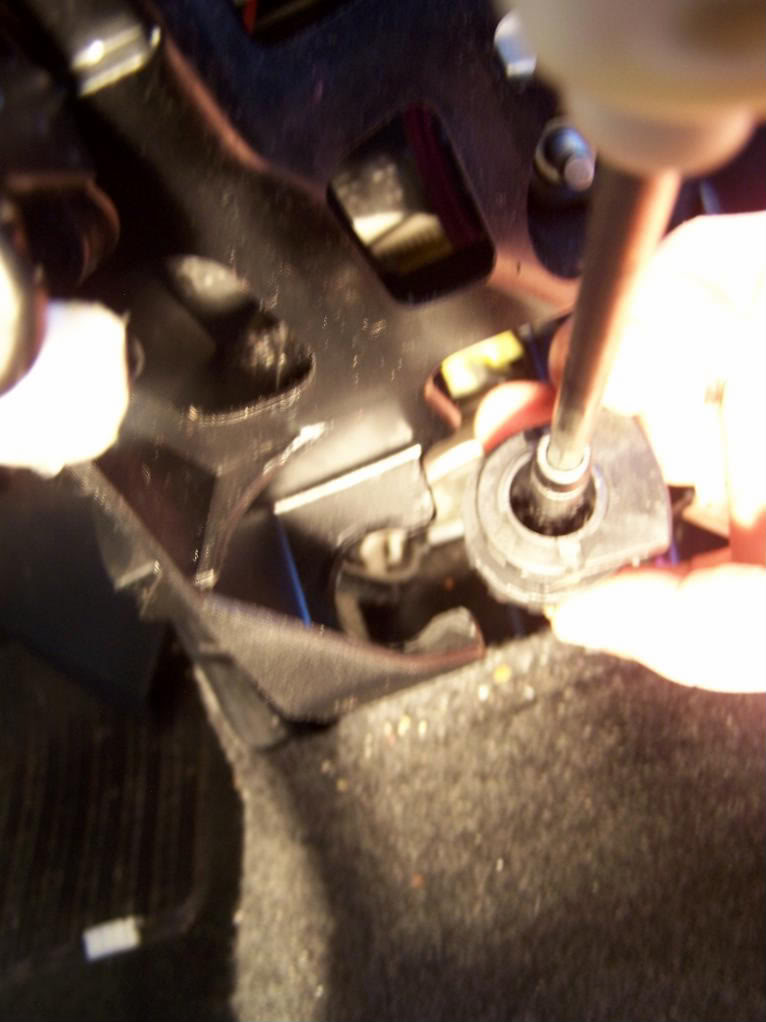
Andrew - Its a 5mm allen wrench...just did my install. Did not use the spring but took it off the stock one in the event that I want to install it later on. Also on the step where you are removing the cable from the housing instead of using a screwdriver and prying it off, there is a round "grippy" (yeah I am technical) part underneath that you can twist a little bit and it will remove the pressure and the cable will slide right out of the housing.
Great write up by the way...Its a very easy install but its always helpful when you can check out the install step by step before you do it. By reading this DIY first it took me all of 15 mins to do the install.
Since this is the DIY thread I will post up in another thread of my 2 cents about the product...

Thread
Thread Starter
Forum
Replies
Last Post
Sgtfluffy16
Regional - Northeast
3
07-28-2021 10:32 PM
Subaru86
Scion FR-S ICE & Interior
0
09-10-2015 08:11 AM