
XB2 Stealth Sub/Amp Build Log


Thread Starter
Member
SL Member
Joined: Aug 2010
Posts: 55
Disclaimer: Ok so I wanted try and actually document a build for once in my life and I figured this a good project to start with. However, I forgot to take notes and pictures until I was halfway done. So I apologize for what little info and photos I have, but it should be enough for ya'll to get an idea of what I did. These were also all taken with my iPhone since I can't seem to find my digi cam. 
Alright, with that out of the way, let me just explain that what I was trying to accomplish here was to fit 2x12" subs and 2 amps as a stealth install under the trunk floor. I want to be able to still put groceries and crap in the back as well as maintain a stealth look as a theft deterrent. Of course this entails losing your spare tire/jack but hopefully if I ever get a flat, someone will be able to get them from my garage!
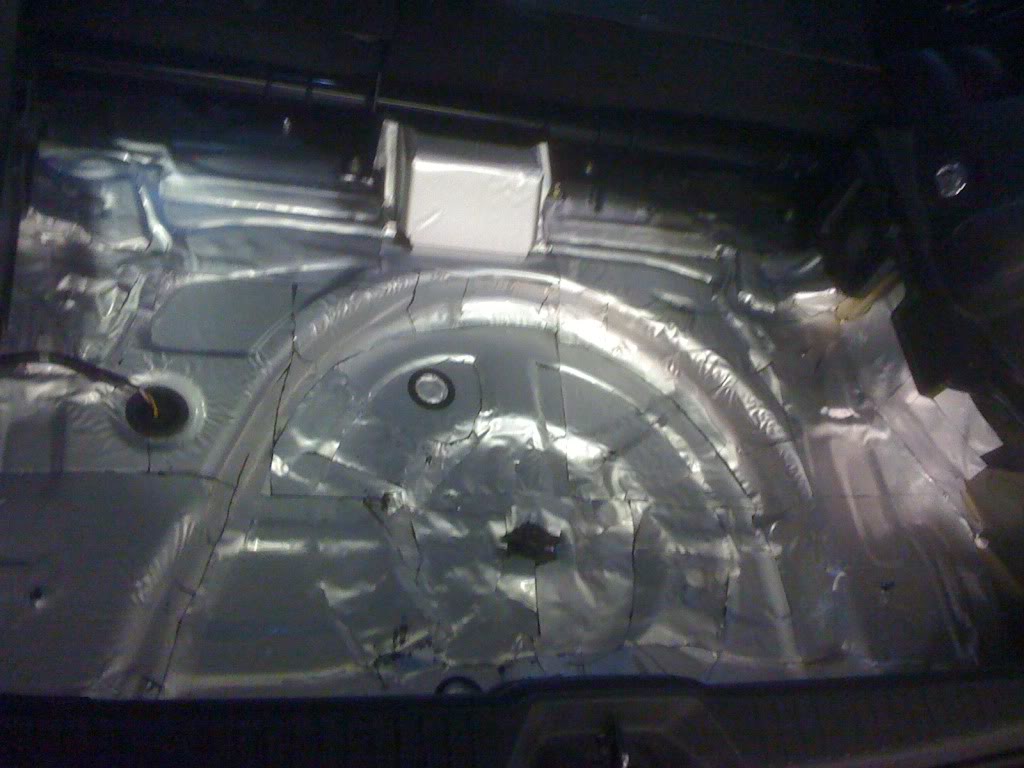
First step was to rip out the trunk and spare tire and lay down some sound deadener.
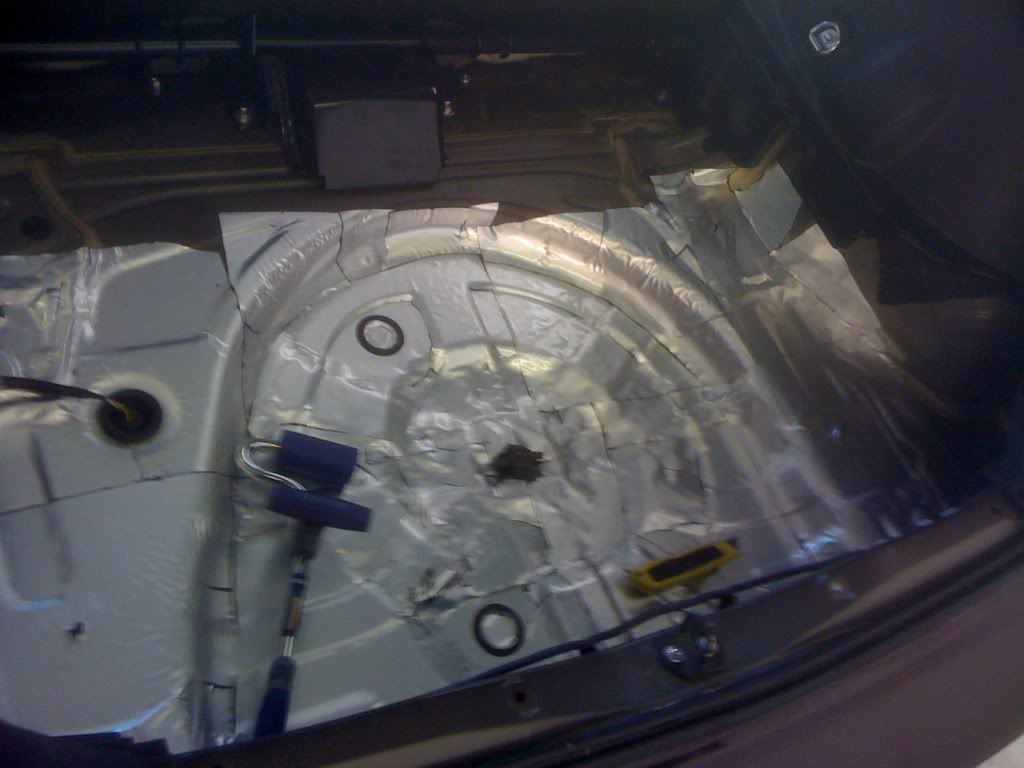
I chose to use edead 40 by Elemental Designs. Its not the best out there but I'm on a budget. Feel free to substitute your own preferred brand of sound block. Make sure you put it on when it is fairly warm out and don't leave any air bubbles underneath. This means you'll have to cut slits in it all around bumps and curves.
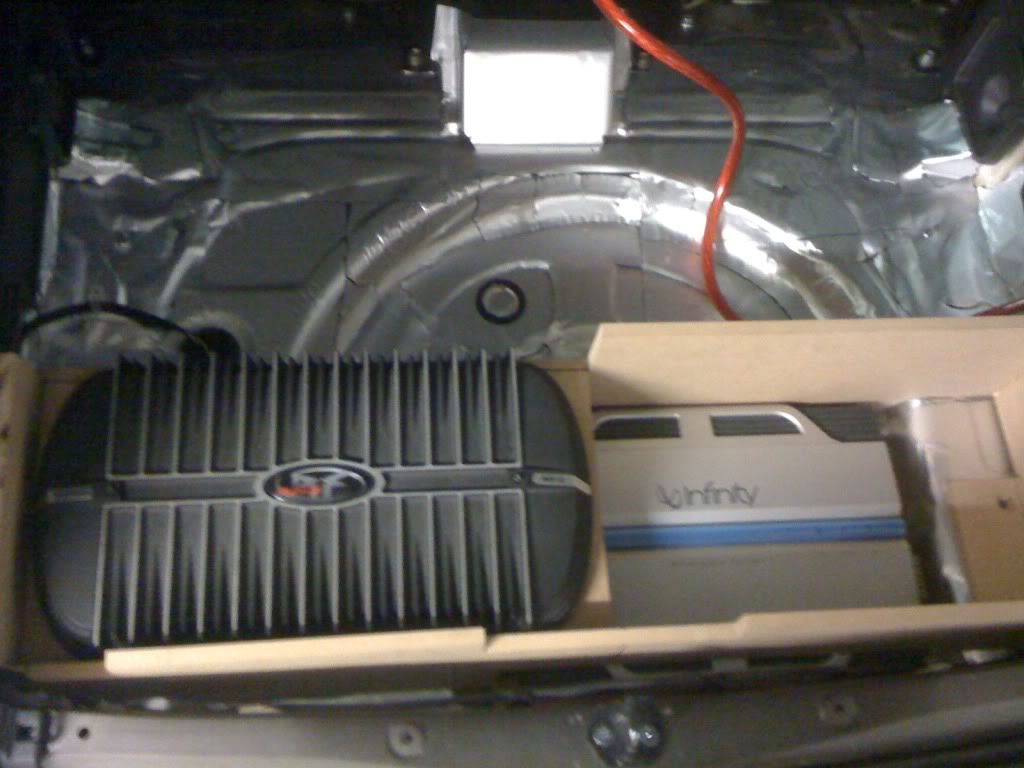
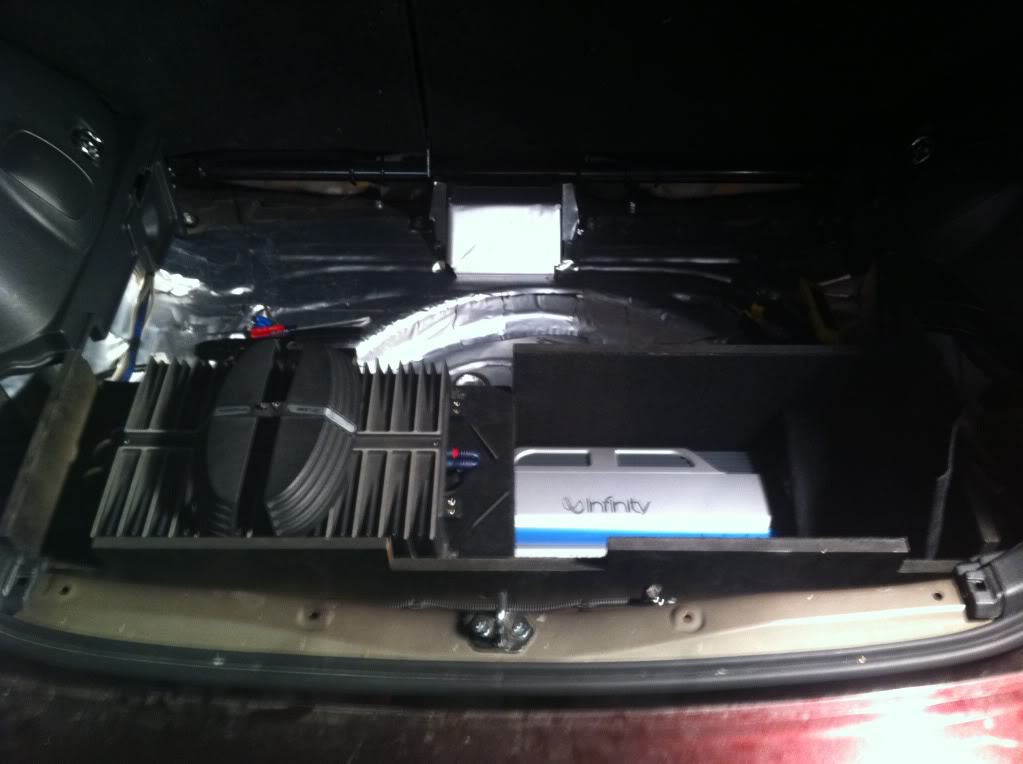
Then I decided to build the amp rack on the furthest back part of the trunk out of 1/2" MDF. I would make the sealed subwoofer box out of 3/4" MDF on the sides and top and use fiberglass on the bottom so that it conformed to the odd shape of the trunk floor.
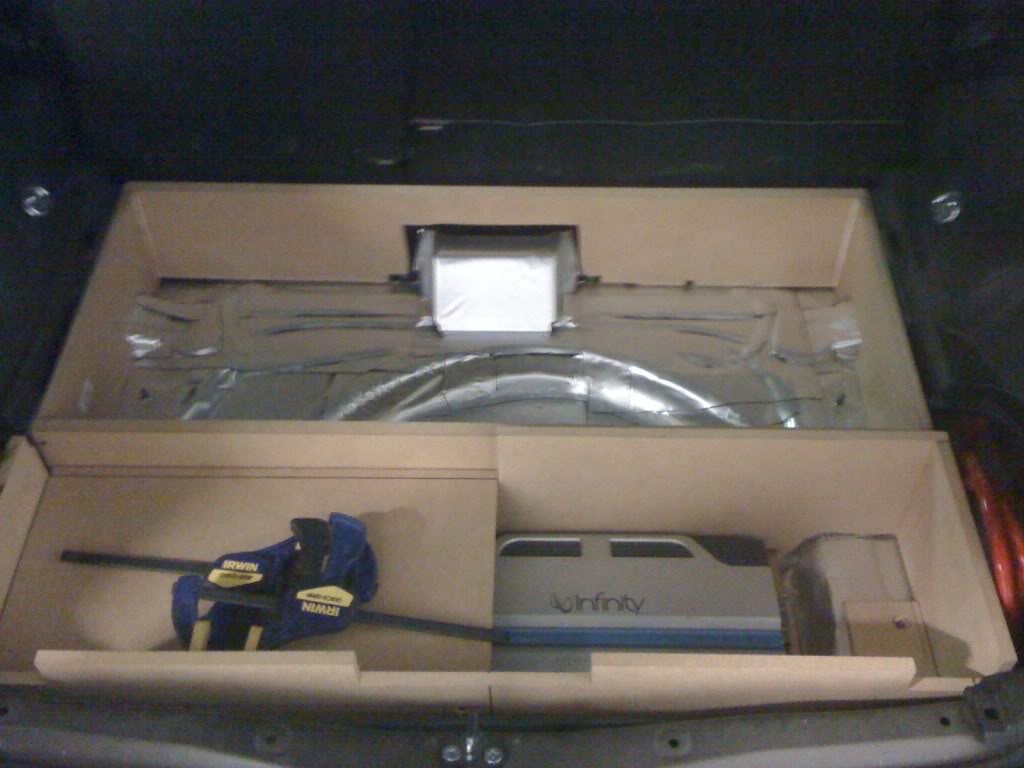
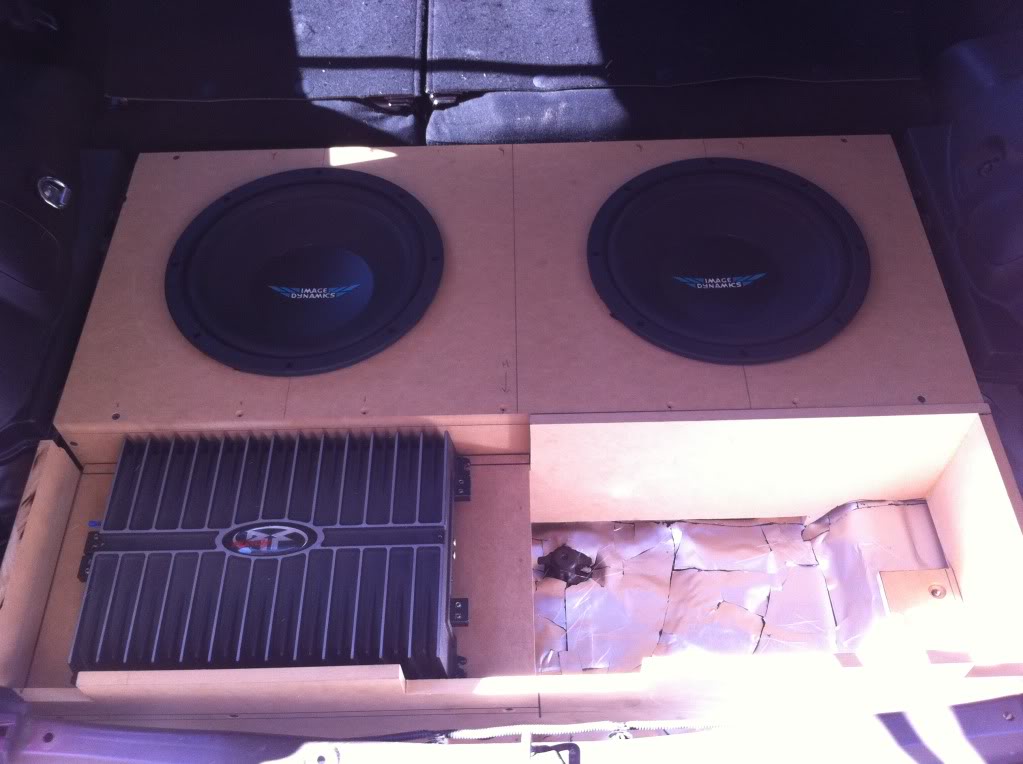
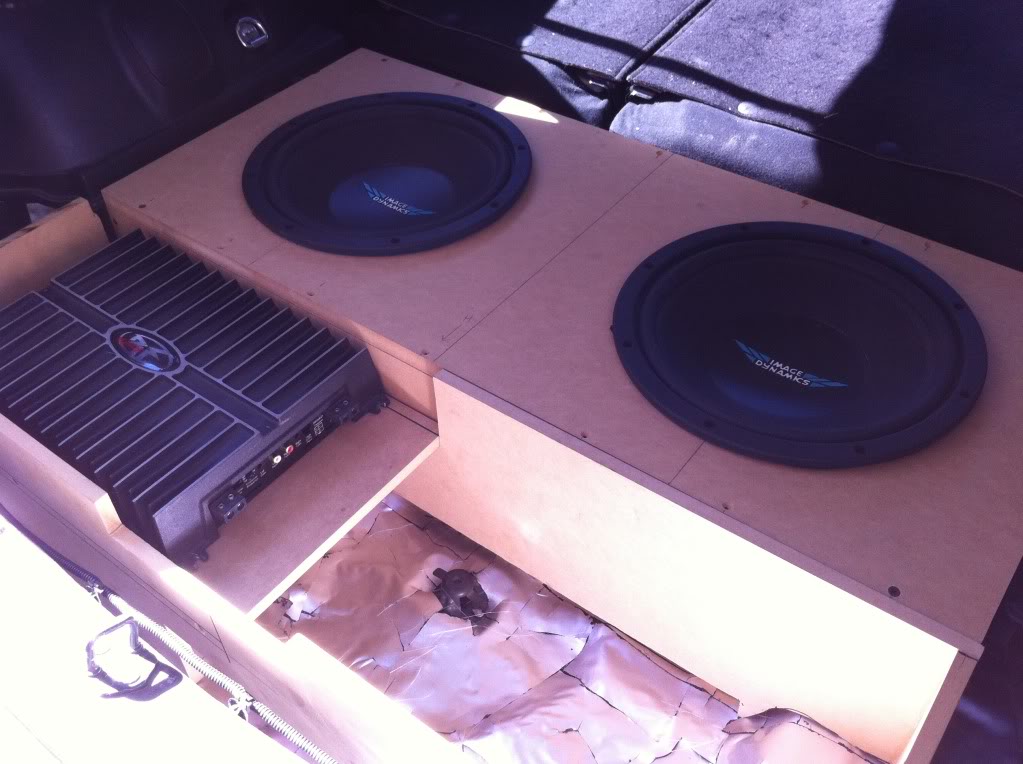
Cutting out the wood to shape the floor was a little tricky so we used a piece of cardboard and just made little cuts here and there until we were able to get it to sit perfectly on the floor. Once that was done, we were able to use the cardboard as a template to cut out the MDF. Unfortunately I don't have any pics of the individual pieces of wood but this is what it looks like in the car:
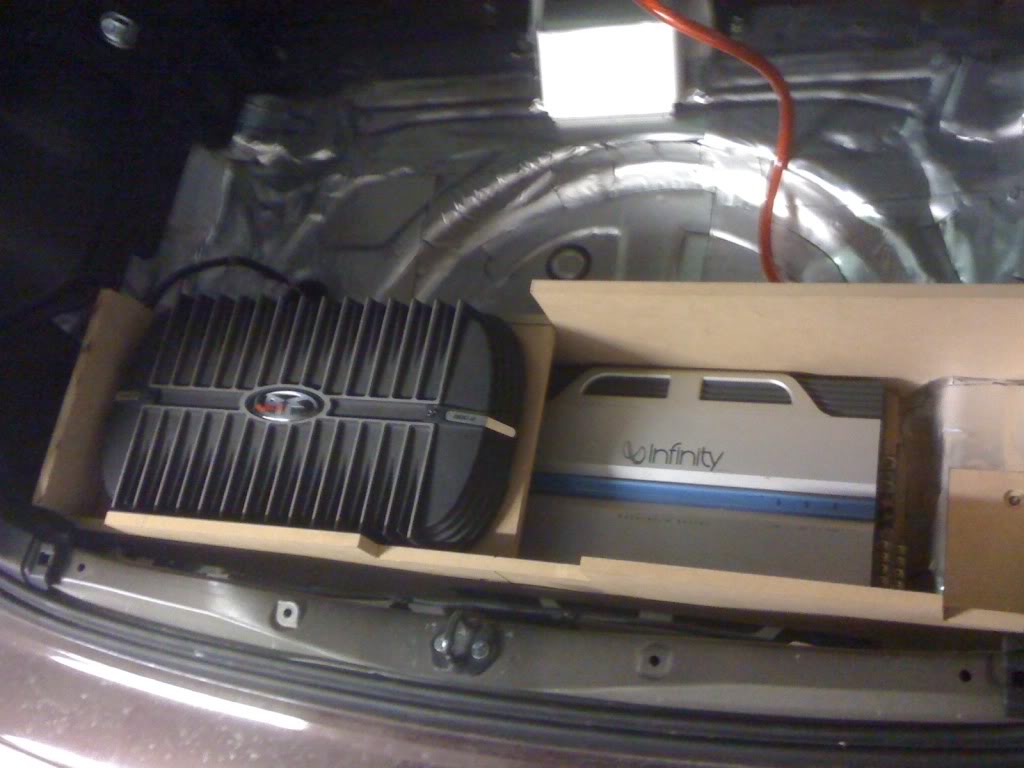
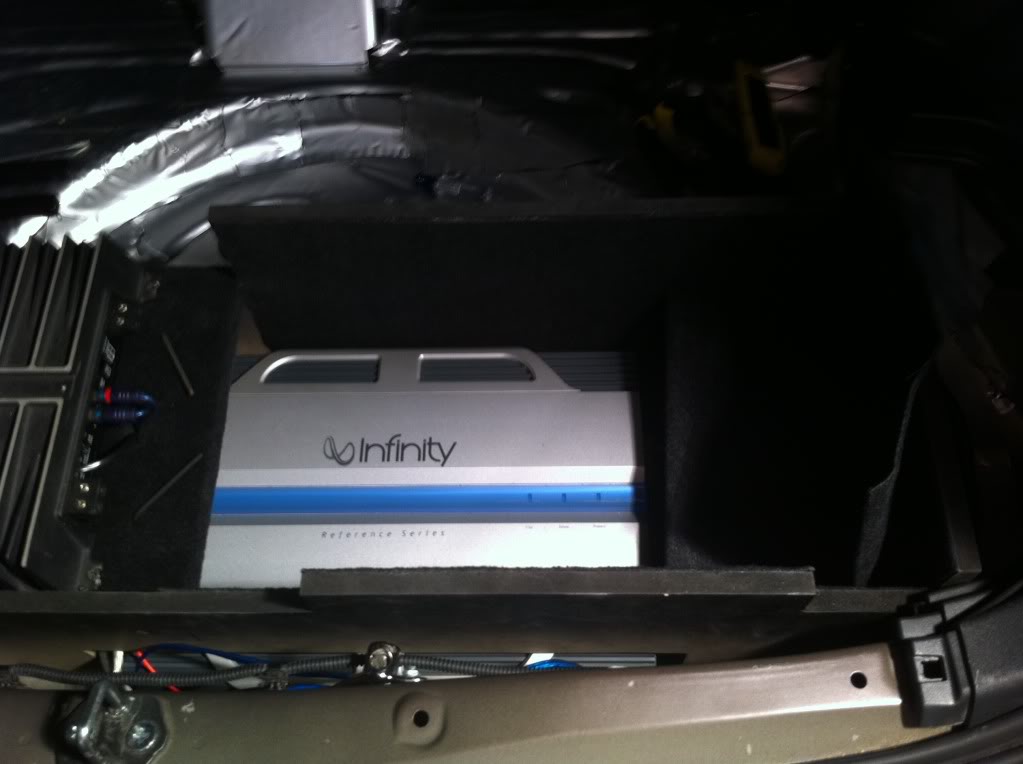
As you can tell, my two amps are too wide to fit in there side by side, so I had to stagger them by mounting the Infiniti on the bottom and the Rockford Fosgate on a raised platform.
Build log will be continued in next post...
Alright, with that out of the way, let me just explain that what I was trying to accomplish here was to fit 2x12" subs and 2 amps as a stealth install under the trunk floor. I want to be able to still put groceries and crap in the back as well as maintain a stealth look as a theft deterrent. Of course this entails losing your spare tire/jack but hopefully if I ever get a flat, someone will be able to get them from my garage!
First step was to rip out the trunk and spare tire and lay down some sound deadener.
I chose to use edead 40 by Elemental Designs. Its not the best out there but I'm on a budget. Feel free to substitute your own preferred brand of sound block. Make sure you put it on when it is fairly warm out and don't leave any air bubbles underneath. This means you'll have to cut slits in it all around bumps and curves.
Then I decided to build the amp rack on the furthest back part of the trunk out of 1/2" MDF. I would make the sealed subwoofer box out of 3/4" MDF on the sides and top and use fiberglass on the bottom so that it conformed to the odd shape of the trunk floor.
Cutting out the wood to shape the floor was a little tricky so we used a piece of cardboard and just made little cuts here and there until we were able to get it to sit perfectly on the floor. Once that was done, we were able to use the cardboard as a template to cut out the MDF. Unfortunately I don't have any pics of the individual pieces of wood but this is what it looks like in the car:
As you can tell, my two amps are too wide to fit in there side by side, so I had to stagger them by mounting the Infiniti on the bottom and the Rockford Fosgate on a raised platform.
Build log will be continued in next post...
Thread Starter
Member
SL Member
Joined: Aug 2010
Posts: 55
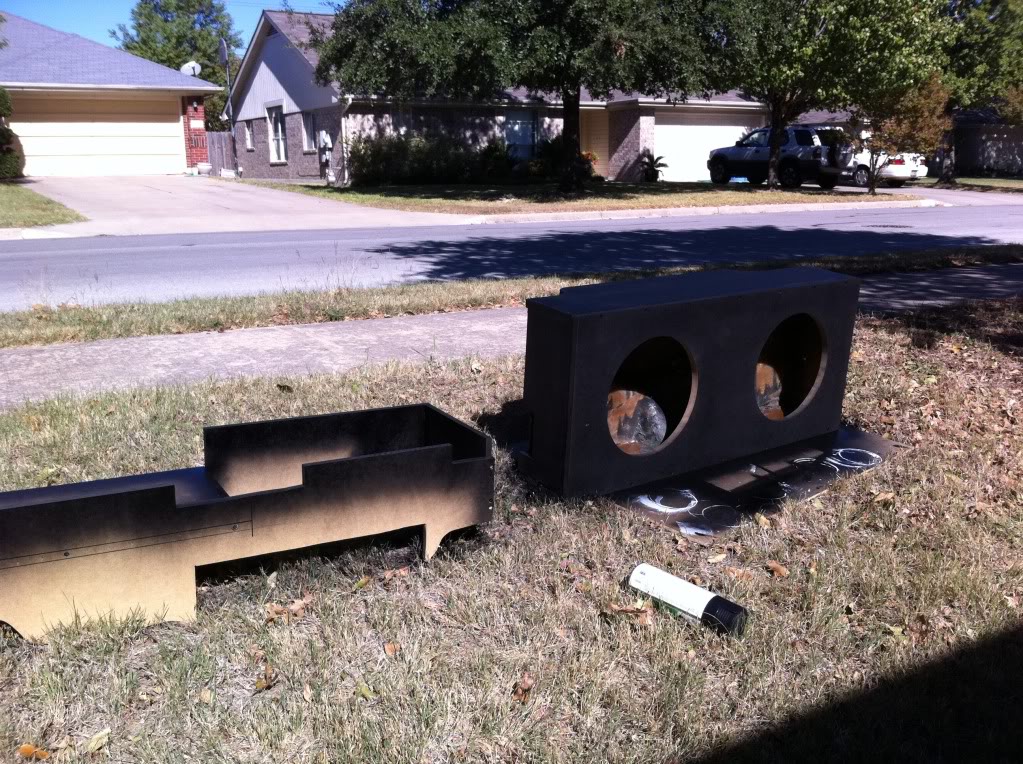
Next step was to build the sub box frame out of the 3/4" MDF to occupy the space between the amps and the back seats.
Here we used the same technique of using cardboard to figure out the best shape and then using them as templates to cut the wood. All through out this, we were constantly measuring and using the level to make sure the tops of all our pieces would be level. At the end, there is going to be a cover piece that sits on all of this so you want to make sure it stays as level as possible.
To hold all of my MDF pieces together, we used a combination of drywall screws, wood glue, and lots of brads via an air nail gun.
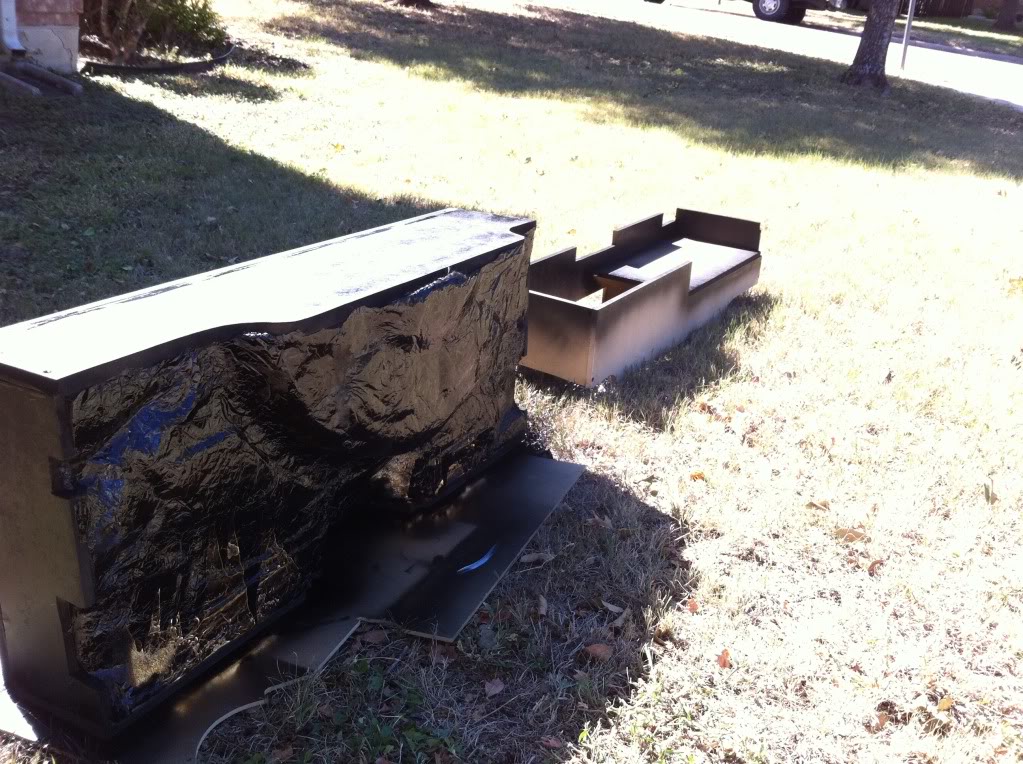
Now it was time to lay the bottom of the sub box with fiberglass so that it would not only sit well in the trunk, but also to assure we got the most possible air space for my Image Dynamics ID12v2 subs.
Before laying down the fiberglass mat, its crucial that you create a barrier between the fiberglass and the trunk covered in sound deadener.
You can use tape but it would stick to everything when you try to remove the box, so we laid down lots of aluminum foil on the trunk floor and made sure to push it in and around all the bumps, nooks, and crannies.
After that we just tore up some mat, laid it in there, mixed up some resin and started pouring!
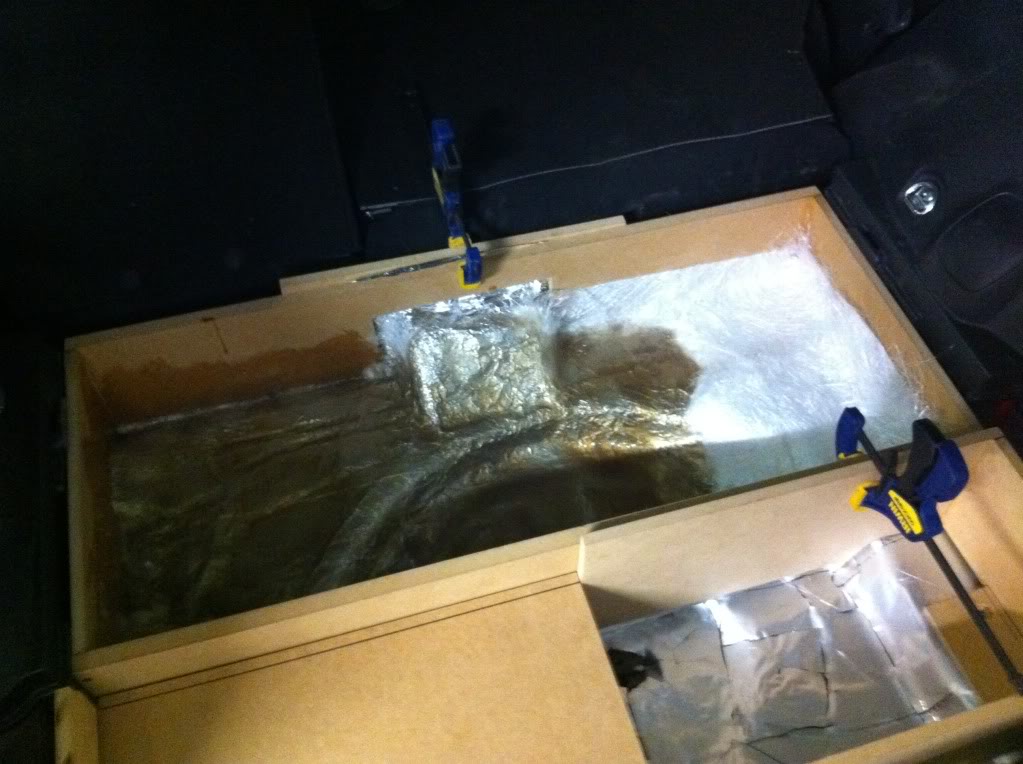
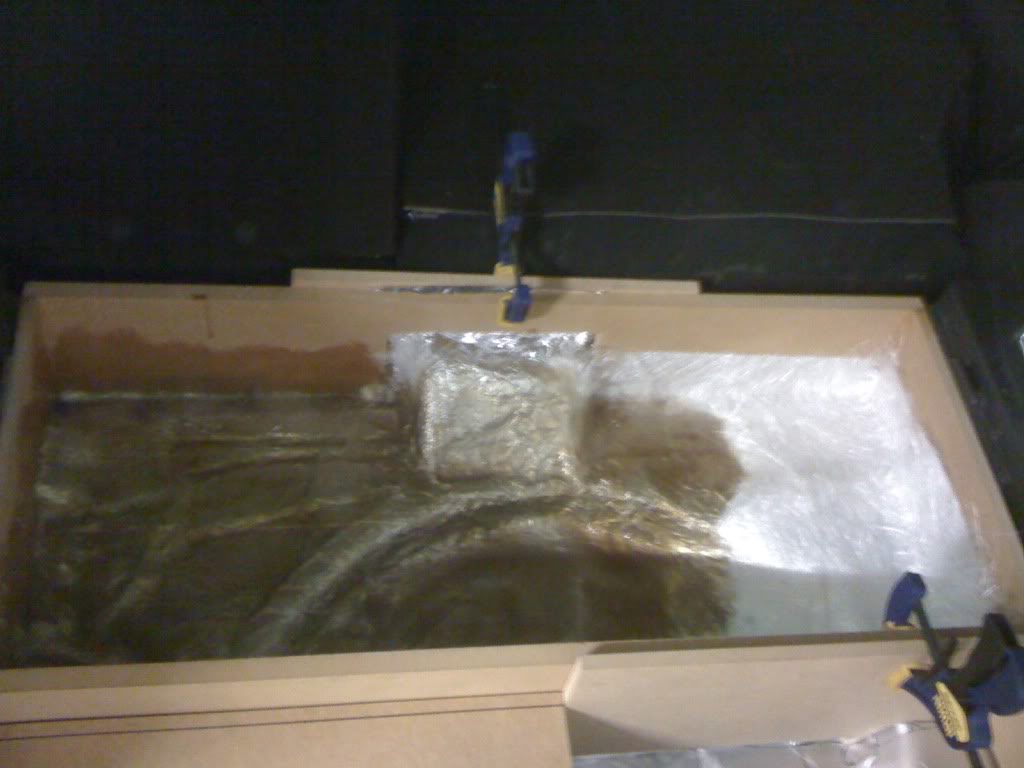
We applied 3 layers of fiberglass and then ran out of resin so we decided it was a good stopping point. Once it started drying, we mixed up some kitty hair (or Bondo Glass filler) and applied it around the edges and creases that might not have gotten the best bond with the fiberglass.
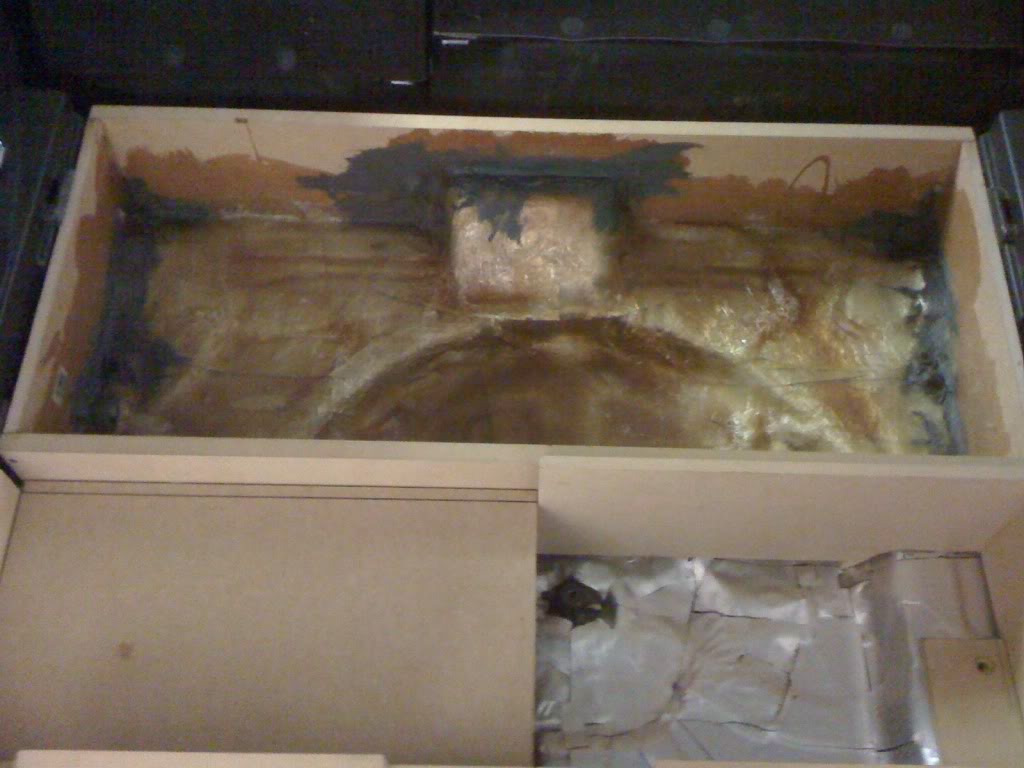
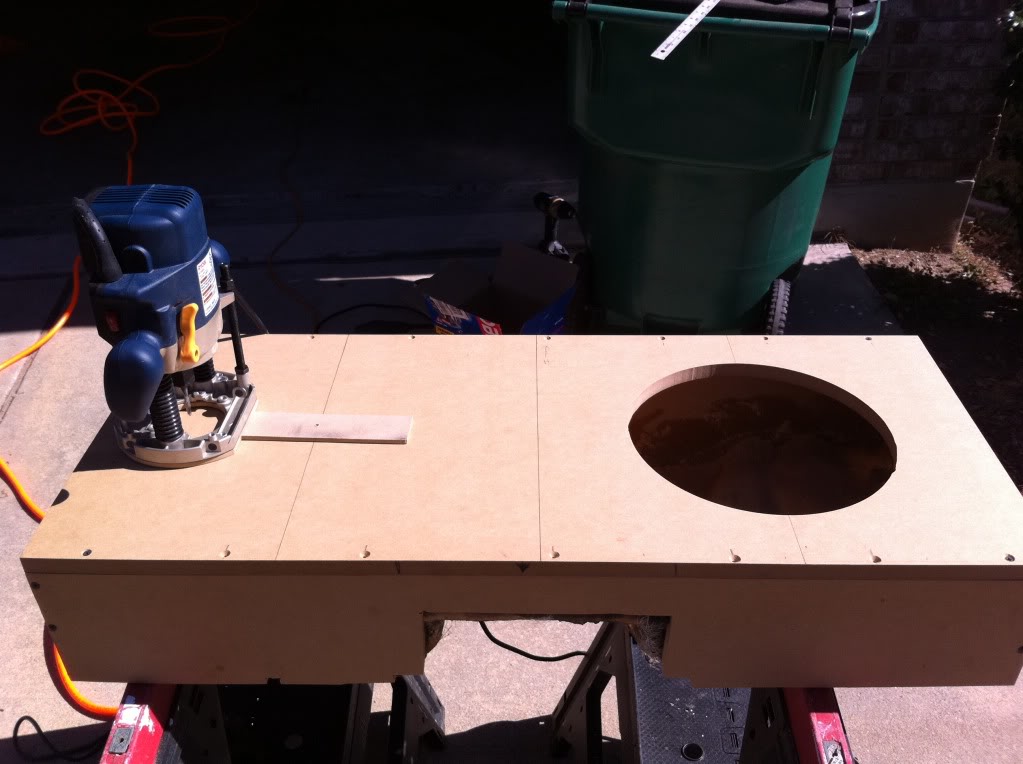
After it dried over night, we removed the box from the trunk and attempted to pull off as much foil from the bottom as possible. Then we cut out the top of the sub box from another sheet of 3/4" MDF and mounted it onto the box and gave the entire thing a good sealing with silicone.
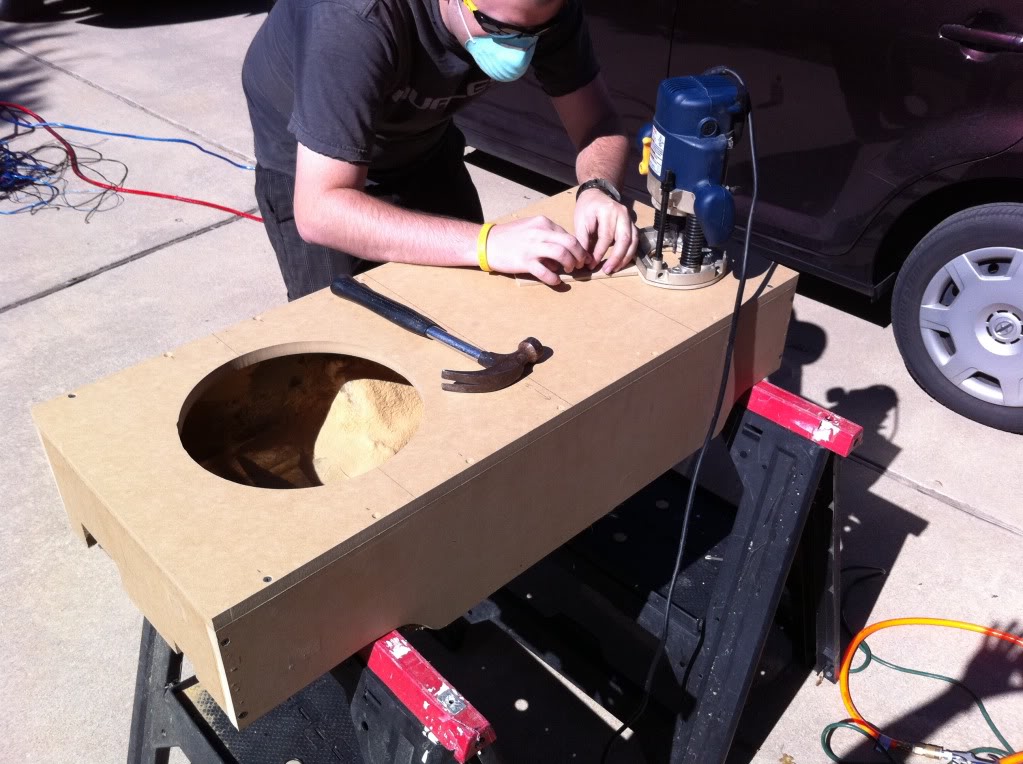
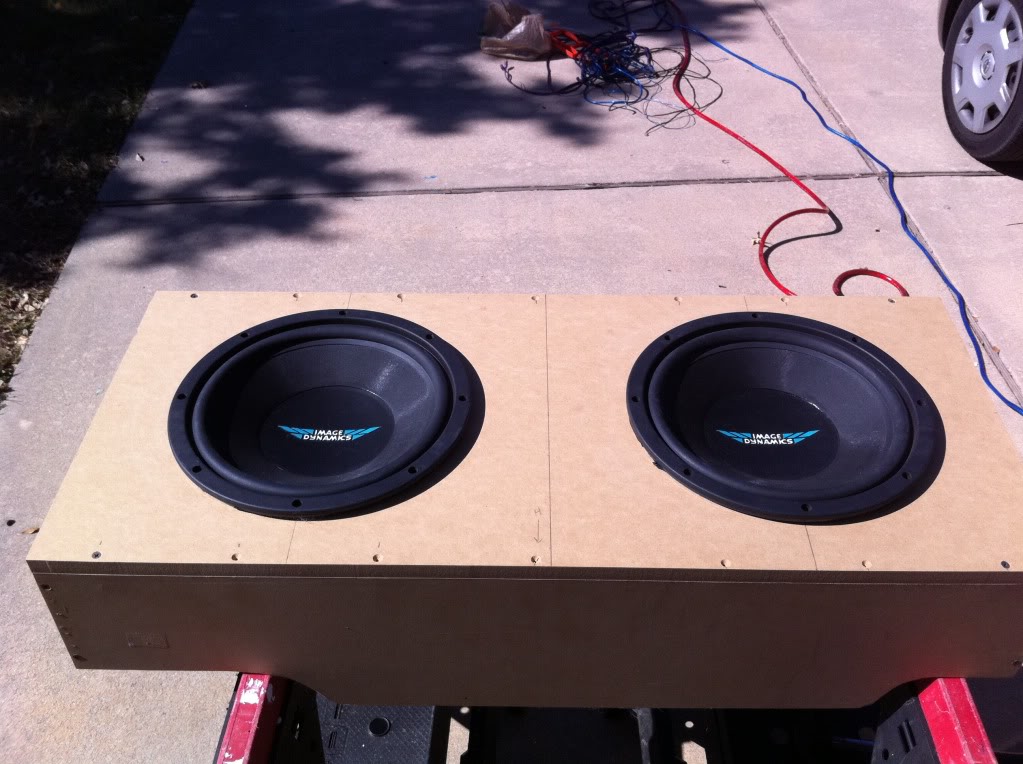
Then it was time to cut the holes and being on a budget, I didn't buy a $50 circle jig. Instead I made one out of some spare 1/4" MDF and it worked out pretty well! See for yourself:
Here we used the same technique of using cardboard to figure out the best shape and then using them as templates to cut the wood. All through out this, we were constantly measuring and using the level to make sure the tops of all our pieces would be level. At the end, there is going to be a cover piece that sits on all of this so you want to make sure it stays as level as possible.
To hold all of my MDF pieces together, we used a combination of drywall screws, wood glue, and lots of brads via an air nail gun.
Now it was time to lay the bottom of the sub box with fiberglass so that it would not only sit well in the trunk, but also to assure we got the most possible air space for my Image Dynamics ID12v2 subs.
Before laying down the fiberglass mat, its crucial that you create a barrier between the fiberglass and the trunk covered in sound deadener.
You can use tape but it would stick to everything when you try to remove the box, so we laid down lots of aluminum foil on the trunk floor and made sure to push it in and around all the bumps, nooks, and crannies.
After that we just tore up some mat, laid it in there, mixed up some resin and started pouring!
We applied 3 layers of fiberglass and then ran out of resin so we decided it was a good stopping point. Once it started drying, we mixed up some kitty hair (or Bondo Glass filler) and applied it around the edges and creases that might not have gotten the best bond with the fiberglass.
After it dried over night, we removed the box from the trunk and attempted to pull off as much foil from the bottom as possible. Then we cut out the top of the sub box from another sheet of 3/4" MDF and mounted it onto the box and gave the entire thing a good sealing with silicone.
Then it was time to cut the holes and being on a budget, I didn't buy a $50 circle jig. Instead I made one out of some spare 1/4" MDF and it worked out pretty well! See for yourself:
Thread Starter
Member
SL Member
Joined: Aug 2010
Posts: 55
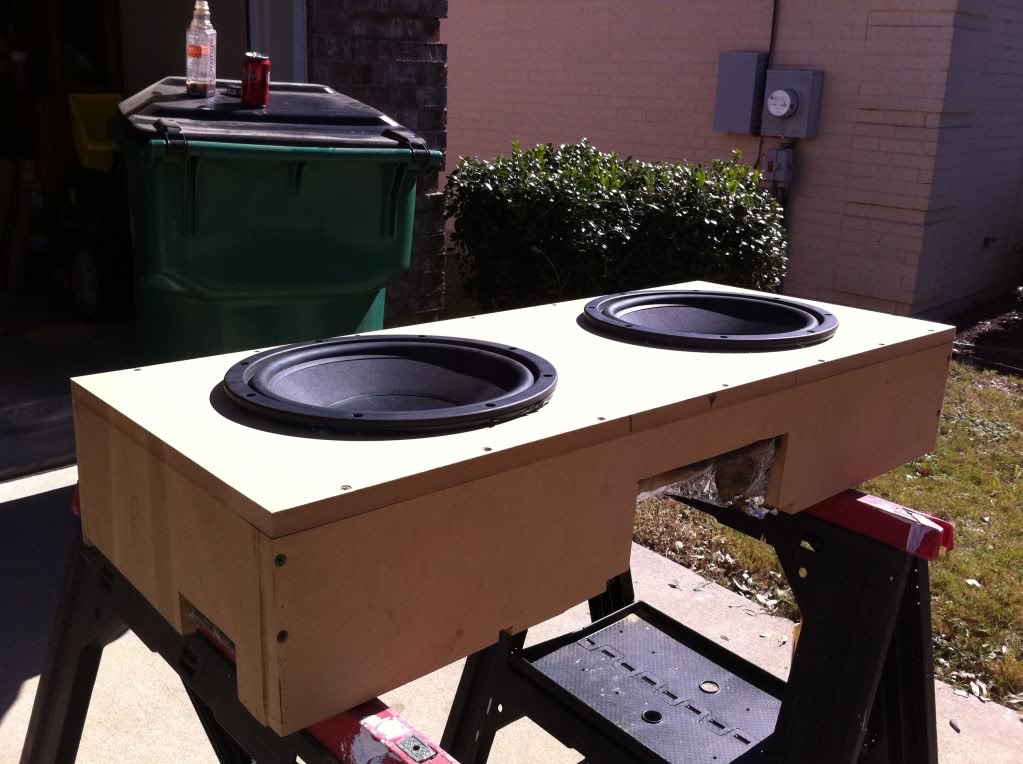
Put it back in the car for a quick fitting test. We found that for an easier ingress/egress of the box we would have to shave about 1/2" off of the plastic slots on the side interior panels with a Dremel.
Then we ripped everything out and gave it a quick paint job in black just as a precaution. We will cover some of it in black carpet later and of course there will also be the overall cover piece that sits on top of it all.
Next we covered the inside of the amp rack with black carpet using 3M spray glue. I know you can't see it in these pics very well but its on there. We also started mounting the amps and running the wires/cables to them.
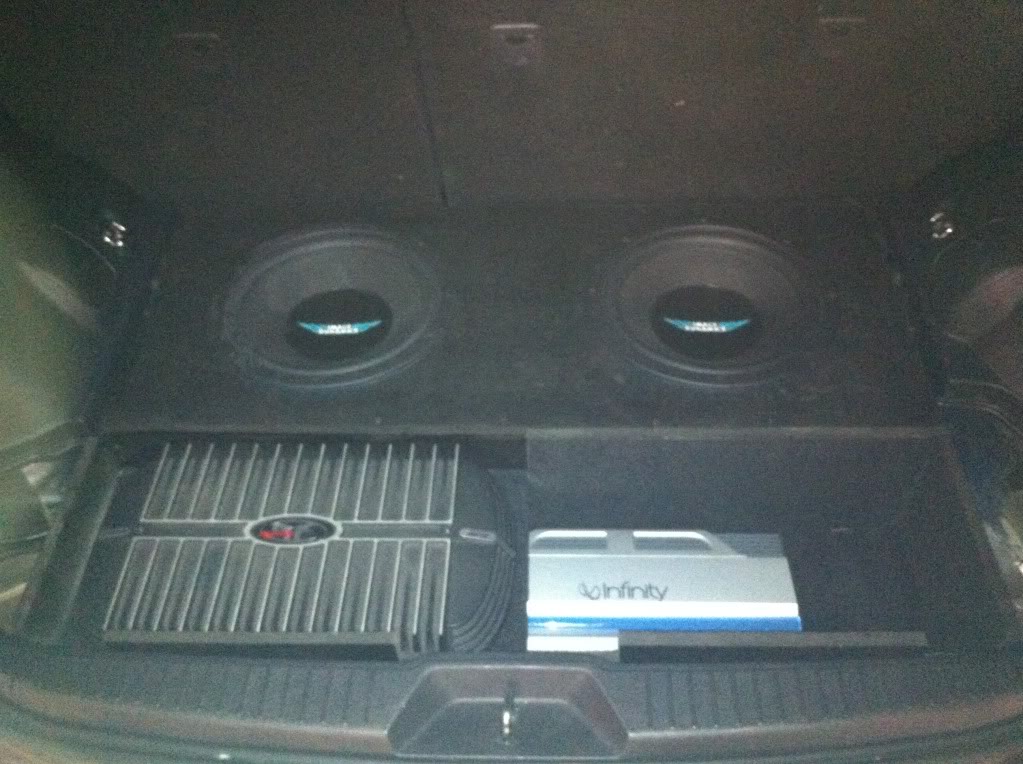
Now we drop the sub box back in, wire it up and give it a test run!
This is where I've left off. Its functional but not finished yet. Unfortunately the holidays have made me even more broke so it might be a few more weeks until I can cut out and finish the cover piece.
I also plan on taking much better quality pics once I get my digi cam back. Let me know what you guys think so far. This is my first build like this and I'm no professional but I hope that the fit and finish is at least acceptable.
Check back soon for more!
Then we ripped everything out and gave it a quick paint job in black just as a precaution. We will cover some of it in black carpet later and of course there will also be the overall cover piece that sits on top of it all.
Next we covered the inside of the amp rack with black carpet using 3M spray glue. I know you can't see it in these pics very well but its on there. We also started mounting the amps and running the wires/cables to them.
Now we drop the sub box back in, wire it up and give it a test run!
This is where I've left off. Its functional but not finished yet. Unfortunately the holidays have made me even more broke so it might be a few more weeks until I can cut out and finish the cover piece.
I also plan on taking much better quality pics once I get my digi cam back. Let me know what you guys think so far. This is my first build like this and I'm no professional but I hope that the fit and finish is at least acceptable.
Check back soon for more!


Senior Member
SL Member
Joined: Oct 2009
Posts: 390
I like how you staggered the Fosgate and Infinity amps to make them fit in the space, very ingenious. I note that you had a dust mask on when you routed your MDF. Isn't that stuff wonderful? Cuts and shapes cleanly, easy to paint (weighs a ton, eats saw blades and router bits, dust makes your skin itch and you nose run). Will you be installing grills over the sub? Looking forward for updates!
Thread Starter
Member
SL Member
Joined: Aug 2010
Posts: 55
Yeah I had to fiddle around with the design for awhile to figure out how everything was going to fit and give the most air space to the subs. I originally was going to have the subs and amps location swapped, but we decided this design worked out the best.
The MDF is wonderful stuff to use in car audio installs, but yes it is very messy and I still inhaled plenty of that dust along with fiberglass resin to make my lungs hurt for several days after. I'm still blowing MDF dust out of my garage to this day!
@randomsuper - Because of the weird shape of the box, I don't have the exact volume but I did make some rough estimates which came out to about .85 cf of air space per sub (1.7cf total) and my ID12's recommend anywhere from .65cf to 1cf so I'm right in the middle
@KaneoheKoa - Yes I'm planning on integrating grills into the cover piece that I'll be building soon so that I can still put groceries and stuff in the trunk.

Thread
Thread Starter
Forum
Replies
Last Post