
My eBay header project :)! (Includes DIY info)


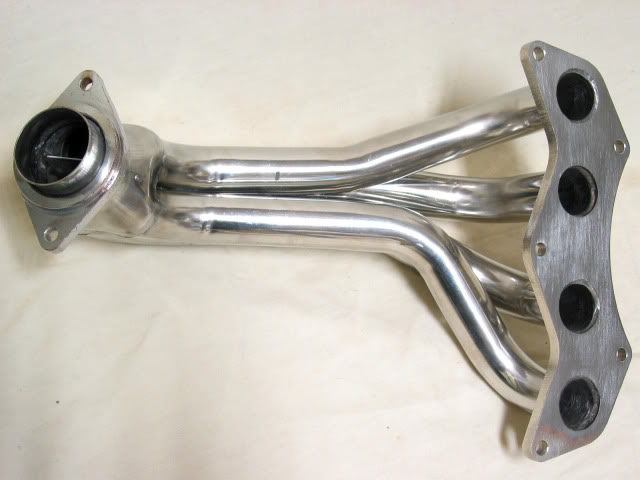
About a week ago I became interested in trying a header on my xB2, but although I really wanted a Weapon-R 4-2-1, the price is just a tad steep  ! I looked about for the DC Sports 4-2-1, but could find little info but price, and although distinctly less than Weapon-R, still a bit rich for my situation !
So, many thanks to Roller_Toaster for challenging the popular perspective (https://www.scionlife.com/forums/sho...d.php?t=200725) and to ScionFred for a well considered suggestion! Last weekend I ordered a $100 eBay Strup header knockoff (made I know not where) and at Fred's additional suggestion, a CEL Eliminator from BigDaddiesGarage (http://www.bigdaddiesgarage.com/angled-cel-fix.html) !
!
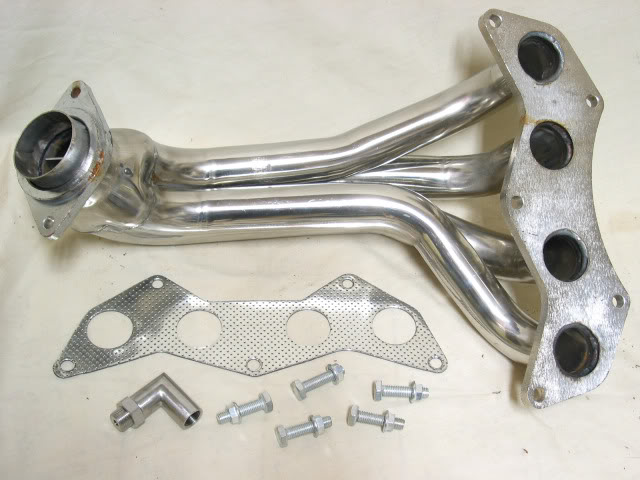
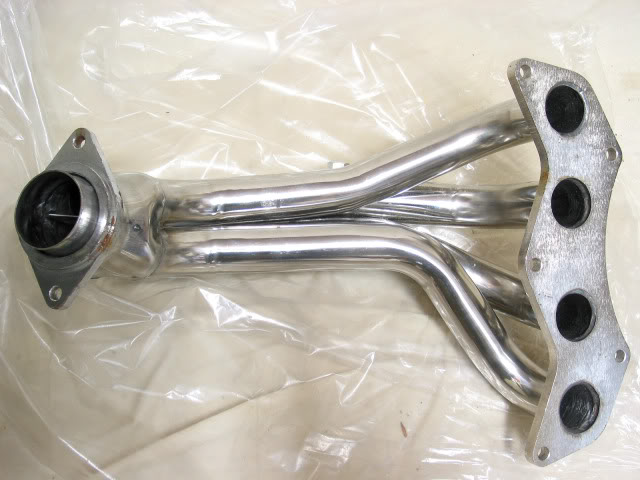
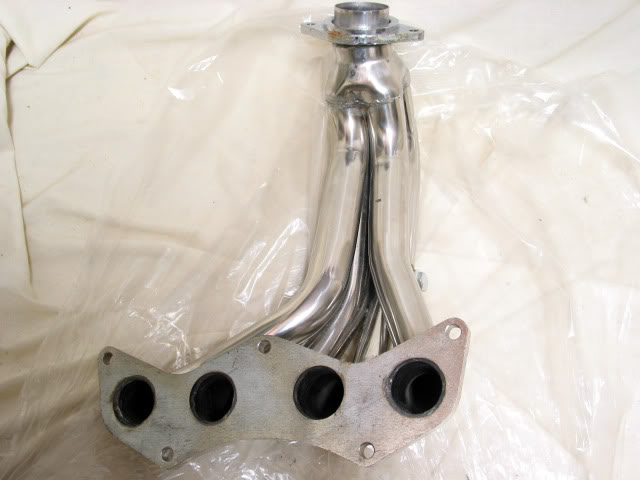
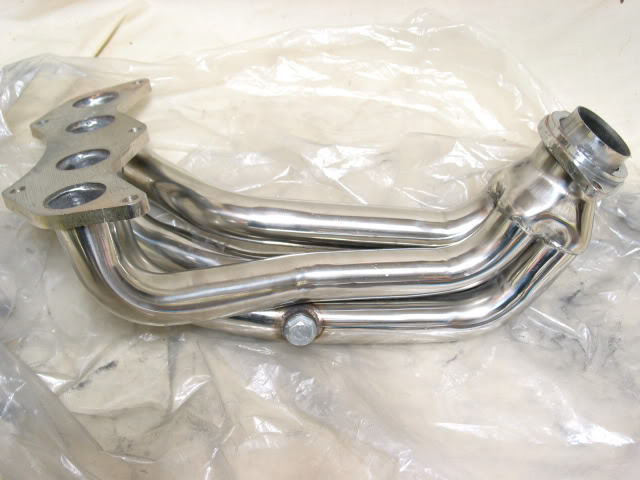
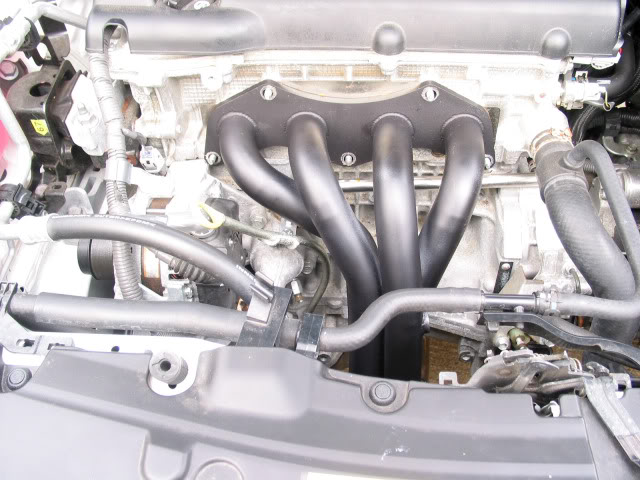
So, as of Friday evening, here's my starting point:
So, many thanks to Roller_Toaster for challenging the popular perspective (https://www.scionlife.com/forums/sho...d.php?t=200725) and to ScionFred for a well considered suggestion! Last weekend I ordered a $100 eBay Strup header knockoff (made I know not where) and at Fred's additional suggestion, a CEL Eliminator from BigDaddiesGarage (http://www.bigdaddiesgarage.com/angled-cel-fix.html)
!So, as of Friday evening, here's my starting point:
Last edited by TrevorS; Apr 19, 2011 at 10:46 PM. Reason: modified thread title
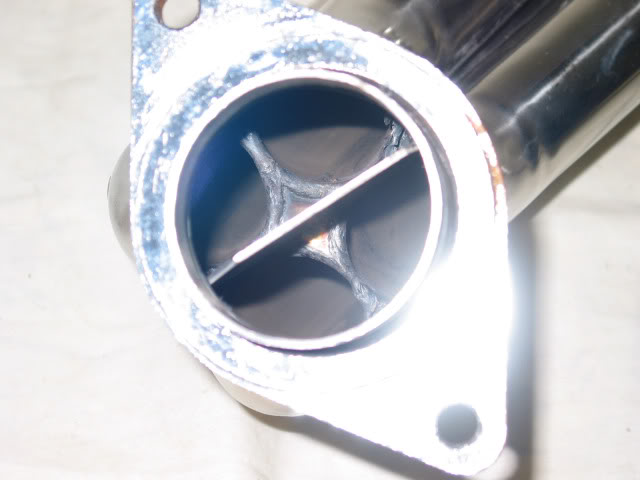
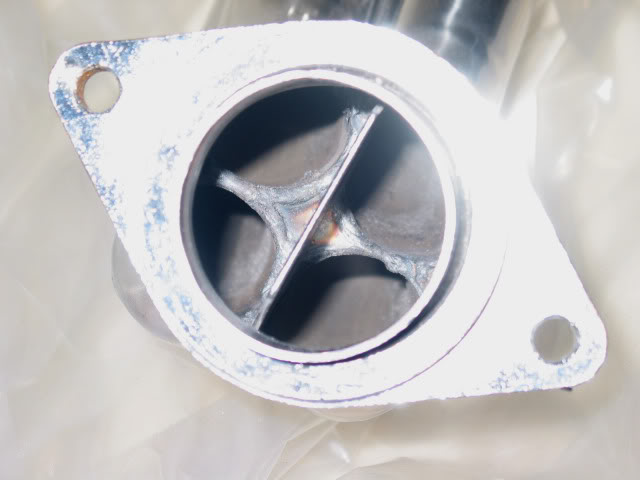
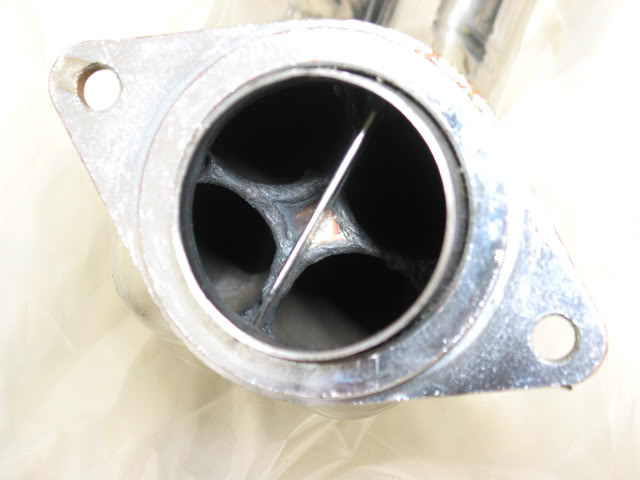
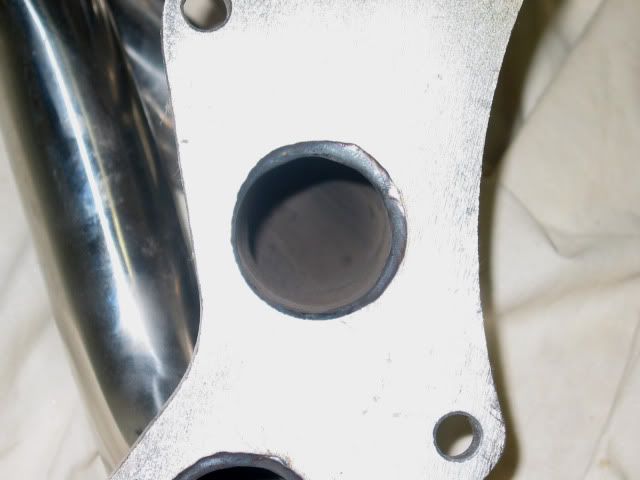
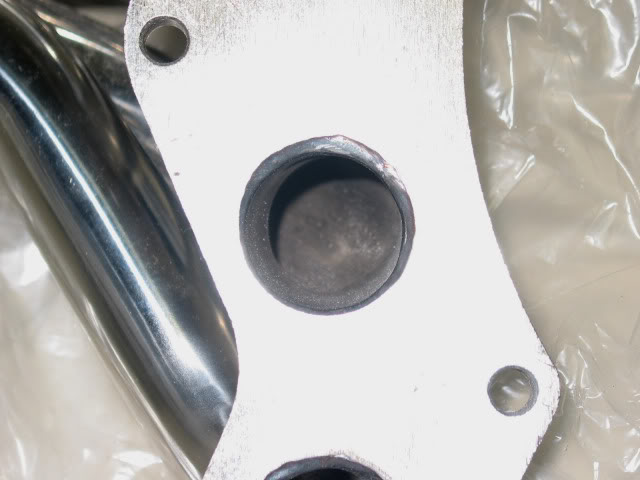
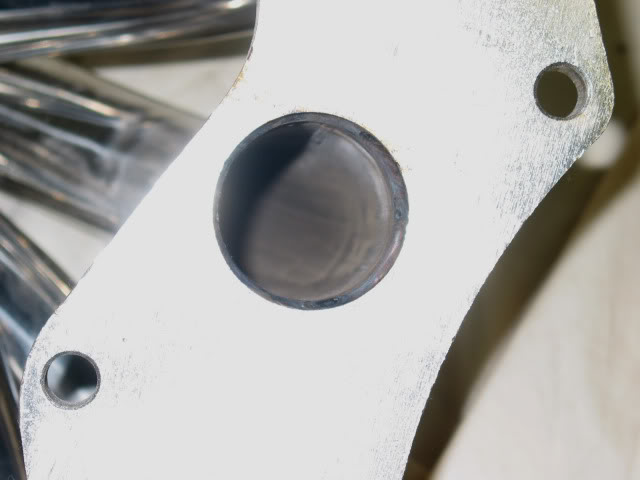
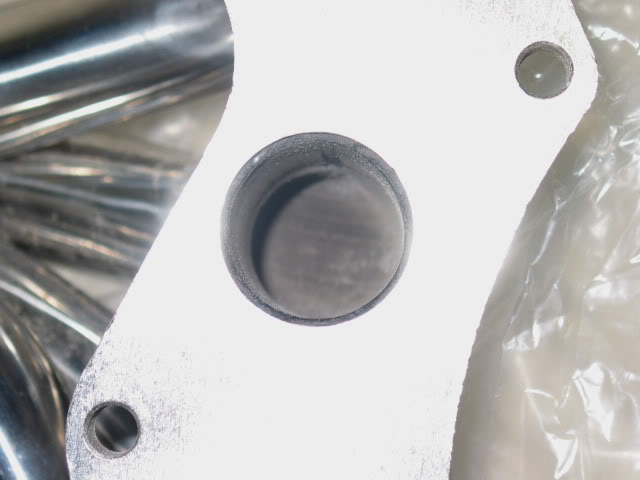
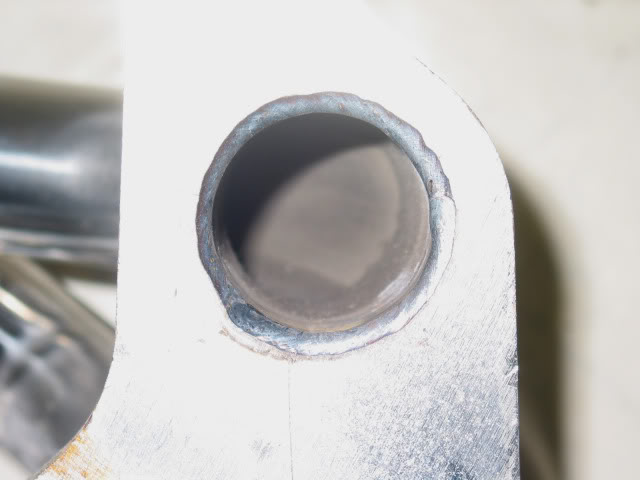
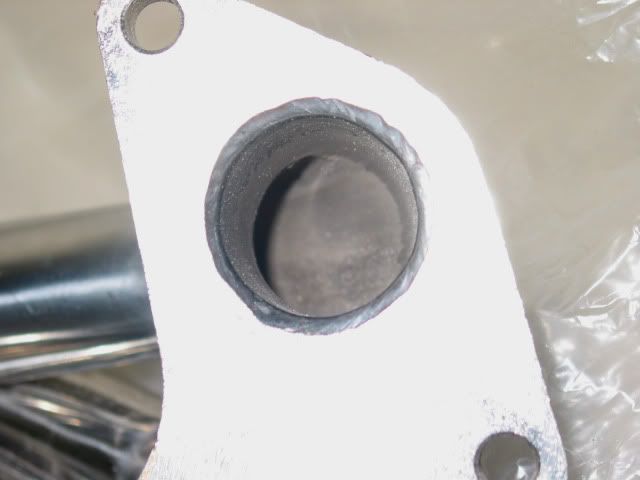
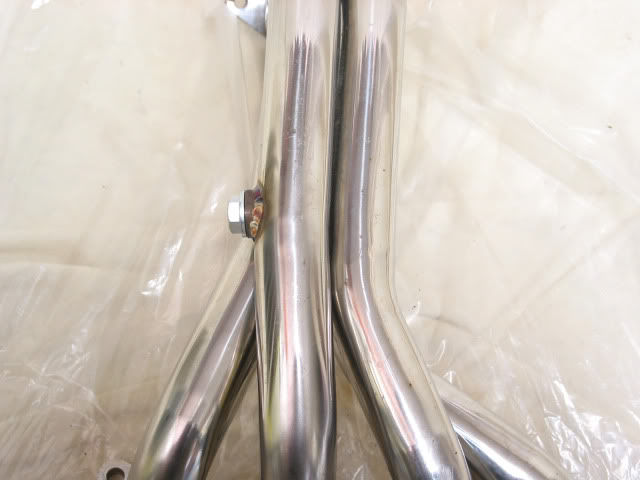
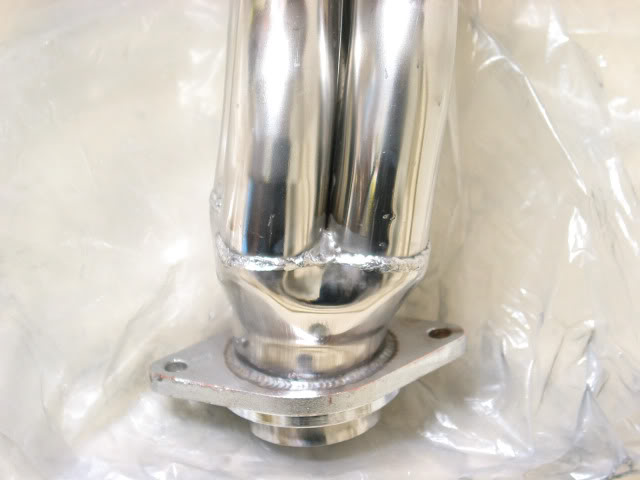
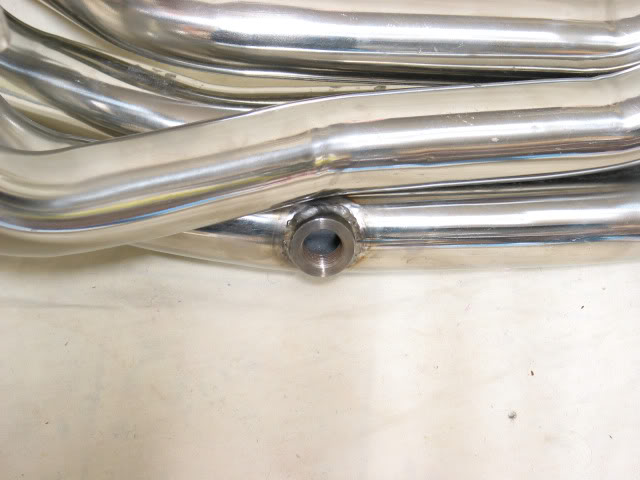
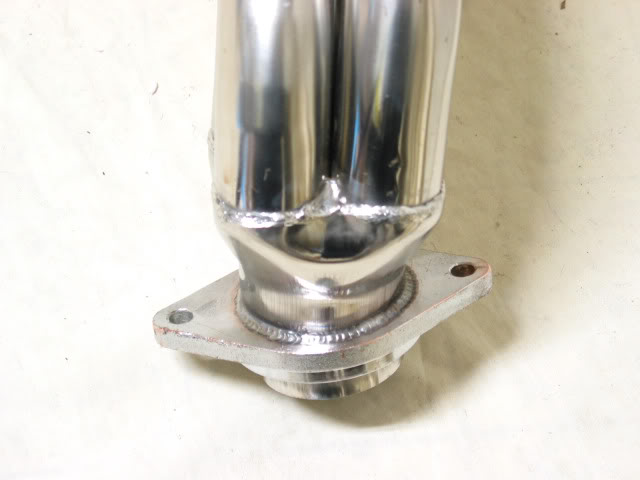
Step one for me was to take a close look at the ports and decide whether I wanted to clean them up a little. As it turned out, I found them to be a little bit rougher than I preferred (especially the header output port -- output pipe misalignment created a step plus the separator edges were sharp), and so I attacked them with Dremel grinding stones and sanding drums, followed by 220 grit and 400 grit hand sanding. Here are before and after photos (probably not a whole lot of difference to see, but plenty by touch )! I haven't cleaned out the pipe interiors yet and so sanding dust is still evident.
Header exit port before:
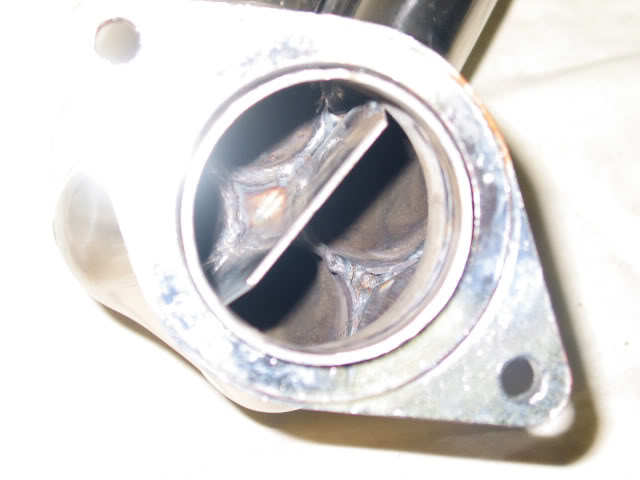
Header exit port after:
Header cylinder #1 before:
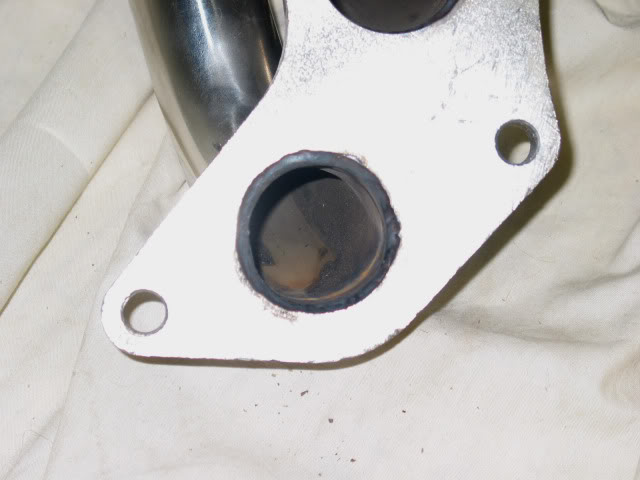
Header cylinder #1 after:
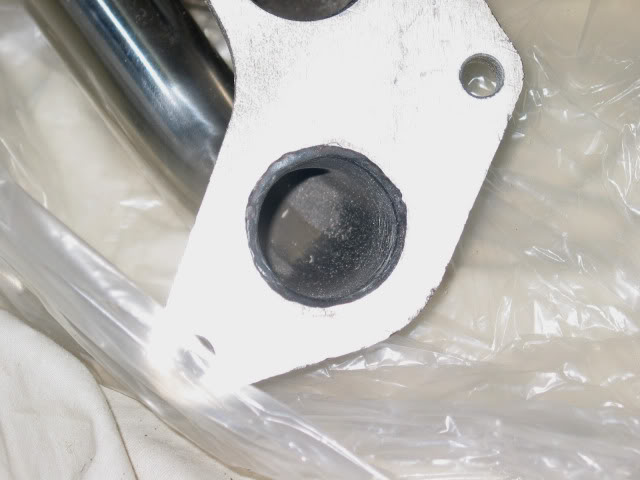
Header cylinder #2 before:
Header cylinder #2 after:
Header cylinder #3 before:
Header cylinder #3 after:
Header cylinder #4 before:
Header cylinder #4 after:
Next step is cleaning up the header exterior before starting on the paint. Haven't done this before and am expecting it to take awhile.
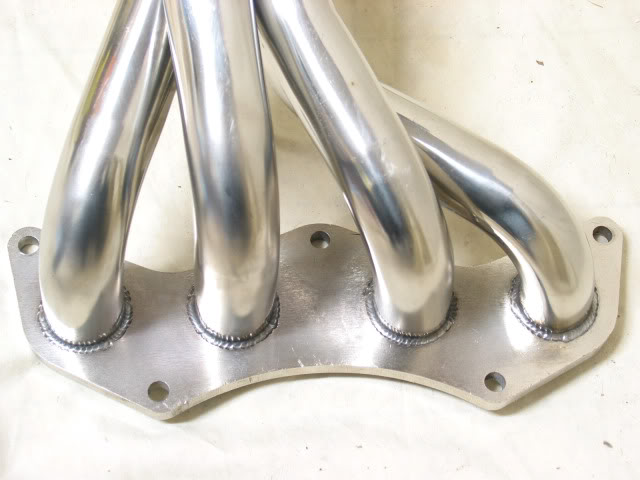
PS. I'm wondering a little about the output separator plate positioning. I would have expected it to separate cylinders 1 and 4 from 2 and 3, but it does the reverse. Seems odd to me given standard cylinder firing sequence, but I don't know for sure what's typical for headers.
)! I haven't cleaned out the pipe interiors yet and so sanding dust is still evident.Header exit port before:
Header exit port after:
Header cylinder #1 before:
Header cylinder #1 after:
Header cylinder #2 before:
Header cylinder #2 after:
Header cylinder #3 before:
Header cylinder #3 after:
Header cylinder #4 before:
Header cylinder #4 after:
Next step is cleaning up the header exterior before starting on the paint. Haven't done this before and am expecting it to take awhile.
PS. I'm wondering a little about the output separator plate positioning. I would have expected it to separate cylinders 1 and 4 from 2 and 3, but it does the reverse. Seems odd to me given standard cylinder firing sequence, but I don't know for sure what's typical for headers.
Last edited by TrevorS; Apr 2, 2011 at 04:02 AM. Reason: added PS


Senior Member

SL Member
Joined: Sep 2009
Posts: 223
From: Greenville, SC
You know, I promised my wife that I wouldn't spend any more money on my car the next two months after I finish my Vette rim project, but I'm really really really getting interested in the $100 header!! Let us know how the installation is and if you have to move the dipstick...step by step would be nice too!!
Header looks good so far can't wait to see the finished product!!
Emanuel
Header looks good so far can't wait to see the finished product!!
Emanuel
! I can't say this one's much worse than the used OE 4G63 turbo manifold face I had shaved two years ago -- but the result was so pretty  ! (And yes, I ported the manifold, they don't look like that from the manufacturer.)
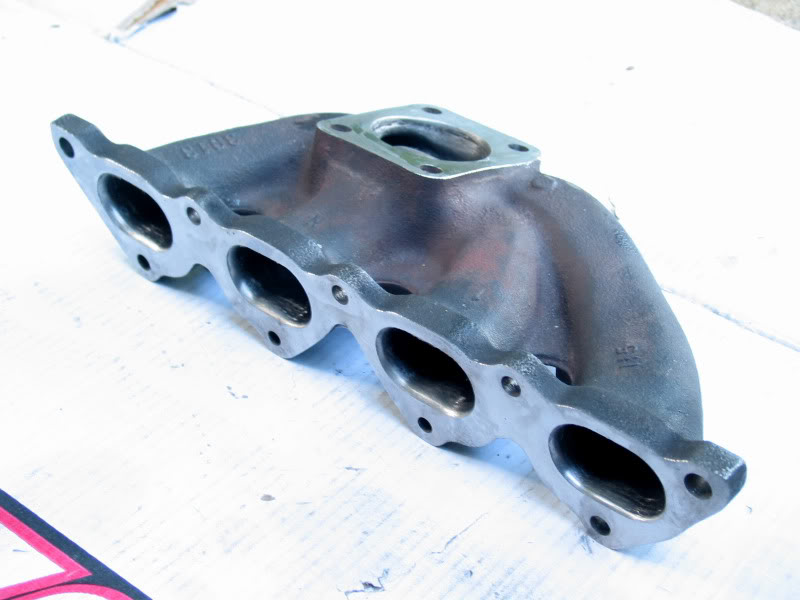
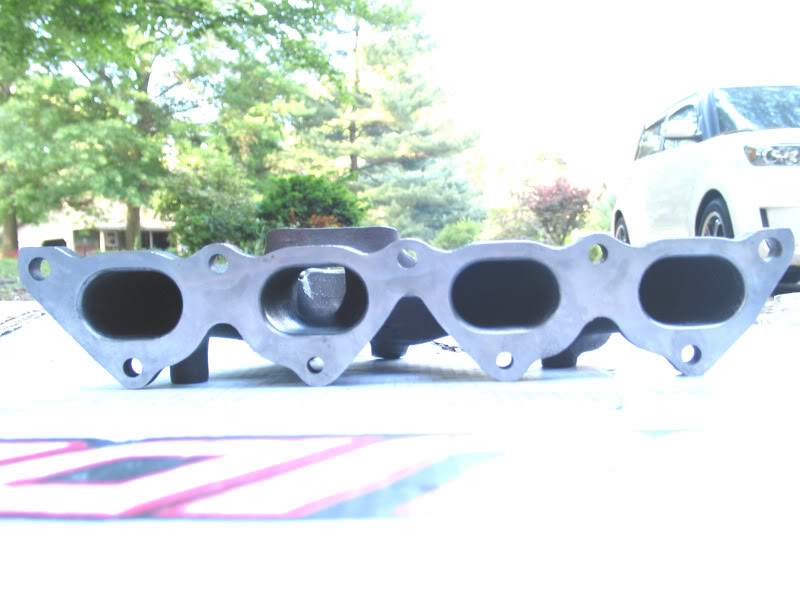
In any case, I clamped the header in a vice today and placed my 3' portable belt sander on it (not running). However, 3" isn't enough to bridge the face, and it was too darned easy for my sander to tilt sideways off the belt, which would be bad news -- I just can't trust myself to hold it stable enough. I do have a 4" stationary belt sander that should do an adequate job, but the C.G. of the header is well over from the face, and while trying to hold it stable, chances are fair I'd end up with a top to bottom curve -- also bad news. Although I really doubt it's necessary with the supplied gasket (I understand Roller_Toaster had no problem), chances are I'm going to get it shaved. However, please realize that results in a hugely superior degree of flatness to the vast majority of OE header faces, so please keep whatever I choose to do in perspective. I don't think shaving is at all necessary for the successful use of this header.
=====================================================
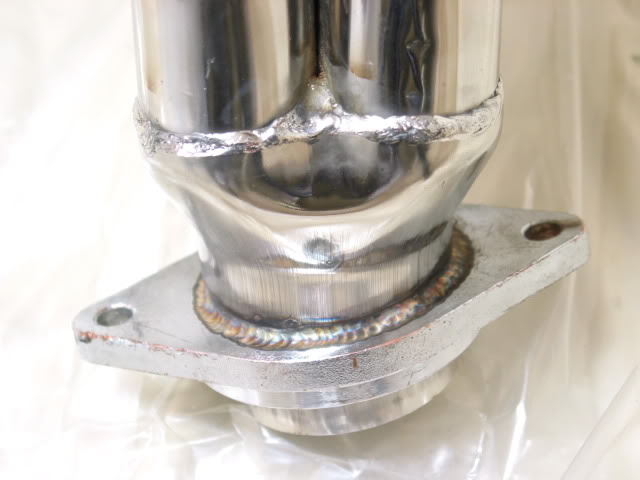
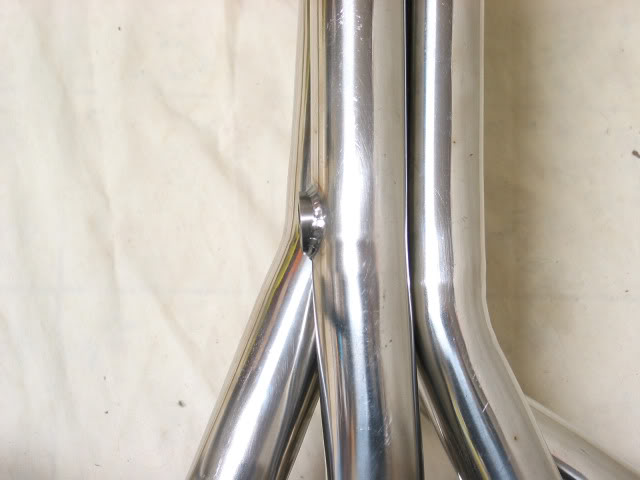
Moving on, I've learned the discolorations around the welds are not due to slag, they're just oxidation/heat-discoloration. It's not necessary to use specialized tools or chemicals to remove it, but that doesn't mean removal isn't a hassle
I'll try to do that -- getting the right angle for a photo could be tricky. There probably isn't more than maybe 1/16" max in it, maybe closer to 1/32". The main reason I'd like to flatten it is to remove the obvious texture plus some easily visible, though not deep, scars...
! Once again, there's no reason to believe flattening the face is necessary for a satisfactory seal with the supplied gasket and properly torqued bolts (as Roller_Toaster has already demonstrated).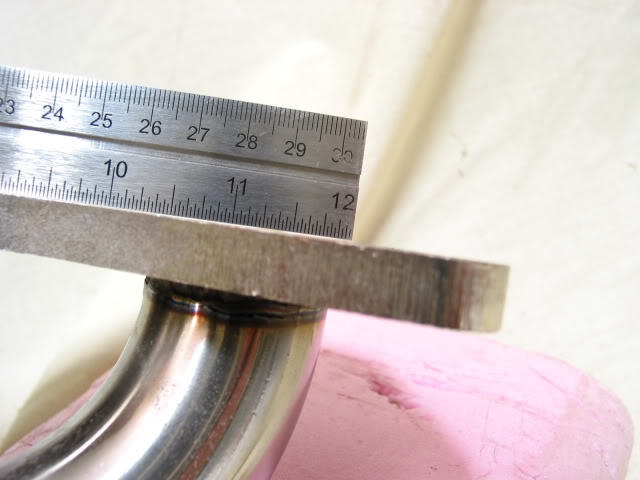
I'm estimating an original end-to-end bow of a smidgen under 1/16", or in other words, the center bowed out from the ends by a smidgen under 1/32".
Just an update -- I've been working on the gasket face and decided to give my 3" portable belt sander a try. The ancient belt didn't take long to pop at the seam, and so I picked up some more. The sander requires concentration to control the for-aft and side-to-side weight centering, and I ran into a couple issues with it. (1) It removes extra metal at the edges of openings, such as where the belt passes over a port. After using it awhile, I went back to the file and realized each port opening that had been covered (the center two) was somewhat recessed from the rest of the face. (2) While operating the sander, two or three times it grabbed -- I later realized the belt edge had caught slightly on a port opening and dug in just that little bit deeper at that spot. So, I'm thinking a portable belt sander isn't an especially good tool for this.
I'm continuing the work with a wide file and coarse paper on a hard sanding block. As far as progress goes, I seem to be down to a smidgen under 1/32" end-to-end. Not sure how far I'll try to take it, but further than it is now anyway. The cylinder two port is still a little high compared to the others. However, as demonstrated by Roller_Toaster, this operation is optional. I'm just choosing to do it.
========================LATER=======================
My last piece of 80 grit just tore on the sanding block and so I'm stuck 'til Monday. Having settled on cross hatch filing and 80 grit block sanding, the gasket face is now flat except for the last 3rd of the outermost two ports and the remaining low spots around the inner two ports (thanks to the belt sander). By the time the gasket face recedes enough to level the outer ports, I expect the worst of the low spots to be a non-concern. Hopefully, I'll be able to post a photo of the leveled flange by Tuesday, then I'll return to cleaning up weld appearance -- sooner the better!
I'm continuing the work with a wide file and coarse paper on a hard sanding block. As far as progress goes, I seem to be down to a smidgen under 1/32" end-to-end. Not sure how far I'll try to take it, but further than it is now anyway. The cylinder two port is still a little high compared to the others. However, as demonstrated by Roller_Toaster, this operation is optional. I'm just choosing to do it
.========================LATER=======================
My last piece of 80 grit just tore on the sanding block and so I'm stuck 'til Monday. Having settled on cross hatch filing and 80 grit block sanding, the gasket face is now flat except for the last 3rd of the outermost two ports and the remaining low spots around the inner two ports (thanks to the belt sander). By the time the gasket face recedes enough to level the outer ports, I expect the worst of the low spots to be a non-concern. Hopefully, I'll be able to post a photo of the leveled flange by Tuesday, then I'll return to cleaning up weld appearance -- sooner the better
!
Last edited by TrevorS; Apr 4, 2011 at 02:10 AM. Reason: added follow up
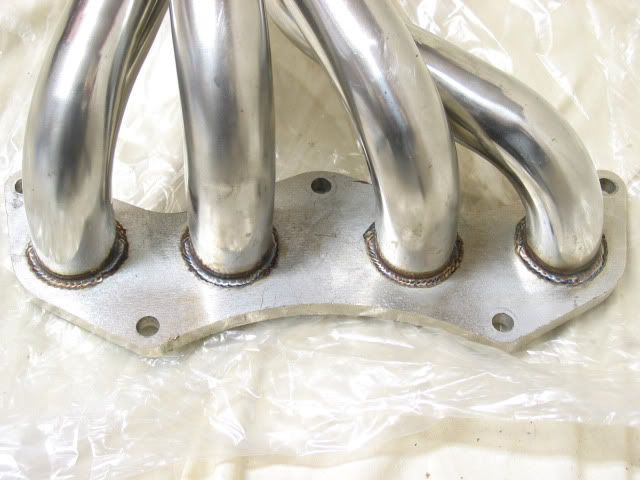
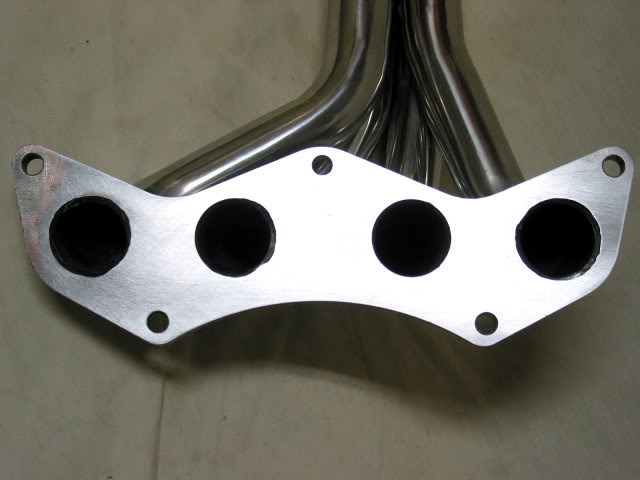
Don't know if anybody's interested in my header flange leveling, but if so, it's done. After filing for a uniform satin-like appearance (emphasis on lengthwise -- some diagonal as needed -- no deep scratches), I lightly sanded with 80, 120, 220, and finally 400 grit on alternating diagonals for a final finish. I compromised on how flat I was going to get this since including the very ends would just require too much metal removal (time and effort). I settled for getting a little beyond the outermost ports plus the rest of the flange level. Judging by my straightedge, everything but the outermost mounting ears are indeed level, and those are actually very close. (By the way, I learned the header cannot be machine shaved, no way to properly secure it.) Back to cleaning the welds !
!
Last edited by TrevorS; Apr 8, 2011 at 05:44 PM. Reason: took a second pass; redid the sanding
Thanks !
This is the first time I've ever leveled a header/manifold flange and it was very much a learning process. After having an overnight break from having "finished" it, I decided to take a second pass, trying to avoid the mistakes of the first as well as extend the end-to-end level just a little further. I still managed to make a mistake which required yet more filing to correct, but I think it's a better job and more "finished" now than it was before. Instead of a new photo post, I just updated the one above.
Hoping to have some cleaned up weld photos a little later.
!This is the first time I've ever leveled a header/manifold flange and it was very much a learning process. After having an overnight break from having "finished" it, I decided to take a second pass, trying to avoid the mistakes of the first as well as extend the end-to-end level just a little further. I still managed to make a mistake which required yet more filing to correct, but I think it's a better job and more "finished" now than it was before. Instead of a new photo post, I just updated the one above.
Hoping to have some cleaned up weld photos a little later.
OK! I've two sets of photos -- first is after cleaning the welds with a coarse steel wool pad. Personally, I think this gives pretty good results and it doesn't require any special tools. Only real hitch is cleaning the rear portion of the sensor bung weld.
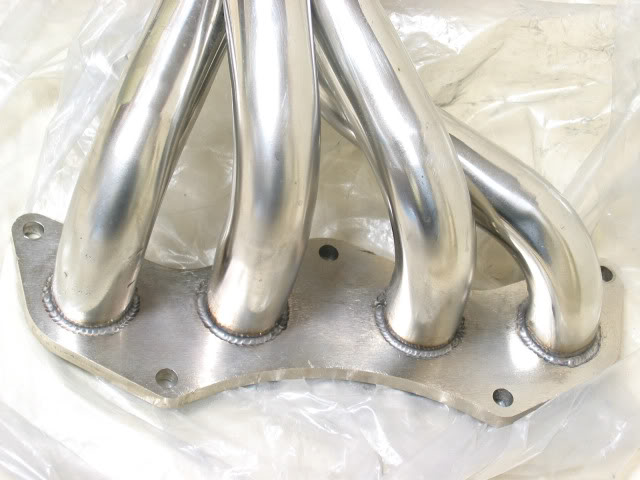
Second set is after applying a carbide steel wire wheel with a Dremel rotary tool (in addition to coarse steel wool).
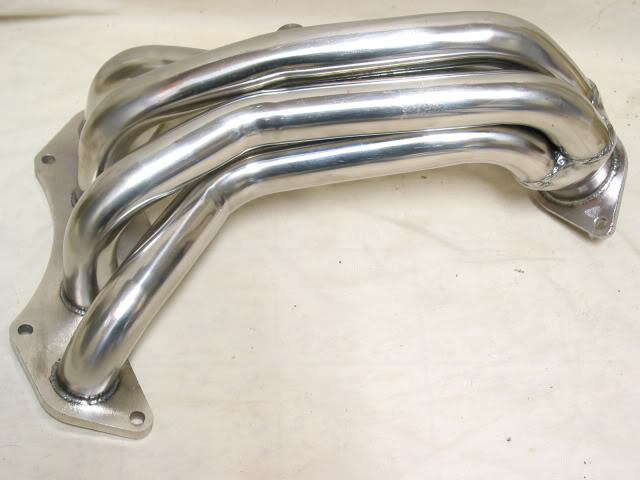
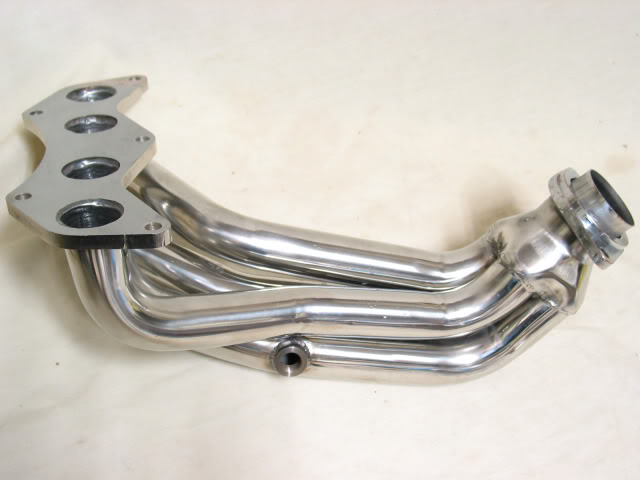
If I hadn't planned on painting the header, I would consider it ready to install at this point. So, here are some final photos before moving on to the next step.
Second set is after applying a carbide steel wire wheel with a Dremel rotary tool (in addition to coarse steel wool).
If I hadn't planned on painting the header, I would consider it ready to install at this point. So, here are some final photos before moving on to the next step.

Senior Member
SL Member
Joined: Oct 2010
Posts: 139
From: Big Rapids, MI
Thank you. Think I found my next project. Plus the fianc� doesn't look under the hood so she'll never know. Looks good can't wait to see the results. I wanna know what it sounds like as well.
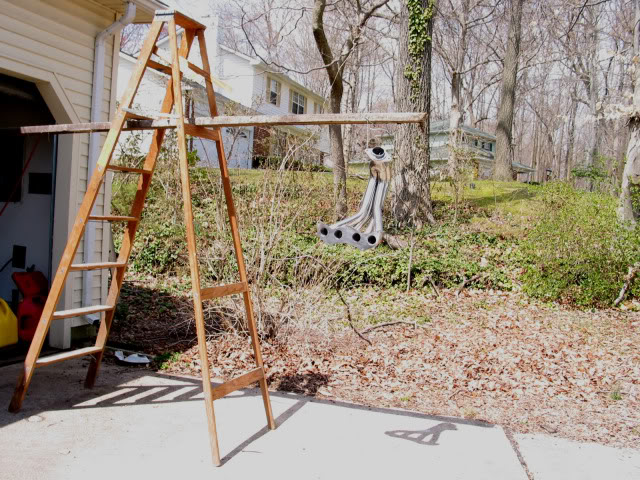
! From what others have said, I'm not really expecting much in sound, though I wouldn't mind a little throatier when leaned on. My remaining OE exhaust pieces will be the scuba and 'S'-pipe and the scuba is definitely staying. I can't make a sound clip, but Roller_Toaster has a before and after on his thread and I remember seeing at least one xB2 with a Strup header on YouTube -- it's basically the same header.Temp is supposed to hit 60F today so I'm setting up to do some painting. According to the cans, the coats have to be finished within the course of an hour allowing at least ten minutes dry time per coat. Seems like an impossibility to me when you're applying primer as well as top coat, but I'll try to keep the timing reasonably tight.
My setup
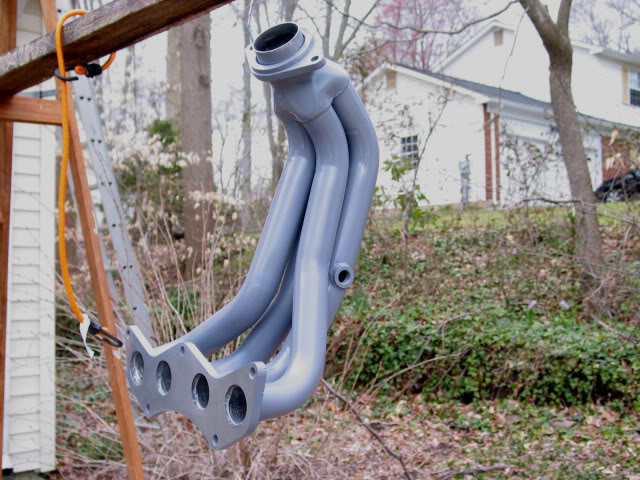
Well, I'm now on my second painting try ! On the first, I managed to get several primer runs including very visible places, and then I crowned it off by bonking my head on the 2x4 "beam" resulting in the header falling. So, after removing all the paint and cleaning up a couple scrapes from the fall, I started again. The primer's done (three coats) and the black is underway.
============================LATER==================================
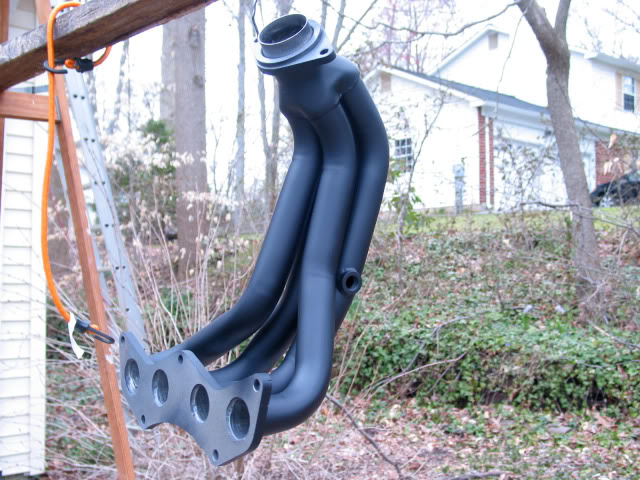
That's three coats of black (all light) and both temp and daylight have started falling. Still, it's painted -- I'll just have to leave it hanging there awhile.
============================LATER==================================
That's three coats of black (all light) and both temp and daylight have started falling. Still, it's painted -- I'll just have to leave it hanging there awhile
!I mentioned earlier I did a home brew CAI, but I never described how. Basically, I kept the OE airbox, but replaced the snorkel with a 3" intake pipe from the driver's side fender. So, that side looks pretty near stock. Here's a photo with the header in position and you can see the dip stick clearance. I think this works for me.
It's too bad the manufacturer didn't allow for the dip stick -- I found that to be a real hassle to resolve and still wouldn't mind more clearance. However, at the cost of the header, it's a livable compromise.
Last edited by TrevorS; Apr 12, 2011 at 01:15 AM. Reason: updated photo and text