
Max2k Summer Overhaul: Watch the Progress (New pics 7.4)


Thread Starter
Senior Member
SL Member
Joined: Feb 2004
Posts: 2,650
From: Sipping haterade.
My car has been lying dormant for the last few months. I haven't done any new mods in a while, and a few things have broken. My taste has also changed. Thus, I have decided to do a complete overhaul of my car.
It's broken down into 4 phases:
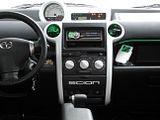
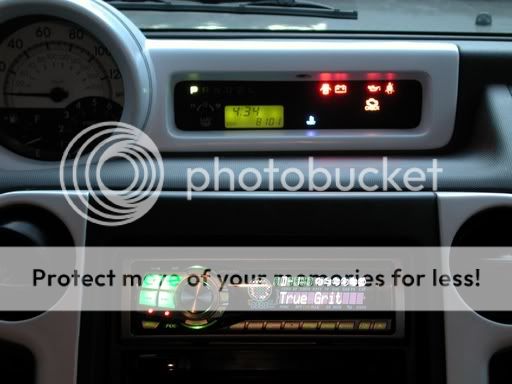
Phase 1: Interior paint-done
-Redo colorscheme inside
-Make center of dashboard white -done
-Make AC/Side pieces silver -done
-Paint center kickpanel white -done, panel wrapped in tweed after paint chipped easily
-Paint storage compartment assembly white. Leave ashtray, switch-panels black.project cancelled, now looking into a black burlwood dash kit
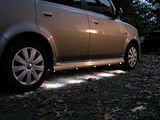
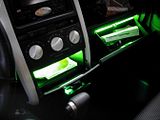
Phase 2: Rework LED Silhouette-done
-Remove LED pods (a few broke and the light is too dispersed for my taste)-done
-Replace with precisely spaced 10mm LED bolts-done
-Place 4 good LED pods under rear bumper-scratched, no good led pods left
Phase 3: Interior Overhaul, pt 1-done
-Strip back of car down to the floor.-done
-Apply eDead to entire area.-done
-Add LED pods to strut towers. Wire to door switch for trunk lighting.-delayed
-Repair broken lights.-done
Phase 4: Interior Overhaul, pt 2
-Get windshield chip repaired.-done
-Have windshield mirror-mount button installed.
-Install Gentex auto-dimming mirror.
-Rewrap headliner with interesting fabric.-done. (hatch and door panels come next)
Phase 5: iPod intergration, step 2
- Rework dash storage compartment to create sliding iPod dock pedestalproject scratched, I like what I've got
Miscellaneous Modifications:-done
-Have front grill painted black-done
-Redo Pinstriping-done
-Redo tail lights?-done
-TYC Smoked Side Markers -scratched, I like what I've got
NEWLY ADDED:
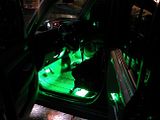
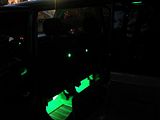
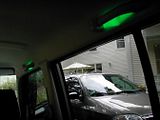
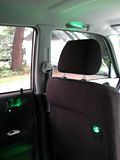
-Replace green roof handle LEDs with white (green clashes with the tweed; we can't have that)-done
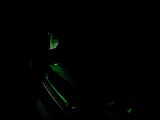
-Replace windshield-glaring green LED cupholders with better-positioned white ones-done
-White LEDs in door panels to shine on the ground (1 each on door switch)
-Chrome Exhaust Tip to tastefully fill out hole -done
-Paint Door Switch Panels Silver
-Remove bag-hook LEDs (they were serious overkill and you could see the exposed LED, which is a big no-no in my car)
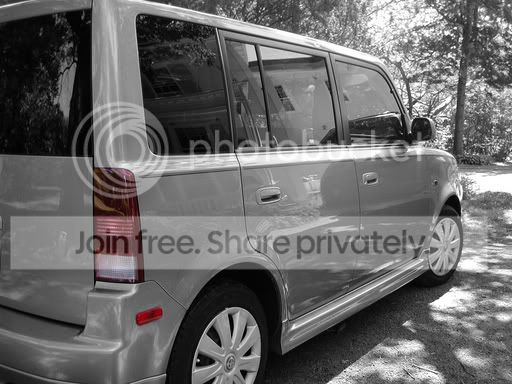
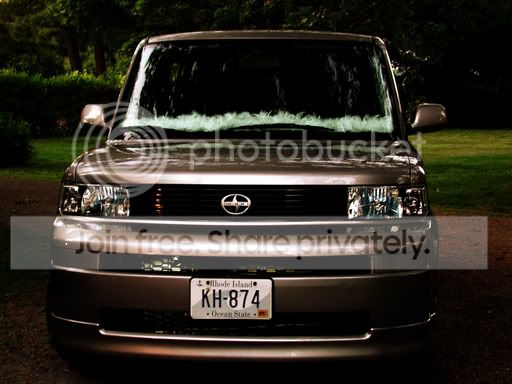
Here's how the car looks right now:


Wish me luck!
It's broken down into 4 phases:
Phase 1: Interior paint-done
-Redo colorscheme inside
-Make center of dashboard white -done
-Make AC/Side pieces silver -done
-Paint center kickpanel white -done, panel wrapped in tweed after paint chipped easily
-Paint storage compartment assembly white. Leave ashtray, switch-panels black.project cancelled, now looking into a black burlwood dash kit
Phase 2: Rework LED Silhouette-done
-Remove LED pods (a few broke and the light is too dispersed for my taste)-done
-Replace with precisely spaced 10mm LED bolts-done
-Place 4 good LED pods under rear bumper-scratched, no good led pods left
Phase 3: Interior Overhaul, pt 1-done
-Strip back of car down to the floor.-done
-Apply eDead to entire area.-done
-Add LED pods to strut towers. Wire to door switch for trunk lighting.-delayed
-Repair broken lights.-done
Phase 4: Interior Overhaul, pt 2
-Get windshield chip repaired.-done
-Have windshield mirror-mount button installed.
-Install Gentex auto-dimming mirror.
-Rewrap headliner with interesting fabric.-done. (hatch and door panels come next)
Phase 5: iPod intergration, step 2
- Rework dash storage compartment to create sliding iPod dock pedestalproject scratched, I like what I've got
Miscellaneous Modifications:-done
-Have front grill painted black-done
-Redo Pinstriping-done
-Redo tail lights?-done
-TYC Smoked Side Markers -scratched, I like what I've got
NEWLY ADDED:
-Replace green roof handle LEDs with white (green clashes with the tweed; we can't have that)-done
-Replace windshield-glaring green LED cupholders with better-positioned white ones-done
-White LEDs in door panels to shine on the ground (1 each on door switch)
-Chrome Exhaust Tip to tastefully fill out hole -done
-Paint Door Switch Panels Silver
-Remove bag-hook LEDs (they were serious overkill and you could see the exposed LED, which is a big no-no in my car)
Here's how the car looks right now:


Wish me luck!

Banned
SL Member
Joined: Jun 2004
Posts: 2,490
From: Middle of Nowhere
sweet! ill definetly watch the progress. btw, quick question, how do the underbody lights hold up? i want to do that, but ill probably hold off theyre prone to breaking or cracking.
thanks,
scott
thanks,
scott
Thread Starter
Senior Member
SL Member
Joined: Feb 2004
Posts: 2,650
From: Sipping haterade.
The LED pods I used didn't take the winter too well. About 2 or 3 of them detached, and a couple of them just won't light anymore. These LED bolts should hold up better: http://www.superbrightleds.com/mini_tubes.htm (scroll down past the Round LED accent lights that I used last time to see the 5 and 10mm LED bolts).


Senior Member
SL Member
Joined: Apr 2005
Posts: 1,834
From: Miami, FL
creative genius at its best because it talks as well as walks.
shows us the process, the path, the results
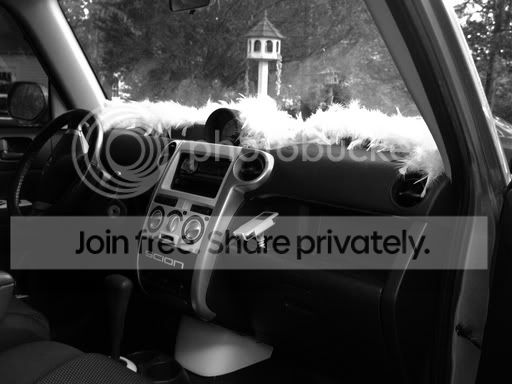
i like th' 'brelly! Hope that stays put.
as for the rest: redress your b'ch'n B to a T
keep us posted often
shows us the process, the path, the results
i like th' 'brelly! Hope that stays put.
as for the rest: redress your b'ch'n B to a T
keep us posted often
Thread Starter
Senior Member
SL Member
Joined: Feb 2004
Posts: 2,650
From: Sipping haterade.
I started work on the center dash pieces today.
I picked up some Testor's spray primer (gray), testor's paint (silver and white), and high grit sandpaper from the local hobby shop (always best to support local businesses over huge chains).
I started by taking out the center dash piece.
After it was out, I took it apart. I started by removing the 2 brass-colored screws on the back, lifting the 3 black plastic tabs, and pulling out the A/C control unit. Once that was out, I gently removed the clear plastic light diffuser by pulling straight backward. Finally, I pushed the translucent illumination sticker things off and stuck them to wax paper to keep them sticky. Be careful not to crease these.
Once my bezel was totally stripped (the vent things are easy to remove), I sanded the old white paint until it was smooth and hit it with a few coats of primer. Remember: slow and steady wins the race. A lot of thin coats are better than one super thick one. It's also good to lightly sand/brush off anything that may have stuck to the paint during drying and to leave about an hour between coats.
I also primed and started painting the center kickpanel and painted my A/C ***** silver. (The testor's silver paint is an awesome match for OEM interior silver).
Tomorrow I'll paint the center dash piece.
Progress pics (sorry for the blurry one, but you get the idea):


The umbrella is staying. I might make new straps for it though.
Senior Member
SL Member
Joined: Apr 2005
Posts: 1,834
From: Miami, FL
The umbrella is staying. I might make new straps for it though.
now I have the bug to paint my RS2's center unit. It all comes out pretty easily? I'm totally green.
I want to make my center unit totally yellow for first interior mod. ... can always change the color again.
cool max ac
====addendum:
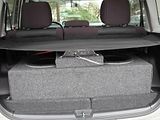
Question: are you going to put the rear seat back in?
Am wanting to have my car cleared of that seat and spare tire and cubby for maximum room for boxes or "van look" inside. Just thinking on this early stage.
carry on....


Thread Starter
Senior Member
SL Member
Joined: Feb 2004
Posts: 2,650
From: Sipping haterade.
Umbrella hatch mod is pretty easy. All you need is a drill, some snaps, and some straps.
Here's how I did it:
1. Remove hatch panel.
2. Measure 4 squared up holes for your snaps.
3. Drill 4 holes to set snaps.
4. Set snaps.
5. Measure and cut 2 straps from leather or whatever material. Set snaps in each end.
6. Reinstall.
Here's how I did it:
1. Remove hatch panel.
2. Measure 4 squared up holes for your snaps.
3. Drill 4 holes to set snaps.
4. Set snaps.
5. Measure and cut 2 straps from leather or whatever material. Set snaps in each end.
6. Reinstall.


Banned
SL Member
Joined: Jun 2004
Posts: 2,490
From: Middle of Nowhere
^ i dont get it
anyone, Max2k, its looking really good. im impressed
did you put some new lights for your underbodies then? they look really good and i knew you said some had went out due to elements.
keep up the good work
anyone, Max2k, its looking really good. im impressed
did you put some new lights for your underbodies then? they look really good and i knew you said some had went out due to elements.
keep up the good work


Senior Member
SL Member
sIcKsCiOnS
Joined: Apr 2004
Posts: 300
From: Rehoboth, MA
nice re-do on the LED undercarriage....sorry, bu ti def had to steal that idea from you...i threw the multicolors under mine though...cant wait to see what else you do, we'll have to meet up sometime.
keep up the goood work
keep up the goood work
Thread Starter
Senior Member
SL Member
Joined: Feb 2004
Posts: 2,650
From: Sipping haterade.
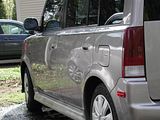
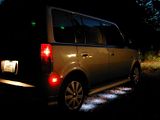
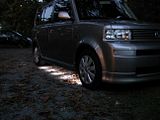
LEDs under the side skirts are redone with 10mm LED bolts from www.superbrightleds.com. The old LED clusters didn't last the winter and were long overdue for replacement.
Ryan: I'll be at this thing: https://www.scionlife.com/forums/viewtopic.php?t=65336. Hope to see you there.
I'll take more pictures of the interior after I get it all finished up. More pictures of the LEDs when I figure out a place to take them with good light.
Stay tuned.
Ryan: I'll be at this thing: https://www.scionlife.com/forums/viewtopic.php?t=65336. Hope to see you there.
I'll take more pictures of the interior after I get it all finished up. More pictures of the LEDs when I figure out a place to take them with good light.
Stay tuned.
Senior Member
SL Member
Joined: Apr 2005
Posts: 1,834
From: Miami, FL
Keep up the postive energy, Max
Favor: please put a portrait of you and your car to the xB portrait/owner thread
https://www.scionlife.com/forums/vie...4533&start=100
Favor: please put a portrait of you and your car to the xB portrait/owner thread
https://www.scionlife.com/forums/vie...4533&start=100