
Another xB with air suspension


Thread Starter
Senior Member
SL Member
Joined: Feb 2005
Posts: 192
From: NJ
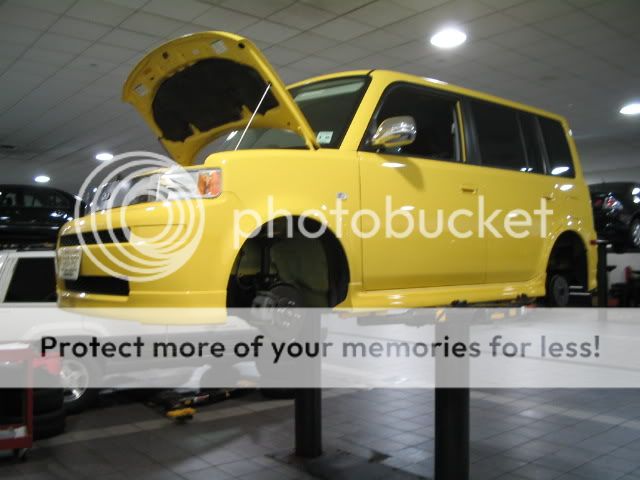
After several months of researching,planning,and saving (lots of that LOL) I've finally installed my air suspension. I still have some minor things to clean up (and upgrades to do) but at least it's together and working.
First thing,I'd like to thank the following people for answering all my questions,in no particular order:
Toy_xbox - Air Runner "Maxed Out" thread.
RTon20s - The Definitive Pneumatic Suspension Thread.
blackwagon - Daily driven xB with Air Runner.
slicksxa - AKA Slick Blackberry. Local guy with a bagged xA.
TRDBox - Easy Street setup with a cool tank setup.
It started when I bottomed out hard on the way to a meet. The rear tires hit the fenderwells and pushed them out. It also cut the sidewalls. I believe Nick (krdshrk) saw the fender damage. After the meet I started looking into air suspension. I also wanted some kind of digital control.
The suspension setup is from Air Runner. Worth it? I'm 50-50 about that. Yes it rides fine so far (only put about 10 miles on it) and pretty much bolt-in,but it has some "iffy" parts. What happened to the supposed quality control check before shipping? It was missing the tubing cutter (no big deal),but the finish on the air tank and "toppin plate" were in bad shape. The mounting plate was also drilled incorrectly,compressor is pressed right up against the tank. They also changed the rear setup from bags to sleeves,not sure if one is any better than the other but didn't East Street change the rears from sleeve to bag? And the upper mounting bracket seems a little weak the way it mounts to the body,but that's just my opinion.
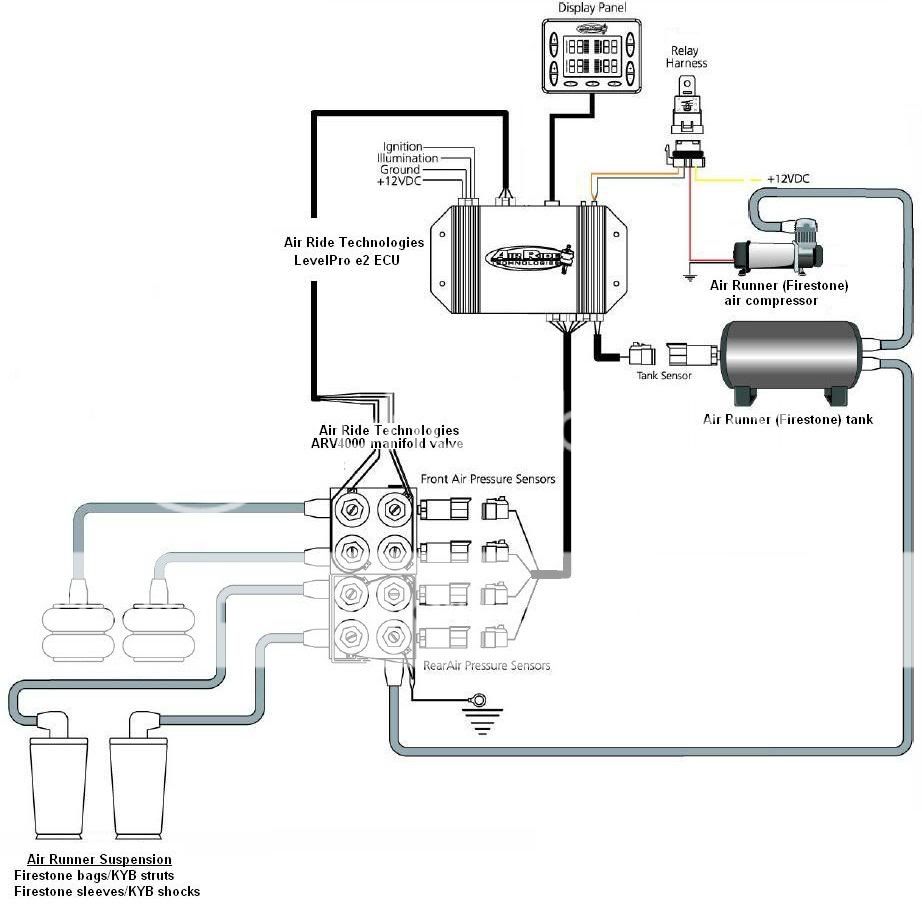
For digital control,Air Ride Technologies RidePro e2
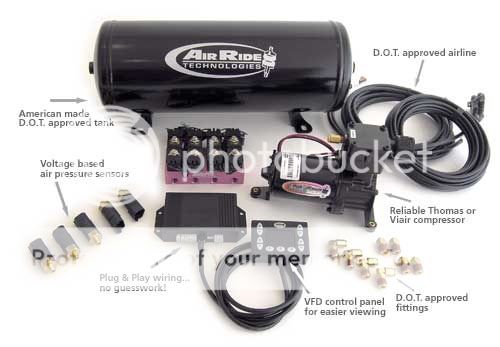
It's a pressure-based setup. You can upgrade it to pressure and height by ordering the height sensors and wiring harness. It's more work to set it up though,requires fabbing sensor mounts and raising/lifting the car several times to calibrate.
Manifold valve setup has 3/8" fittings,sensors thread right on to it so no need for T fittings. It's mounted in the passenger side trunk storage cubby.
ECU is on the passenger floor for now. Controller is loose,sitting on the passenger seat.

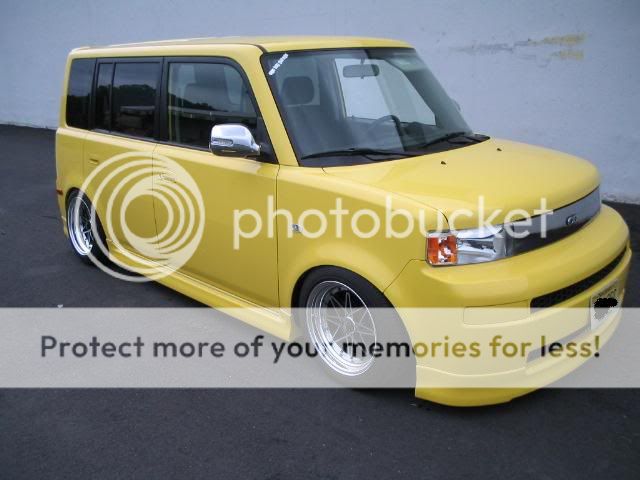
Experimenting with the "4x4 no bottoming out" ride height,still playing with it.
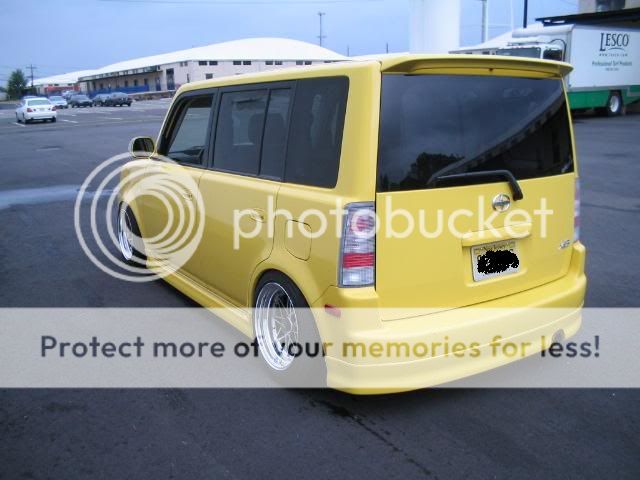
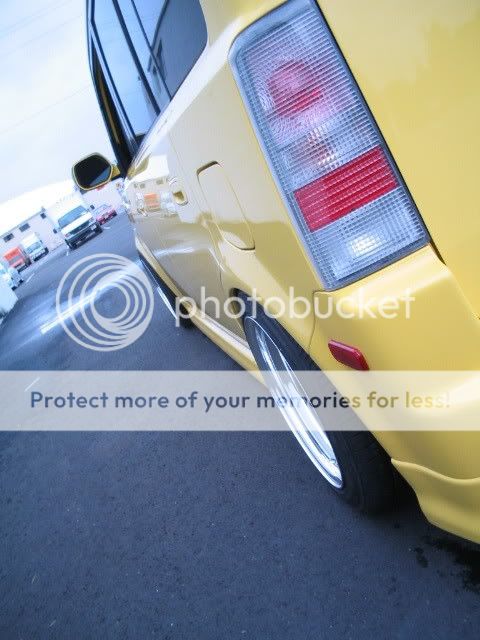
Dumped. I can't tuck in because my Equips are 15x8 with aggressive offset,tires are sitting on the fender lips.
OTG camber shims. I may put back the 10mm shims

Working on it at my job yesterday (8/26)
It took me 90 minutes at most to install the suspension,that was the easy part. Running air lines and wiring the controller was the PITA.
Front air lines are run parallel with the factory fuel/brake lines. Rear lines followed the brake line and EVAP hoses. There are two large grommets underneath where you can cut and run the lines through. Battery wiring was also routed this way. This is all temporary.
Next upgrades:
Alignment. I'm going to set the driving height to factory specs,and on stock wheels/tires,then align.
Stainless steel tubing and braided hose to replace the current DOT plastic airline.
Extend wiring harnesss so I can trunk-mount the supension control ECU.
Mount compressor under the trunk,there's enough room once I cut part of the trunk stryrofoam.
Probably remove the trunk-mounted Air Runner tank and use the smaller ART tank,mounted outside.
More pics to come,my camera's batteries died so I couldn't shoot the installed suspension parts.
Diagram of the setup
First thing,I'd like to thank the following people for answering all my questions,in no particular order:
Toy_xbox - Air Runner "Maxed Out" thread.
RTon20s - The Definitive Pneumatic Suspension Thread.
blackwagon - Daily driven xB with Air Runner.
slicksxa - AKA Slick Blackberry. Local guy with a bagged xA.
TRDBox - Easy Street setup with a cool tank setup.
It started when I bottomed out hard on the way to a meet. The rear tires hit the fenderwells and pushed them out. It also cut the sidewalls. I believe Nick (krdshrk) saw the fender damage. After the meet I started looking into air suspension. I also wanted some kind of digital control.
The suspension setup is from Air Runner. Worth it? I'm 50-50 about that. Yes it rides fine so far (only put about 10 miles on it) and pretty much bolt-in,but it has some "iffy" parts. What happened to the supposed quality control check before shipping? It was missing the tubing cutter (no big deal),but the finish on the air tank and "toppin plate" were in bad shape. The mounting plate was also drilled incorrectly,compressor is pressed right up against the tank. They also changed the rear setup from bags to sleeves,not sure if one is any better than the other but didn't East Street change the rears from sleeve to bag? And the upper mounting bracket seems a little weak the way it mounts to the body,but that's just my opinion.
For digital control,Air Ride Technologies RidePro e2
It's a pressure-based setup. You can upgrade it to pressure and height by ordering the height sensors and wiring harness. It's more work to set it up though,requires fabbing sensor mounts and raising/lifting the car several times to calibrate.
Manifold valve setup has 3/8" fittings,sensors thread right on to it so no need for T fittings. It's mounted in the passenger side trunk storage cubby.
ECU is on the passenger floor for now. Controller is loose,sitting on the passenger seat.
Experimenting with the "4x4 no bottoming out" ride height,still playing with it.
Dumped. I can't tuck in because my Equips are 15x8 with aggressive offset,tires are sitting on the fender lips.
OTG camber shims. I may put back the 10mm shims
Working on it at my job yesterday (8/26)
It took me 90 minutes at most to install the suspension,that was the easy part. Running air lines and wiring the controller was the PITA.
Front air lines are run parallel with the factory fuel/brake lines. Rear lines followed the brake line and EVAP hoses. There are two large grommets underneath where you can cut and run the lines through. Battery wiring was also routed this way. This is all temporary.
Next upgrades:
Alignment. I'm going to set the driving height to factory specs,and on stock wheels/tires,then align.
Stainless steel tubing and braided hose to replace the current DOT plastic airline.
Extend wiring harnesss so I can trunk-mount the supension control ECU.
Mount compressor under the trunk,there's enough room once I cut part of the trunk stryrofoam.
Probably remove the trunk-mounted Air Runner tank and use the smaller ART tank,mounted outside.
More pics to come,my camera's batteries died so I couldn't shoot the installed suspension parts.
Diagram of the setup

Senior Member

SL Member

Joined: Feb 2004
Posts: 1,881
From: Charlotte, NC (L.A.)
It looks good. If you consider rolling your fenders. You may be able to get quite a bit lower, in the rear.I wish I had such a nice place to install mine. It took me about 2 days on jackstands in my driveway to get everything done.
Thread Starter
Senior Member
SL Member
Joined: Feb 2005
Posts: 192
From: NJ
Thanks man. Yeah I was thinking about rolling the fenders before,figure if I keep dumping the suspension the tires will roll them for me LOL.
My driveway isn't as nice,it's gravel. It's raining now and I can't clean up the wiring harnesses,ran out of time @ work to route them neatly.
My driveway isn't as nice,it's gravel. It's raining now and I can't clean up the wiring harnesses,ran out of time @ work to route them neatly.


Thread Starter
Senior Member
SL Member
Joined: Feb 2005
Posts: 192
From: NJ
Originally Posted by Big_Jim
Looks great man! are you having any problems with the camber in the rear and the bag setup?

Originally Posted by Ed
Originally Posted by Big_Jim
Looks great man! are you having any problems with the camber in the rear and the bag setup?
do you have positive camber in the front cause of the strut bags?
Thread Starter
Senior Member
SL Member
Joined: Feb 2005
Posts: 192
From: NJ
Originally Posted by Big_Jim
do you have positive camber in the front cause of the strut bags?
Thread Starter
Senior Member
SL Member
Joined: Feb 2005
Posts: 192
From: NJ
Aligned it today. Ride height was set to factory (used a coworker's stock xB as reference) and on stock steelies/tires. I also reinstalled my OTG 10mm rear hub spacers,took them off before because of tire rub once in a while.
No more slight pull,car tracks straight even with no hands on the steering wheel,and since I'm at stock height I can take on any dip,bump,or steep driveway without rubbing a thing. Rides just as well or better than stock. I don't think I'll ever go back to springs on this car unless I sell it
Big_Jim - no positive front camber. I think it was at like negative 2/10 of a degree,left the printouts in the car (I'll get soaked trying to get 'em).
Have a safe Labor Day weekend everyone. I'll be spending mine mostly indoors thanks to Ernesto's rain


Thread Starter
Senior Member
SL Member
Joined: Feb 2005
Posts: 192
From: NJ
Thread Starter
Senior Member
SL Member
Joined: Feb 2005
Posts: 192
From: NJ
Originally Posted by Spider13
That didn't last long. But good luck with selling that. Its an awsome setup.

