
Nology Hotwires Install


Thread Starter
Senior Member

Scikotics
SL Member
Joined: Oct 2005
Posts: 7,514
From: Orlando, FL (UCF)
yep, doing another DIY for y'all  typical disclaimer, i'm not the person telling you to do anything to your car, your doing it by your own free will, i can't be blamed if you mess up, blah blah blah. Okies, on with the DIY!
I received my Nology Hotwires from from another user on here parting out his car. Parts were BNIB! Install wasn't difficult at all. In all it took about an hour and a half to do, but that's only because i was taking pictures
alright, so first things first, i'm going to show you where the nology coil relocation bracket (sounds complicated eh?) goes.
here we have the tC engine bay. i've take off my engine cover and my stut bar to make things more roomy to work in. strut tower bolts are 14mm and the engine cover bolts are 10mm.

now, to install the bracket, your going to have to go on the backside of the engine (towards the firewall) there you'll see the fuel rail, intake manifold, etc. We're concerned with the valve cover bolts. the center bolt and the bolt on the drivers side need to be removed. They're 10mm bolts
this one-

and this one-
I installed the bracket just so you can see where these bolts are on the backside of the engine bay. the two bolts holding down the bracket in these 2 pictures are the two you need to remove-
alrighty then, now that those 2 valve cover bolts are removed, set them up on the dash cowl for later. Now we move on to removing the coilpacks. They're held on by a single 10mm bolt. Remove the bolt and then gently (but firmly?) pull up on the coilpack and it'll pop up. You'll see this-
undo this clip and remove the coilpack from the plug wiring-
save the bolts used to hold down the coilpacks, we'll use them later.
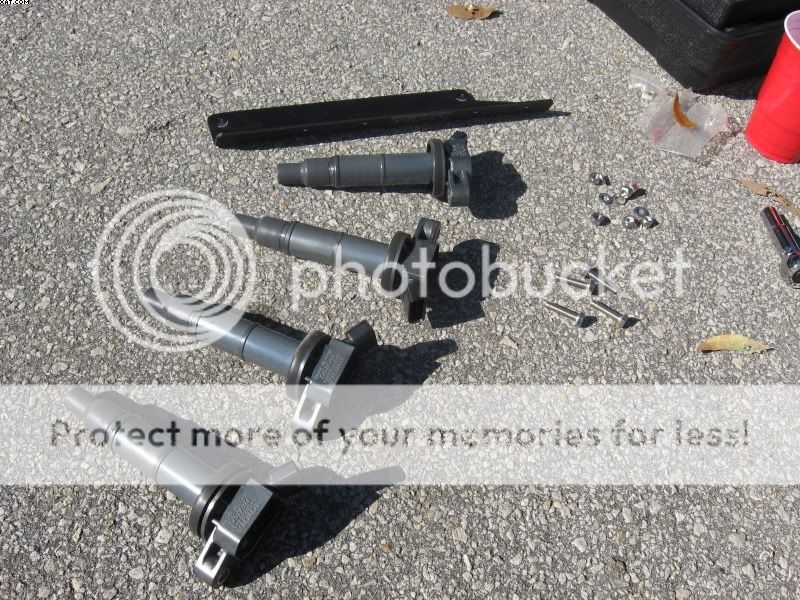
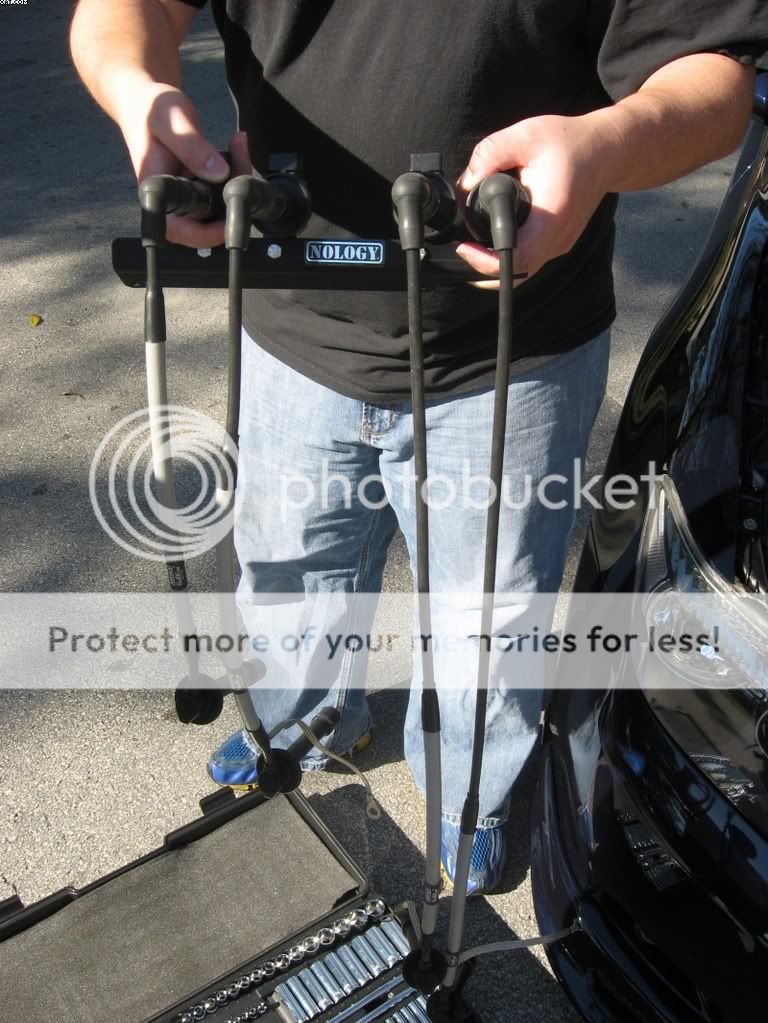
remove all the coilpacks, get the bracket, and all the nuts/bolts that were supplied with the hotwires-
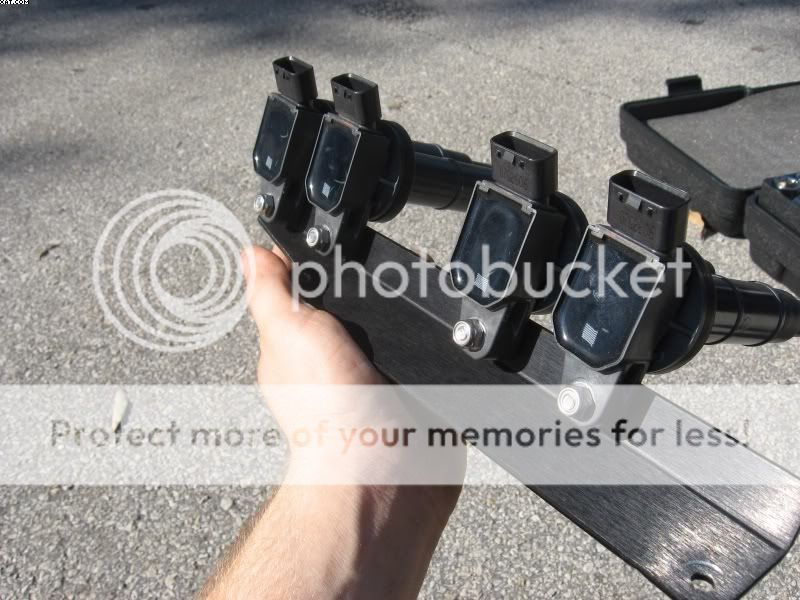
now we're ready to put that coil relocation bracket to good use! attach the coilpacks to the brakcet using the supplied hardware. they're 10mm bolts. The coilpacks weren't tightened down tightly from the factory, so i really didn't torque them down overly tight onto the bracket, but i did torque enough so that they wouldnt move. 10mm bolts/nuts are used here. it'll look like this when your done-

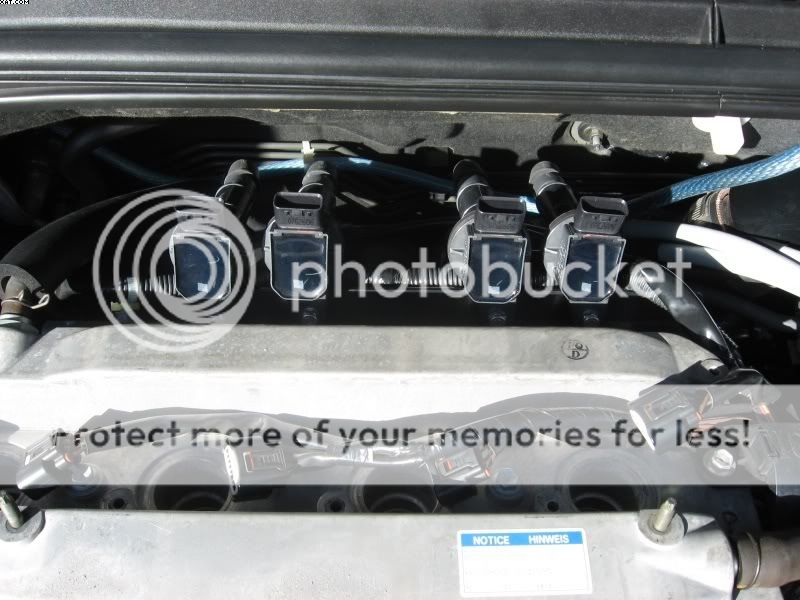
and when all 4 coilpacks are installed-
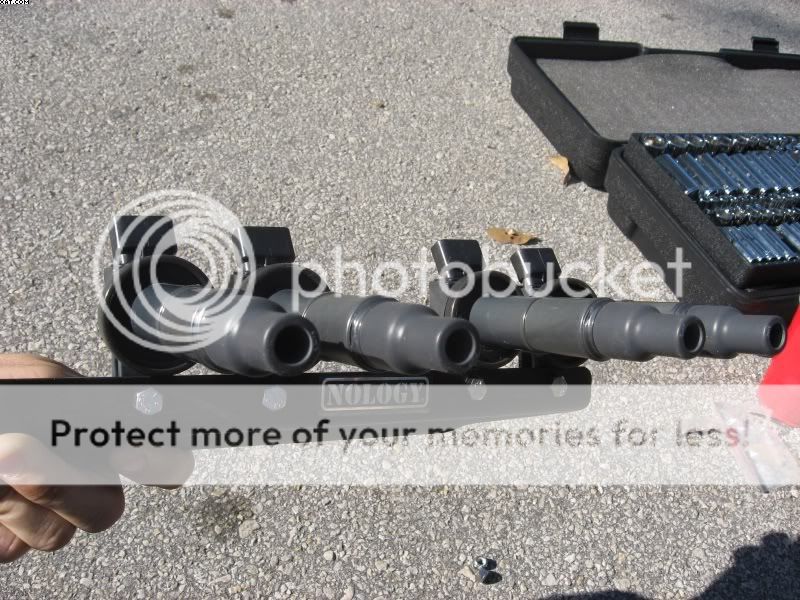
now go grab the hotwires themselves. one end has this only plastic coilpack looking thingy and the other has a rubber boot with a spring inside. Push the rubber boot springy thing (great description eh?) onto the end of the coilpacks. make sure that the spring makes contact with the spring inside the coilpack! the lengths of wire should be setup like shown in the picture-
install the bracket onto the valve cover. Use the 10mm bolts that you removed in the first step-
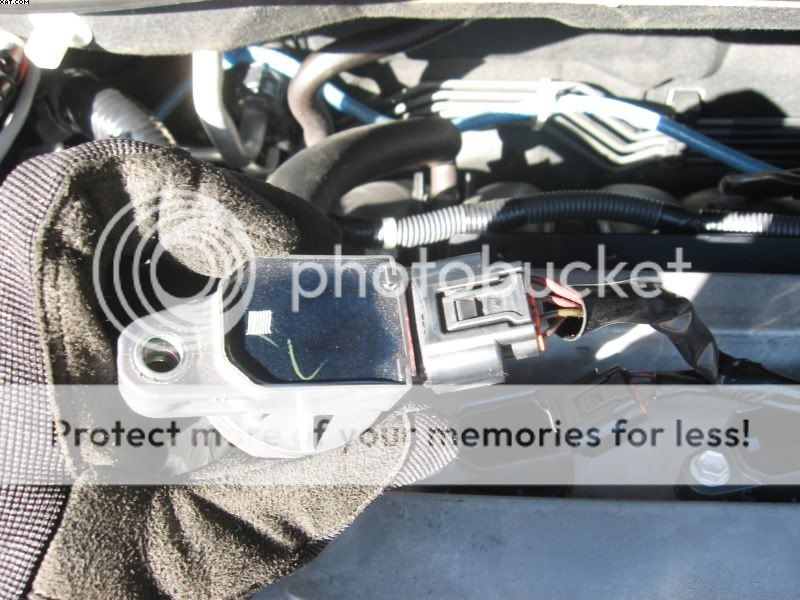
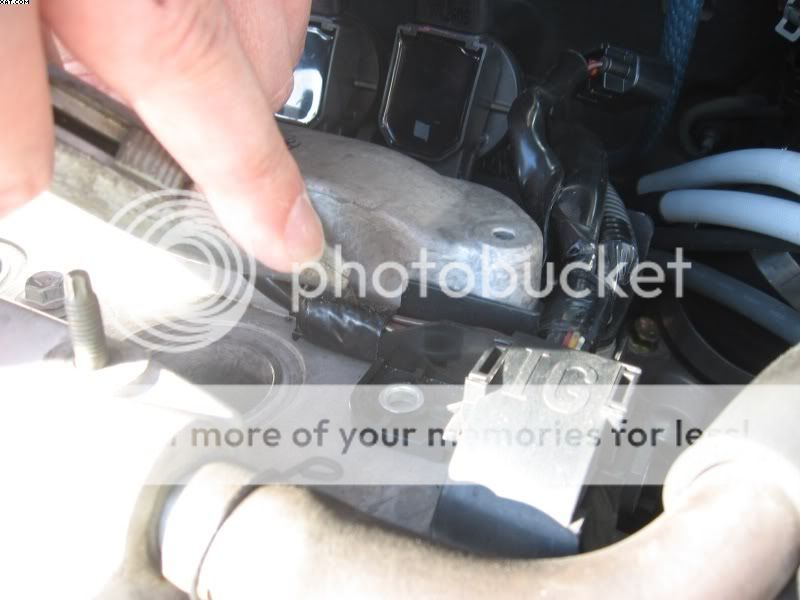
here is where i ran into a small problem. the stock plug wiring is made to go straight to the coilpacks embedded into the channel on the valve cover, not to a bracket on the backside of the valve cover. I had to do a little cutting of the electrical tape in order for the wiring to stretch. BE CAREFUL CUTTING THE ELECTRICAL TAPE. In the picture above, to the right side of the picture, you see a small plastic piece bolted down by a 10mm bolt. remove this bolt and it helps you stretch the wiring-
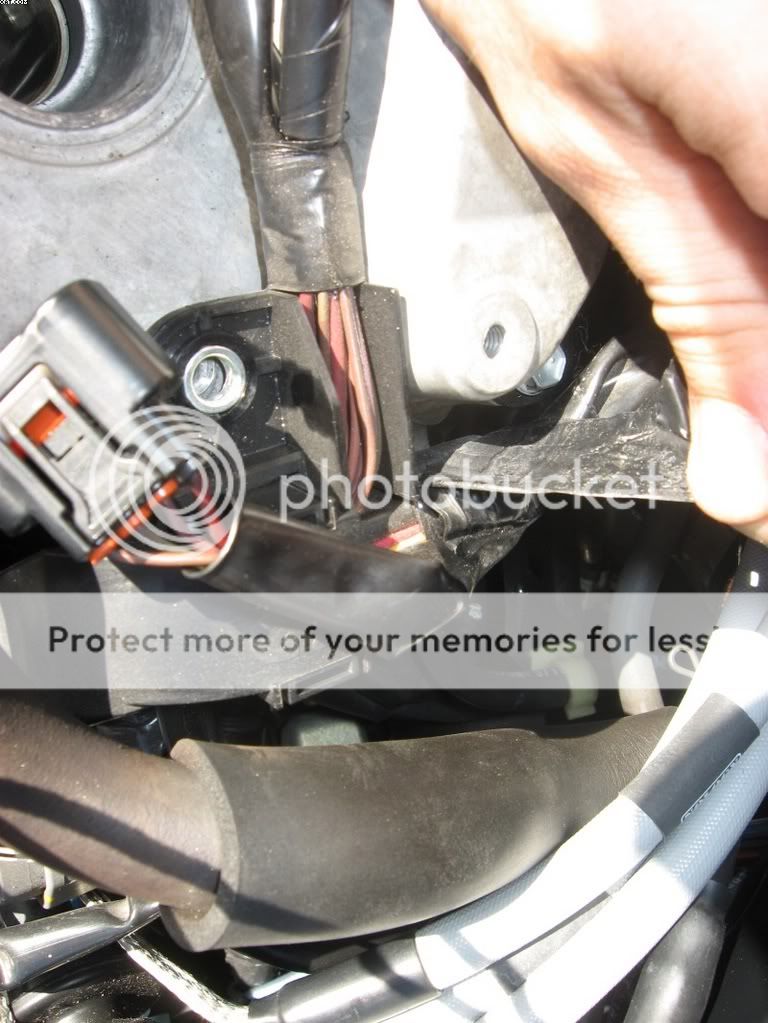
basicaly when you reconnect the the connectors onto the coil pack, your attach them just how they were when the coilpacks were in the cylinders. the coilpack on the leftside of hte bracket gets the connector for the cylinder on the leftmost side of the engine (passenger side). once all the connections are done, bolt down that plastic piece again. the connecters will look like this-

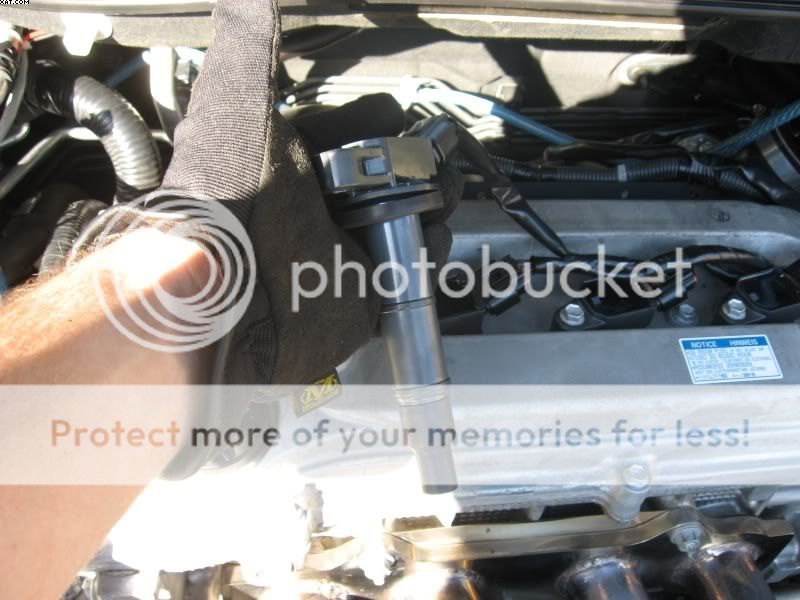
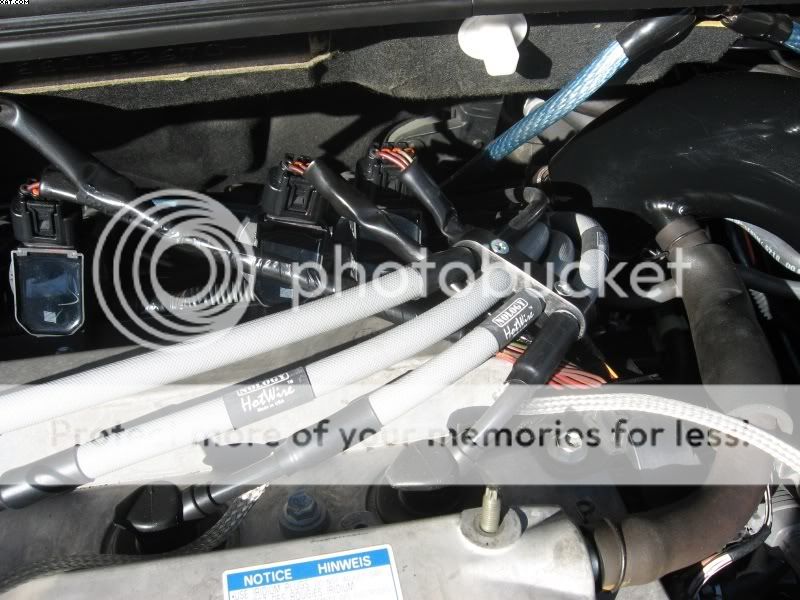
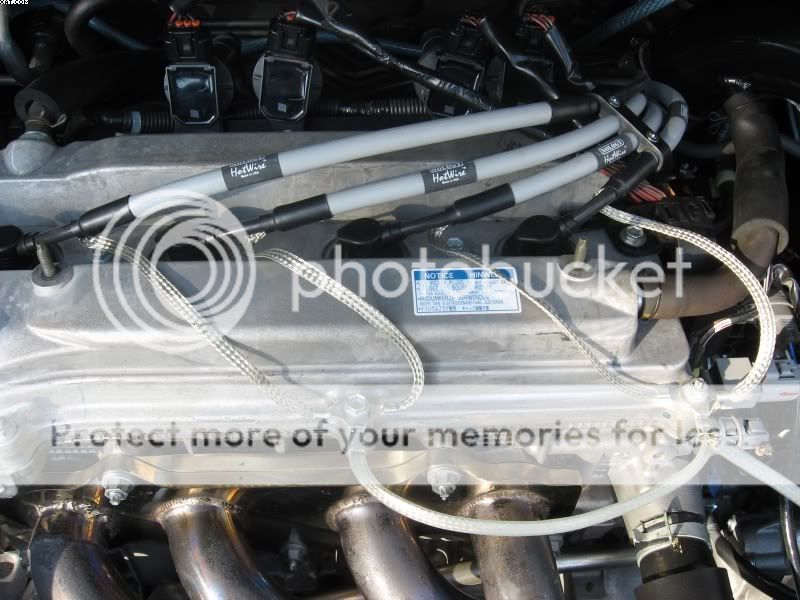
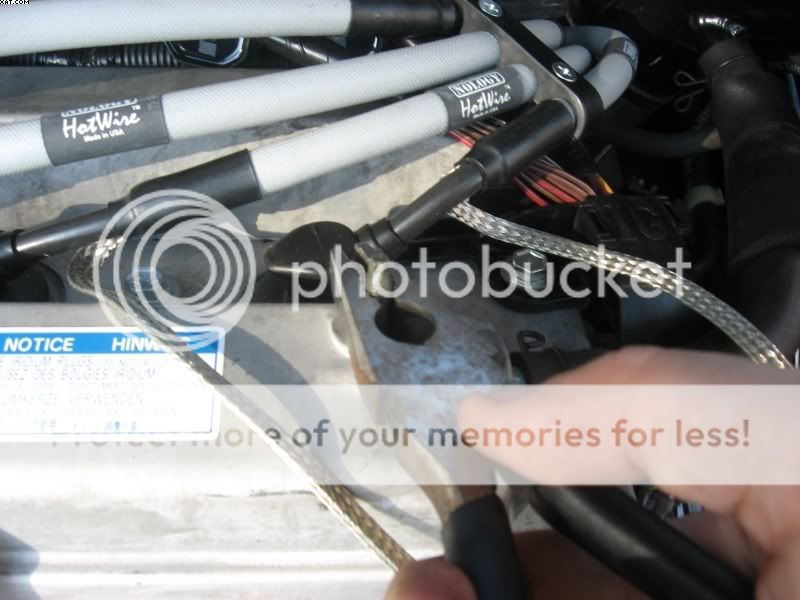
time to install the Hotwires. if you've followed directions up to this point, the leftmost coilpack should have the longest hotwire. this hotwire will wrap around and go to the leftmost cylinder. the 2nd longest wire should be on the next coilpack to the right, and this wire will go to the next cylinder to the right. bring all the hotwires around and put them into the spark plug hole. once in, press down on the rubber top part of it firmly and you'll feel it pop into place. it'll look like this when your done-
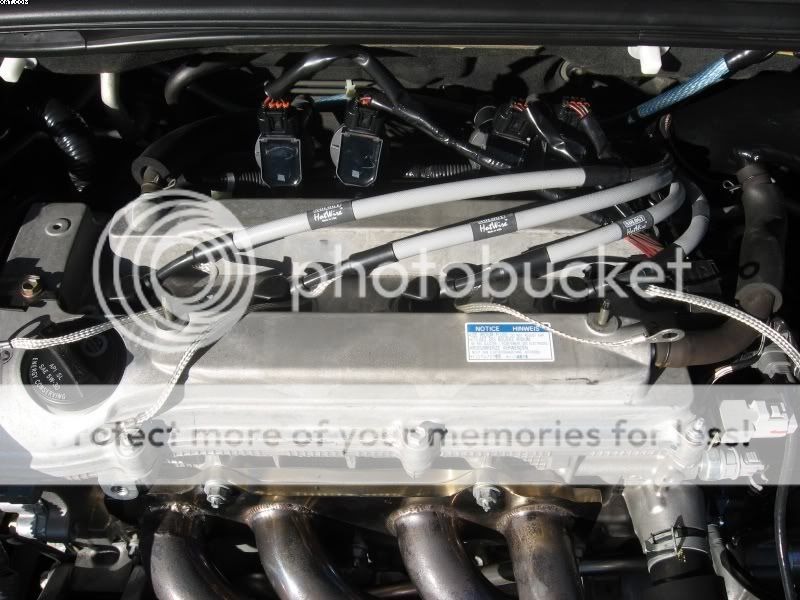
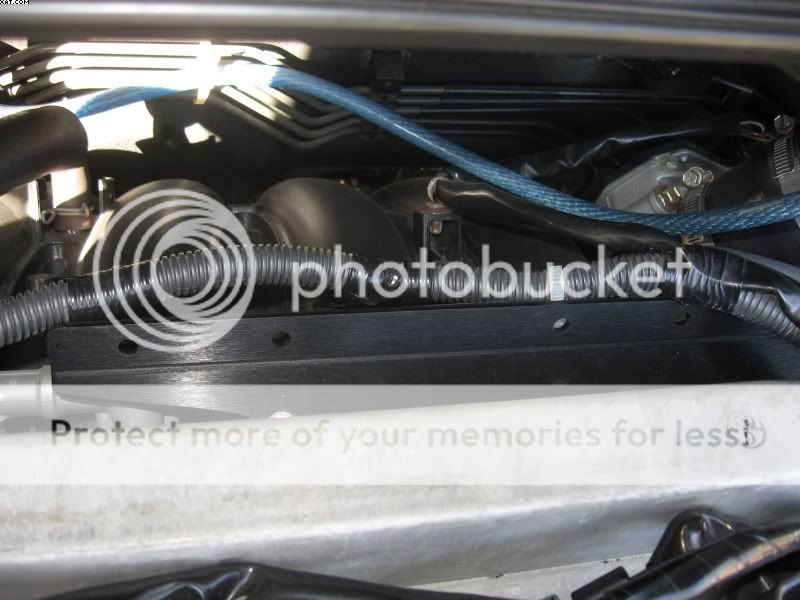
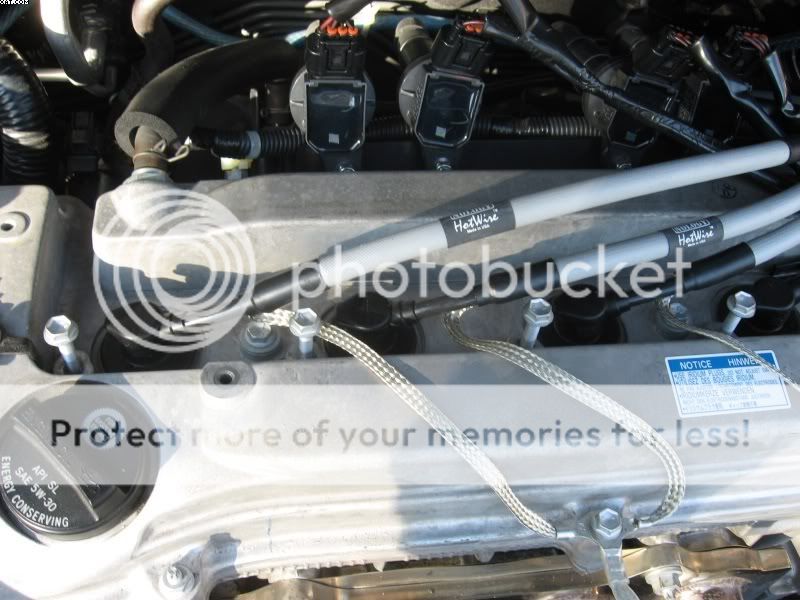
supplied with the hotwires is a cable organizer. it's held together with a couple of phillips head screws and some nuts. you can put this wherever you want, but here is where i put mine-
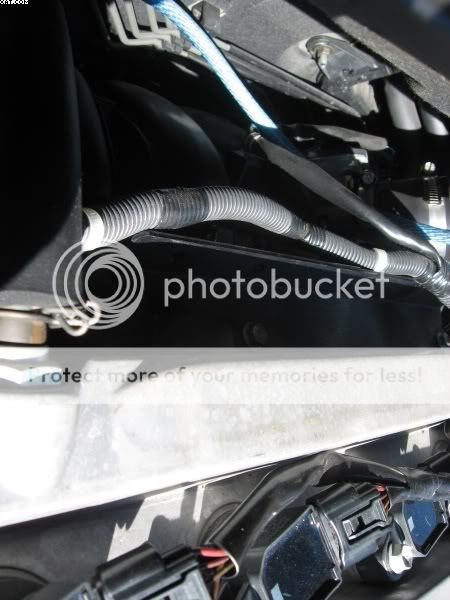
almost done! time to connect all the grounds. here are a few pictures of where i ground the hotwires and where i connected the groundwire cable supplied with the hotwires kit- (note, i had to undo 2 10mm valve cover bolts on the frontside of the engine bay to connect these)
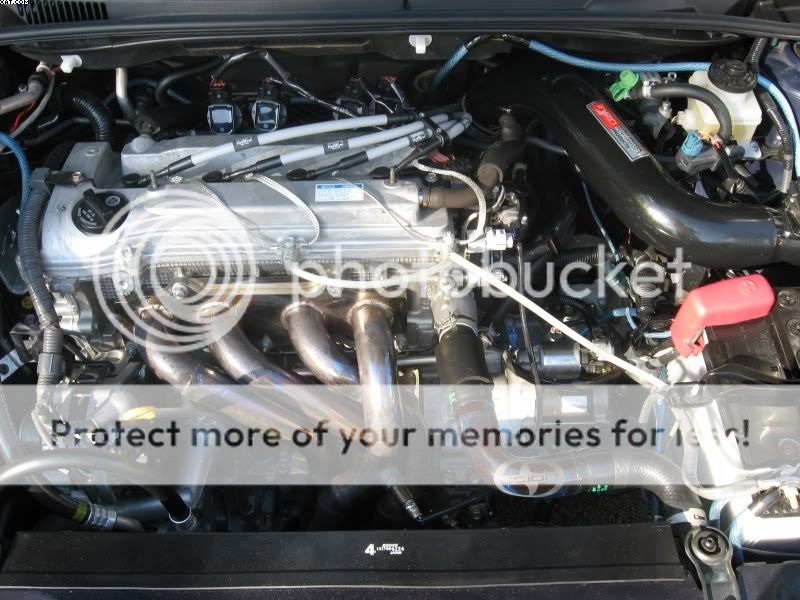
seeing as i didnt want to cover up my new mod, i chose not to reinstall my engine cover. i dont know if it would fit over the wires or not, to tell you the truth, i didnt even try to see if it would or not. Seeing as i'm not using the engine cover anymore, might as well take out the studs that the engine cover bolts screw on to. I used a pair of pliers-
remember those bolts used to hold down the coilpacks originally? you saved em right? Good! Now i dont know if i'm ever going to take out these hotwires or not, and being in college, i have my doubts with my ability to keep track of 4 small bolts, so i just screwed them back where they're supposed to go. note, they don't screw all the way in. I know it looks a little retarded not screwed all the way in, but hey, i'll remove em @ shows and keep em in my pocket and reinstall after judging-
ALL DONE! double check all your connections, make sure you dont have anything loose anywhere, etc etc etc. hop in the car and start the car. I had a minor rough idle issue for the first minute or so after install, after that though it ran fine. overall i didnt feel any difference with these. i consider it a show mod.
BEFORE-
AFTER-

I received my Nology Hotwires from from another user on here parting out his car. Parts were BNIB! Install wasn't difficult at all. In all it took about an hour and a half to do, but that's only because i was taking pictures
alright, so first things first, i'm going to show you where the nology coil relocation bracket (sounds complicated eh?) goes.
here we have the tC engine bay. i've take off my engine cover and my stut bar to make things more roomy to work in. strut tower bolts are 14mm and the engine cover bolts are 10mm.
now, to install the bracket, your going to have to go on the backside of the engine (towards the firewall) there you'll see the fuel rail, intake manifold, etc. We're concerned with the valve cover bolts. the center bolt and the bolt on the drivers side need to be removed. They're 10mm bolts
this one-
and this one-
I installed the bracket just so you can see where these bolts are on the backside of the engine bay. the two bolts holding down the bracket in these 2 pictures are the two you need to remove-
alrighty then, now that those 2 valve cover bolts are removed, set them up on the dash cowl for later. Now we move on to removing the coilpacks. They're held on by a single 10mm bolt. Remove the bolt and then gently (but firmly?) pull up on the coilpack and it'll pop up. You'll see this-
undo this clip and remove the coilpack from the plug wiring-
save the bolts used to hold down the coilpacks, we'll use them later.
remove all the coilpacks, get the bracket, and all the nuts/bolts that were supplied with the hotwires-
now we're ready to put that coil relocation bracket to good use! attach the coilpacks to the brakcet using the supplied hardware. they're 10mm bolts. The coilpacks weren't tightened down tightly from the factory, so i really didn't torque them down overly tight onto the bracket, but i did torque enough so that they wouldnt move. 10mm bolts/nuts are used here. it'll look like this when your done-
and when all 4 coilpacks are installed-
now go grab the hotwires themselves. one end has this only plastic coilpack looking thingy and the other has a rubber boot with a spring inside. Push the rubber boot springy thing (great description eh?) onto the end of the coilpacks. make sure that the spring makes contact with the spring inside the coilpack! the lengths of wire should be setup like shown in the picture-
install the bracket onto the valve cover. Use the 10mm bolts that you removed in the first step-
here is where i ran into a small problem. the stock plug wiring is made to go straight to the coilpacks embedded into the channel on the valve cover, not to a bracket on the backside of the valve cover. I had to do a little cutting of the electrical tape in order for the wiring to stretch. BE CAREFUL CUTTING THE ELECTRICAL TAPE. In the picture above, to the right side of the picture, you see a small plastic piece bolted down by a 10mm bolt. remove this bolt and it helps you stretch the wiring-
basicaly when you reconnect the the connectors onto the coil pack, your attach them just how they were when the coilpacks were in the cylinders. the coilpack on the leftside of hte bracket gets the connector for the cylinder on the leftmost side of the engine (passenger side). once all the connections are done, bolt down that plastic piece again. the connecters will look like this-
time to install the Hotwires. if you've followed directions up to this point, the leftmost coilpack should have the longest hotwire. this hotwire will wrap around and go to the leftmost cylinder. the 2nd longest wire should be on the next coilpack to the right, and this wire will go to the next cylinder to the right. bring all the hotwires around and put them into the spark plug hole. once in, press down on the rubber top part of it firmly and you'll feel it pop into place. it'll look like this when your done-
supplied with the hotwires is a cable organizer. it's held together with a couple of phillips head screws and some nuts. you can put this wherever you want, but here is where i put mine-
almost done! time to connect all the grounds. here are a few pictures of where i ground the hotwires and where i connected the groundwire cable supplied with the hotwires kit- (note, i had to undo 2 10mm valve cover bolts on the frontside of the engine bay to connect these)
seeing as i didnt want to cover up my new mod, i chose not to reinstall my engine cover. i dont know if it would fit over the wires or not, to tell you the truth, i didnt even try to see if it would or not. Seeing as i'm not using the engine cover anymore, might as well take out the studs that the engine cover bolts screw on to. I used a pair of pliers-
remember those bolts used to hold down the coilpacks originally? you saved em right? Good! Now i dont know if i'm ever going to take out these hotwires or not, and being in college, i have my doubts with my ability to keep track of 4 small bolts, so i just screwed them back where they're supposed to go. note, they don't screw all the way in. I know it looks a little retarded not screwed all the way in, but hey, i'll remove em @ shows and keep em in my pocket and reinstall after judging-
ALL DONE!
BEFORE-
AFTER-

Thread Starter
Senior Member
Scikotics
SL Member
Joined: Oct 2005
Posts: 7,514
From: Orlando, FL (UCF)
better spark power. the hotwires have a capacitor inline with the wire that supposedly helps spark voltage.
Goes against all thinking though. the tC ignition is coil on plug, which is the best ignition type out there. The hotwires kits coverts this to a conventional coil off plug + spark plug wire setup. Probably hurts more than it helps (maybe better in cars with this type of ignition already?), but hey, it's another mod that i can say i have @ shows.
Goes against all thinking though. the tC ignition is coil on plug, which is the best ignition type out there. The hotwires kits coverts this to a conventional coil off plug + spark plug wire setup. Probably hurts more than it helps (maybe better in cars with this type of ignition already?), but hey, it's another mod that i can say i have @ shows.


Senior Member
Scikotics
SL Member
Joined: Apr 2006
Posts: 1,459
From: West Virginia
these would work best on something with a distributor like set-up....probably help quite a bit, but maybe even overload the pulgs on some ignitions..
too bad they dont help the tc....
oh well
too bad they dont help the tc....
oh well

Senior Member
SL Member
Joined: Dec 2006
Posts: 569
personally i think this mod is an absolute waiste. The only possible advantage is it could actually reduce ignition timing generated by the long pause as the capacitor builds voltage.
Takes your hightech proven coil on plug and ads longer wires, a capacitor that decreases spark duration and all kinds or wires and grounds everwhere.
Toyota knows what they are doing. If plug wires made such a great diffrence they would have done it from the factory or offered it through trd.
Takes your hightech proven coil on plug and ads longer wires, a capacitor that decreases spark duration and all kinds or wires and grounds everwhere.
Toyota knows what they are doing. If plug wires made such a great diffrence they would have done it from the factory or offered it through trd.


Senior Member
SL Member
Scion Evolution
Joined: Feb 2005
Posts: 2,860
From: Motor City
Yeah the blue ones look sick! They look good with red valve cover. Now if I can only get the fitment problem fixed! I'll try again once it warms up.
I called Nology about my problem and sent them this tech link. The sales guys from nology was impressed with your write up! haha
I called Nology about my problem and sent them this tech link. The sales guys from nology was impressed with your write up! haha
Thread Starter
Senior Member
Scikotics
SL Member
Joined: Oct 2005
Posts: 7,514
From: Orlando, FL (UCF)
i just hope i dont find my pictures and such on any website sometime down the road like another user on here directed me to the other day-
http://www.customtc.com/grille.htm
the blue tC with the black grilles is my car....

http://www.customtc.com/grille.htm
the blue tC with the black grilles is my car....