
View Poll Results: Do you want to see how I installed my NOS kit


Voters: 50. You may not vote on this poll
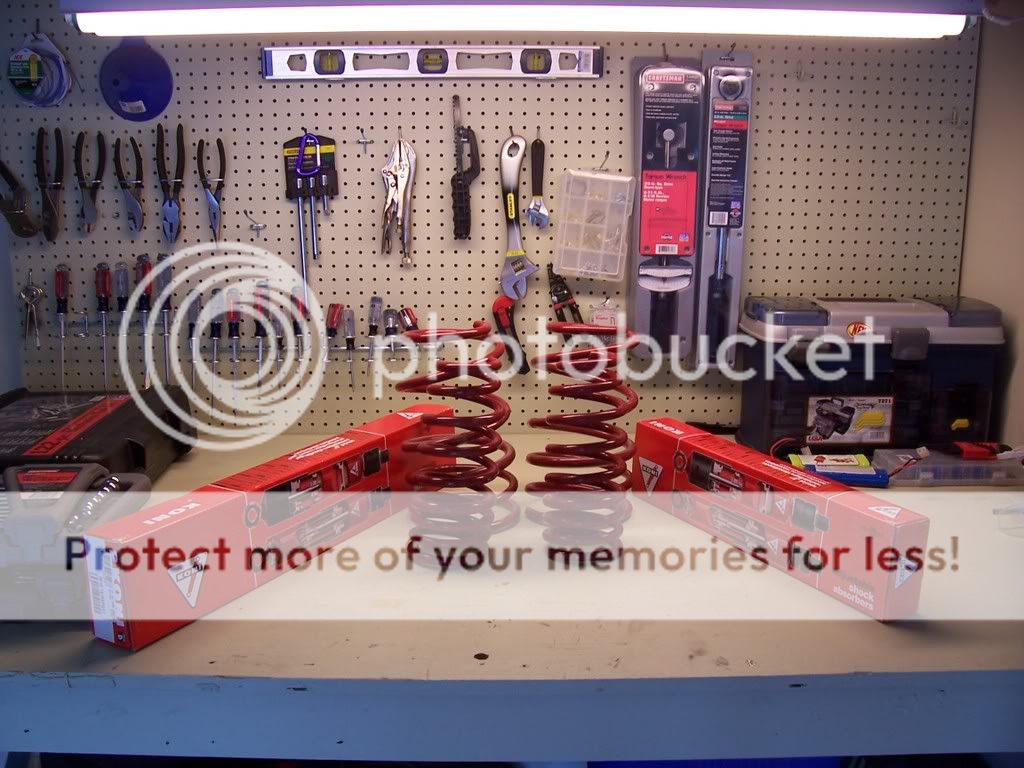
Strut Install (Front, Koni Yellow)


Thread Starter
Member
SL Member
Joined: Mar 2006
Posts: 68
This hopefully will give you an idea of what it takes to install the front Koni yellows. This will not cover removal of the struts and springs, because that has been covered elsewhere. This will give a step by step, of how I modify the stock strut and replace it with the yellow front inserts. It is an easy modification. If you can remove the strut, there should be no reason you don�t install the Yellows yourself.
This is not intended to be a manual, or a how to. Only follow the instruction from the Manufacturer. This should only be used as pretty pictures. In other words, I take no reasonability if you believe anything I say
Tools needed:
14mm dill bit
Dermal and a metal cutting disk
Place to put strut oil
First Step
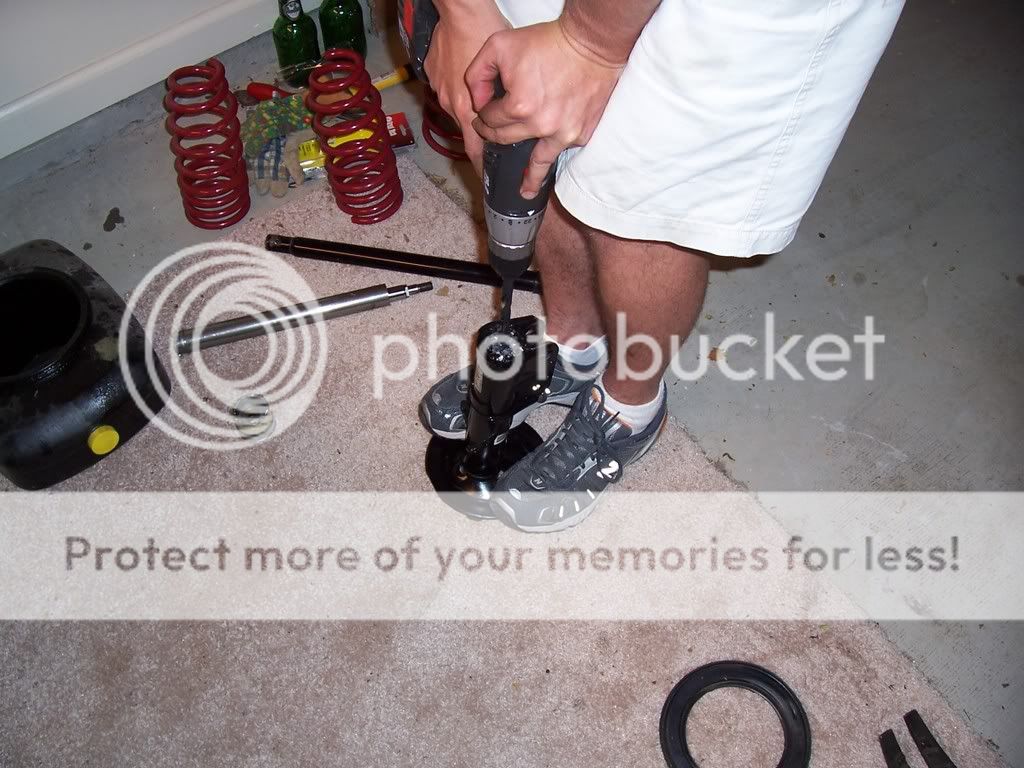
Removed strut and drilled a tiny hole in the bottom center with a small drill bit. I would recommend not drilling it like I did. If you have a vice that would probable be safer.
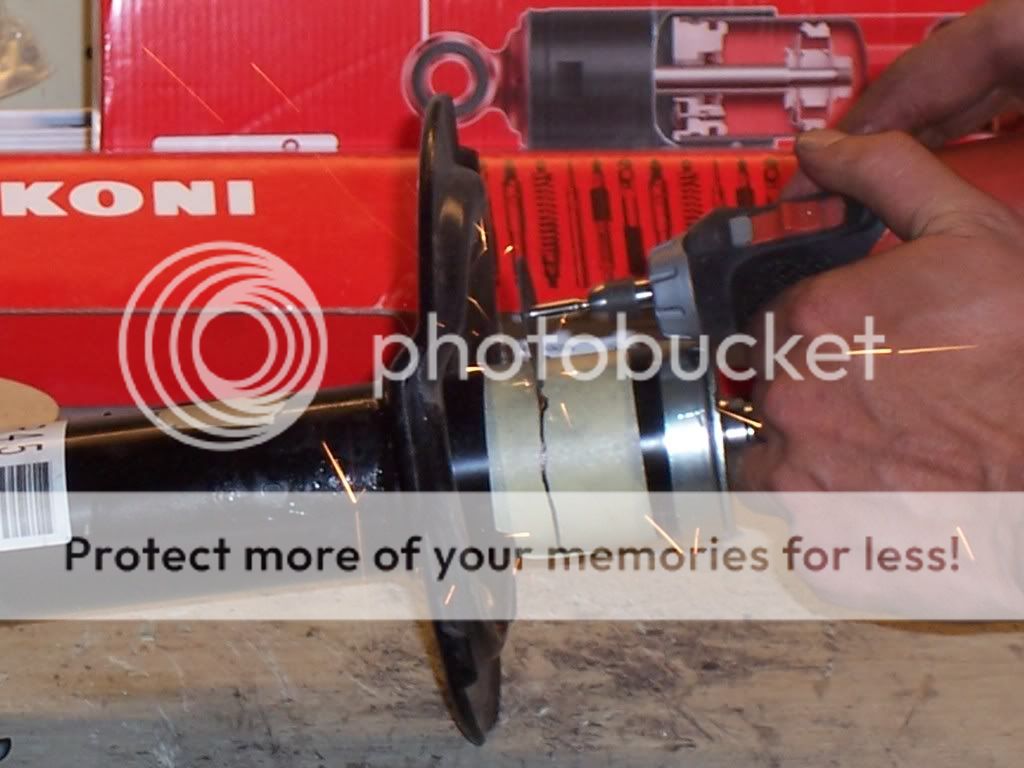
This is actually me drilling with the 14mm as you can see the top of the strut has already been cut off. This will just give you and idea of how I drilled the holes.
Koni says to drill the small hole then tape over. Then proceed to cut the top portion off.
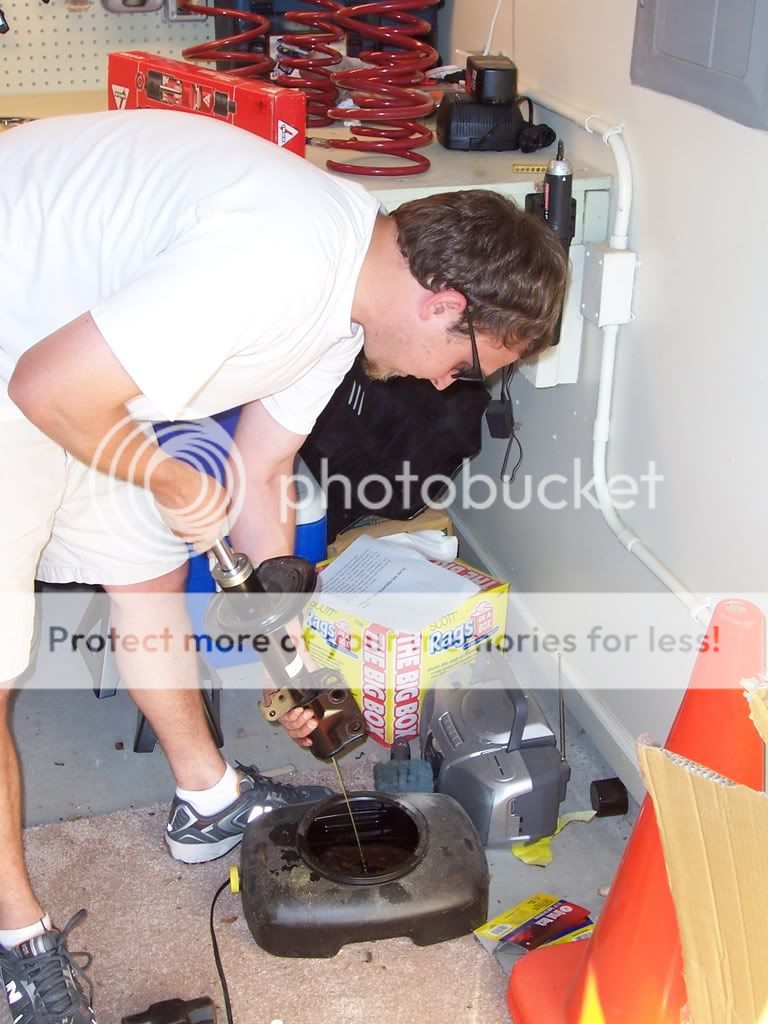
I found it easier to pump the piston to get rid of the oil, via the hole you just drilled, before cutting off the top. I could only imagine the mess if you follow their instructions.
After the oil has been removed, drill out the small hole in the bottom of the strut with the 14 mm bit.
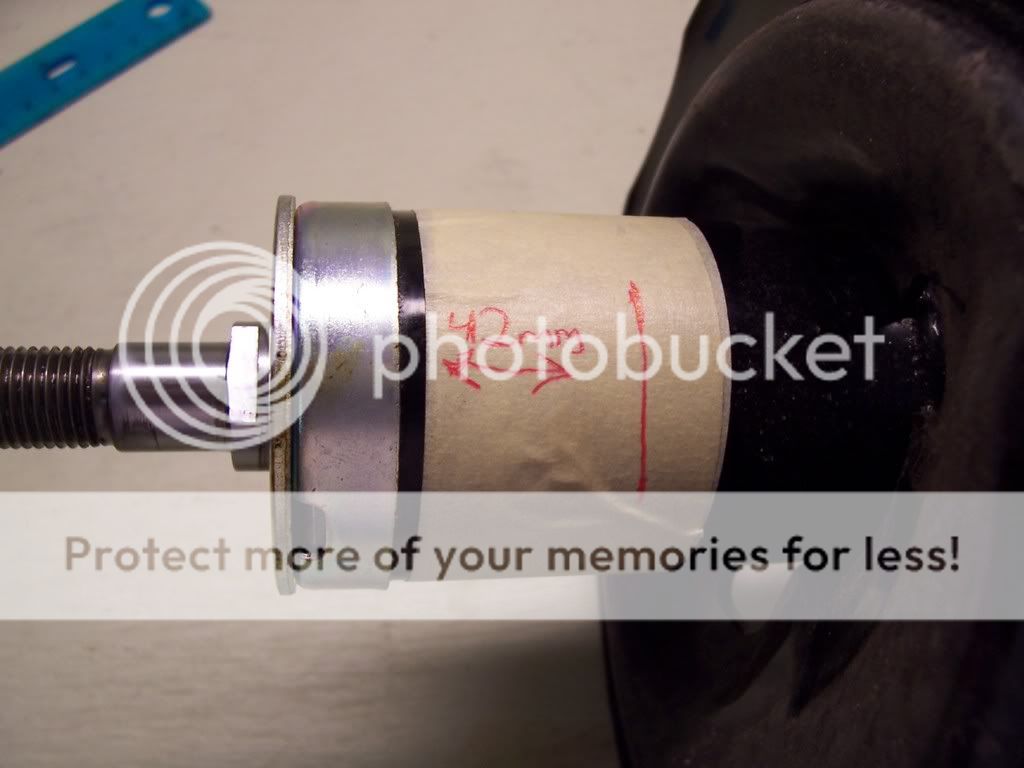
Next measure 42 mm from the top of the strut, not the top of my tape shown
I cut the first one off with a hand saw, it sucked. The second one I used a dermal tool with a metal cutting disk. It worked great and I got to throw some sparks.
Next you just have to slide the strut into its new home. Pull down the rubber boot and put the bottom bolt to hold the strut in. I lost the first bolt on the road because of vibration. I would recommend locktite to prevent this from happing to you.
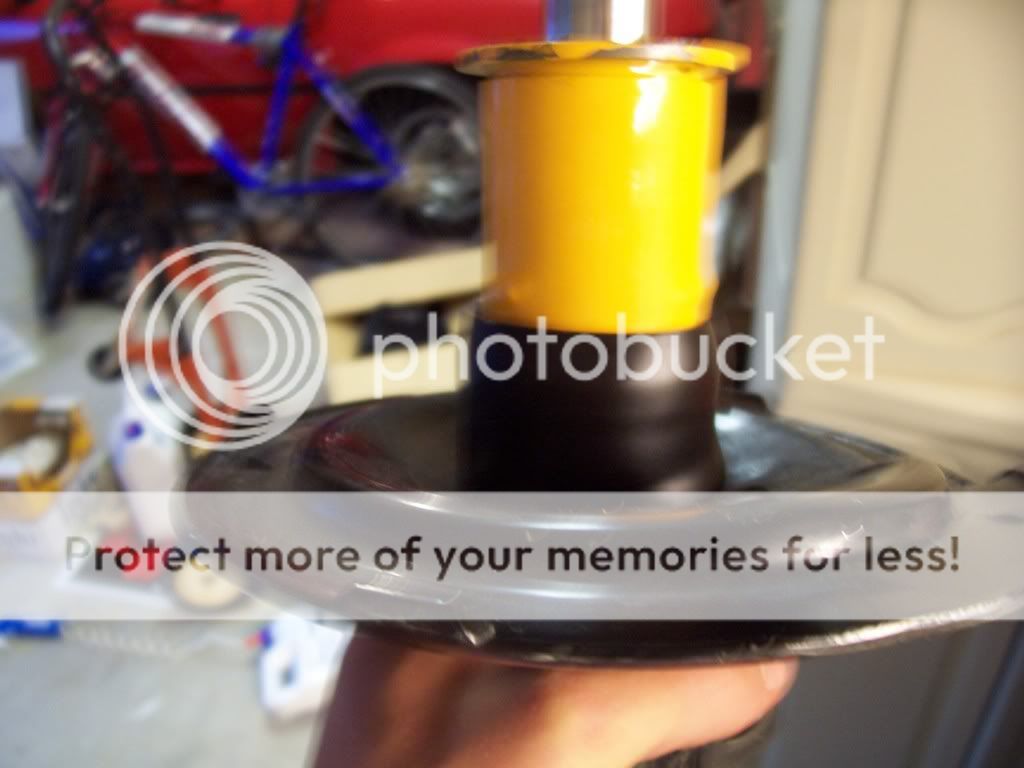

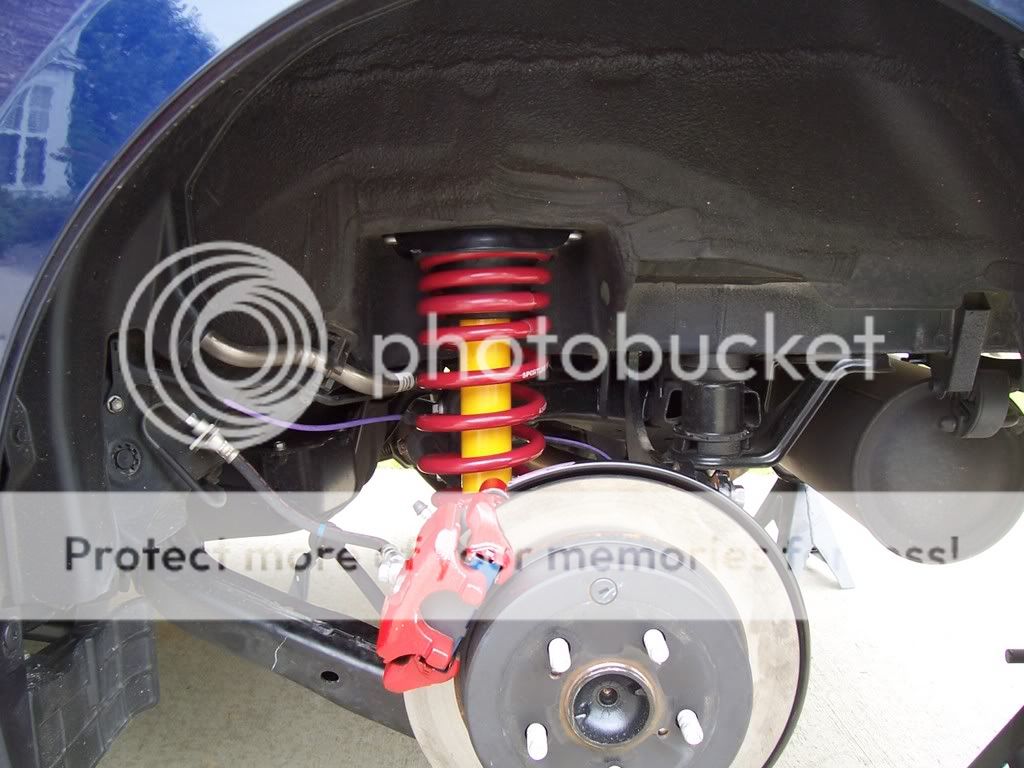
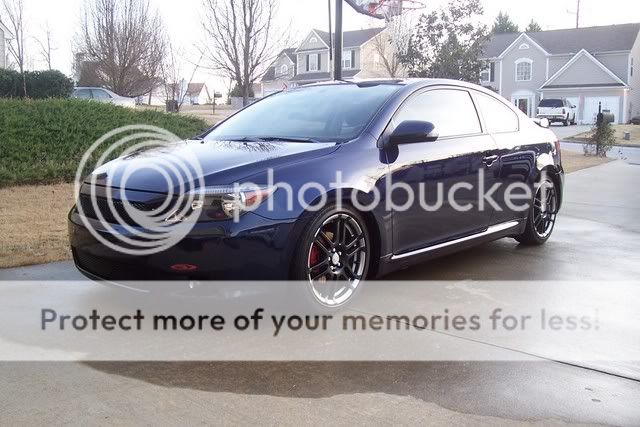
Finished product
Eibach sportline and Koni Yellow


As for the rears, they just bolt in. Be careful no to put the spring perch in upside down when putting the rears together. I did, and so have a couple other people. The perch needs to be facing down. You will know if you did it wrong because the rear will not drop at all.
I plan on installing a NOS kit soon, let me know if you are interested in a NOS instillation sticky.
This is not intended to be a manual, or a how to. Only follow the instruction from the Manufacturer. This should only be used as pretty pictures. In other words, I take no reasonability if you believe anything I say
Tools needed:
14mm dill bit
Dermal and a metal cutting disk
Place to put strut oil
First Step
Removed strut and drilled a tiny hole in the bottom center with a small drill bit. I would recommend not drilling it like I did. If you have a vice that would probable be safer.
This is actually me drilling with the 14mm as you can see the top of the strut has already been cut off. This will just give you and idea of how I drilled the holes.
Koni says to drill the small hole then tape over. Then proceed to cut the top portion off.
I found it easier to pump the piston to get rid of the oil, via the hole you just drilled, before cutting off the top. I could only imagine the mess if you follow their instructions.
After the oil has been removed, drill out the small hole in the bottom of the strut with the 14 mm bit.
Next measure 42 mm from the top of the strut, not the top of my tape shown
I cut the first one off with a hand saw, it sucked. The second one I used a dermal tool with a metal cutting disk. It worked great and I got to throw some sparks.
Next you just have to slide the strut into its new home. Pull down the rubber boot and put the bottom bolt to hold the strut in. I lost the first bolt on the road because of vibration. I would recommend locktite to prevent this from happing to you.
Finished product
Eibach sportline and Koni Yellow
As for the rears, they just bolt in. Be careful no to put the spring perch in upside down when putting the rears together. I did, and so have a couple other people. The perch needs to be facing down. You will know if you did it wrong because the rear will not drop at all.
I plan on installing a NOS kit soon, let me know if you are interested in a NOS instillation sticky.

Senior Member

SL Member

Joined: Jul 2005
Posts: 8,776
From: Corpus Christi, TX
kool, i was planning on getting these but after knowing i had to cut some of the OEM strut for it to fit, i didnt want to spend $550+ for something i have to do more besides direct swap which is why i went with TRD. How's the ride?
Thread Starter
Member
SL Member
Joined: Mar 2006
Posts: 68
Rides Great. I went with Yellows for the adjustablilty and lifetime warranty. In retrospect I should of just bought coil overs but I happy with them. Its a rare setup and she corners very well. When I installed the struts and spring in Feb 06 I think I was the first with this setup.

Senior Member
SL Member
Joined: Aug 2004
Posts: 9,061
From: VEGAS BABY!
Nice rite up. I think it's worth mentioning that after you put the bolt in to hold the insert into the stock houseing, be sure to tigheten it again after you put it back on the ground.
I didn't and lost a bolt, so I had to have Koni send me a new one.
Mine with Hothckis ride great! I chose these over the TRD because I could get the fronts now, and the rears later when I can afford them. Also, they are so easy to adjust and it actually makes a big difference depending on what your doing (highway, rough roads, or track)
But I agree with you, James, in that I should have just gone with fully adjustable coilovers to begin with, but hey, you live an you learn.

I am going through the Koni / Tein SS-P debate right now. I really would like the dampening adjustability so I can tighten it up for the weekends/autocross and leave it softer for my 50mi commute to work.
It's easy to say "just go with coilovers" but they are a lot more expensive than the strut/spring combo, and I am not rolling in cash right now.
I know for the Konis and Teins the fronts can be adjusted at the top of the strut tower inside the engine bay. But how hard is it to change the dampening on the rears of the Koni struts? I thought I read somewhere that they need to be taken off.. Same question if anyone knows about the Tein SS-P...
Thanks


Senior Member
SL Member
Joined: Aug 2004
Posts: 9,061
From: VEGAS BABY!
Originally Posted by Hat_Trick_Hokie
I thought I read somewhere that they need to be taken off.. Same question if anyone knows about the Tein SS-P...
Thanks
Thanks
I'm not sure about the Tein rears.
Originally Posted by Mr_Meaty
Originally Posted by Hat_Trick_Hokie
I thought I read somewhere that they need to be taken off.. Same question if anyone knows about the Tein SS-P...
Thanks
Thanks
I'm not sure about the Tein rears.
Senior Member
SL Member
Joined: Aug 2004
Posts: 9,061
From: VEGAS BABY!
Like I said, if I could have waited, i would have gotten fully adjustable coilovers. But then again, I'm not sure how to adjust the Teins. Also, if you find the right setting for the rears, you should be able to just leave them there, and just adjust the fronts a quarter turn this way or that way for street or track.
I would set up both for mild track use, then just turn down the fronts if your streets are rally bad. But I know what you mean. If your paying for fully adjustable, you want to have fully adjustable.
I would set up both for mild track use, then just turn down the fronts if your streets are rally bad. But I know what you mean. If your paying for fully adjustable, you want to have fully adjustable.

Senior Member
SL Member
Joined: Feb 2006
Posts: 468
From: Spokane, WA
Nice, I was planning on writing a DIY for this when I install mine next week or so. I previously had to do this on my 04 civic, so I know how it goes.
With my civic, all 4 corners were adjustable from inside the car (fronts under the hood, rears in the trunk), but most of the time, despite the really horrible roads in this town, I ran the rears all the way firm. It actually rode pretty well, maybe even better than stock.
I know it's probably different for the tC since it's a different car and weighs 600lbs more, but my suggestion would be to install them, drive around and see how it is, and take it apart and adjust them just to mess around with it. Sure, it may be a few more steps than you'd want (especially compressing the springs and whatnot), but I think it's worth it for how good the Konis really are.
Most of my friends with "JDMTyt3" coilovers usually end up having the dampers blow out at anywhere from 10-30k miles, whereas my civic and 2 of my friends' other cars running Konis had 47k, 72k, and around 50k on them, with no problems at all. And the fact that they can be revalved is a big plus, especially since there's a few places in town that can do it here.
JamesD, I'll still take some step-by-step pics when I end up doing mine, maybe you can add them to your DIY or something.
Thread Starter
Member
SL Member
Joined: Mar 2006
Posts: 68
Sounds cool just send the pics when you get them. The setting is pretty easy to set up. Anything over stock is better and more than 2 turns is asking for back problems. Mine are set at 1.5 turns. Ride is not rough and you can still take entrance loops at 90+. (do not attempt, this was done on a closed course with a professonal driver) 

Senior Member
Scikotics
SL Member
Joined: Oct 2006
Posts: 2,170
From: South SoCal, California
That's it. I'm going for coilovers. I'm running my stocks with Hotchkis for only 4K miles and I think I have plenty of time to save up for coilovers before the stocks go. I'm only living in an apartment complex so I would never be attempting to do this. Good luck for those who will. :D

