DIY: iQ Oil and Filter Change
 07-19-2013, 10:12 PM
#1
Senior Member

SL Member
Thread Starter
Join Date: Nov 2005
Location: Surf City SoCal
Posts: 1,527
This DIY will explain how to change your own oil and filter in your Scion iQ.
As with any DIY you will assume all responsibility for any damage inflicted on you or your car. This is a simple guide to changing your oil and filter. Always follow safety practices including but not limited to, wearing eye protection, gloves and protective clothing. Always ensure your car is supported by jack stands or car ramps. Engage the parking brake before lifting your vehicle and leave in place during all activities while the car is off the ground. Dispose of used oil at a designated oil recycling facility.
The recommend oil change intervals suggested by Scion are every 10,000 miles. I prefer to change mine at least every 5,000 miles. The scheduled oil changes are covered by the dealer for the first three or longer depending on which maintenance agreement you purchased with your iQ. To satisfy my warranty requirements I have the scheduled maintenance done at the dealership but the 5,000 mile oil changes I prefer to do myself. The job can be a bit messy but I find it satisfying to do the work myself.
Scion recommends using full synthetic oil with a weight of 0w-20. I use Mobil One Advanced Fuel Economy which I purchase at Walmart for a discounted price. I use the five quart jug and although the iQ doesn't require five quarts the savings over buying individual quarts makes it worthwhile for me. I pay $22 for the five gallon as compared to $25.00 for the individual quarts.
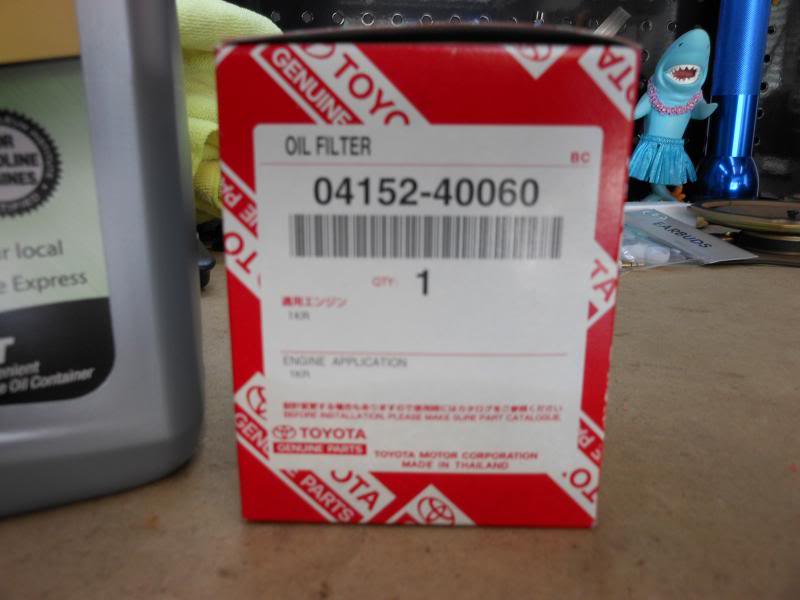
There are aftermarket companies selling oil filter cartridges for the iQ but I prefer to use the Toyota factory brand which I purchase at my dealership for around $8.00. They give me a %20 discount, the normal price is close to $14.00.
The Mobil One synthetic oil...
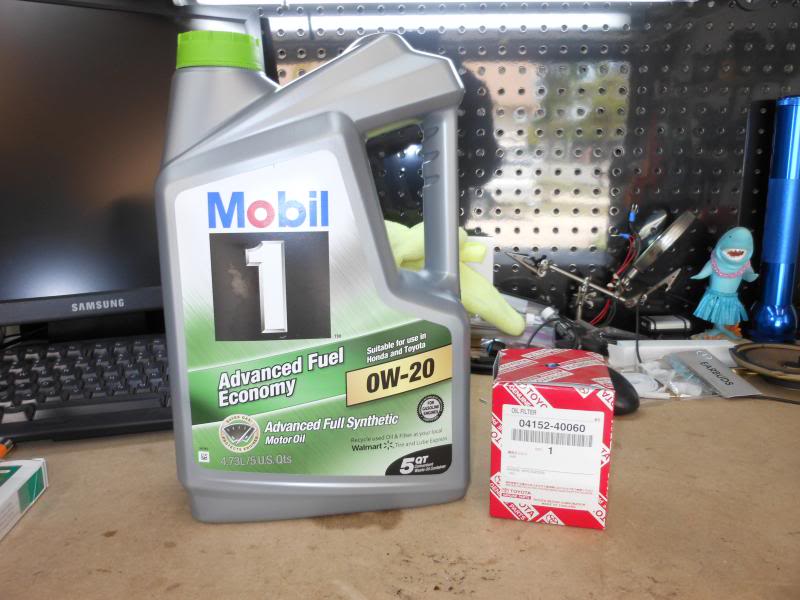
The Toyota filter...
The contents of the oil filter cartridge replacement...
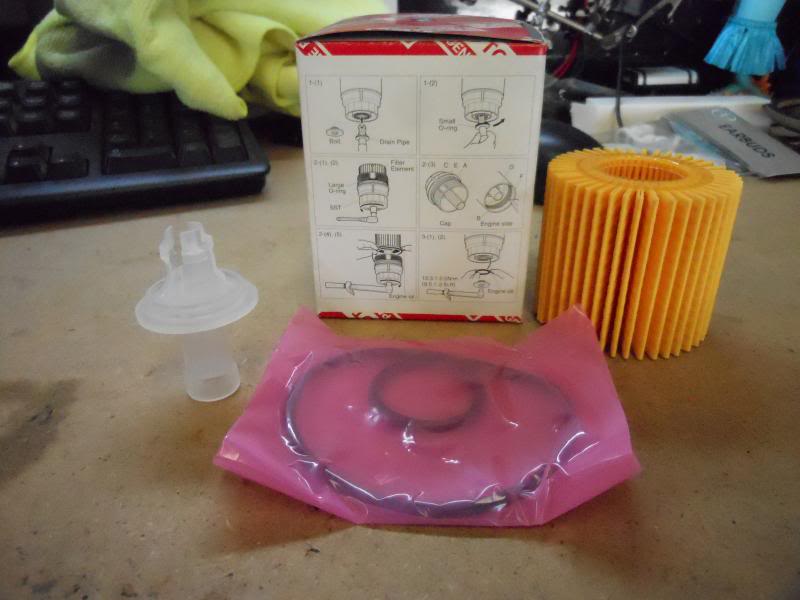
*Notice the instructions located on the side of the box.
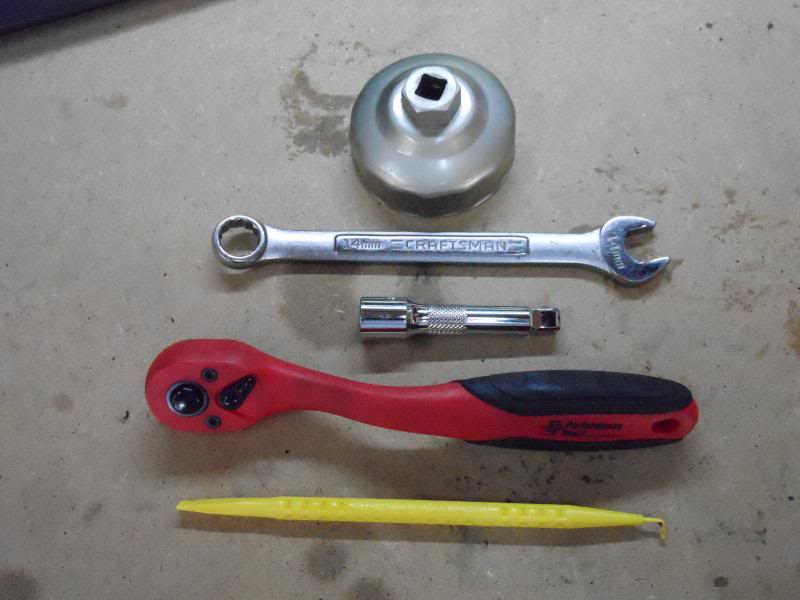
The tools you will need: 1. 14mm wrench, 2. Oil filter canister removal socket, 3. 3/8 inch ratchet, 4. 3/8 drive extension 5. A small pick or screw driver...
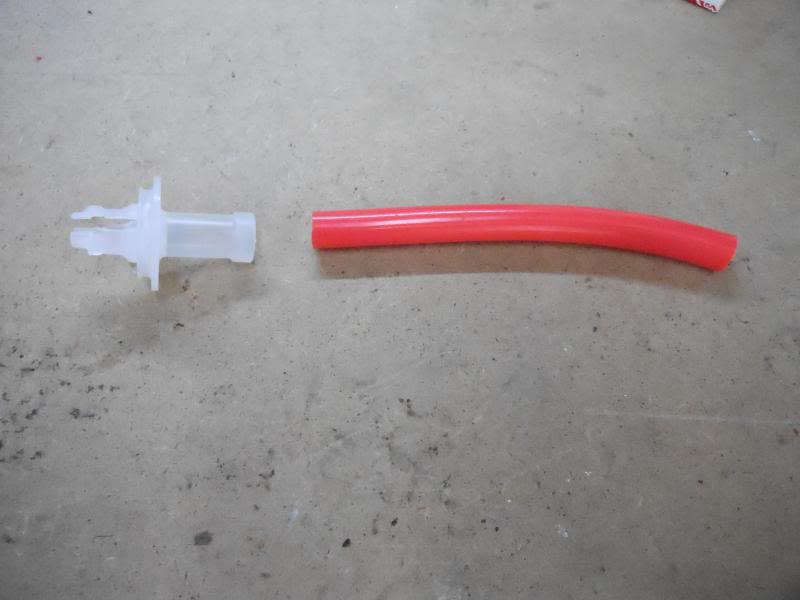
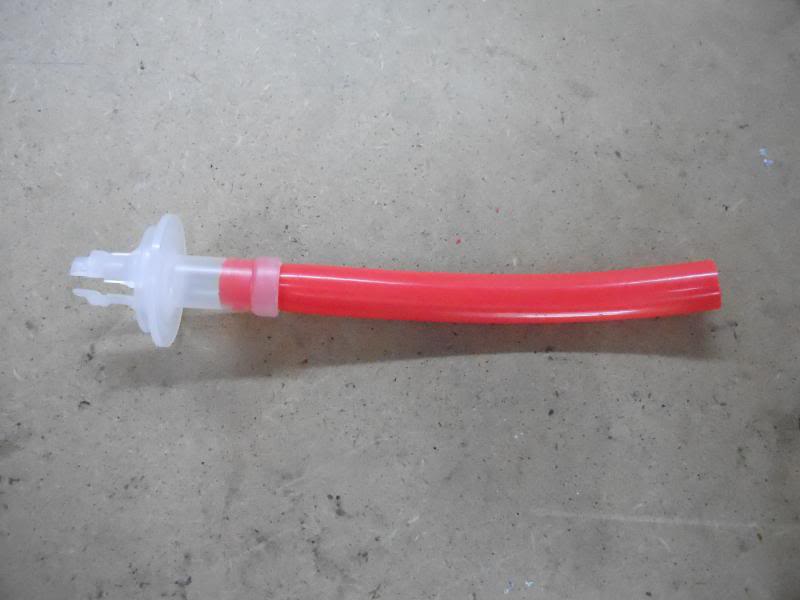
The small plastic nipple is used to drain oil from the filter. I use a small piece of plastic hose attached to the nipple to make the oil draining process a little cleaner...
Lift your iQ or drive it up the car ramps as I have. Ensure that your parking brake is set and the transmission is in the Park mode...
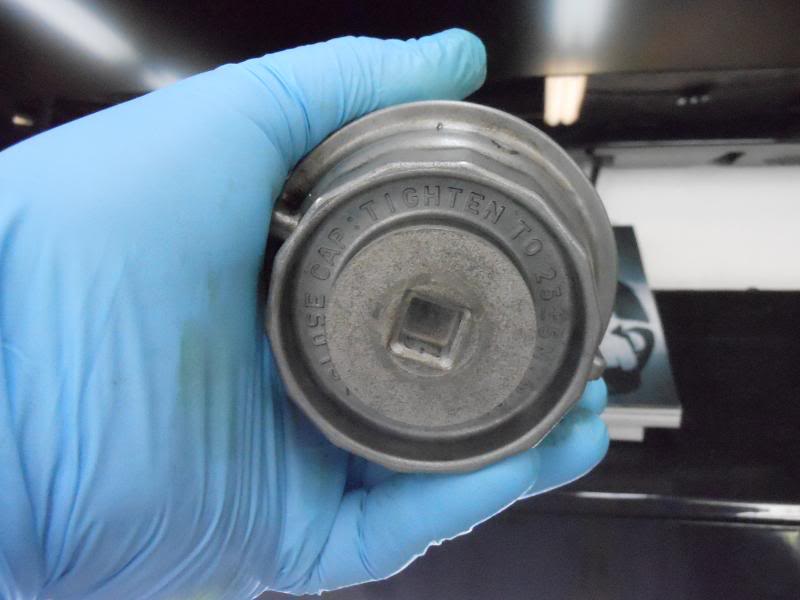
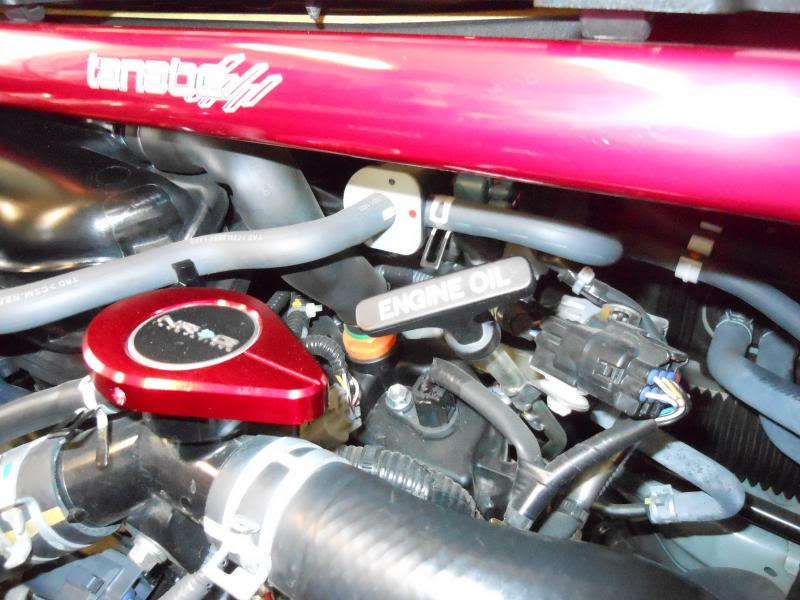
Locate the oil filler cap on the passenger side of the motor and remove it...
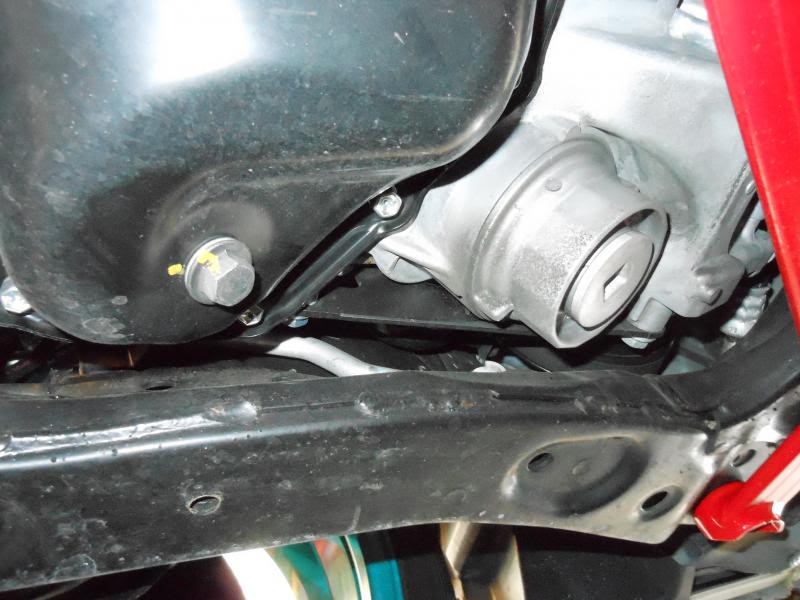
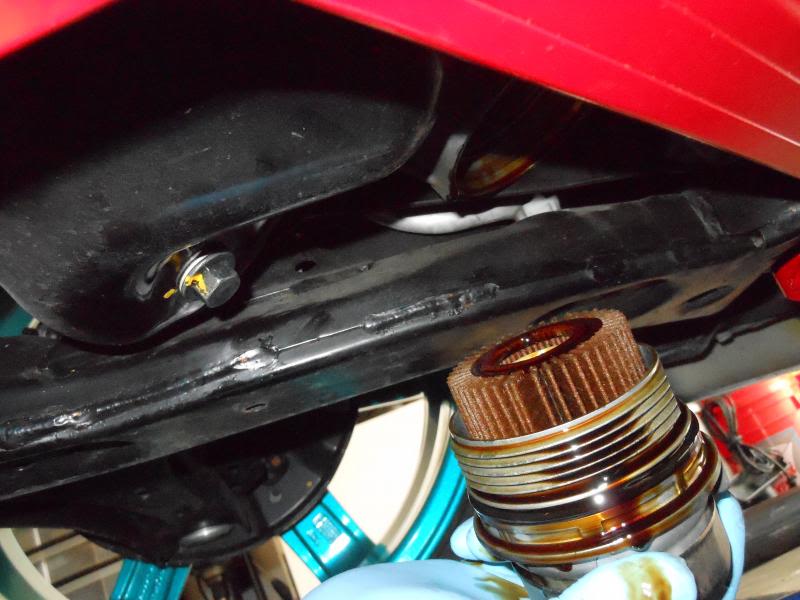
Here you will see the oil pan drain plug and the oil filter canister...
Using a 3/8 inch ratchet and extension remove the oil canister drain plug...
Insert the oil canister drain nipple and let it drain into your pan...
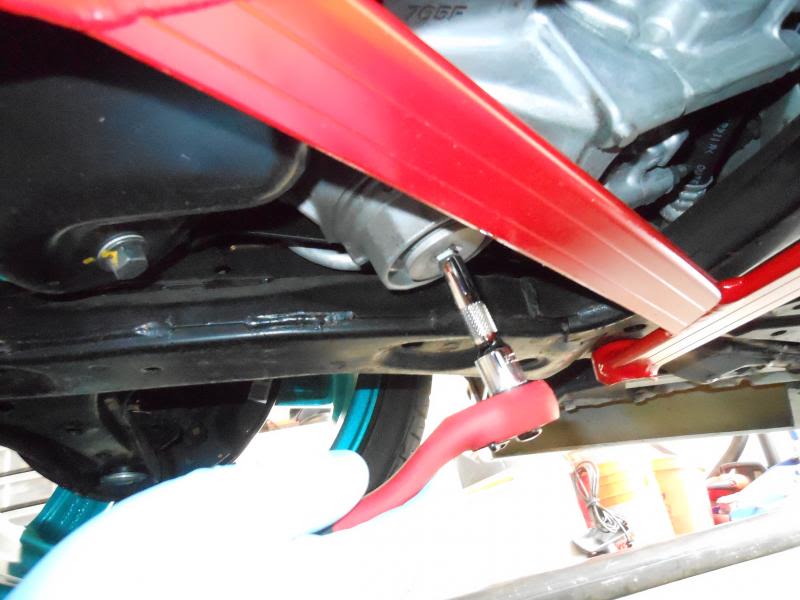
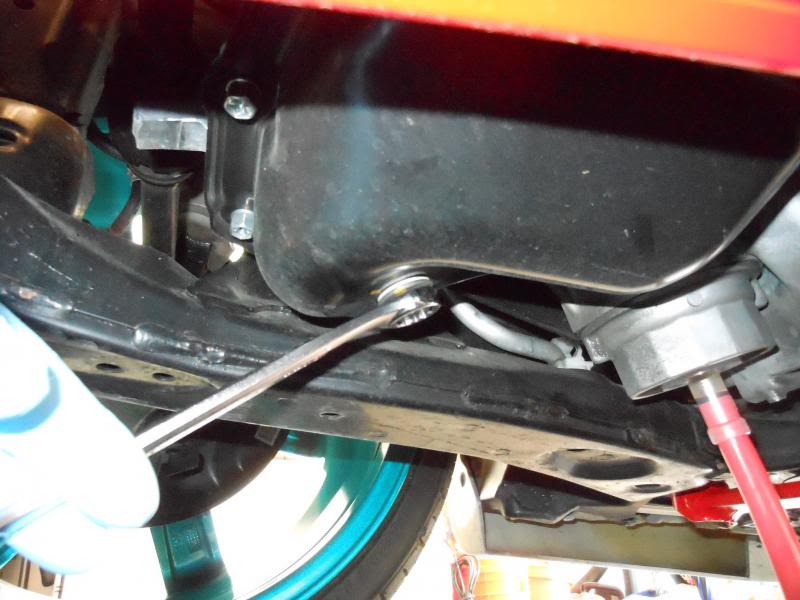
Using a 14mm wrench, loosen and remove the oil drain plug...
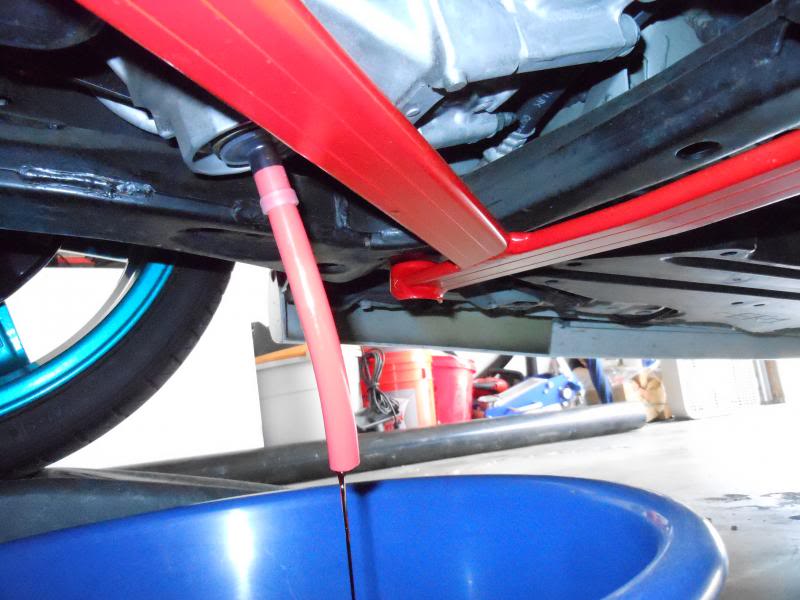
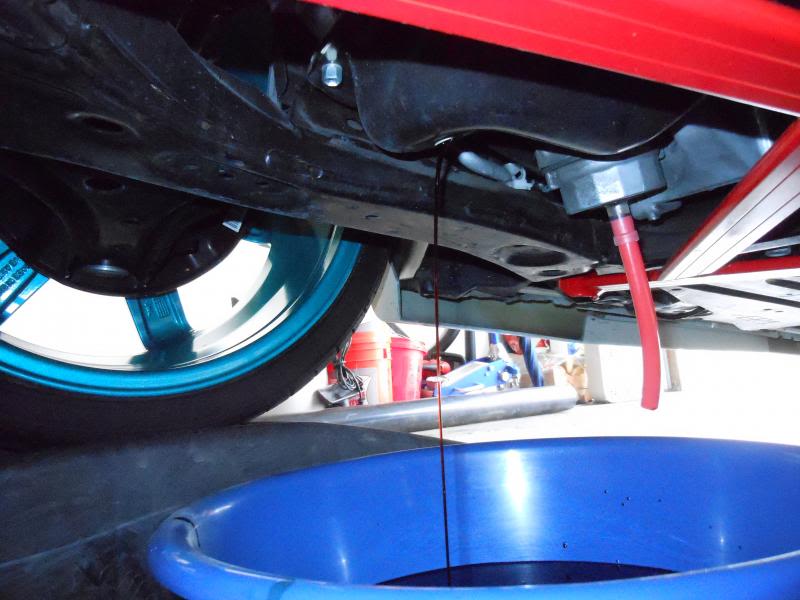
Let the oil drain for a while until it is done dripping...
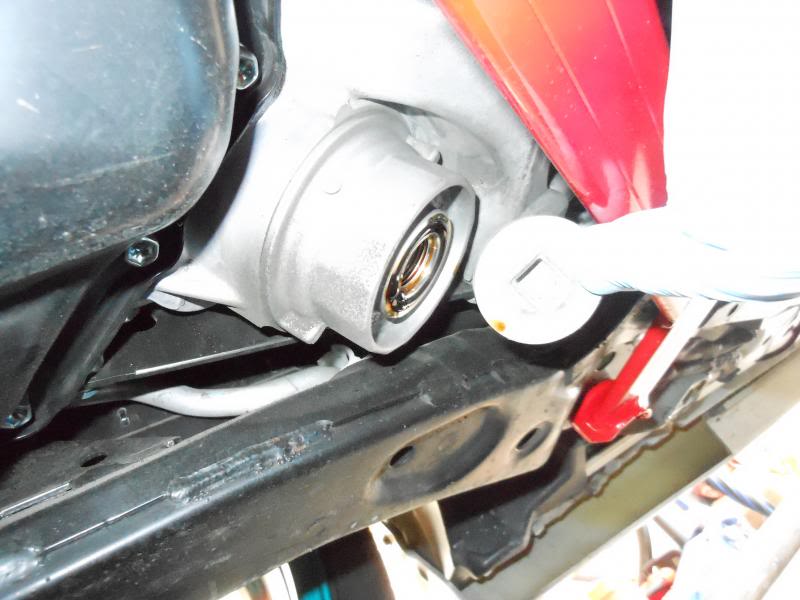
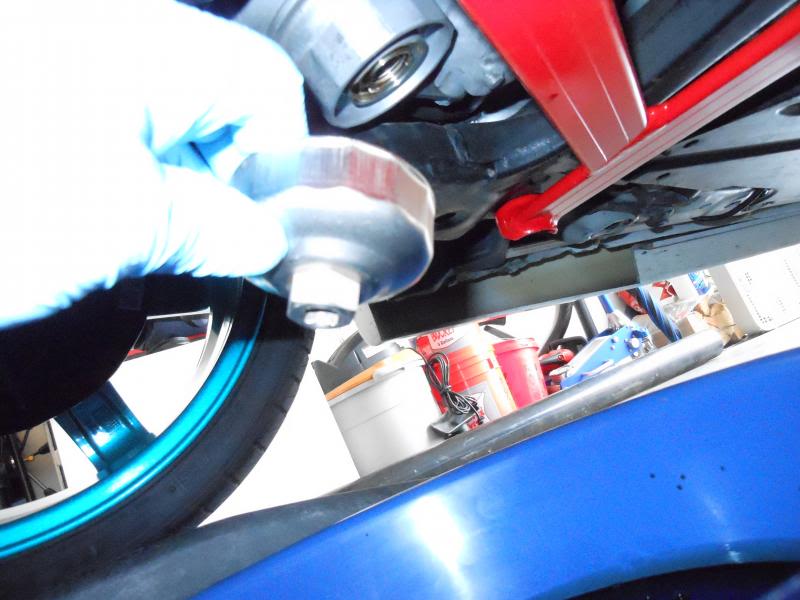
Using the oil canister removal socket and a 3/8 inch ratchet, remove the oil filter canister by turning counter clockwise, oil will still drip so do it over the pan...
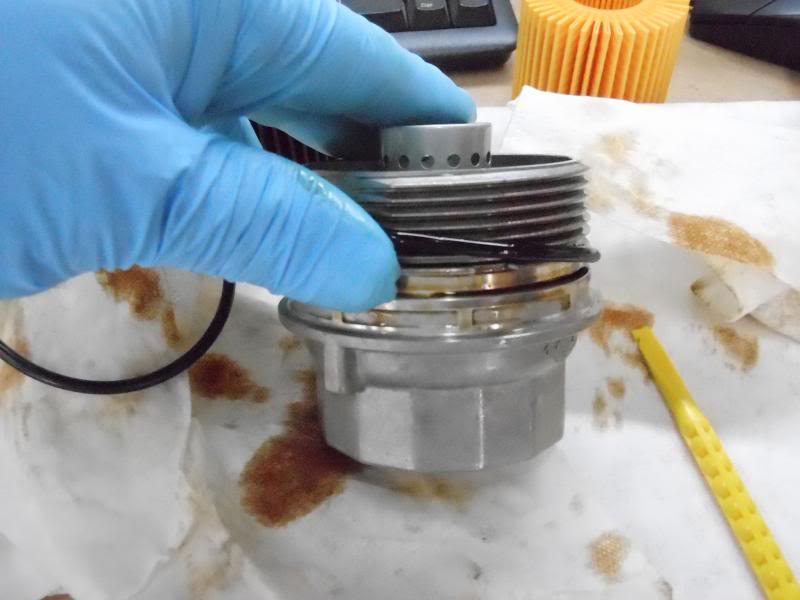
With the oil filter canister removed it is time to change the filter cartridge...
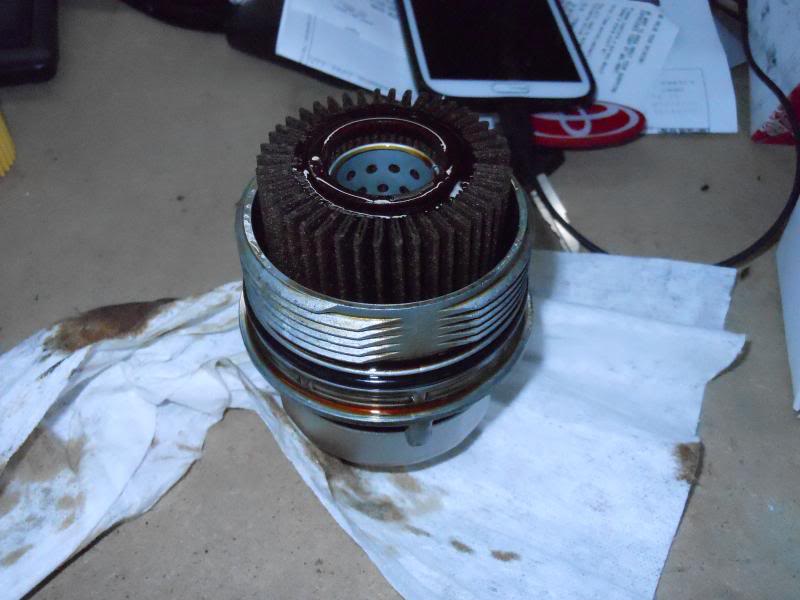
*This part can be messy as there will still be some oil remaining in the filter canister. Be careful not to turn the canister over until you have it above the oil drain pan. Once the canister is empty you can inspect the lower O-ring. It may be attached to the oil drain nipple as mine was...
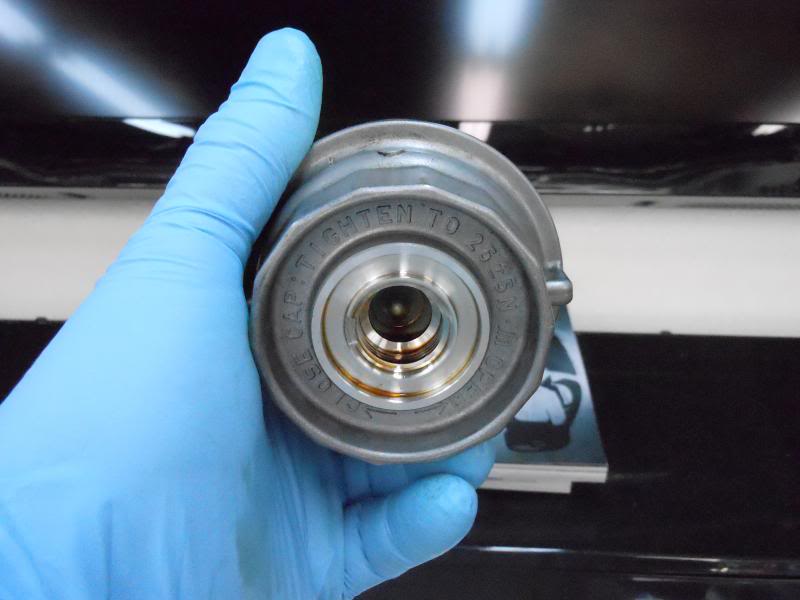
Replace the lower O-ring with the new small one provided with the oil filter cartridge...
Apply a small amount of new oil to the O-ring to prevent it from hardening and re-install the oil canister drain plug using the 3/8 inch drive ratchet...
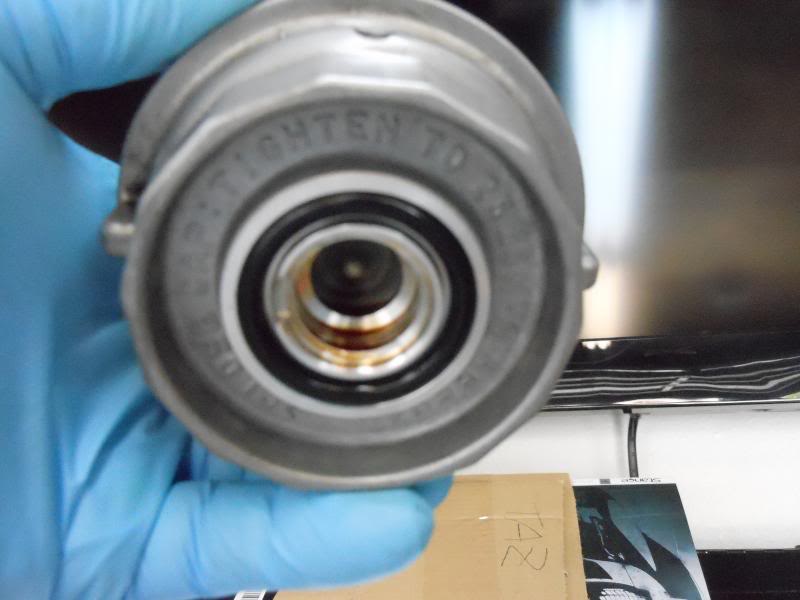
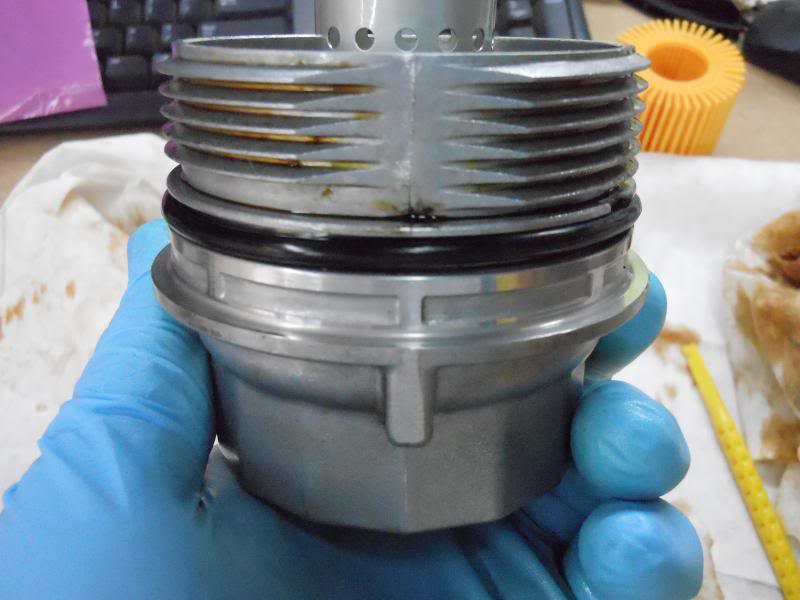
Next remove the large O-ring from the oil filter canister and replace with the new large one included in the oil filter cartridge box...
Apply a small amount of new oil to this O-ring as well...
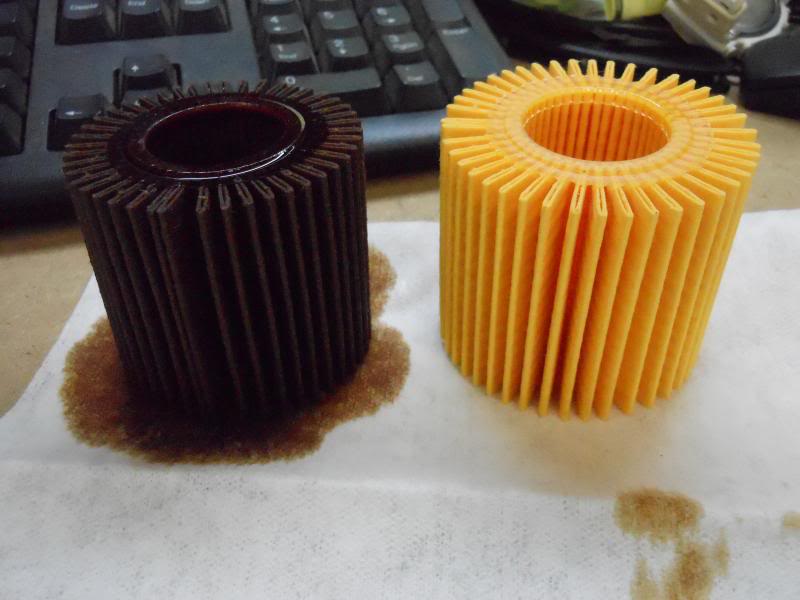
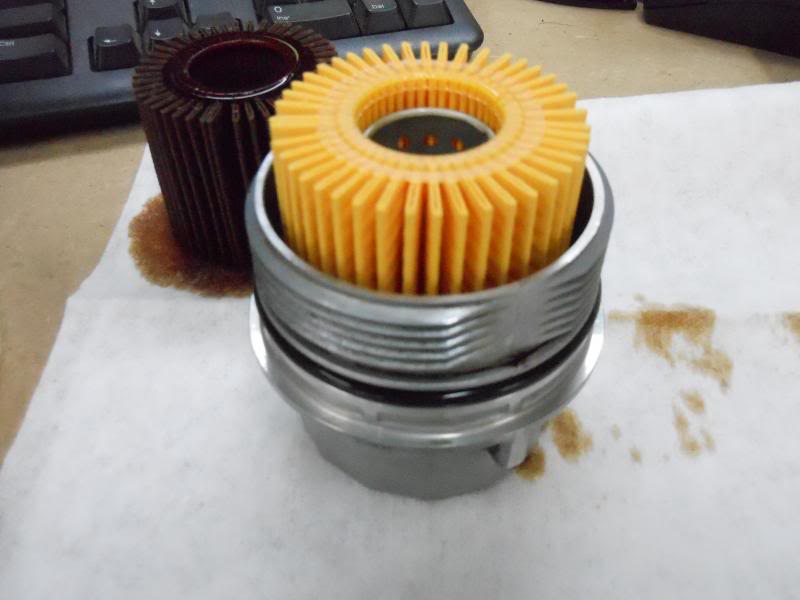
Here you can see the difference between the new filter and the one with 5,000 miles on it...
Place the new filter cartridge in the canister and re-install in the motor...
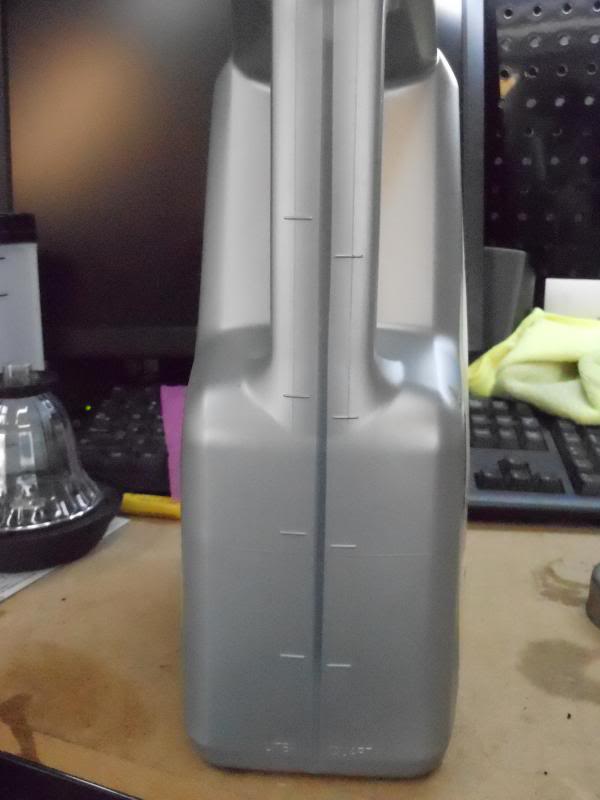
After the canister has been re-installed and all fittings are tight, replace the motor oil. The required amount with a filter change is 3.7 quarts. Use the lines on the side of the jug to determine the correct amount of oil to add...
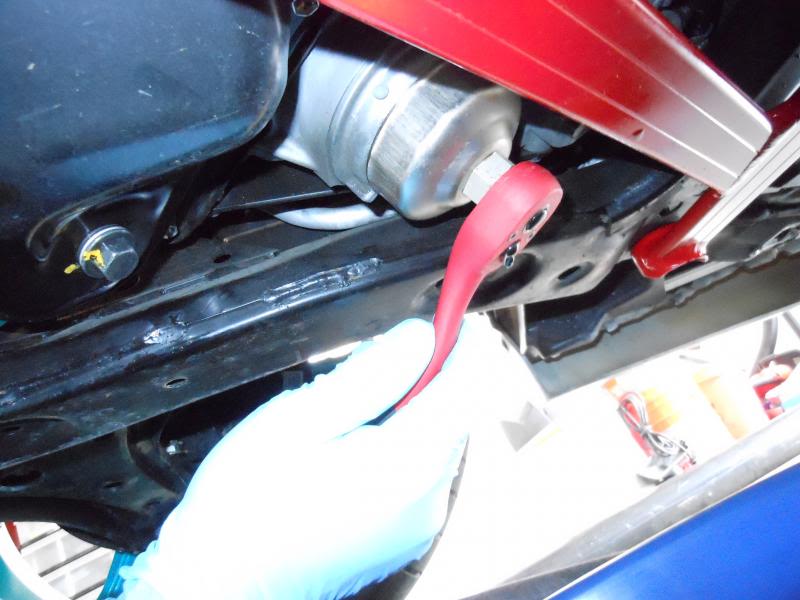
After filling the motor with new oil start the car and check for any oil leaks at the drain plug and cartridge seal. Lower the car or remove from the car ramps.
Locate the oil dipstick near the middle of the motor and remove to check the oil level. The new oil will make it hard to see but you will be able to discern the level well enough...
If the level appears correct and you have no leaks pat yourself on the back and go have a icy cold beverage, you've just changed your own oil...
As with any DIY you will assume all responsibility for any damage inflicted on you or your car. This is a simple guide to changing your oil and filter. Always follow safety practices including but not limited to, wearing eye protection, gloves and protective clothing. Always ensure your car is supported by jack stands or car ramps. Engage the parking brake before lifting your vehicle and leave in place during all activities while the car is off the ground. Dispose of used oil at a designated oil recycling facility.
The recommend oil change intervals suggested by Scion are every 10,000 miles. I prefer to change mine at least every 5,000 miles. The scheduled oil changes are covered by the dealer for the first three or longer depending on which maintenance agreement you purchased with your iQ. To satisfy my warranty requirements I have the scheduled maintenance done at the dealership but the 5,000 mile oil changes I prefer to do myself. The job can be a bit messy but I find it satisfying to do the work myself.
Scion recommends using full synthetic oil with a weight of 0w-20. I use Mobil One Advanced Fuel Economy which I purchase at Walmart for a discounted price. I use the five quart jug and although the iQ doesn't require five quarts the savings over buying individual quarts makes it worthwhile for me. I pay $22 for the five gallon as compared to $25.00 for the individual quarts.
There are aftermarket companies selling oil filter cartridges for the iQ but I prefer to use the Toyota factory brand which I purchase at my dealership for around $8.00. They give me a %20 discount, the normal price is close to $14.00.
The Mobil One synthetic oil...

The Toyota filter...

The contents of the oil filter cartridge replacement...

*Notice the instructions located on the side of the box.
The tools you will need: 1. 14mm wrench, 2. Oil filter canister removal socket, 3. 3/8 inch ratchet, 4. 3/8 drive extension 5. A small pick or screw driver...

The small plastic nipple is used to drain oil from the filter. I use a small piece of plastic hose attached to the nipple to make the oil draining process a little cleaner...


Lift your iQ or drive it up the car ramps as I have. Ensure that your parking brake is set and the transmission is in the Park mode...

Locate the oil filler cap on the passenger side of the motor and remove it...

Here you will see the oil pan drain plug and the oil filter canister...

Using a 3/8 inch ratchet and extension remove the oil canister drain plug...


Insert the oil canister drain nipple and let it drain into your pan...

Using a 14mm wrench, loosen and remove the oil drain plug...

Let the oil drain for a while until it is done dripping...

Using the oil canister removal socket and a 3/8 inch ratchet, remove the oil filter canister by turning counter clockwise, oil will still drip so do it over the pan...


With the oil filter canister removed it is time to change the filter cartridge...

*This part can be messy as there will still be some oil remaining in the filter canister. Be careful not to turn the canister over until you have it above the oil drain pan. Once the canister is empty you can inspect the lower O-ring. It may be attached to the oil drain nipple as mine was...

Replace the lower O-ring with the new small one provided with the oil filter cartridge...

Apply a small amount of new oil to the O-ring to prevent it from hardening and re-install the oil canister drain plug using the 3/8 inch drive ratchet...

Next remove the large O-ring from the oil filter canister and replace with the new large one included in the oil filter cartridge box...

Apply a small amount of new oil to this O-ring as well...

Here you can see the difference between the new filter and the one with 5,000 miles on it...

Place the new filter cartridge in the canister and re-install in the motor...

After the canister has been re-installed and all fittings are tight, replace the motor oil. The required amount with a filter change is 3.7 quarts. Use the lines on the side of the jug to determine the correct amount of oil to add...

After filling the motor with new oil start the car and check for any oil leaks at the drain plug and cartridge seal. Lower the car or remove from the car ramps.
Locate the oil dipstick near the middle of the motor and remove to check the oil level. The new oil will make it hard to see but you will be able to discern the level well enough...


If the level appears correct and you have no leaks pat yourself on the back and go have a icy cold beverage, you've just changed your own oil...


Thread
Thread Starter
Forum
Replies
Last Post
awdmofo
Scion tC 1G Owners Lounge
44
02-08-2016 05:58 AM
mrsocks
Scion xA/xB 1st-Gen Drivetrain & Power
2
01-20-2015 01:29 PM
cid_mcdp
Maintenance & Car Care
4
01-05-2015 02:45 PM
06ScionTc5sp1
Maintenance & Car Care
18
12-21-2014 07:21 AM