crg5990's WrbtC ** Built Motor w/Big Turbo + More
 06-28-2014, 07:18 PM
#1

Whats up guys! Been a member on the site for the better part of 6 years now but never got around to making a thread for my build. I have a ton changing right now so I figured it was as good a time as any to start one.
This first post is probably going to be incredibly long so I'll start off with a summary for anyone that doesn't want to read the whole thing haha
Here's a list of the current mods
Engine/Drivetrain
- pTuning Fully Built Longblock (more on that further in)
- Manual Transmission Swap
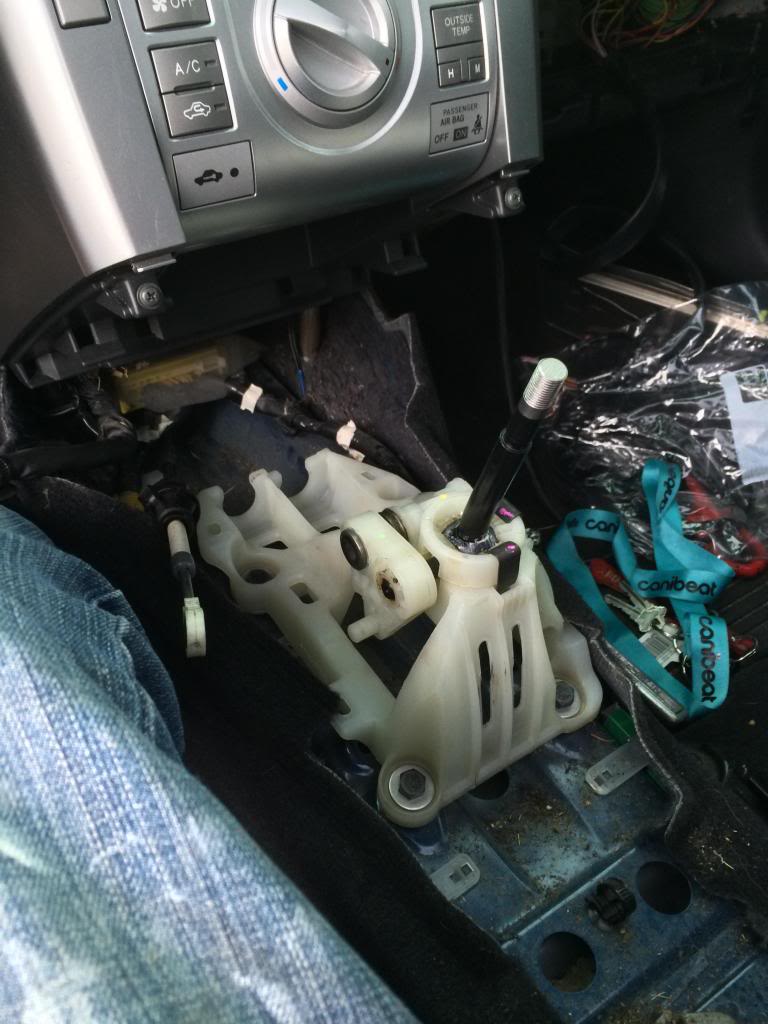
- Doc I Shortshifter
- TWM solid aluminum shift cage bushings
- TWM solid shift linkage bushings
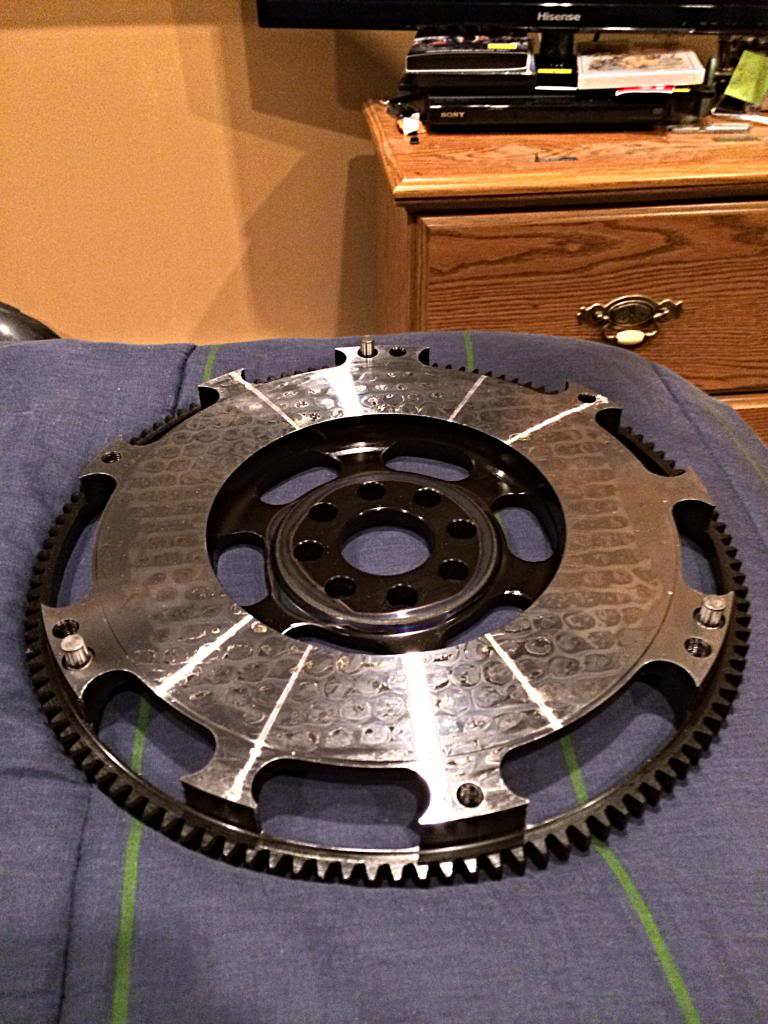
- Clutch Masters Lightweight Flywheel
- ARP Flywheel Bolts
- ACT Clutch 6 puck sprung race disk with Xtreme pressure plate
- Quaife LSD
Suspension
- BC Racing Br Extreme Low Coilovers With Custom Spring Rates
- H&R Rear Sway Bar
- Greddy Front Strut Bar
- H&R Front Camber Bolts
- Hotchkis Adjustable Rear Camber Arms
Wheels/Tires
- CCW Lm5 17x10f 3″ Lips, 17x11r 5″ Lips
- Falken Fk452 (225/35/17 Front, 235/40/17 Rear)
Interior
- Shaved and Tucked Engine Bay
- Shaved Valve Cover
- NRG short hub and 2.5 Quick release
- Grip Royal, Royal Woodie Steering Wheel
- A-pillar Triple Gauge Pod With Glowshift Black 7 Series Boost, Oil Pressure, and Afr
- Wood Floor Trunk And Rear Seat Foot Mats
Exterior
- Full Repaint In 2013 World Rally Blue Pearl (1 of 1)
- Nia Fiberglass Eyelids
- VRD Grills
- Shaved Washer Fluid Nozzles
- Shaved Passenger Door Lock
- Custom Widened and Flared Rear Fenders
- Shaved Radio Antenna
- 5 Axis Front Lip
- OEM Scion Ground Effects Sideskirts
- Stoptech Slotted Rotors With Hawk Hps Pads
- Dezod Stainless Steel Braided Brake Lines
- VRD Full-third Brakelight
- Weather-tech Rain Guards
- Badgeless Rear Hatch
- RS1 Rear Lip
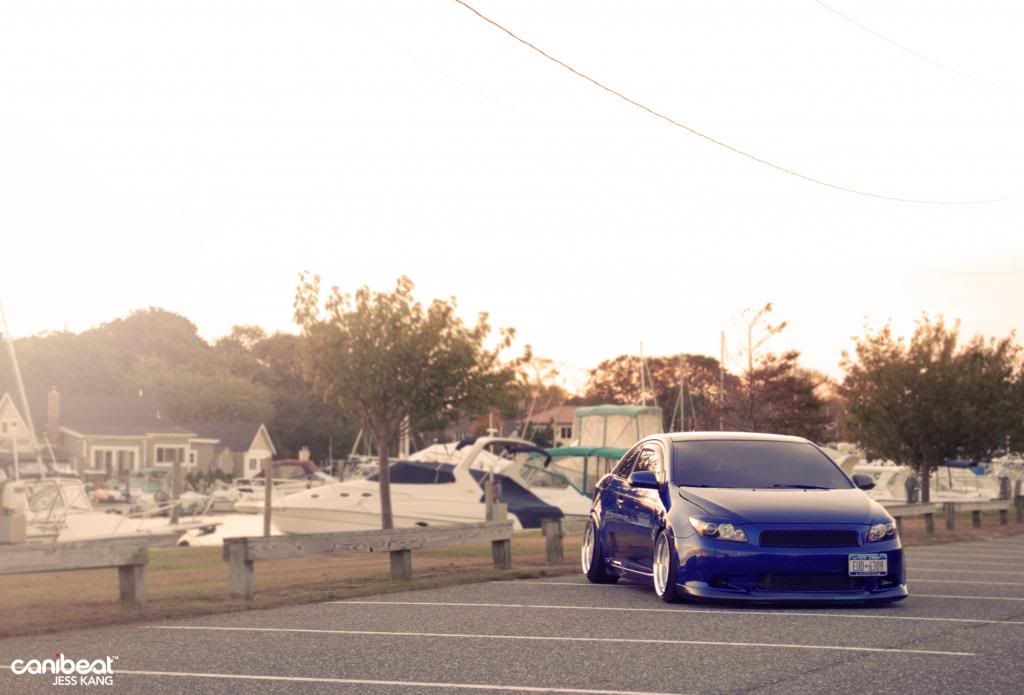
Here's a side by side of when i got her, and now. Sorry it looks like crap, I made it for Instagram lol
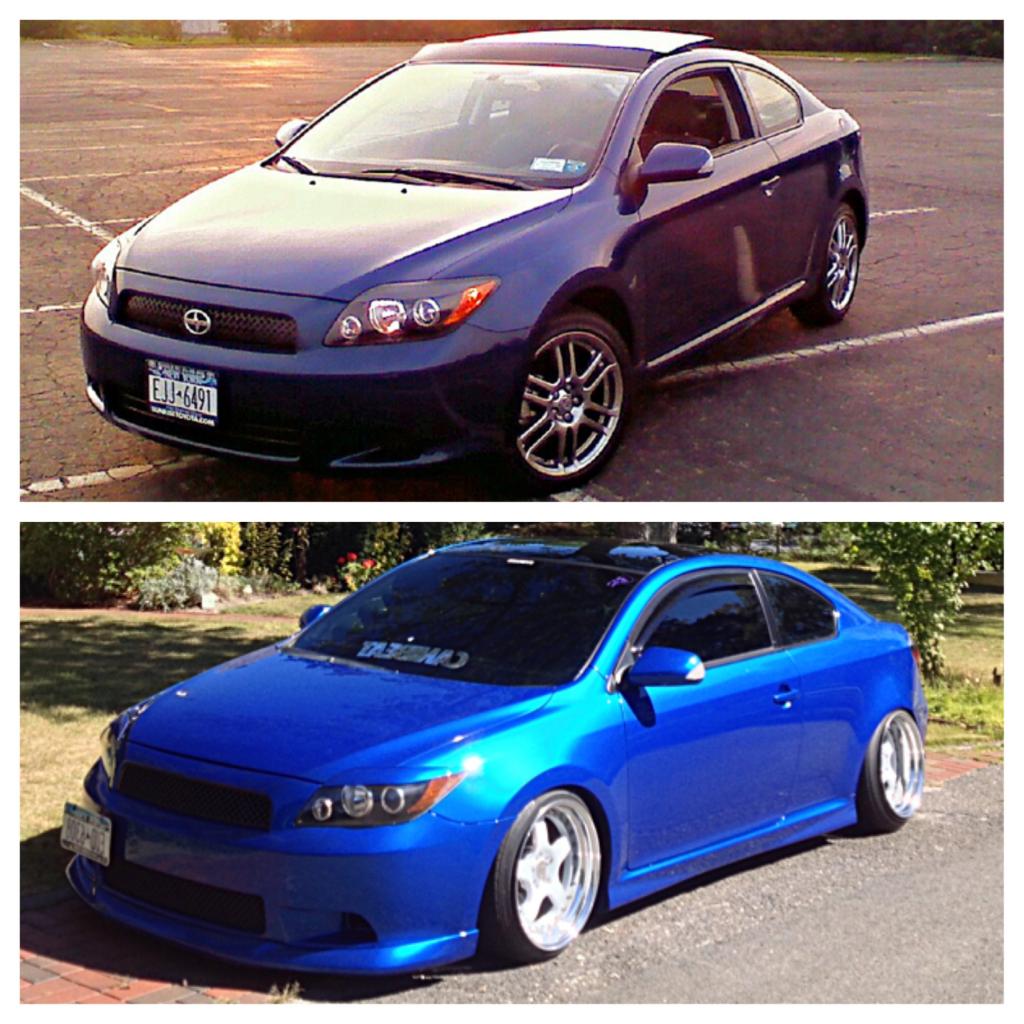
So, I bought the car brand new in June '08 from a local dealer and it stayed essentially stock for the next 2 years. I did the typical tinted taillights and painted stockies,
got a set of Racelands for the cheap low and a Skunk 2 Catback from a friend that was parting out. That got me through till around April/May of 2010 when I got a deal on a Turbonetics v2 kit.
Installed that in my friends driveway and was finally boosting :D
Unfortunately that didn't last very long.
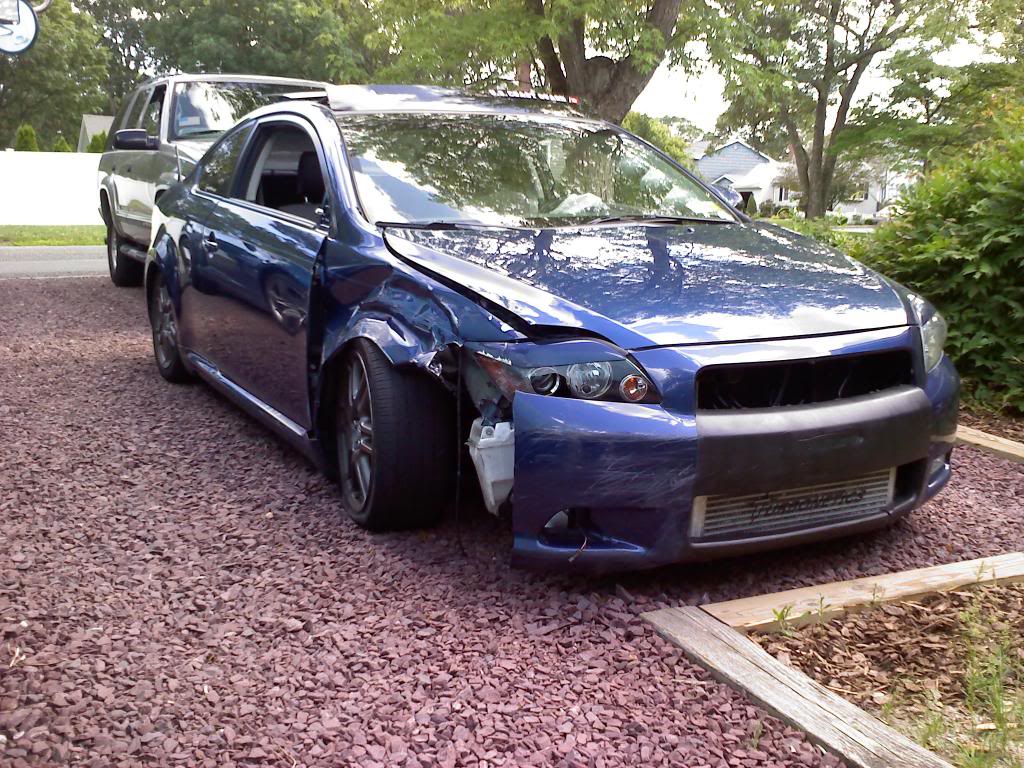
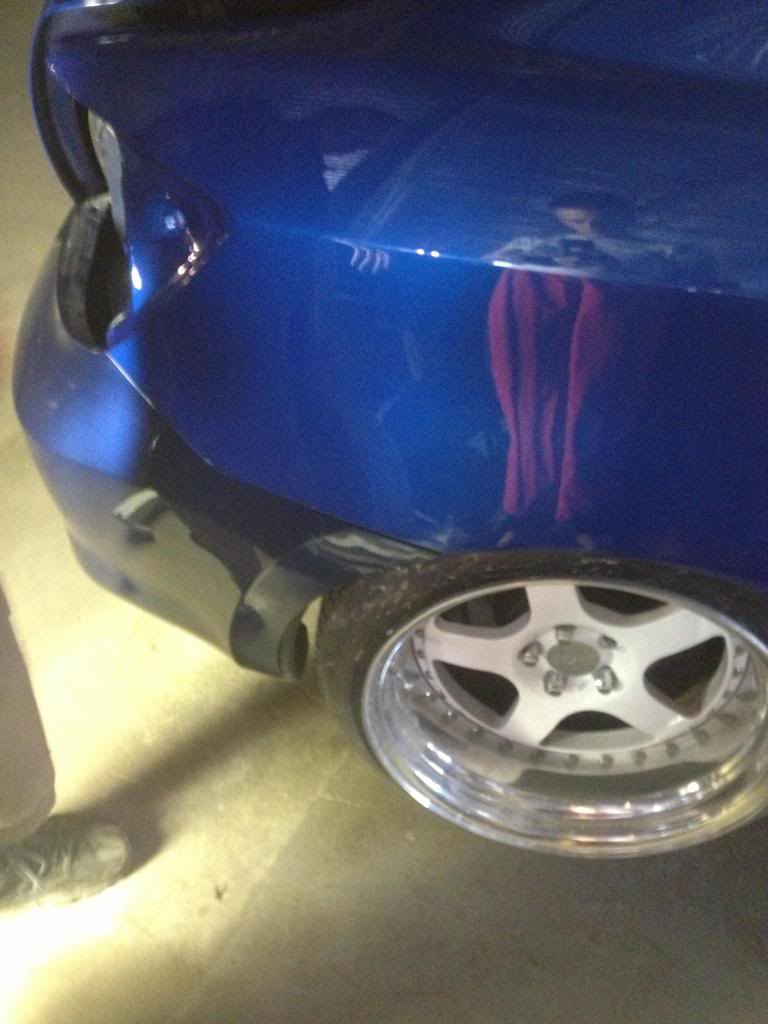
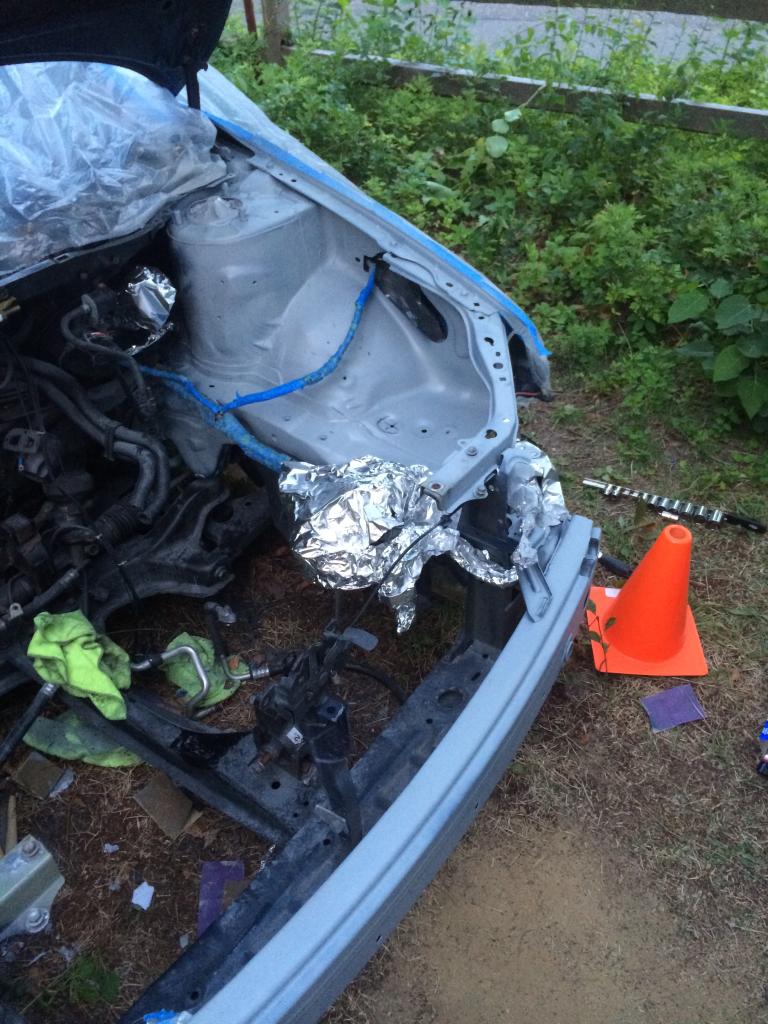
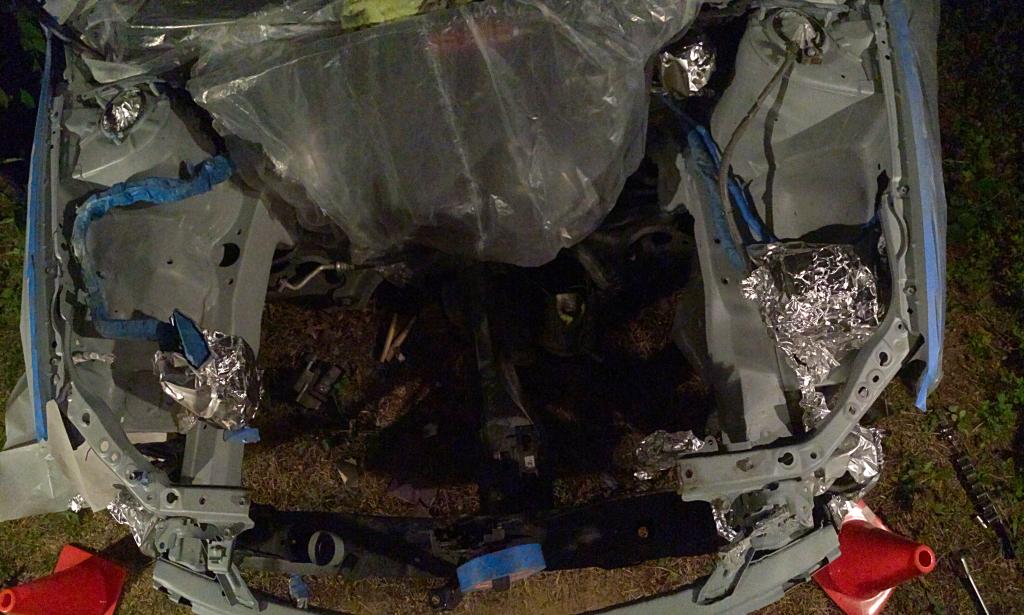
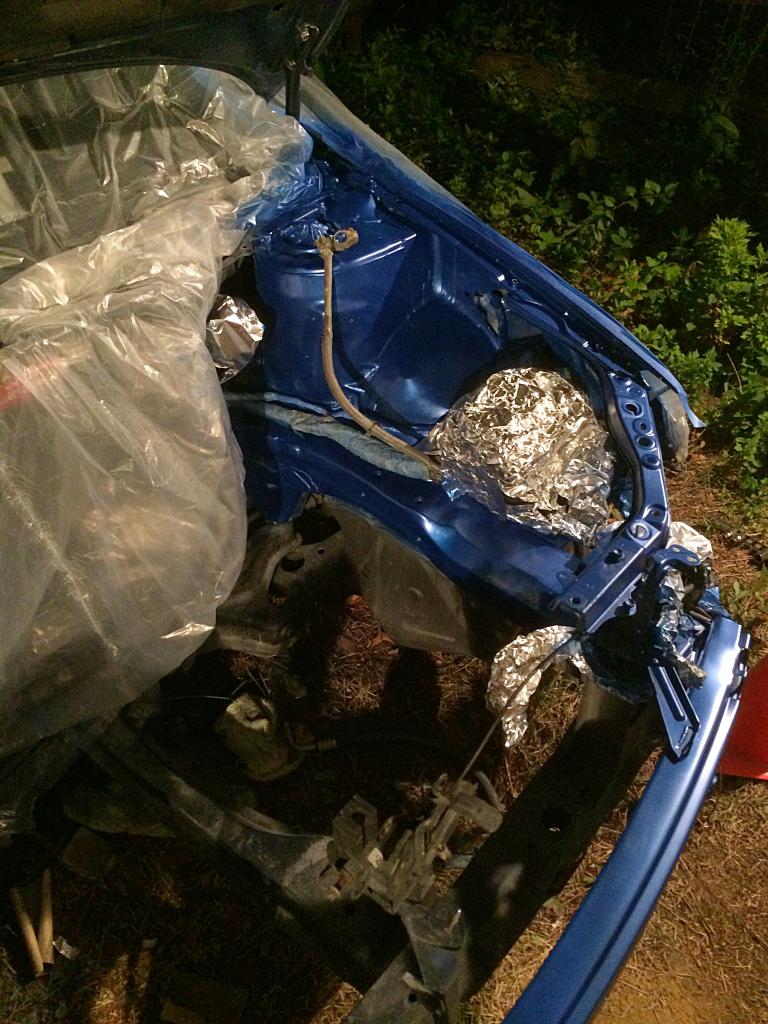
Fell asleep at the wheel late one night in July 2010 and hit a parked car at about 35/40. Bent the frame going down the whole passenger side to the point that the trunk didn't even line up with the rear quarters. Not quite sure how it all worked out, since I believe my insurance company wanted to total it, but I was able to keep her and insurance gave me a check for a few grand, and I payed the rest out of pocket to fix her up. I couldn't part with it just yet. Long story short a mutual friend that owned a body shop straightened the frame and after that it was really just cosmetic (new fender, hood, wheel, axle, and other bs)
Once I got her back it stayed boosted on stocks and Racelands for another 2 years until May of 2012 when I decided it was time for wheels. I had gotten a new job and found myself with the ability to be able to do things to the car I had been wanting to for quite a long time.
So I got a set of CCW Lm5's built to the specs I wanted, and received those 4 months later.

Still rockin Racelands at this point until I blew out a fender in NYC and then decided I needed to up my suspension game and got a set of BC extreme lows; also picked up a 5 axis front lip, Hotchkis rear camber arms, and Ingalls camber bolts for the front.
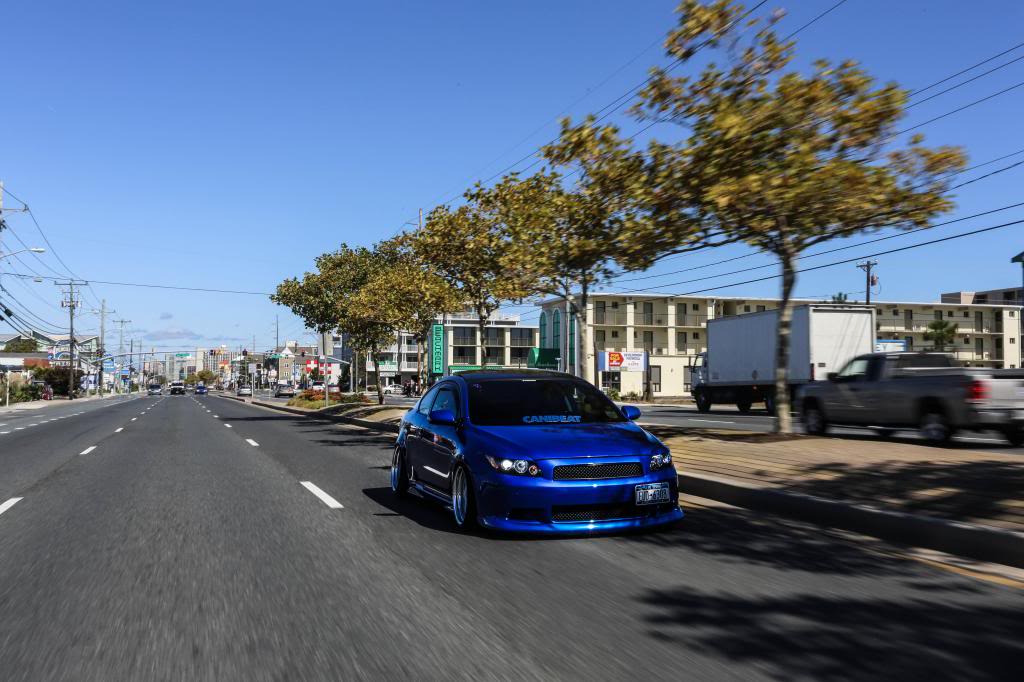
Along with all of that came an offer that I had only been dreaming of getting up until that point. My amazing friend and photographer Jess asked if I'd like a feature for Canibeat and I immediately said I'd love one and we set up a shoot.
That Winter took a beating on the car between the salt on the roads and it was unusually windy, so tons of shopping carts wanted to be one with my paint, and I lost the lip. When spring rolled around I wanted to fix the dings and chips, get a new bumper that ate a curb, and fix the fender that had been eaten by my wheel in the city. Didn't go back to the shop that had fixed my car after the accident since their clear coat had started coming off within the year after they did it. Found another local shop that had done work for several older show cars that were mint and decided to have them do the respray and body work. My original plan of just respraying the same color with the dents fixed turned into a 4 month project of widening the rear quarters, shaving the antenna and bug spray nozzles, and changing the color to 2013 World Rally Blue Pearl.
Here's some shots of the changes.
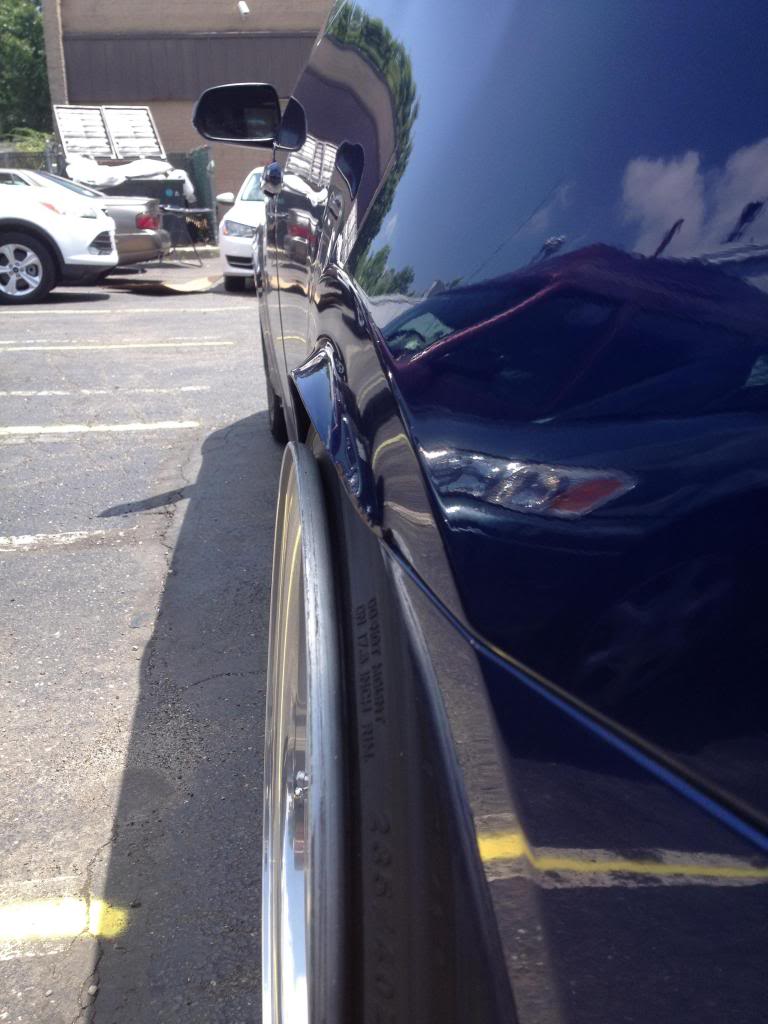
Fenders

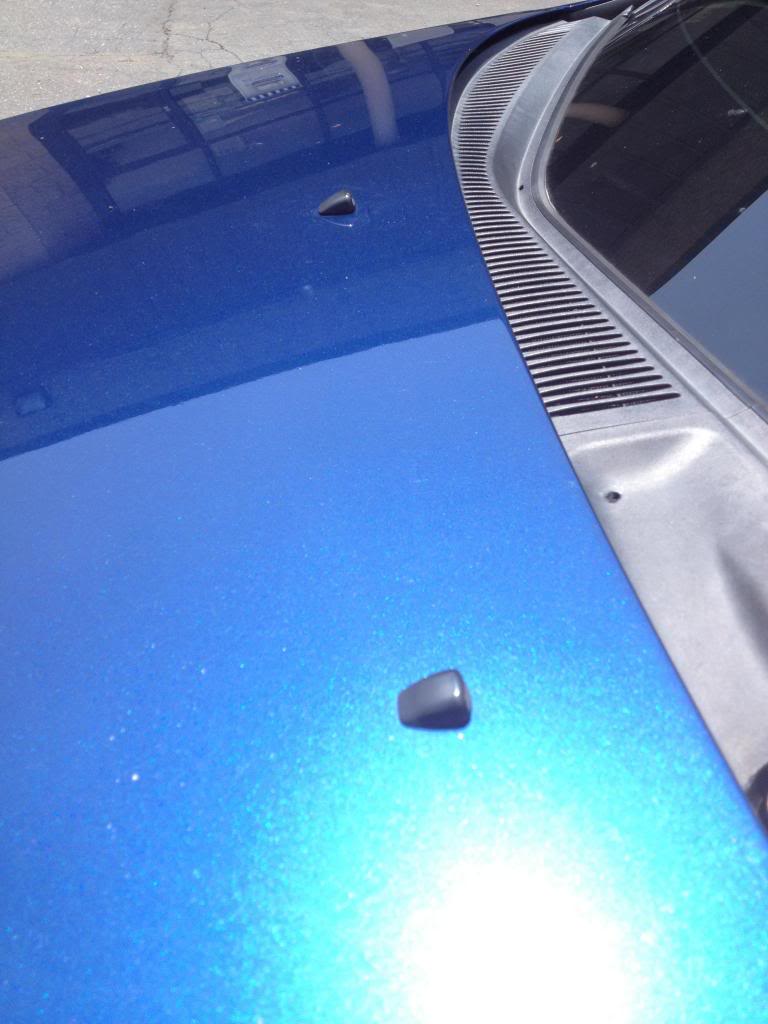
Nozzles
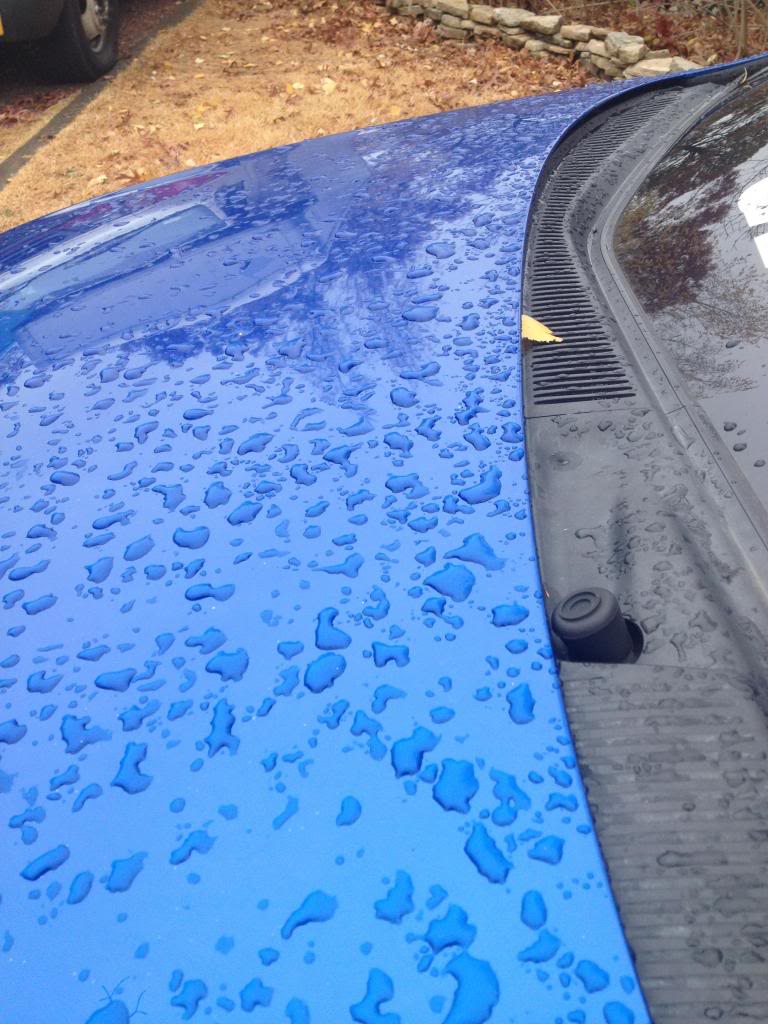
Difference in color between the Blue Ribbon Metallic and WRB
Got her back with an all new lip kit, and rushed to get the wheels back on, interior reassembled, and coilovers set, so that I could get down to H20i 2013.
With my luck, I made the trip down and back fine but a month later, the 2AZ decided to eat 2.5 quarts of oil and spin a rod bearing. Sick. Since then the car has been sitting,
sold off the Turbonetics kit and I'm rebuilding her with a full built head and block from pTuning, a pTuning turbo kit with gtx3582, and converting to manual.
More on that in the next post since this is already long enough haha
This first post is probably going to be incredibly long so I'll start off with a summary for anyone that doesn't want to read the whole thing haha
Here's a list of the current mods
Engine/Drivetrain
- pTuning Fully Built Longblock (more on that further in)
- Manual Transmission Swap
- Doc I Shortshifter
- TWM solid aluminum shift cage bushings
- TWM solid shift linkage bushings
- Clutch Masters Lightweight Flywheel
- ARP Flywheel Bolts
- ACT Clutch 6 puck sprung race disk with Xtreme pressure plate
- Quaife LSD
Suspension
- BC Racing Br Extreme Low Coilovers With Custom Spring Rates
- H&R Rear Sway Bar
- Greddy Front Strut Bar
- H&R Front Camber Bolts
- Hotchkis Adjustable Rear Camber Arms
Wheels/Tires
- CCW Lm5 17x10f 3″ Lips, 17x11r 5″ Lips
- Falken Fk452 (225/35/17 Front, 235/40/17 Rear)
Interior
- Shaved and Tucked Engine Bay
- Shaved Valve Cover
- NRG short hub and 2.5 Quick release
- Grip Royal, Royal Woodie Steering Wheel
- A-pillar Triple Gauge Pod With Glowshift Black 7 Series Boost, Oil Pressure, and Afr
- Wood Floor Trunk And Rear Seat Foot Mats
Exterior
- Full Repaint In 2013 World Rally Blue Pearl (1 of 1)
- Nia Fiberglass Eyelids
- VRD Grills
- Shaved Washer Fluid Nozzles
- Shaved Passenger Door Lock
- Custom Widened and Flared Rear Fenders
- Shaved Radio Antenna
- 5 Axis Front Lip
- OEM Scion Ground Effects Sideskirts
- Stoptech Slotted Rotors With Hawk Hps Pads
- Dezod Stainless Steel Braided Brake Lines
- VRD Full-third Brakelight
- Weather-tech Rain Guards
- Badgeless Rear Hatch
- RS1 Rear Lip
Here's a side by side of when i got her, and now. Sorry it looks like crap, I made it for Instagram lol
So, I bought the car brand new in June '08 from a local dealer and it stayed essentially stock for the next 2 years. I did the typical tinted taillights and painted stockies,
got a set of Racelands for the cheap low and a Skunk 2 Catback from a friend that was parting out. That got me through till around April/May of 2010 when I got a deal on a Turbonetics v2 kit.
Installed that in my friends driveway and was finally boosting :D
Unfortunately that didn't last very long.
Fell asleep at the wheel late one night in July 2010 and hit a parked car at about 35/40. Bent the frame going down the whole passenger side to the point that the trunk didn't even line up with the rear quarters. Not quite sure how it all worked out, since I believe my insurance company wanted to total it, but I was able to keep her and insurance gave me a check for a few grand, and I payed the rest out of pocket to fix her up. I couldn't part with it just yet. Long story short a mutual friend that owned a body shop straightened the frame and after that it was really just cosmetic (new fender, hood, wheel, axle, and other bs)
Once I got her back it stayed boosted on stocks and Racelands for another 2 years until May of 2012 when I decided it was time for wheels. I had gotten a new job and found myself with the ability to be able to do things to the car I had been wanting to for quite a long time.
So I got a set of CCW Lm5's built to the specs I wanted, and received those 4 months later.
Still rockin Racelands at this point until I blew out a fender in NYC and then decided I needed to up my suspension game and got a set of BC extreme lows; also picked up a 5 axis front lip, Hotchkis rear camber arms, and Ingalls camber bolts for the front.
Along with all of that came an offer that I had only been dreaming of getting up until that point. My amazing friend and photographer Jess asked if I'd like a feature for Canibeat and I immediately said I'd love one and we set up a shoot.
That Winter took a beating on the car between the salt on the roads and it was unusually windy, so tons of shopping carts wanted to be one with my paint, and I lost the lip. When spring rolled around I wanted to fix the dings and chips, get a new bumper that ate a curb, and fix the fender that had been eaten by my wheel in the city. Didn't go back to the shop that had fixed my car after the accident since their clear coat had started coming off within the year after they did it. Found another local shop that had done work for several older show cars that were mint and decided to have them do the respray and body work. My original plan of just respraying the same color with the dents fixed turned into a 4 month project of widening the rear quarters, shaving the antenna and bug spray nozzles, and changing the color to 2013 World Rally Blue Pearl.
Here's some shots of the changes.
Fenders
Nozzles
Difference in color between the Blue Ribbon Metallic and WRB
Got her back with an all new lip kit, and rushed to get the wheels back on, interior reassembled, and coilovers set, so that I could get down to H20i 2013.
With my luck, I made the trip down and back fine but a month later, the 2AZ decided to eat 2.5 quarts of oil and spin a rod bearing. Sick. Since then the car has been sitting,
sold off the Turbonetics kit and I'm rebuilding her with a full built head and block from pTuning, a pTuning turbo kit with gtx3582, and converting to manual.
More on that in the next post since this is already long enough haha
Last edited by MR_LUV; 07-04-2018 at 07:55 PM.
 06-28-2014, 08:06 PM
#2
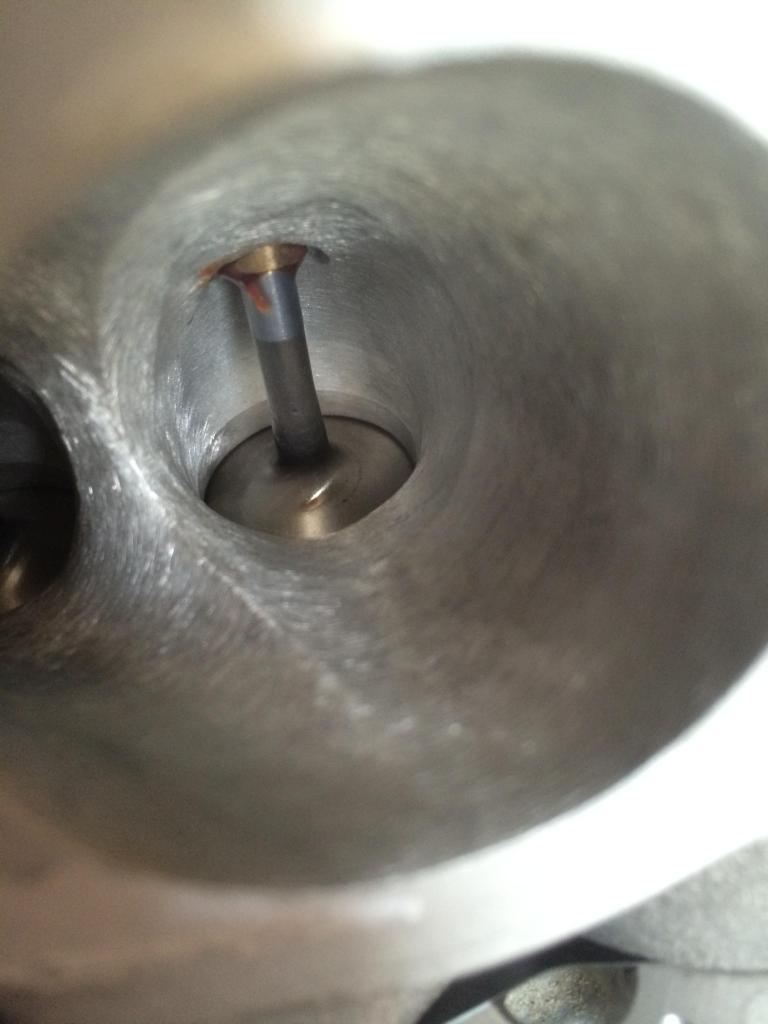
Alright! So the motor build and manual swap all started around October of 2013 when the bearing spun and ruined the motor. Turns out that when I originally heard the tapping (that I thought was the timing chain), the shop I had replace the timing components didn't time it correctly and left the exhaust cam off by a tooth. Not sure how much that effected anything but that cams looked great
jk
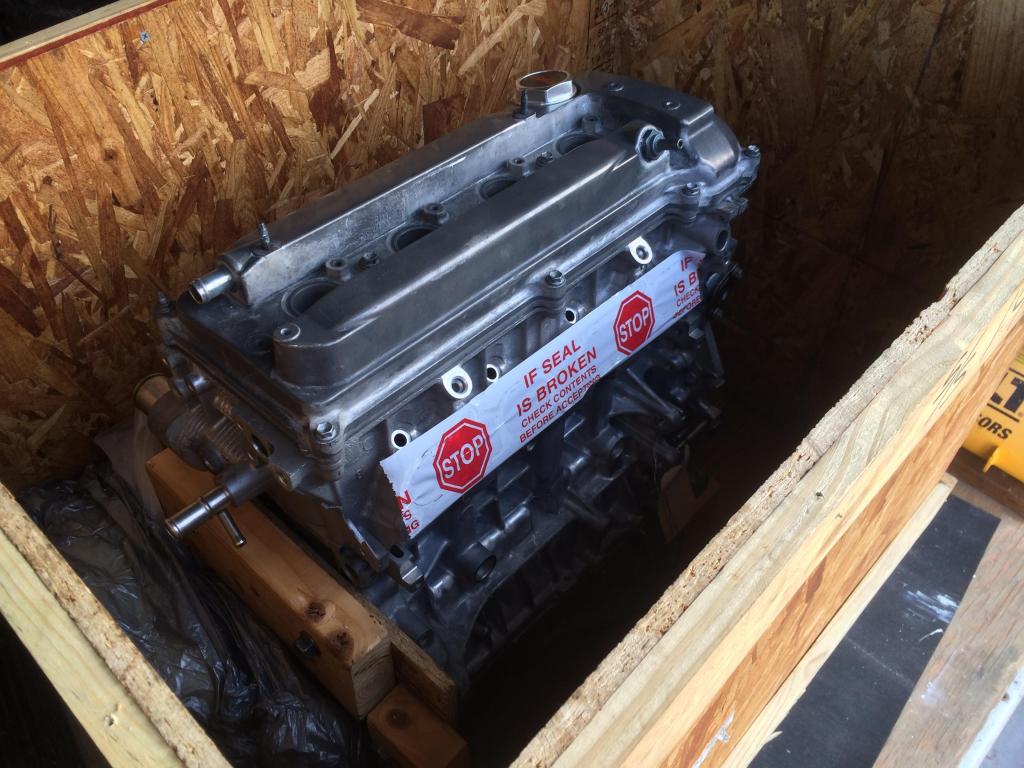
Pulled everything apart and since I was that far into it, I decided to go all out. Scrapped everything but a few bolts and connectors and the accessories, and then got in contact with pTuning for a motor. Ended up with this about 3 1/2 months later
- Acl Bearings
- CP Pistons 9.0:1cr
- Manley Rods
- ARP Main Studs
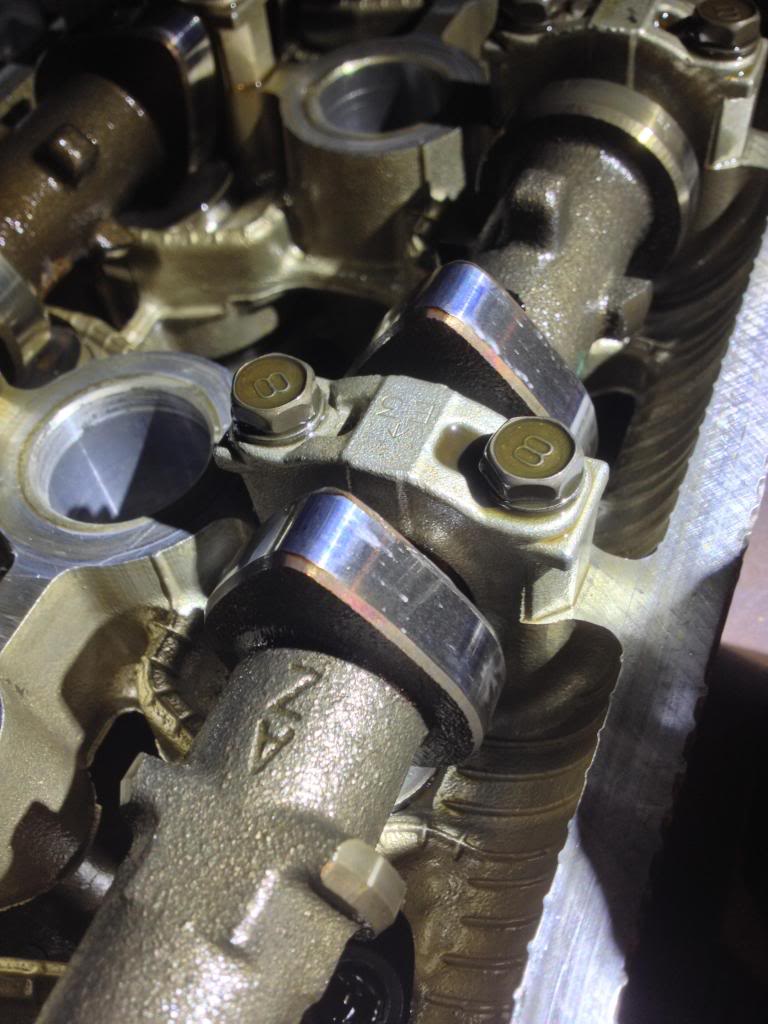
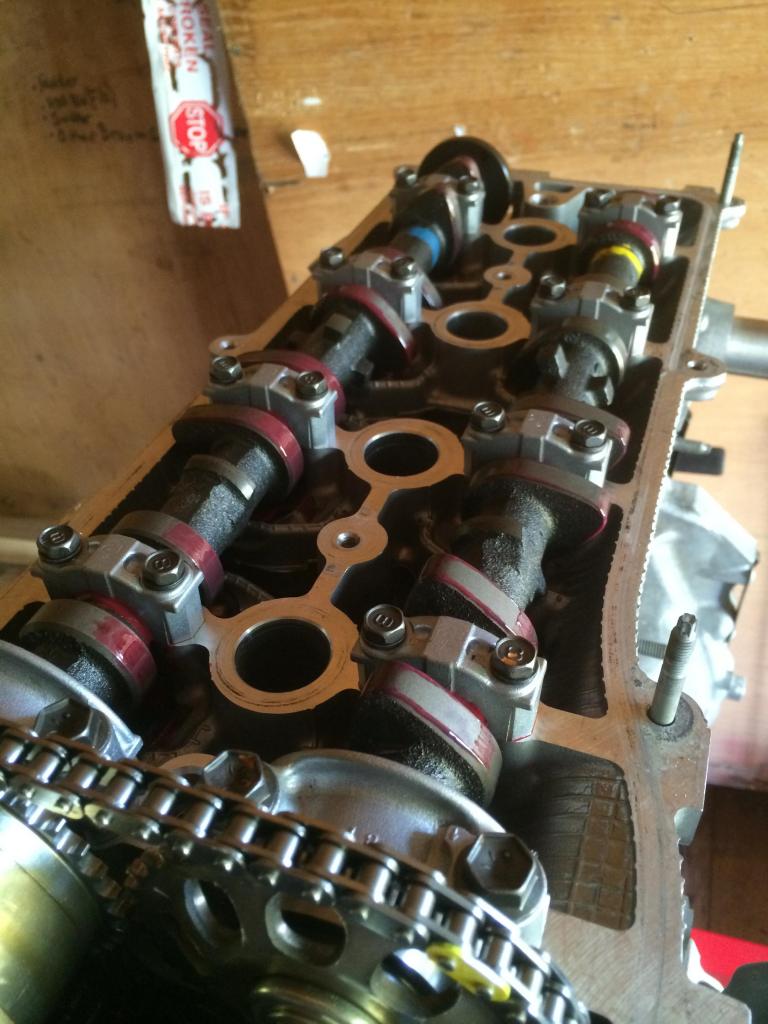
- Brian Crower Stage 2 Turbo Cams
- Supertech titanium valves
- Supertech springs/retainers
- ARP Head Studs
- PnP Head
Valves and PnP
BC cams (and correct timing! hah)
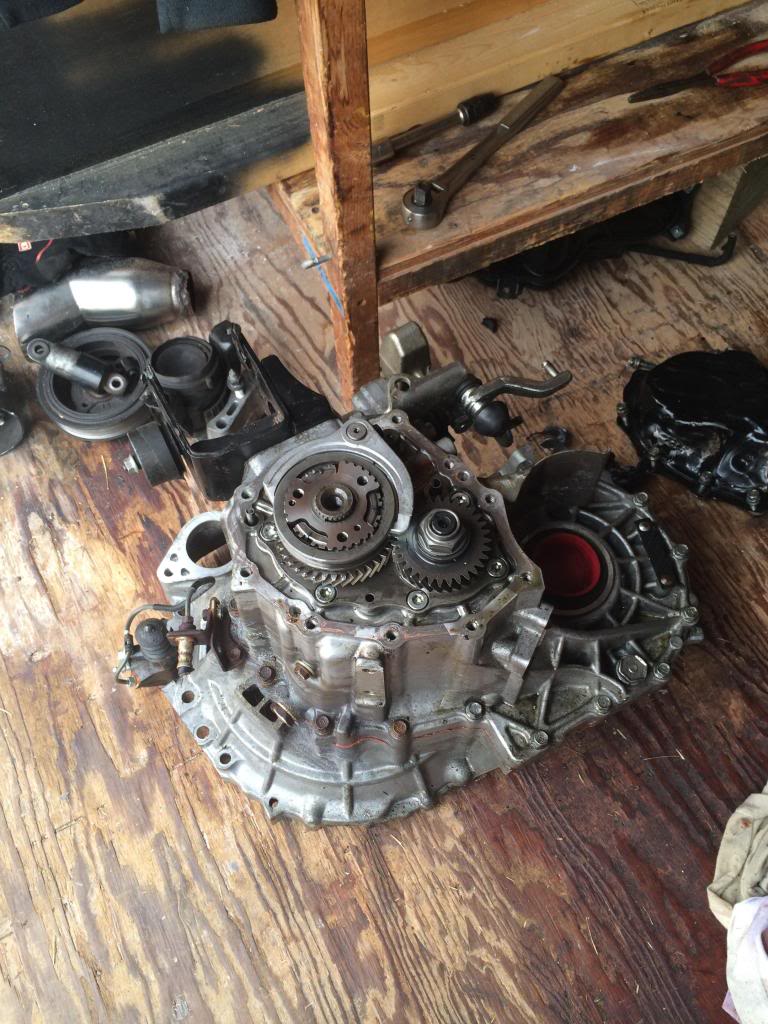
During the wait for the motor I picked up a used E351 trans, the manual brake pedal, clutch pedal, slave cylinder, clutch fork, brake fluid reservoir for the manuals, Doc I shortshifter, ARP flywheel bolts, and clutchmasters flywheel thats a whole whopping 8 lbs lol
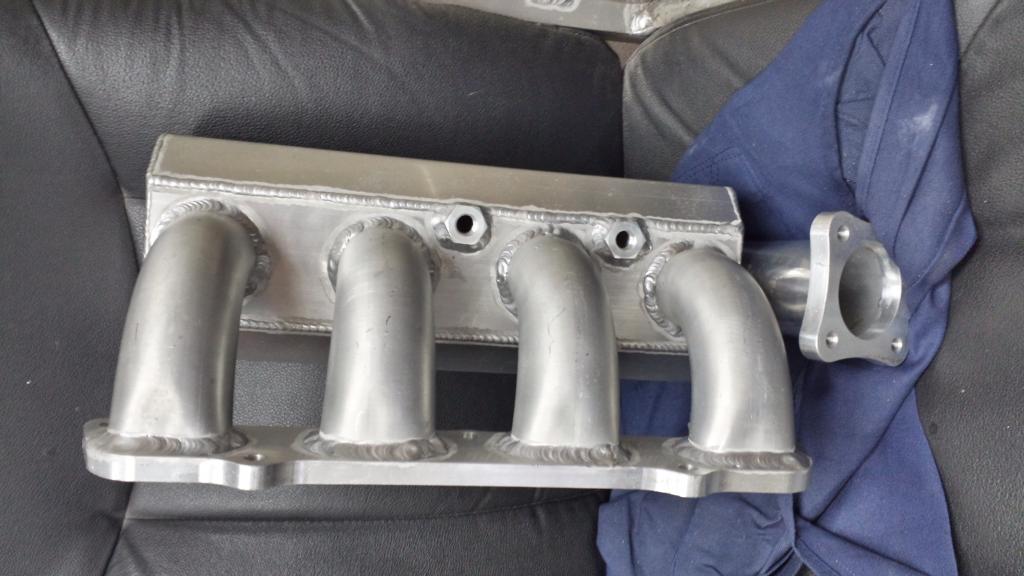
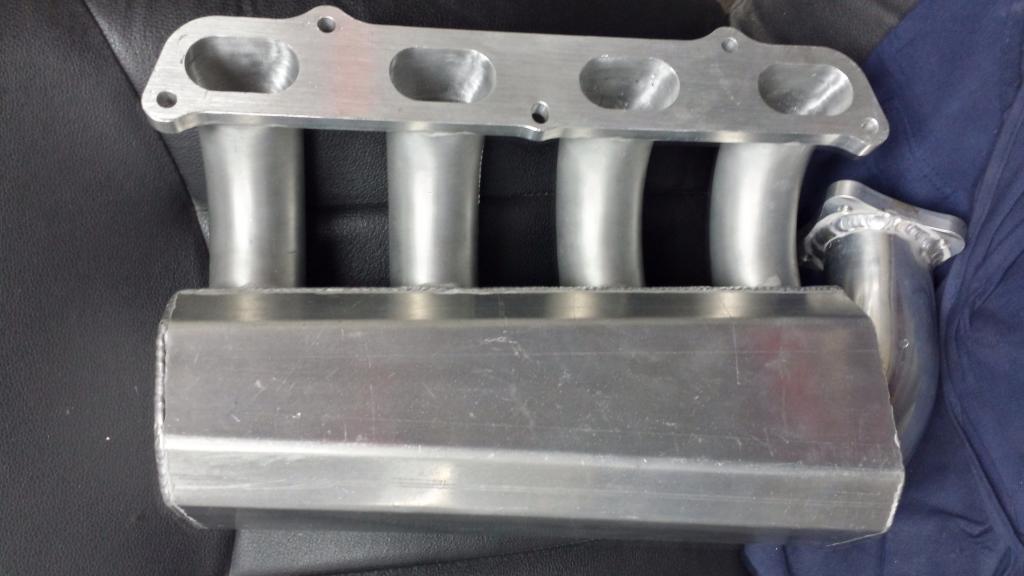
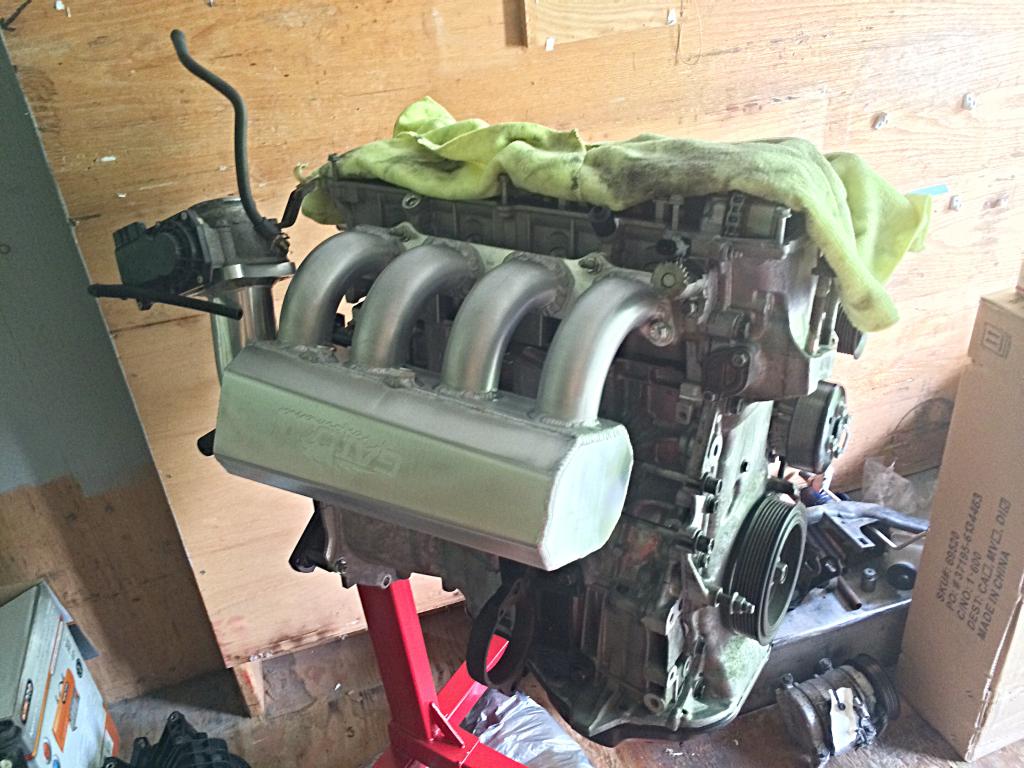
Also managed to source a shop from Florida for this beautious aluminum intake mani with a huge 4.5 liter plenum and 2.25" diameter runners :D
The company I got the trans from dicked me and sent me a damaged unit but it's not too bad. Needs a new 5th(?) gear and fork slider ring thing (its the gear and ring on the left in the pic). Not quite sure which gear and parts I need yet but I'll figure it out soon.
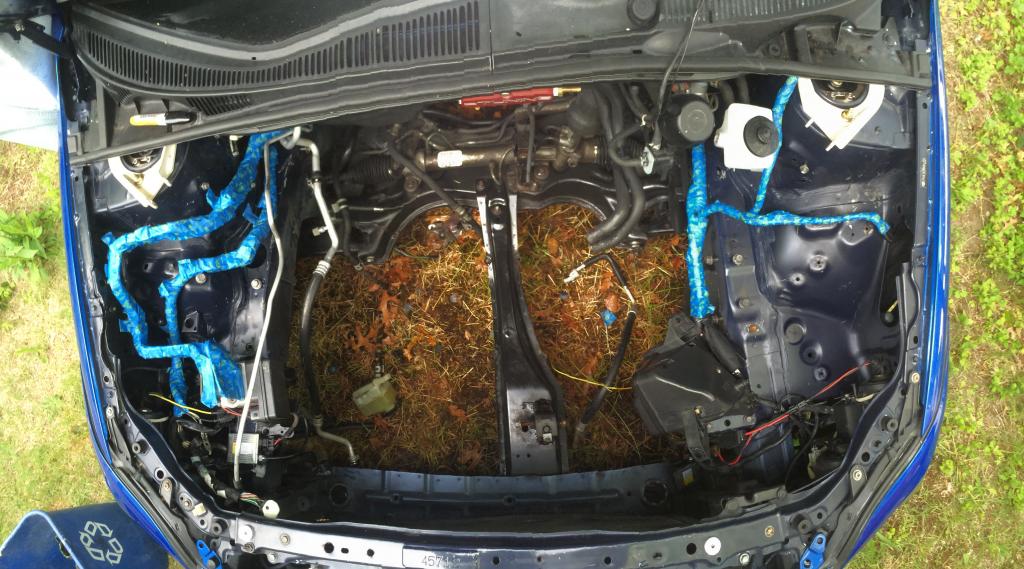
Currently working on doing a mild wire tuck and bay shave, and going to repaint the bay in wrb as well. Never had that done during the original respray since it would have been way too much work at the time. Now I have an excuse lol
That's pretty much what I'm up too for now, still have to get my hands on a standalone, injectors, fuel return system, an engine harness for the manual, an LSD, axles, the turbo kit, motor mounts, shift cables, and decide if I want to delete my a/c or not. I'll throw in more pics of the body work and build progress later on, this was alot of typing haha
jk
Pulled everything apart and since I was that far into it, I decided to go all out. Scrapped everything but a few bolts and connectors and the accessories, and then got in contact with pTuning for a motor. Ended up with this about 3 1/2 months later
- Acl Bearings
- CP Pistons 9.0:1cr
- Manley Rods
- ARP Main Studs
- Brian Crower Stage 2 Turbo Cams
- Supertech titanium valves
- Supertech springs/retainers
- ARP Head Studs
- PnP Head
Valves and PnP
BC cams (and correct timing! hah)
During the wait for the motor I picked up a used E351 trans, the manual brake pedal, clutch pedal, slave cylinder, clutch fork, brake fluid reservoir for the manuals, Doc I shortshifter, ARP flywheel bolts, and clutchmasters flywheel thats a whole whopping 8 lbs lol
Also managed to source a shop from Florida for this beautious aluminum intake mani with a huge 4.5 liter plenum and 2.25" diameter runners :D
The company I got the trans from dicked me and sent me a damaged unit but it's not too bad. Needs a new 5th(?) gear and fork slider ring thing (its the gear and ring on the left in the pic). Not quite sure which gear and parts I need yet but I'll figure it out soon.
Currently working on doing a mild wire tuck and bay shave, and going to repaint the bay in wrb as well. Never had that done during the original respray since it would have been way too much work at the time. Now I have an excuse lol
That's pretty much what I'm up too for now, still have to get my hands on a standalone, injectors, fuel return system, an engine harness for the manual, an LSD, axles, the turbo kit, motor mounts, shift cables, and decide if I want to delete my a/c or not. I'll throw in more pics of the body work and build progress later on, this was alot of typing haha
Last edited by crg5990; 07-27-2014 at 02:28 AM.
 07-03-2014, 06:34 AM
#5
Thanks guys, and yeah the motor was quite a bit, and honestly a lot more then I thought it was going to be lol
Little update from today, got the valve cover mostly shaved and filled, and started shaving the bay as well. Couldn't grab pics of the bay tonight since it was too dark to get any decent pics, but here's the VC before/during/after
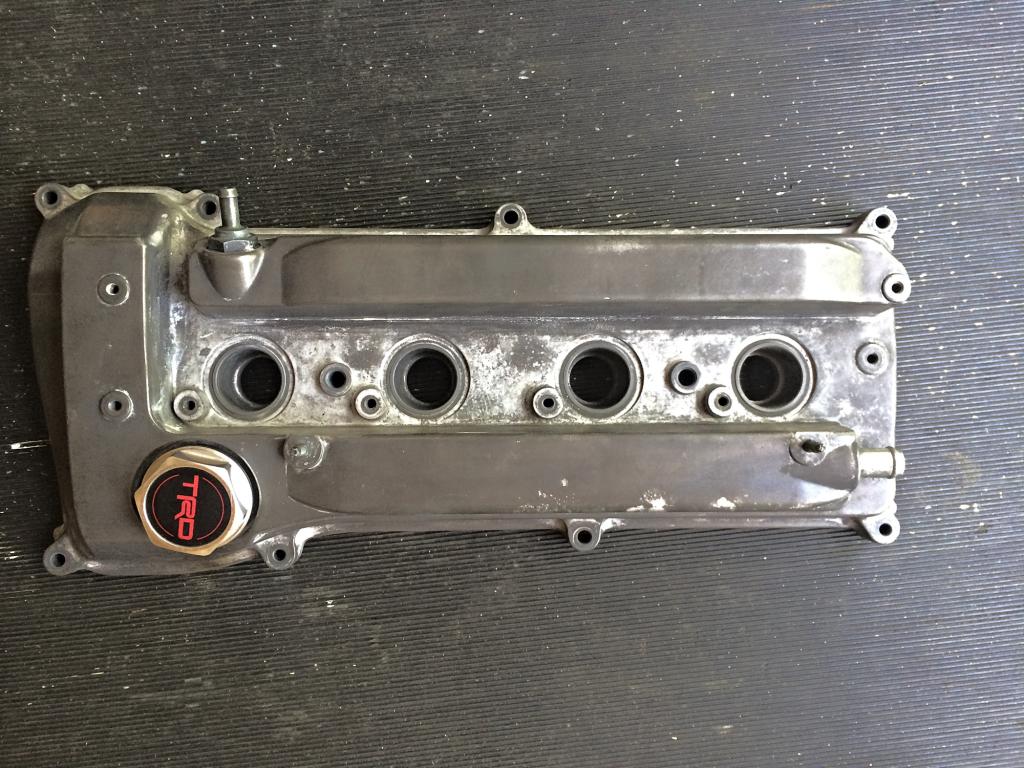
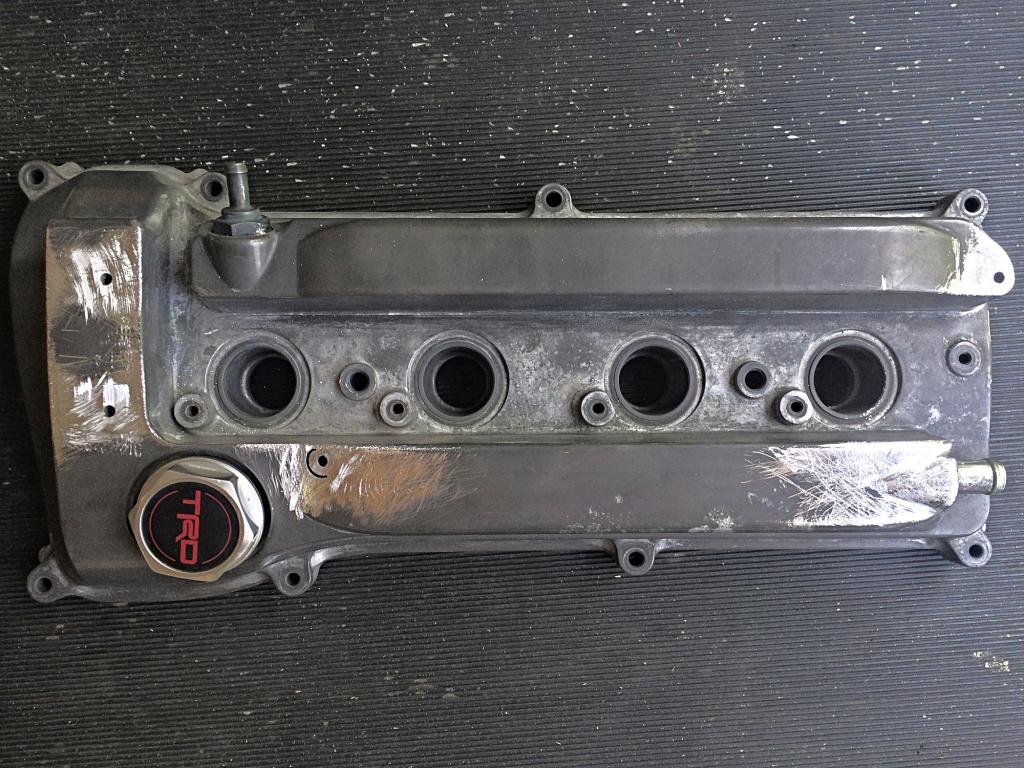
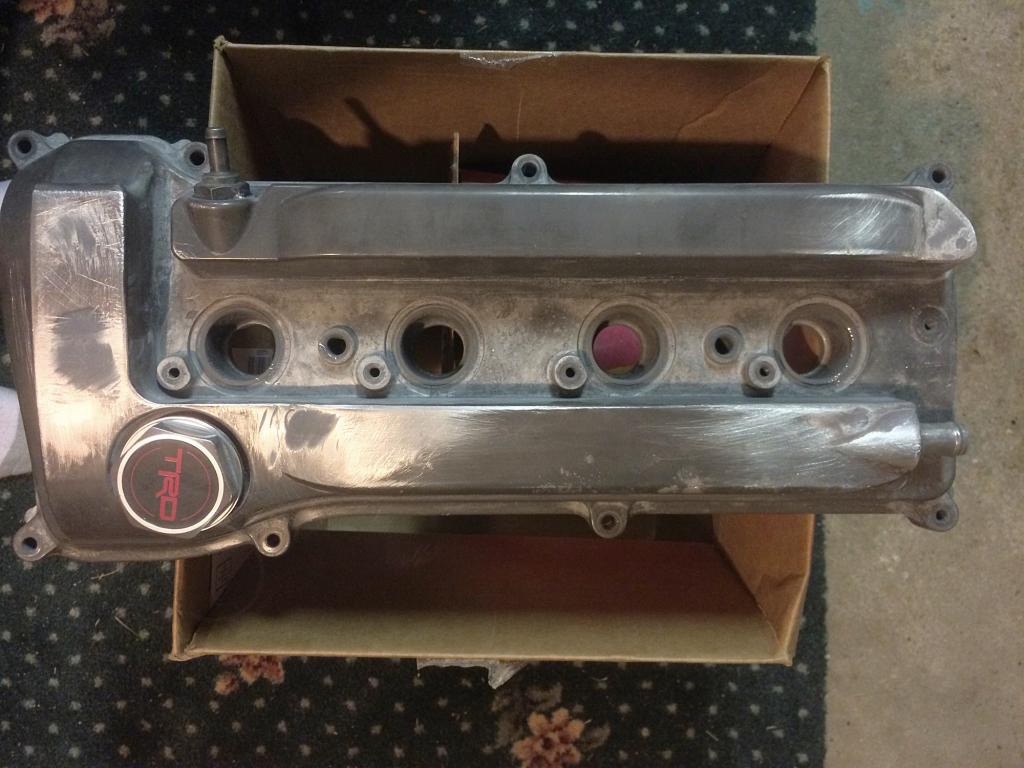
Little update from today, got the valve cover mostly shaved and filled, and started shaving the bay as well. Couldn't grab pics of the bay tonight since it was too dark to get any decent pics, but here's the VC before/during/after
Last edited by crg5990; 07-06-2014 at 06:15 PM.


 07-10-2014, 03:53 AM
#9
I was too and even originally planned on doing a built auto but decided to just go with the manual. It's honestly not all that bad to do, I mean I'm not nearly done but I only need a few more clutch lines and I'll have everything and it was easier to accumulate then I thought. Imagined I was going to be going crazy over parts lol
07-10-2014, 03:59 AM
#10
Update on the tuck and shave:
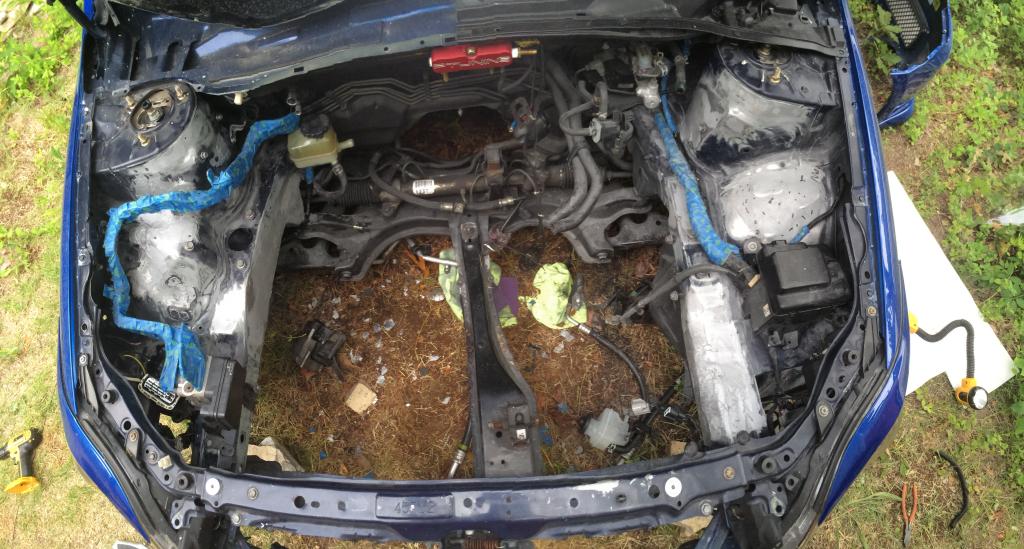
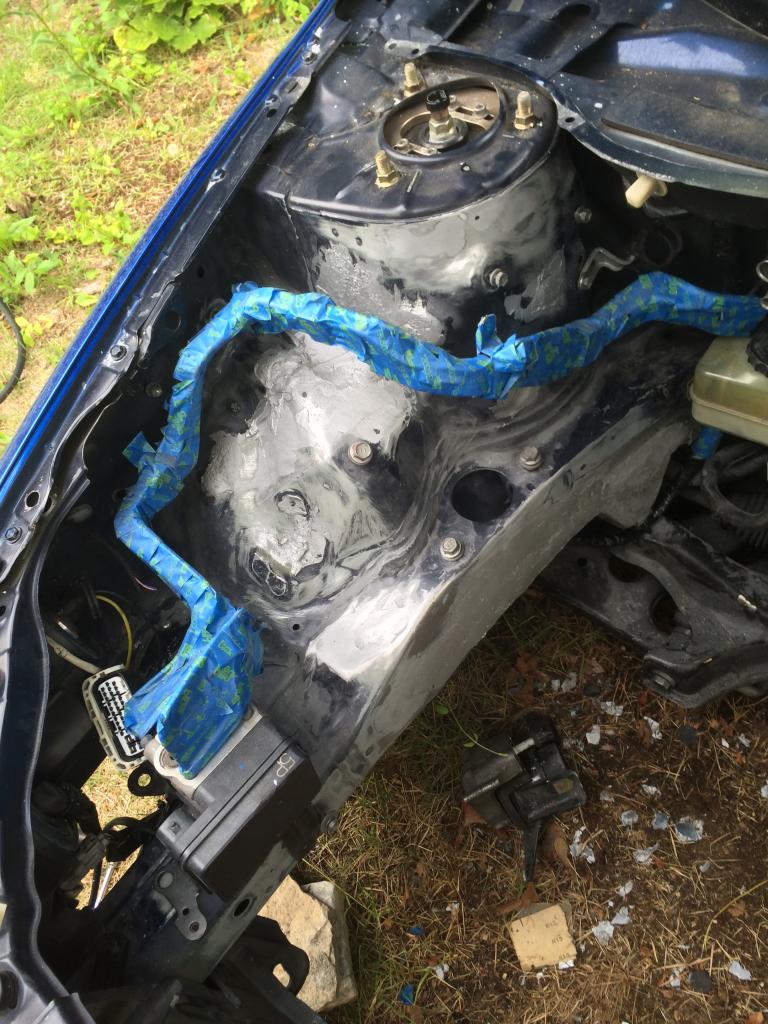
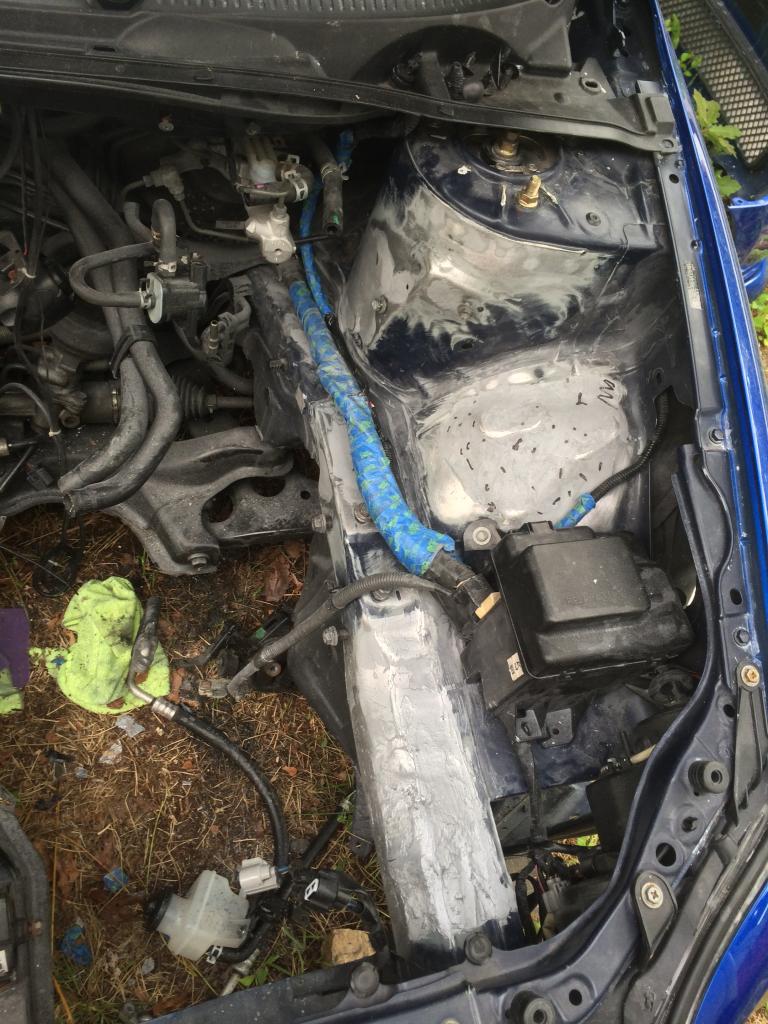
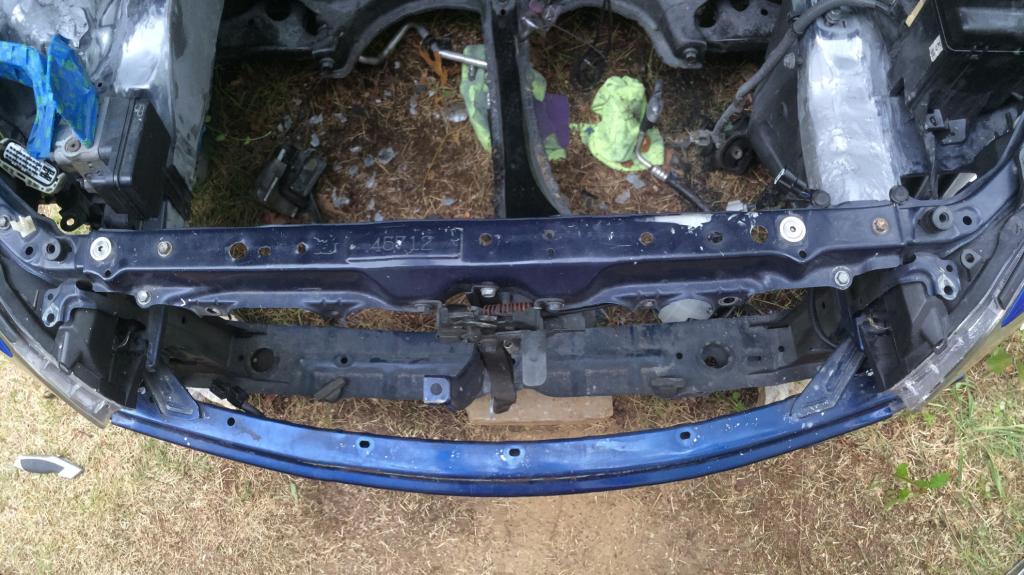
Tucked the passenger side harness, driver side head light wires, both HID ballasts, the wiper motor power line, hid the harness I had for the vrd fogs that was originally ontop of the crash bar, along with the oem wires that ran to the a/c, horns, and thermometer sensor. Also deleted the a/c, and the rain tray drain tube.
UPDATE: 7/13/14
Finally got in all new intake and exhaust manifold bolts, studs, and nuts, and samco radiator hoses. Since I was bored, I mocked up the intake mani
Last edited by crg5990; 07-14-2014 at 02:12 AM.
07-23-2014, 04:31 PM
#11
Few more parts on the way: primer and paint for the bay, new 5th gear and the fork slider to replace the chipped ones, and a sweet $60 eBay header to atleast get me running for the time being lmao
Last edited by crg5990; 07-26-2014 at 10:53 PM.
 07-26-2014, 10:58 PM
#13
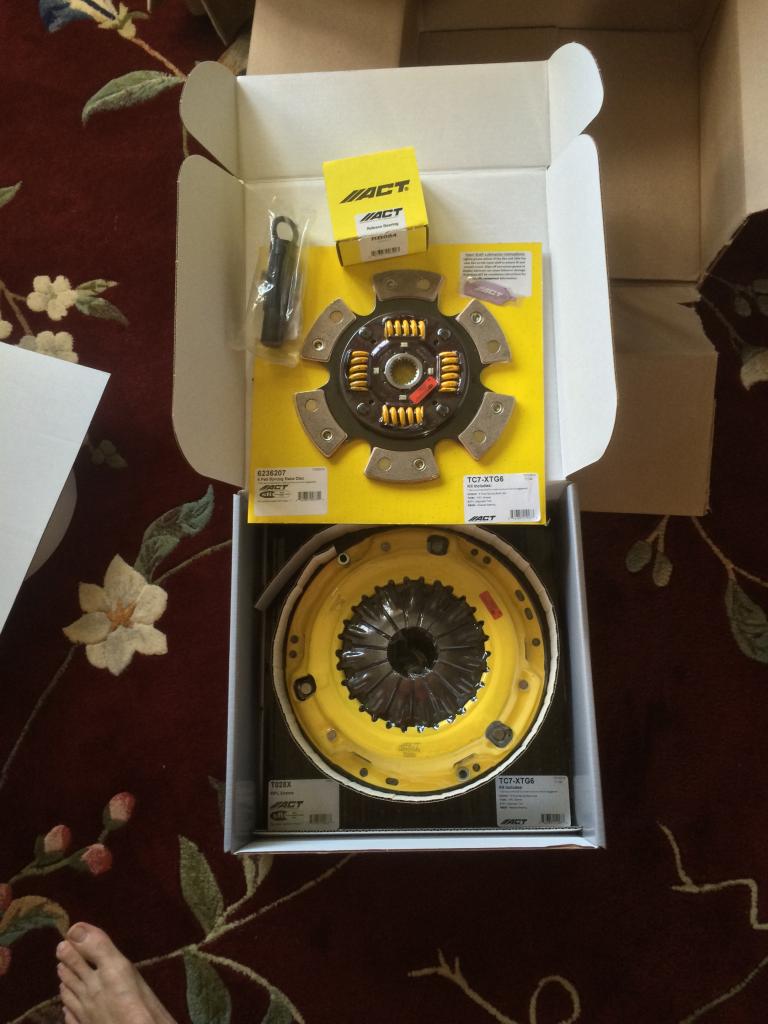
Got my clutch today. Act 6 puck race disk (sprung) and xtreme pressure plate. May switch to the heavy duty plate before install if I decide that the xtreme will put my crank and things in jeopardy of walking. Still need to do a little more reading but over all pleased so far. Also, anyone know if/where I can get arp pressure plate bolts?
Last edited by crg5990; 07-26-2014 at 11:26 PM.
07-30-2014, 02:58 AM
#14
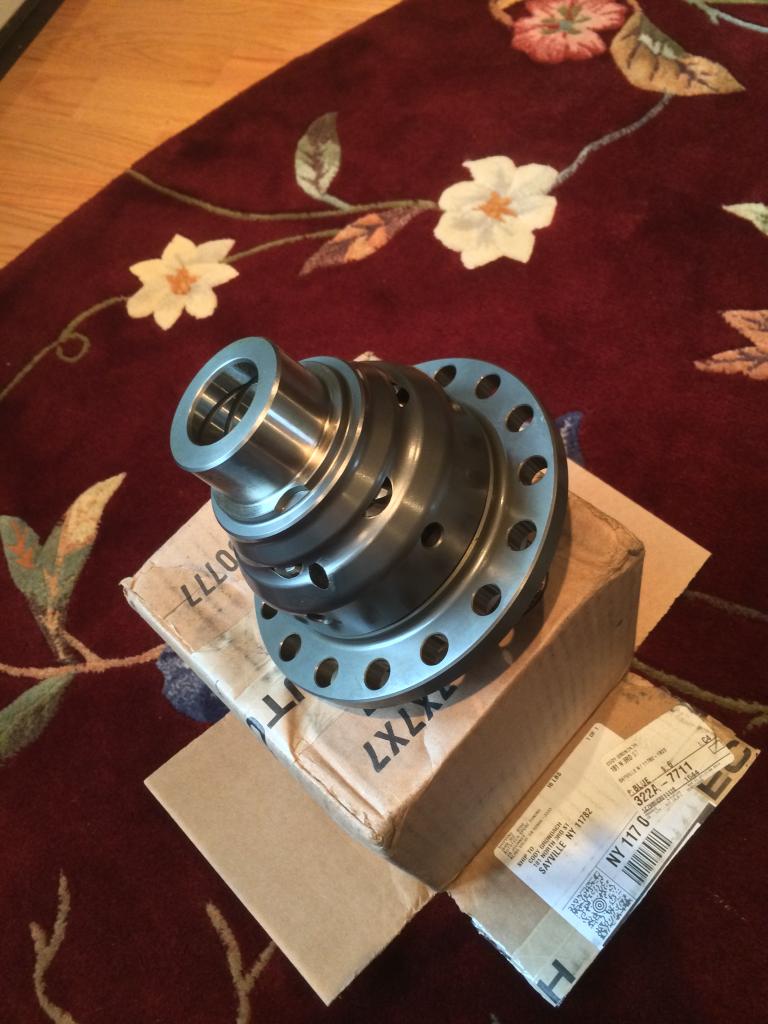
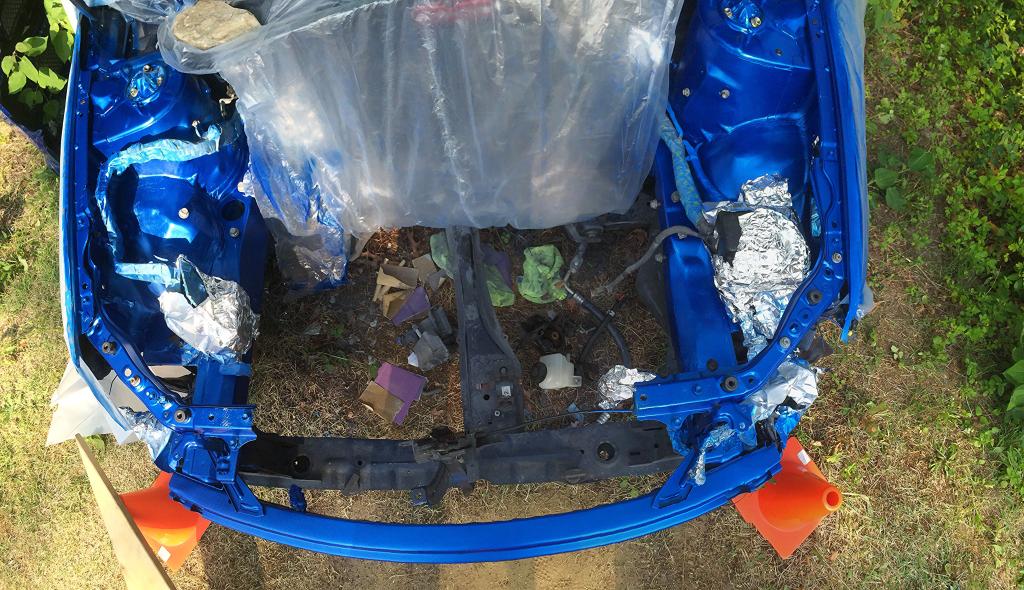
Big update to finish off the day! UPS delivered my header, the parts to fix the trans, and the primer and paint for the bay. Also ordered a quaife lsd last night which also shipped last night and should be coming in Friday. Laid primer and paint in the bay tonight:
Still need a little work in the bay so smooth things out but with color now I can see everything better
Here's the header mocked up on the motor, nothin special

Still need a little work in the bay so smooth things out but with color now I can see everything better
Here's the header mocked up on the motor, nothin special
08-05-2014, 02:46 AM
#15
Got my LSD delivered the other day, and grabbed a daytime shot of the bay. Also have the install kit for the lsd on order so when that comes in I can finally get the trans repaired and done.