Clutch and Motor Mount
 03-13-2015, 01:34 AM
#1
Member
SL Member
Thread Starter

Join Date: Mar 2015
Posts: 21
I read all the Clutch Replacement threads and they all sucked. 2005 Scion xB 167K miles. Original Clutch.
Remove Battery
Remove Air Intake and throttle body.
Disconnect Shifter
Drain Transmission. Because if you don't it will drain itself when you pull out both axle shafts.
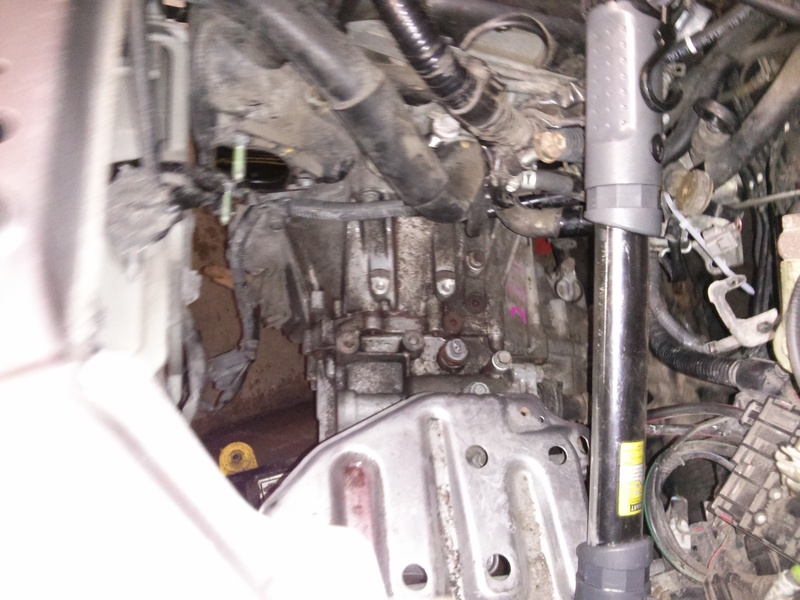
Relocate all Wiring and harnesses and you are left with this:
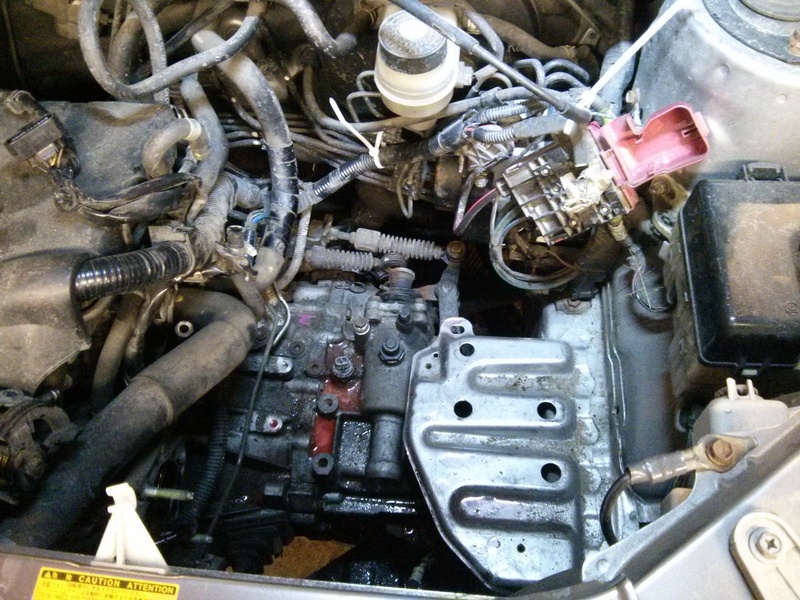
Remove Battery
Remove Air Intake and throttle body.
Disconnect Shifter
Drain Transmission. Because if you don't it will drain itself when you pull out both axle shafts.
Relocate all Wiring and harnesses and you are left with this:

Last edited by MR_LUV; 02-19-2020 at 03:39 AM.

 03-17-2015, 07:54 PM
#3
Member
SL Member
Thread Starter
Join Date: Mar 2015
Posts: 21
Use a Pickle fork and a 3 lb Sledge and split the Lower Ball Joint from the upper a-arm. I used a bigger truck fork. Inspect Boots for damage replace with the Energy Suspension XXXX Part.
Pry bar on the insides of the Axle Shafts which pop out and you are left with this.
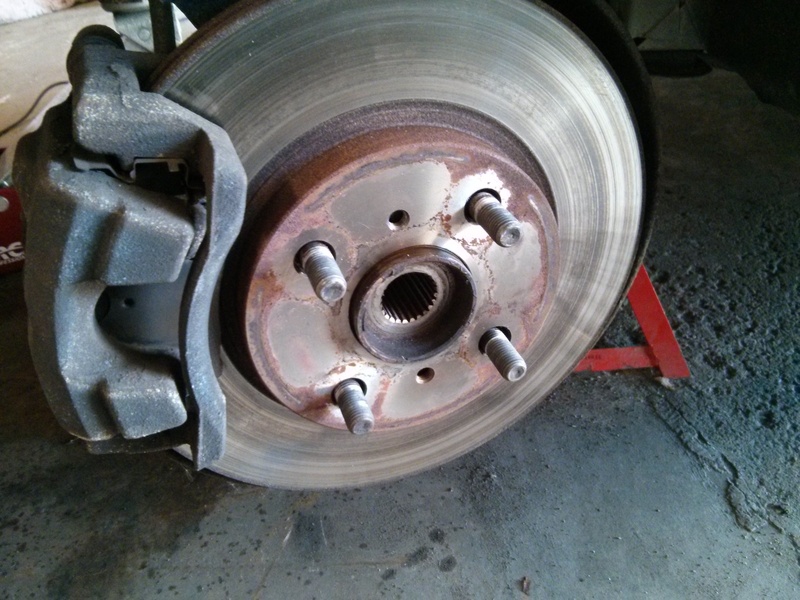
Pry bar on the insides of the Axle Shafts which pop out and you are left with this.

 03-17-2015, 08:03 PM
#5
Member
SL Member
Thread Starter
Join Date: Mar 2015
Posts: 21
The hardest part of the entire exercize.
Three bolts on bottom of the sub frame. I snapped one of them clean off. Had to buy a new mount. I could have drilled it and used a replacement bolt but it had 167K Miles and I am not going in there again.
Bolt that goes thru rubber piece is threaded into a welded bung. You get at it from the right side with a breaker bar and a long cheater bar threaded thru all the hoses and wiring. Snap it lose and use a ratchet to get the rest out.
Bolt on the Heat shield needs to be taken out from the passenger wheel well with a 3 foot extension, universal joint, 6 POINT Mandatory socket and two people. One to turn the ratchet and one to hold it straight. Dont strip this bolt or you will hate life.
Remove rubber piece thru the top, you will need to move motor back and forth up and down etc.
Remove Starter, One bolt in one side of the bellhousing and one on the other.
Unbolt but do not disconnect Clutch Slave Cylinder.
Remove rest of motor mount. For one of the bolts we used a two foot extension that went all the way back to the catalytic converter with universal and breaker bar with cheater bar. Watch out for the knuckles on this one.
Last edited by rjjablo; 03-17-2015 at 08:14 PM.
03-17-2015, 08:26 PM
#6
Member
SL Member
Thread Starter
Join Date: Mar 2015
Posts: 21
7 Bolts total on this other than the two starter bolts. Two on the bottom and one on the back come in from the motor side.
The one in the back by the motor mount cannot be removed because it is blocked by the heat shield. Take it out as far as you can until you split the transmission and the motor at which point you will have enough clearance to get it out of the case.
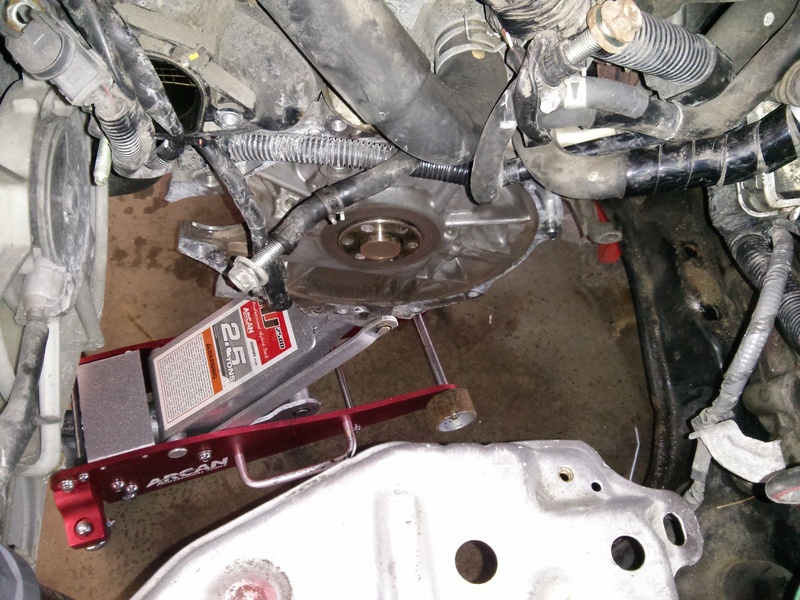
Put a jack underneath it. We also used a milk crate and scooter tires to catch it.
Roll motor forward and down and split it with you preferred implement of destruction. We used a wrecking bar and screw drivers and pried all the way around and slowly slithered it off the shaft. Don't drop it on your hands or head. It weighs 50 lbs.
You are left with this. Blow out all the dust and do not inhale it.
The one in the back by the motor mount cannot be removed because it is blocked by the heat shield. Take it out as far as you can until you split the transmission and the motor at which point you will have enough clearance to get it out of the case.
Put a jack underneath it. We also used a milk crate and scooter tires to catch it.
Roll motor forward and down and split it with you preferred implement of destruction. We used a wrecking bar and screw drivers and pried all the way around and slowly slithered it off the shaft. Don't drop it on your hands or head. It weighs 50 lbs.
You are left with this. Blow out all the dust and do not inhale it.
 03-17-2015, 08:33 PM
#7
Member
SL Member
Thread Starter
Join Date: Mar 2015
Posts: 21
No pictures of pressure plate it went straight into recycle bin.
Clutch Looked like this. Notice how the wear marks are not flat across disk.
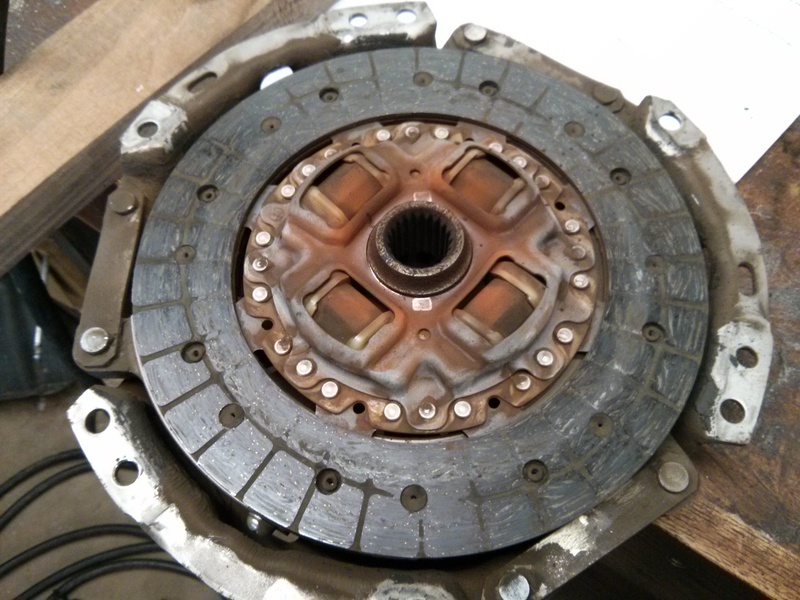
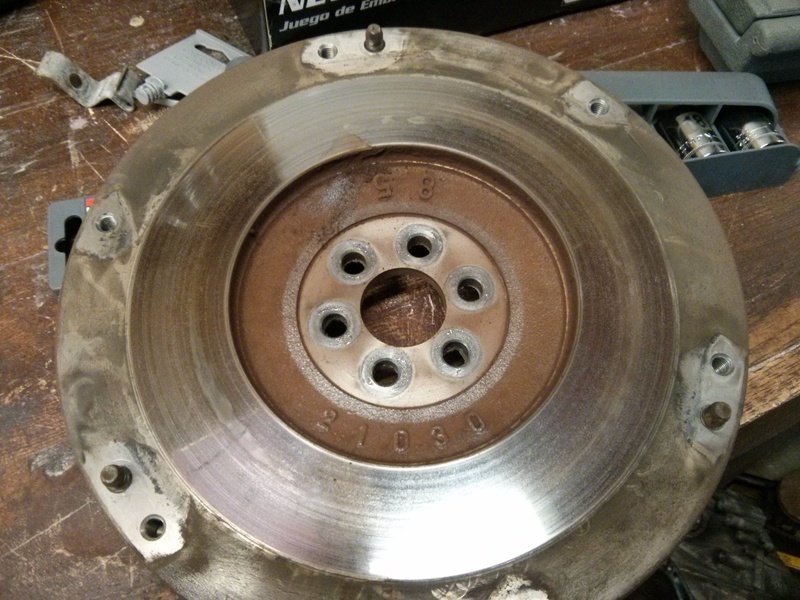
Flywheel looked like this. Machinist said it was not flat anymore. Heat marks etc
Clutch Looked like this. Notice how the wear marks are not flat across disk.

Flywheel looked like this. Machinist said it was not flat anymore. Heat marks etc
 03-17-2015, 08:36 PM
#8
Member
SL Member
Thread Starter
Join Date: Mar 2015
Posts: 21
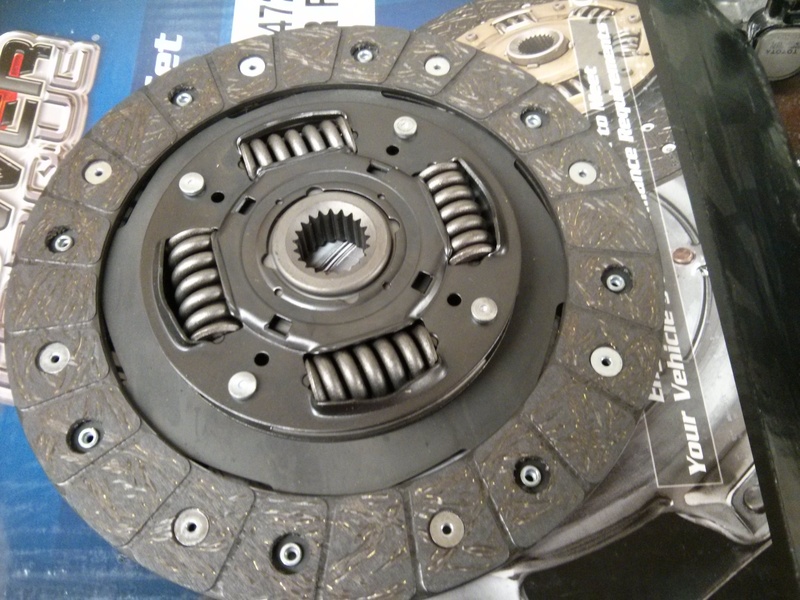
New Clutch, Mine was marked which side goes to the flywheel. Make sure you get it right.
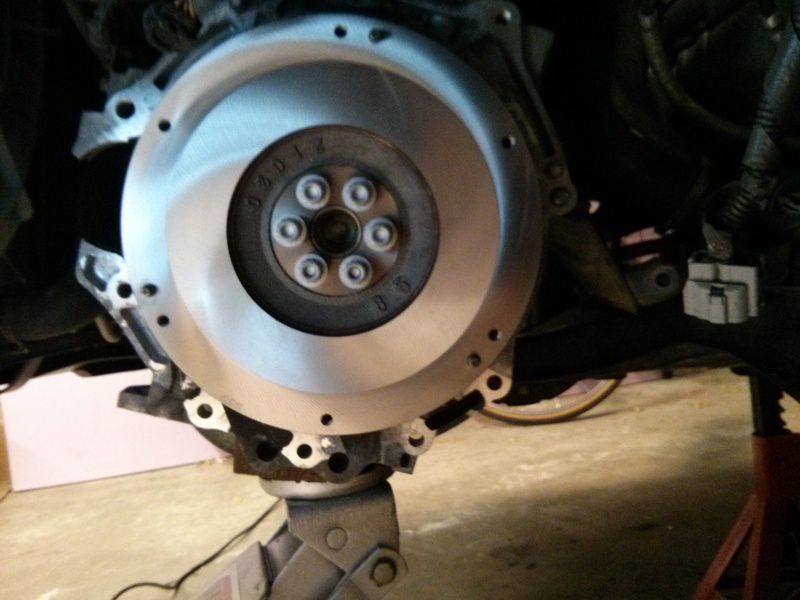
Resurfaced Flywheel. .008 off it. Notice how the entire wheel was cut to keep clutch clearance the same.
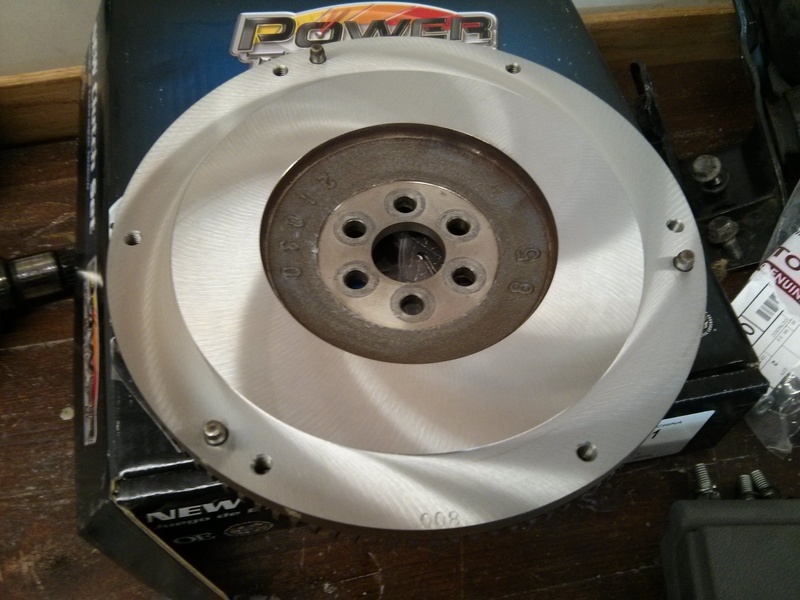

Resurfaced Flywheel. .008 off it. Notice how the entire wheel was cut to keep clutch clearance the same.

Last edited by rjjablo; 03-17-2015 at 11:22 PM.
03-17-2015, 08:41 PM
#9
Member
SL Member
Thread Starter
Join Date: Mar 2015
Posts: 21
Mandatory New Flywheel bolts. These are one time use. Got them at dealer. Red Loctite is already on them. I had to take them out with an impact.
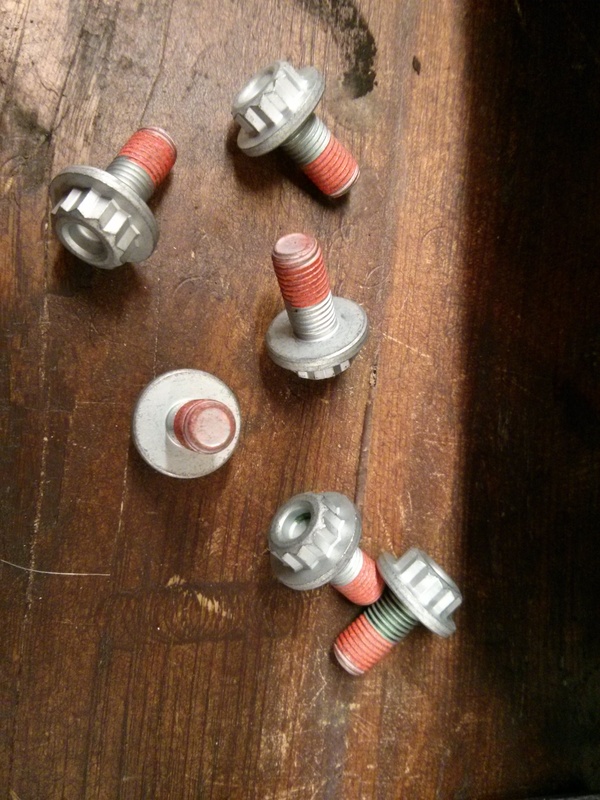
Torque flywheel bolts to 49Nm/36 ft.lbs, Tighten in the following pattern; 12 o'clock, 8 o'clock, 4 o'clock, 10 o'clock, 6 o'clock, 2 o'clock. afterwards tighten the bolts (in the same pattern) an additional 90 degrees.
BTW: Do not reuse old flywheel bolts, Use new ones P/N 90913-01024, the new bolts come with threadlocker applied to the threads. I used 1/2" Breaker bar both hands and a lot of effort for that last quarter turn. Thanks bB384
19MM Wrench on the crankshaft and it will get stopped by the frame.

Last edited by rjjablo; 03-17-2015 at 11:28 PM.
 03-17-2015, 11:33 PM
#11
Member
SL Member
Thread Starter
Join Date: Mar 2015
Posts: 21
Put the transmission back on Milk Crate. One guy on top and one on the bottom. Pickup transmission from top and get it situated on shaft. We got the rear of the transmission over the subframe and then line it up.
Rock it back and forth on the shaft and it should slide on. Once you are sure its on you can use the bolts to get it the final distance. Adjust them one at a time not one all the way. Make sure all the dowel pins are lined up and don't force it.
Reassembly the way you took everything else out and top off the Transmission with your favorite gear lube.

Last edited by MR_LUV; 02-19-2020 at 03:45 AM.
03-20-2015, 04:09 PM
#12
Member
SL Member
Thread Starter
Join Date: Mar 2015
Posts: 21
PIA. Even with the motor jacked all the way up and to the front there is not enough room to put the Motor mount back in. I bolted the part that attaches to the motor first with all three bolts.
Problem is the two studs on the rubber part do not give you enough clearance to get it in. The following is what I did.
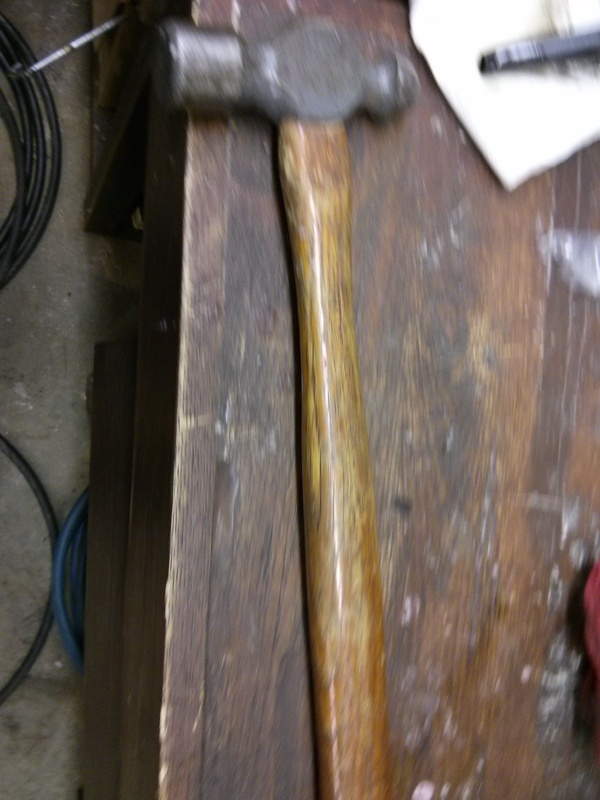
Break out your favorite tool of destruction. 28 OZ Ball Peen Hammer
Clamp Mount in your Vintage American Made Wilton Vise that can turn metal into dust.
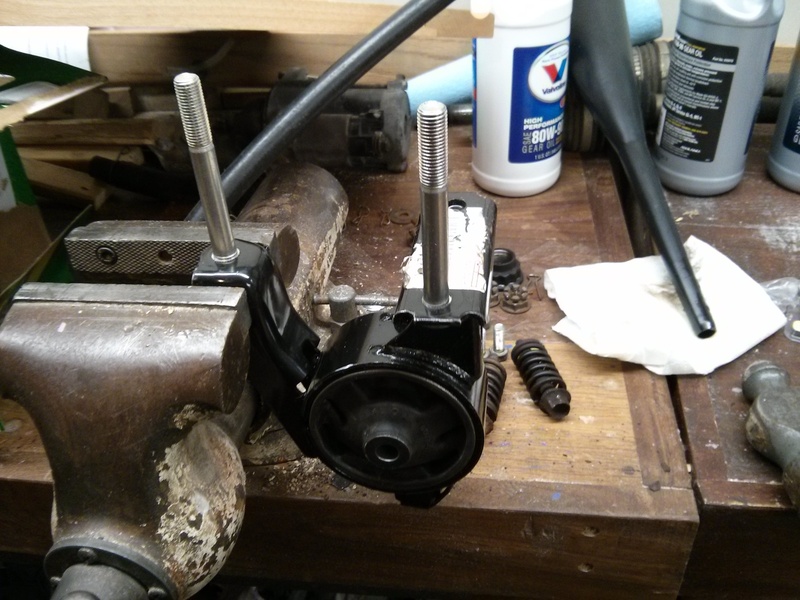
Give the stud a solid whack down and it will pop out and you get this.
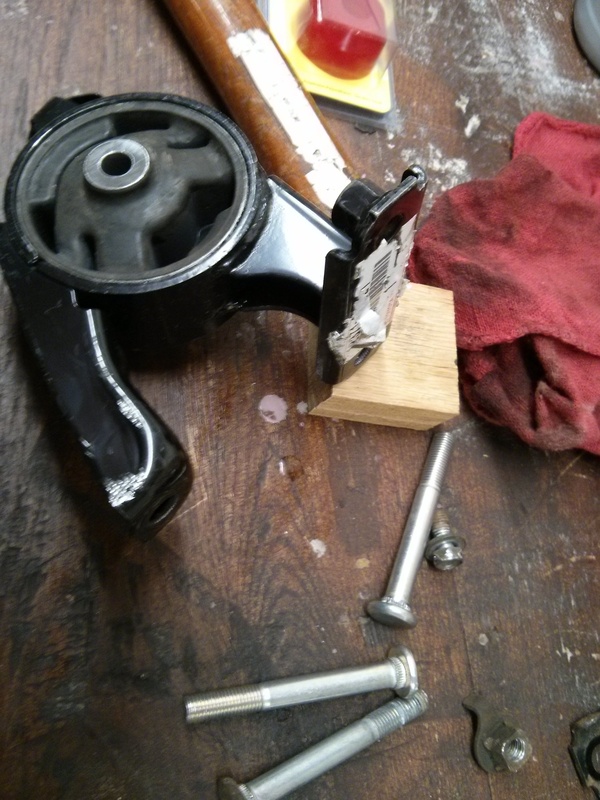
Put front motor mount on and then the rear will line up and this part will slide right in.
Reinstall using the one fixed nut. Drop the other two studs back in from the top. Climb underneath and snug down nuts. You will have to hold the top of the stud until the splines catch and then torque away.
____
Problem is the two studs on the rubber part do not give you enough clearance to get it in. The following is what I did.
Break out your favorite tool of destruction. 28 OZ Ball Peen Hammer

Clamp Mount in your Vintage American Made Wilton Vise that can turn metal into dust.

Give the stud a solid whack down and it will pop out and you get this.

Put front motor mount on and then the rear will line up and this part will slide right in.
Reinstall using the one fixed nut. Drop the other two studs back in from the top. Climb underneath and snug down nuts. You will have to hold the top of the stud until the splines catch and then torque away.
____
Last edited by MR_LUV; 02-19-2020 at 03:46 AM.
03-26-2015, 03:35 PM
#13
Member
SL Member
Thread Starter
Join Date: Mar 2015
Posts: 21
Bought a new doughnut for the exhaust system at the Dealer. $48.00 but it looked like a little piece of jewelry to replace mine that was completely gone. Problem was when hooking exhaust system back up I could not get the two flanges close enough together to get the bolts to engage. I bought some flanged M10 1.25 X 70MM bolts grade 5 at HW store. Which were long enough to engage. They will rust and probably be difficult or impossible to get out the next time though as the threads that are exposed will corrode due to the heat. Don't care, I am selling it at 200K Miles.
 08-25-2016, 01:56 AM
#15
Member
SL Member
Thread Starter
Join Date: Mar 2015
Posts: 21
193K miles on the Box now. Engaging first gear is getting a bit rough especialy on downshifts. Dont know if I should be looking at the shifter first or the Clutch Slave or master cylinder. Clutch takeup from a start is also not the best. It gets herky jerky and not the best. 30K on new clutch, replaced all the motor mounts when I did the clutch.
Any great ideas to look at first?
Any great ideas to look at first?
02-19-2020, 02:29 AM
#16
Junior Member

Join Date: Feb 2020
Posts: 1
Put front motor mount on and then the rear will line up and this part will slide right in. Reinstall using the one fixed nut. Drop the other two studs back in from the top. Climb underneath and snug down nuts. You will have to hold the top of the stud until the splines catch and then torque away.
I saw what you were saying about taking out the studs then re-installing them back in place.
I had thought about doing the same thing you did.
How did it turn out for you?
Give the stud a solid whack down and it will pop out and you get this.
Attachment 23265
Last edited by MR_LUV; 02-19-2020 at 03:49 AM.

Thread
Thread Starter
Forum
Replies
Last Post
Hexadecimus
Scion tC 1G Drivetrain & Power
5
12-16-2017 11:49 PM
burgandybomber
Scion tC 1G Drivetrain & Power
6
01-03-2014 07:02 PM
r3load3d
Scion tC 1G Drivetrain & Power
3
07-07-2007 03:18 PM
MotoMan_YZ400
Scion xA/xB 1st-Gen Forced Induction
14
11-04-2005 11:06 PM