Sound Deadening DIY
 03-14-2012, 03:12 PM
#1

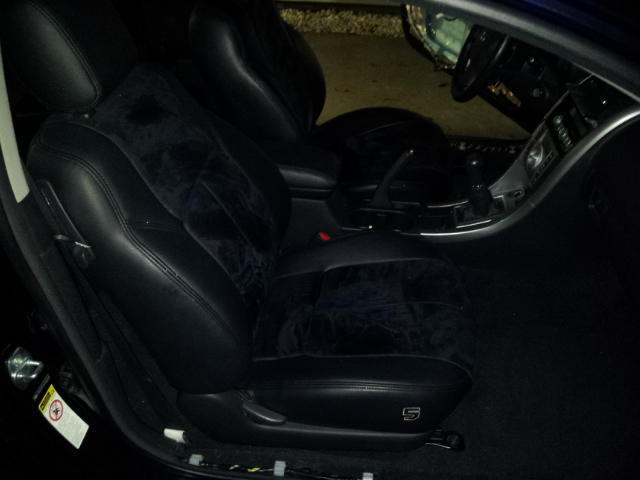
Two days of back breaking labor and I finally finished. I have done some research and homework on sound deadening / insulation until I decided on what product I wanted to use, but fell short on advice and photos as to how it goes in to the tC. As we all know the stock tC is a NOISE BOX on the highway. I am not responsible for anything that breaks or any problems that may arise. NO your interior wont fit the EXACT same way, but if you have patience you can make it fit 99% perfect. Final product

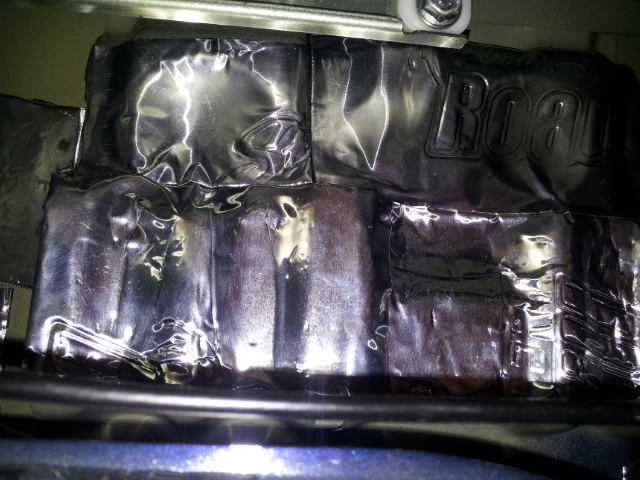
I bought 98 square feet (3 bulk packs) of mat, and I only used 72 square feet of roll-on, adhesive butyl based deadening mat with aluminum backing. Stinger Audio Roadkill Expert. seen here
http://stingerelectronics.com/produc...&CategoryID=12
I bought 24 square feet (two 32" x 54") carped pads with vinyl backing. Stinger Audio Roadkill. I used all of the padding. seen here
http://stingerelectronics.com/produc...&CategoryID=12
My BEST friend while installing the deadening mat was the Marshalltown roller. I used both ends of this thing and abused it. I am glad I didn't get a cheap one. seen here
http://www.walltools.com/store/marsh...ft-handle.html
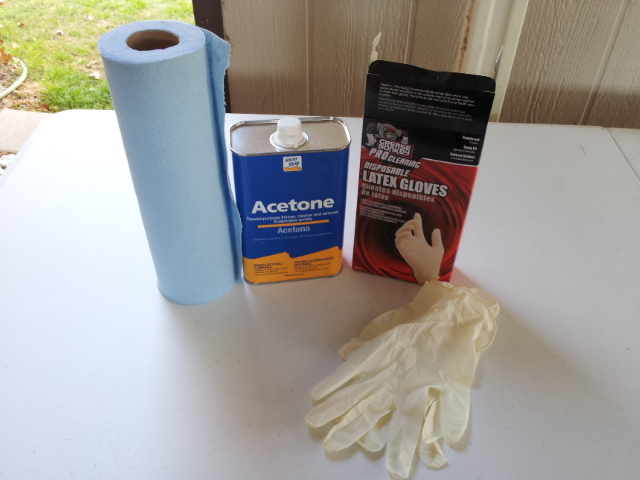
A few other things that I used: Acetone, rubber gloves, microfiber towels, paper towels, heavy duty scissors, razor knife.
I also replaced ever plastic clip along the way to ensure tight panel fitment, I wanted it to be perfect. I have a list of the clips I ordered from Toyota if you would like to PM me about it.
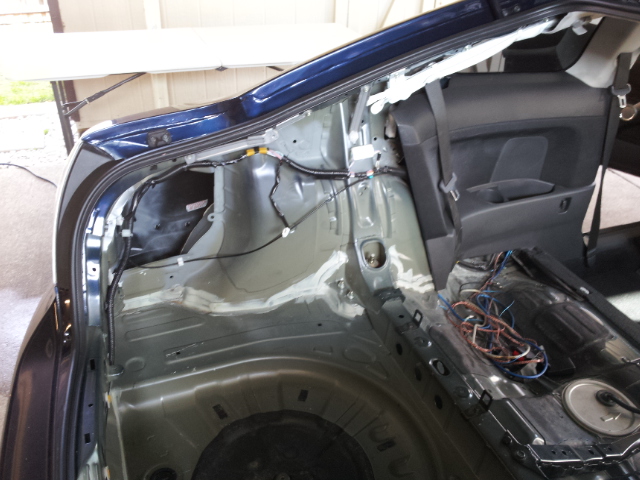
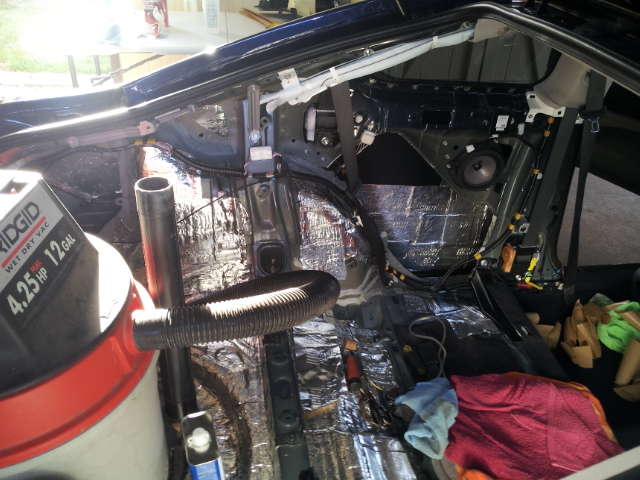
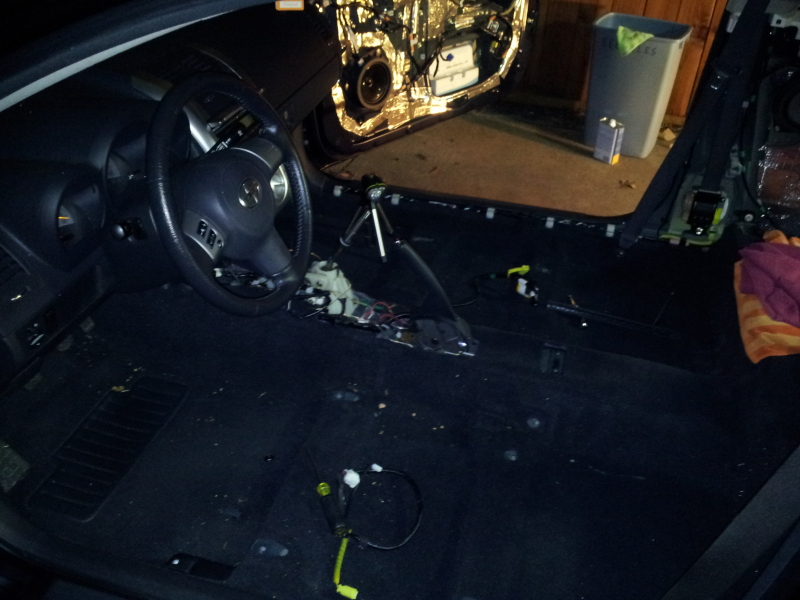
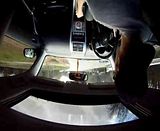
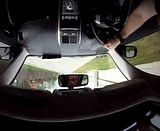
The first step is disassembling your interior. Let me say this, if you are uncomfortable disassembling your interior, then installing this sound deader is probably not the job for you. It requires logic to visualize the panel fitment when the car is taken apart so you can place the deadener in areas that wont interfere with fitment of panels. The mat was like a big jigsaw puzzle in the making. This is very time consuming but worth it to those who are willing. Also, if you have trouble taking it all apart, then you definitely will struggle getting it all to fit right, because this deadener will occupy more space and make things tighter. Start here thanks to MANDOS from Scion Life
https://www.scionlife.com/forums/sho...sound+deadener
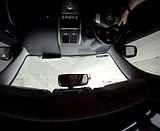
Once the interior is apart you have a blank canvas. Preparation is key to successful adhesion of the mat. Vacuum out all areas inside the fenders and on the floor, then with rubber gloves on and acetone, wipe down any surface you are visualizing the mat.
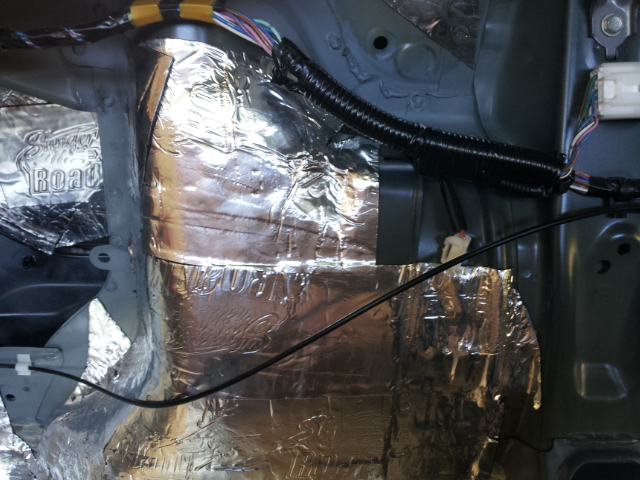
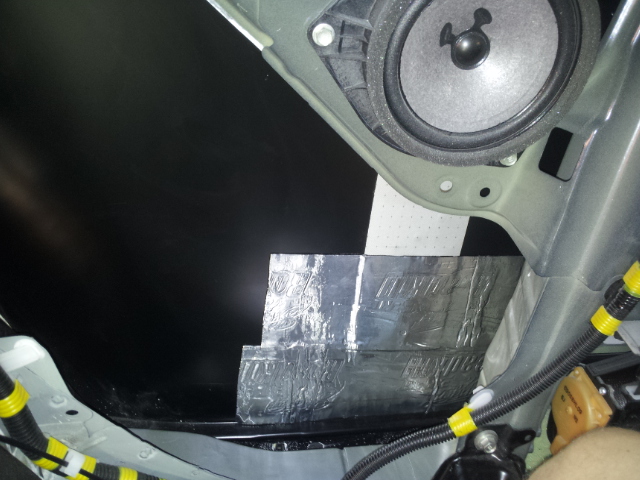
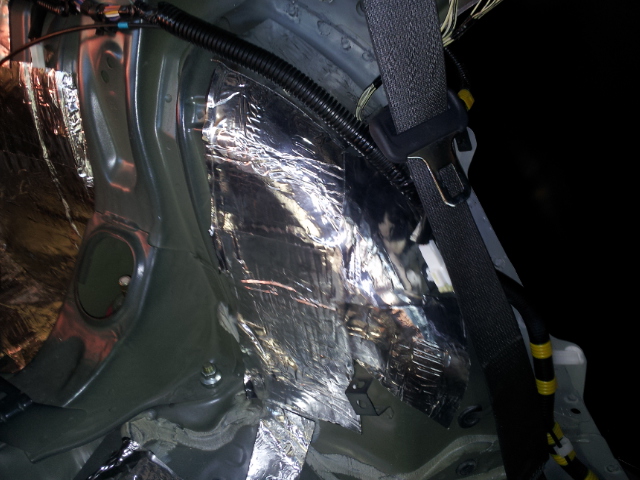
Even small areas on any flat piece of sheet metal could use some insulation. If you want to get tricky you could scrape up the stock deadener. My motto is the more the merrier. So I insulated over the factory deadening too. I layed the deadener in the same order I re-install my interior, back to front. Start with the rear quarter panels. The drivers side has a fuel neck so there is no way to physically cover the entire outer body panel, So lay the insulation as far as you can until you reach the fuel filling area. Go ahead and get comfortable inside the car. I folded a towel up and sat in the spare tire opening. use caution when rolling the mat on to body panels, then are thin and can become malformed if the roller is used too hard and unevenly, then again you want this mat to stick good right? Use adequate pressure to get a slight "ripple" on the aluminum backing. Also roll the edges of the mat tight to ensure no moisture can work its way under it.
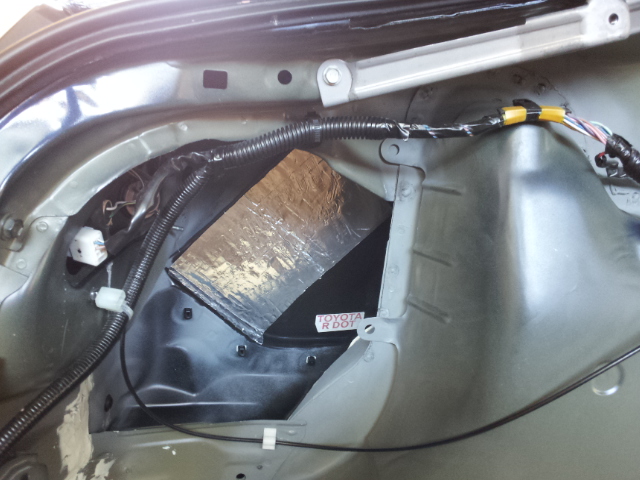

The passenger side rear quarter has enough room to lay insulation from the taillight to the door jam.
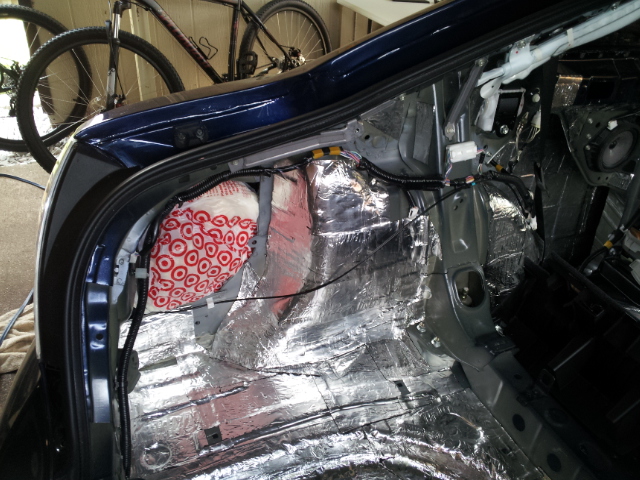
There is a support brace that runs from rear shock mount to rear shock mount, cover both rear fenderwells from there towards the back of the car.
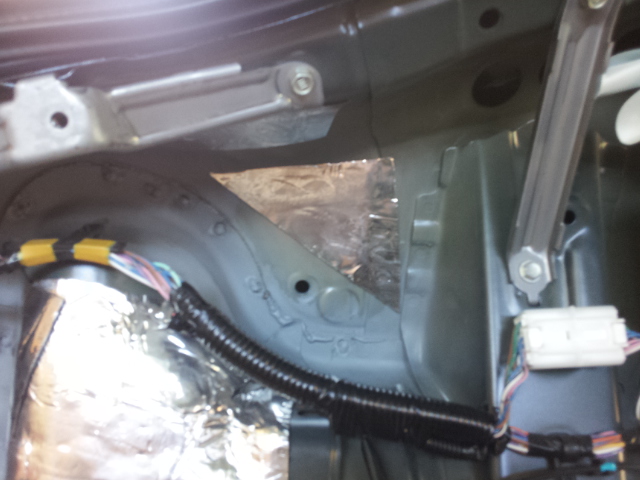
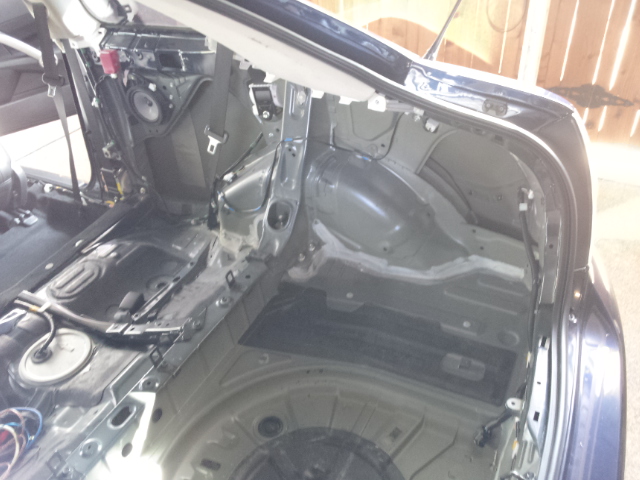
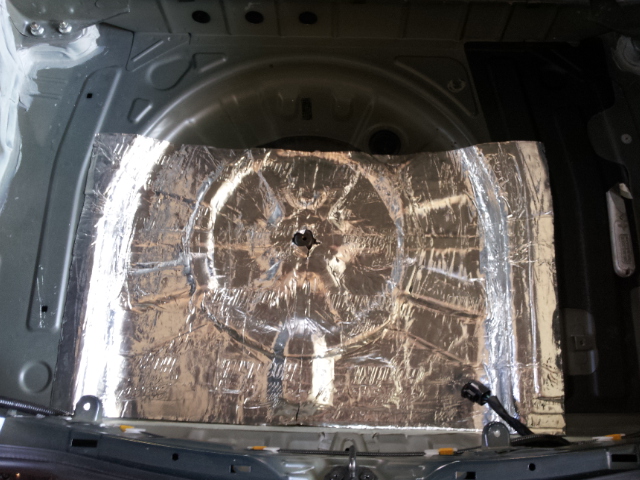
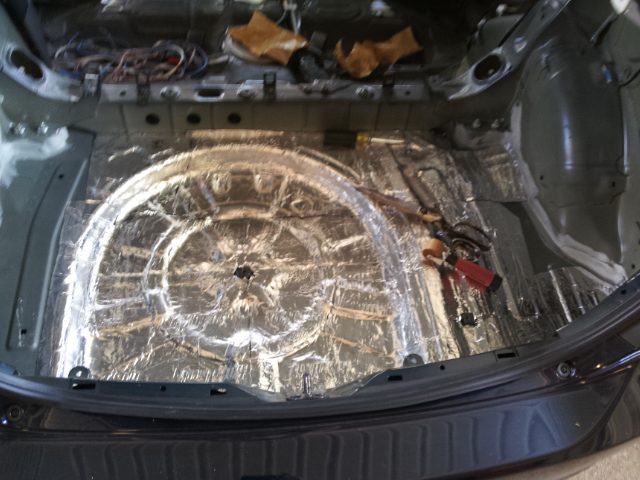
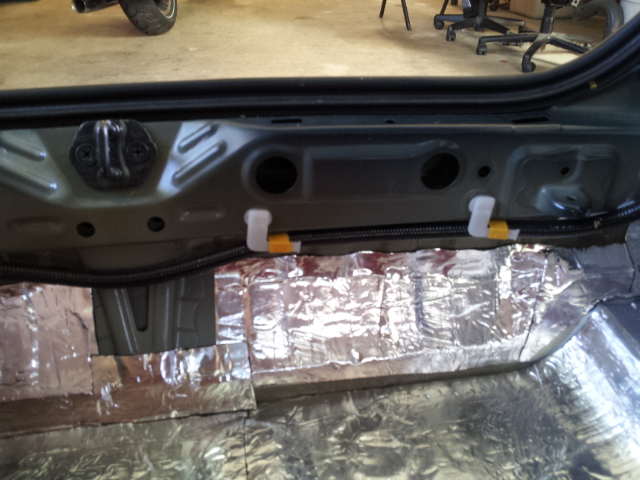
Start in the spare tire opening and work your way up to the fenderwells and support brace from rear shock to rear shock. I also covered the areas under the taillights and rear latch. I double layered the spare tire opening.

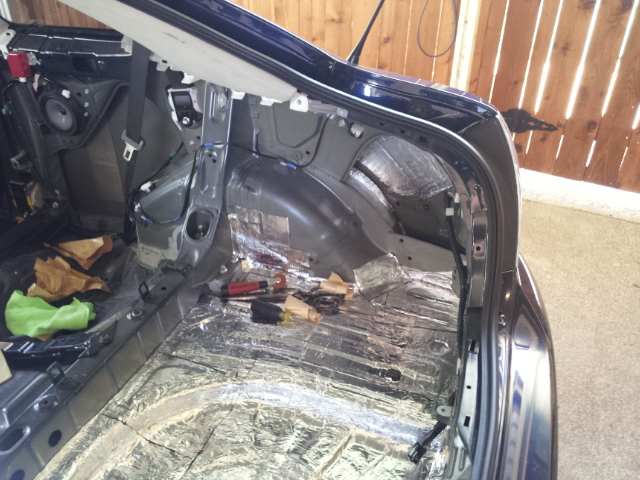

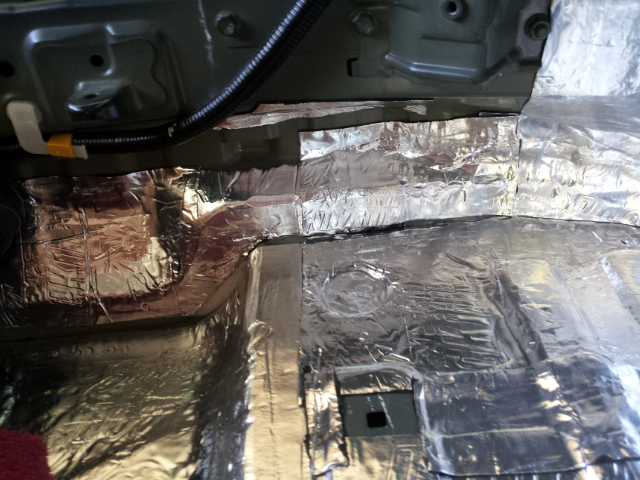
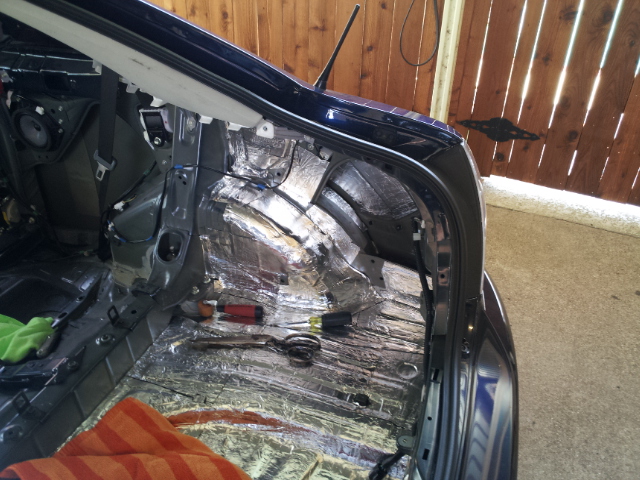
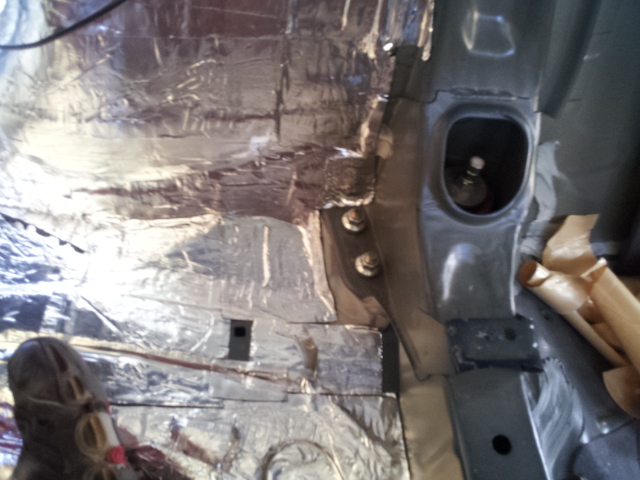

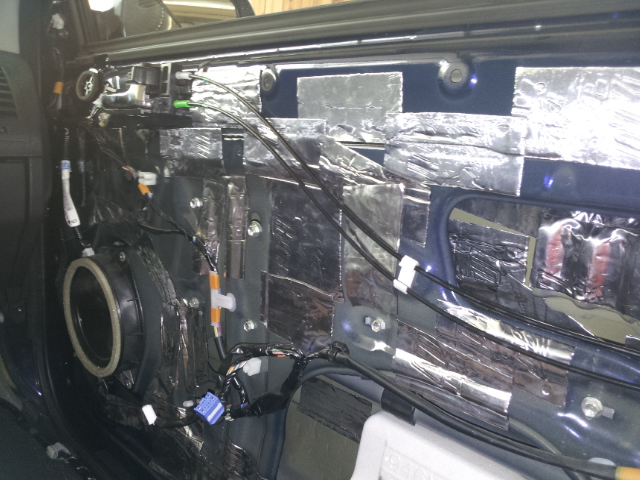
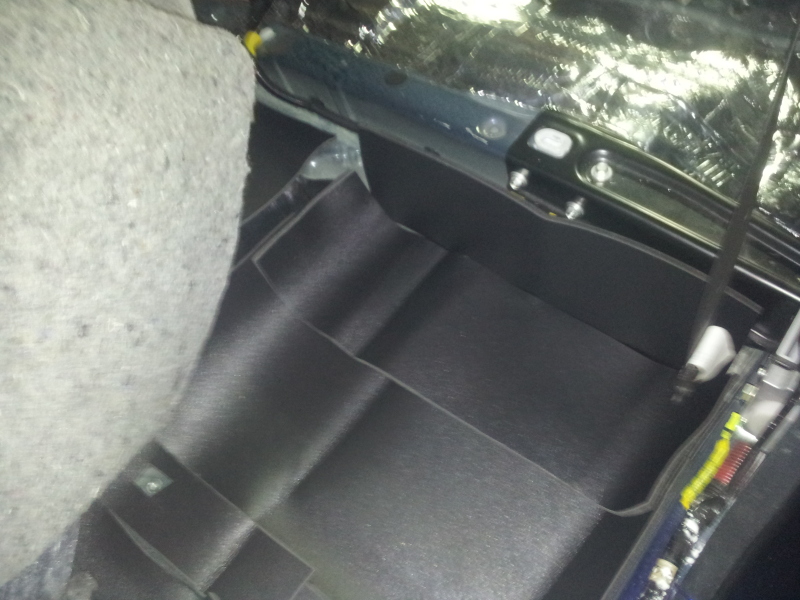
Once the rear area of the car is done move to the rear quarter panels between the wheel and the door jams, place the mat as far up and back into the panel that you can.

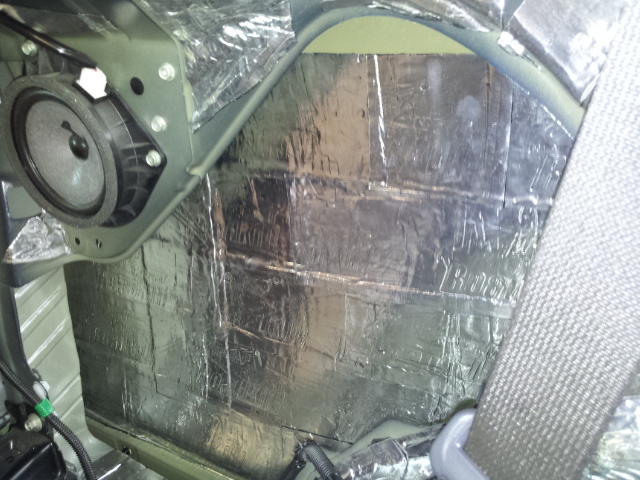
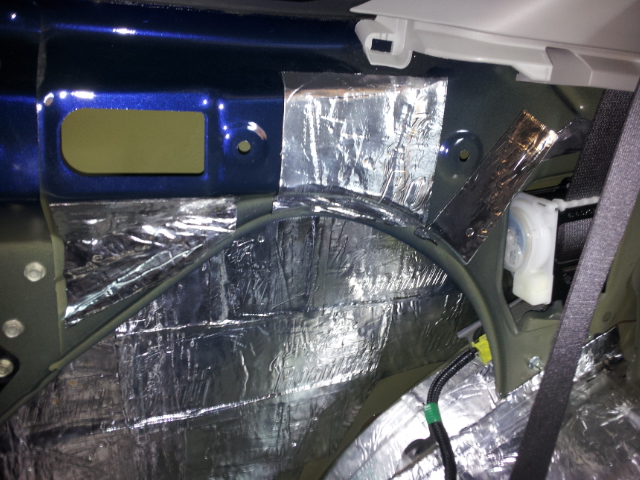
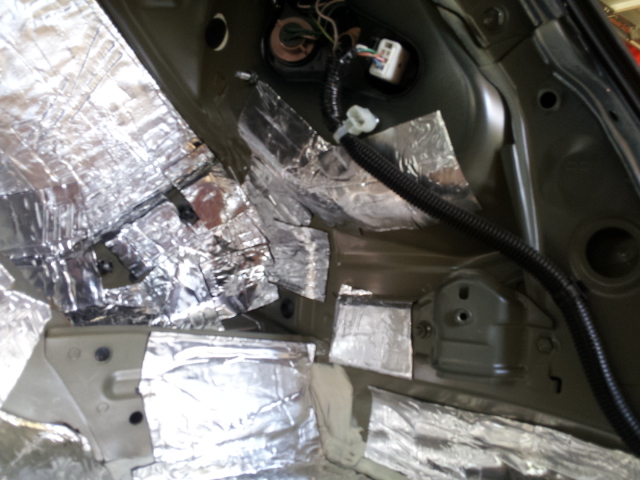
From this point I covered the front of the fenderwells and the rear seat area. BE SURE NOT TO COVER ANY HOLES OR FLAT SURFACES THAT THE SEATS BOLT TO.
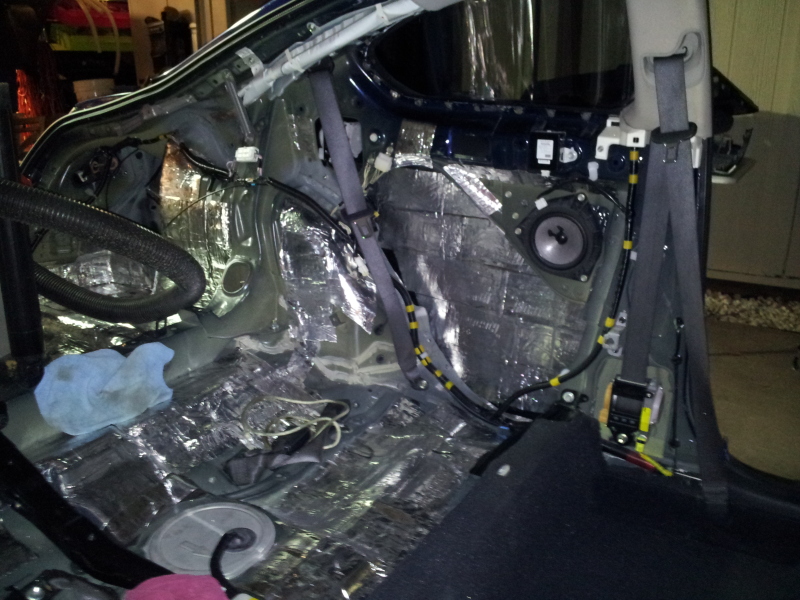
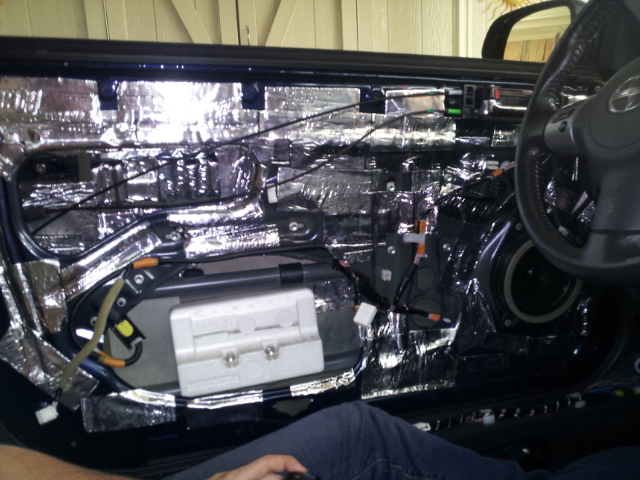
The doors are tricky, you want good coverage but you have many components that cannot be interfered with. I removed the moisture barrier and reused it. There are not many big openings to get inside of the door with, speaker removal will help, but I didn't. Don't use toooo much product or your doors will be REALLY heavy and stress the hinges.
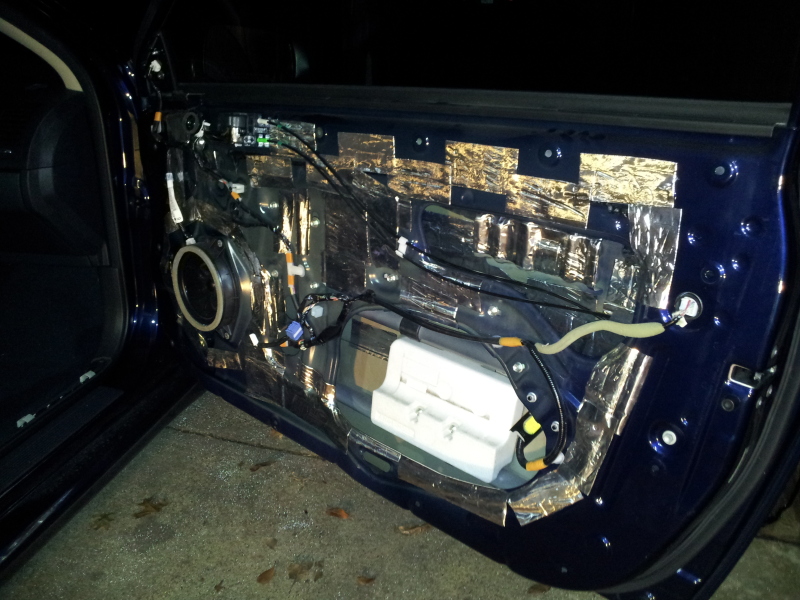
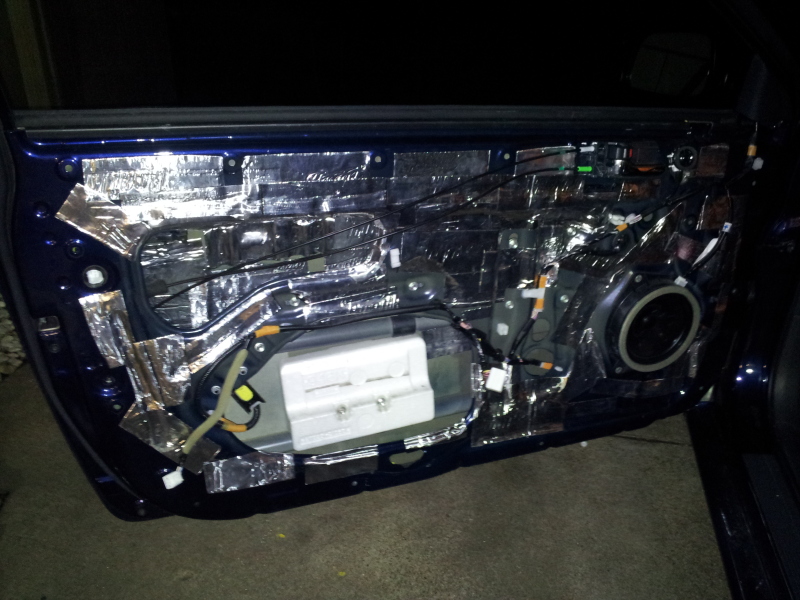

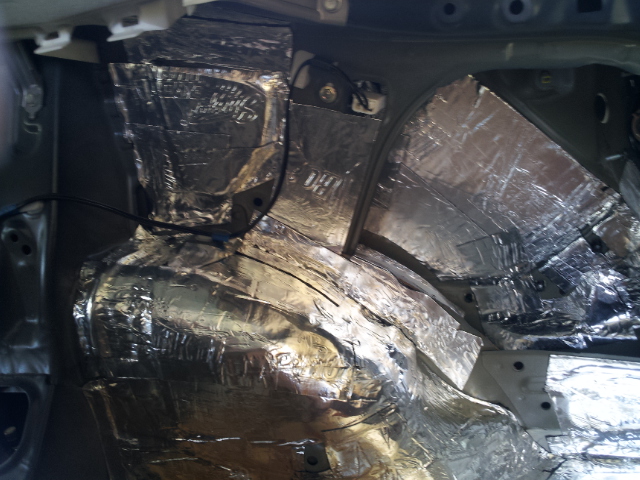
The side interior panels have some LAME foam on them, I removed the lower foam and doubled up on the deadener.
 .
.
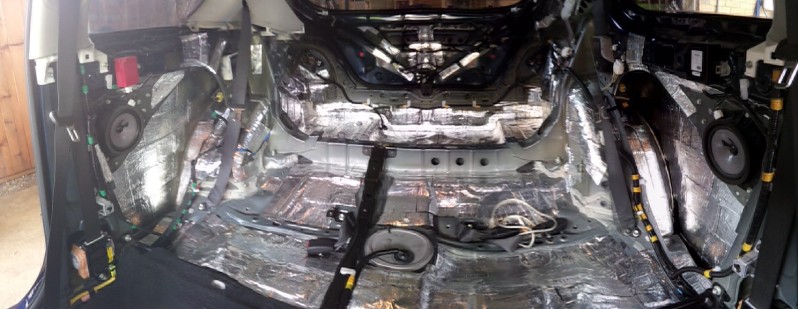
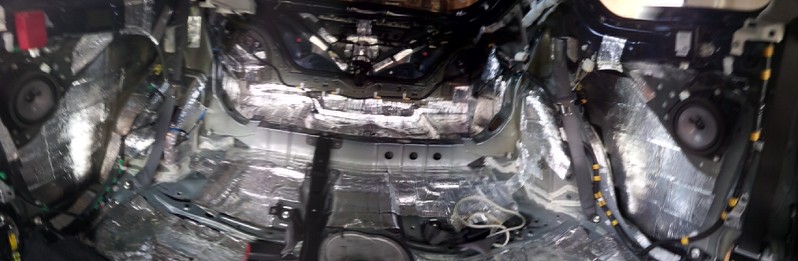
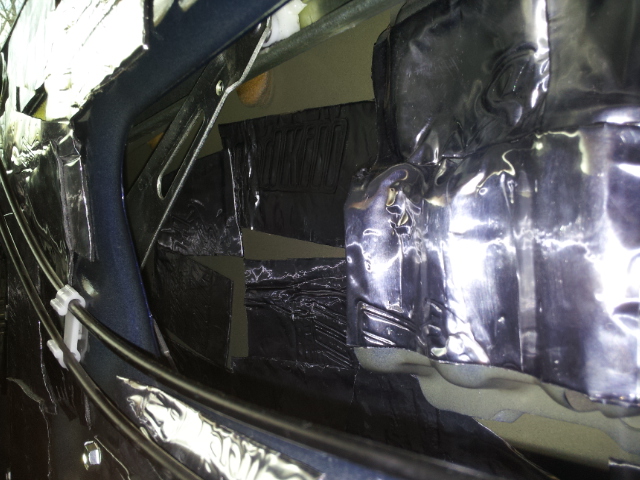
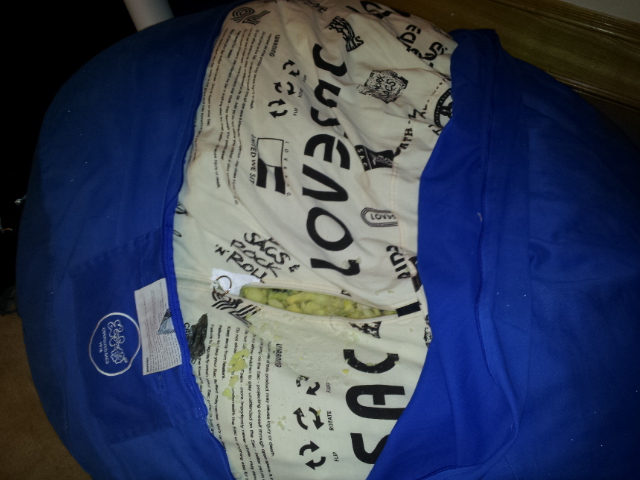
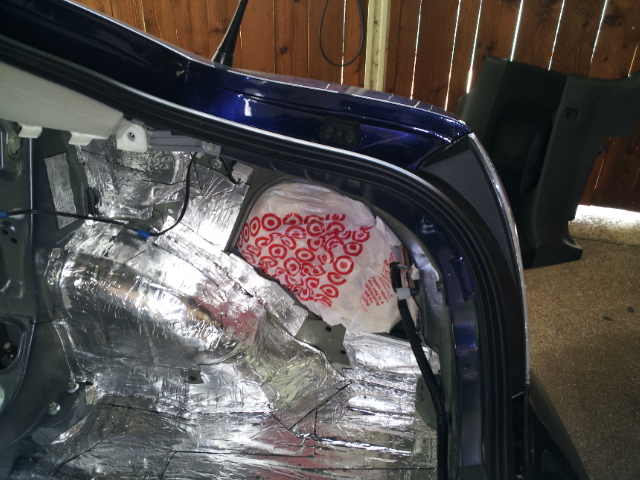
There are still some open air spaces in the fender wells, they need to be filled. A bag full of "poly fill" from a hobby store will work. Stuff the back full of it and tuck it away in the open spaces, I do not recommend grocery bags because of temp rating, they could melt. I robbed some shredded foam rubber from my love sac lol. you can squeeze the air out of the bag and stuff it way up in the fenders.
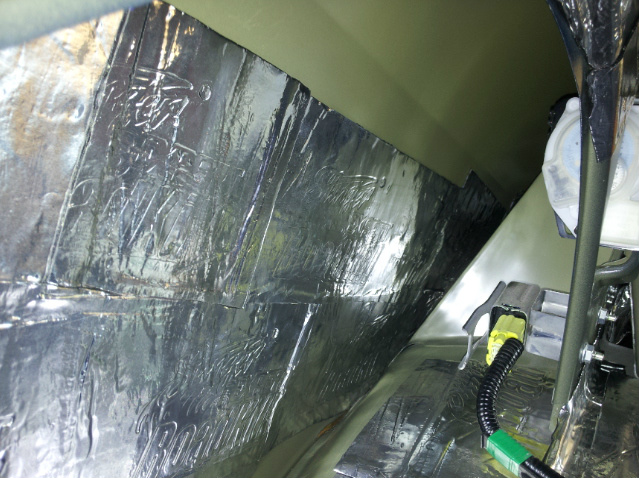
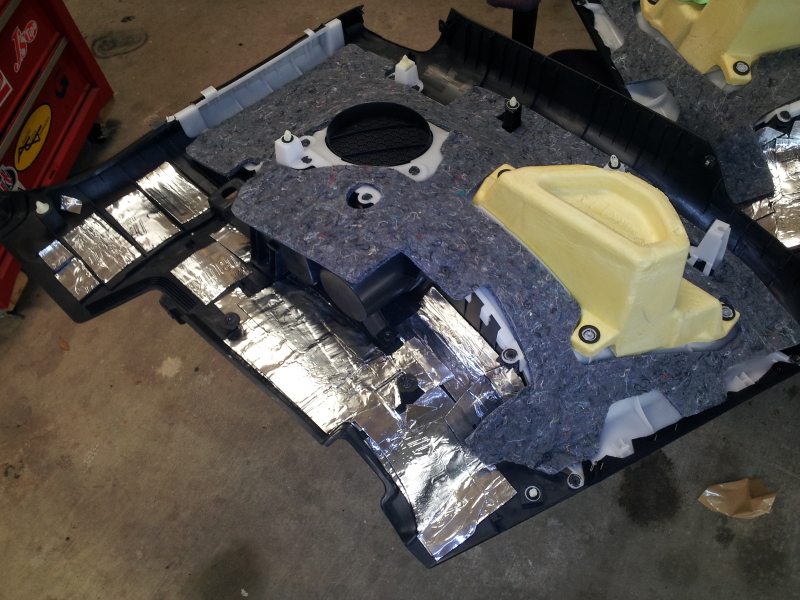
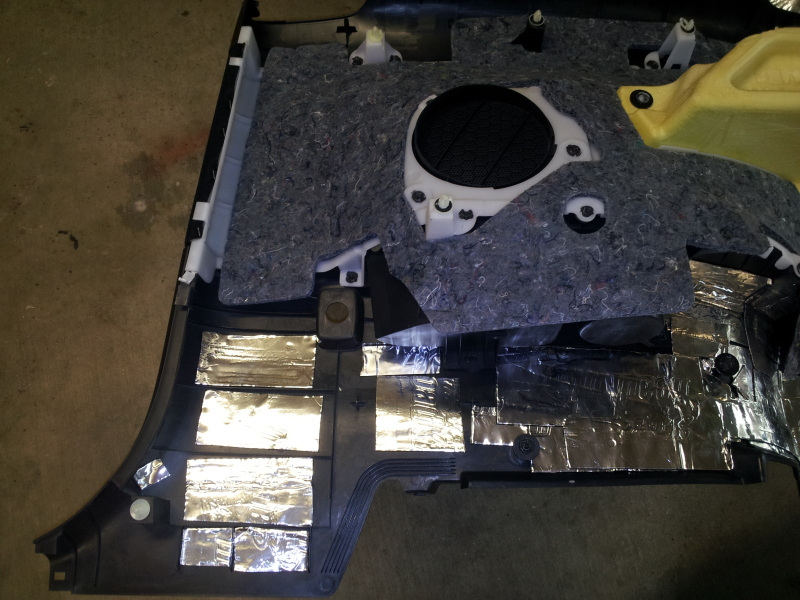
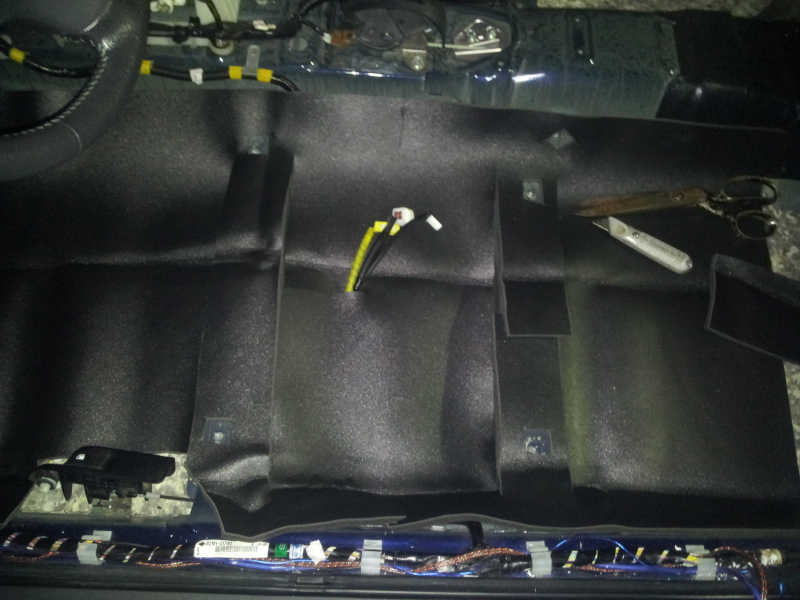
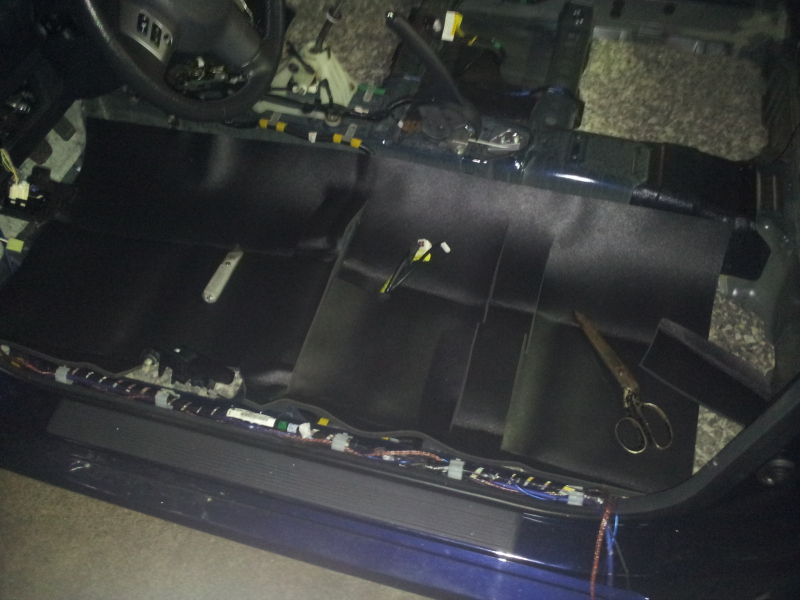
For the carpet pad, I HAD to remove the stock styrafoam from the carpet. With the foam pad installed (vinyl side up) it boosts the carpet up drastically. The styrofoam was showing itself so I pulled them off. Just slice the foam to let it settle around the seat channels. Then cut holes for seat brackets, wiring harness, gas cap lever. When the mat is in place, put the carpet back in and walk around on it. stomp down in all corners to help the foam and carpet settle. Putting the interior back in will be a little tricky, but patience is key.

I bought 98 square feet (3 bulk packs) of mat, and I only used 72 square feet of roll-on, adhesive butyl based deadening mat with aluminum backing. Stinger Audio Roadkill Expert. seen here
http://stingerelectronics.com/produc...&CategoryID=12
I bought 24 square feet (two 32" x 54") carped pads with vinyl backing. Stinger Audio Roadkill. I used all of the padding. seen here
http://stingerelectronics.com/produc...&CategoryID=12
My BEST friend while installing the deadening mat was the Marshalltown roller. I used both ends of this thing and abused it. I am glad I didn't get a cheap one. seen here
http://www.walltools.com/store/marsh...ft-handle.html
A few other things that I used: Acetone, rubber gloves, microfiber towels, paper towels, heavy duty scissors, razor knife.
I also replaced ever plastic clip along the way to ensure tight panel fitment, I wanted it to be perfect. I have a list of the clips I ordered from Toyota if you would like to PM me about it.
The first step is disassembling your interior. Let me say this, if you are uncomfortable disassembling your interior, then installing this sound deader is probably not the job for you. It requires logic to visualize the panel fitment when the car is taken apart so you can place the deadener in areas that wont interfere with fitment of panels. The mat was like a big jigsaw puzzle in the making. This is very time consuming but worth it to those who are willing. Also, if you have trouble taking it all apart, then you definitely will struggle getting it all to fit right, because this deadener will occupy more space and make things tighter. Start here thanks to MANDOS from Scion Life
https://www.scionlife.com/forums/sho...sound+deadener
Once the interior is apart you have a blank canvas. Preparation is key to successful adhesion of the mat. Vacuum out all areas inside the fenders and on the floor, then with rubber gloves on and acetone, wipe down any surface you are visualizing the mat.
Even small areas on any flat piece of sheet metal could use some insulation. If you want to get tricky you could scrape up the stock deadener. My motto is the more the merrier. So I insulated over the factory deadening too. I layed the deadener in the same order I re-install my interior, back to front. Start with the rear quarter panels. The drivers side has a fuel neck so there is no way to physically cover the entire outer body panel, So lay the insulation as far as you can until you reach the fuel filling area. Go ahead and get comfortable inside the car. I folded a towel up and sat in the spare tire opening. use caution when rolling the mat on to body panels, then are thin and can become malformed if the roller is used too hard and unevenly, then again you want this mat to stick good right? Use adequate pressure to get a slight "ripple" on the aluminum backing. Also roll the edges of the mat tight to ensure no moisture can work its way under it.
The passenger side rear quarter has enough room to lay insulation from the taillight to the door jam.
There is a support brace that runs from rear shock mount to rear shock mount, cover both rear fenderwells from there towards the back of the car.
Start in the spare tire opening and work your way up to the fenderwells and support brace from rear shock to rear shock. I also covered the areas under the taillights and rear latch. I double layered the spare tire opening.
Once the rear area of the car is done move to the rear quarter panels between the wheel and the door jams, place the mat as far up and back into the panel that you can.
From this point I covered the front of the fenderwells and the rear seat area. BE SURE NOT TO COVER ANY HOLES OR FLAT SURFACES THAT THE SEATS BOLT TO.
The doors are tricky, you want good coverage but you have many components that cannot be interfered with. I removed the moisture barrier and reused it. There are not many big openings to get inside of the door with, speaker removal will help, but I didn't. Don't use toooo much product or your doors will be REALLY heavy and stress the hinges.
The side interior panels have some LAME foam on them, I removed the lower foam and doubled up on the deadener.
.There are still some open air spaces in the fender wells, they need to be filled. A bag full of "poly fill" from a hobby store will work. Stuff the back full of it and tuck it away in the open spaces, I do not recommend grocery bags because of temp rating, they could melt. I robbed some shredded foam rubber from my love sac lol. you can squeeze the air out of the bag and stuff it way up in the fenders.
For the carpet pad, I HAD to remove the stock styrafoam from the carpet. With the foam pad installed (vinyl side up) it boosts the carpet up drastically. The styrofoam was showing itself so I pulled them off. Just slice the foam to let it settle around the seat channels. Then cut holes for seat brackets, wiring harness, gas cap lever. When the mat is in place, put the carpet back in and walk around on it. stomp down in all corners to help the foam and carpet settle. Putting the interior back in will be a little tricky, but patience is key.
Last edited by Tshock; 03-19-2012 at 04:50 AM.
 03-16-2012, 05:52 PM
#3
Senior Member
SL Member

Join Date: Jul 2010
Posts: 130
Any kind of foam.... FTL! my experience with Foam = moisture trapper = moisture like mad on windows...and it keeps a "stench" if the foam isn't treated prior to using it. but foam does do wonders in the rear quarter panels ;)
Good job deadening, i didn't do that many layers; I used eDead material; liquid + mat. I also don't like the fact the brand you went with has their logo stamped all over... kinda takes away from a smooth roll out it seems... and uneven placing of the mat?
Good job deadening, i didn't do that many layers; I used eDead material; liquid + mat. I also don't like the fact the brand you went with has their logo stamped all over... kinda takes away from a smooth roll out it seems... and uneven placing of the mat?
03-19-2012, 04:44 AM
#4
Any kind of foam.... FTL! my experience with Foam = moisture trapper = moisture like mad on windows...and it keeps a "stench" if the foam isn't treated prior to using it. but foam does do wonders in the rear quarter panels ;)
Good job deadening, i didn't do that many layers; I used eDead material; liquid + mat. I also don't like the fact the brand you went with has their logo stamped all over... kinda takes away from a smooth roll out it seems... and uneven placing of the mat?
Good job deadening, i didn't do that many layers; I used eDead material; liquid + mat. I also don't like the fact the brand you went with has their logo stamped all over... kinda takes away from a smooth roll out it seems... and uneven placing of the mat?
#1 reason I went with stinger. I got a HOOK up and it was way cheaper than shipping anything, my audio guru had everything in stock.
The uneven mat placement bothers me too, but its not about uniformity. The material is simply adding weight to the panel. As far as I am concerned, if the surface is prepped and adhered properly, it will reduce resonance, no matter how ugly I placed it lol. This stuff is thicker than dynamat extreme, so it DID NOT like forming to cracks and crevices, thus I used smaller pieces in odd shaped areas.
03-19-2012, 08:46 PM
#5
Senior Member
SL Member
Join Date: Jul 2010
Posts: 130
You'd be surprised how easily moisture can be trapped in your car; the door panels will have holes on the bottom end to allow water to drip out from windows, etc. Moisture eventually enters in that way, then spreads throughout your car. hence, you can't really stuff the door panels with foam (i learned from experience) on both sides of the inner door panel and yet let the window go up and down.
I bet you're enjoying that nice sound deadening, cuz I sure know I'm enjoying my two layers, I will eventually end up fitting one more layer later this summer.
I bet you're enjoying that nice sound deadening, cuz I sure know I'm enjoying my two layers, I will eventually end up fitting one more layer later this summer.
03-20-2012, 01:36 AM
#6
You'd be surprised how easily moisture can be trapped in your car; the door panels will have holes on the bottom end to allow water to drip out from windows, etc. Moisture eventually enters in that way, then spreads throughout your car. hence, you can't really stuff the door panels with foam (i learned from experience) on both sides of the inner door panel and yet let the window go up and down.
I bet you're enjoying that nice sound deadening, cuz I sure know I'm enjoying my two layers, I will eventually end up fitting one more layer later this summer.
I bet you're enjoying that nice sound deadening, cuz I sure know I'm enjoying my two layers, I will eventually end up fitting one more layer later this summer.
And YES it makes a huge diff with exhaust drone and road noise. My stock woofer sounded like my 12" sub, until I realized the 12" JL woofer wasnt turned on lol.


 03-20-2012, 02:52 AM
#12
It's up to you, I value my comfort and the ability to have a conversation while driving on the highway. It's worth it to me, it actually slows your car down by adding weight, so be sure you know what you are committing to... this stuff is very sticky.
03-21-2012, 04:32 PM
#13
Senior Member
SL Member
Join Date: Jul 2010
Posts: 130
the weight of the roll = the weight you're adding to your car; depending on how much you use / order. that's your base car weight + that. Just FYI, personal experience... 50lbs of sound deadening is A LOT of deadening but NOT a lot of extra weight to slow your car down.
It's psychological, because your cabin is quieter, u may think you're going slower.... lol
I've experienced same MPG after adding deadening material; then running 2 tanks without interior, then 2 tanks WITH full interior. <1mpg difference, so tiny that the sound deadening is DEFINITELY worth it.
It's psychological, because your cabin is quieter, u may think you're going slower.... lol
I've experienced same MPG after adding deadening material; then running 2 tanks without interior, then 2 tanks WITH full interior. <1mpg difference, so tiny that the sound deadening is DEFINITELY worth it.


 04-10-2012, 01:18 PM
#16
Member
SL Member
Join Date: Mar 2010
Location: Jerzey
Posts: 49
very nice. ive told myself over and over i would deaden my car but i just never get the motivation to do it. always wind up just buying new speakers or something...i go through speakers every few months lol
expanding foam like great stuff is probably a better option for filling in the spaces you can easily get to with the layering. it turns solid so it wont absorb moisture like foam, and it expands a ton so it fills in air gaps you cant reach
expanding foam like great stuff is probably a better option for filling in the spaces you can easily get to with the layering. it turns solid so it wont absorb moisture like foam, and it expands a ton so it fills in air gaps you cant reach


Thread
Thread Starter
Forum
Replies
Last Post
halosinfire
Scion tC 2G Forced Induction
4
06-10-2015 05:21 PM

