Spark Plug Change
 01-18-2005, 07:51 PM
#1
Member
SL Member
Thread Starter

Join Date: Aug 2004
Location: Florida
Posts: 63
SPARK PLUGS REPLACEMENT

By: Brian

This is my spark plug change on a 2004 xA. It had NGK V-power plugs and I replaced them with the same. $7 for 4 spark plugs at local auto-part stores.
Tools used:
-10mm socket w/wrench,
- 5/8 inch (16mm) spark plug wrench
- Torque wrench w/ 6 inch extension and 16mm socket
- Plug/shim gap measureing tool
Plus:
-4X NGK -bkr5eya
- 1 pack high temp anti-seize
1. I started with a cool engine. Used the 10mm socket to remove the engine covers 4 nuts

2. Under the engine cover I used a brush and towel to clean away dirt and debrit so it wouldn't be falling down the spark plug wells. Then I used the 10mm socket to remove the 4 bolts holding the coil packs/boots down.

3. Once all the bolts were out I did one replacement at a time. I removed the first boot from the plug by giving it a twist and pulling it off the plug. (if there isn't enough slack in the wire to pull it out, you can disconnect the clip)

4. With that out you can see down to the plug

You can insert the spark plug wrench and unscrew the plug counter clockwise

-or-
if it's stuck you can use a wrench (torque wrench in pic) and the 16mm socket on an extension to break it loose.

5. Once it's unscrewed the plug will stay in the plug wrench (if equipped with rubber grommet) and you can lift it right out. If you aren't using a plug wrench you can use a small section of hose to push down on the end of the plug or some other imagenative device.

6. Inspect the old spark plug. Here are some examples of what to look for. Here's a side-by-side of the old and new plug. Notice the rounded electrode on the old plug and the slightly larger gap.

7. Check the gap on the new plugs. (old plug shown)

It should be 0.032 in. If it is bigger you can tap the plug on the electrode to close in the gap

-or-
if the gap is too small you can CAREFULLY pry it open some.

8. Coat the threads of the plug with antiseize. This will help on your next change and keep the plugs from getting seized up in the engine.

9. Now you can put the new plug in. Lower it doen into the hole. Start by turning the wrench counter-clockwise till you feel the threads "pop" a little (that's the starting point of the threads fitting correctly) then turn the wrench clockwise to screw the plug in. If you feel much resistance, unscrew the plug and start over. This is to keep you from "cross-threading" the plug (very bad) and forcing it in where it will almost definately get seized in the engine ( very pricey to fix).

*** another trick for beginners is to use a small section of hose. Fit it on the top of the plug and use it in place of the wrench to screw the plug in.
If the threads start to cross the hose will slip around the plug instead of forcing it in.
10. Once the plug is screwed in you can use the torque wrench to tighten it to 13 ft lbs
-or-
after it's hand-tight tighten it 1/2 a turn more.
11. Put the boot back in and onto the plug.

12. Put the 10mm bolt back in to hold the coil pack/boot down

-13. Repeat steps 1-12 on the remaing plugs and put the engine cover back on.
Should only take about 15-30 minutes.
Faster than an oil change, cheaper than an oil change, yet so often neglected
By: Brian
This is my spark plug change on a 2004 xA. It had NGK V-power plugs and I replaced them with the same. $7 for 4 spark plugs at local auto-part stores.
Tools used:
-10mm socket w/wrench,
- 5/8 inch (16mm) spark plug wrench
- Torque wrench w/ 6 inch extension and 16mm socket
- Plug/shim gap measureing tool
Plus:
-4X NGK -bkr5eya
- 1 pack high temp anti-seize
1. I started with a cool engine. Used the 10mm socket to remove the engine covers 4 nuts
2. Under the engine cover I used a brush and towel to clean away dirt and debrit so it wouldn't be falling down the spark plug wells. Then I used the 10mm socket to remove the 4 bolts holding the coil packs/boots down.
3. Once all the bolts were out I did one replacement at a time. I removed the first boot from the plug by giving it a twist and pulling it off the plug. (if there isn't enough slack in the wire to pull it out, you can disconnect the clip)
4. With that out you can see down to the plug
You can insert the spark plug wrench and unscrew the plug counter clockwise
-or-
if it's stuck you can use a wrench (torque wrench in pic) and the 16mm socket on an extension to break it loose.
5. Once it's unscrewed the plug will stay in the plug wrench (if equipped with rubber grommet) and you can lift it right out. If you aren't using a plug wrench you can use a small section of hose to push down on the end of the plug or some other imagenative device.
6. Inspect the old spark plug. Here are some examples of what to look for. Here's a side-by-side of the old and new plug. Notice the rounded electrode on the old plug and the slightly larger gap.
7. Check the gap on the new plugs. (old plug shown)
It should be 0.032 in. If it is bigger you can tap the plug on the electrode to close in the gap
-or-
if the gap is too small you can CAREFULLY pry it open some.
8. Coat the threads of the plug with antiseize. This will help on your next change and keep the plugs from getting seized up in the engine.
9. Now you can put the new plug in. Lower it doen into the hole. Start by turning the wrench counter-clockwise till you feel the threads "pop" a little (that's the starting point of the threads fitting correctly) then turn the wrench clockwise to screw the plug in. If you feel much resistance, unscrew the plug and start over. This is to keep you from "cross-threading" the plug (very bad) and forcing it in where it will almost definately get seized in the engine ( very pricey to fix).
*** another trick for beginners is to use a small section of hose. Fit it on the top of the plug and use it in place of the wrench to screw the plug in.
If the threads start to cross the hose will slip around the plug instead of forcing it in.
10. Once the plug is screwed in you can use the torque wrench to tighten it to 13 ft lbs
-or-
after it's hand-tight tighten it 1/2 a turn more.
11. Put the boot back in and onto the plug.
12. Put the 10mm bolt back in to hold the coil pack/boot down
-13. Repeat steps 1-12 on the remaing plugs and put the engine cover back on.
Should only take about 15-30 minutes.
Faster than an oil change, cheaper than an oil change, yet so often neglected


 01-19-2005, 02:46 AM
#9
Member
SL Member
Thread Starter
Join Date: Aug 2004
Location: Florida
Posts: 63
Originally Posted by MSCOFF
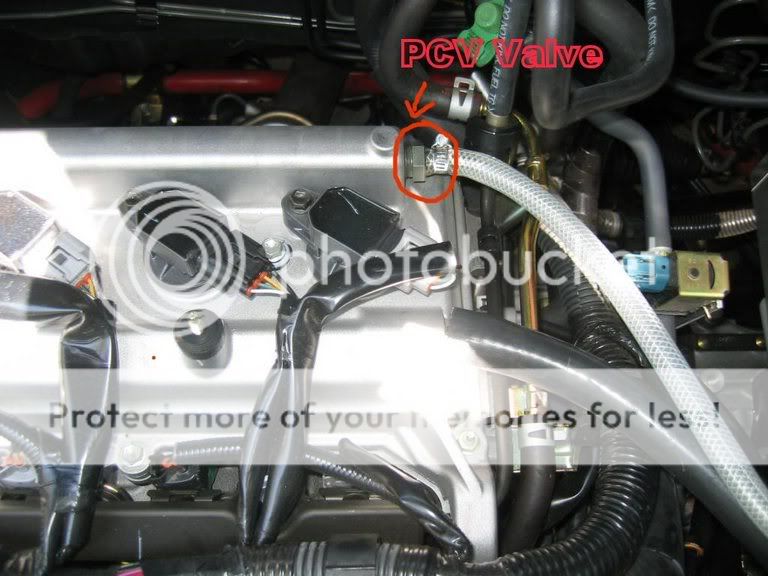
while you were in there, did you see a PCV valve? Nice DIY. Thanks. I saved the page. There are some good DIYs on the Echofans website.
 01-22-2005, 10:09 PM
#13
Senior Member
SL Member

Join Date: Feb 2004
Location: Los Angeles
Posts: 635
According to the Xb Service manual here are the correct specs for the plug gaps:
Denso (K16RU)= 0.7 mm / 0.028 inches
NKG (BKR5EYA)= 0.8 mm / 0.031 inches
Also, it's not a bad idea to put some Dielectric Tune-Up Grease on the tip of the boot and on the ceramic part of the plug to make sure no fusing occurs do to heat.
Denso (K16RU)= 0.7 mm / 0.028 inches
NKG (BKR5EYA)= 0.8 mm / 0.031 inches
Also, it's not a bad idea to put some Dielectric Tune-Up Grease on the tip of the boot and on the ceramic part of the plug to make sure no fusing occurs do to heat.
01-22-2005, 10:34 PM
#14
Senior Member
SL Member
Join Date: Feb 2004
Location: Los Angeles
Posts: 635
Originally Posted by MSCOFF
while you were in there, did you see a PCV valve? Nice DIY. Thanks. I saved the page. There are some good DIYs on the Echofans website.
 01-25-2005, 05:02 AM
#15
Junior Member

Join Date: Jan 2005
Location: Millbrook, AL
Posts: 3
I just bought my xB a day or so after Christmas, so I haven't tried any mods. And I'm not familiar with how the new computer controlled engins react to what I'm about to mention.
In the OLD days--I mean OLD days-- we'd drop a step or two to a colder plug, then we'd gap a little wider than spec. Generally, we could feel a boost in power. Has anybody tried this on an xB? I think I will, before the stock plugs go kaput, so I can reinstall them if there's no improvement.
In the OLD days--I mean OLD days-- we'd drop a step or two to a colder plug, then we'd gap a little wider than spec. Generally, we could feel a boost in power. Has anybody tried this on an xB? I think I will, before the stock plugs go kaput, so I can reinstall them if there's no improvement.
 02-12-2005, 09:28 PM
#18
Senior Member

SL Member
Team N.V.S.

Originally Posted by firesquare
do iridium spark plugs really add "horsepower" or is that some marketing myth
are you all saying thet sparkplugs gotta be changed every 30,000?
are you all saying thet sparkplugs gotta be changed every 30,000?
02-13-2005, 03:13 AM
#19
Originally Posted by firesquare
do iridium spark plugs really add "horsepower" or is that some marketing myth
are you all saying thet sparkplugs gotta be changed every 30,000?
are you all saying thet sparkplugs gotta be changed every 30,000?
im clueless when it comes to spark plugs. guess ill be going to toyota on monday to get me some.
crap my tool box is still in NY argh. now o gotta buy a spark plug socket and extension and rachett.
what size is the spark plug socket i need?

