Just installed glove box illumination :)
 04-28-2012, 12:47 AM
#1

Thanks to this inspiration: https://www.scionlife.com/forums/sho...d.php?t=212877
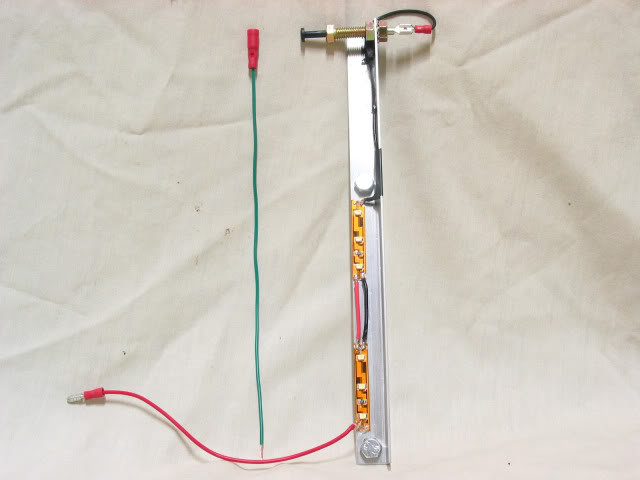
I decided to make glove box illumination my next xB2 project -- just finished today !
!
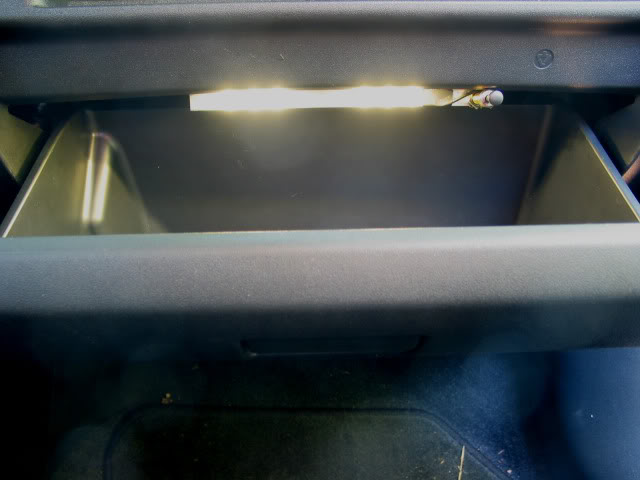
I decided to make glove box illumination my next xB2 project -- just finished today
!

 04-28-2012, 01:18 AM
#3
Thanks !
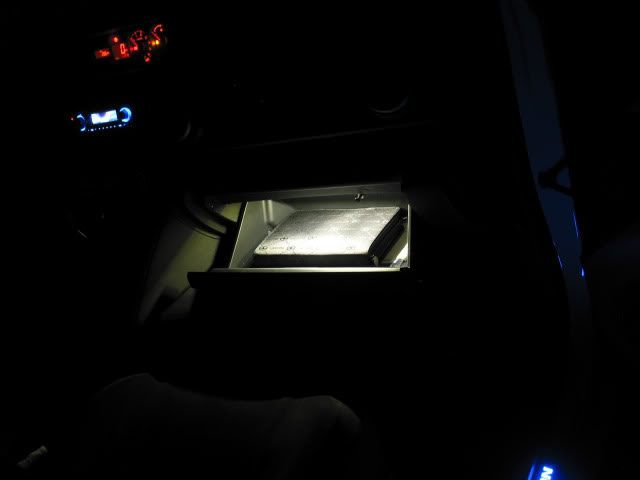
Yes, it closes perfectly and I don't feel the switch when closing the door. I've adjusted it so with the door closed, it's only barely pushed, enough to break the contact plus a tad. If the door is to any degree open, the box is illuminated.
!Yes, it closes perfectly and I don't feel the switch when closing the door. I've adjusted it so with the door closed, it's only barely pushed, enough to break the contact plus a tad. If the door is to any degree open, the box is illuminated.
04-28-2012, 03:03 AM
#5
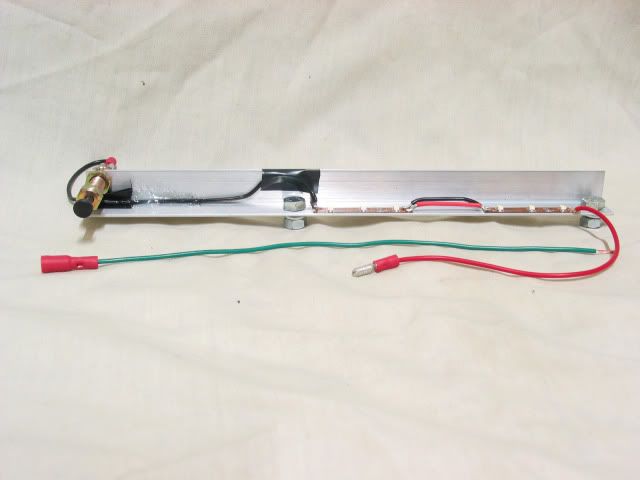
1) It's necessary to tap the small gauge dark green ILL+ wire (pin 10) on radio connector C1 (front door speakers plus other) for a power pigtail to feed the glove box (you can see the end of mine at the left of the second photo. It needs a female connector to accept the illumination male (red wire). If you have a harness adapter installed (aftermarket radio), then you can alternatively tap the adapter harness equivalent wire (which is what I did).
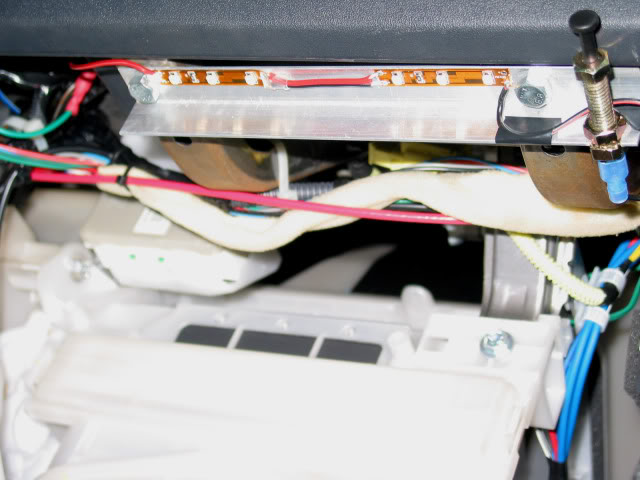
2) As you can see from the second photo, the assembly is bolted to the two steel braces above the glove box. If you remove your glove box door, you'll see they each have three holes, the bolts pass through the holes closest the passenger seat. If you sit on the passenger sill and feel down over the edge of those braces with your forefinger, you'll find the access space is very limited. I found it to be adequate, but positioning the fastening hardware to the bolt requires finger dexterity and patience. Basically, it's a three step process, the easiest being positioning a split ring lock washer over the end of a partially inserted bolt, next maneuvering a nut over the end of the bolt, and then carefully starting the bolt into the nut -- takes plenty of patience getting them aligned properly when you can't see the nut, only feel it. My guess is it'll take a couple or so tries to get some feel for it and a dry run without the light assembly is probably the best way to start.
 04-28-2012, 10:41 AM
#7
Senior Member
SL Member

Join Date: Feb 2011
Location: Oregon City, OR
Posts: 455
very intuitive i must say. allthough i dont like the switch and i would personally put in more thought on re designing it. (meaning if i was going to build one i would do it not that YOU need to, it works for you right? ) i give you mad props for it non the less. good work.
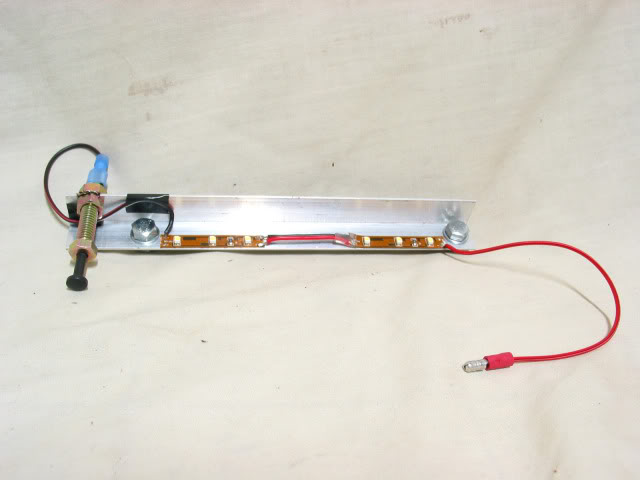
  im curious how come you didn't use a continuous LED strip? instead you used to separate little strips.
for future reference if you want a brighter ouput. use 5050 SMD led cool white or neutral white strip. they are closer together and have a brighter output than anything else.
) i give you mad props for it non the less. good work. for future reference if you want a brighter ouput. use 5050 SMD led cool white or neutral white strip. they are closer together and have a brighter output than anything else.
 04-28-2012, 09:36 PM
#10
very intuitive i must say. allthough i dont like the switch and i would personally put in more thought on re designing it. (meaning if i was going to build one i would do it not that YOU need to, it works for you right?) i give you mad props for it non the less. good work. im curious how come you didn't use a continuous LED strip? instead you used to separate little strips.
for future reference if you want a brighter ouput. use 5050 SMD led cool white or neutral white strip. they are closer together and have a brighter output than anything else.
) i give you mad props for it non the less. good work. for future reference if you want a brighter ouput. use 5050 SMD led cool white or neutral white strip. they are closer together and have a brighter output than anything else.
Last edited by TrevorS; 04-28-2012 at 10:42 PM.
04-28-2012, 10:04 PM
#11
!There are also car door open pin switches out there, but I specifically needed one that had a long adjustable reach.
Trevor, if you're willing to make it and ship it to me, I'm down for it. I don't have the experience with doing custom brackets and LEDs, so getting it in my hands will give me an opportunity to play around with it and learn from it.
Let me know what kind of price you're looking at for materials and assembly. Then we'll talk shipping ha ha.
Let me know what kind of price you're looking at for materials and assembly. Then we'll talk shipping ha ha.
04-30-2012, 12:38 AM
#13
I decided the pin switch would be better located further off to the side, so I moved it out roughly 3" further. Definitely better now, though at first I had clearance issues between the side of the glove box and the aluminum bracket -- guess I went 1/8" too far !
!

 05-01-2012, 12:18 AM
#16
Just an aside -- I expect some might prefer to simplify a bit further by using a single strip of nine LEDs instead of my approach of jumpering two strips of three. It would also make the center region brighter, but for me, the six works fine and I like the reasonably even illumination. A question of personal choice !
Thank you sir, happy to please!
In case anyone was following this discussion, we've switched to PM for the time being.
! Thank you sir, happy to please
!In case anyone was following this discussion, we've switched to PM for the time being.