
custom front bumper build(56k dont even try)


Thread Starter
Senior Member
SL Member
Joined: Mar 2007
Posts: 254
From: Jacksonville, FL
so this is all copy and paste from another fourm so there might be some random stuff that makes no since from other comments i didnt copy. but i wanted to show the fellow scion owners. i starte dlast may and its taken awhiloe to get were i am now but this is it.
before

what im going for

all the stuff

base and protecting my car

cardboard back to hold up foam

one sidde of foam glued to gether with spary glue

some great stuff and progress on other side


where i left of to night i was hungry adn tired


opend the hole open more.

a little sanding made it look so much better adn gave me the hope to continue on cause it was running short.

adding to the hood

doing some shaping


added center
update from todays work. got a lot of imperfections out using templets.


that rectangle is there so i can still get to my hood latch

before
what im going for
all the stuff
base and protecting my car
cardboard back to hold up foam
one sidde of foam glued to gether with spary glue
some great stuff and progress on other side
where i left of to night i was hungry adn tired
opend the hole open more.
a little sanding made it look so much better adn gave me the hope to continue on cause it was running short.
adding to the hood
doing some shaping
added center
update from todays work. got a lot of imperfections out using templets.
that rectangle is there so i can still get to my hood latch
Thread Starter
Senior Member
SL Member
Joined: Mar 2007
Posts: 254
From: Jacksonville, FL
new pics

all the fiberglass came in

started raining :-(

Almost done

done

all taped up with foil tape ready for glassing tomorrow.
i actually had to take some of the tape off and fix a high spot but no pics of that so the one spot that looks off around the headlights and top grill is fixed now
first layer of glass on

glass and foam taken off the car here is the back side with all the card board holding it up

front side

after ripping and cutting all the foam out. it sucks cause it took so long to sculpt the foam now its all in pieces in the trash lol but i knew that was gonna happen

two layers of glass on out side

shaving my rear hatch handle cause i had the fiber glass out and had to epoxy all the stud screws back on cause they all broke off.


after the two layers of glass and putting the original cardboard bottom back on and glassing the bottom edge but its not trimmed yet.


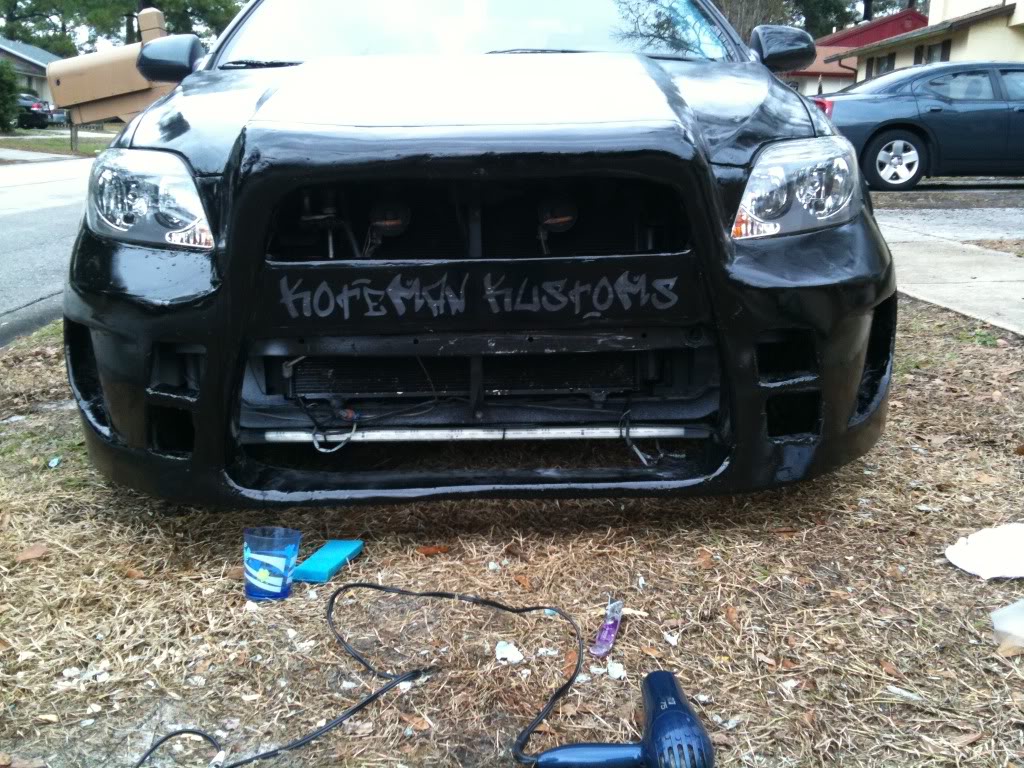
so i had to put my stock bumper back on so i can drive tonight and tomorrow plus i start classes monday but i can work on the bumper now with it off the car any ways. but i havent had time or enough resin to finish the bumper and hood so i left all the foam and tape on the hood for now it looks funny lol.

and jose21740 dont get discouraged this is my first really big glass project. my first was fixing a hole in a skim board. second was makeing two sub boxes to be molde in my trunk that was hard and i didnt know i needed like 10 layers for subs so they were only 3 AND not that good.


yes i know the amp and subs sucked thats y i have a new set up now.
which was my second project glassing.

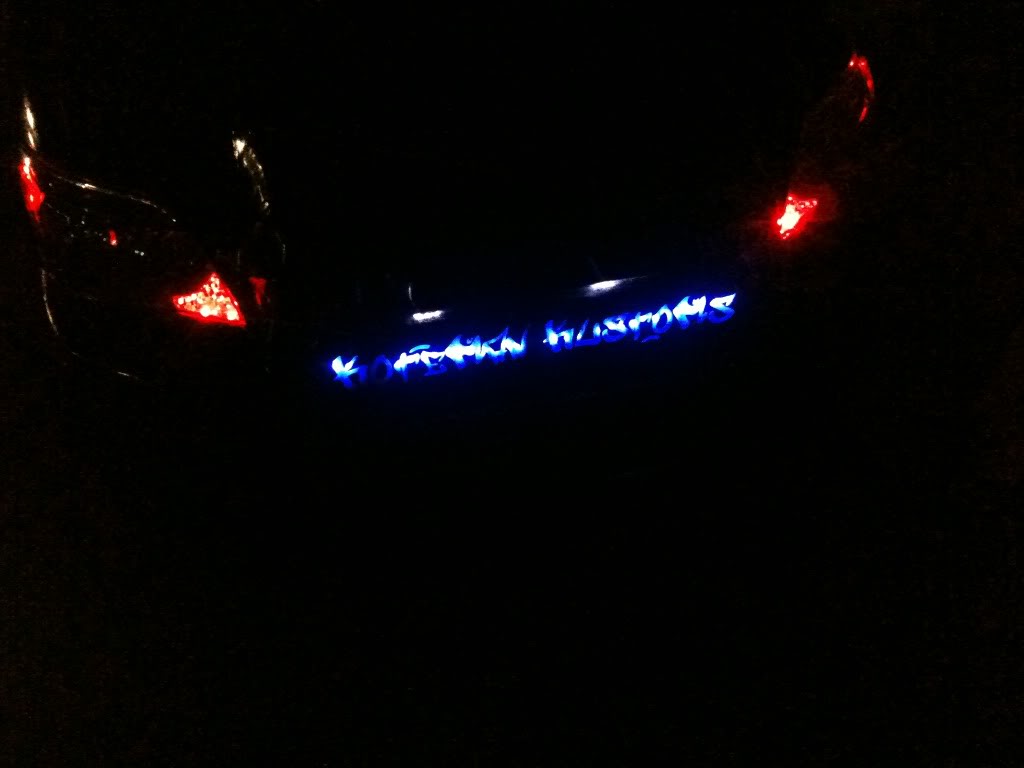
here it was done with lights and fog machine under the plexi and stuff.


and thats not strong enough either cause i rushed it to finish for a show but plan on redoing the whole trunk set up again hopefully this summer. so as long as u dont rush it ull be good. and buying the nicer resin makes it 10x easier i think. and if anything messes up u can always fix it with cutting and sanding and re glassing if needed. Ive had everything get me down during this bumper like rain adn time constraints. i have hardened resin in my hair i got great stuff on my leg and had to shave a huge patch of hair off the back of my calf Ive spent way more money than i have so thank god for credit cards which i only use if i have to. and since my garage has been open so much lately a bird is making a nest in there. plus i get yelled at i get yelled at every five minutes for being to loud or having the garage dirty by my step mom cause we own a hair salon and the spa is above the garage. and every time she walks out she tells me my car looks home made and like crap which dosent help my motivation and everyone on Facebook tells me its not gonna turn out how i want it but what do they know. so as long as u take your time and have a place u can leave your car parked for awhile out of the weather ull be good. sorry for the really long message and ranting but im really bored at work right now
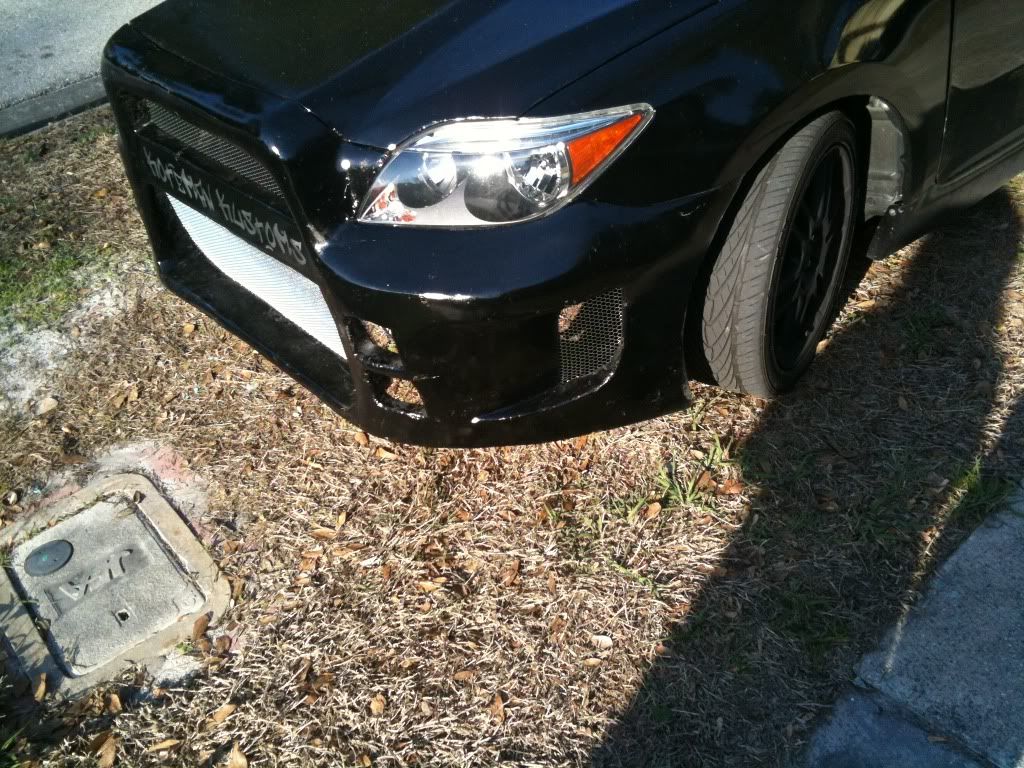
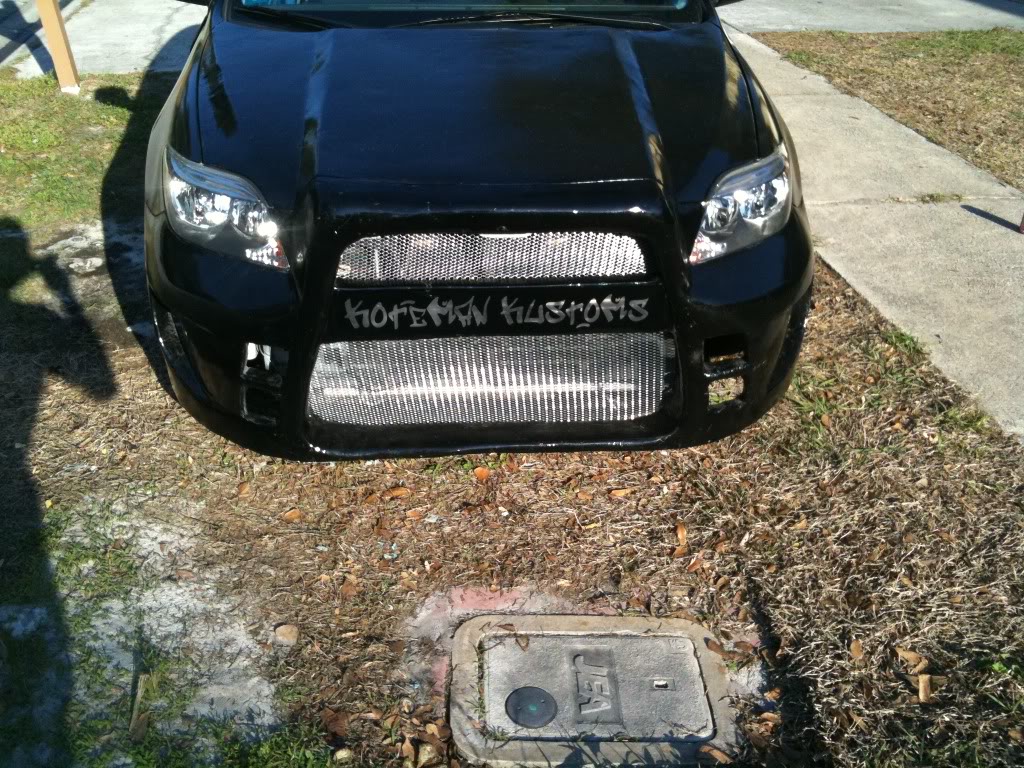
update!!!!! so i didnt get much done today cause i had work and decied to go skim boarding after work so i didnt start till like 10pm after i took a nap from like 6-9 lol. but i did alot of needed triming of edges and makeing all the lips on the openings the same depth all the way around. some sanding on the inside and the main thing i did was the plexi cut out in the center brace where im going to do a stealth led thing i saw some where on here with (the hiyabussa turn signal in the mirror) koteman kustoms is its kinda my logo i made and put on everything. so i cut the plexi and the hole ing the bumper and fiber glassed a lip for it to rest on on the back so the inside of the bumper. the pics r really crapy from my phone but u might be able to see whats going on.
the piece of plexi i cut

the hole im cutting to put it in

plexi all taped up with my handy foil tape that was the last of my two rolls :-( hope i dont need any more.

the plexi taped up in place to hold it flat and flush with the rest of it while i glass the lip

the lip being glassed in on the inside of the bumper it will be a 1/4 inch -1/2 all the way around when im done so im cutting most of the excess out that has no resin on it.

had some left over resin so started folding over the gap around the edges.

and to answer rattops question ive used 1 gallon and 16oz of resin and half a roll of 6 inch wide 1.5 oz mat it was 80 yards long plus a lot of gloves and brushes
all the fiberglass came in
started raining :-(
Almost done
done
all taped up with foil tape ready for glassing tomorrow.
i actually had to take some of the tape off and fix a high spot but no pics of that so the one spot that looks off around the headlights and top grill is fixed now
first layer of glass on
glass and foam taken off the car here is the back side with all the card board holding it up
front side
after ripping and cutting all the foam out. it sucks cause it took so long to sculpt the foam now its all in pieces in the trash lol but i knew that was gonna happen
two layers of glass on out side
shaving my rear hatch handle cause i had the fiber glass out and had to epoxy all the stud screws back on cause they all broke off.
after the two layers of glass and putting the original cardboard bottom back on and glassing the bottom edge but its not trimmed yet.
so i had to put my stock bumper back on so i can drive tonight and tomorrow plus i start classes monday but i can work on the bumper now with it off the car any ways. but i havent had time or enough resin to finish the bumper and hood so i left all the foam and tape on the hood for now it looks funny lol.
and jose21740 dont get discouraged this is my first really big glass project. my first was fixing a hole in a skim board. second was makeing two sub boxes to be molde in my trunk that was hard and i didnt know i needed like 10 layers for subs so they were only 3 AND not that good.
yes i know the amp and subs sucked thats y i have a new set up now.
which was my second project glassing.
here it was done with lights and fog machine under the plexi and stuff.
and thats not strong enough either cause i rushed it to finish for a show but plan on redoing the whole trunk set up again hopefully this summer. so as long as u dont rush it ull be good. and buying the nicer resin makes it 10x easier i think. and if anything messes up u can always fix it with cutting and sanding and re glassing if needed. Ive had everything get me down during this bumper like rain adn time constraints. i have hardened resin in my hair i got great stuff on my leg and had to shave a huge patch of hair off the back of my calf Ive spent way more money than i have so thank god for credit cards which i only use if i have to. and since my garage has been open so much lately a bird is making a nest in there. plus i get yelled at i get yelled at every five minutes for being to loud or having the garage dirty by my step mom cause we own a hair salon and the spa is above the garage. and every time she walks out she tells me my car looks home made and like crap which dosent help my motivation and everyone on Facebook tells me its not gonna turn out how i want it but what do they know. so as long as u take your time and have a place u can leave your car parked for awhile out of the weather ull be good. sorry for the really long message and ranting but im really bored at work right now
update!!!!! so i didnt get much done today cause i had work and decied to go skim boarding after work so i didnt start till like 10pm after i took a nap from like 6-9 lol. but i did alot of needed triming of edges and makeing all the lips on the openings the same depth all the way around. some sanding on the inside and the main thing i did was the plexi cut out in the center brace where im going to do a stealth led thing i saw some where on here with (the hiyabussa turn signal in the mirror) koteman kustoms is its kinda my logo i made and put on everything. so i cut the plexi and the hole ing the bumper and fiber glassed a lip for it to rest on on the back so the inside of the bumper. the pics r really crapy from my phone but u might be able to see whats going on.
the piece of plexi i cut
the hole im cutting to put it in
plexi all taped up with my handy foil tape that was the last of my two rolls :-( hope i dont need any more.
the plexi taped up in place to hold it flat and flush with the rest of it while i glass the lip
the lip being glassed in on the inside of the bumper it will be a 1/4 inch -1/2 all the way around when im done so im cutting most of the excess out that has no resin on it.
had some left over resin so started folding over the gap around the edges.
and to answer rattops question ive used 1 gallon and 16oz of resin and half a roll of 6 inch wide 1.5 oz mat it was 80 yards long plus a lot of gloves and brushes
Thread Starter
Senior Member
SL Member
Joined: Mar 2007
Posts: 254
From: Jacksonville, FL

plexi in the cut out

only a few more spots to strengthen up
so i grinded all the bumpps out of the glass and fabric ffrom the nails in the frame sticking up. also too all the fabric and glass of from the the sids or the frame out to strat fressh and re shape all the foam cause it was bumpy. i leard to day a gringer with a metal blade is me now favorite tool to cut and sand fiber glass adn it was really good for shaping foam if u go slow.

got it mounted with all the stock mounting points.


reshaped and 3 layers of 6 oz s glass cloth and some matt in the corners

better view from far away after i got to my moms so it stayed on on the highway luckly
[IMG]http://sphotos.ak.fbcdn.net/hphotos-ak-snc4/hs293.snc4/40991_10150235395815475_810450474_14436870_5183177_n.jpg[/IMG]

painted and some body fill

no body fill just painted in the rain with spray cans
 that once area getting smooth
so i made a paper model of my bumper to design the wind spliter cause i suck at drawing

cut the whole bottom lip of then made a new one out of foam really quick only 3/4 inch now instead of 3 inches to make room for the spliter.


fiberglassed and on the car.
 hopefully i get some more work done this week but idk cause i work alot covering for people this week. on i also took all the lightning off if u notcied it looks better now i think
adding the deep lip for the lower grill gonna be slanted

[IMG]http://sphotos.ak.fbcdn.net/hphotos-ak-snc4/hs763.snc4/66334_10150284073345475_810450474_15596774_5592517_n.jpg[/IMG]
Thread Starter
Senior Member
SL Member
Joined: Mar 2007
Posts: 254
From: Jacksonville, FL
heres some day time full bumper pics since most of my recent ones have been really close or at night


[IMG]http://sphotos.ak.fbcdn.net/hphotos-ak-snc4/hs942.snc4/73541_10150285300380475_810450474_15617883_3519323_n.jpg[/IMG]

go the fiberglass off hood and removed all the tape i could and the great stuff the was still on the sides plus all the nails that where holding it down then sanded it with 120. i haven't seen my stock hood in forever and forgot about all the lighting on it since i took it off my car a month ago.

reinforcing the underside of the hood by fiberglassing the wood frame to the hood and fixing the 3 cracks i made while pulling it off cause it was stuck hard
i glued it back with SEM general purposiveness flexible body paneling adhesive. the local kempler paints had it for 27$ and let me borrow one of their 80$ caulking guns and take it home to do it and bring back tomorrow cause they didn't wanna make me buy one for a one time use so that was sweet. ill get a pic of that in the morning cause it was dark when i did it
the hood being epoxied down and drying for 24 hours

one of the places it cracked while pulling it off and the screws holding it down while it dries cause it didn't fit perfect after glassing the underside

more screws holding it down


almost done smothing the hood out

one coat of primer to see the imperfections

[IMG]http://sphotos.ak.fbcdn.net/hphotos-ak-snc4/hs951.snc4/74426_10150296940575475_810450474_15831072_7113510_n.jpg[/IMG]
so i have scion exposed the 12 of febuary so i got 11 days to try and finish this lets see how it goes.

have to re shape the left side to make it semetric

gettign smooth
 0150384181160475_810450474_17379807_7686754_n.jpg[/IMG]

sandign in the green stage makes lots of blue chesses lol

testing the plexi in the insert final one will be epoxyed in not screws adn all smoothed out even
as of right now it looks like this. Im still not done got a lot more smoothing to get it perfect but wanted to take a break from it.
[IMG]http://i1228.photobucket.com/albums/ee450/koteman/IMG_0439.jpg[/IMG]
Im also going to make a nice grill from aluminum slates that one now is temp.
But I started last may and did 7 days straight to sculpt the foam then slowly after the first layer of glass.and a year later it looks decent but I know ill get it better.
[IMG]http://sphotos.ak.fbcdn.net/hphotos-ak-snc4/hs942.snc4/73541_10150285300380475_810450474_15617883_3519323_n.jpg[/IMG]
go the fiberglass off hood and removed all the tape i could and the great stuff the was still on the sides plus all the nails that where holding it down then sanded it with 120. i haven't seen my stock hood in forever and forgot about all the lighting on it since i took it off my car a month ago.
reinforcing the underside of the hood by fiberglassing the wood frame to the hood and fixing the 3 cracks i made while pulling it off cause it was stuck hard
i glued it back with SEM general purposiveness flexible body paneling adhesive. the local kempler paints had it for 27$ and let me borrow one of their 80$ caulking guns and take it home to do it and bring back tomorrow cause they didn't wanna make me buy one for a one time use so that was sweet. ill get a pic of that in the morning cause it was dark when i did it
the hood being epoxied down and drying for 24 hours
one of the places it cracked while pulling it off and the screws holding it down while it dries cause it didn't fit perfect after glassing the underside
more screws holding it down
almost done smothing the hood out
one coat of primer to see the imperfections
[IMG]http://sphotos.ak.fbcdn.net/hphotos-ak-snc4/hs951.snc4/74426_10150296940575475_810450474_15831072_7113510_n.jpg[/IMG]
so i have scion exposed the 12 of febuary so i got 11 days to try and finish this lets see how it goes.
have to re shape the left side to make it semetric
gettign smooth
0150384181160475_810450474_17379807_7686754_n.jpg[/IMG]sandign in the green stage makes lots of blue chesses lol
testing the plexi in the insert final one will be epoxyed in not screws adn all smoothed out even
as of right now it looks like this. Im still not done got a lot more smoothing to get it perfect but wanted to take a break from it.
[IMG]http://i1228.photobucket.com/albums/ee450/koteman/IMG_0439.jpg[/IMG]
Im also going to make a nice grill from aluminum slates that one now is temp.
But I started last may and did 7 days straight to sculpt the foam then slowly after the first layer of glass.and a year later it looks decent but I know ill get it better.


To the guy I made fun of who wondered if you could put an Evo bumper on a tc... you can...
Good work. I mean that, you have the guts to undergo this. To me it looks like something out of nfsu.
Good work. I mean that, you have the guts to undergo this. To me it looks like something out of nfsu.


Senior Member
SL Member
Joined: Jan 2008
Posts: 315
From: Houston, TX and Cleveland, OH
Personally it isn't my cup of tea...
But....
That is some serious work that you put in. Major props to the amount of work that you had put in. Definitely looks very well done. Definitely a one of a kind tC.
Good worksmanship.
But....
That is some serious work that you put in. Major props to the amount of work that you had put in. Definitely looks very well done. Definitely a one of a kind tC.
Good worksmanship.