DIY - Interior Trim Removal!
 03-02-2012, 03:43 AM
#1
Senior Member
SL Member
Thread Starter
iTrader: (1)

Join Date: Nov 2011
Location: Jacksonville, FL
Posts: 1,267
First of all:
I AM NOT RESPONSIBLE FOR ANY DAMAGE TO YOUR VEHICLE. THIS IS SIMPLY THE PROCEDURES THAT I FOLLOWED, IT IS YOUR CHOICE IF YOU WANT TO FOLLOW THIS OR NOT.
This DIY will explain the steps to remove the following trims:
-Door Panel
-Dash
-Steering Wheel
-A/C Vents
-A/C Gauges
-Shifter
Once again.. Please note that is at your own risk
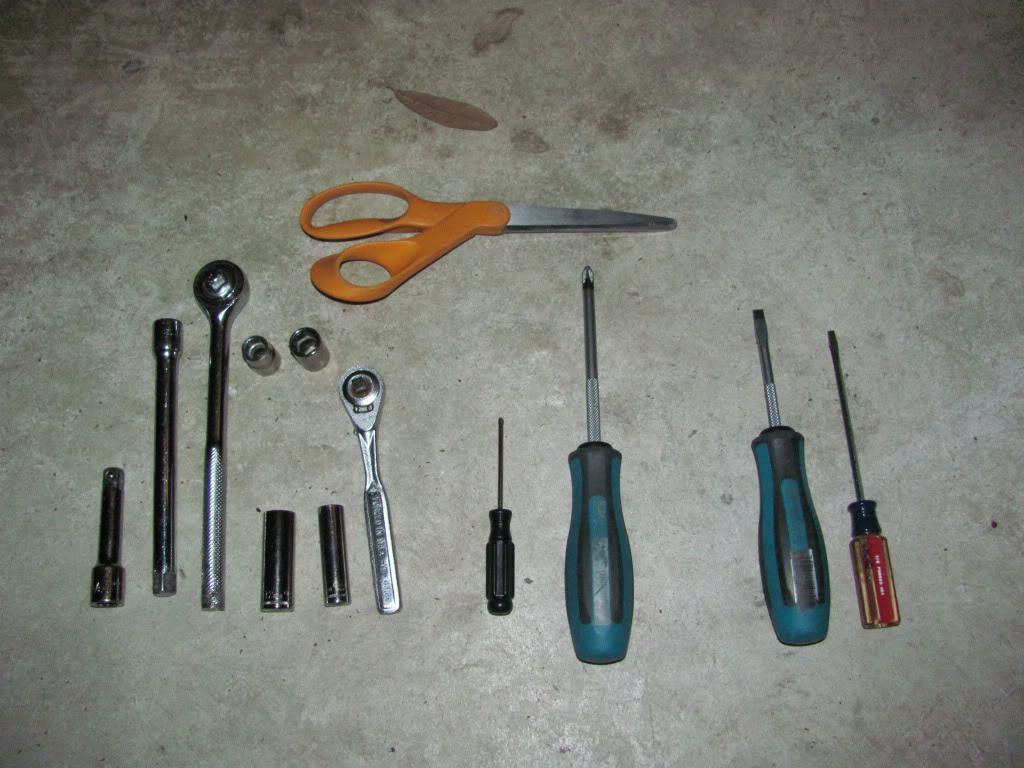
-Tools Needed: Scissors, Large Flat Head Screwdriver, Small Flat Head Screwdriver, Large Phillips Head Screwdriver, Small Phillips Head Screwdriver,
Small Ratchet with 10 and 12mm sockets.. or 10 and 12mm wrenches, Medium Ratchet + extensions with 10 and 12mm sockets.. or use the stated above
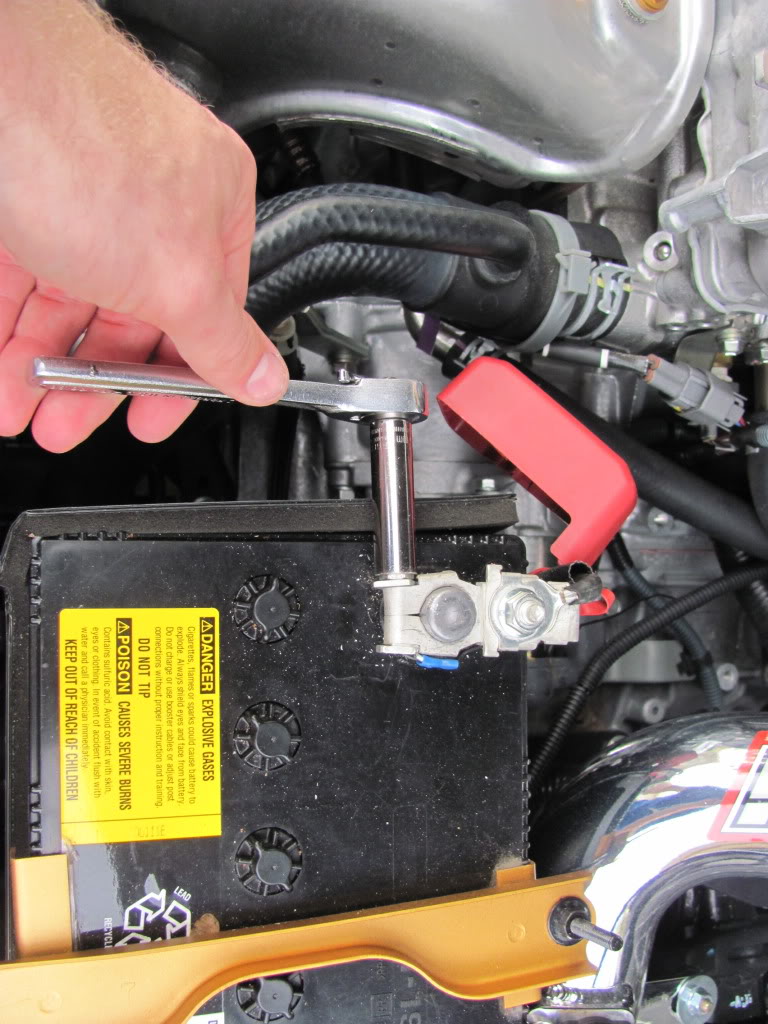
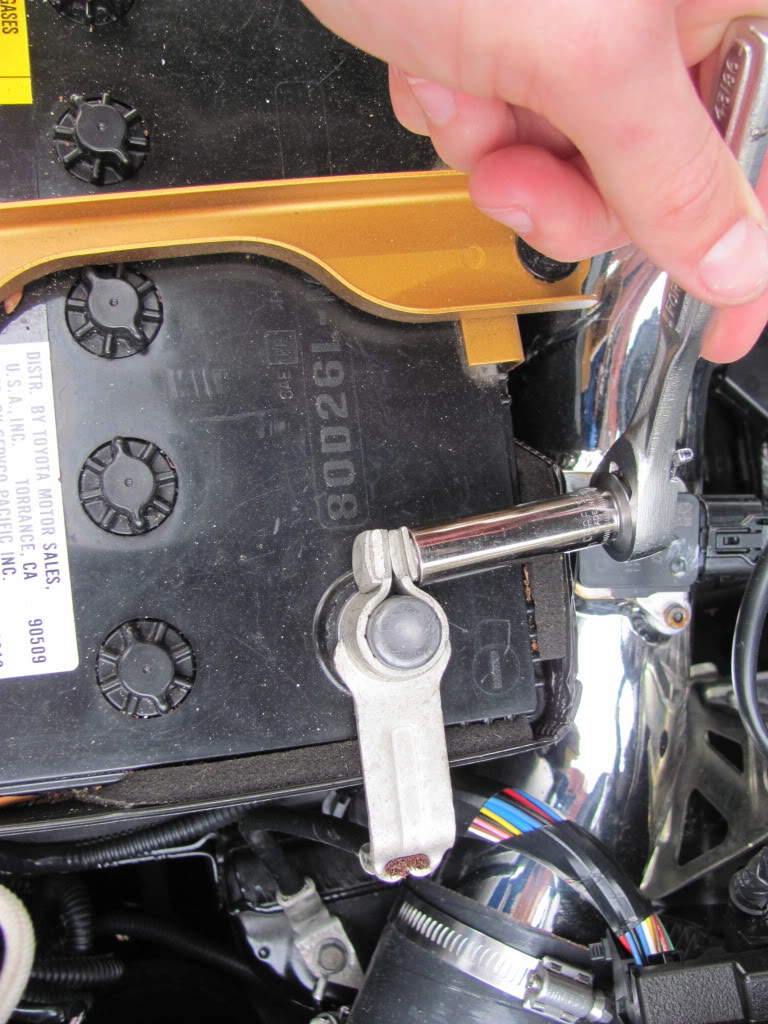
-Disconnect your battery. I always choose to disconnect the positive AND the negative just cuz.
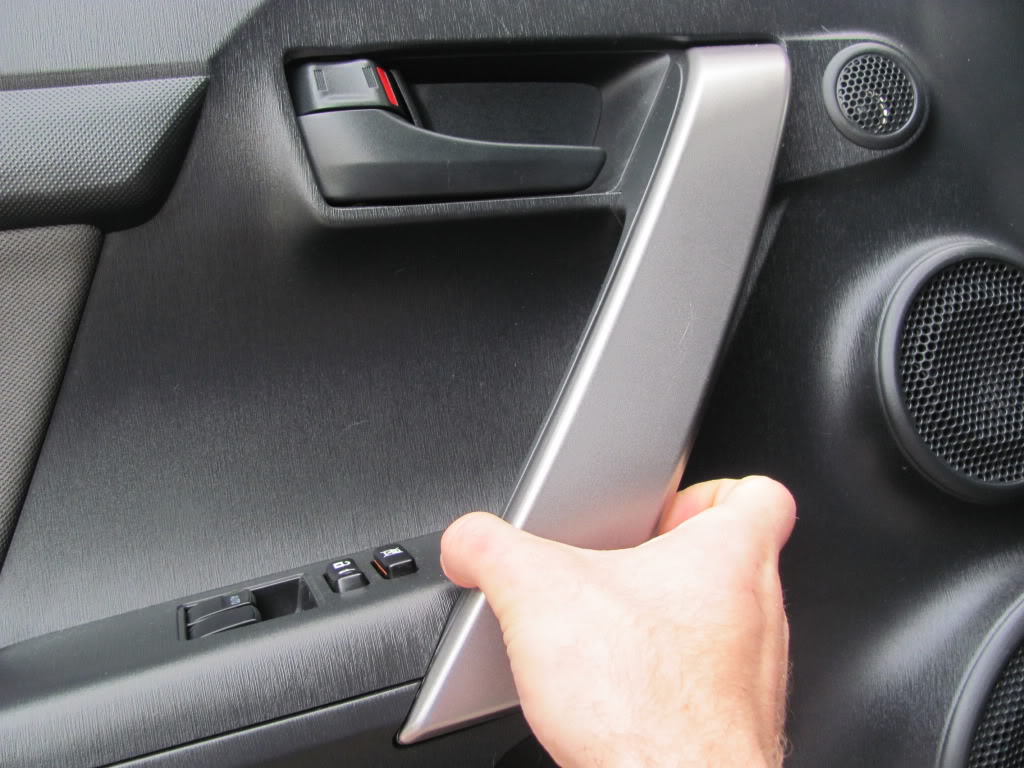
-Start with the drivers door. Open the door. Using a large flat head screwdriver, insert it into the slot on the bottom and pull out to release the first clip.
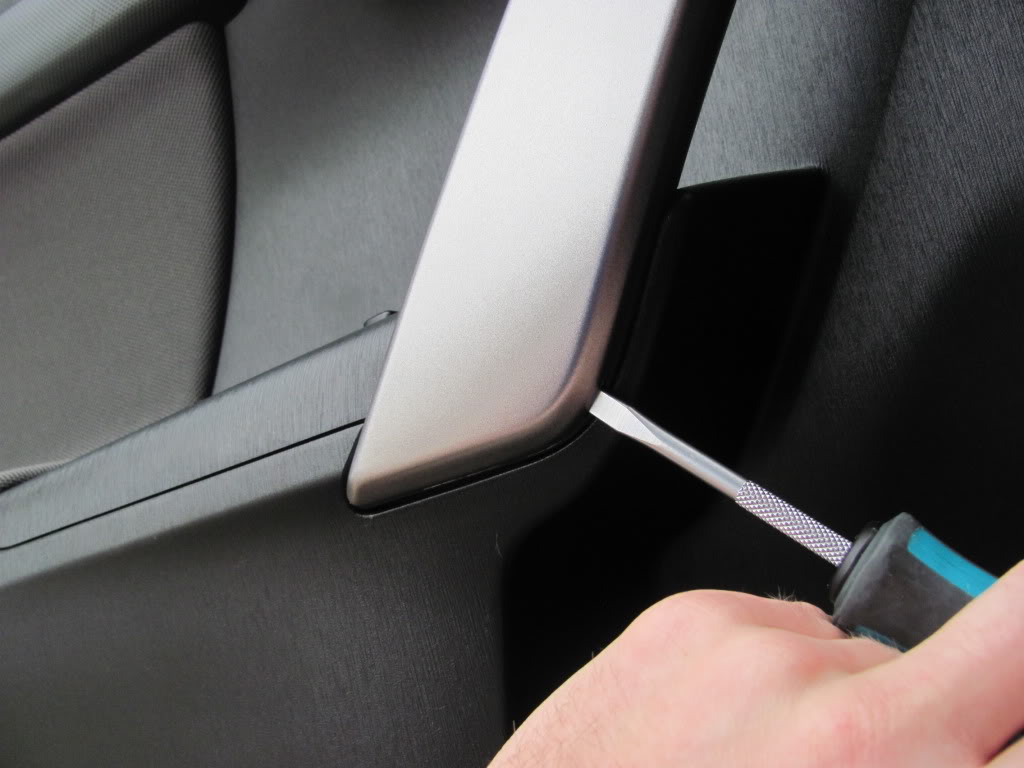
-Once the first clip is released, pull the trim away from the door. Don't be afraid to use force.. the clip's are strong and don't break very easily at all
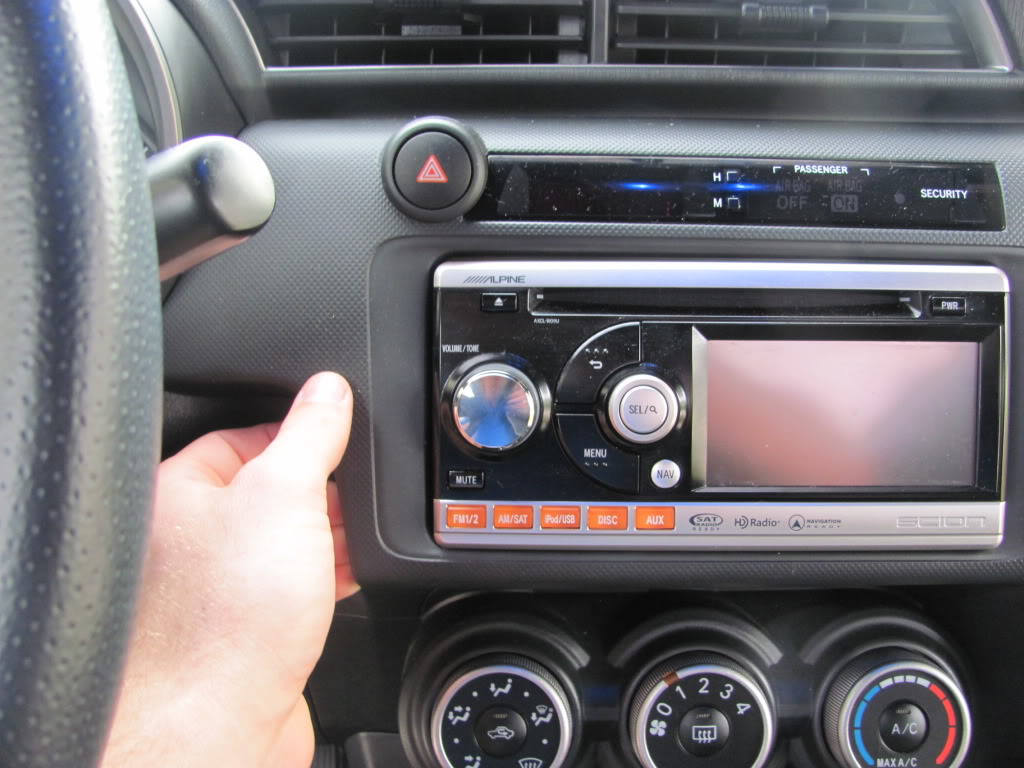
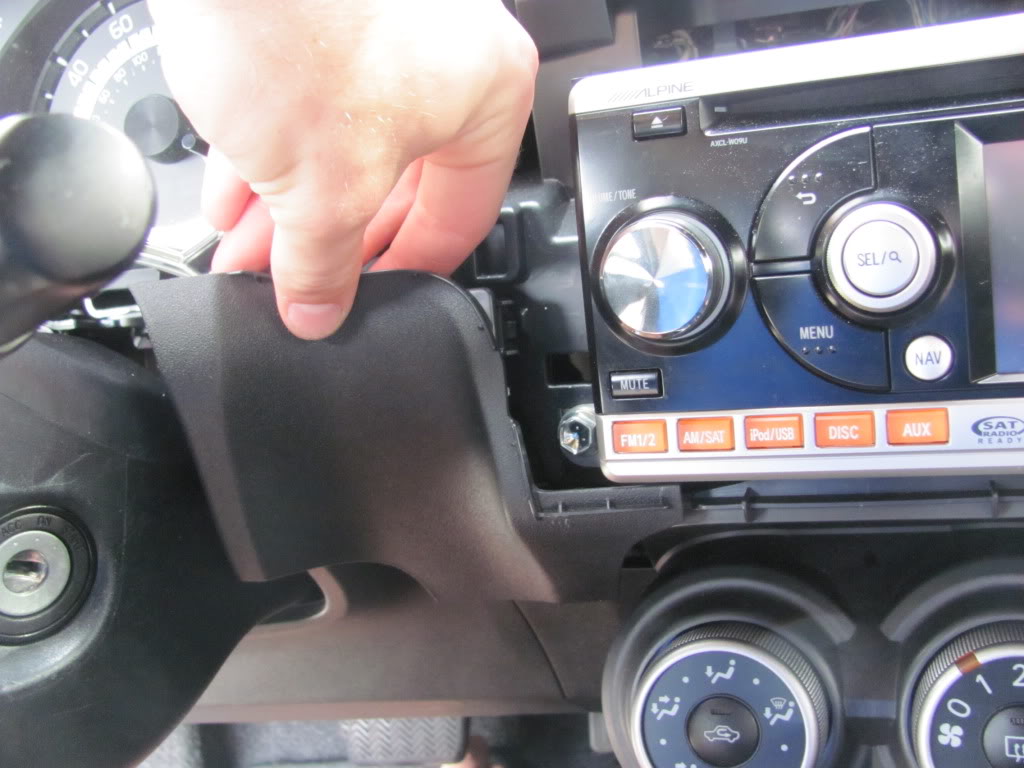
-Using the same screwdriver, place it under the radio trim and pull out to pop the first clip.
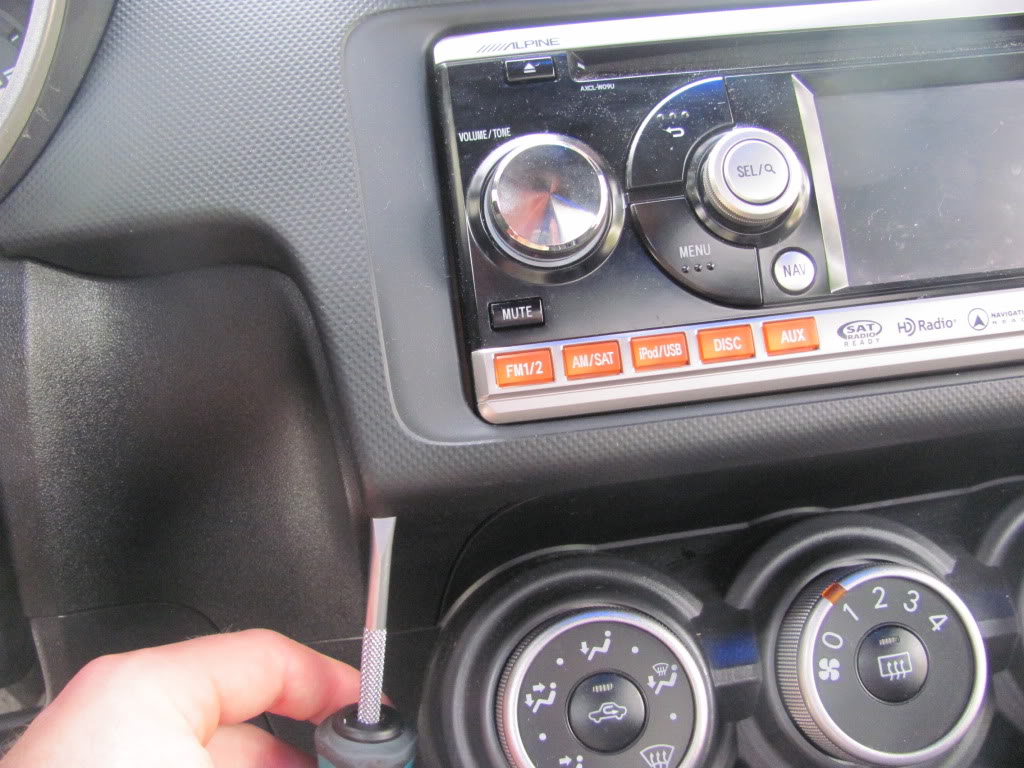
-Once the first clip is released, pull the trim away from the dash. Once again, don't be afraid to use force.
-Unplug the clock / security indicator
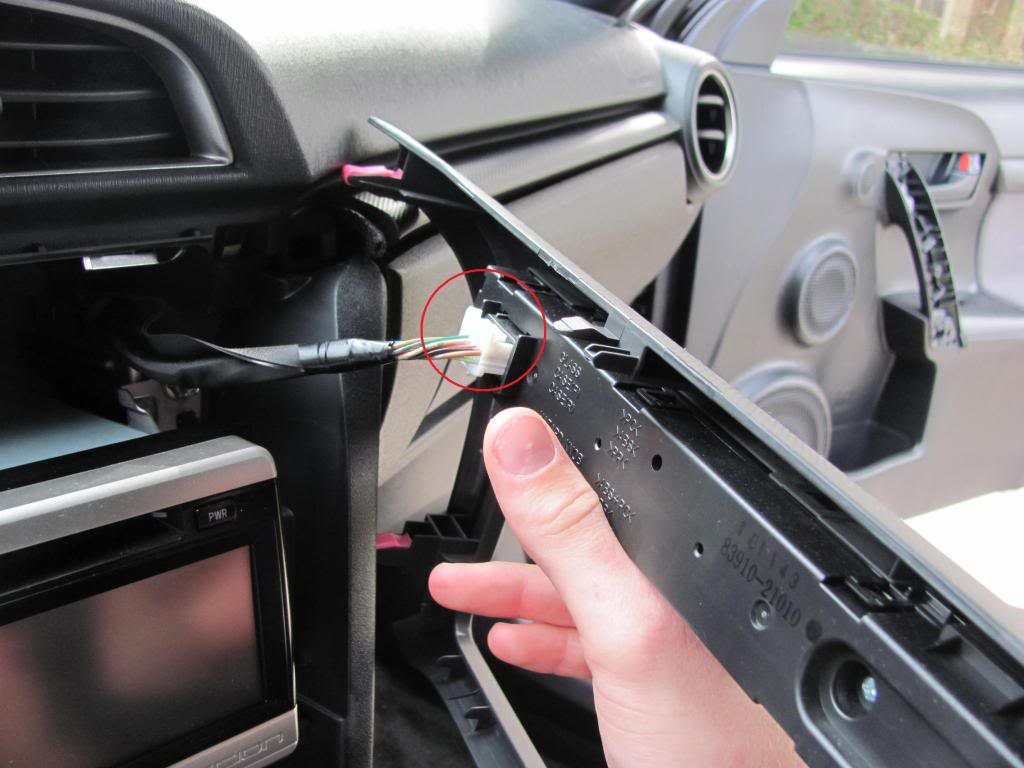
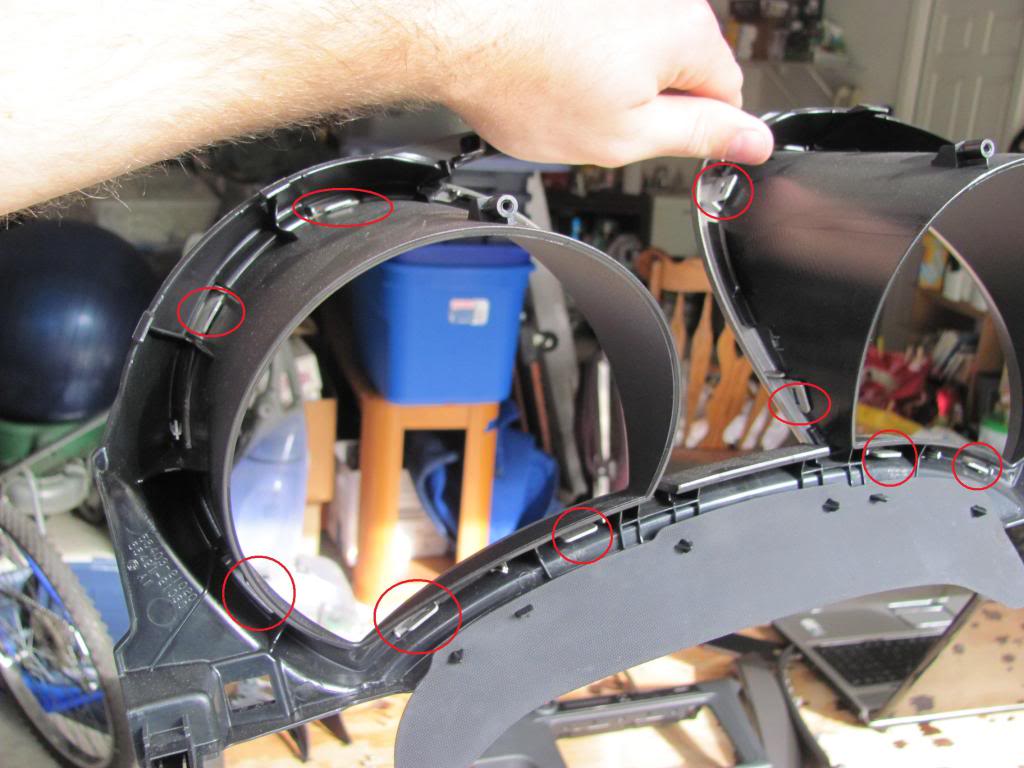
-Remove the LCD and screen from the radio trim by pulling it from the clips. There are a few small clips that can be pulled out with your fingernails, and the screen can then be removed.
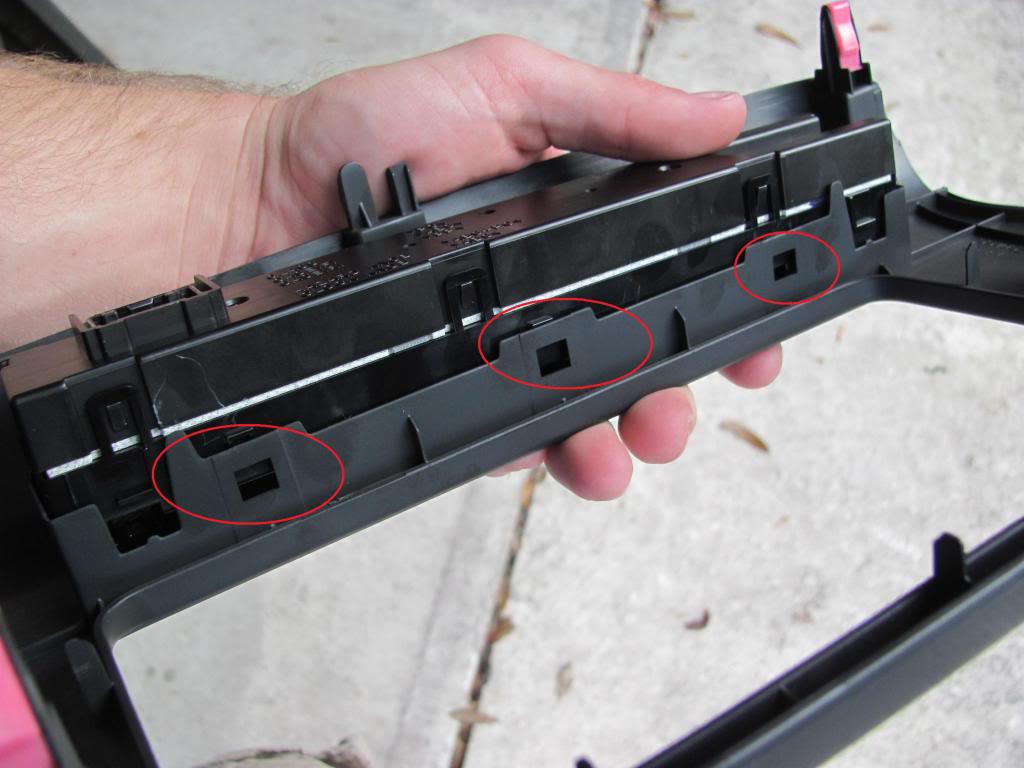
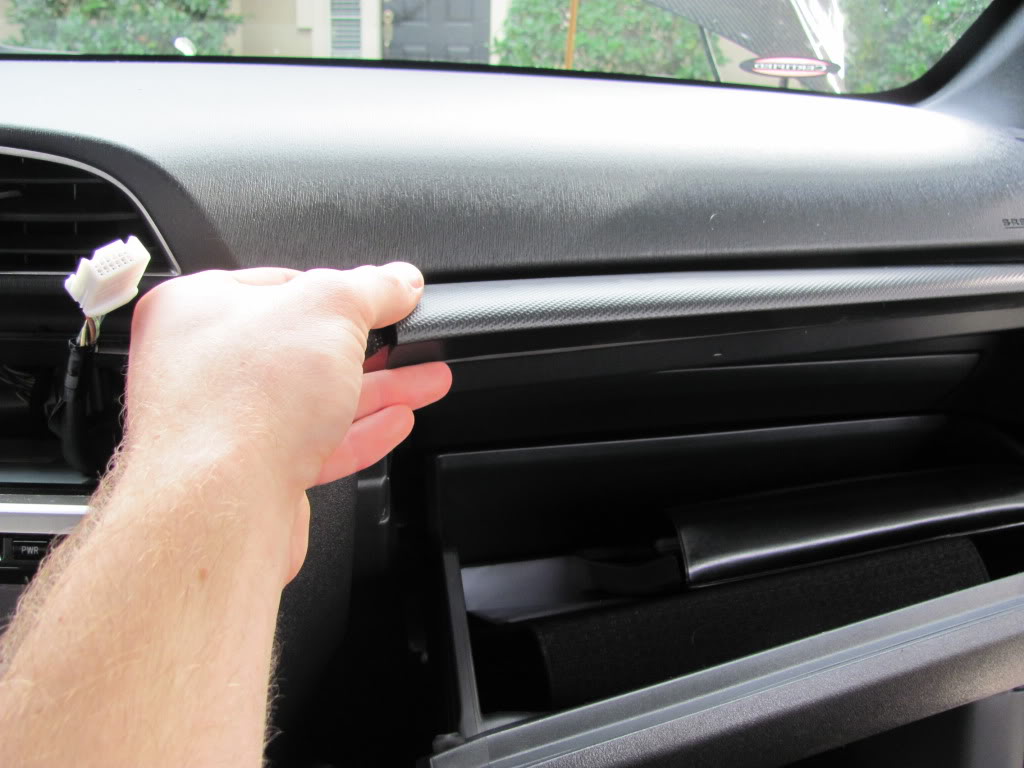
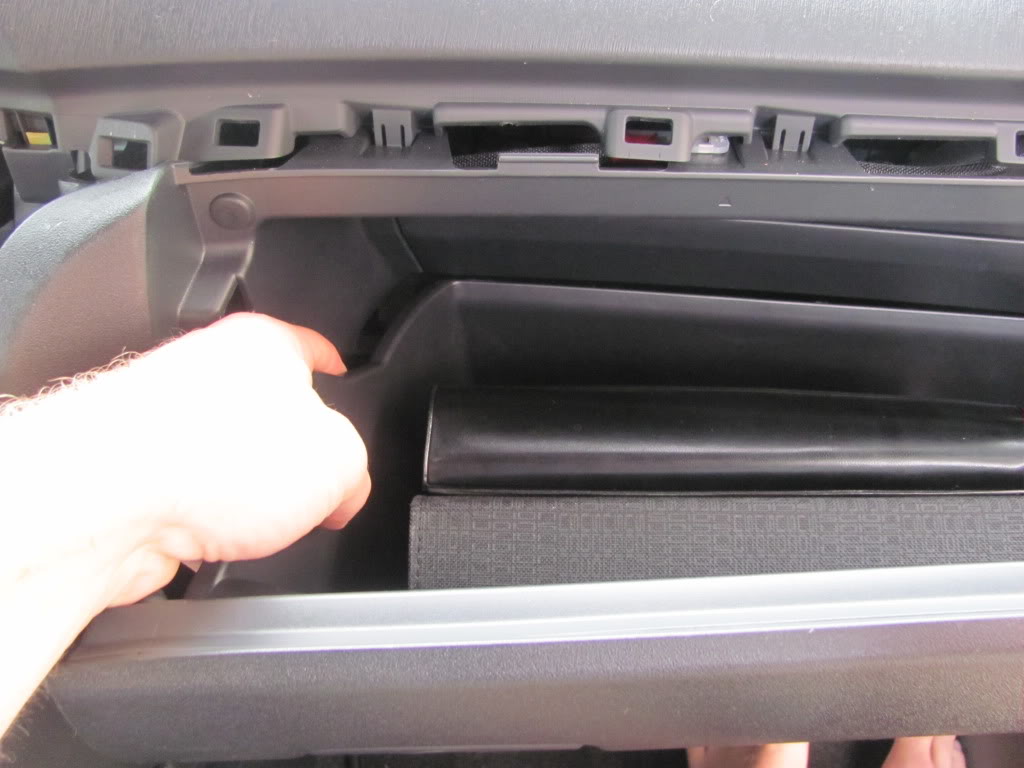
-Open up your glovebox. Now pull the dash trim above the glovebox out from the dash. There is only a few clips holding this on.
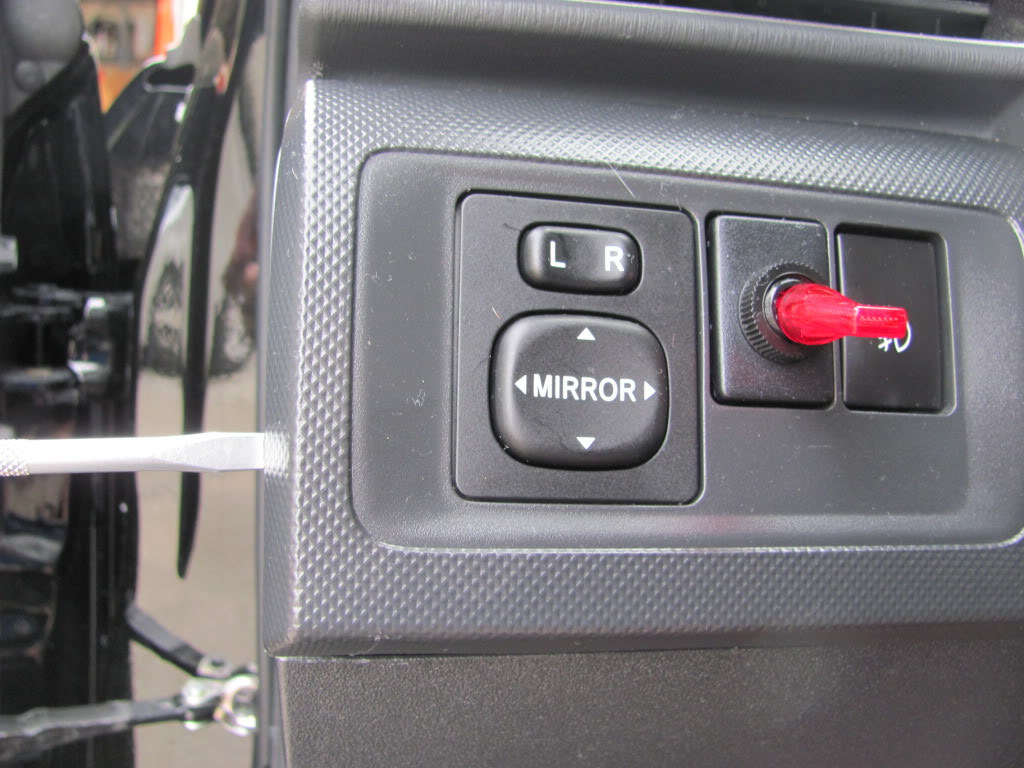
-Using the same screwdriver, place it behind the mirror control trim and pull out to pop the first clip. Once this is popped, pull the rest of the mirror control trim out
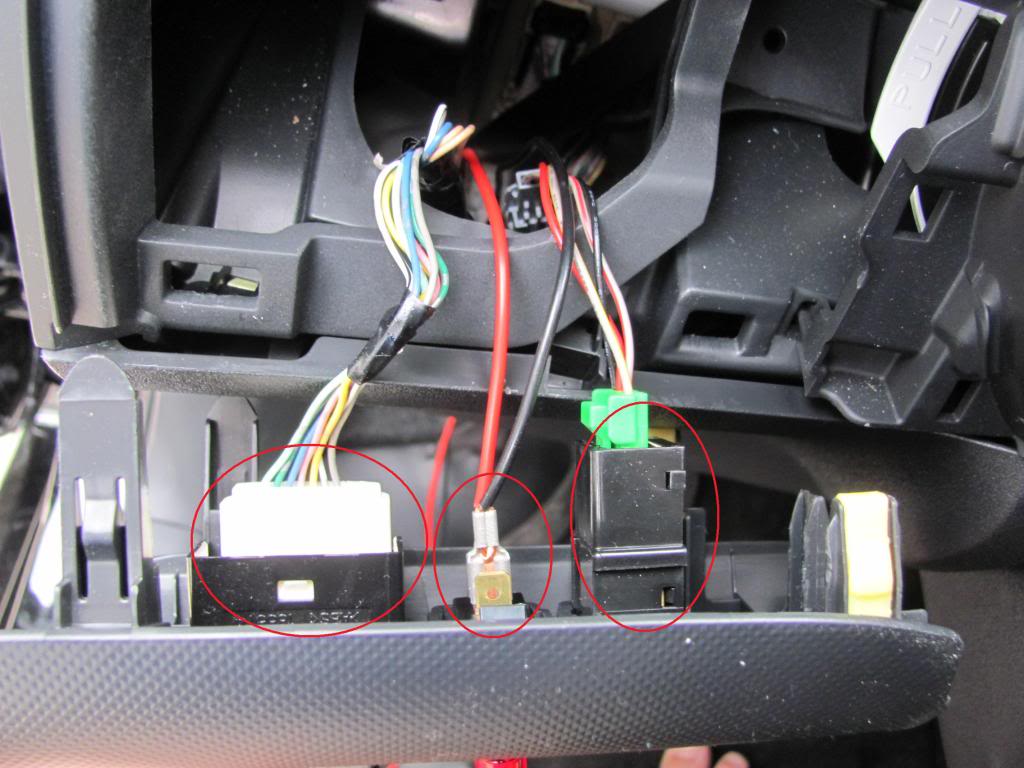
-Unplug the Mirror control trim plus. This will consist of 1-3 plugs.. dependent upon wither you have Fog Lights and Bluetooth.
-Remove the Mirror control buttons from the trim. This can be done by pushing in the clips on each side and pushing out the front of the trim
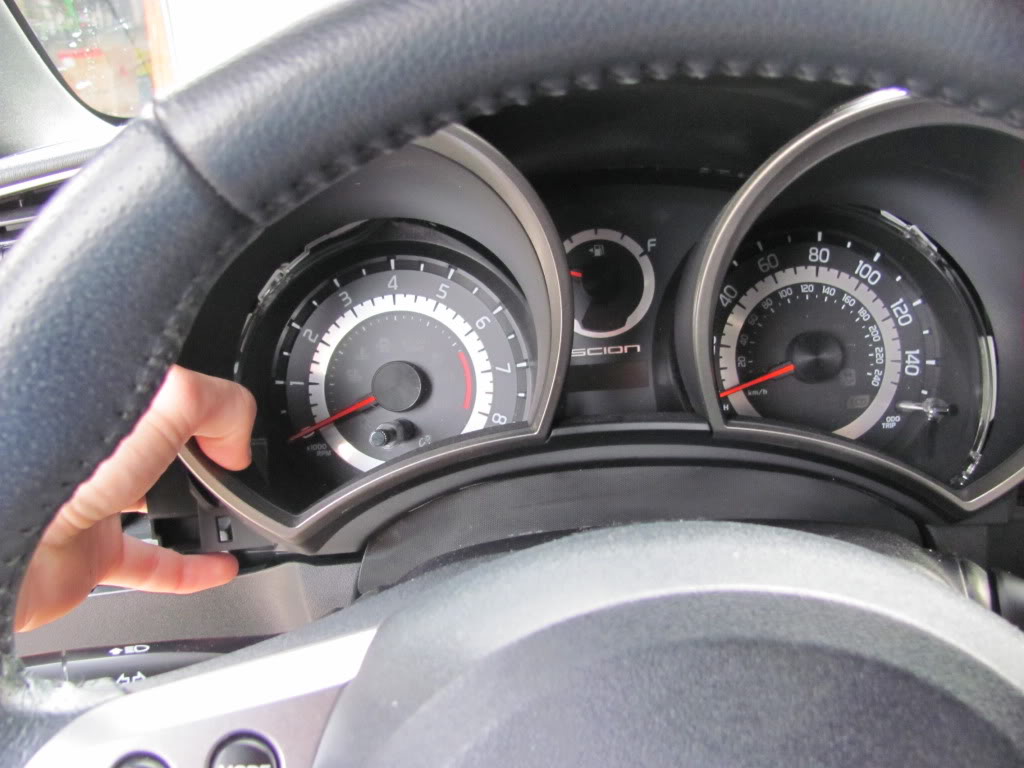
-Tilt the steering wheel all the way down and pull all the way away from the dash.
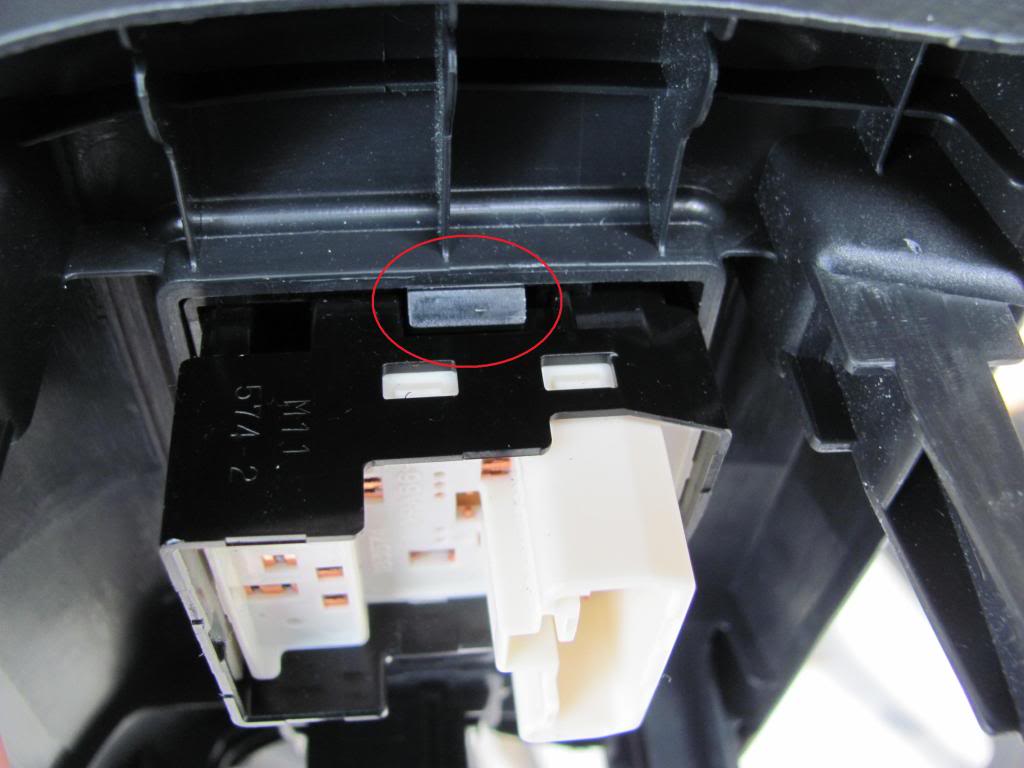
-Pull the Speedometer trim out away from the dash. This is just held on by 2 clips
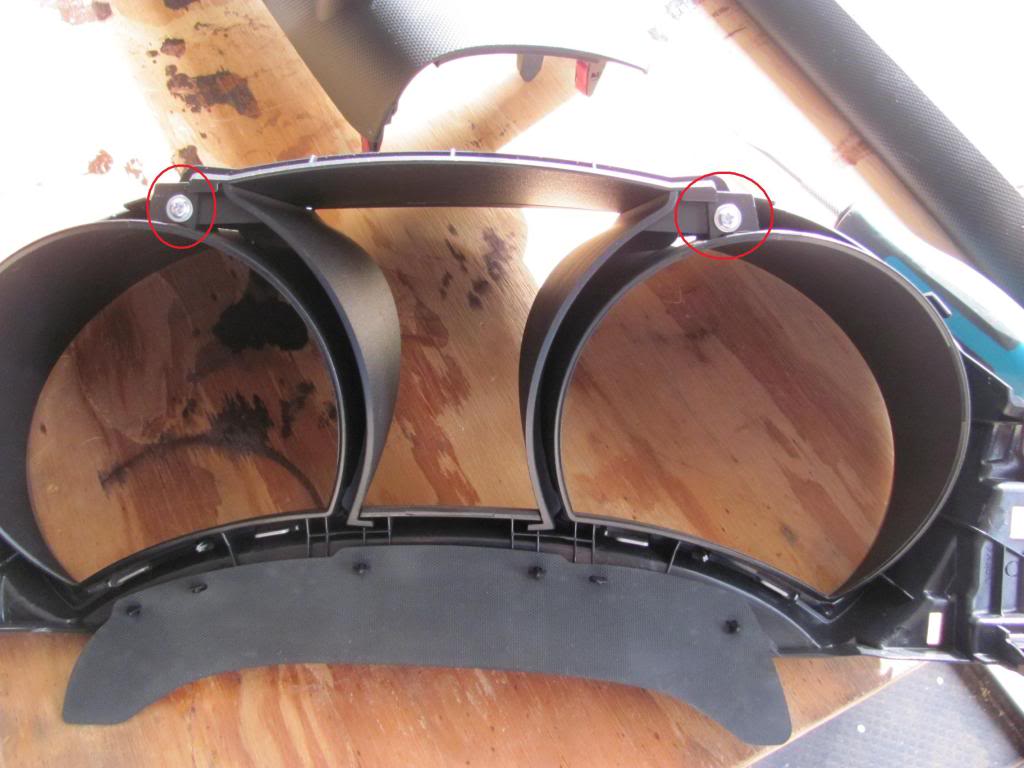
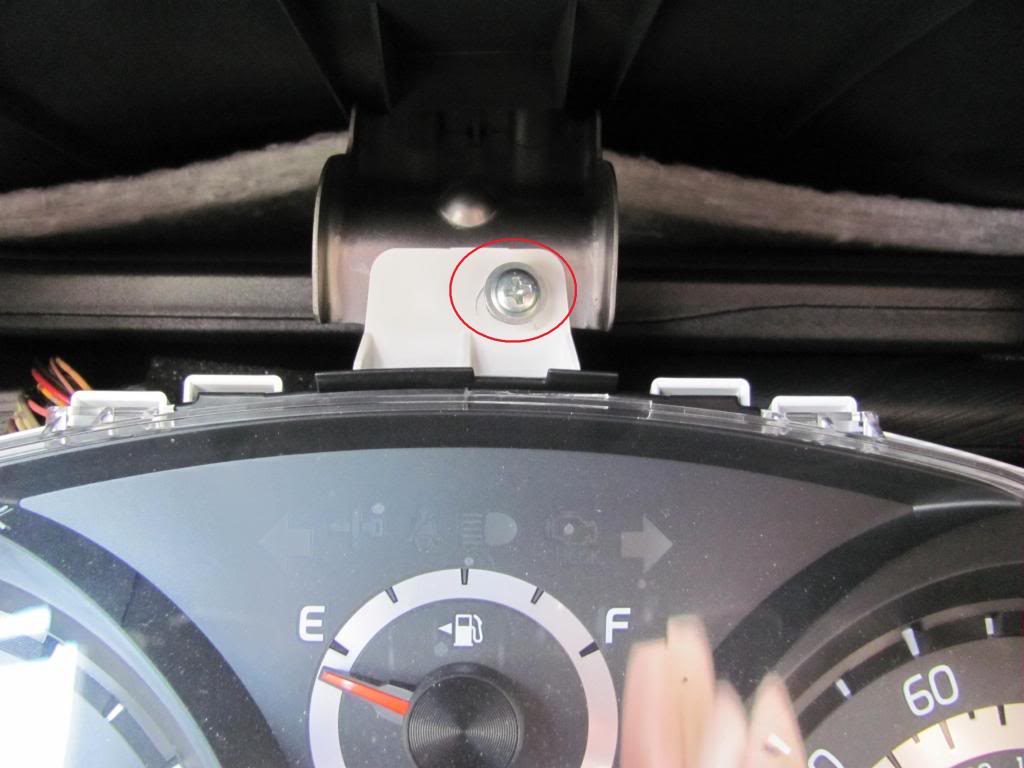
-Using a Phillips head screwdriver, remove the 2 screws at the top of the speedometer trim
-Remove the aluminum trim from the speedometer trim. This can be done by pulling out the clips around the aluminum trim with your fingernails or a flat head screwdriver
-Pull out the dash piece between the steering wheel and the radio. This will be the location of the push start on an RS and the button must be disconnected from the back after the trim has been pulled out. This is just help on by clips and is very easy to pull off
-Pull out the Passenger kick panel. This is just held on by a few clips. Pull away from the dash
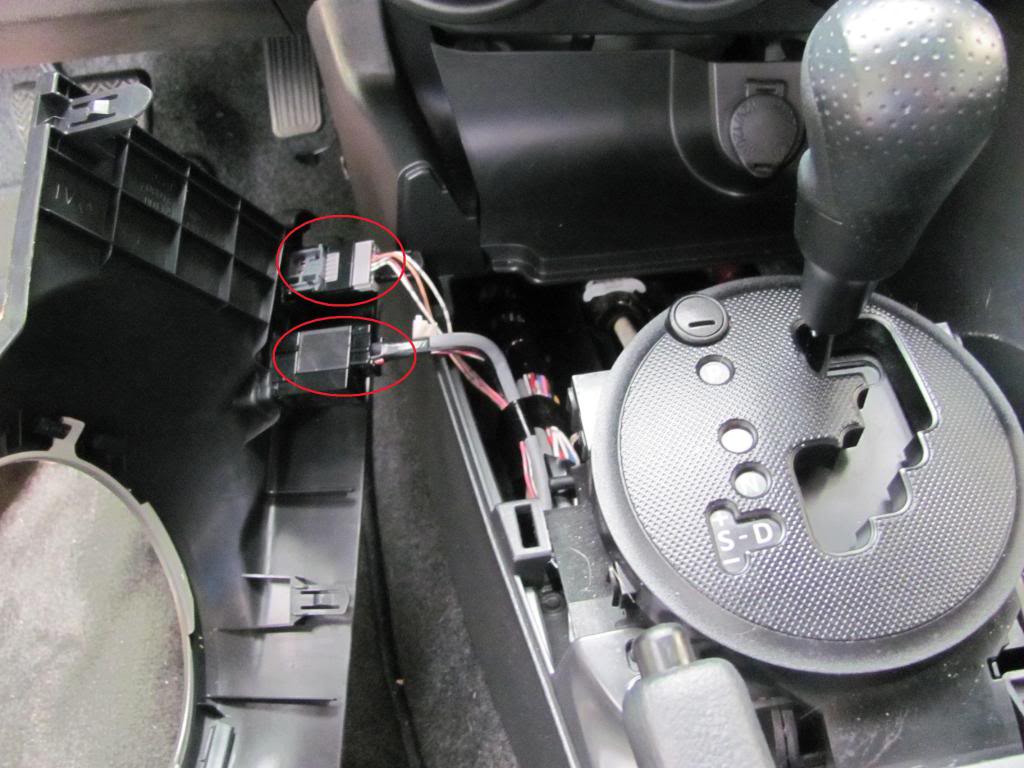
-Pull out the USB / Stick trim. This is held on by only a few clips and can be easily pulled away from the dash.
-Unplug the USB and Traction control plugs
-Remove the aluminum stick trim from the dash trim. This can be done by just pulling it out
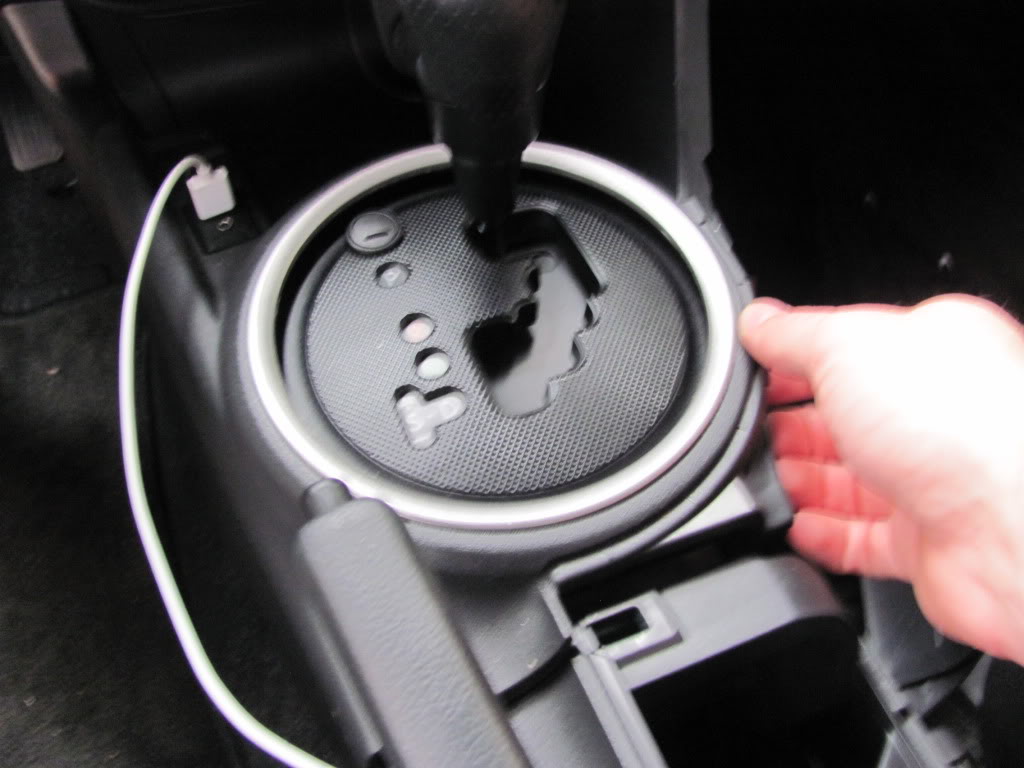
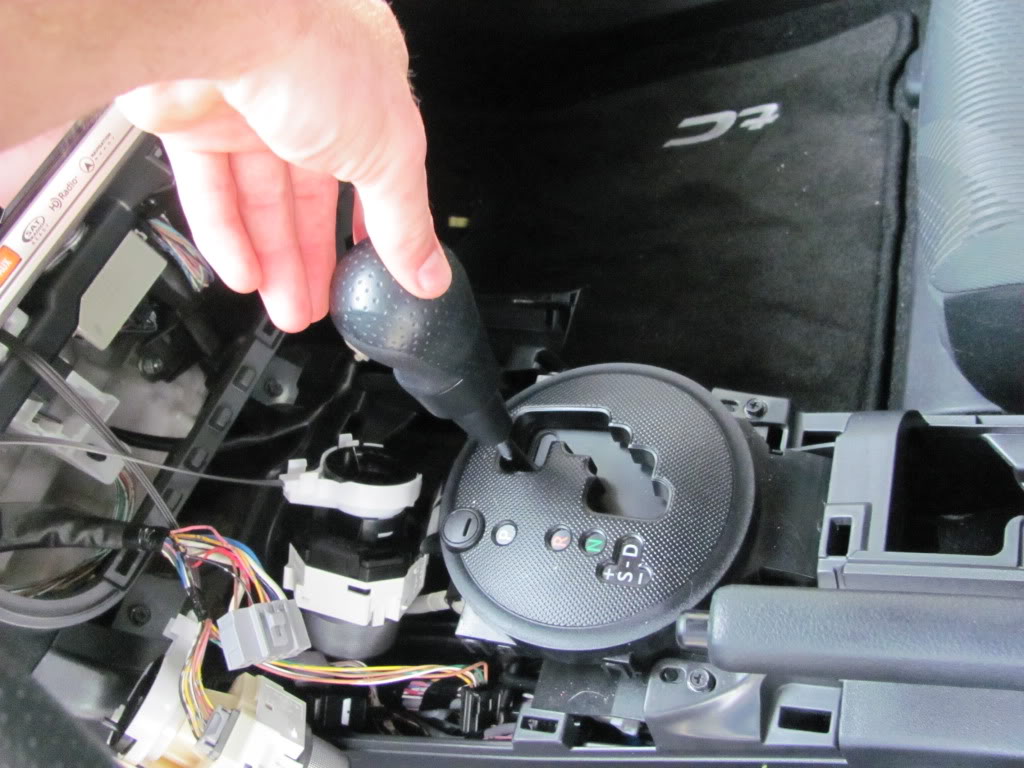
-Twist off the shifter ****
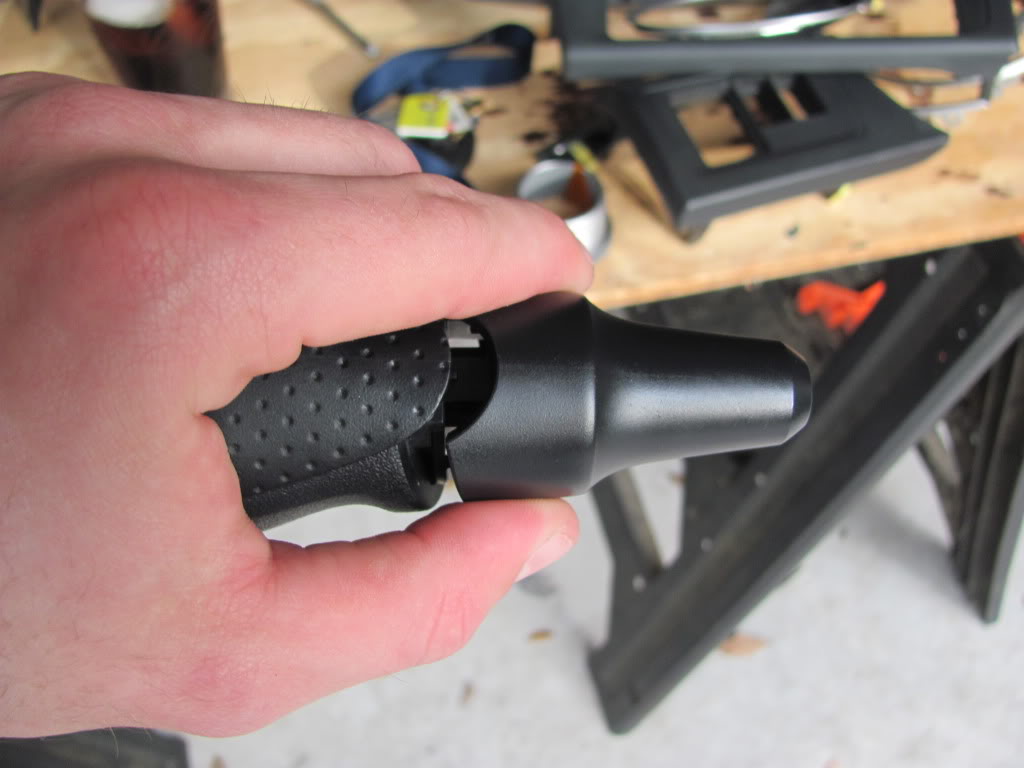
-Pull off the shifter **** trim from the shifter ****. Simply pull the trim away from the rubber
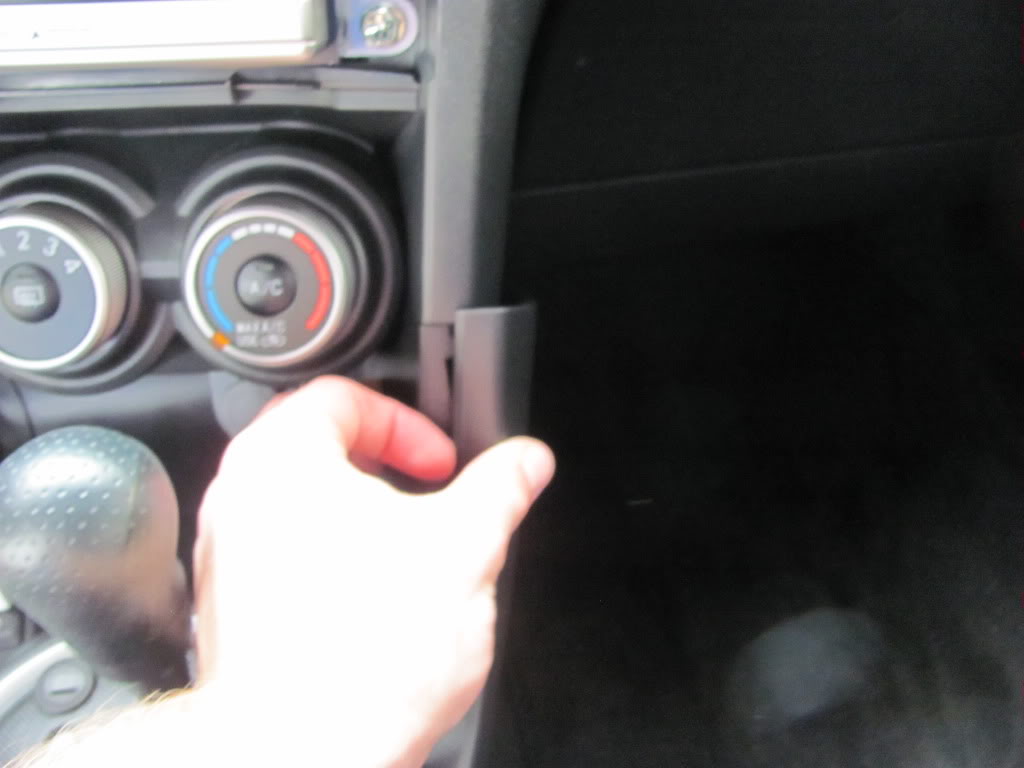
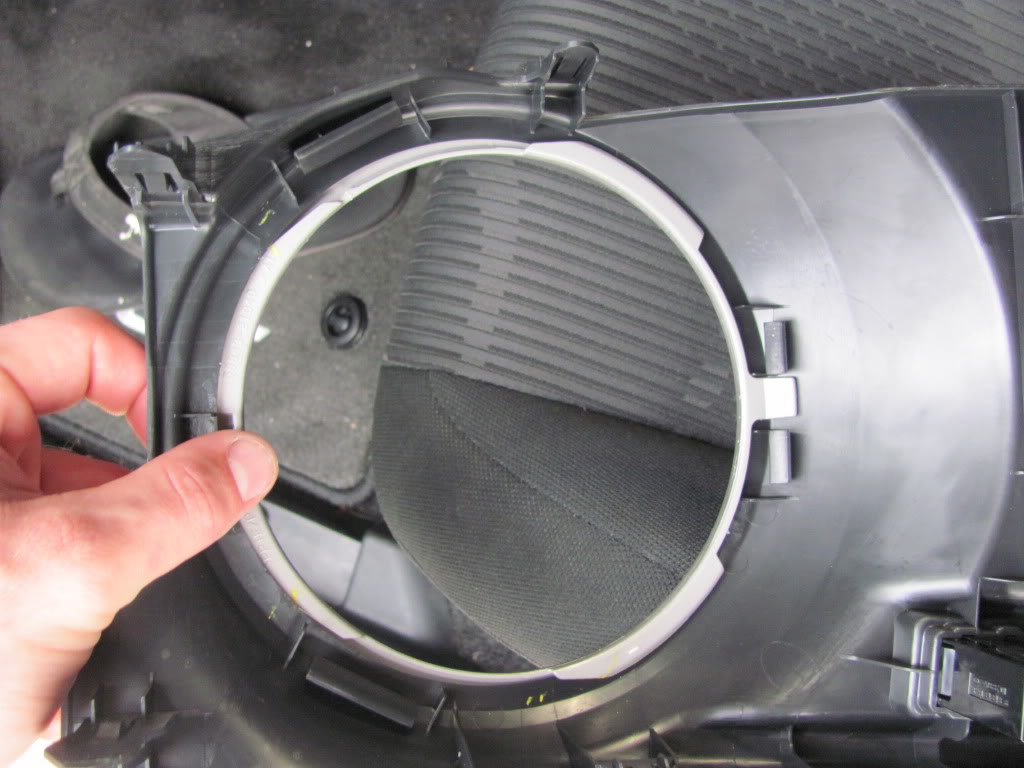
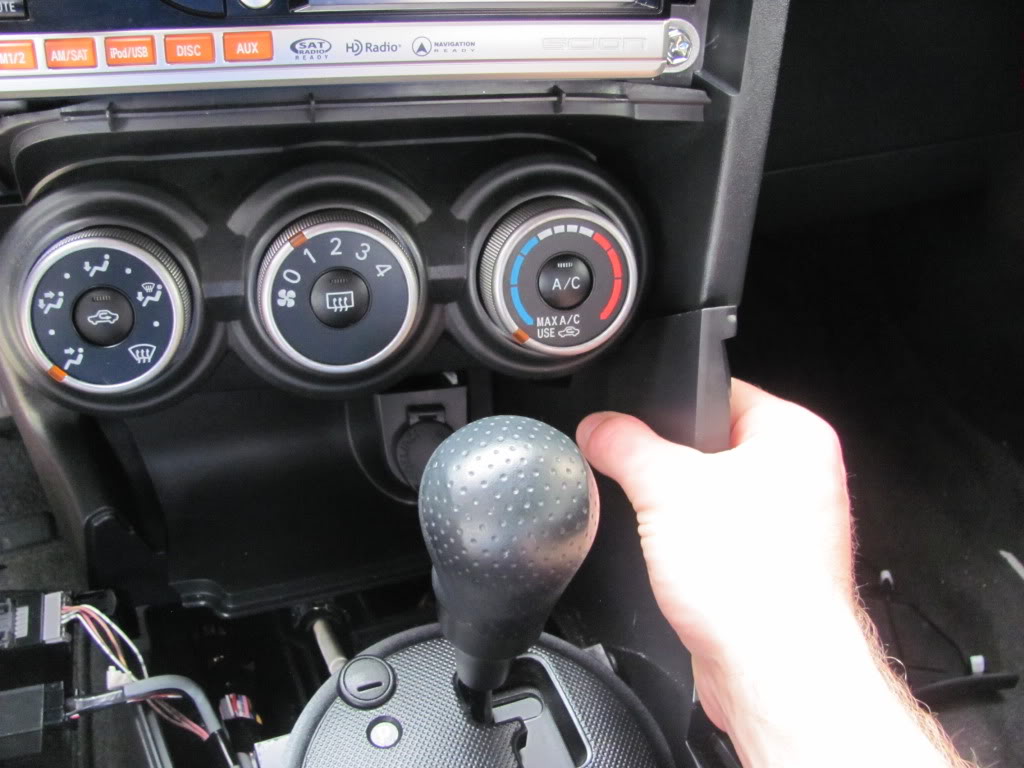
-Pull out the dash piece holding the cigarette lighter. This is only held on by a few clips, just pull away from the dash
-You can disconnect the cigarette lighter but I did not, I just let it hang off to the side where it was out of the way.
-Pull the A/C gauge assembly out from the dash. This is held on by a few clips, just pull away from the dash
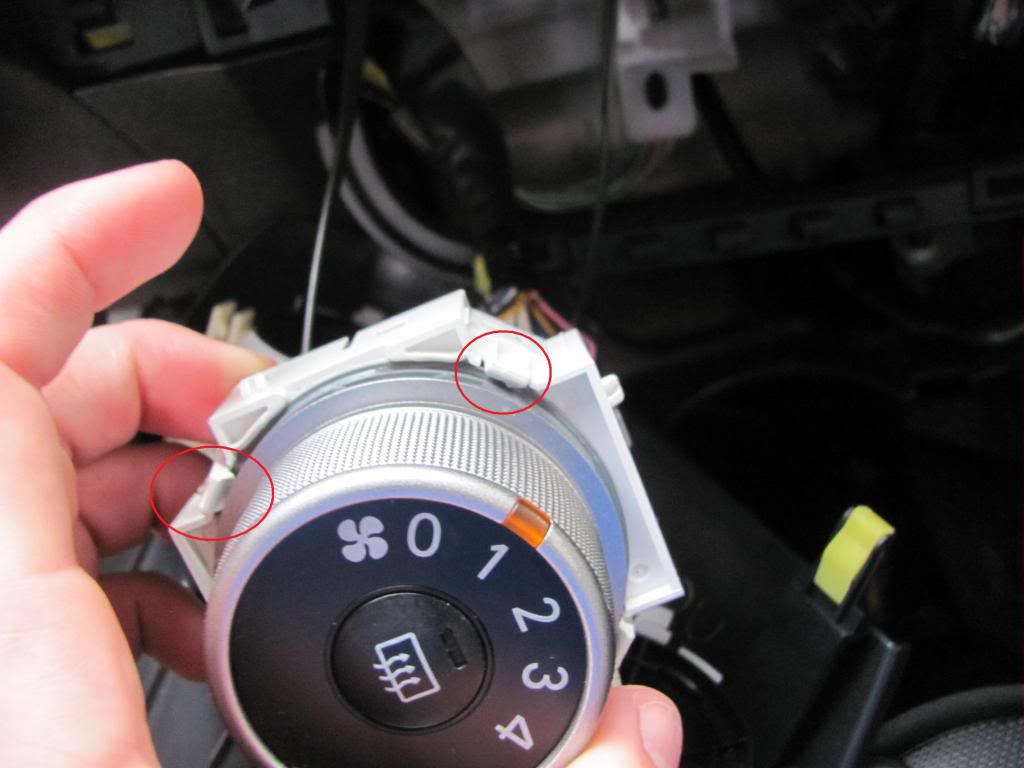
-Remove the A/C Gauges by pulling out the clips from each side of each gauge. Then pull the gauge out of the back
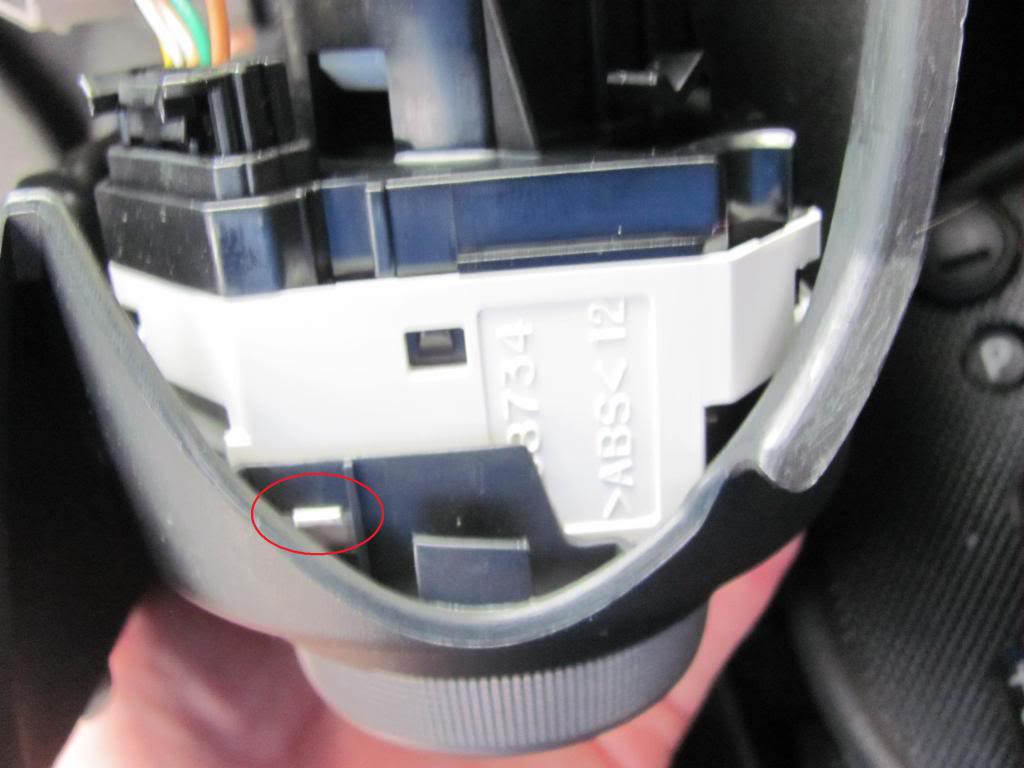
-Remove the trim from the gauge. Pull the clip from each corner and pull the trim out the front
-Remove the glovebox by pushing in each side and pulling out
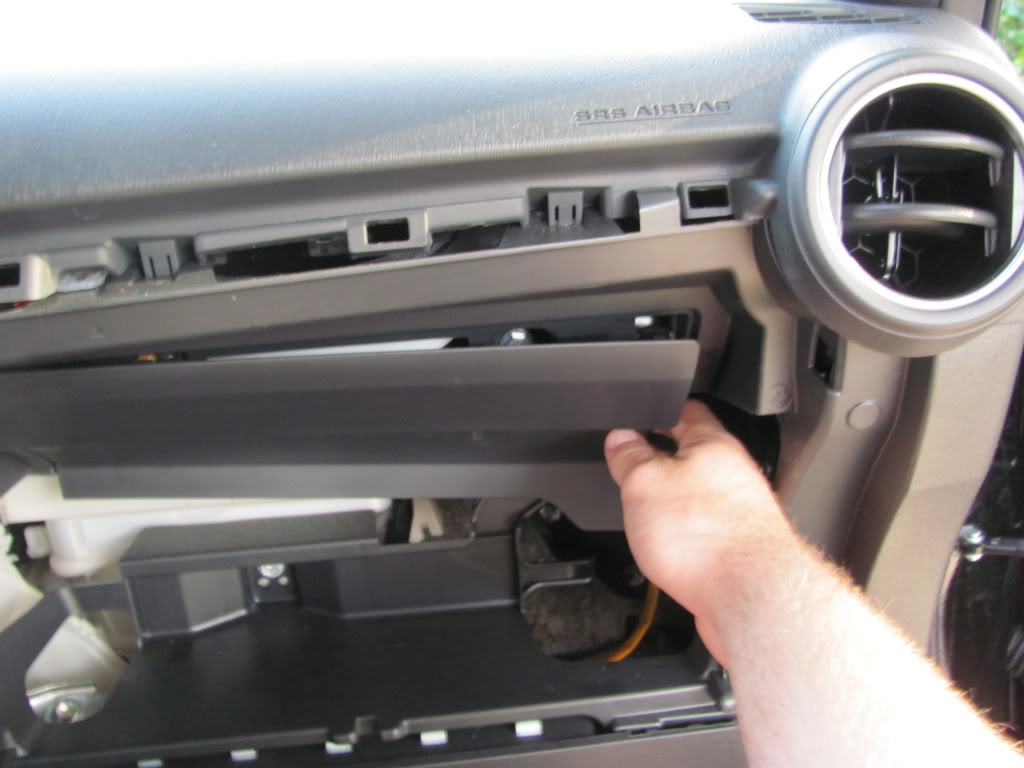
-Remove the dash piece behind the glove box. Pull it away from the dash
-Next we will remove various Phillips head screws from the dash.
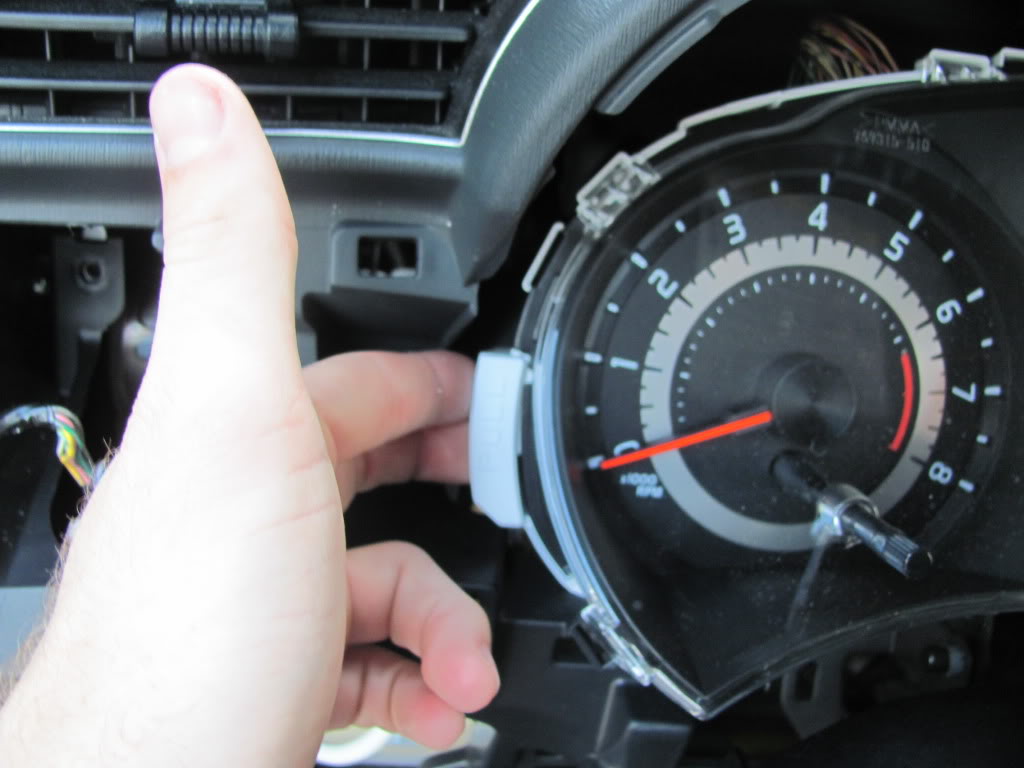
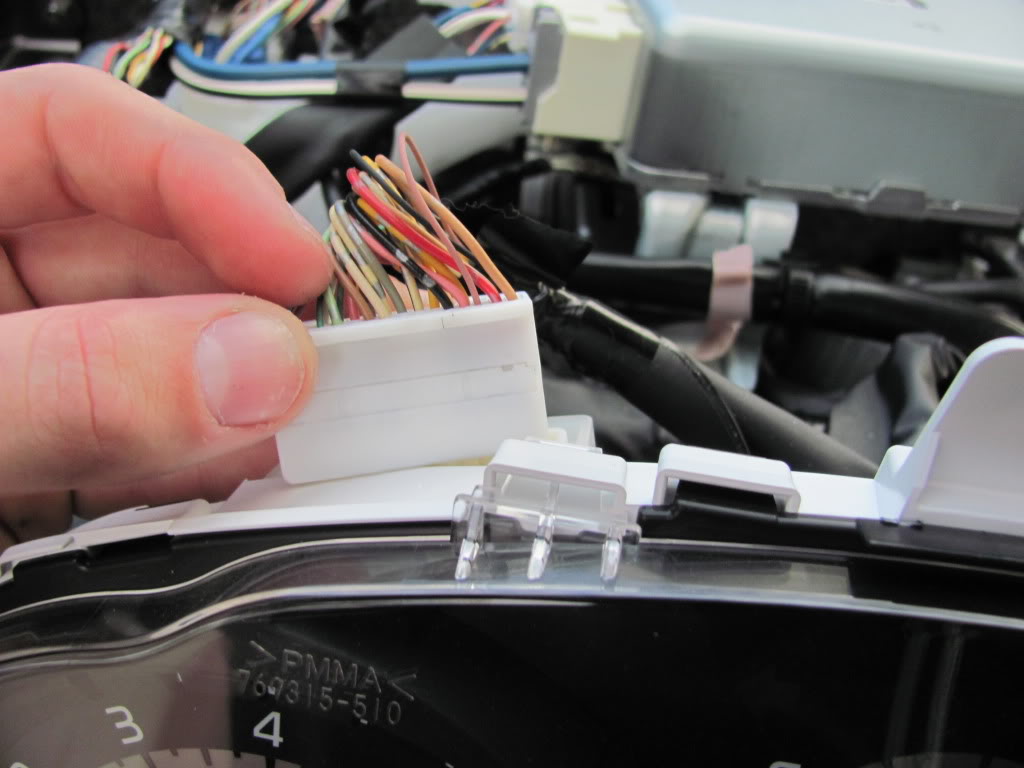
-Remove the speedometer by pulling away from the dash and disconnect it from the harness
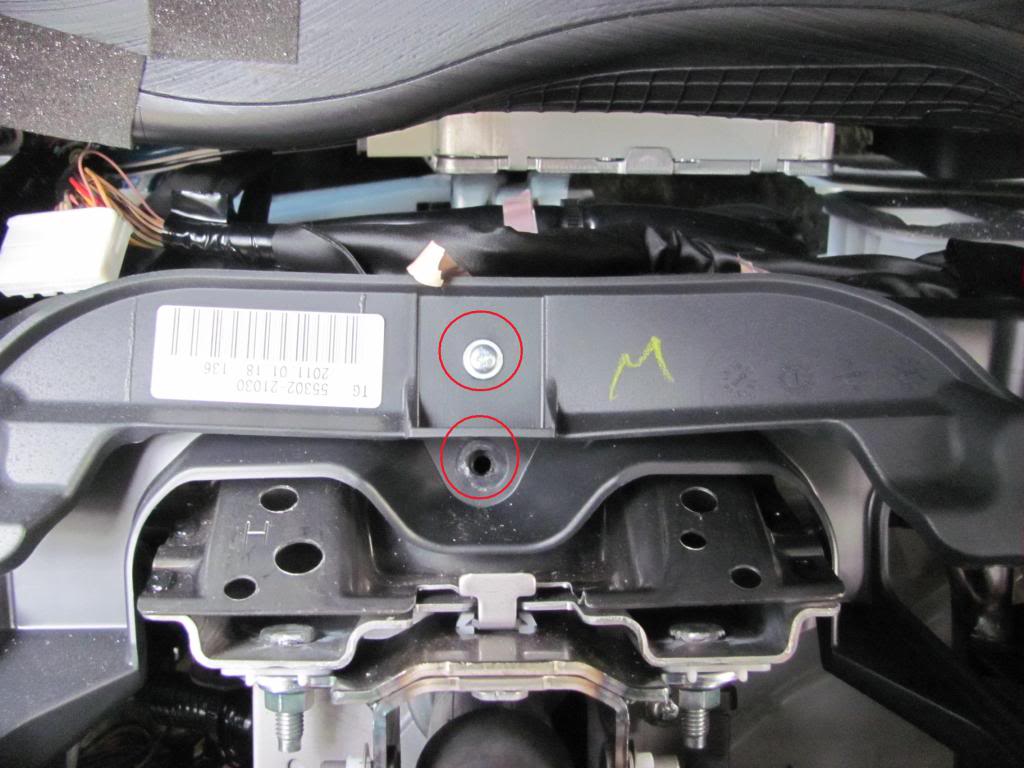
-Remove the 2 screws there were behind the speedometer
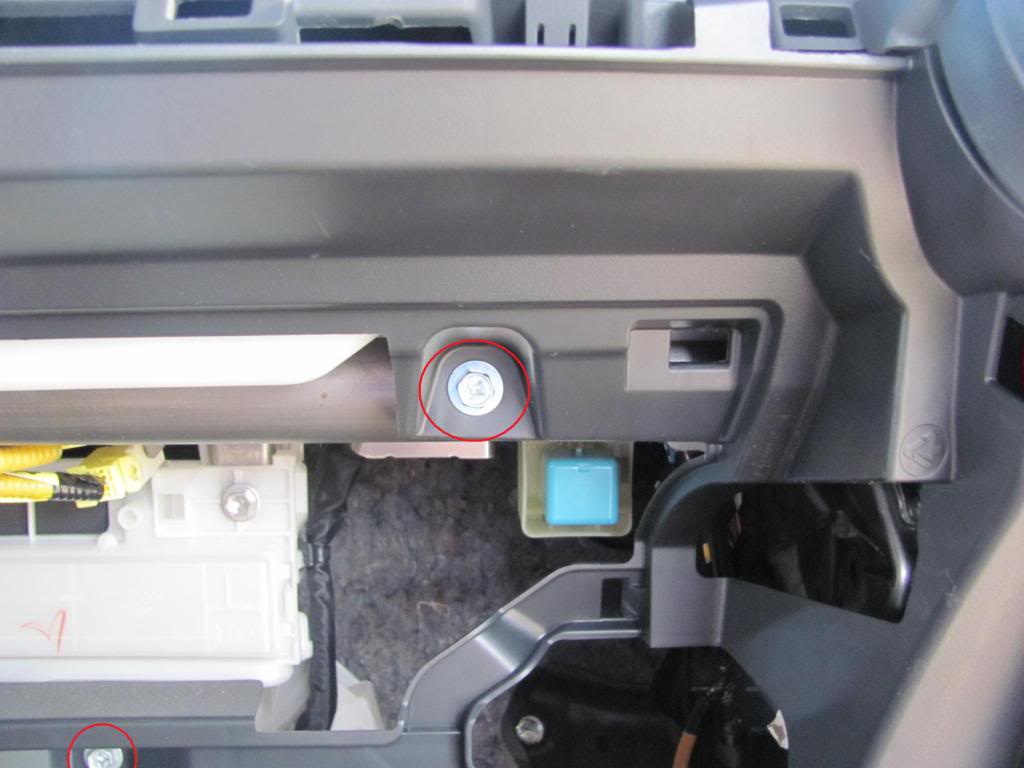
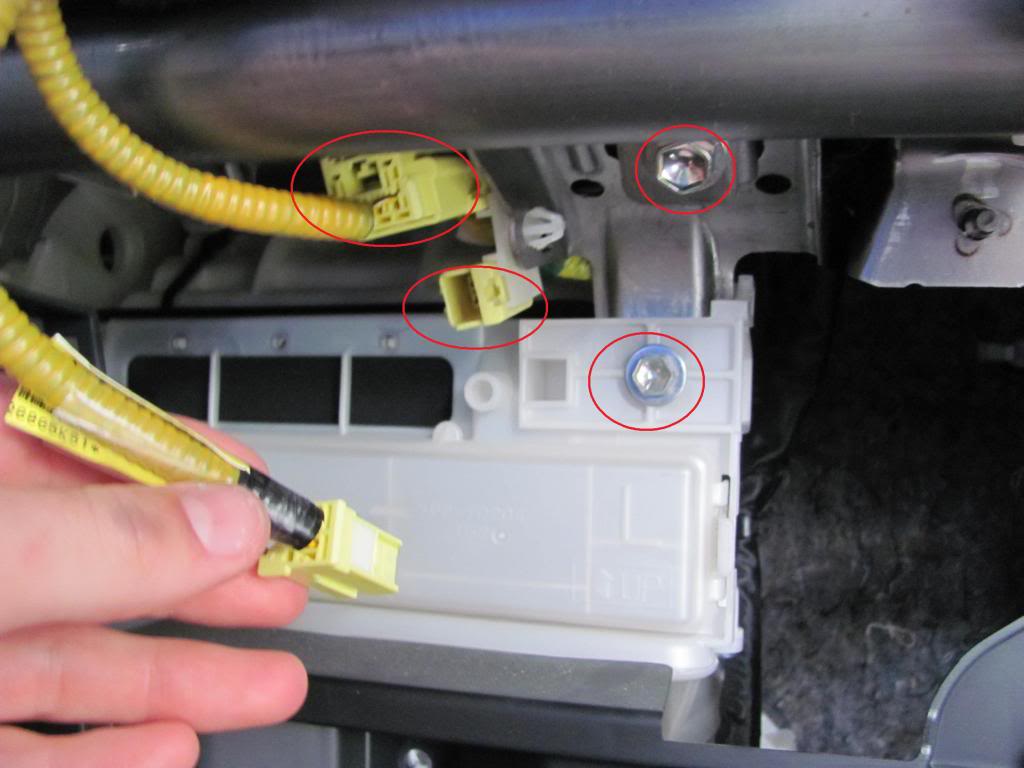
-Remove the 2 airbag plugs and the 3 bolts that were behind the glove box

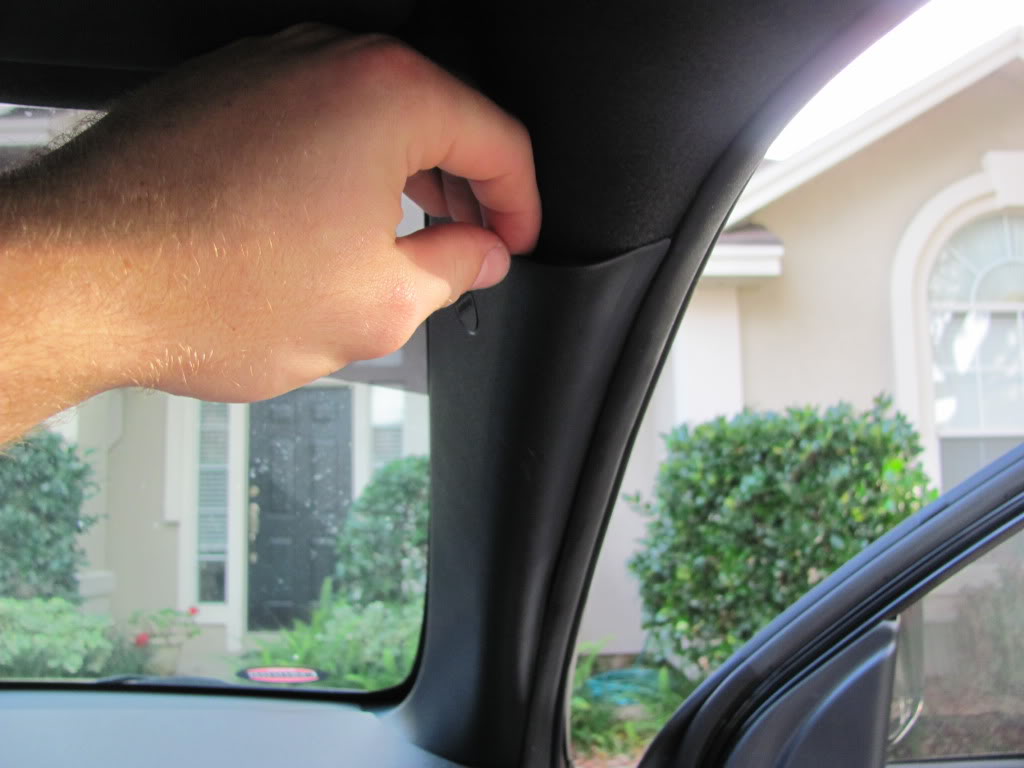
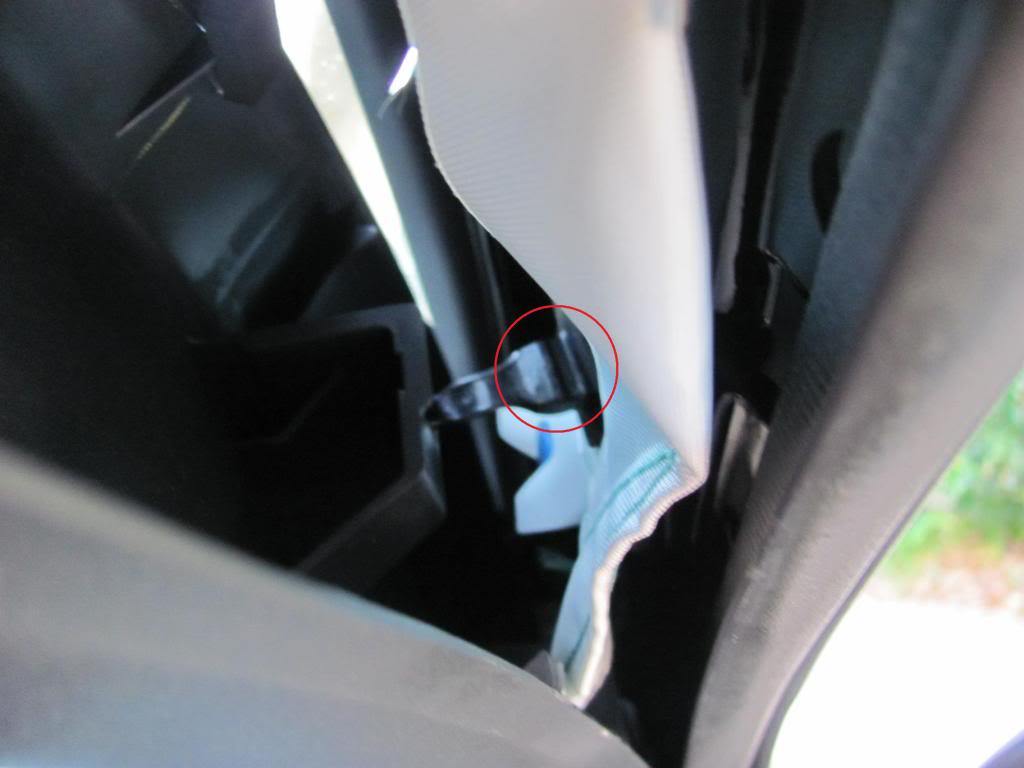
-Gently pull the Pillar trim off, this is held on by clips as well as twist clips. The clips must first be popped by pulling away from the wall, then the twist clips must be turned 90 degrees to allow it to be pulled out.
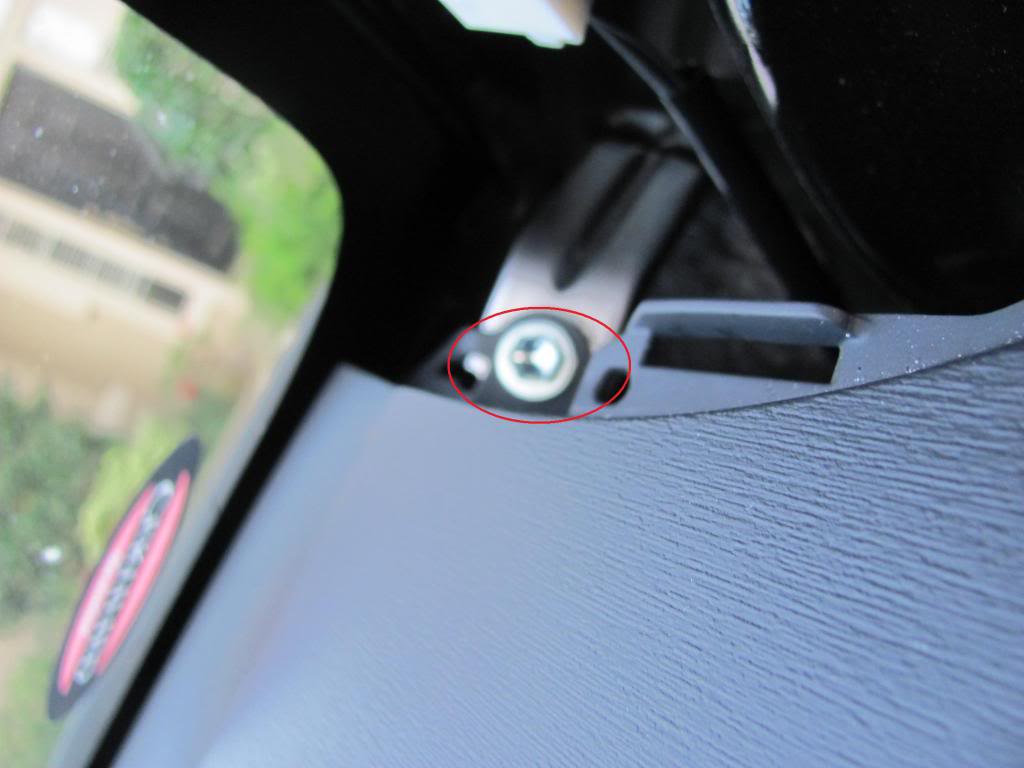
-Remove the bolt on each side of the vehicle that the pillars were hiding
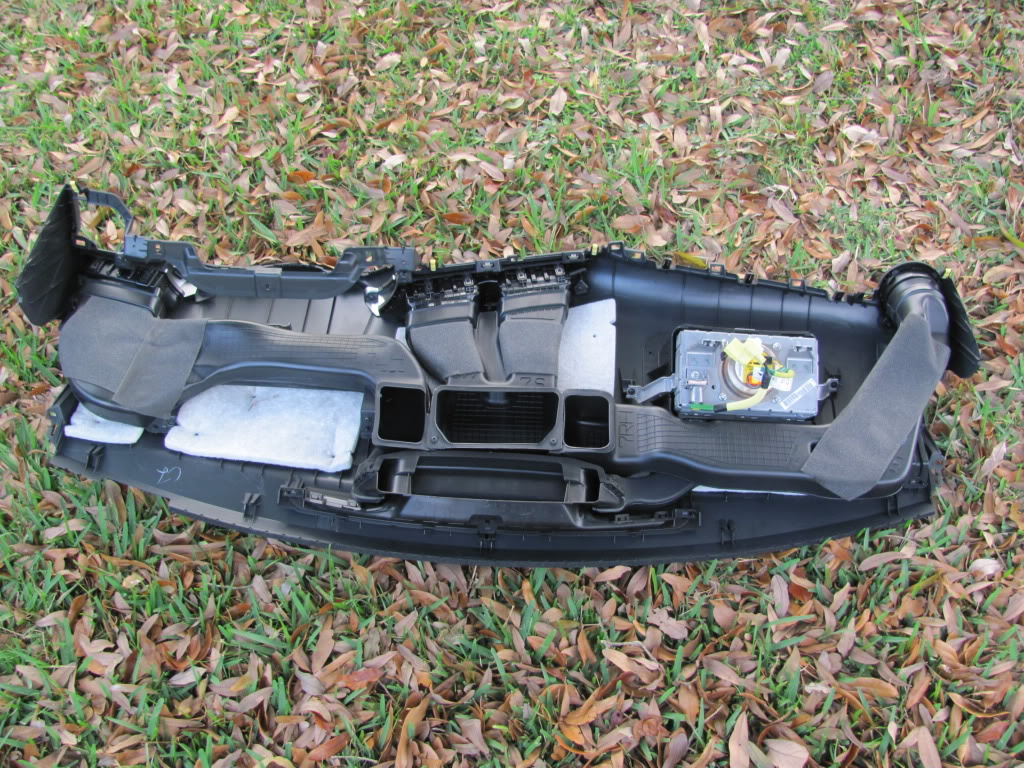
-Pull the whole top dash out, be careful as the passenger airbag will still be attached to the dash. This will come out with the dash
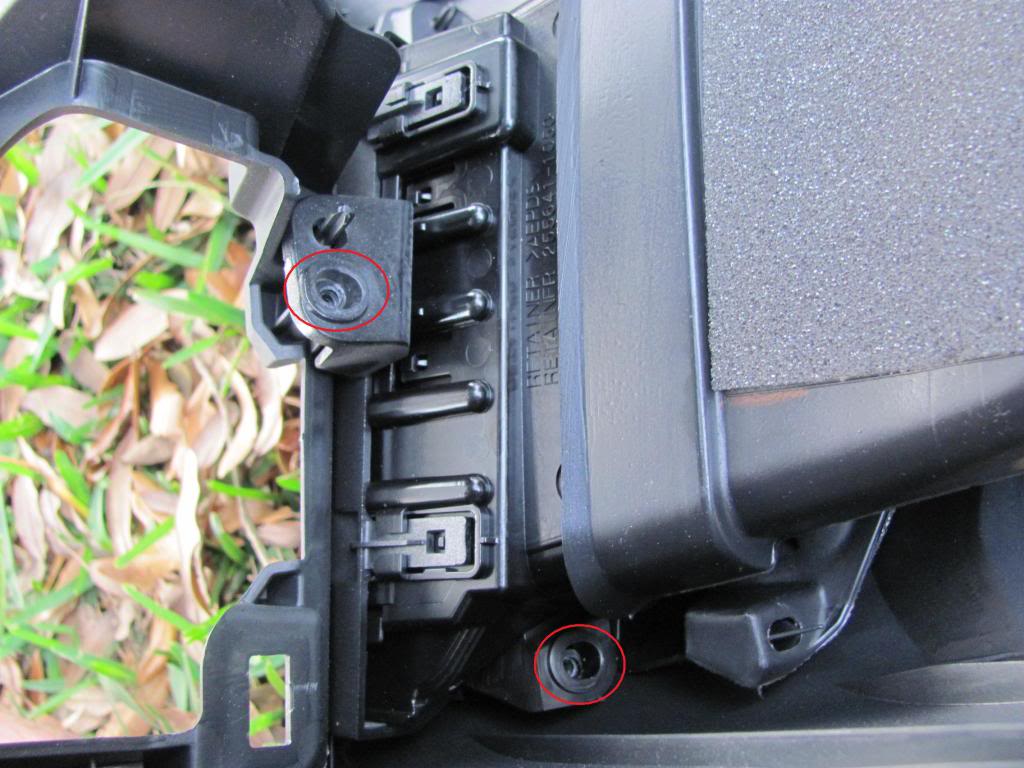
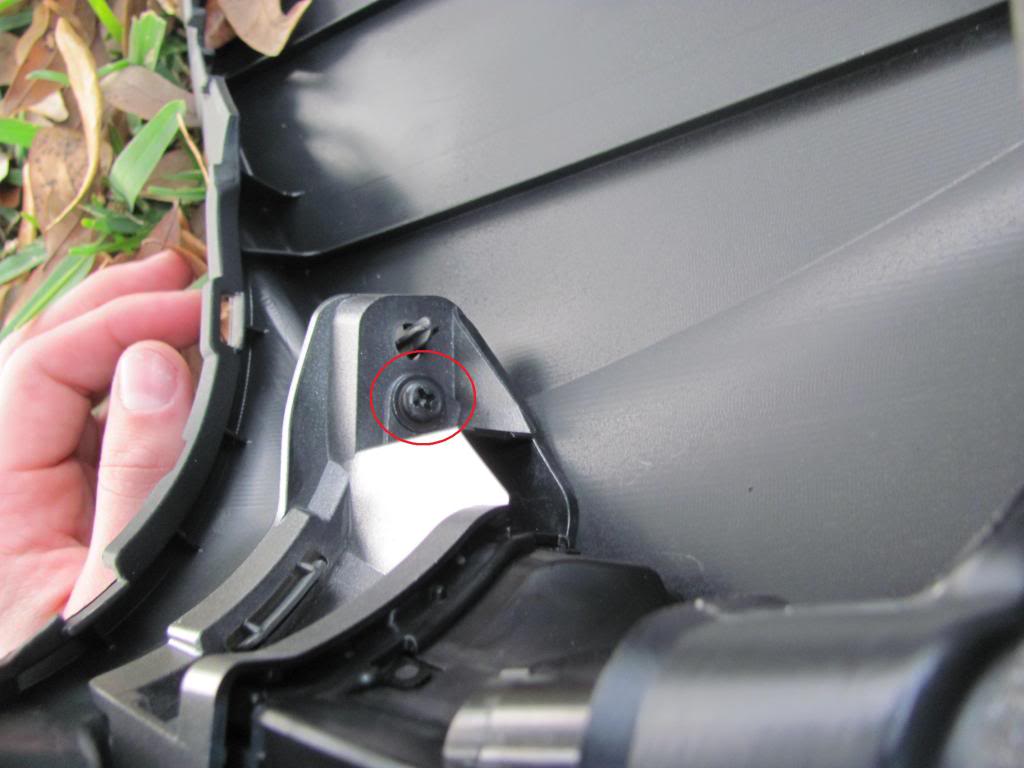
-Remove the various Phillips head screws holding on the vents and the A/C tubes
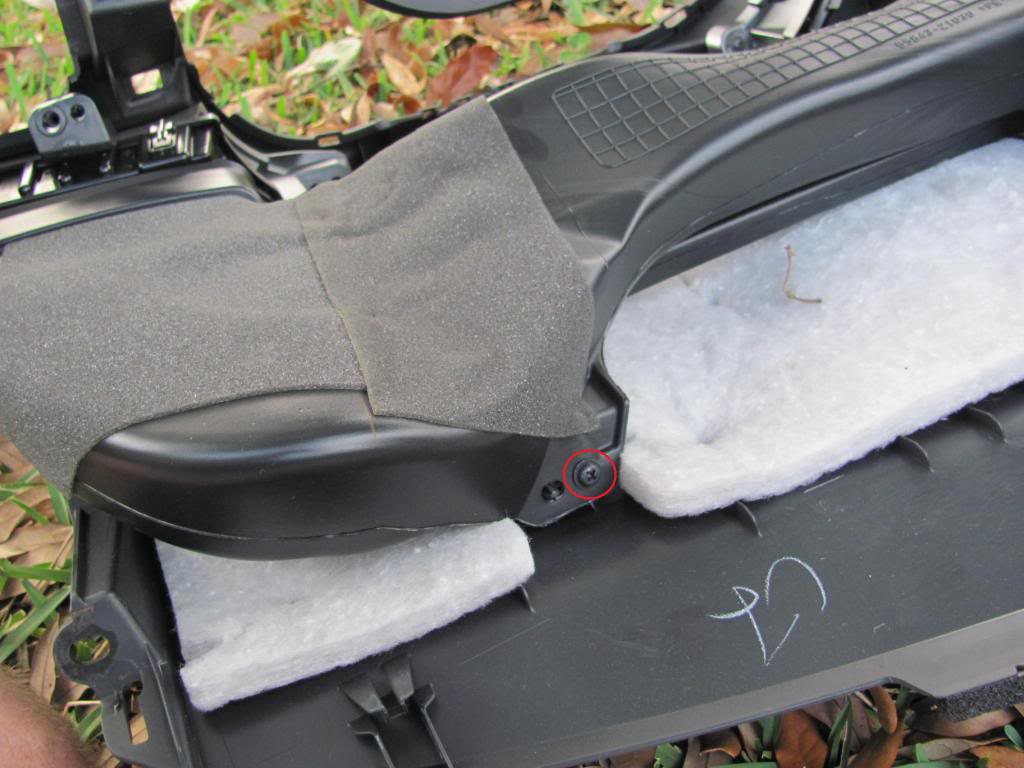
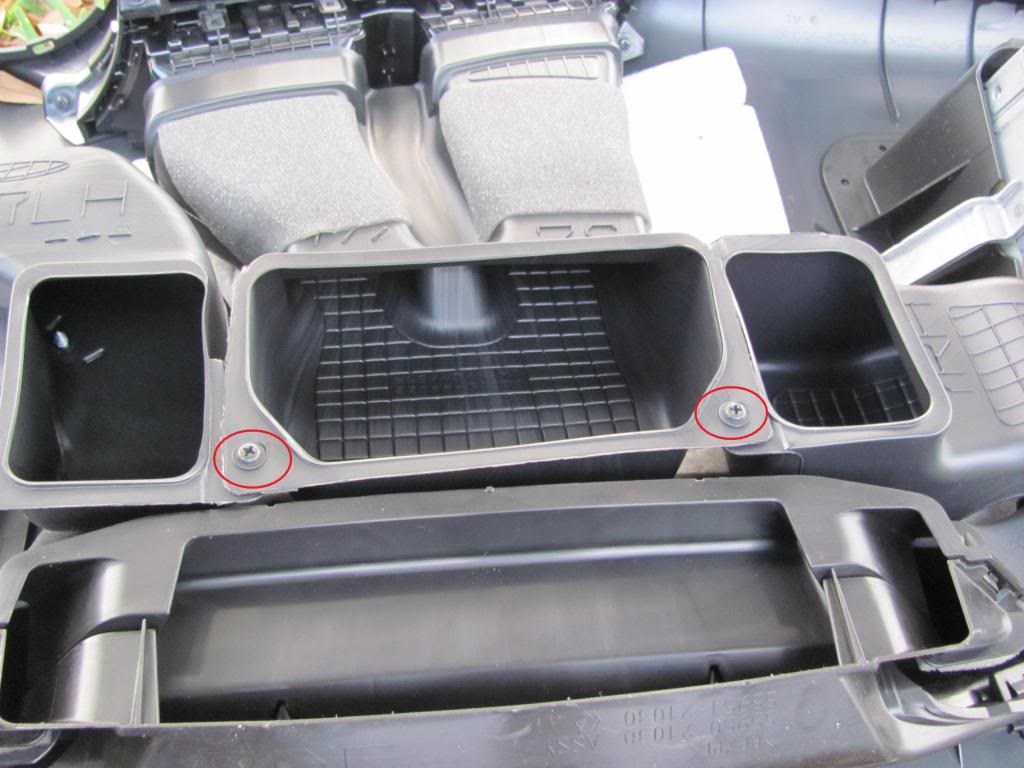

-The drivers vent and the middle vent can be easily taken out the back once these few screws are removed

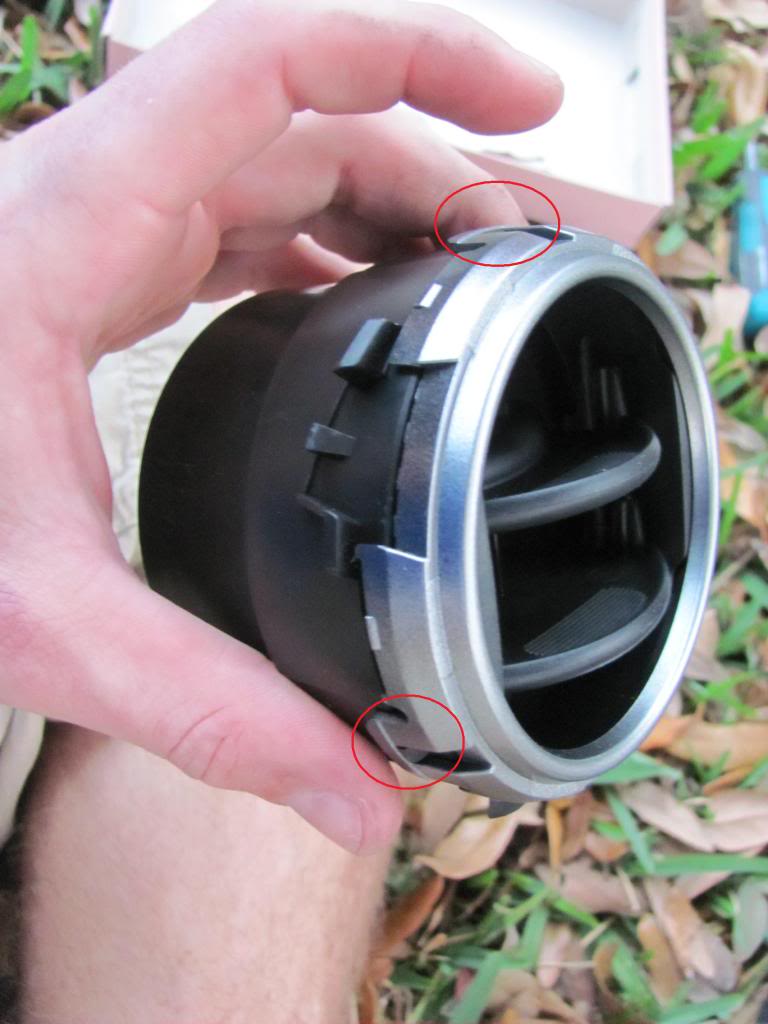
-The aluminum trim can be pulled off of the vents by pulling the multiple clips around them and then pulling the trim off
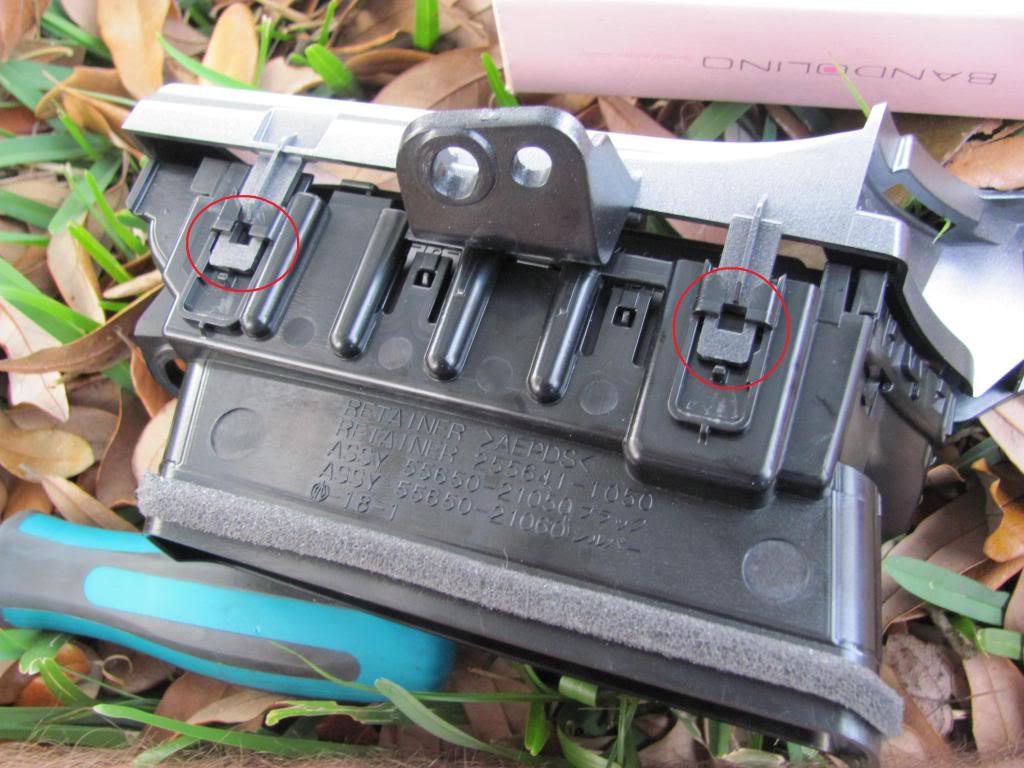
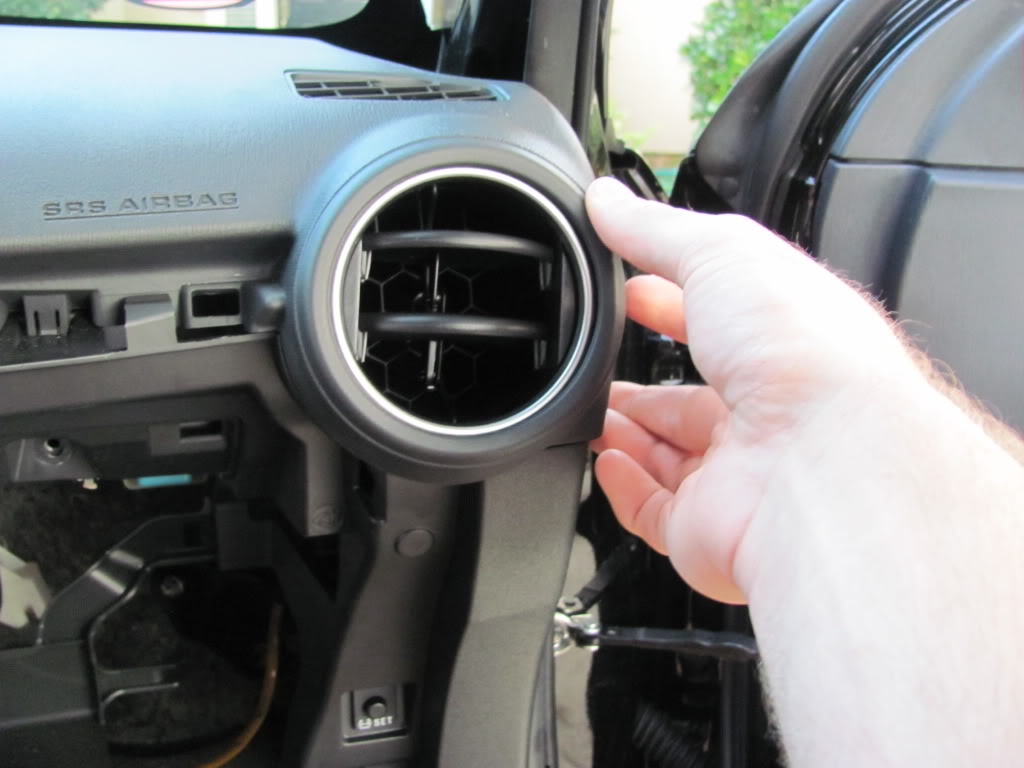
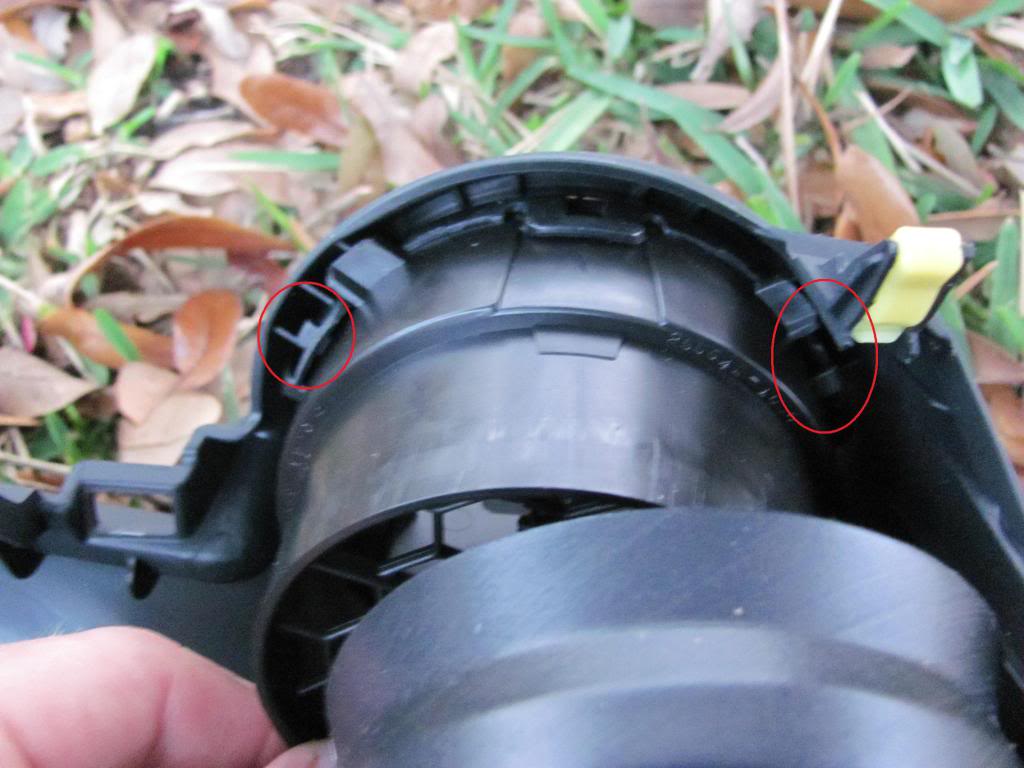
-The passenger vent can be removed by pulling off the 2 clips and pulling the vent out the back
-The aluminum trim can be pulled off by pulling the clips up and pulling the trim off the front
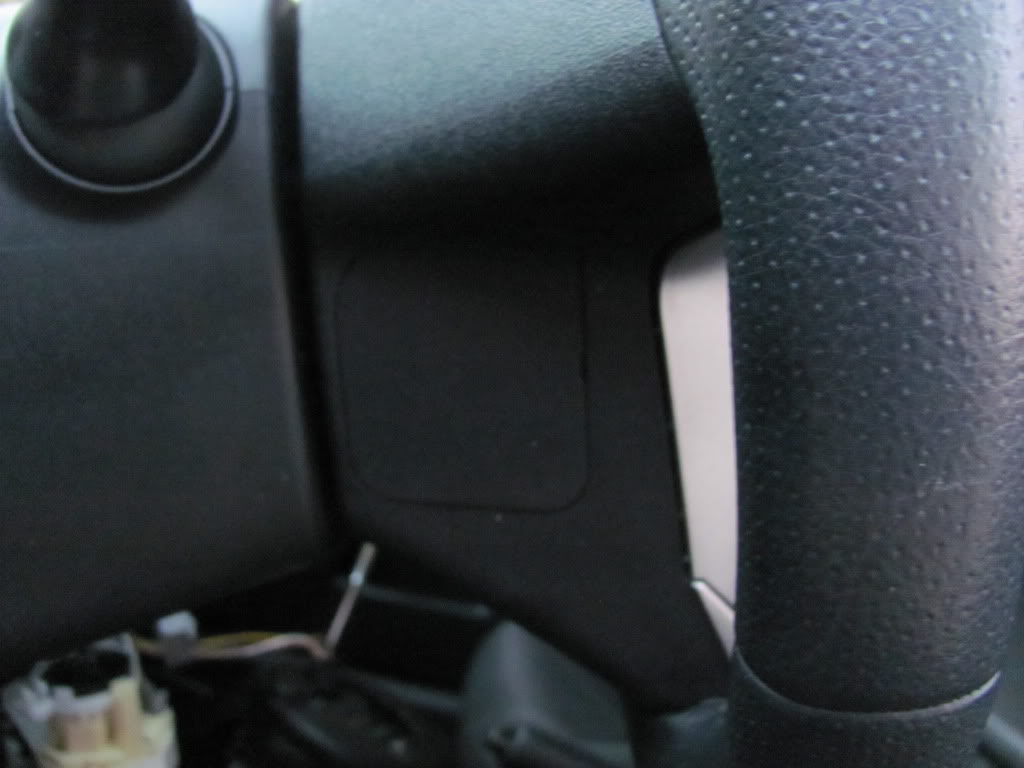
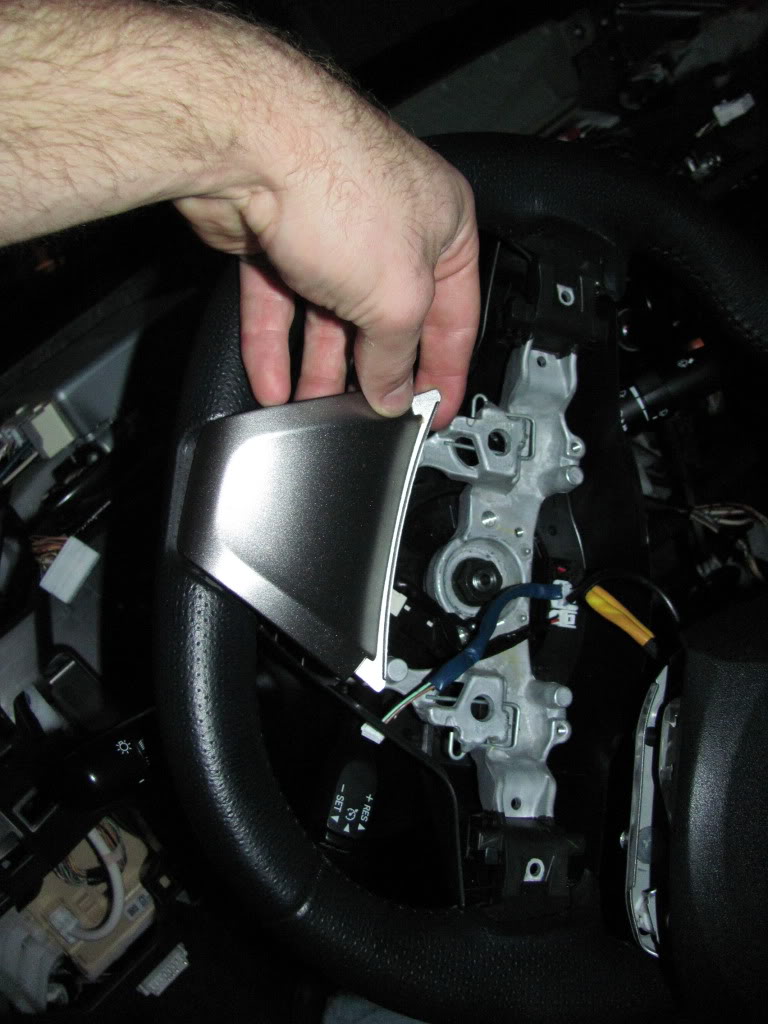
-Using a small flathead screwdriver, pop out the panel on each side of the steering wheel plastic
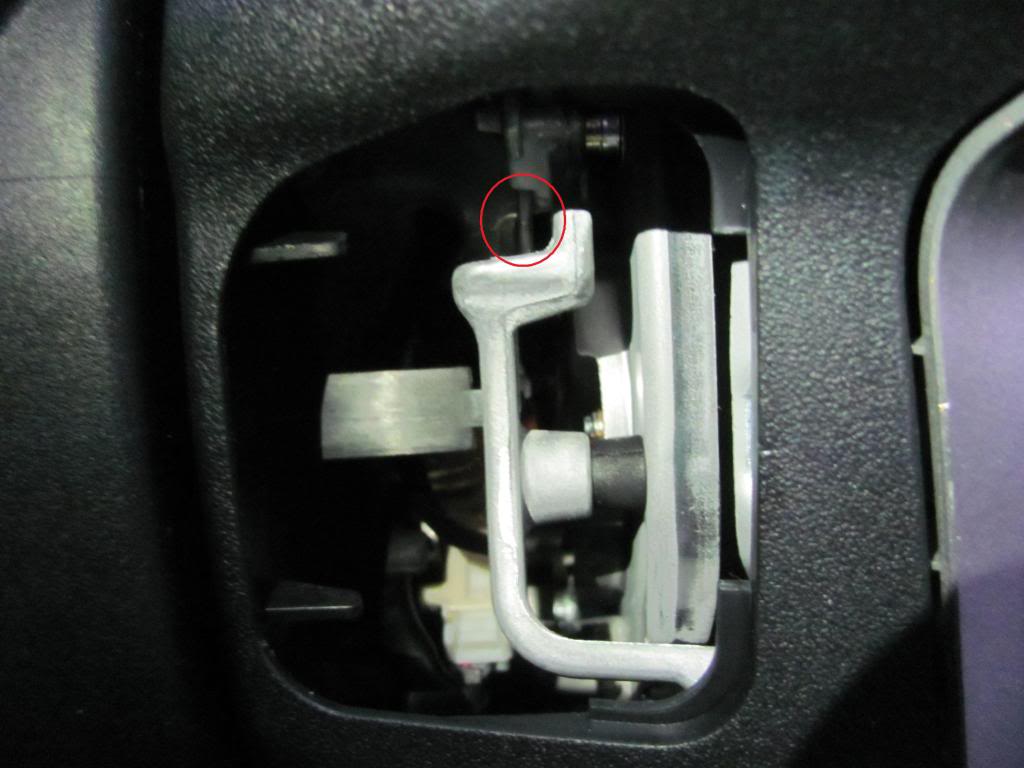
-A small vertical rod can be seen from each side. Using a screwdriver, push this rod towards the other side to release a locking mechanism. Do this for both sides
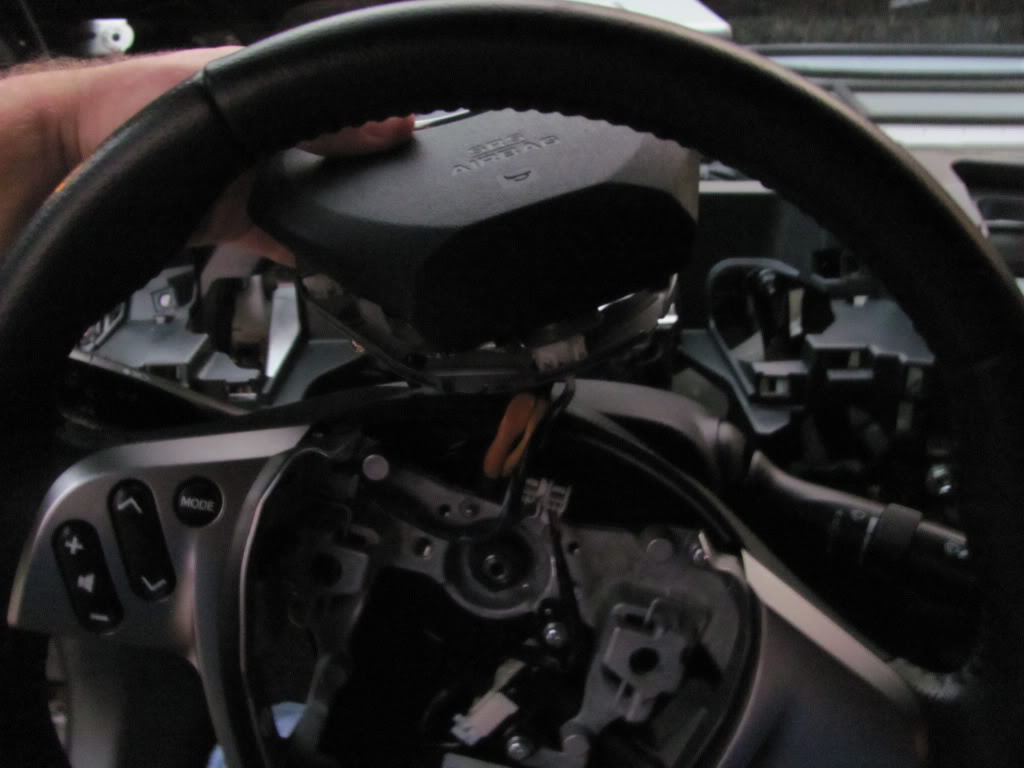
-Pull the center of the steering wheel out and place it on top of the steering wheel. It can be unplugged and completely removed, but I did not

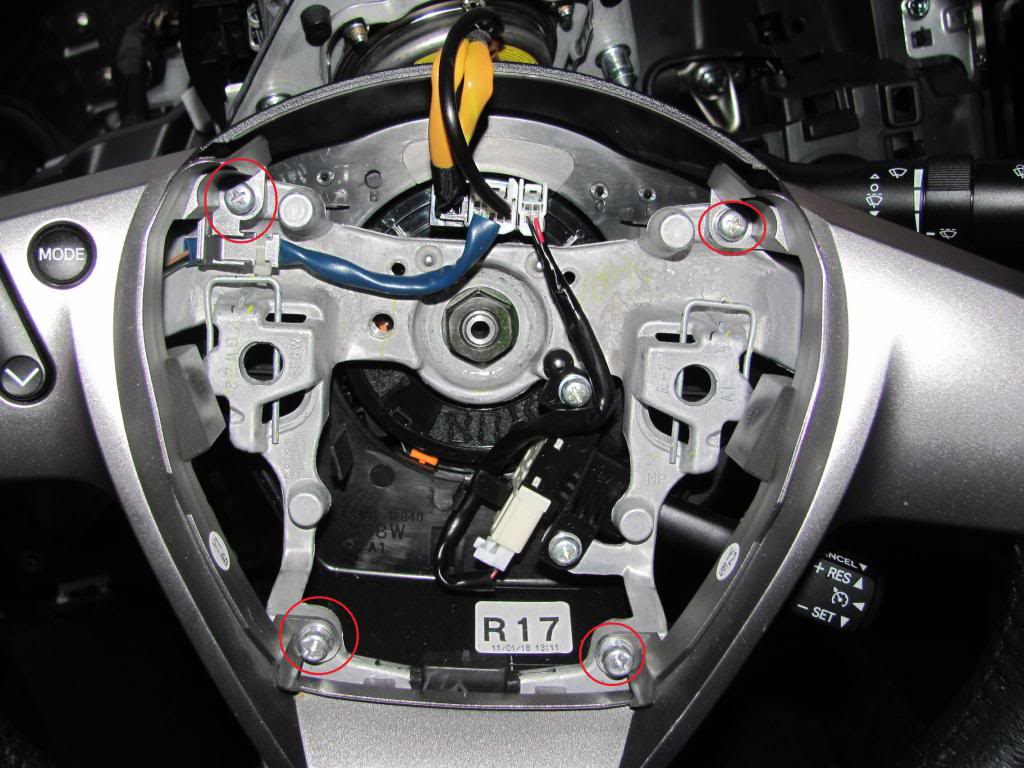
-Remove the 4 Phillips head screws in the center of the steering wheel
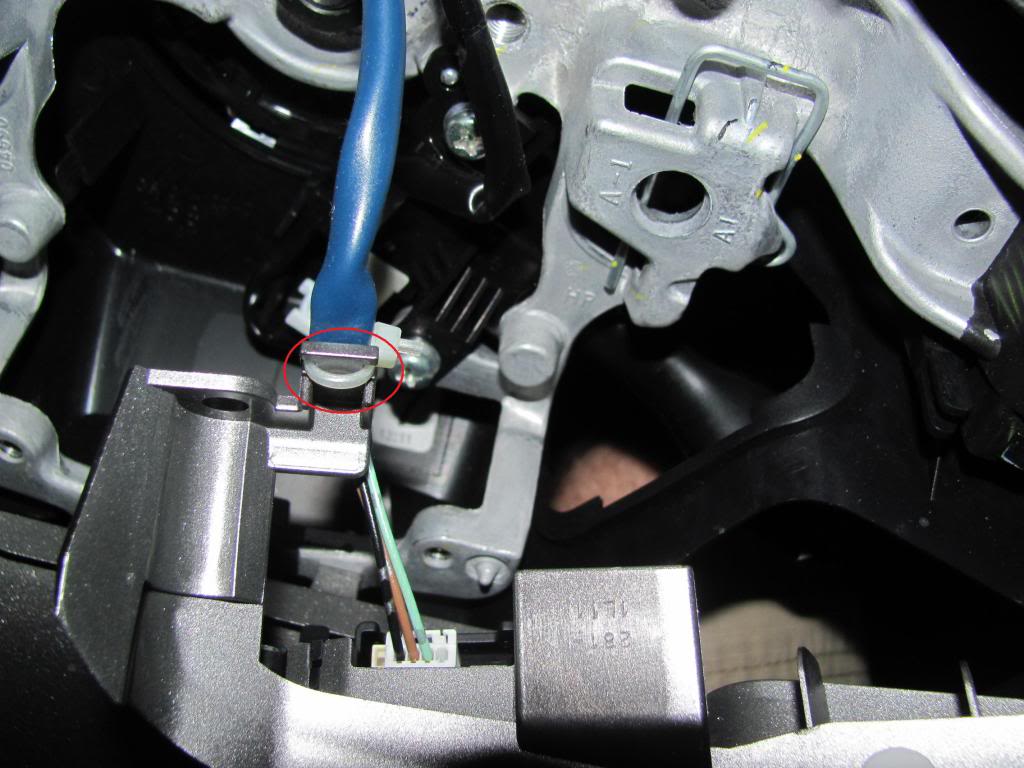
-Using scissors, but the zip tie holding the wires going to the steering wheel controls. Also disconnect the steering wheel controls
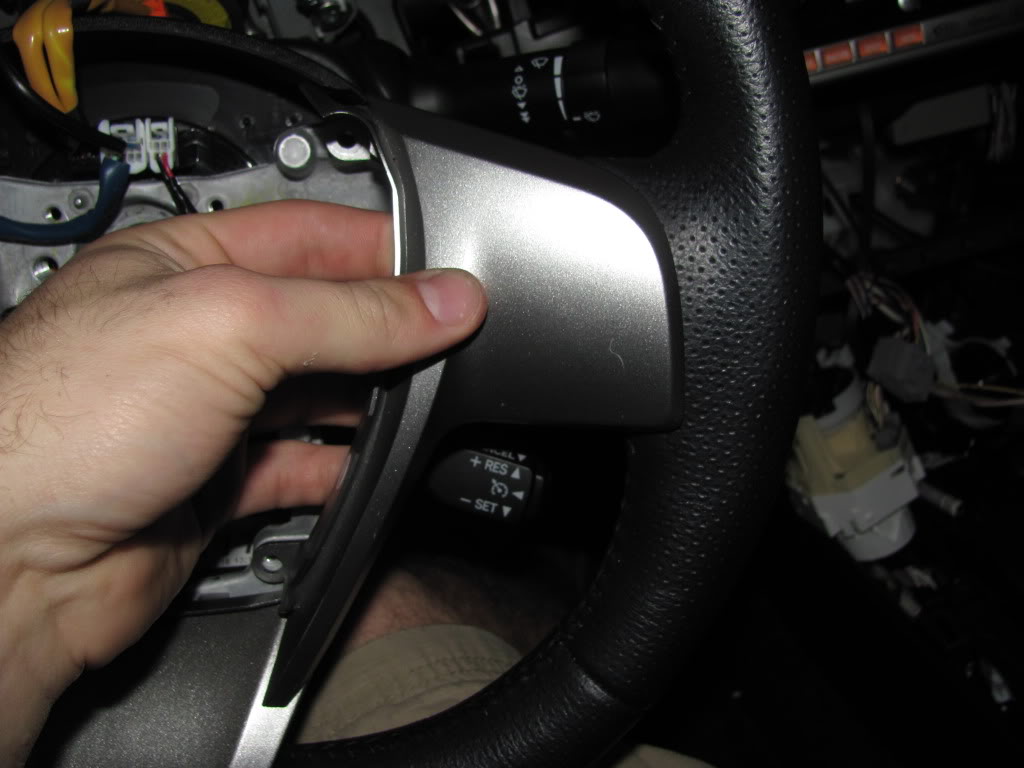
-Pull the side steering wheel trims out. They are held on by clips and can be removed by pulling away from the dash
-Turn the steering wheel upside down as much as possible until it locks up

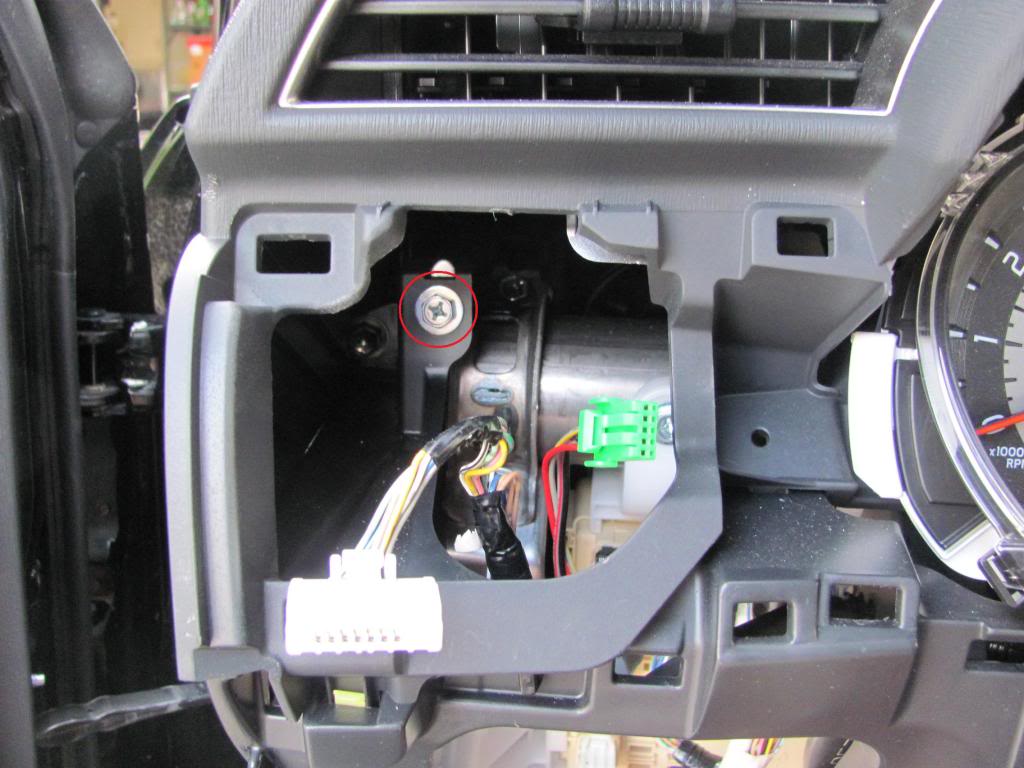
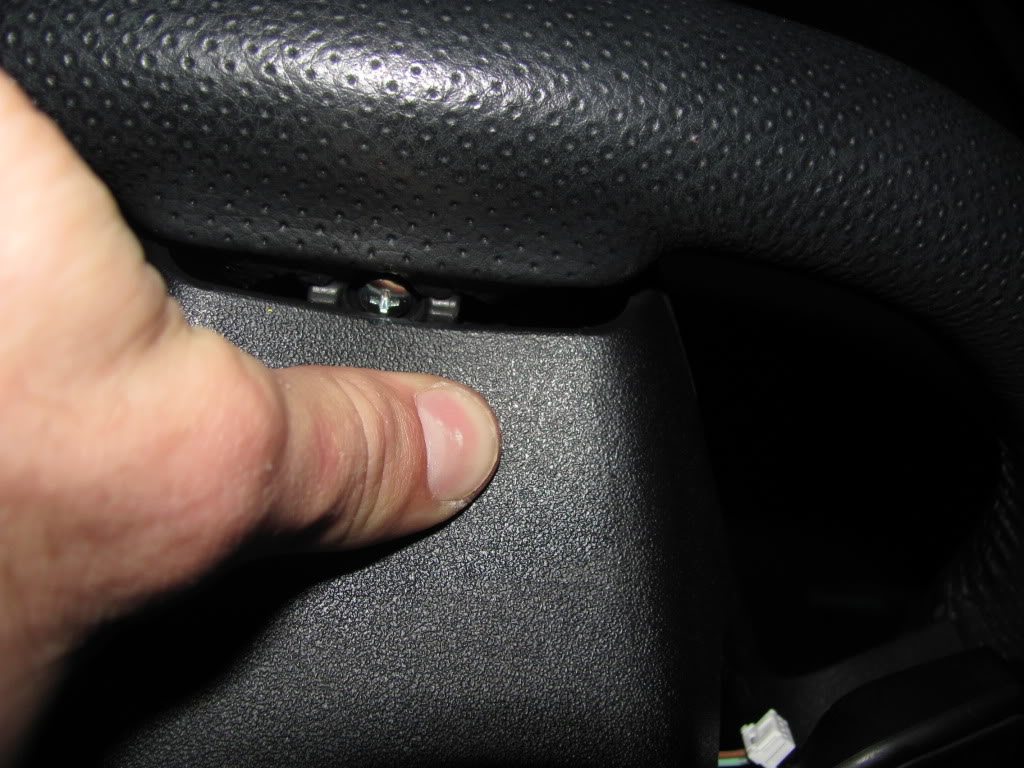
-Directly behind the lower steering wheel trim, push in the plastic enough to expose the hidden Phillips head screw. While pushing in the plastic, remove this screw
-With the hidden screw now removed, pull the middle steering wheel trim out away from the dash
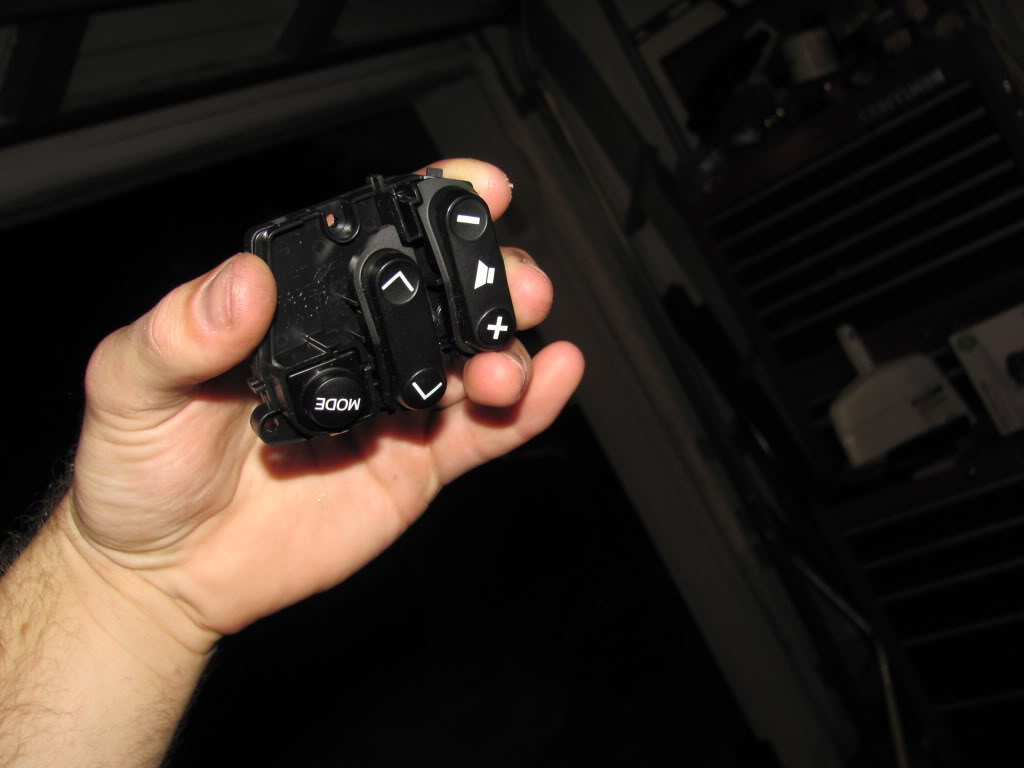
-Remove the 3 small Phillips head screws holding the steering wheel controls to the steering wheel trim
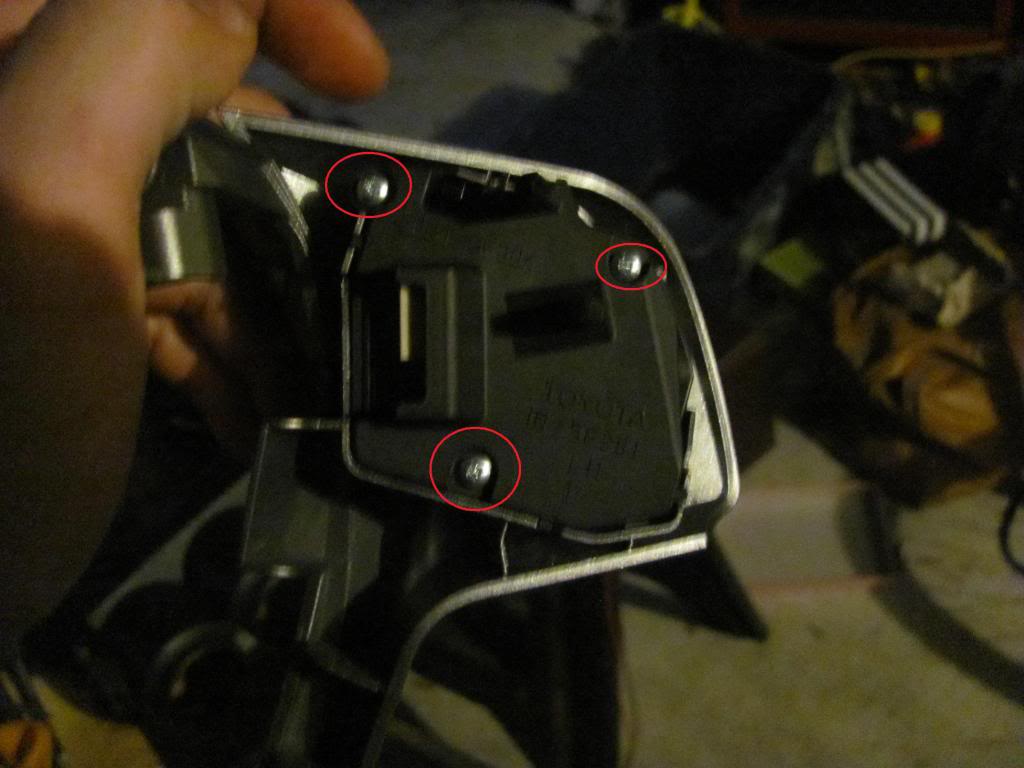
-The controls can now be taken out the back of the trim
-Now relax because you have removed a whole _____ ton of trim!!
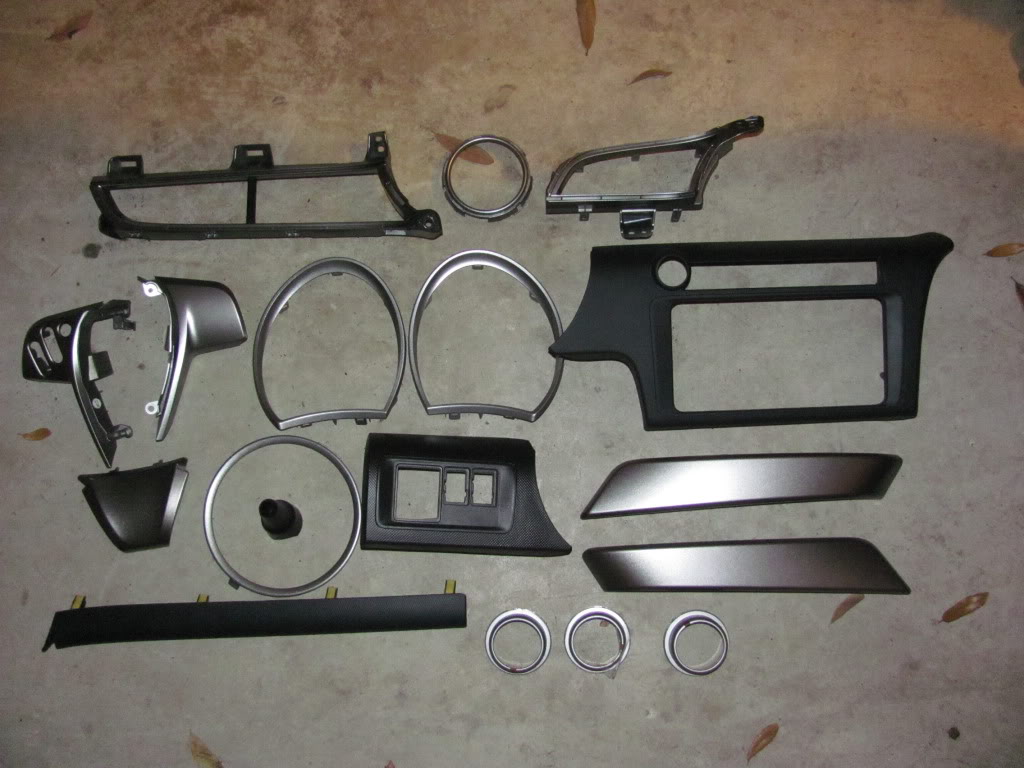
Now Paint and do the exact opposite to reassemble!
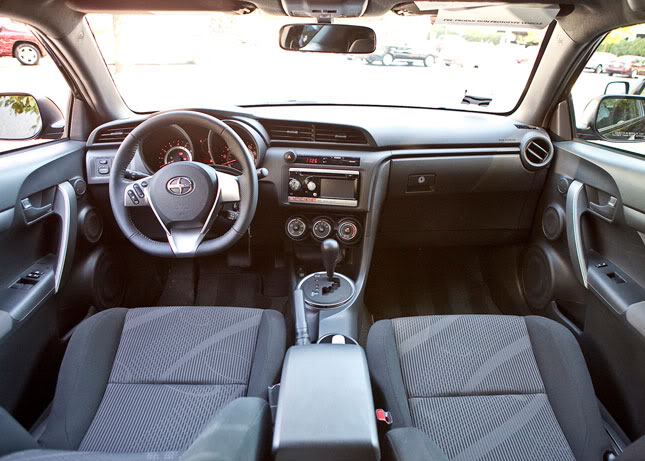
Before:
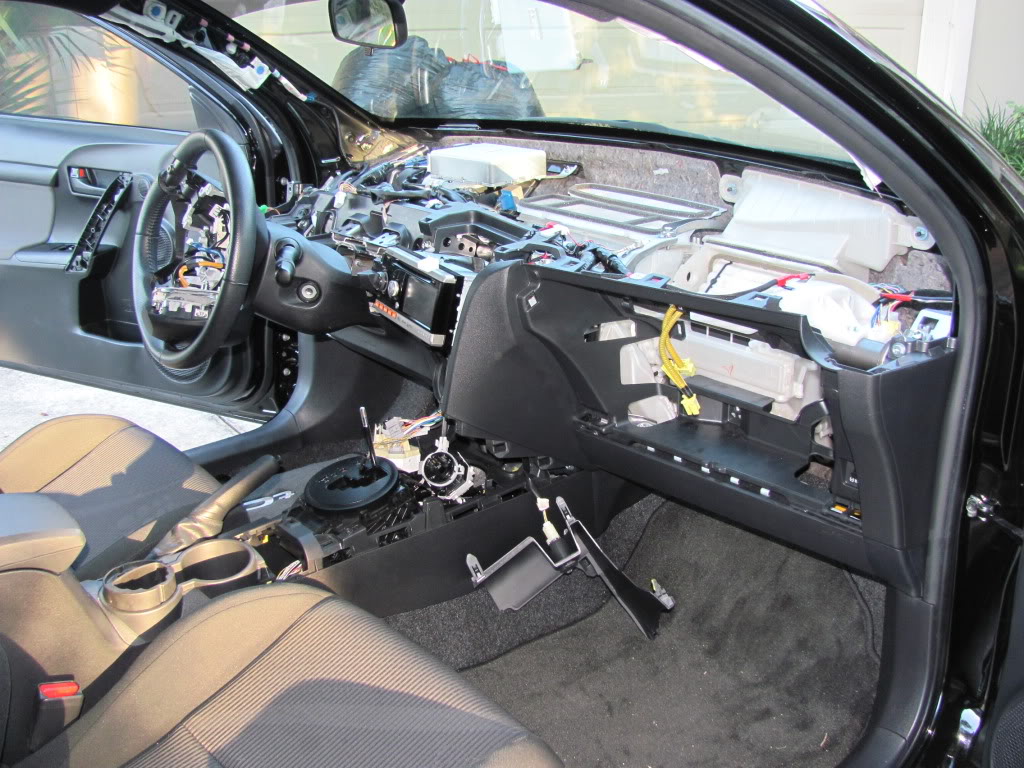
During:
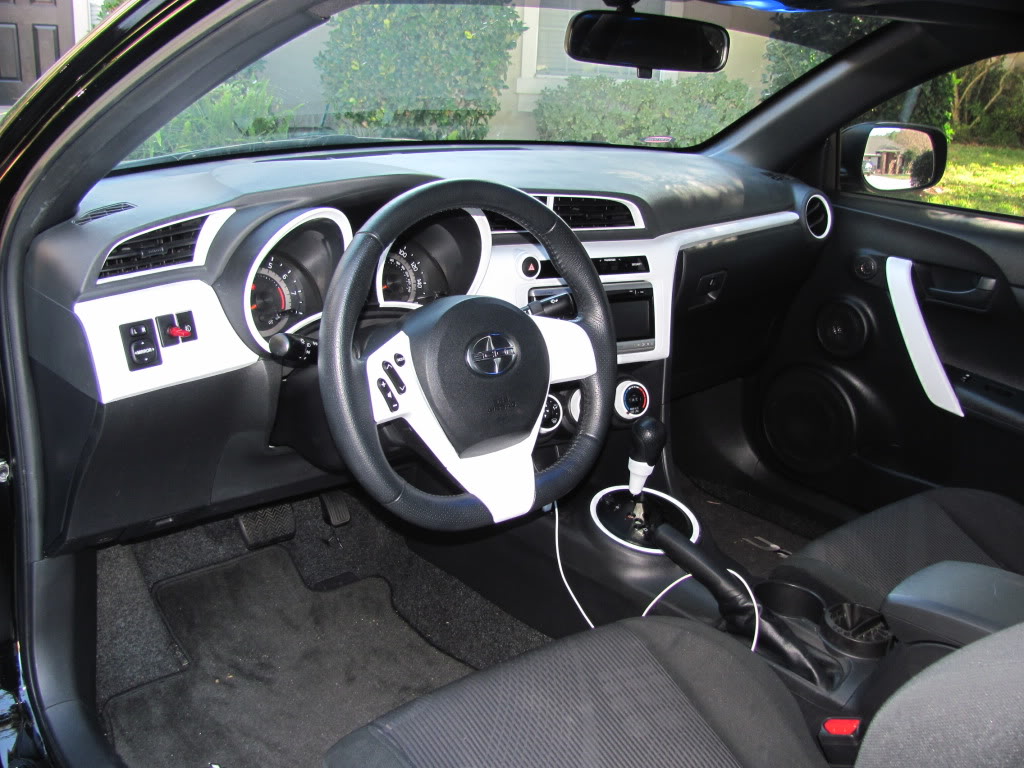
After:
Please let me know if I missed anything, but I believe I got everything. Good luck and let me know if you have any questions! And big shoutout to anyone who answered questions I had while I was removing my trim!
__________________
I AM NOT RESPONSIBLE FOR ANY DAMAGE TO YOUR VEHICLE. THIS IS SIMPLY THE PROCEDURES THAT I FOLLOWED, IT IS YOUR CHOICE IF YOU WANT TO FOLLOW THIS OR NOT.
This DIY will explain the steps to remove the following trims:
-Door Panel
-Dash
-Steering Wheel
-A/C Vents
-A/C Gauges
-Shifter
Once again.. Please note that is at your own risk
-Tools Needed: Scissors, Large Flat Head Screwdriver, Small Flat Head Screwdriver, Large Phillips Head Screwdriver, Small Phillips Head Screwdriver,
Small Ratchet with 10 and 12mm sockets.. or 10 and 12mm wrenches, Medium Ratchet + extensions with 10 and 12mm sockets.. or use the stated above
-Disconnect your battery. I always choose to disconnect the positive AND the negative just cuz.
-Start with the drivers door. Open the door. Using a large flat head screwdriver, insert it into the slot on the bottom and pull out to release the first clip.
-Once the first clip is released, pull the trim away from the door. Don't be afraid to use force.. the clip's are strong and don't break very easily at all
-Using the same screwdriver, place it under the radio trim and pull out to pop the first clip.
-Once the first clip is released, pull the trim away from the dash. Once again, don't be afraid to use force.
-Unplug the clock / security indicator
-Remove the LCD and screen from the radio trim by pulling it from the clips. There are a few small clips that can be pulled out with your fingernails, and the screen can then be removed.
-Open up your glovebox. Now pull the dash trim above the glovebox out from the dash. There is only a few clips holding this on.
-Using the same screwdriver, place it behind the mirror control trim and pull out to pop the first clip. Once this is popped, pull the rest of the mirror control trim out
-Unplug the Mirror control trim plus. This will consist of 1-3 plugs.. dependent upon wither you have Fog Lights and Bluetooth.
-Remove the Mirror control buttons from the trim. This can be done by pushing in the clips on each side and pushing out the front of the trim
-Tilt the steering wheel all the way down and pull all the way away from the dash.
-Pull the Speedometer trim out away from the dash. This is just held on by 2 clips
-Using a Phillips head screwdriver, remove the 2 screws at the top of the speedometer trim
-Remove the aluminum trim from the speedometer trim. This can be done by pulling out the clips around the aluminum trim with your fingernails or a flat head screwdriver
-Pull out the dash piece between the steering wheel and the radio. This will be the location of the push start on an RS and the button must be disconnected from the back after the trim has been pulled out. This is just help on by clips and is very easy to pull off
-Pull out the Passenger kick panel. This is just held on by a few clips. Pull away from the dash
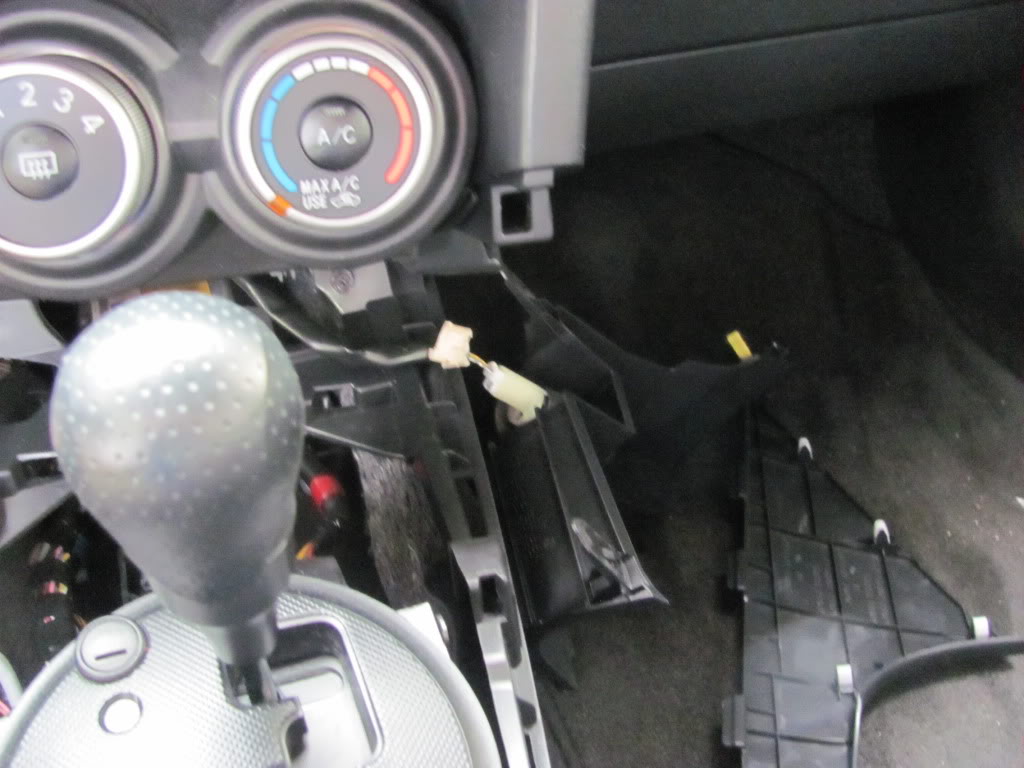
-Pull out the USB / Stick trim. This is held on by only a few clips and can be easily pulled away from the dash.
-Unplug the USB and Traction control plugs
-Remove the aluminum stick trim from the dash trim. This can be done by just pulling it out
-Twist off the shifter ****
-Pull off the shifter **** trim from the shifter ****. Simply pull the trim away from the rubber
-Pull out the dash piece holding the cigarette lighter. This is only held on by a few clips, just pull away from the dash
-You can disconnect the cigarette lighter but I did not, I just let it hang off to the side where it was out of the way.
-Pull the A/C gauge assembly out from the dash. This is held on by a few clips, just pull away from the dash
-Remove the A/C Gauges by pulling out the clips from each side of each gauge. Then pull the gauge out of the back
-Remove the trim from the gauge. Pull the clip from each corner and pull the trim out the front
-Remove the glovebox by pushing in each side and pulling out
-Remove the dash piece behind the glove box. Pull it away from the dash
-Next we will remove various Phillips head screws from the dash.
-Remove the speedometer by pulling away from the dash and disconnect it from the harness
-Remove the 2 screws there were behind the speedometer
-Remove the 2 airbag plugs and the 3 bolts that were behind the glove box
-Gently pull the Pillar trim off, this is held on by clips as well as twist clips. The clips must first be popped by pulling away from the wall, then the twist clips must be turned 90 degrees to allow it to be pulled out.
-Remove the bolt on each side of the vehicle that the pillars were hiding
-Pull the whole top dash out, be careful as the passenger airbag will still be attached to the dash. This will come out with the dash
-Remove the various Phillips head screws holding on the vents and the A/C tubes
-The drivers vent and the middle vent can be easily taken out the back once these few screws are removed
-The aluminum trim can be pulled off of the vents by pulling the multiple clips around them and then pulling the trim off
-The passenger vent can be removed by pulling off the 2 clips and pulling the vent out the back
-The aluminum trim can be pulled off by pulling the clips up and pulling the trim off the front
-Using a small flathead screwdriver, pop out the panel on each side of the steering wheel plastic
-A small vertical rod can be seen from each side. Using a screwdriver, push this rod towards the other side to release a locking mechanism. Do this for both sides
-Pull the center of the steering wheel out and place it on top of the steering wheel. It can be unplugged and completely removed, but I did not
-Remove the 4 Phillips head screws in the center of the steering wheel
-Using scissors, but the zip tie holding the wires going to the steering wheel controls. Also disconnect the steering wheel controls
-Pull the side steering wheel trims out. They are held on by clips and can be removed by pulling away from the dash
-Turn the steering wheel upside down as much as possible until it locks up
-Directly behind the lower steering wheel trim, push in the plastic enough to expose the hidden Phillips head screw. While pushing in the plastic, remove this screw
-With the hidden screw now removed, pull the middle steering wheel trim out away from the dash
-Remove the 3 small Phillips head screws holding the steering wheel controls to the steering wheel trim
-The controls can now be taken out the back of the trim
-Now relax because you have removed a whole _____ ton of trim!!
Now Paint and do the exact opposite to reassemble!
Before:
During:
After:
Please let me know if I missed anything, but I believe I got everything. Good luck and let me know if you have any questions! And big shoutout to anyone who answered questions I had while I was removing my trim!
__________________
Last edited by MR_LUV; 04-05-2021 at 04:46 AM. Reason: Awarded 5 Yr Badge


 03-02-2012, 05:08 PM
#3

double that on awesomeness! nice right up brotha! def will be referring to this soon
this needs a sticky for sure!
this needs a sticky for sure!
Last edited by scottobahn; 03-02-2012 at 05:09 PM. Reason: added more content
03-02-2012, 05:40 PM
#5
Junior Member
SL Member

Join Date: Feb 2012
Location: New York
Posts: 10
Fantastic writeup. Thank you!!!!
I've been wanting to take the top of the dash off and I was wondering where the airbag deployed as I want to cover/wrap the top of the dash with something like DI NOC.
After looking at this I'm still wondering where the passenger airbag deploys.
Does anyone know for sure exactly where/how it comes out?
Thanks again for the great write up.
03-02-2012, 06:36 PM
#7
Senior Member
SL Member


Join Date: Apr 2008
Location: Rockland County NY
Posts: 753
03-02-2012, 06:59 PM
#8
Senior Member
SL Member

Join Date: Sep 2011
Location: Washington, DC
Posts: 732
 03-03-2012, 09:49 PM
#10

Glad I could help and for your orange piece removal on the A/C ***** idk if it can be removed I just left mine on when I did mine
and taped over it everything looks good though and was the A/C vent removal well explained in my tutorial I sorta wrote it off of memory,
And cant wait to see the finish products.
__________________
and taped over it everything looks good though and was the A/C vent removal well explained in my tutorial I sorta wrote it off of memory,
And cant wait to see the finish products.
__________________
Last edited by MR_LUV; 03-24-2021 at 01:57 PM. Reason: Awarded 5 Yr Badge


