Haolebuilt II build thread
 10-19-2012, 10:51 PM
#161
Senior Member

SL Member
Thread Starter
Join Date: Nov 2005
Location: Surf City SoCal
Posts: 1,527
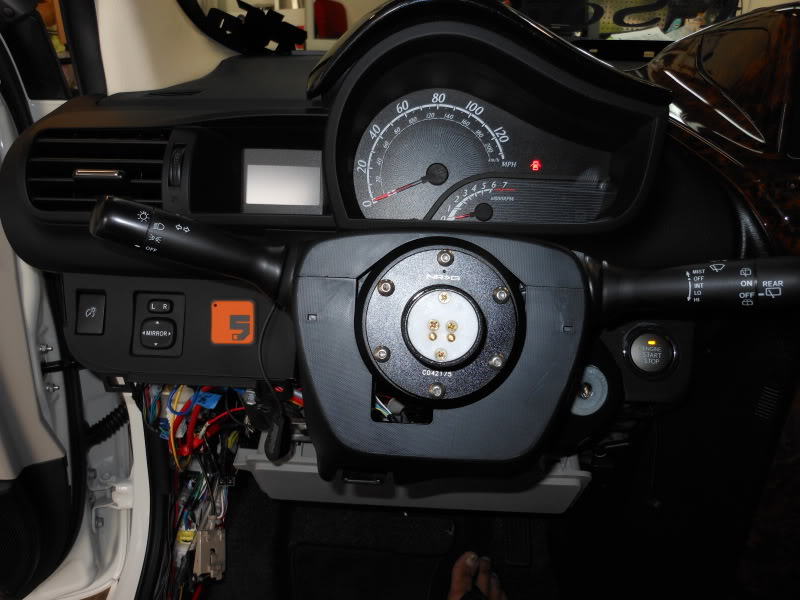
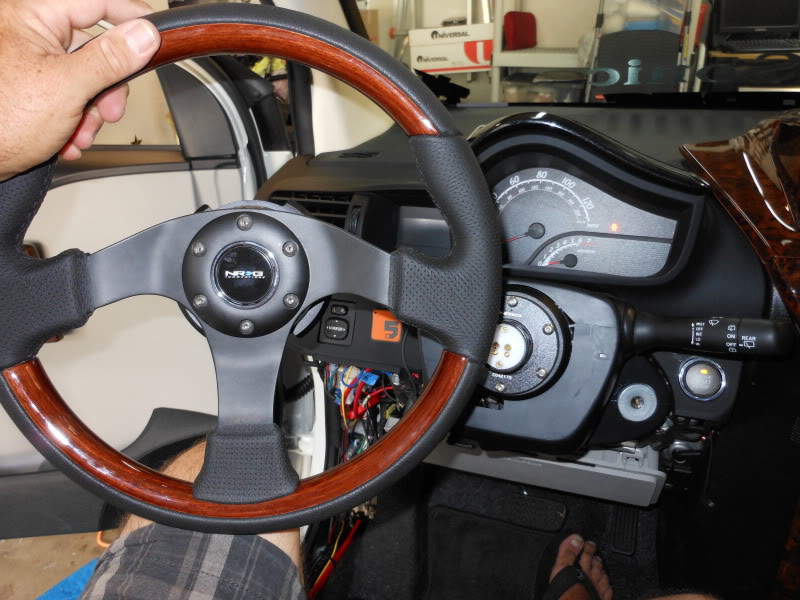
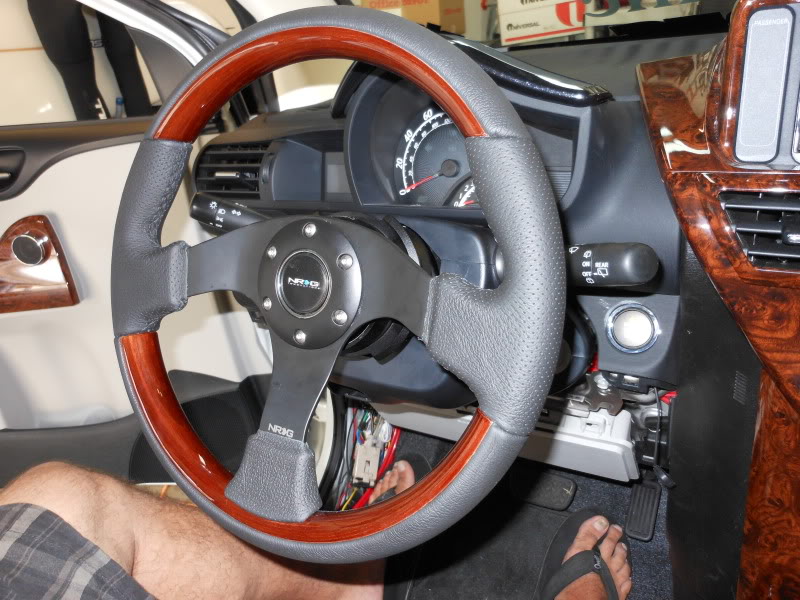
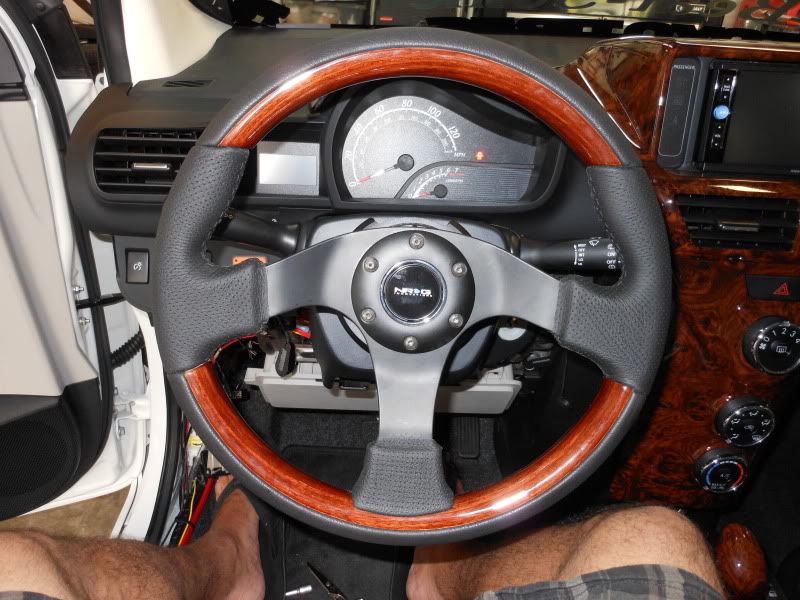
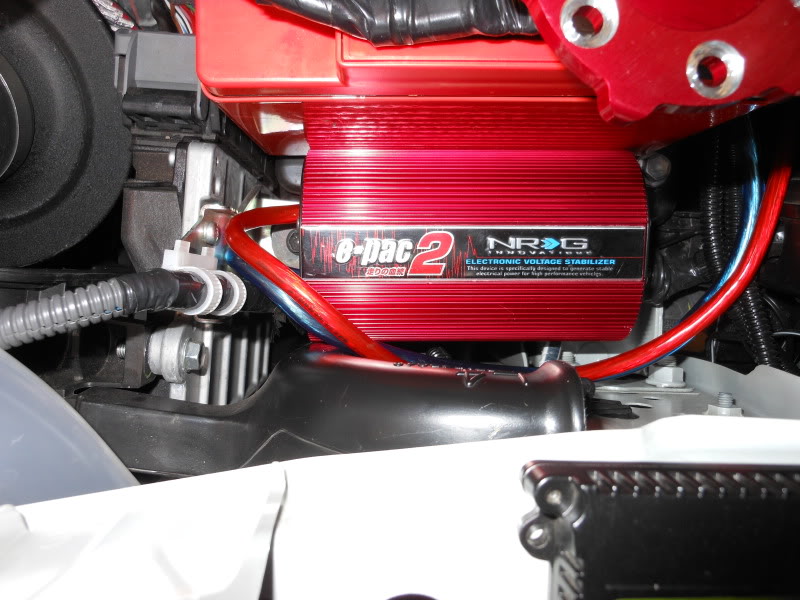
I had a chance to day to install some of the goodies from NRG Innovations. I started with the Quick Release Hub and Steering Wheel.
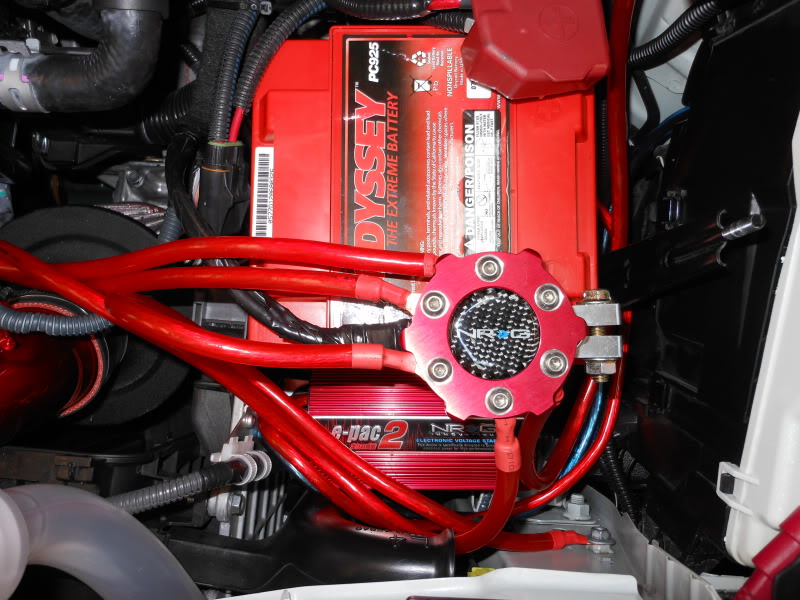
Then it was on to the engine bay where I installed the NRG Red Voltage Stabilizer...
Then the NRG Red Ground Wire Kit...
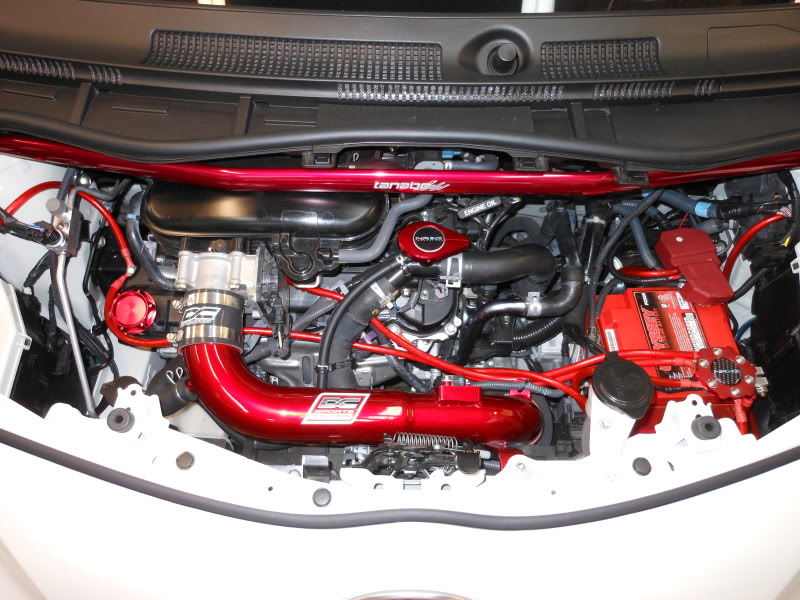
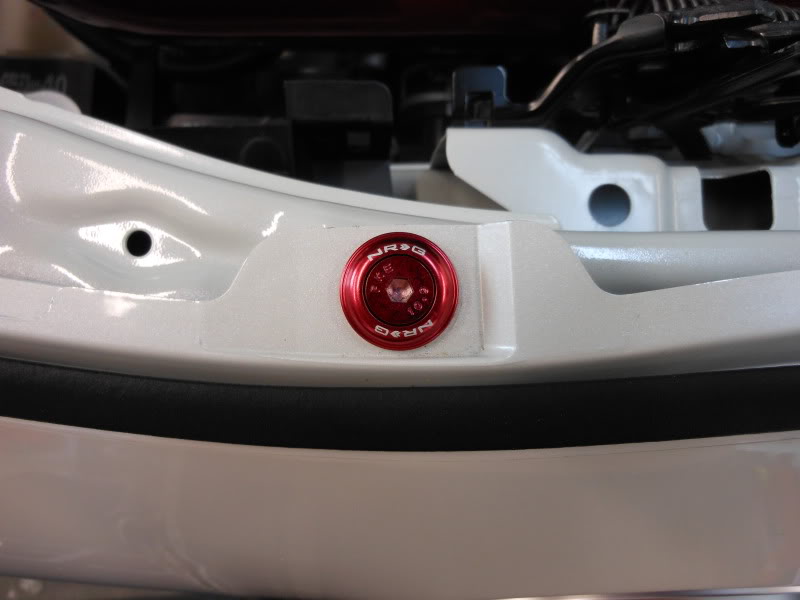
Then the NRG Red Fender Washers and Red Radiator Cap...

Many thanks to the great guys at NRG Innovations for the contributions to the Haolebuilt II project.
www.getnrg.com
Then it was on to the engine bay where I installed the NRG Red Voltage Stabilizer...
Then the NRG Red Ground Wire Kit...
Then the NRG Red Fender Washers and Red Radiator Cap...
Many thanks to the great guys at NRG Innovations for the contributions to the Haolebuilt II project.
www.getnrg.com
 10-20-2012, 12:03 AM
#162

love the rad cap and the fender washers, they go great with all the other red stuff, the voltage stabilizer is a bit too much for me though. Maybe if the ground wires werent red and were routed better....
10-24-2012, 03:14 AM
#163
Senior Member
SL Member
Thread Starter
Join Date: Nov 2005
Location: Surf City SoCal
Posts: 1,527
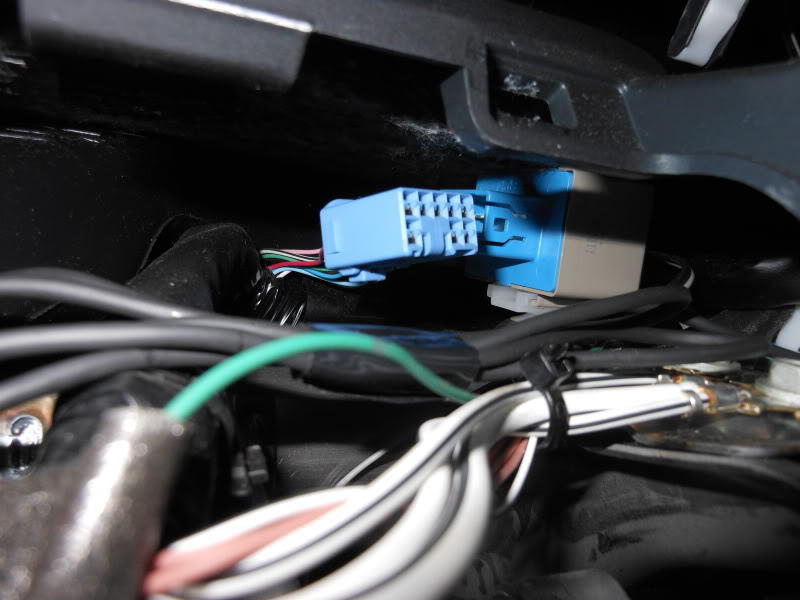
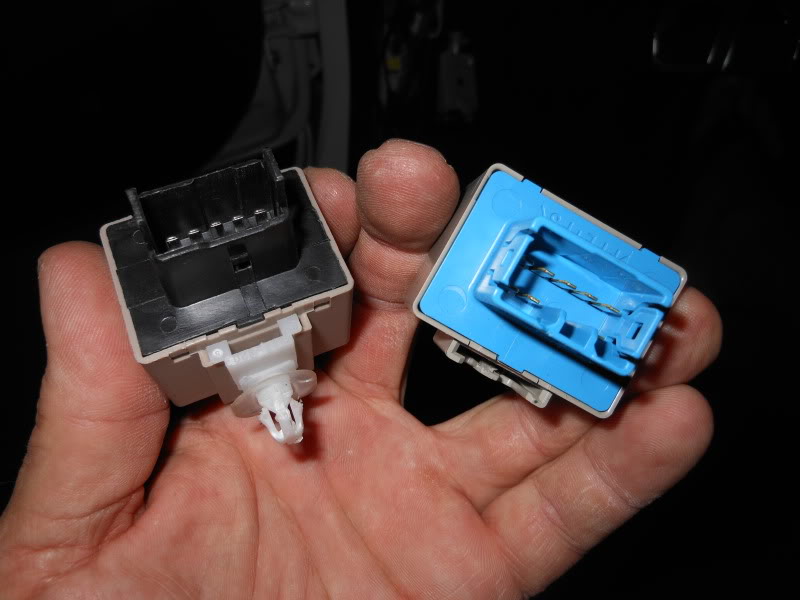
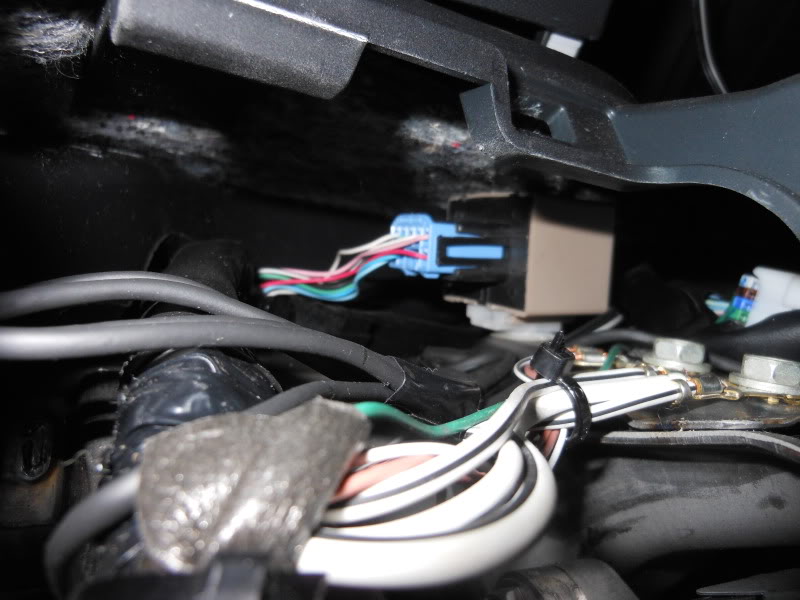
The nice people at Advanced Keys have added a security / push to start system to the Haolebuilt II project.
The Toyota iQ's have the option of push button start but the Scion model does not. I really wanted to add a push button start and this system does it all.
Auto door lock / unlock. Remote engine start. Full alarm system and Push to Start. When I have the key card in my pocket and approach the iQ the doors unlock at about a five foot distance. When I walk away the doors lock and the alarm system activates at about 10 feet. Beyond the 10 foot range the remote engine start will work. I can start my iQ from inside my house.
Professional installation is suggested so I had my buddy Gene do it while I watched. The installation is rather straight forward and programming is simple. There is a flashing LED to alert the public that the alarm is active. The system comes with two key cards and two bypass cards. There is a small receiver mounted on the dash that will bypass the system in the event your battery in the key card dies or you lose it. When the bypass is used the alarm is deactivated but the push to start is still active.
I will post up a video of how the system performs but for now here are some pictures of the start button.
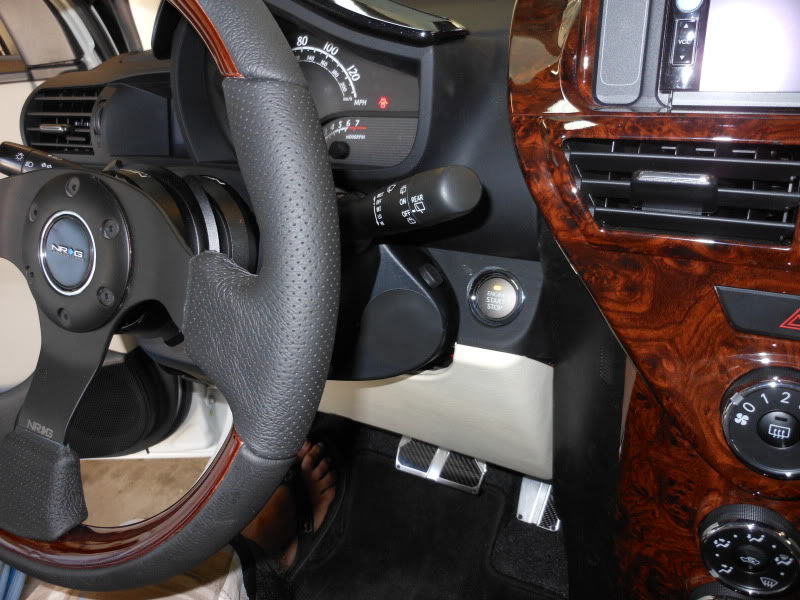

It is pure joy not having to use the key anymore.
This system is the AK - 105B and retails for $349.
The customer support was amazing. Brian from Advanced Keys spoke to us on the phone during the installation even though it was past 10:00 pm his time. The system is the latest they have and the installation instructions had not been finalized. He walked us through some wiring questions and made the job so much easier.
You can check them out at www.advancedkeys.com
The Toyota iQ's have the option of push button start but the Scion model does not. I really wanted to add a push button start and this system does it all.
Auto door lock / unlock. Remote engine start. Full alarm system and Push to Start. When I have the key card in my pocket and approach the iQ the doors unlock at about a five foot distance. When I walk away the doors lock and the alarm system activates at about 10 feet. Beyond the 10 foot range the remote engine start will work. I can start my iQ from inside my house.
Professional installation is suggested so I had my buddy Gene do it while I watched. The installation is rather straight forward and programming is simple. There is a flashing LED to alert the public that the alarm is active. The system comes with two key cards and two bypass cards. There is a small receiver mounted on the dash that will bypass the system in the event your battery in the key card dies or you lose it. When the bypass is used the alarm is deactivated but the push to start is still active.
I will post up a video of how the system performs but for now here are some pictures of the start button.
It is pure joy not having to use the key anymore.
This system is the AK - 105B and retails for $349.
The customer support was amazing. Brian from Advanced Keys spoke to us on the phone during the installation even though it was past 10:00 pm his time. The system is the latest they have and the installation instructions had not been finalized. He walked us through some wiring questions and made the job so much easier.
You can check them out at www.advancedkeys.com
11-02-2012, 06:36 PM
#164
Senior Member
SL Member

Join Date: Oct 2006
Posts: 285
 11-08-2012, 01:51 PM
#165
Senior Member
SL Member
Thread Starter
Join Date: Nov 2005
Location: Surf City SoCal
Posts: 1,527
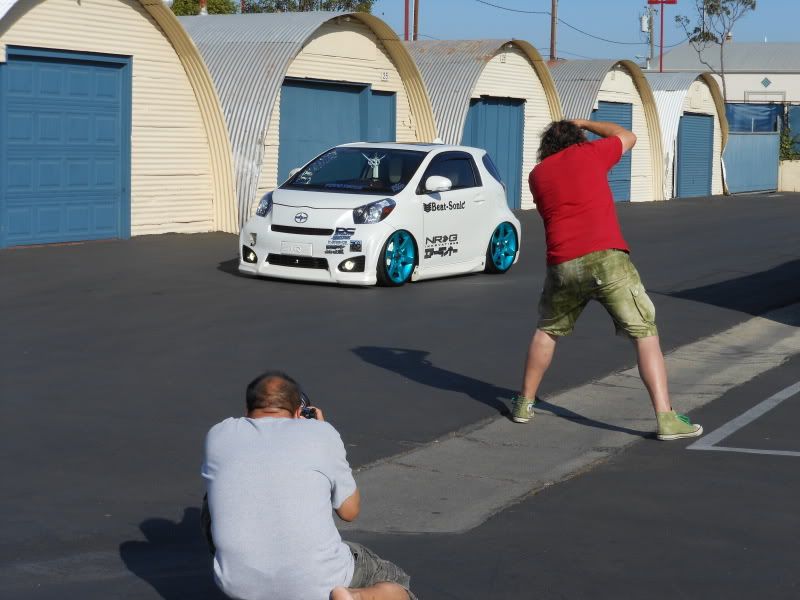
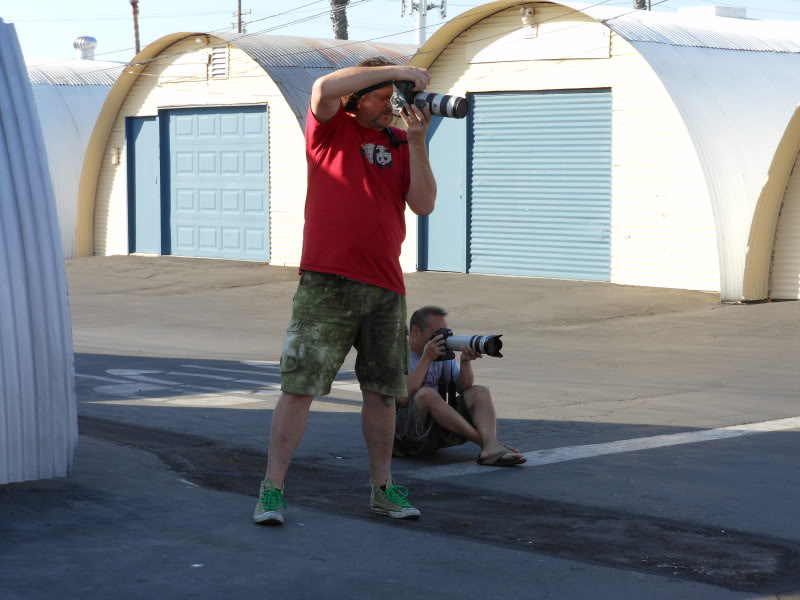
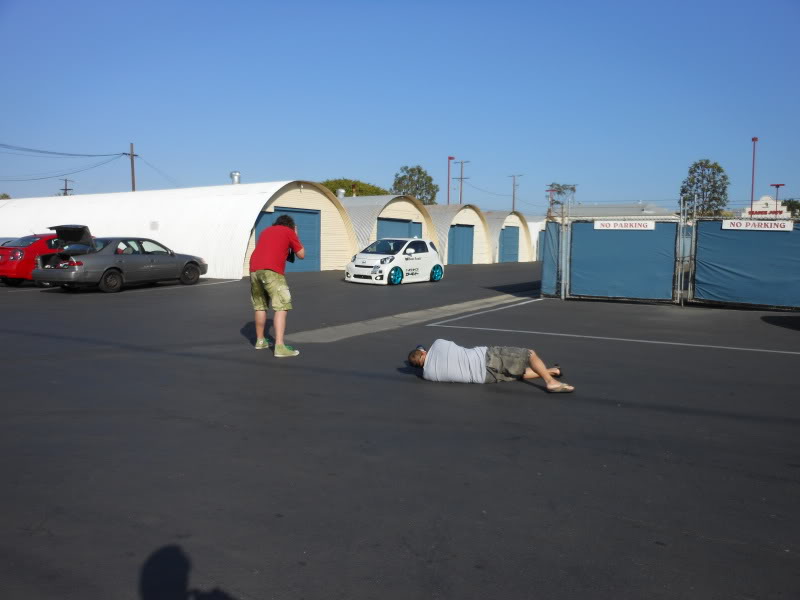
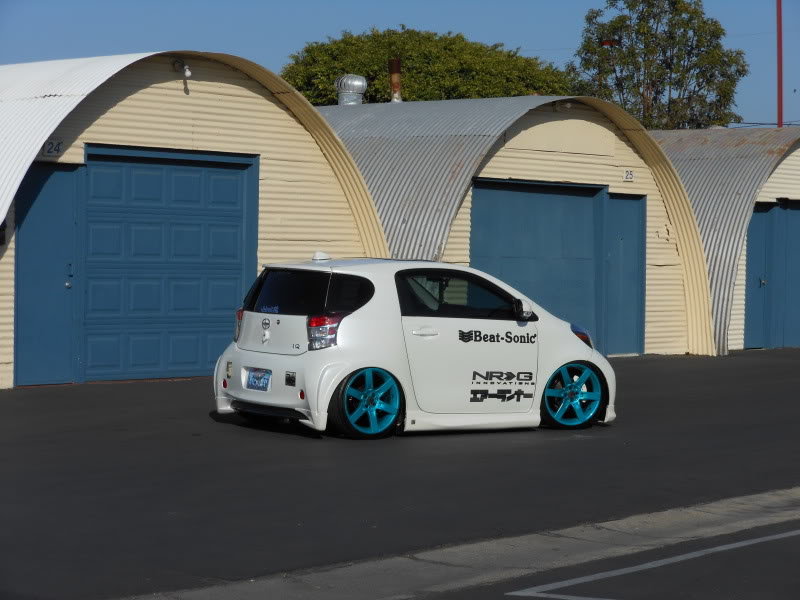
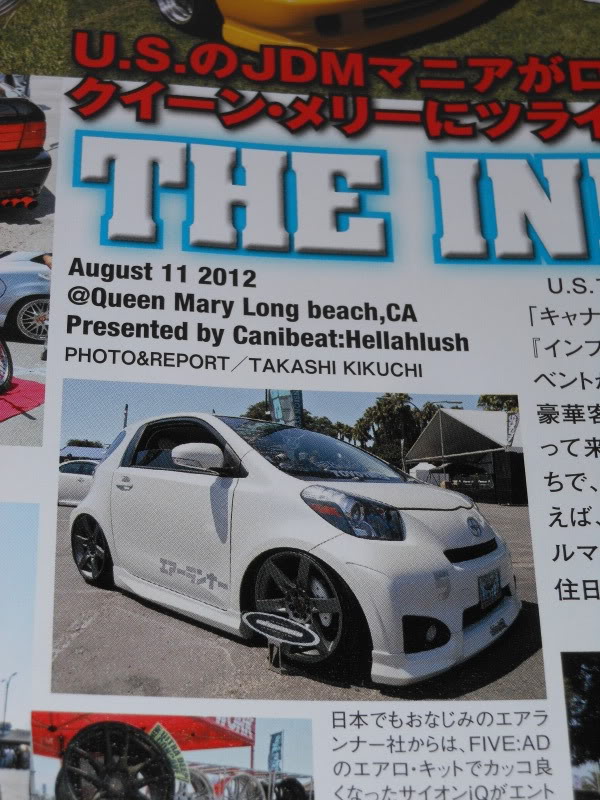
The iQ was photographed by world famous photographers Andrew "Fly" Tipping and James Louis for an article in Japanese Performance Magazine in the UK. The shoot and interview was done in Newport Beach CA.

11-20-2012, 01:30 PM
#166
Senior Member
SL Member
Thread Starter
Join Date: Nov 2005
Location: Surf City SoCal
Posts: 1,527
I added some new LED front turn signals. They are the usual 7440 connectors but with a third wire added to provide the look of DRL's. The lights are illuminated white when the parking lights are on and then flash amber when the turn signals are used. I also added a flasher relay to replace the stock one. This will allow the addition of LED turn signals without having to install resistors at each lamp location.
The LED "switchback" bulbs and flasher unit...

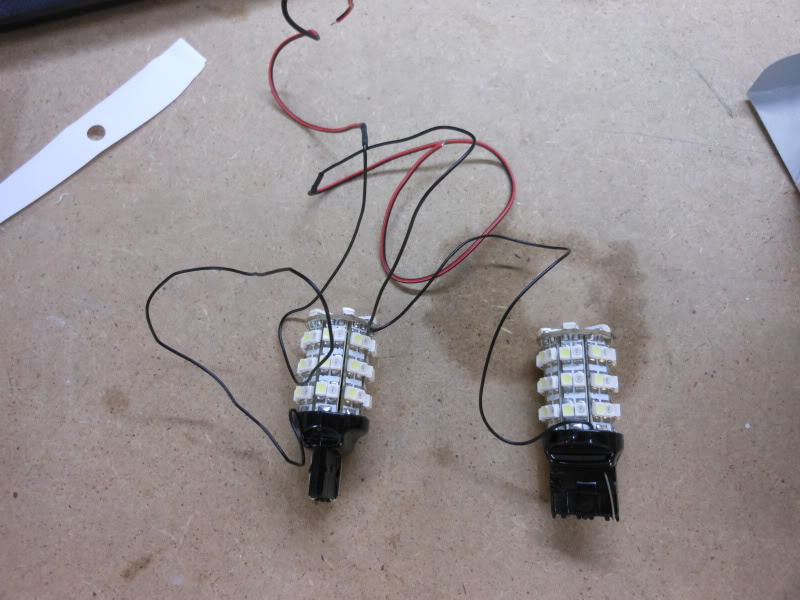
The third wire is simply run to the parking light side marker light positive wire and spliced in...

The stock flasher is removed and replaced with the LED flasher...
The bulb appears white when the parking lights are on...
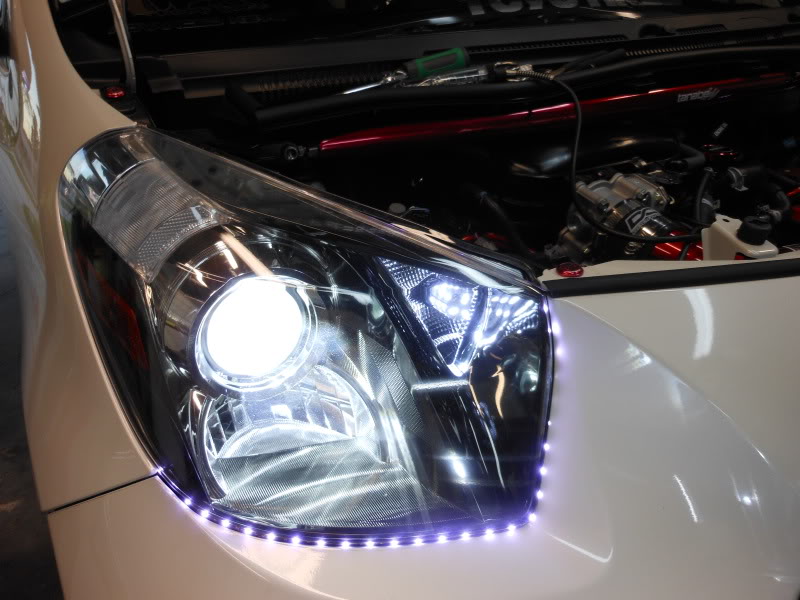
And amber when flashing...
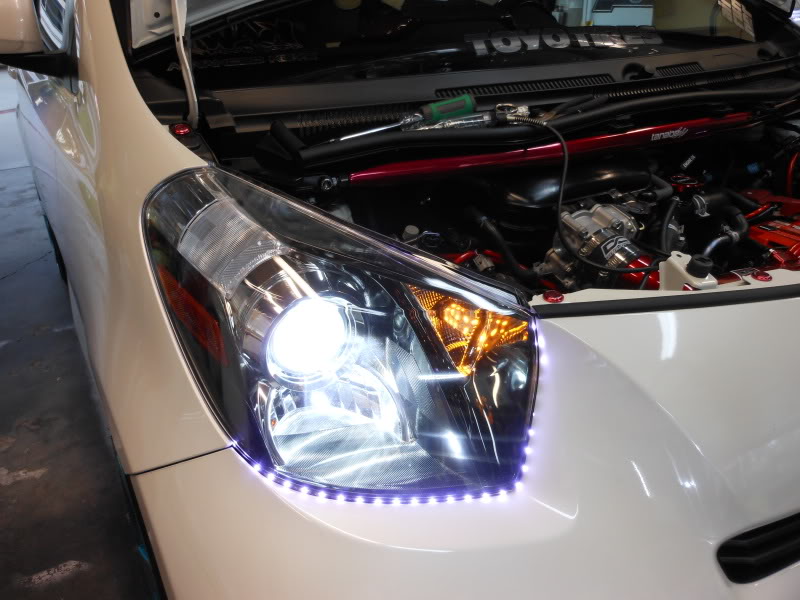
The bulbs can be found here: iJdmToy Switchback 7440 LED bulbs
The LED flasher can be found here: iJdm LED Toyota Flasher Relay
The LED "switchback" bulbs and flasher unit...
The third wire is simply run to the parking light side marker light positive wire and spliced in...
The stock flasher is removed and replaced with the LED flasher...
The bulb appears white when the parking lights are on...
And amber when flashing...
The bulbs can be found here: iJdmToy Switchback 7440 LED bulbs
The LED flasher can be found here: iJdm LED Toyota Flasher Relay
11-21-2012, 03:35 AM
#167
Senior Member
SL Member
Thread Starter
Join Date: Nov 2005
Location: Surf City SoCal
Posts: 1,527
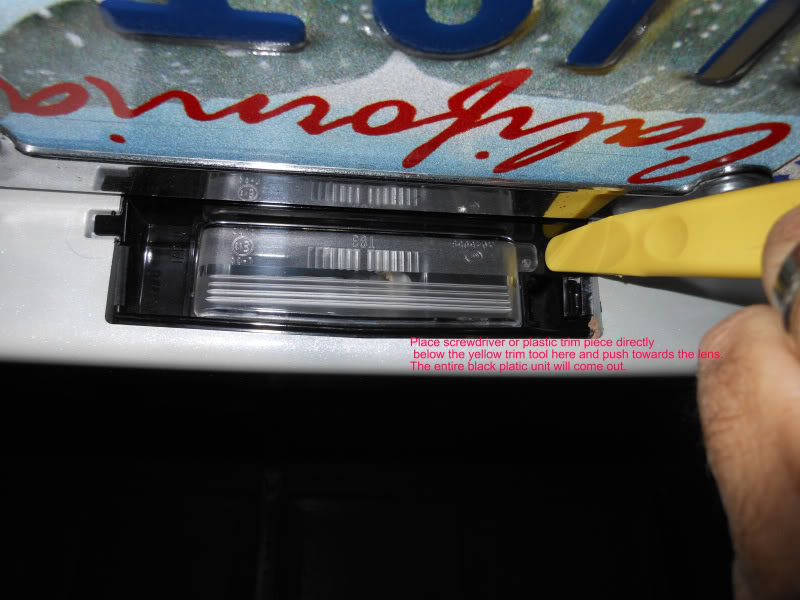
The stock 194 Wedge bulb used for lighting the rear license plate on the iQ is not the brightest bulb (pun intended) so I changed it out to a 194 Wedge type LED bulb from iJDMToy. It's a simple job and the results are much better than stock.
The only tools you'll need are a flat head screw driver or a plastic trim removal tool.
The light bulb can be accessed from the under side of the rear bumper just above the license plate...
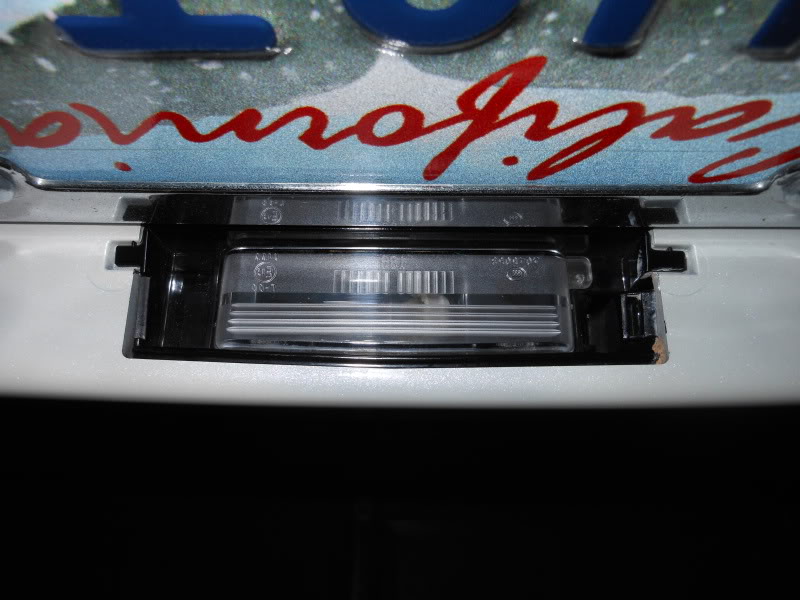
Using a flat head screw driver or a plastic trim removal tool, press on the black plastic tab located at the end of the lens and push towards the lens. The entire black plastic housing will be removed from the bumper, not just the lens.
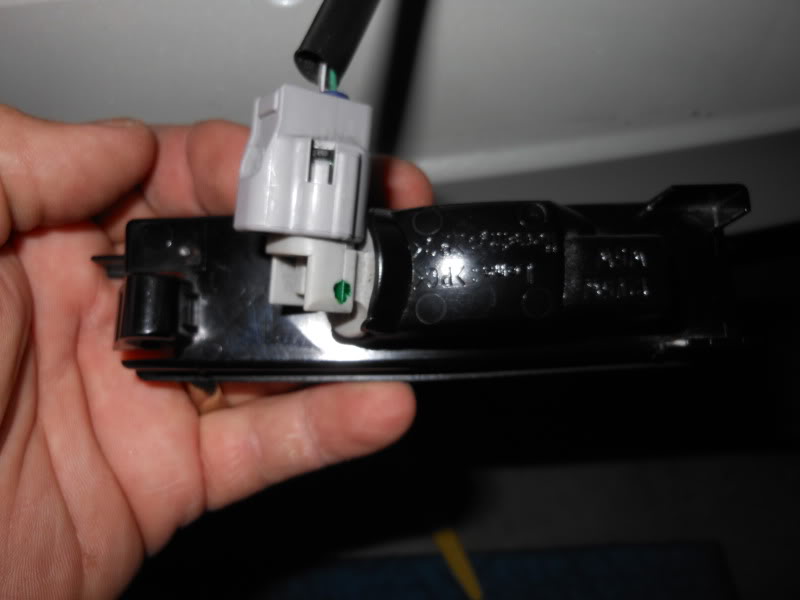
When you have the housing removed, turn the bulb socket counter clockwise and the socket will come lose from the housing...
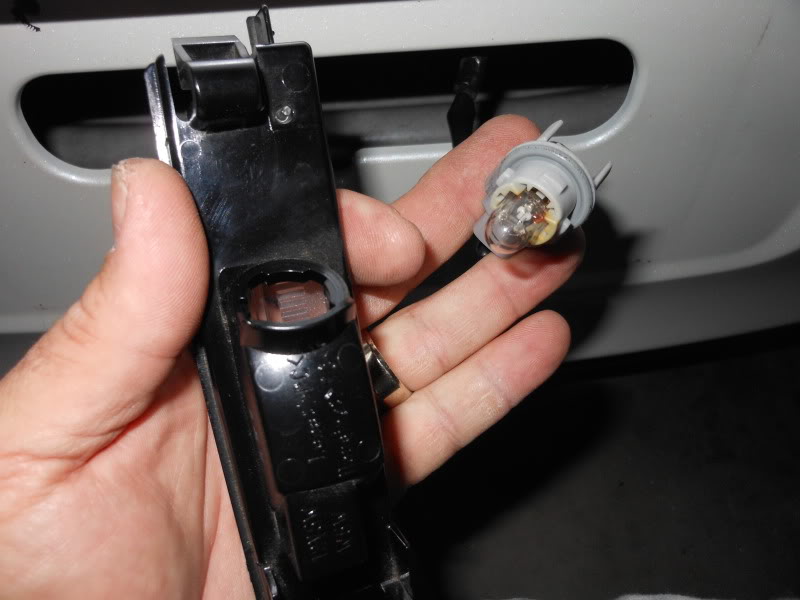
Gently pull on the stock bulb and it will come out of the socket. Replace the stock bulb with the LED bulb and turn on the lights to check that it lights. If it does not, reverse the bulb and try again. The LED bulb is polarity conscious and will only light if installed correctly.
Once you are sure everything is working properly, the installation is the reverse of the removal.
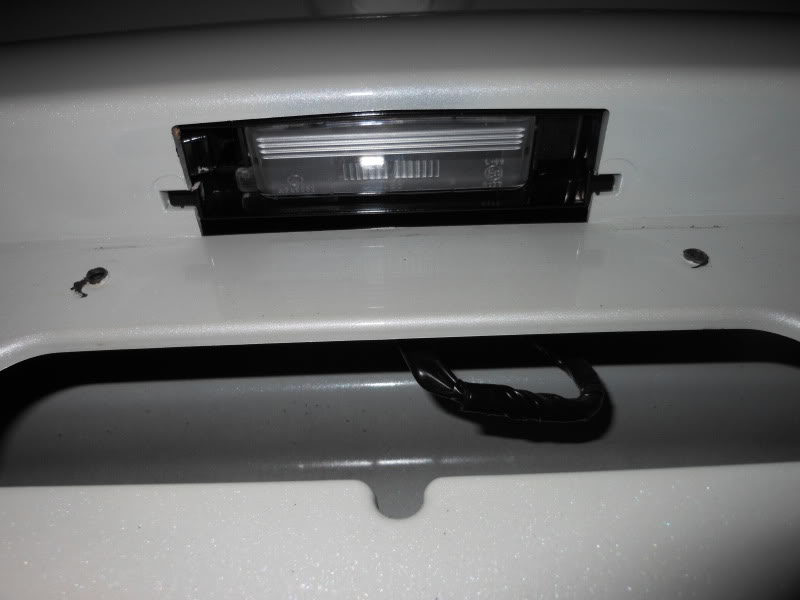
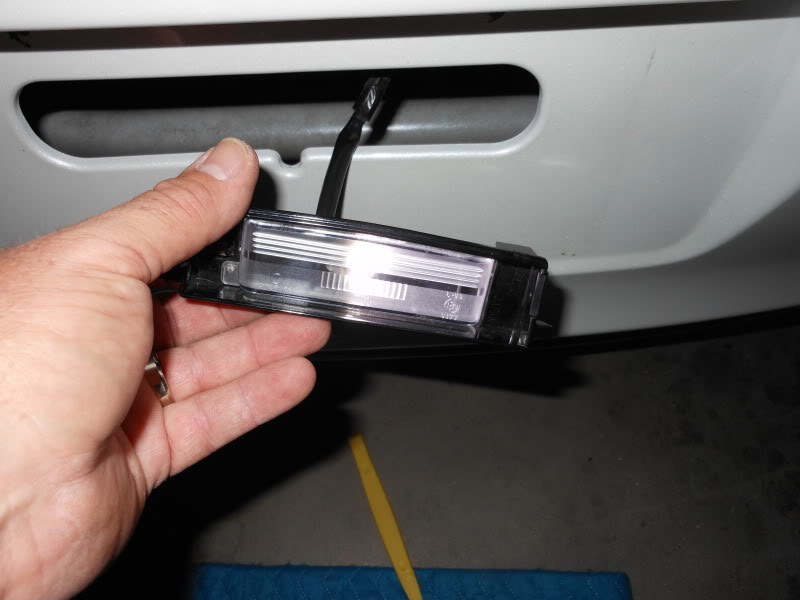
Here you can see the stock lighting...
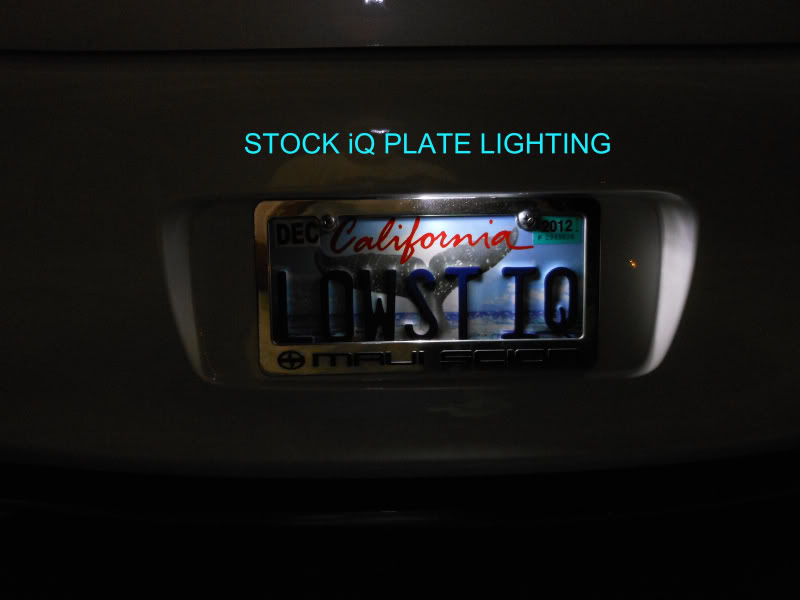
And the difference with the LED bulb is clear to see...

An easy job but the result is well worth the short time it takes to accomplish.
The only tools you'll need are a flat head screw driver or a plastic trim removal tool.
The light bulb can be accessed from the under side of the rear bumper just above the license plate...
Using a flat head screw driver or a plastic trim removal tool, press on the black plastic tab located at the end of the lens and push towards the lens. The entire black plastic housing will be removed from the bumper, not just the lens.
When you have the housing removed, turn the bulb socket counter clockwise and the socket will come lose from the housing...
Gently pull on the stock bulb and it will come out of the socket. Replace the stock bulb with the LED bulb and turn on the lights to check that it lights. If it does not, reverse the bulb and try again. The LED bulb is polarity conscious and will only light if installed correctly.
Once you are sure everything is working properly, the installation is the reverse of the removal.
Here you can see the stock lighting...
And the difference with the LED bulb is clear to see...
An easy job but the result is well worth the short time it takes to accomplish.
11-26-2012, 03:28 PM
#168
Senior Member
SL Member
Thread Starter
Join Date: Nov 2005
Location: Surf City SoCal
Posts: 1,527
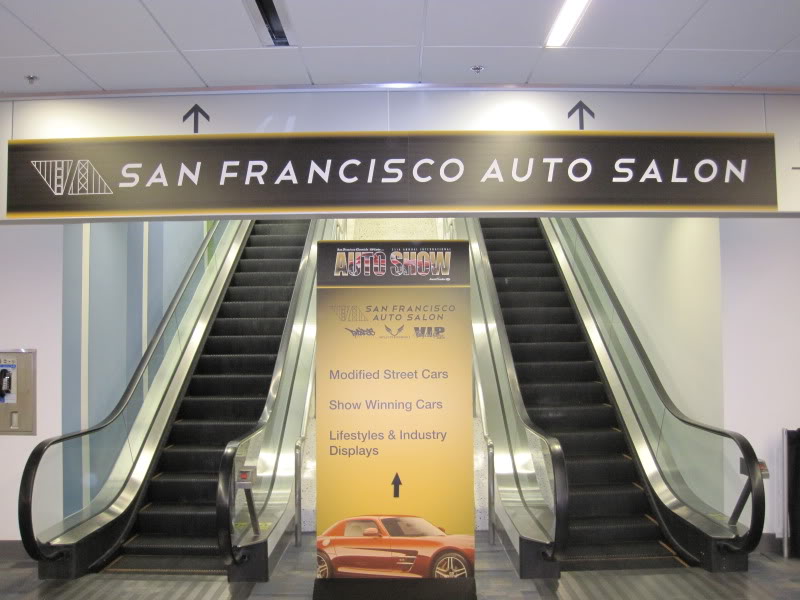
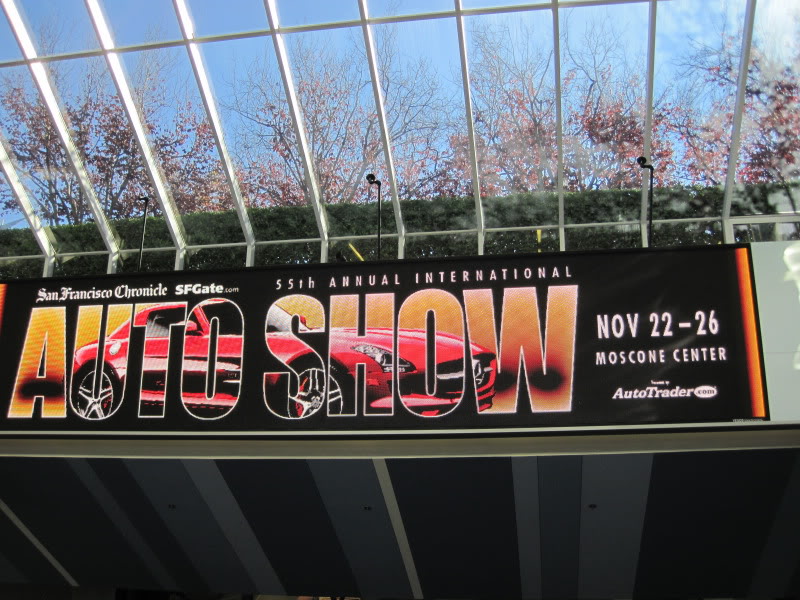
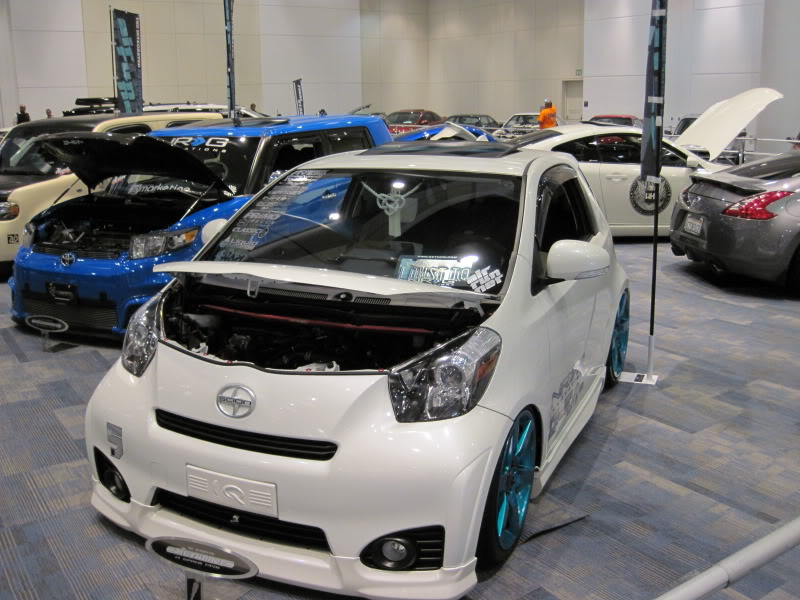
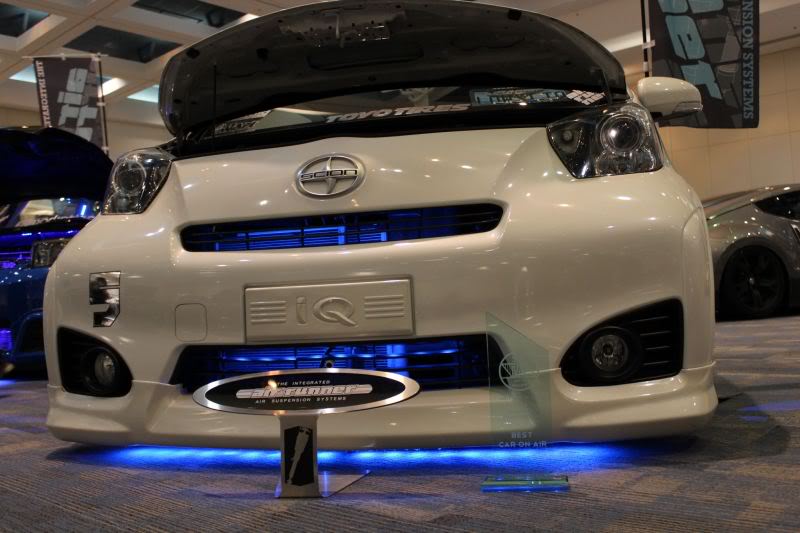
I was invited to display the iQ at the SF Auto Salon, a one day car show inside of the 55th Annual San Francisco Car Show this past Saturday. There were many amazing vehicles on display. The iQ took home the trophy for Best Car On Air. Here are some pictures of the event...

 11-28-2012, 09:56 PM
#171
Senior Member
SL Member
Thread Starter
Join Date: Nov 2005
Location: Surf City SoCal
Posts: 1,527
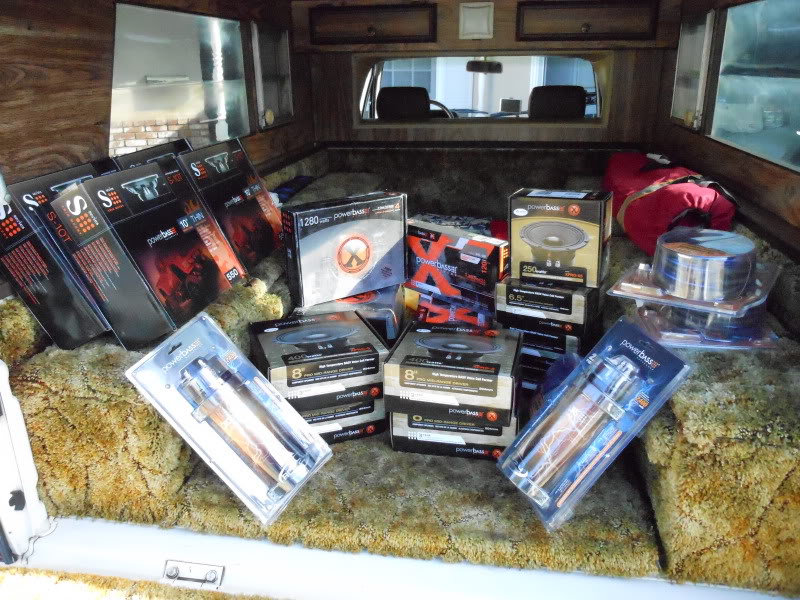
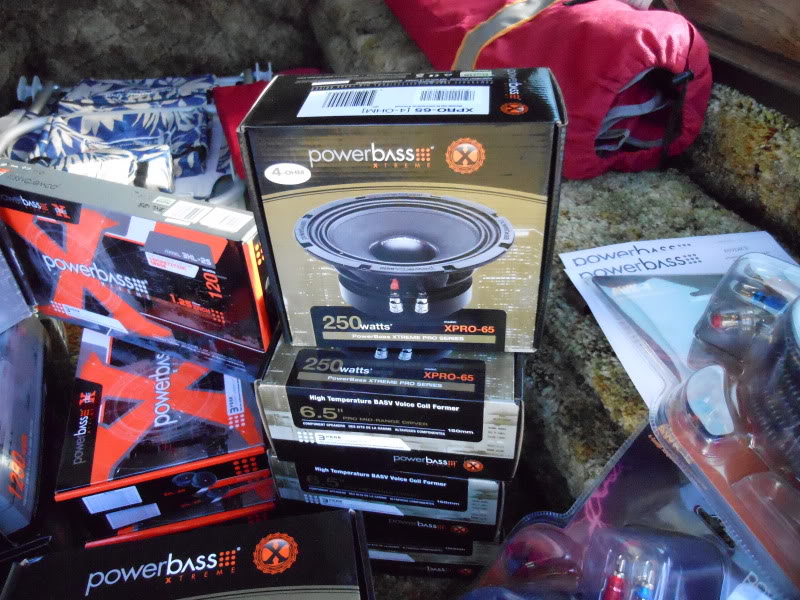
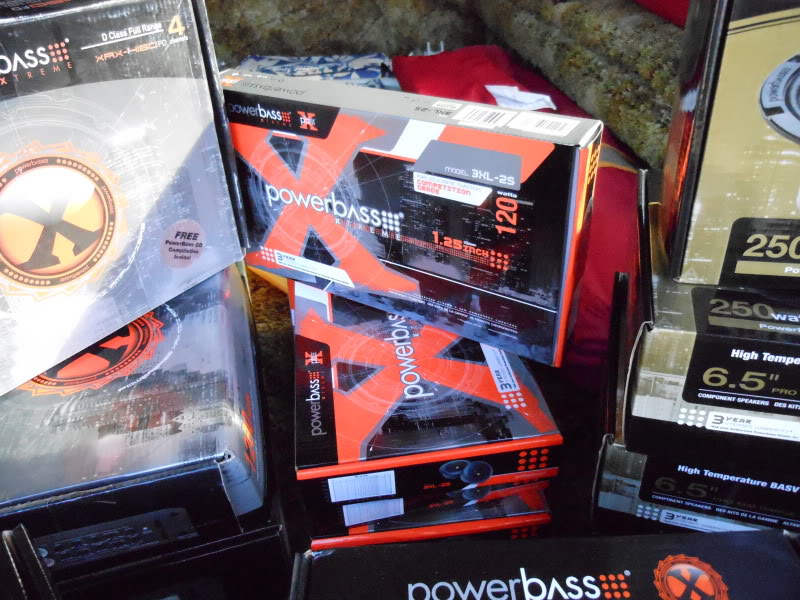
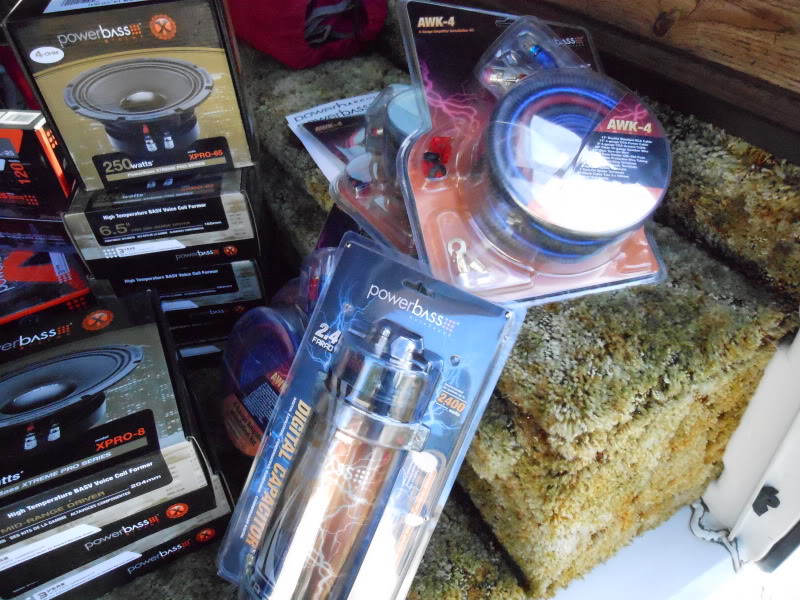
Next project is starting. PowerBass USA is sponsoring the HAOLEBUILT II iQ for the International Consumer Electronics Show in January. The iQ will be on display with new products from PowerBass installed. I went out to the headquarters in Ontario today to pick up the equipment we will be installing in the iQ. I have just over four weeks to build and install all of this. It's going to be a busy month...
11-29-2012, 01:53 PM
#173
Senior Member
SL Member
Thread Starter
Join Date: Nov 2005
Location: Surf City SoCal
Posts: 1,527

 11-29-2012, 03:53 PM
#174


 12-06-2012, 03:01 AM
#176
Senior Member
SL Member
Thread Starter
Join Date: Nov 2005
Location: Surf City SoCal
Posts: 1,527
I'm getting ready for the new audio system installation so I decided it was time to upgrade the "Big Three". I ran 0 gauge wire from the alternator to the battery and from the negative battery post to the engine and body ground points. The stock Scion wire is really small and doesn't allow for as much current to be passed as I'll need with all the amps installed. By adding the 0 gauge wire it gives a much larger path for the power to run through. My grounding point is also a more solid point than the stock location. From the factory the ground lead connects to a bridge piece above the strut on the driver side. It has to rely on the strength of the weld to flow to the body. I used a grounding point that is on the main body and makes contact directly without any welds. This will provide a path with my less resistance than the stock.
Here are pictures of the stock wire connections...
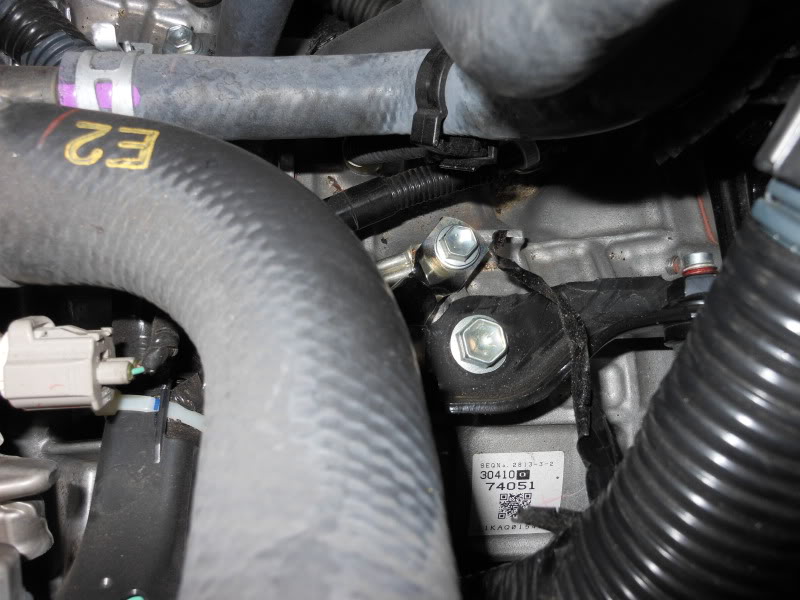
The alternator...
The body ground...

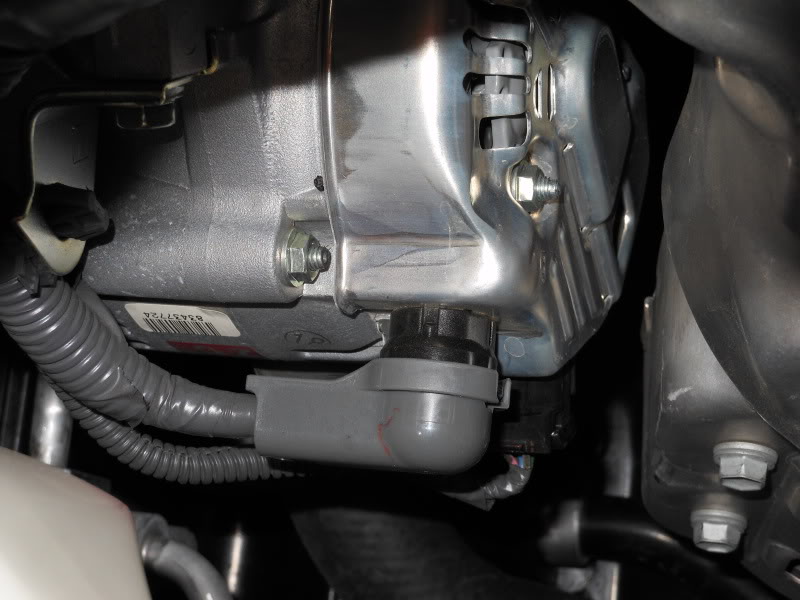
And the engine block (this location is fine and is where I connected my new 0 gauge wire)...
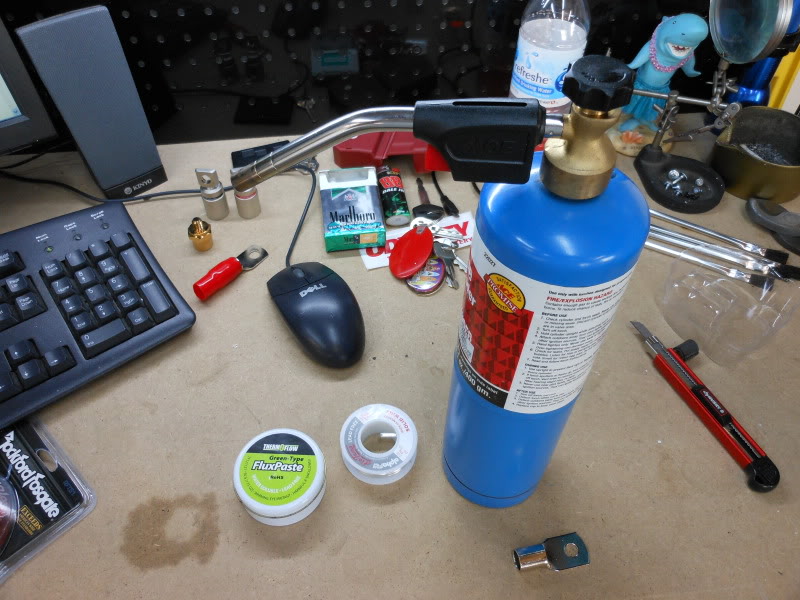
Some of the tools required to solder the new 0 gauge connectors to the wires...
The new 0 gauge wire from the alternator to the battery...
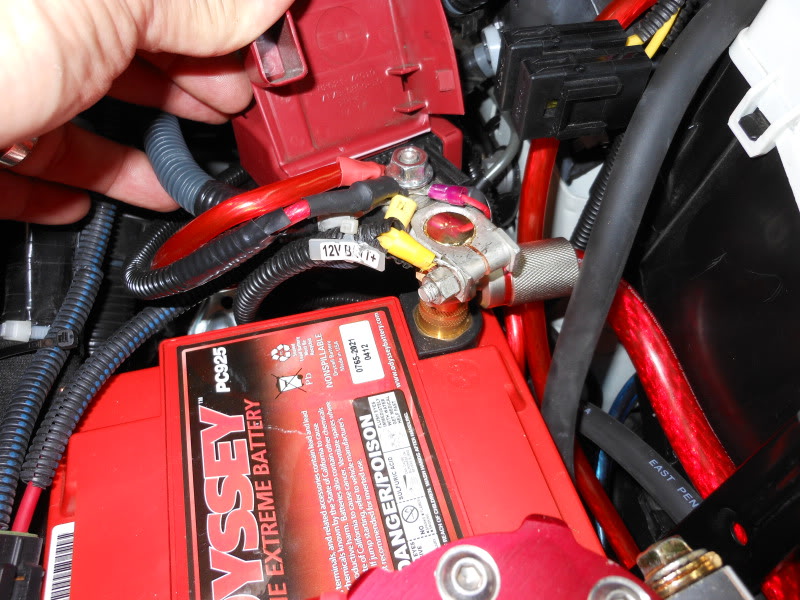
The new 0 gauge ground wire from the battery to the strut tower...

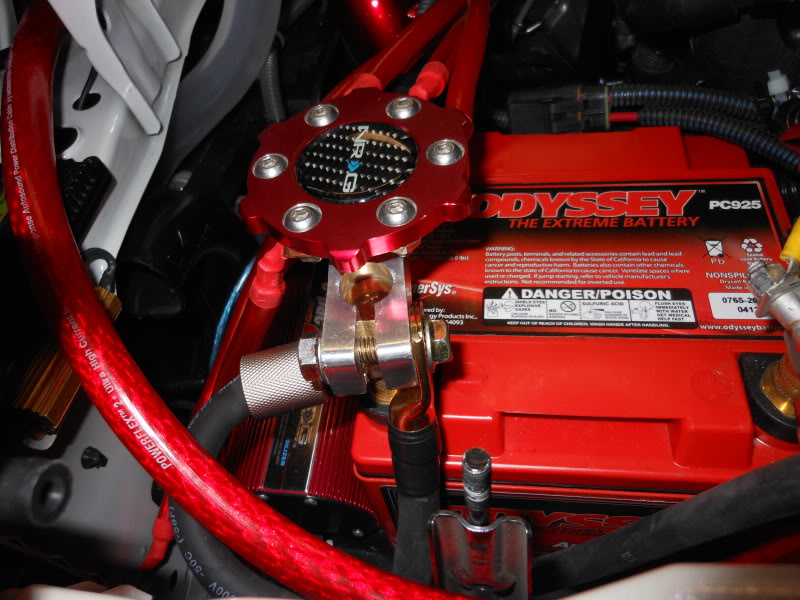
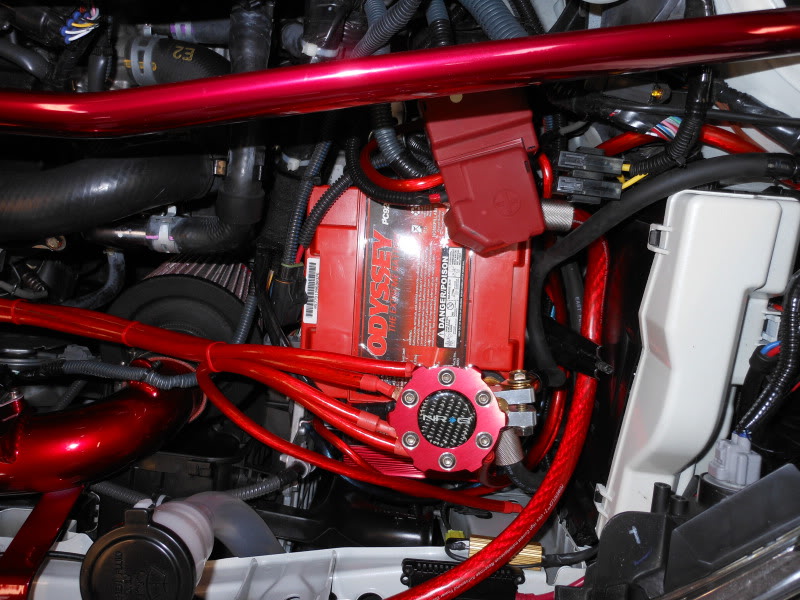
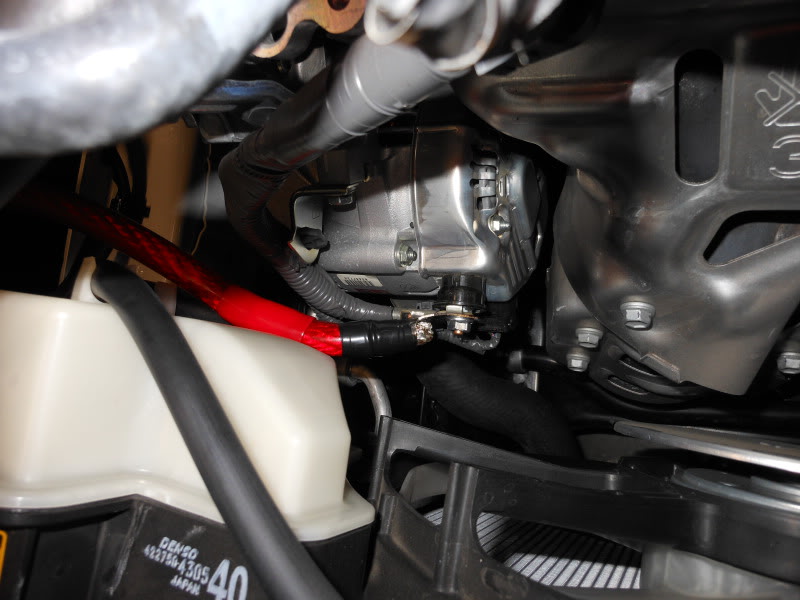
And the completed project...

I've done this to several of my cars that have had high performance audio systems and it really makes a big difference. More power to the amps means better sound and no dimming of the headlights.
Here are pictures of the stock wire connections...
The alternator...
The body ground...
And the engine block (this location is fine and is where I connected my new 0 gauge wire)...
Some of the tools required to solder the new 0 gauge connectors to the wires...
The new 0 gauge wire from the alternator to the battery...
The new 0 gauge ground wire from the battery to the strut tower...
And the completed project...
I've done this to several of my cars that have had high performance audio systems and it really makes a big difference. More power to the amps means better sound and no dimming of the headlights.
12-13-2012, 12:40 AM
#177
Senior Member
SL Member
Thread Starter
Join Date: Nov 2005
Location: Surf City SoCal
Posts: 1,527
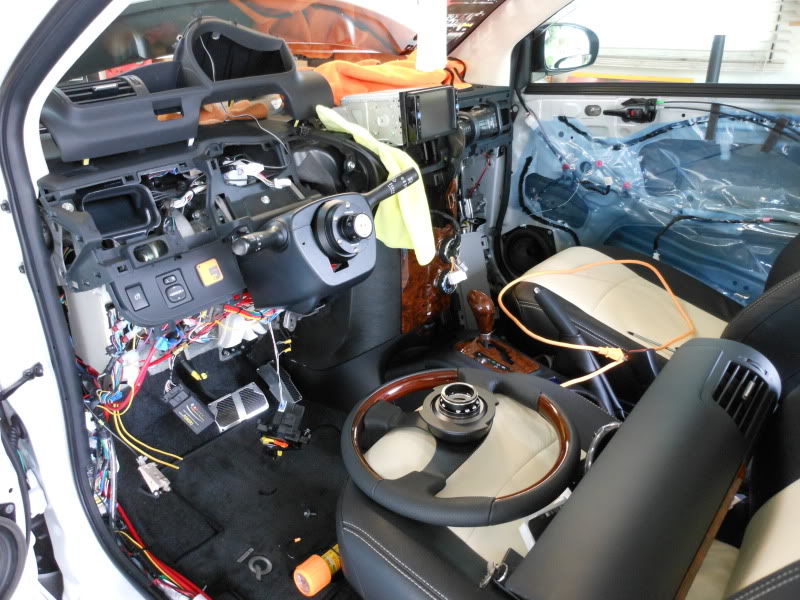
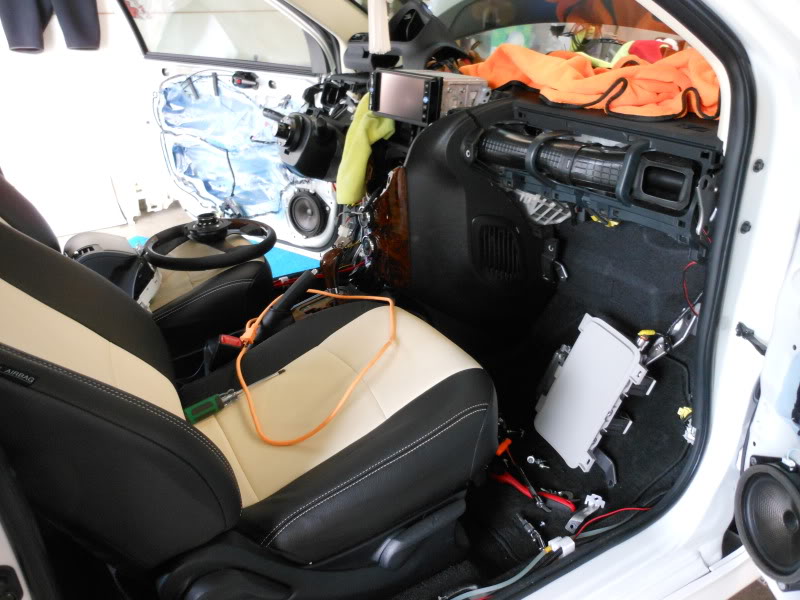
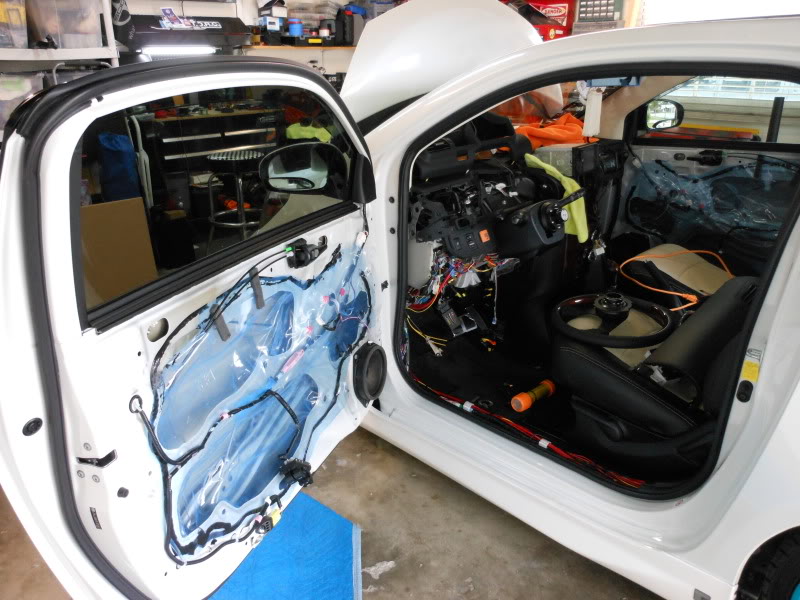
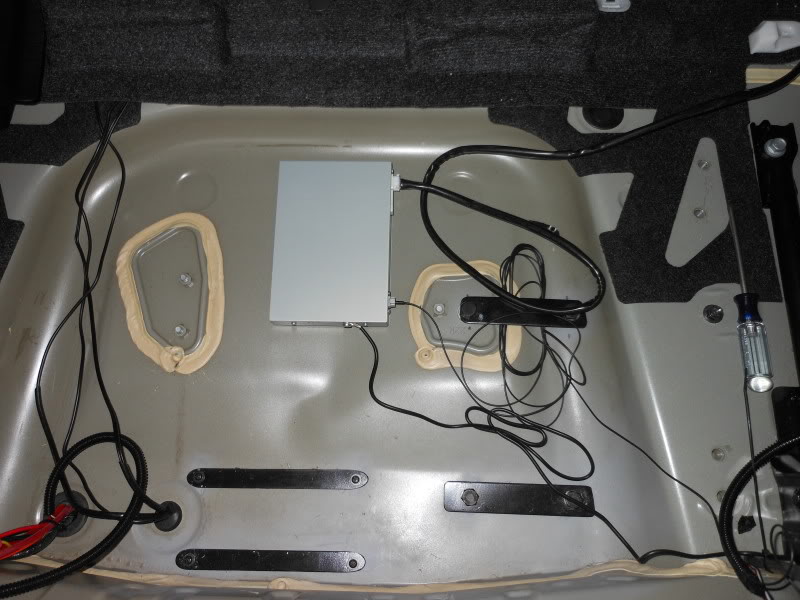
Work has begun on the PowerBass USA audio system in the iQ. The door panels have been removed and will be altered to allow the installation of 6.5", 1" and 8" speakers. This will involve some bracing and fiberglass work.
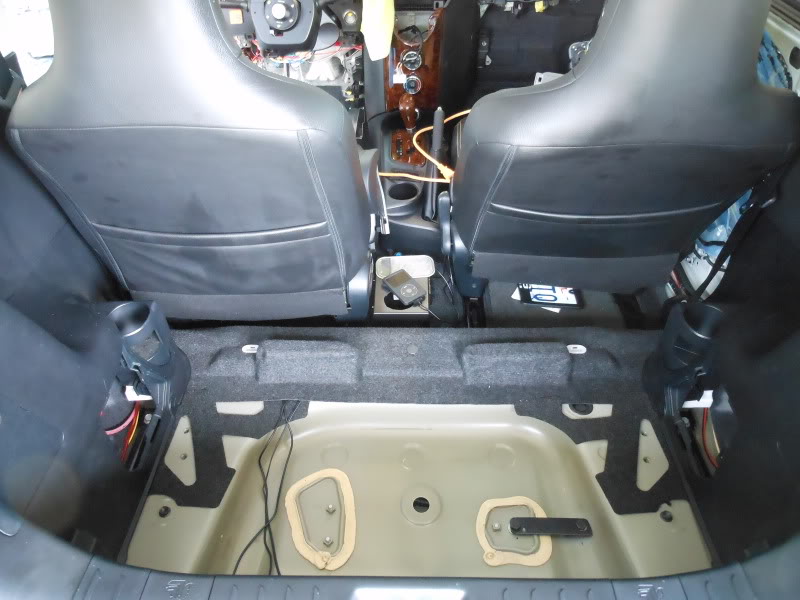
The rear seat has been removed to make room for the sub enclosures and the amplifiers. There will be four 10" subs and three amplifiers.
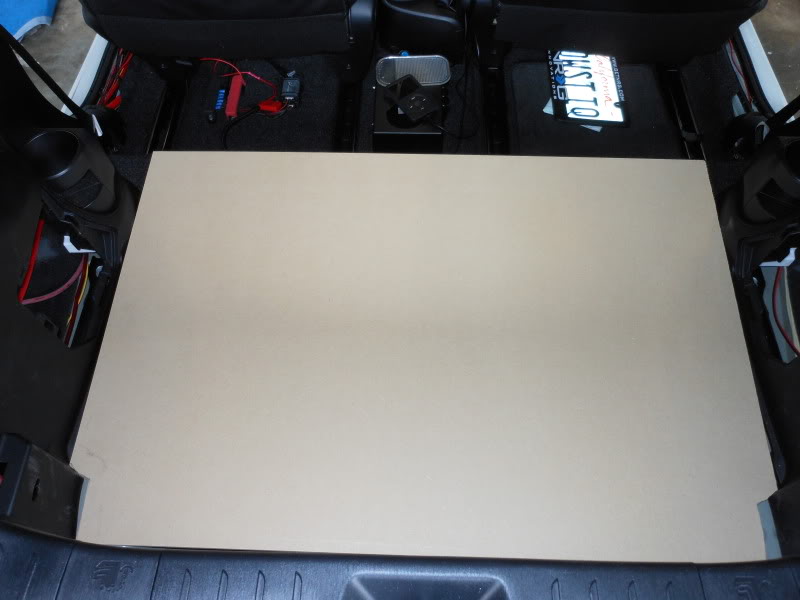
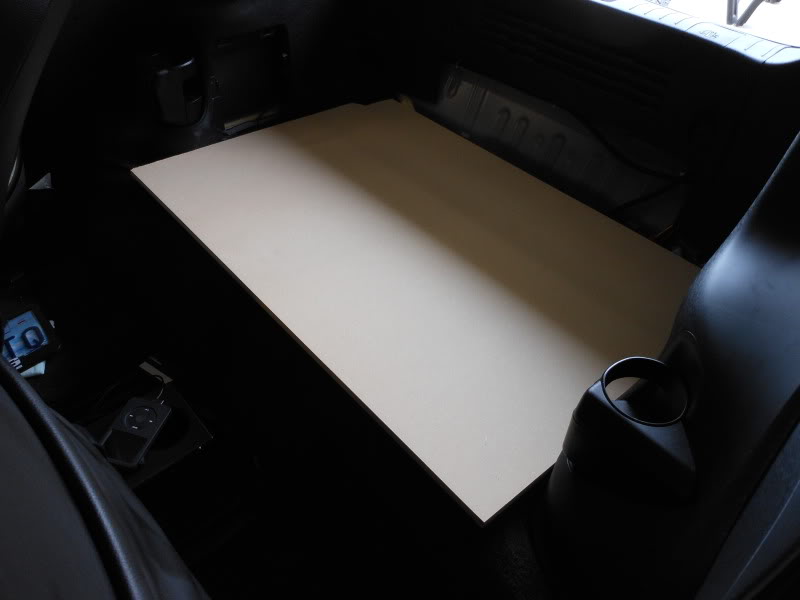
Today a made a floor board for the audio system to sit on. This will be our level starting point for building the sub enclosures.
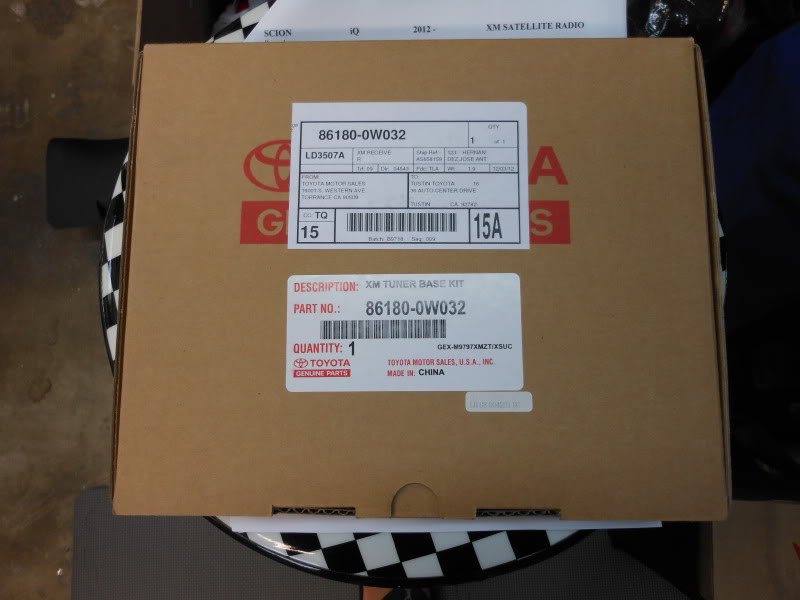
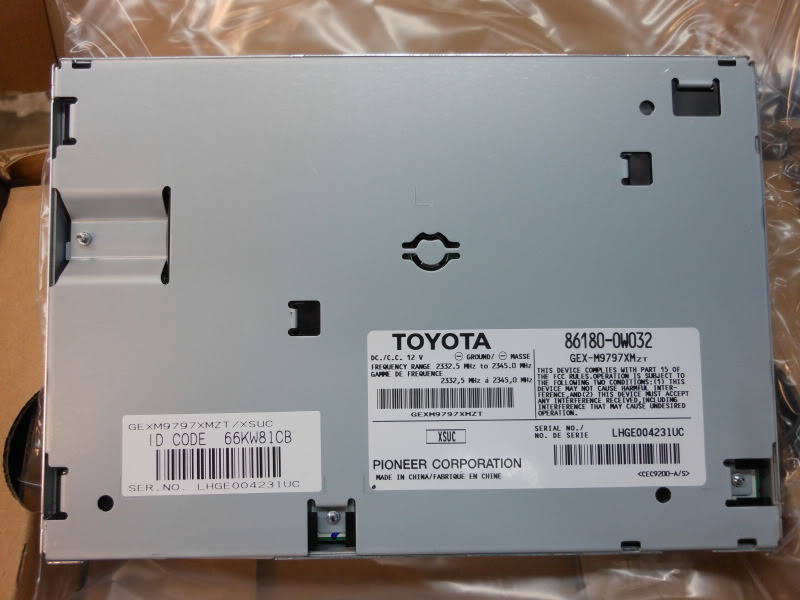
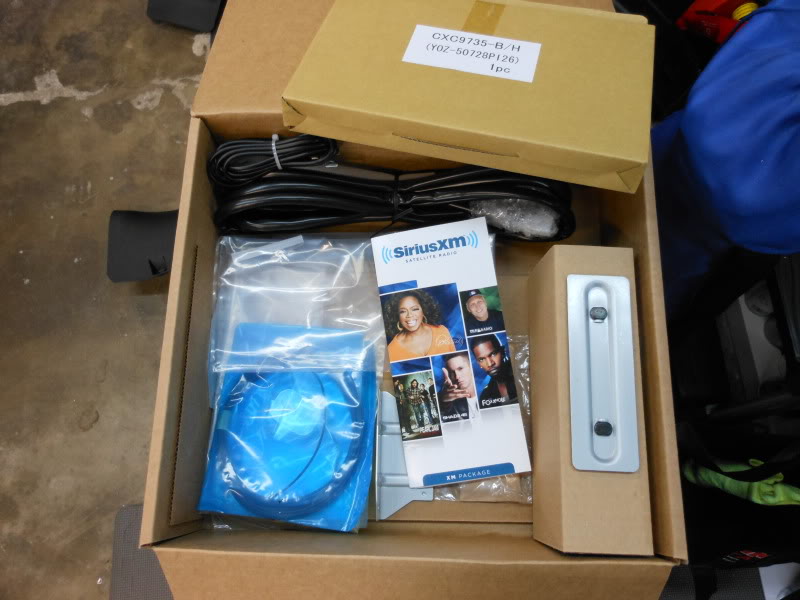
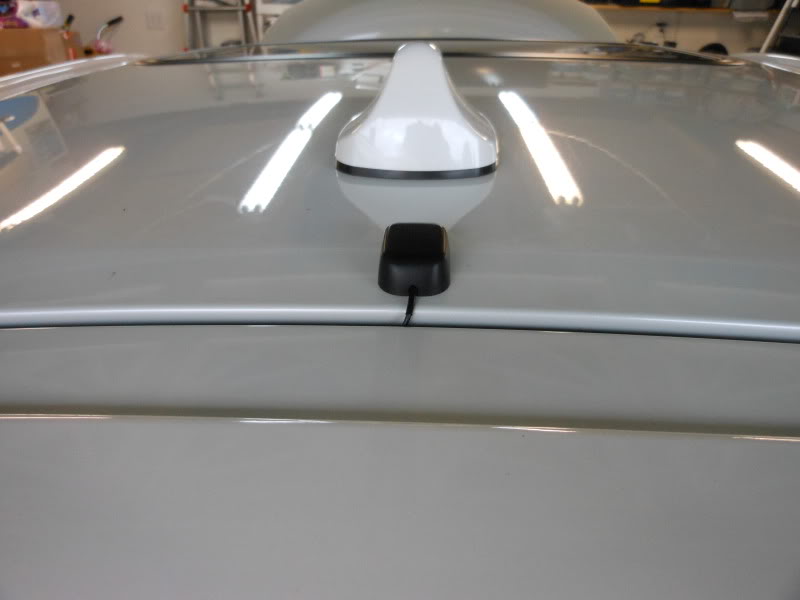
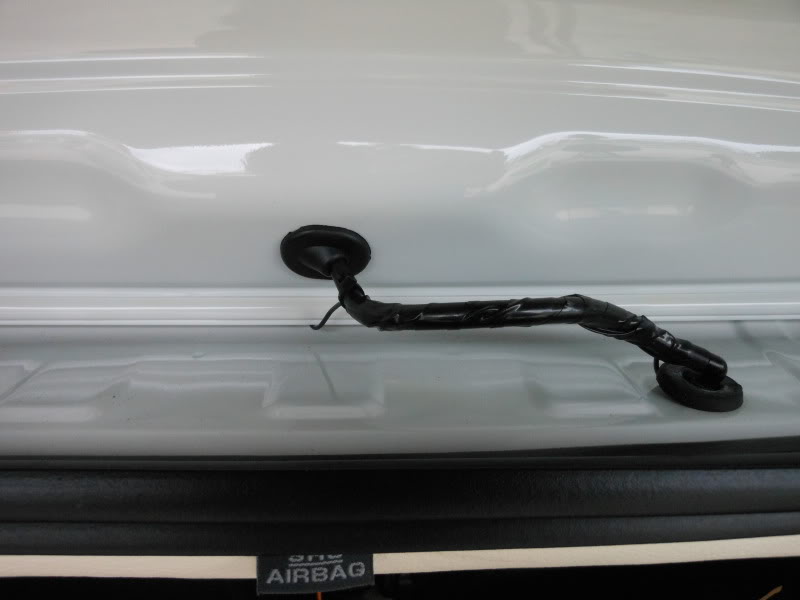
I installed the XM Satellite radio antenna and receiver.
The RCA dual shielded audio cables were run from the head unit to the rear area as well as the remote wire for the amp turn on.
The 0 gauge wire has been run from the battery to the circuit breaker and then through the firewall to the rear of the iQ.
Here are some pictures of the progress...
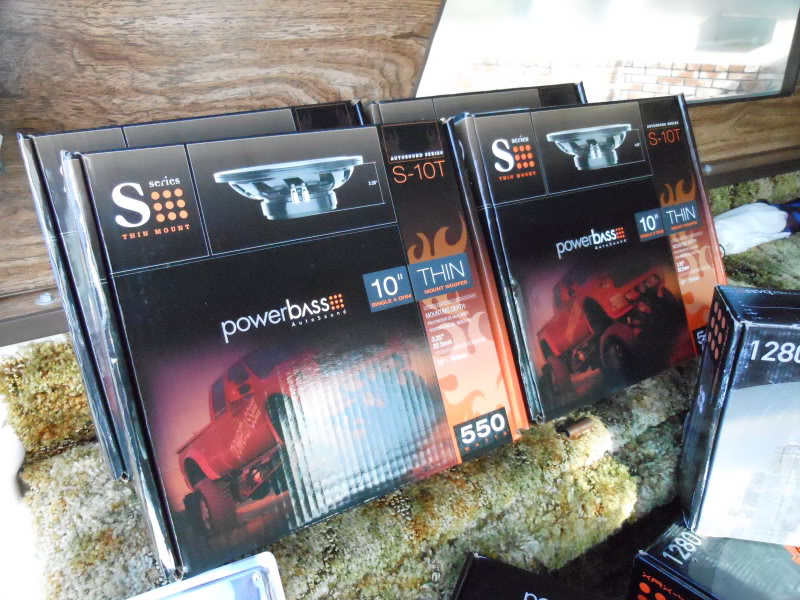
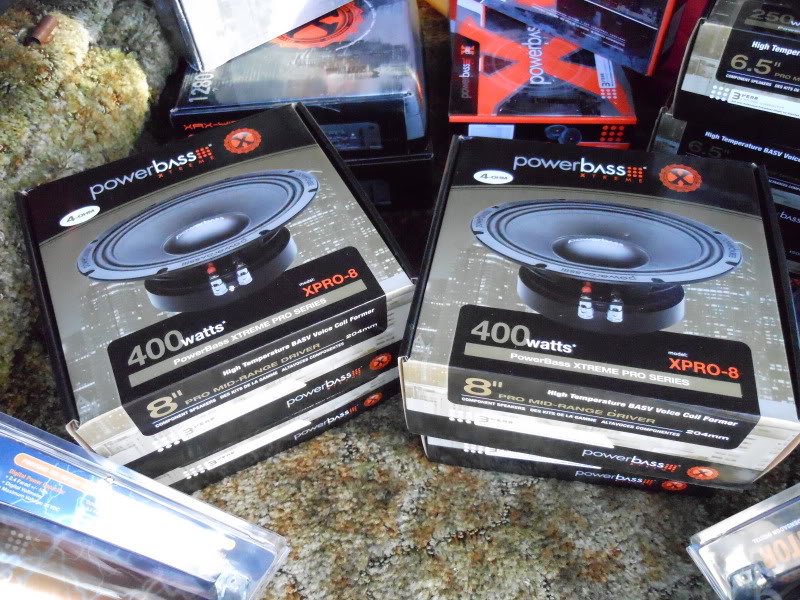
The equipment to be installed from PowerBass USA...
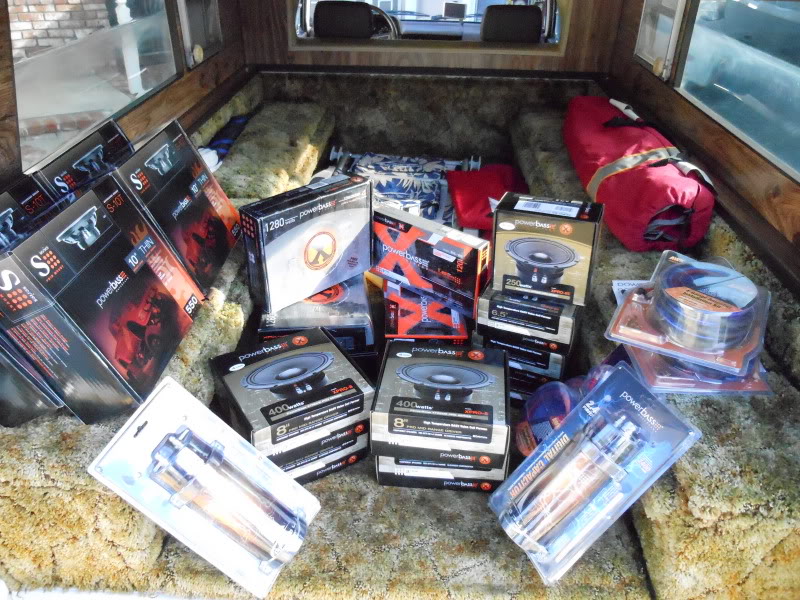
The rear seat has been removed to make room for the sub enclosures and the amplifiers. There will be four 10" subs and three amplifiers.
Today a made a floor board for the audio system to sit on. This will be our level starting point for building the sub enclosures.
I installed the XM Satellite radio antenna and receiver.
The RCA dual shielded audio cables were run from the head unit to the rear area as well as the remote wire for the amp turn on.
The 0 gauge wire has been run from the battery to the circuit breaker and then through the firewall to the rear of the iQ.
Here are some pictures of the progress...
The equipment to be installed from PowerBass USA...

 01-03-2013, 06:46 AM
#180
Junior Member

Join Date: Dec 2012
Location: East Bay
Posts: 3
First of all...love your ride. I took my gf to the SF auto show this past Nov. & we saw your iQ (actually, the first iQ we've seen ever) & she can't stop talking about it. So, little did she knew...I bought it two weekends later and kept it in the garage until revealing her gift on Xmas. ScionLife is awesome...& your build page makes my life a lot easier. lol.
I'm looking into upgrading the side mirrors for her (because she's attending college, welcome light is perfect for her safety) ...so, I was wondering the specific type of lights you bought on ebay and how to install it. Thanks.
I'm looking into upgrading the side mirrors for her (because she's attending college, welcome light is perfect for her safety) ...so, I was wondering the specific type of lights you bought on ebay and how to install it. Thanks.