DIY: Retrofitting (Quad HID low beam projector set up)
 05-24-2013, 06:15 AM
#1

What you'll need!!!
Tools:
1) Screw Drivers (Phillips/Flat Head (to pry open the head lights))
2) Wire cutters
3) Conventional Oven
4) Dremel tool
a) Dremel cutting wheel
b) Dremel cutting drill bit (a drill bit that fits into the chuck will do fine)
c) Practice and patience (you only get one chance when you're cutting do it right the first time)
5) Sandpaper (Stage 3,2,1 grits)
6) TIME
Products/Parts:
1) Projectors (I'll tell you what I'm using and give you a few options later)
2) Shrouds (Personal liking from what you can find)
3) HEADLIGHTS
4) Silicone (High heat/Fire retardant)
5) Industrial adhesive (Again High heat application only)
6) SEM's color matched paint (I color matched the interior light assembly to my body color)
7) Bondo kit
 Fiberglass kit
9) TIME
Let's get started!!
1) Have an idea of what you want. Look into what other people have done so you're not flying blind into this. Here's a link to the retro fit source. They have all the products you will need if you don't have the patents to pull your own parts from the yard.
http://www.theretrofitsource.com/
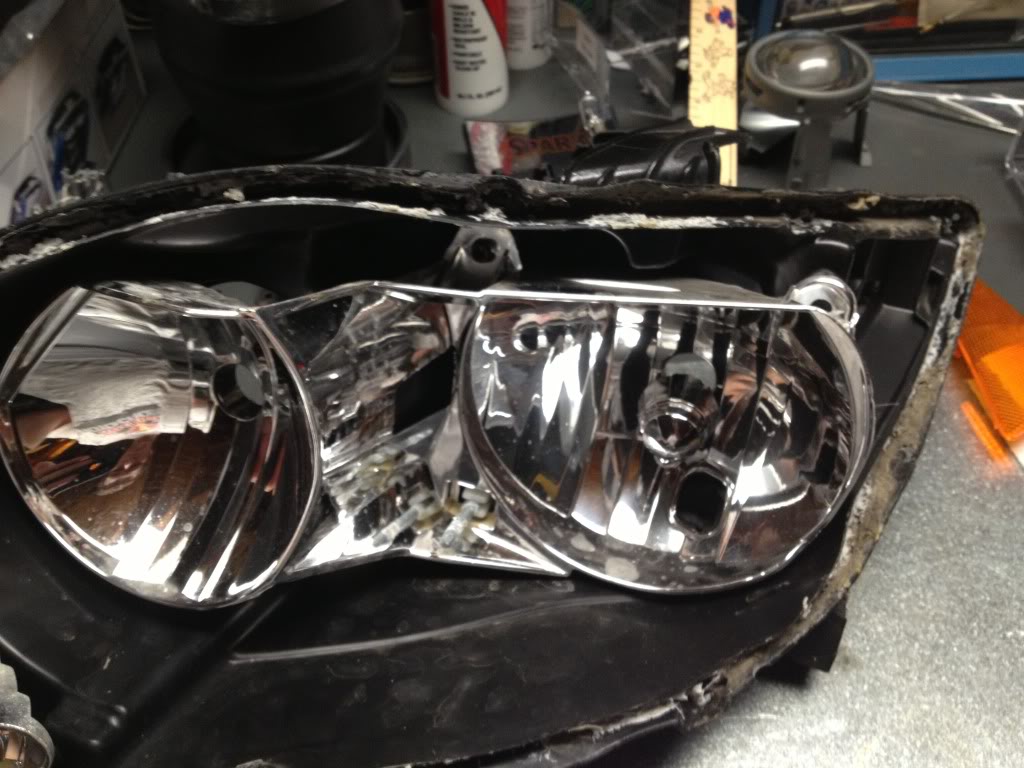
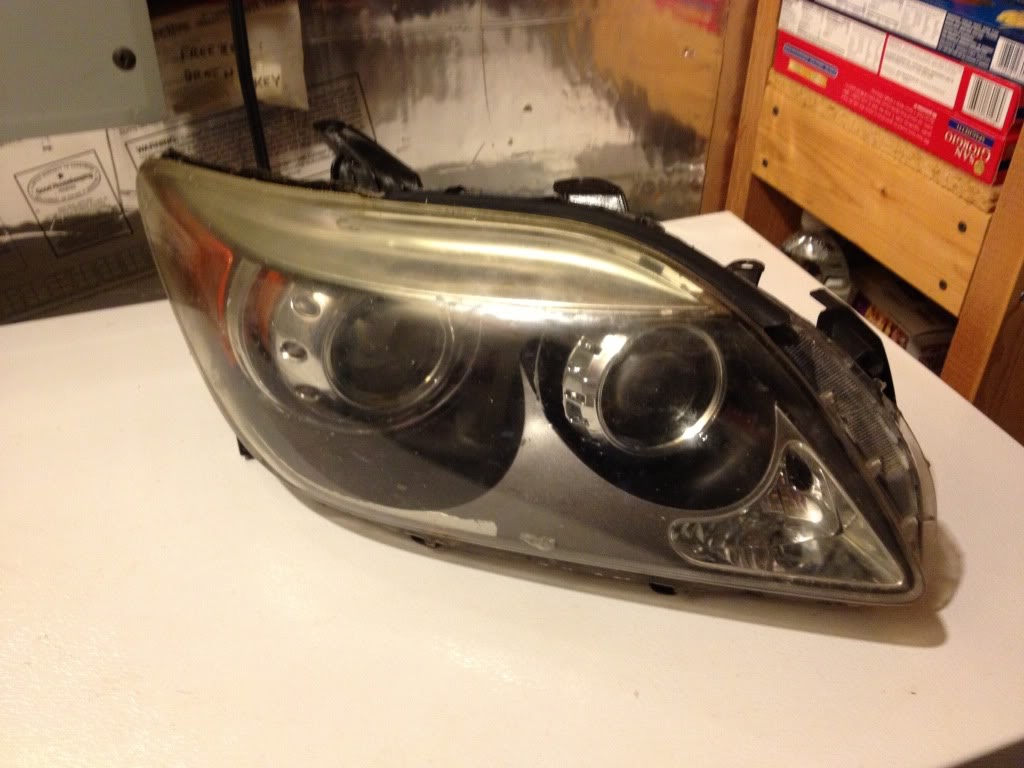
2) Once you have the headlights out of the car take them apart! On the back of the head lights you will find a few screws holding the lens onto the housing; remove these before you do anything else.
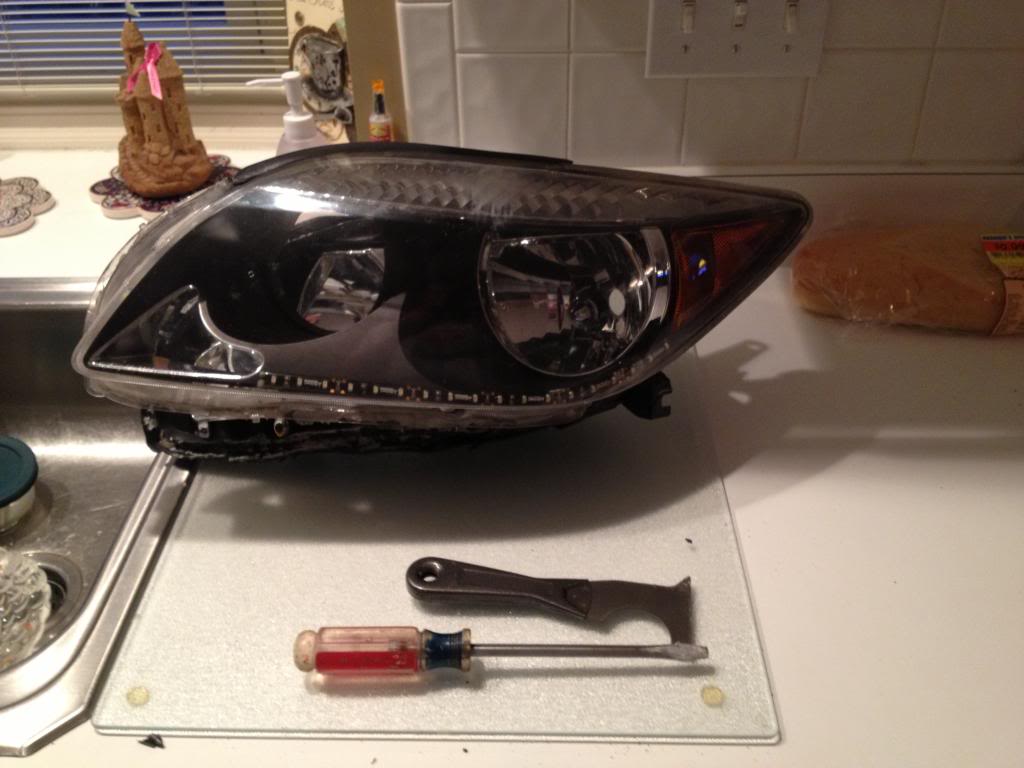
*I'm using a flat head screw driver and a putty knife to pry the lenses off.*
3) Place the headlights in an oven at 350 degrees or so for one minute at a time (I melted one before and ever since I check after one minute just so it doesn't happen again).
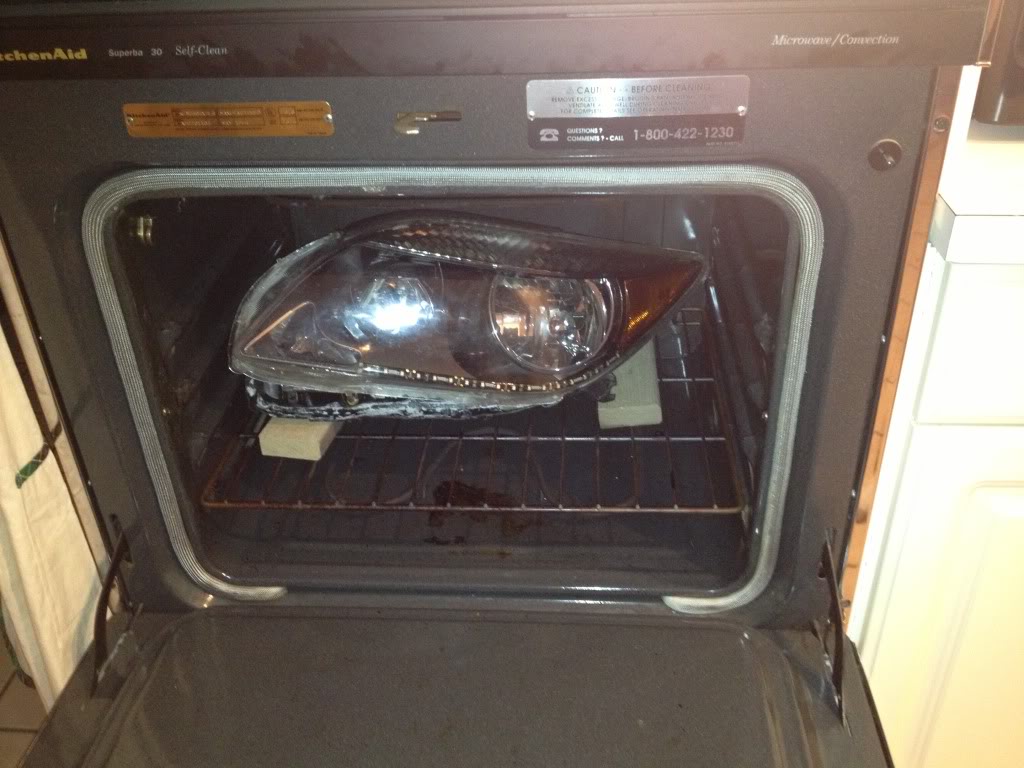
*This is going to take some time and a bit of muscle. There are a few plastic 'clips' holding the lens to black housing. If you get stuck pulling the lens off look for a clip. If there's no clip put the light back in the oven for another minute.*
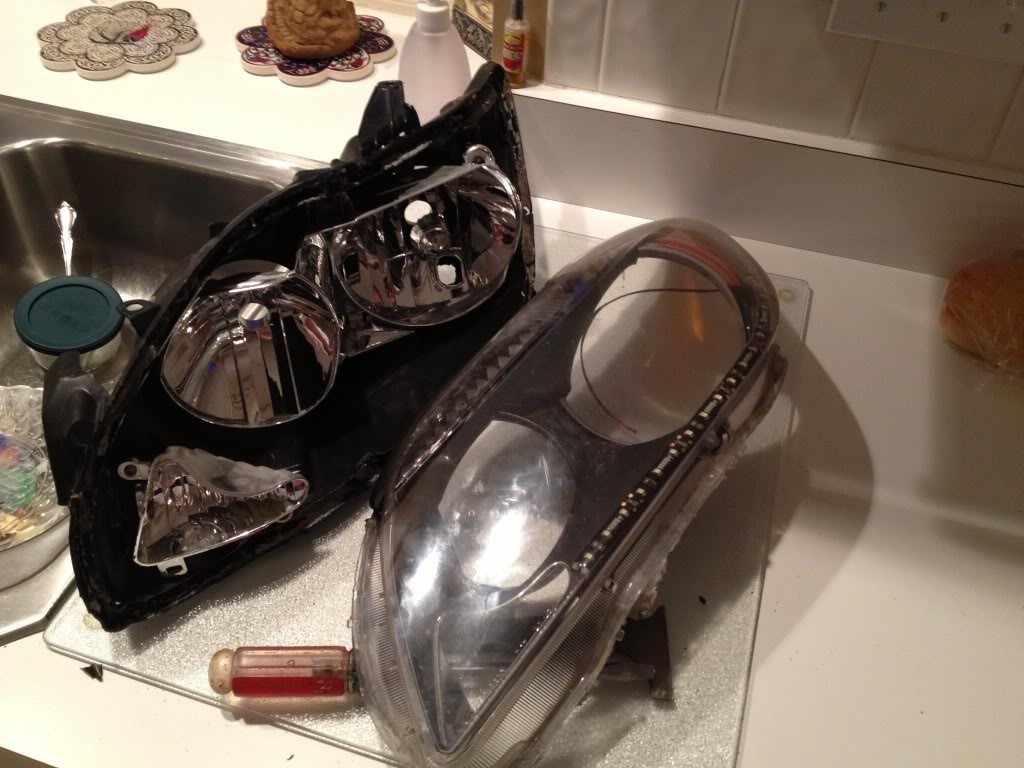
4) Got them apart!
5) Clean up you mess (aint no one got time for dat crap)
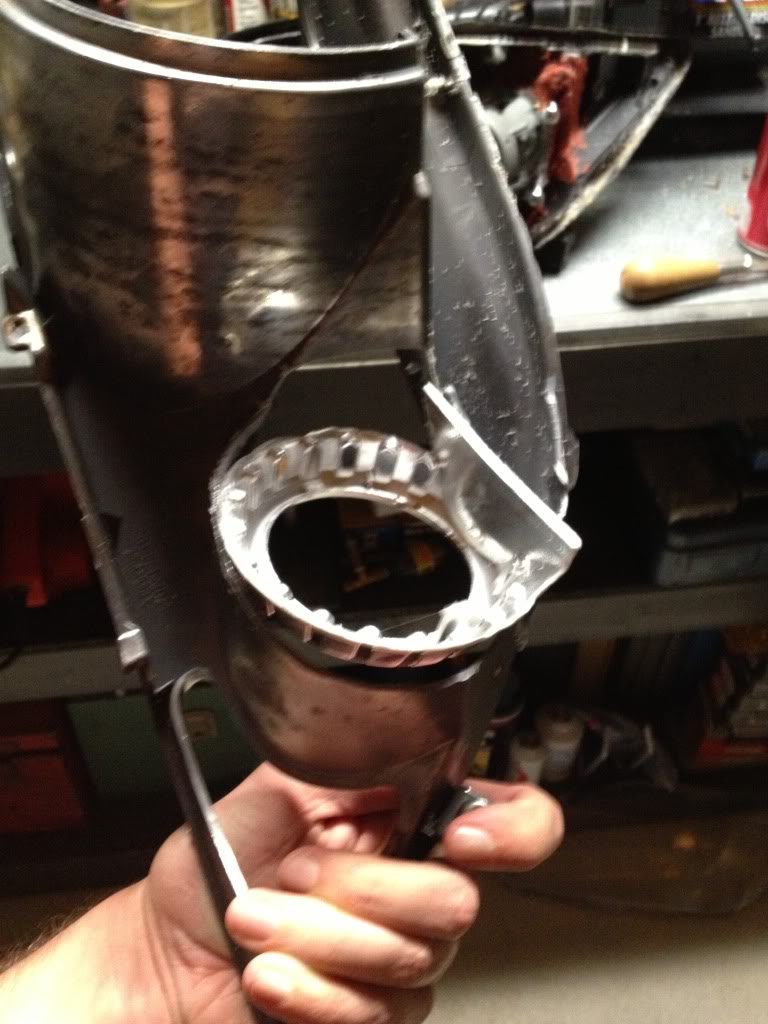
6) Taking the headlight bowls out:
*As you will see there are three screws holding the bowls in. A clip screw combo on the bottom center. A screw clip combo top center and a force bolt on the right (outter). To be honest I didn't need these so I just ripped them out. If you plan on not using them to minimize gaps start from the right and work your way to the center*
7) Bowl's out!:
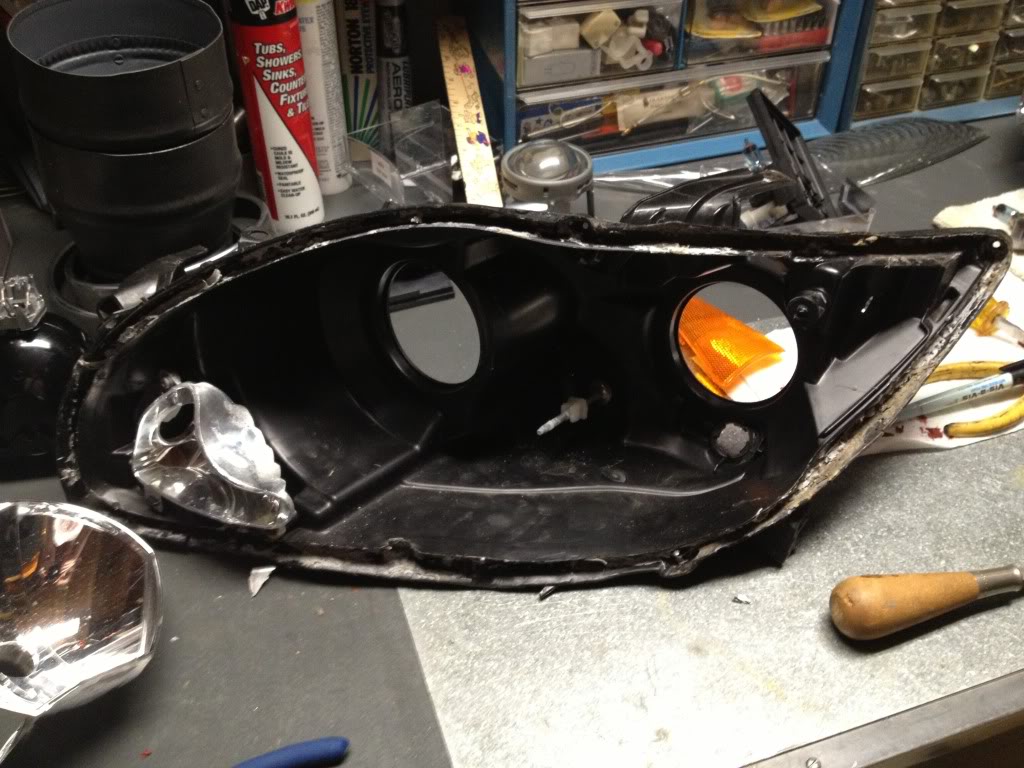
*Cool fact those circles are dead center and perpendicular when mounted in the tc. You know what that means? No bracket work!! Projectors will mount directly to the black housing and be level!!!*
PROJECTOR TALK:
I have heard a lot of talk about projectors.. HID vs Hallogen light reflection angles.... Basically a lot of head ache no one should have to worry about. I'm not trying to understand them just build a quality set of headlights, so to sum it all up for you in five words... Start off with quality parts.
I'm using a pair of BMW seven series projectors I pulled out of an early 90's BM from my local U pull and save ($15 bucks). The BMW projectors are going on the inside (closest to the turn signal).
I'm also using a pair of projectors out of an AUDI A8. Again, out of an early 90's model, but the reflector bowl is one of the shortest designs I've seen. Great for us and how little room we have to play with under the hood by the fuse box. Again the Audi projectors only cost 15 bucks for the pair from my Pull A Part.
Blam HID ready projectors for only 30 bucks... This isn't that expensive.... Just takes time and a dremel tool!!!
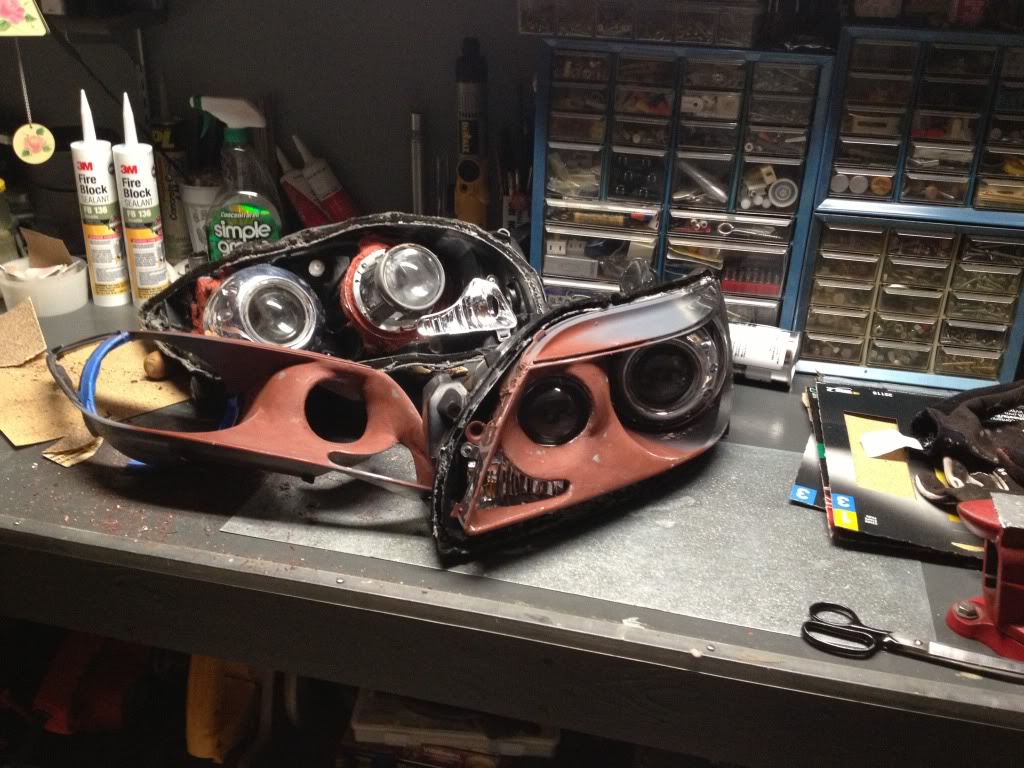
9) Mounting Projectors:
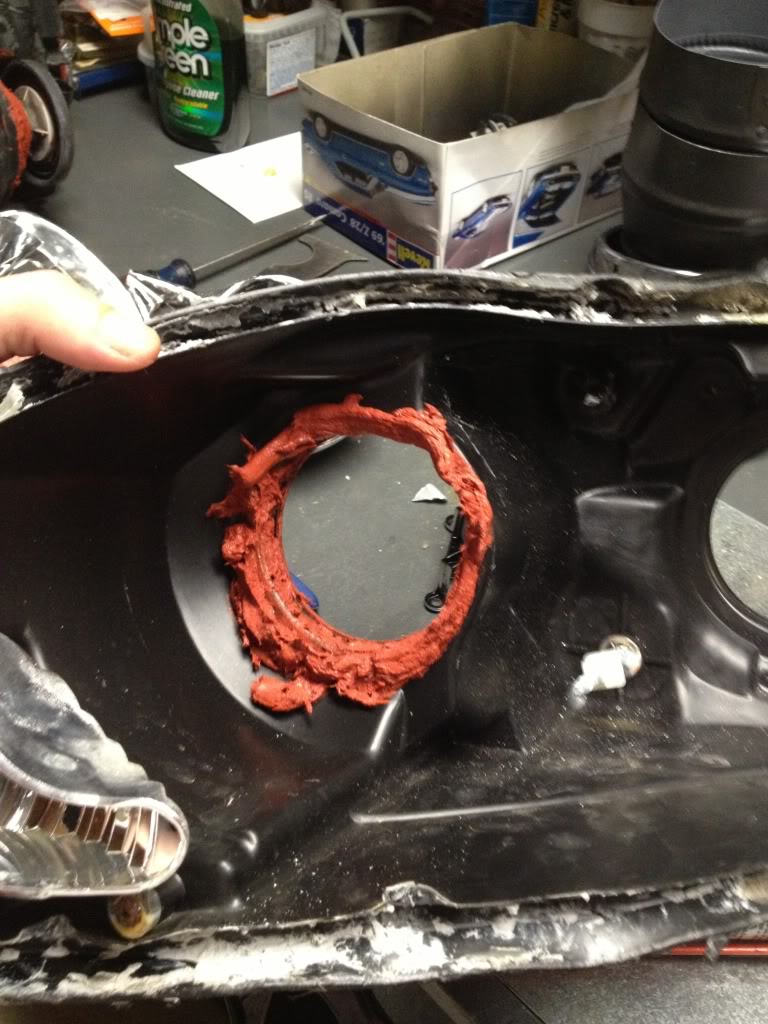
*Use High Temp silicon and get it goin!*
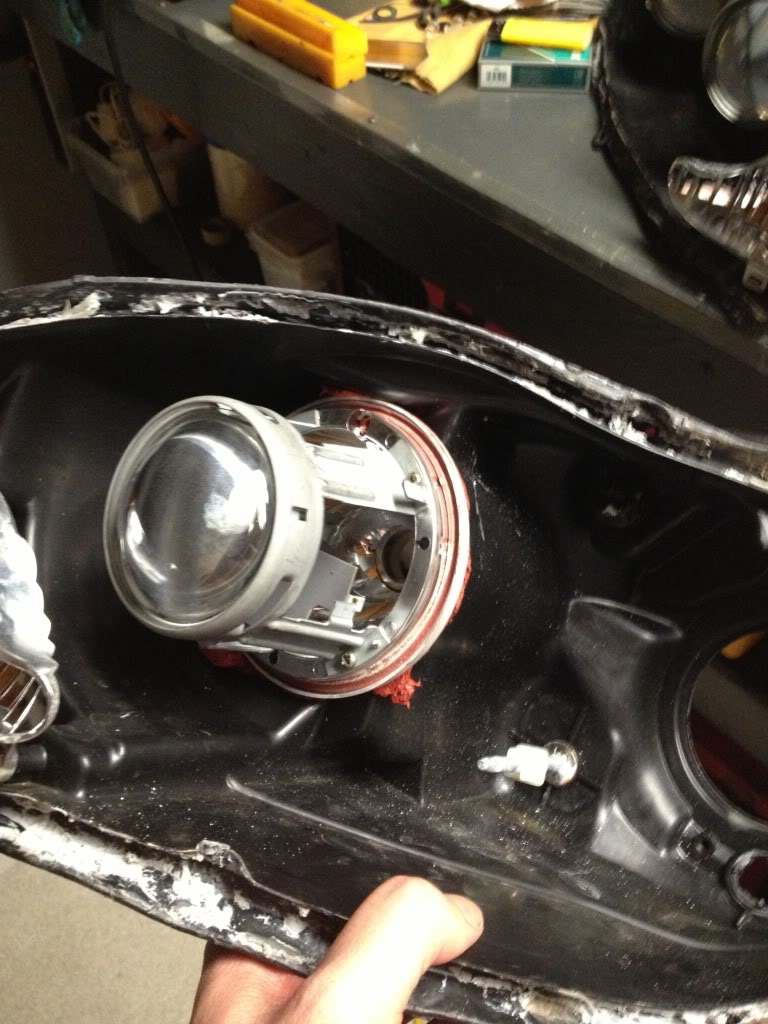
*One's in*
*Second is in and level! All you have to do is keep the cut off lines parallel and level to one another. Then let them sit!*
*The bmw projectors run the same bulb size as our low beams so no worries, but the audi.. Well I found out that little metal bit is riveted to the projector. Once the rivit was out the h3 addapter fell right off; and left a hole perfect size to slip in our high beam bulb... Talk about a bit sketchy but damn lucky.*
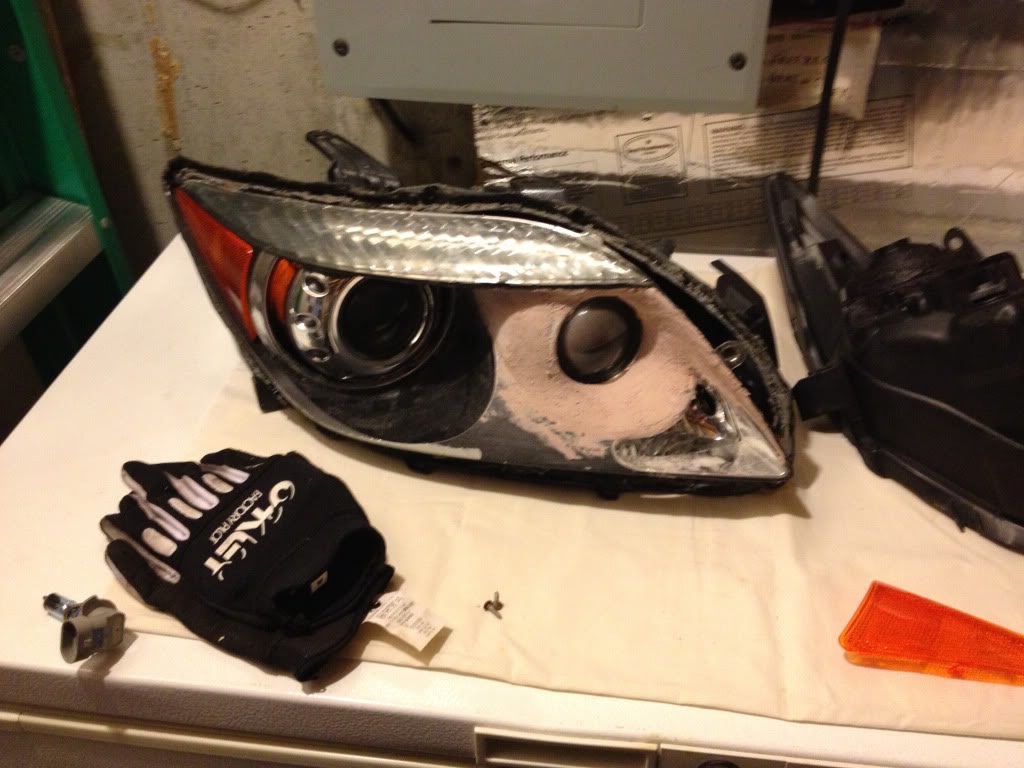
10) Shrouds!!
*Picked these up from the retro fit source. MC-R's for the outters and E55 extended's for the inners. I haven't found a pair of projectors yet that aren't 2.5" in diameter so any shroud fitting that dimension should work. If you have questions. Email the retro fit source, they will do anything and everything to help!*
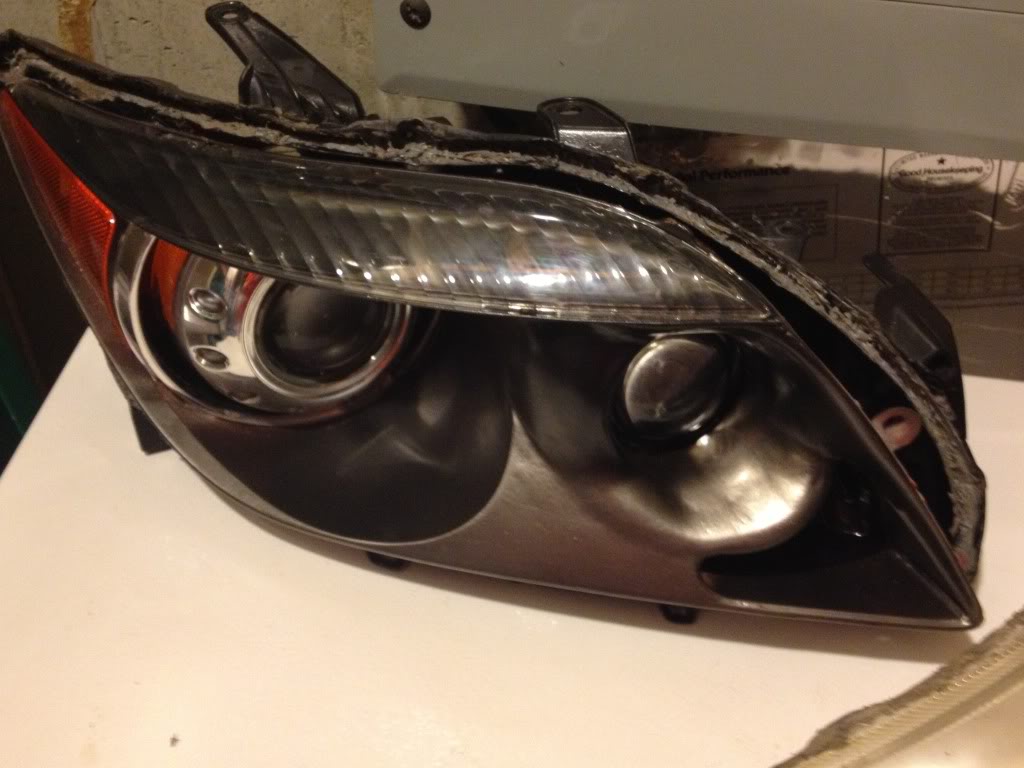
11) Trimming and test fitting (Dremel time):
*As you can see the MC-R's fit fine. No need to cut them cut but the E55's are going to need a lot of work."
*I ended up having to cut off the complete outer ring and cut up the stock bit (for lack of a better word) to make it fit right*
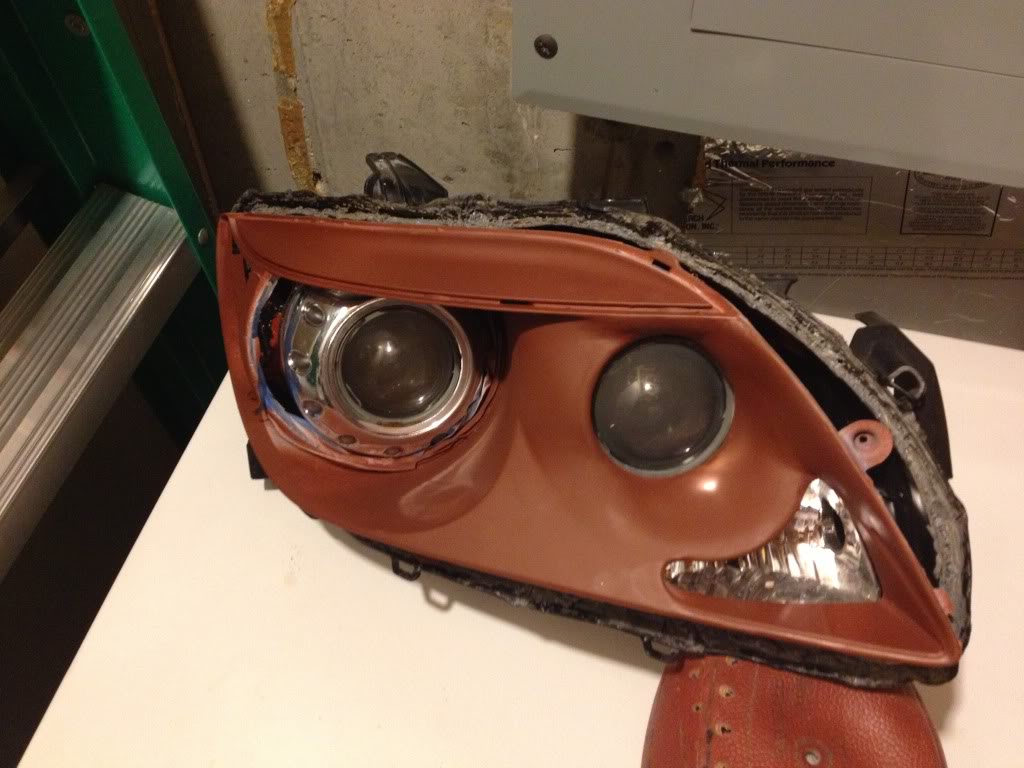
*This is what I have so far! Once I get my color matching paint in and figure a way to fill in the gaps I'll update this post*
Update:
12) Filling in the gaps!
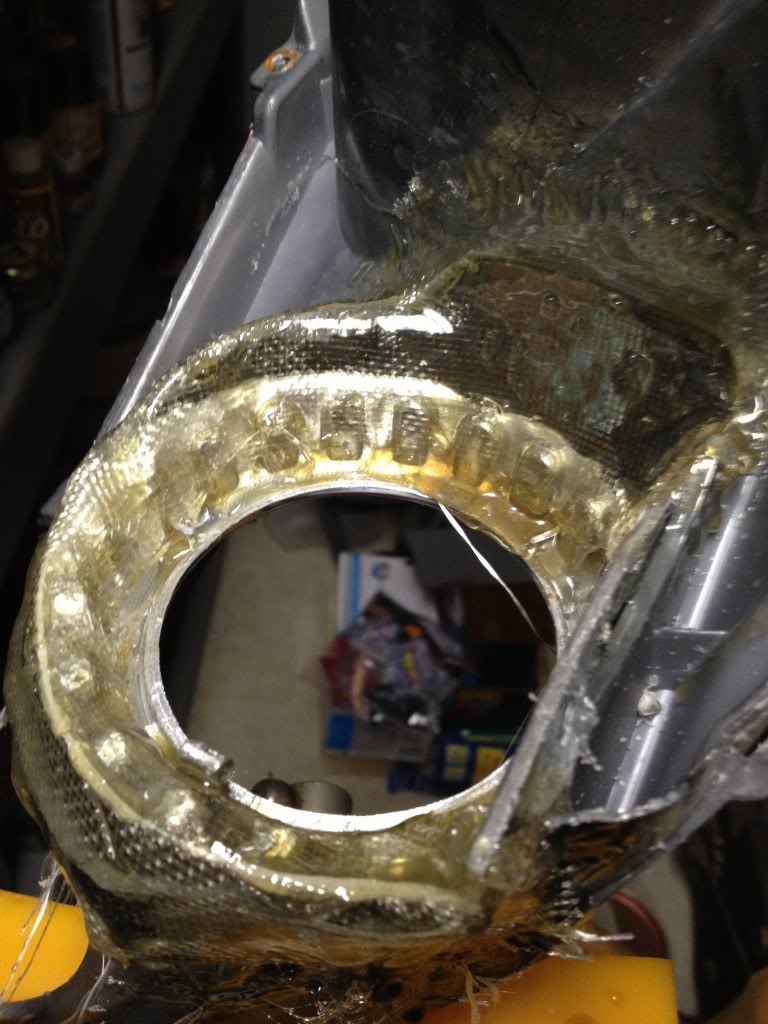
*Ended up Fiberglassing the back of the cut up shroud and then filled the gap with body filler. Should hold up. I've seen it done before but only way to find out.*
*Almost there, one more coat of filler then some final sanding and it should be ready for some paint*

*FINALLY!!!! After three days of primer/sanding I finally got them smoothed out and they are ready for paint and final prep/assembly!!!!* I'll be updating the tools needed/materials because well.. These are going to look awesome done right... Flush and clean with a tasteful shroud choice (which I'm still going to have to seal up to the projector so no light's leaking)
*Yea, a bit of showing off... After three days of sandpaper scrapes and dust in the eyes.. I think it's well deserved.*
*YESSSS!!! After two long weeks of priming, then sanding, priming then sanding and then a bit more priming and sanding. I finally have a something ready for final paint/assembly!!!!!!! This took about two cans of primer and 25 bucks of sandpaper to get everything smoothed out and ready for paint. Time well spent in my book because the final product will show any and all imperfections with the gloss finish. Also the projector shroud on the far left is about to be sealed to the back of the headlight housing, which I will show how to do later, so we don't have any light leaks.*
*We now have a finished product and ready to go back in the car. I'll be posting up pictures of the cut offs to prove just how simple getting the projectors level for our cars really is. Yes, getting everything smooth after fiber glassing/body filler/primer/final paint was indeed worse than a leg day at the gym, but hey. The finished product speaks for itself...*
Tools:
1) Screw Drivers (Phillips/Flat Head (to pry open the head lights))
2) Wire cutters
3) Conventional Oven
4) Dremel tool
a) Dremel cutting wheel
b) Dremel cutting drill bit (a drill bit that fits into the chuck will do fine)
c) Practice and patience (you only get one chance when you're cutting do it right the first time)
5) Sandpaper (Stage 3,2,1 grits)
6) TIME
Products/Parts:
1) Projectors (I'll tell you what I'm using and give you a few options later)
2) Shrouds (Personal liking from what you can find)
3) HEADLIGHTS
4) Silicone (High heat/Fire retardant)
5) Industrial adhesive (Again High heat application only)
6) SEM's color matched paint (I color matched the interior light assembly to my body color)
7) Bondo kit
9) TIME
Let's get started!!
1) Have an idea of what you want. Look into what other people have done so you're not flying blind into this. Here's a link to the retro fit source. They have all the products you will need if you don't have the patents to pull your own parts from the yard.
http://www.theretrofitsource.com/
2) Once you have the headlights out of the car take them apart! On the back of the head lights you will find a few screws holding the lens onto the housing; remove these before you do anything else.

*I'm using a flat head screw driver and a putty knife to pry the lenses off.*
3) Place the headlights in an oven at 350 degrees or so for one minute at a time (I melted one before and ever since I check after one minute just so it doesn't happen again).

*This is going to take some time and a bit of muscle. There are a few plastic 'clips' holding the lens to black housing. If you get stuck pulling the lens off look for a clip. If there's no clip put the light back in the oven for another minute.*
4) Got them apart!

5) Clean up you mess (aint no one got time for dat crap)

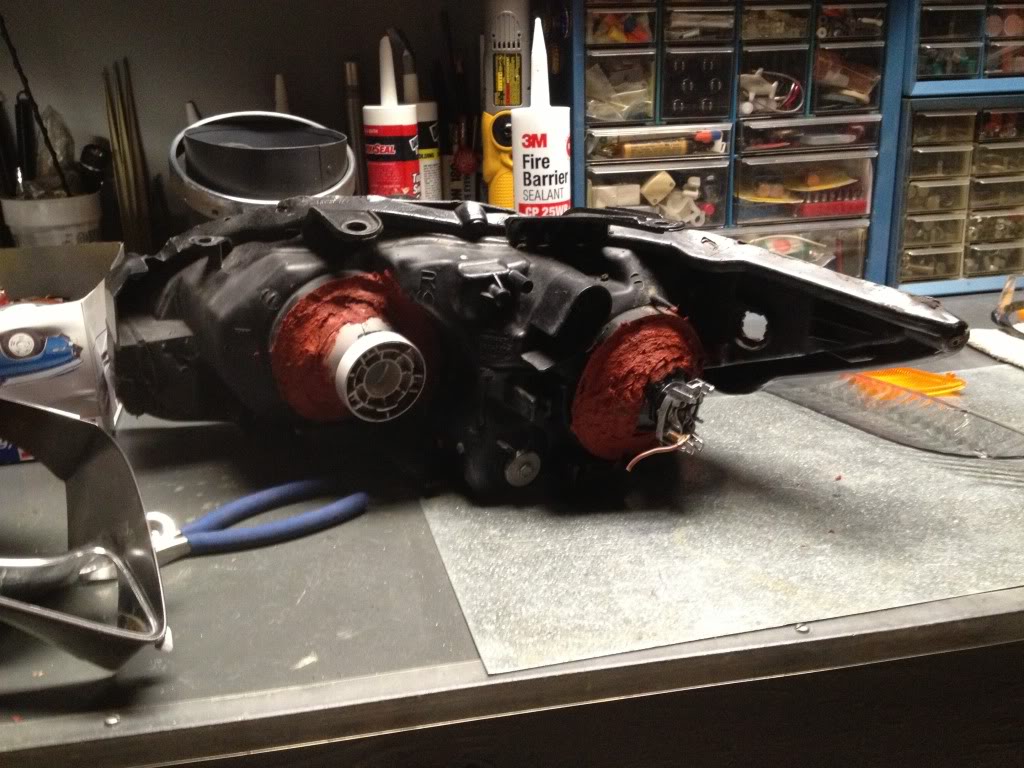
6) Taking the headlight bowls out:

*As you will see there are three screws holding the bowls in. A clip screw combo on the bottom center. A screw clip combo top center and a force bolt on the right (outter). To be honest I didn't need these so I just ripped them out. If you plan on not using them to minimize gaps start from the right and work your way to the center*
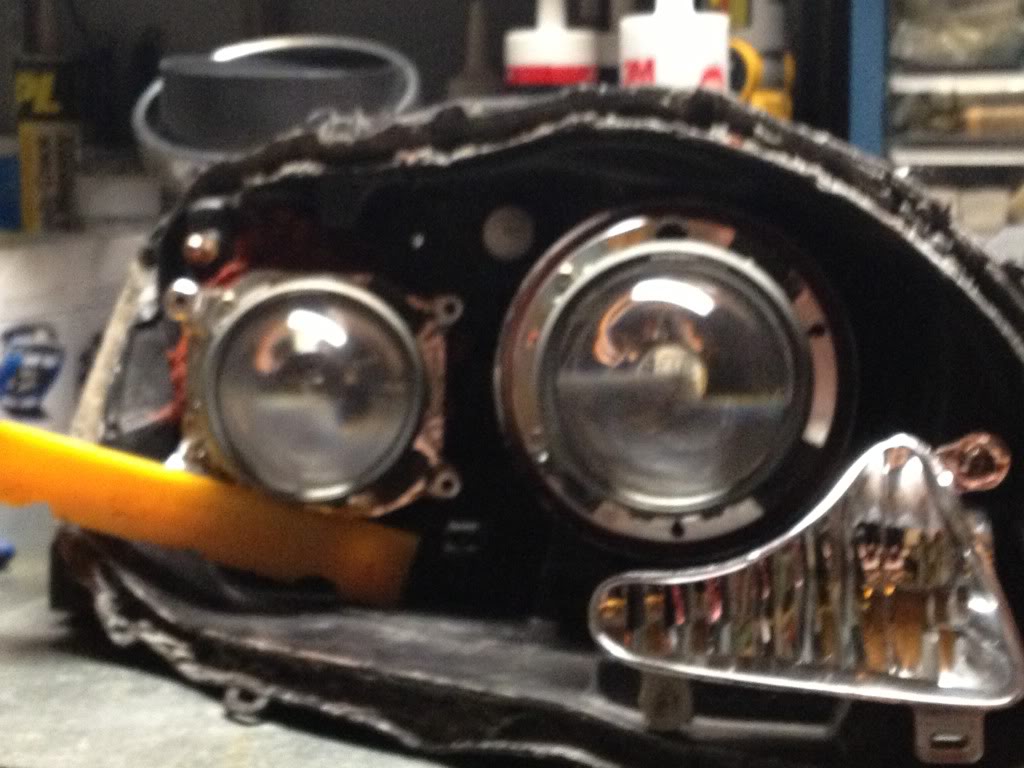
7) Bowl's out!:

*Cool fact those circles are dead center and perpendicular when mounted in the tc. You know what that means? No bracket work!! Projectors will mount directly to the black housing and be level!!!*
I have heard a lot of talk about projectors.. HID vs Hallogen light reflection angles.... Basically a lot of head ache no one should have to worry about. I'm not trying to understand them just build a quality set of headlights, so to sum it all up for you in five words... Start off with quality parts.
I'm using a pair of BMW seven series projectors I pulled out of an early 90's BM from my local U pull and save ($15 bucks). The BMW projectors are going on the inside (closest to the turn signal).
I'm also using a pair of projectors out of an AUDI A8. Again, out of an early 90's model, but the reflector bowl is one of the shortest designs I've seen. Great for us and how little room we have to play with under the hood by the fuse box. Again the Audi projectors only cost 15 bucks for the pair from my Pull A Part.
Blam HID ready projectors for only 30 bucks... This isn't that expensive.... Just takes time and a dremel tool!!!
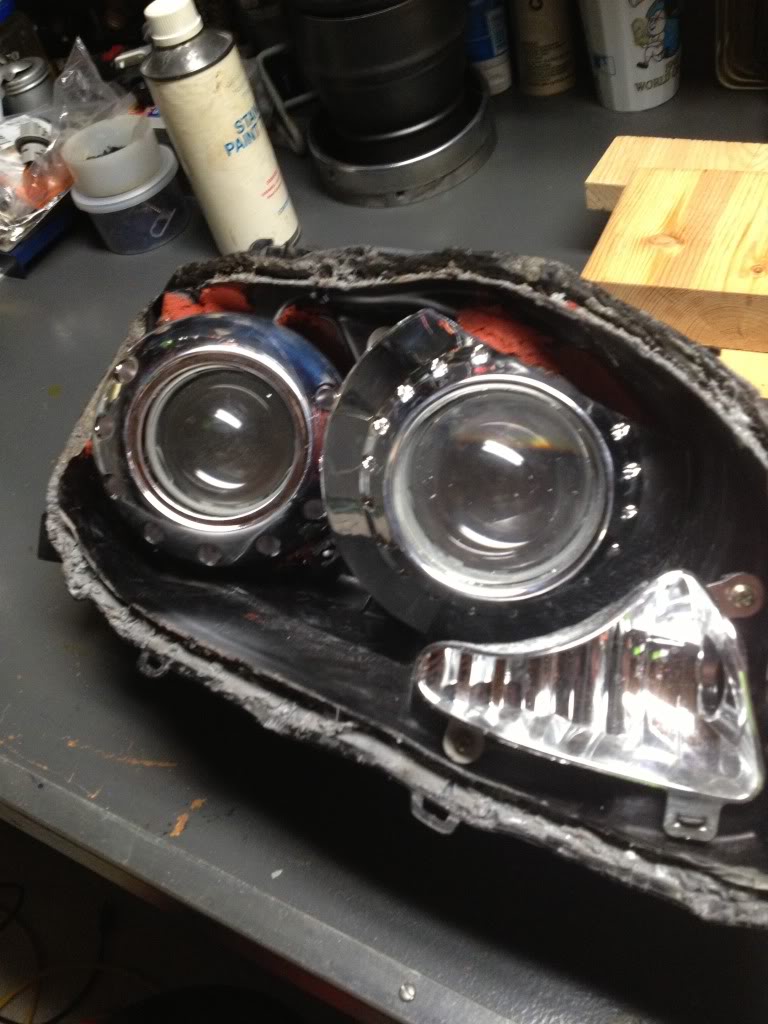
9) Mounting Projectors:

*Use High Temp silicon and get it goin!*

*One's in*

*Second is in and level! All you have to do is keep the cut off lines parallel and level to one another. Then let them sit!*

*The bmw projectors run the same bulb size as our low beams so no worries, but the audi.. Well I found out that little metal bit is riveted to the projector. Once the rivit was out the h3 addapter fell right off; and left a hole perfect size to slip in our high beam bulb... Talk about a bit sketchy but damn lucky.*
10) Shrouds!!

*Picked these up from the retro fit source. MC-R's for the outters and E55 extended's for the inners. I haven't found a pair of projectors yet that aren't 2.5" in diameter so any shroud fitting that dimension should work. If you have questions. Email the retro fit source, they will do anything and everything to help!*
11) Trimming and test fitting (Dremel time):

*As you can see the MC-R's fit fine. No need to cut them cut but the E55's are going to need a lot of work."

*I ended up having to cut off the complete outer ring and cut up the stock bit (for lack of a better word) to make it fit right*

*This is what I have so far! Once I get my color matching paint in and figure a way to fill in the gaps I'll update this post*
Update:
12) Filling in the gaps!

*Ended up Fiberglassing the back of the cut up shroud and then filled the gap with body filler. Should hold up. I've seen it done before but only way to find out.*

*Almost there, one more coat of filler then some final sanding and it should be ready for some paint*

*FINALLY!!!! After three days of primer/sanding I finally got them smoothed out and they are ready for paint and final prep/assembly!!!!* I'll be updating the tools needed/materials because well.. These are going to look awesome done right... Flush and clean with a tasteful shroud choice (which I'm still going to have to seal up to the projector so no light's leaking)

*Yea, a bit of showing off... After three days of sandpaper scrapes and dust in the eyes.. I think it's well deserved.*

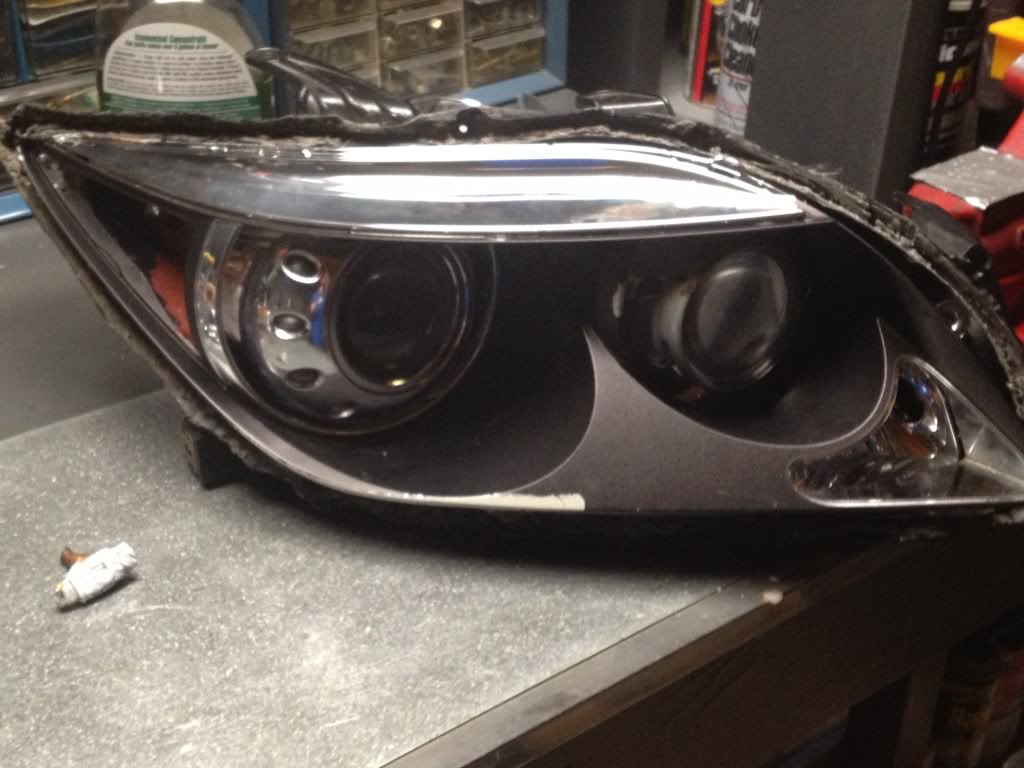
*YESSSS!!! After two long weeks of priming, then sanding, priming then sanding and then a bit more priming and sanding. I finally have a something ready for final paint/assembly!!!!!!! This took about two cans of primer and 25 bucks of sandpaper to get everything smoothed out and ready for paint. Time well spent in my book because the final product will show any and all imperfections with the gloss finish. Also the projector shroud on the far left is about to be sealed to the back of the headlight housing, which I will show how to do later, so we don't have any light leaks.*

*We now have a finished product and ready to go back in the car. I'll be posting up pictures of the cut offs to prove just how simple getting the projectors level for our cars really is. Yes, getting everything smooth after fiber glassing/body filler/primer/final paint was indeed worse than a leg day at the gym, but hey. The finished product speaks for itself...*
Last edited by natc07; 06-11-2013 at 01:02 AM. Reason: Added pic and Updated tools/materials

 05-26-2013, 05:23 AM
#4
Senior Member
SL Member

Join Date: Mar 2013
Posts: 516
Good Job on this. I admire those who can accomplish retrofits. It is not an easy task because I myself went through 2 of them with my 2001 Mustang and 2007 VW GTI. One of the hardest thing to do is Aim them perfectly and reseal them again. Silicone wont work, after a while water will work its way in. The best seal is the window ribbon sealer sold at Theretrofitsource.com
05-26-2013, 05:42 AM
#5
Thanks Killer, I think it's fun and with the tc they aren't all to bad. Well getting them in line and on target so to speak. Since the one in the high beam location is perfect for just laying in the projector I'm using in and then line the other one up to the other side with it.
Personally I'd love to see a triple projector set up with the gen two's. Change out the turn signal for a fog light with quad low beams. Then pop in a cfl turn signal along the bottom (make it look like the new lexus cfls). No clue if it'd work but I have a pair of small projector fogs out of an audi lol.. Might just be my next venture if I can convince a friend to 'fund' it, hahaha.. Yea right... Kid worrys about his warranty like me and my lady worry about plan b lolol!!!
Personally I'd love to see a triple projector set up with the gen two's. Change out the turn signal for a fog light with quad low beams. Then pop in a cfl turn signal along the bottom (make it look like the new lexus cfls). No clue if it'd work but I have a pair of small projector fogs out of an audi lol.. Might just be my next venture if I can convince a friend to 'fund' it, hahaha.. Yea right... Kid worrys about his warranty like me and my lady worry about plan b lolol!!!
05-26-2013, 07:41 PM
#7
Sure thing guy! I'll add a picture of it in the post for you all once I spray the back of it with truck bed liner.
The silicone is sure as hell strong enough though. Once it's hard you can hold the projectors where the light bulbs go; and hold it straight out, wiggle it around, what ever. That projector is there to stay. Along with the heat. After the first set I did for myself I went for a drive to Georgia from Kentucky (Friend's wedding not just a drive). Had the lights on for a good 8 hours of the drive. The silicone didn't get loose or droop the projectors at all.
The silicone is sure as hell strong enough though. Once it's hard you can hold the projectors where the light bulbs go; and hold it straight out, wiggle it around, what ever. That projector is there to stay. Along with the heat. After the first set I did for myself I went for a drive to Georgia from Kentucky (Friend's wedding not just a drive). Had the lights on for a good 8 hours of the drive. The silicone didn't get loose or droop the projectors at all.


Thread
Thread Starter
Forum
Replies
Last Post