2AZ-FE Removal Steps and My Build..
 01-15-2012, 10:12 PM
#1
Senior Member
SL Member
Thread Starter

Join Date: Jul 2006
Location: Colorado
Posts: 308
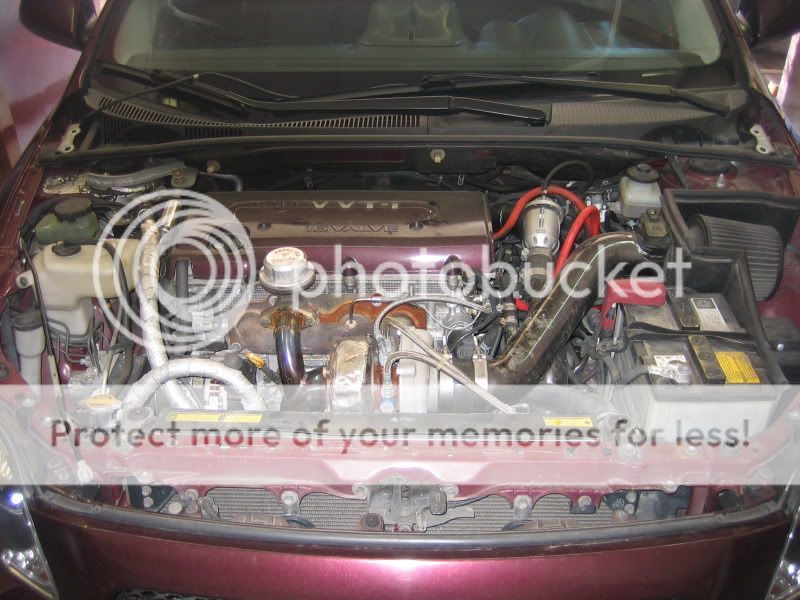
I began my engine build back in July and finished it around Thanksgiving. I documented every step to remove the motor and trans cause it may benefit someone else in the future.
I know I'm not the first to do this but I always say "the more information the better". I will get to my Motor Build after the removal steps.
1. Remove heat shield from hood
2. Remove washer hose from hood
3. Remove hood - mark hood hinge first for re-install
4. Remove engine cover
5. Remove Battery
6. Remove air cleaner
7. Remove cold air shield for air filter
8. Unplug MAF
9. Remove intake pipe
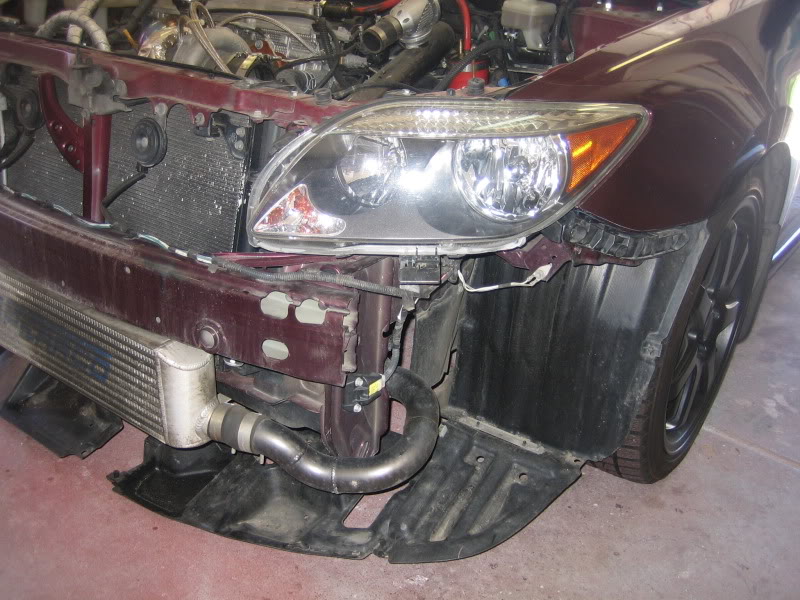
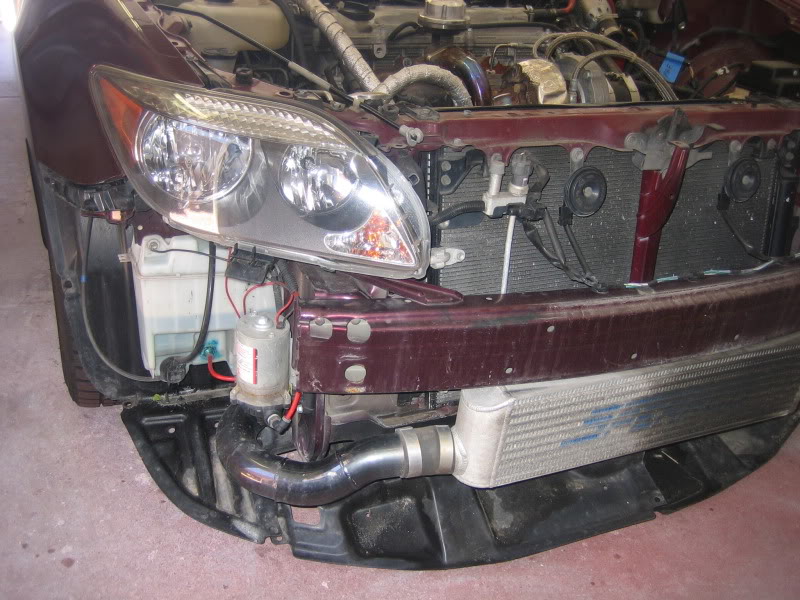
10. Remove bumper cover
11. Remove Styrofoam from under bumper cover
12. Drain radiator
13. Remove upper and lower radiator hose
14. Remove upper radiator brackets
15. Remove over flow hose to radiator
16. Remove both I/C pipes going to Turbo
17. Disconnect coolant lines from Turbo
18. Remove oil line from Turbo
19. Remove EGT sensor from exhaust manifold
20. Remove vacuum line from wastegate
21. Unplug O2 sensors
22. Disconnect "S" pipe from downpipe and oil return line from oil pan
23. Remove exhaust manifold with Turbo and downpipe
24. Remove radiator
25. Remove vacuum line from BOV
26. Disconnect water injection from I/C pipe
27. Remove I/C pipe that is connected to the intake manifold
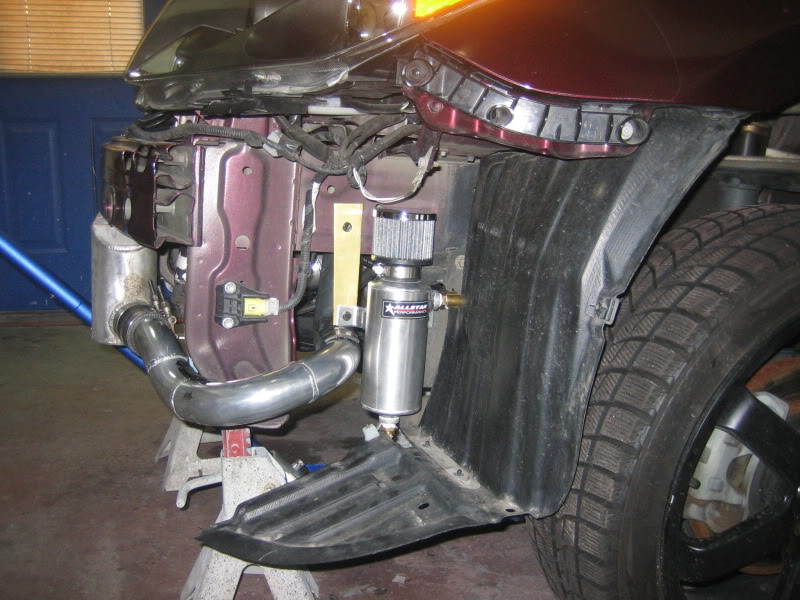
28. Remove oil catch can
29. Remove clutch slave cylinder and hose bracket
30. Unplug oil pressure switch (factory) and oil pressure sensor (autometer)
31. Remove serpentine belt and wire to A/C compressor
32. Remove A/C compressor but leave lines connoted, set aside
33. Remove ETD
34. Disconnect wiring to Alternator
35. Remove ground wire off of trans (goes to battery)
36. Remove battery tray
37. Remove heater core hoses from engine
38. Remove throttle body coolant hoses
39. Remove axles see URL - http://clubsciontc.com/forums/diy-in...-shafts-32463/
40. Remove wiring harness (one end is connected to the engine) from the under hood fuse box
41. Remove under hood fuse box power lead from positive terminal on battery connector
42. Unplug blue connector from under brake fluid reservoir
43. Remove Vac line from throttle body
44. Remove aftermarket tach wire from #1 coil wiring
45. Remove fuel rail and injectors
46. Remove wiring harness from ECU in passengers foot well
47. Pull wiring harness through firewall and lay on engine
48. Disconnect linkage from trans
49. Remove shift linkage bracket
50. Disconnect low pressure line from P/S pump
51. Disconnect high pressure line from P/S pump including bracket holding it to the engine
52. Disconnect "S" pipe O2 sensor wiring from sensor
53. Disconnect vac line that goes from the firewall to the back of the intake manifold
54. Remove bolt from rear motor mount
55. Put front spindles back on temporarily to roll car around if needed
56. Connect engine hoist to engine and lift to apply tension
57. Remove all trans and motor mounts
58. Lift engine slowly, not much room
59. Disconnect wiring harness plug going to trans
60. Separate engine and trans
61. Remove clutch and flywheel
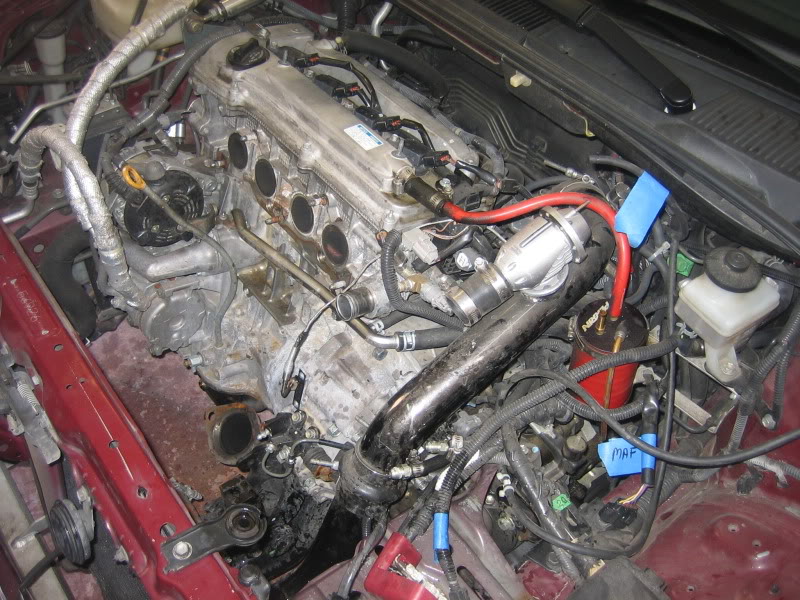
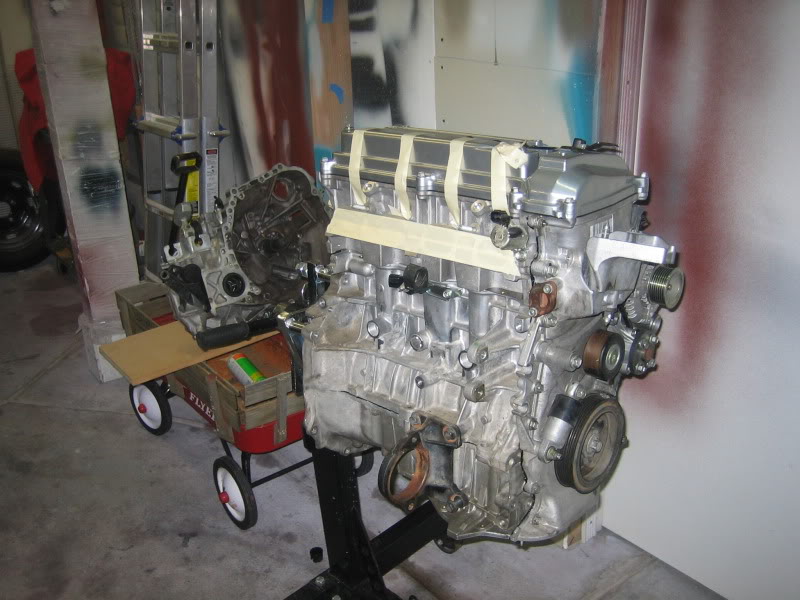
62. Put engine on stand
Now with engine on stand, here are my engine tear down steps
1. Remove intake fasteners
2. Disconnect vac line from rear of intake manifold to rear of valve cover
3. Unplug P/S pump sensor wire
4. Unbolt front wiring harness plastic loom from head
5. Unbolt rear wiring harness plastic loom from valve cover and head
6. Pull intake away from head then disconnect the knock (I think it's the knock sensor) sensor and ground wires
7. Remove coil packs
8. Remove P/S pump
9. Remove Alt
10. Remove crank sensor wire completely
11. Remove crank pulley bolt, reinstall 2 flywheel bolts to use as leverage
12. Remove crank pulley
13. Remove valve cover
14. Remove timing cover
15. Remove belt tensioner
16. Remove passenger side motor mount
17. Remove crank sensor ring
18. Remove VVTI sensor from head
19. Remove timing gear from crank
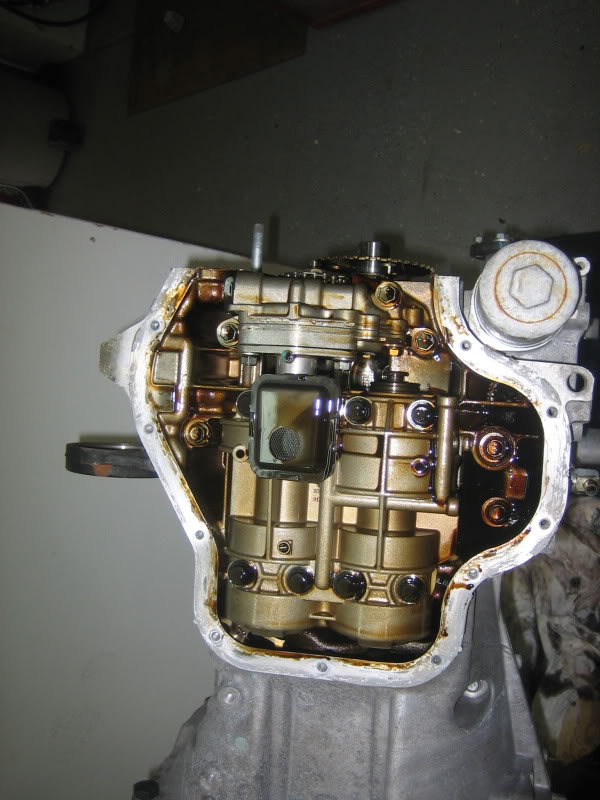
20. Remove oil pan
21. Remove gear from oil pump
22. Remove oil pump with chain and oil pump crank gear
23. Remove balance shaft cover
24. Remove balance shafts and bearings
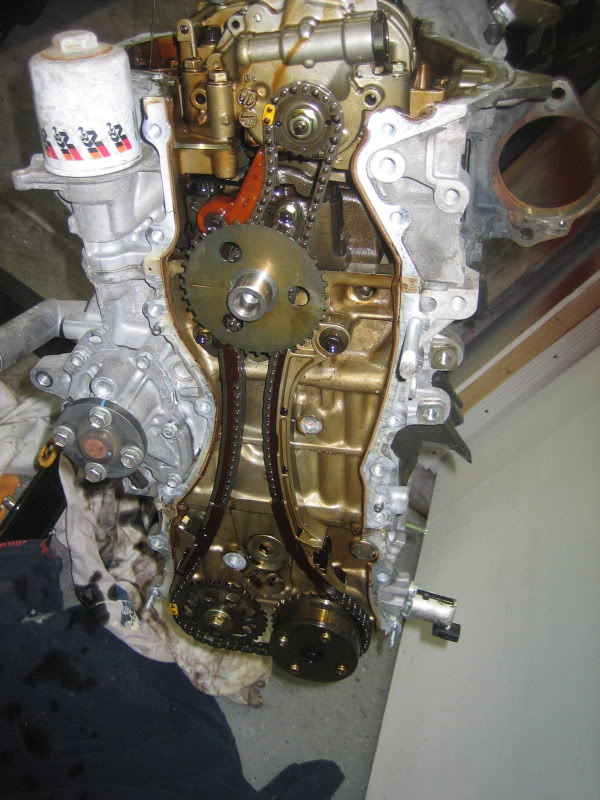
25. Remove timing chain tensioner
26. Remove timing chain
27. Remove cam shafts , be sure not to roll over motor unless you have secured or documented the camshaft bucket locations
28. Remove head bolts working from outer to inner
29. Remove head
30. Remove lower crank case
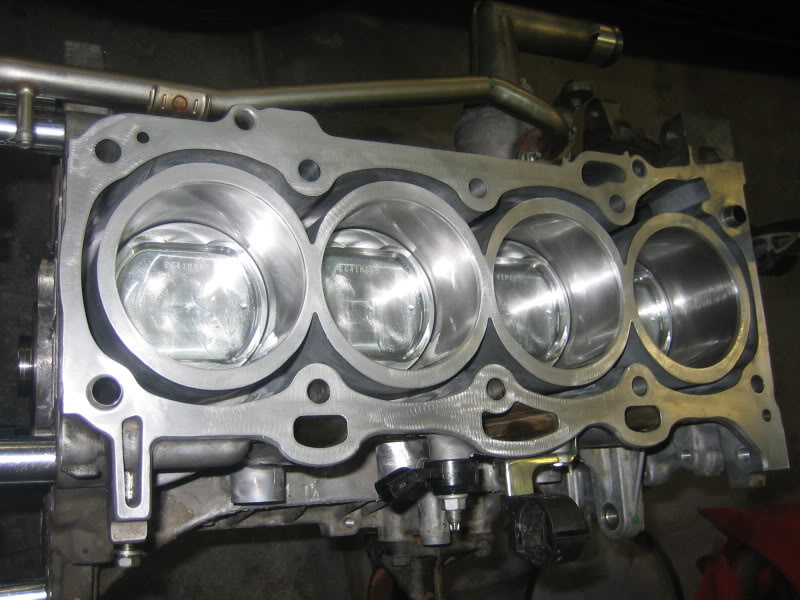
31. Remove rods & pistons
32. Remove crank paying attention to #3 bearing shims locati
IMG_0017.jpg?t=1326855982
IMG_0026.jpg?t=1326856182
List of Changes and Mods:
Deleted balance shafts
Had the whole rotating assemble balanced (flywheel,crank,crank pulley,rods,pistons)
Had all the internal parts (crank,pistons,rods,bearings) cryogenically frozen for additional strength
Replace the valves with stainless steel ones (thanks Dezod)
Replaced the valve springs with dual wound REV (thanks Dezod)
Replaced the valve spring retainers with titanium ones (thanks Dezod)
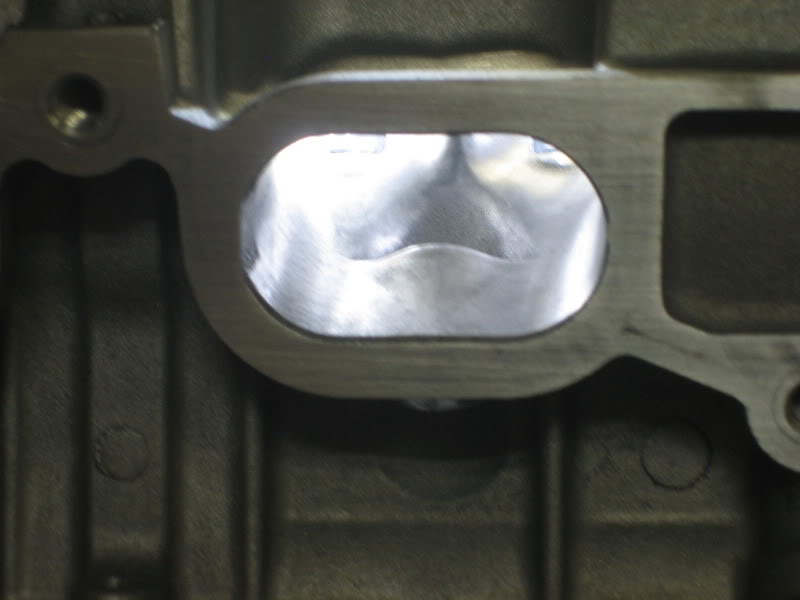
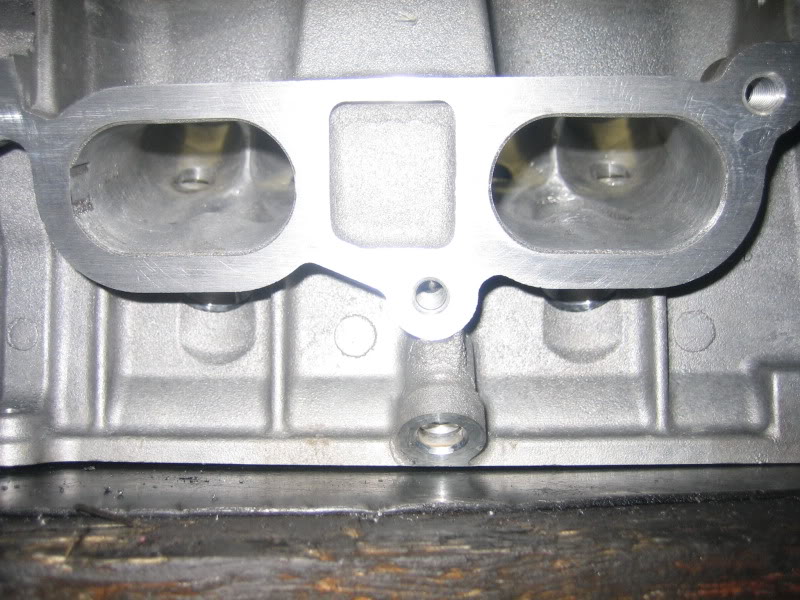
Had the head ported and polished for more flow
Installed ARP head bolts
Ceramic coated the turbo exhaust housing (thermal protection and good looks)
Ceramic coated the exhaust manifold and downpipe (thermal protection and good looks)
Ceramic coated all the I/C pipes (thermal protection and good looks)
Replaced the rods with “H” beam K-1 rods with Clevite bearings (thanks Dezod)
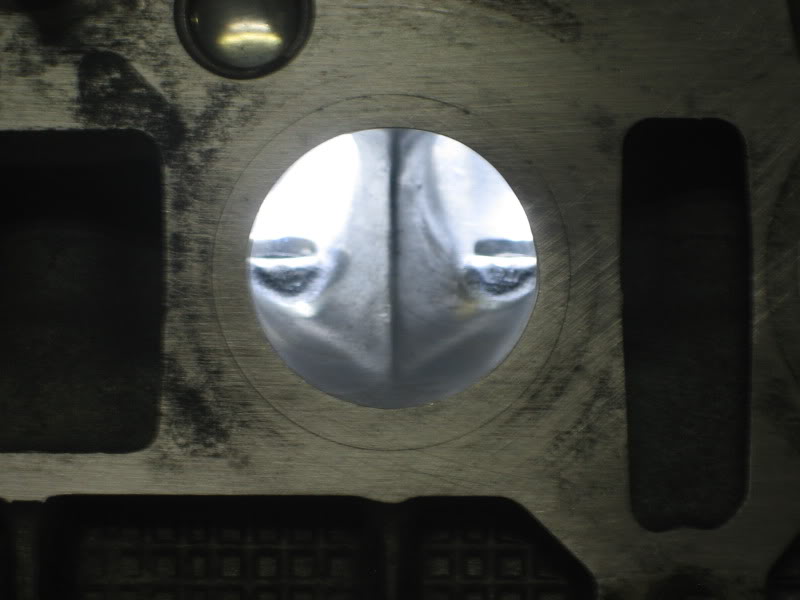
Replaced the Pistons with forged Wiseco 9:1 (thanks Dezod)
Honed cylinders
Resurfaced flywheel
Install Toyota TOB
Install Centerforce DFX 6 puck Clutch
Installed Polyurethane motor mounts (thanks Dezod)
Powder coated the valve cover (cosmetic)
APR X-1 (Allan Phillips Racing) engine management (special thanks Dezod)
The engine is running very well, the clutch is amazing with a near factory feel but 6 puck sprung. I am working through a few X-1 issues but nothing major.
I am only running 10.5 psi at low boost and 15 psi on high until spring when I take off my Winter tires.
__________________
I know I'm not the first to do this but I always say "the more information the better". I will get to my Motor Build after the removal steps.
1. Remove heat shield from hood
2. Remove washer hose from hood
3. Remove hood - mark hood hinge first for re-install
4. Remove engine cover
5. Remove Battery
6. Remove air cleaner
7. Remove cold air shield for air filter
8. Unplug MAF
9. Remove intake pipe
10. Remove bumper cover
11. Remove Styrofoam from under bumper cover
12. Drain radiator
13. Remove upper and lower radiator hose
14. Remove upper radiator brackets
15. Remove over flow hose to radiator
16. Remove both I/C pipes going to Turbo
17. Disconnect coolant lines from Turbo
18. Remove oil line from Turbo
19. Remove EGT sensor from exhaust manifold
20. Remove vacuum line from wastegate
21. Unplug O2 sensors
22. Disconnect "S" pipe from downpipe and oil return line from oil pan
23. Remove exhaust manifold with Turbo and downpipe
24. Remove radiator
25. Remove vacuum line from BOV
26. Disconnect water injection from I/C pipe
27. Remove I/C pipe that is connected to the intake manifold
28. Remove oil catch can
29. Remove clutch slave cylinder and hose bracket
30. Unplug oil pressure switch (factory) and oil pressure sensor (autometer)
31. Remove serpentine belt and wire to A/C compressor
32. Remove A/C compressor but leave lines connoted, set aside
33. Remove ETD
34. Disconnect wiring to Alternator
35. Remove ground wire off of trans (goes to battery)
36. Remove battery tray
37. Remove heater core hoses from engine
38. Remove throttle body coolant hoses
39. Remove axles see URL - http://clubsciontc.com/forums/diy-in...-shafts-32463/
40. Remove wiring harness (one end is connected to the engine) from the under hood fuse box
41. Remove under hood fuse box power lead from positive terminal on battery connector
42. Unplug blue connector from under brake fluid reservoir
43. Remove Vac line from throttle body
44. Remove aftermarket tach wire from #1 coil wiring
45. Remove fuel rail and injectors
46. Remove wiring harness from ECU in passengers foot well
47. Pull wiring harness through firewall and lay on engine
48. Disconnect linkage from trans
49. Remove shift linkage bracket
50. Disconnect low pressure line from P/S pump
51. Disconnect high pressure line from P/S pump including bracket holding it to the engine
52. Disconnect "S" pipe O2 sensor wiring from sensor
53. Disconnect vac line that goes from the firewall to the back of the intake manifold
54. Remove bolt from rear motor mount
55. Put front spindles back on temporarily to roll car around if needed
56. Connect engine hoist to engine and lift to apply tension
57. Remove all trans and motor mounts
58. Lift engine slowly, not much room
59. Disconnect wiring harness plug going to trans
60. Separate engine and trans
61. Remove clutch and flywheel
62. Put engine on stand
Now with engine on stand, here are my engine tear down steps
1. Remove intake fasteners
2. Disconnect vac line from rear of intake manifold to rear of valve cover
3. Unplug P/S pump sensor wire
4. Unbolt front wiring harness plastic loom from head
5. Unbolt rear wiring harness plastic loom from valve cover and head
6. Pull intake away from head then disconnect the knock (I think it's the knock sensor) sensor and ground wires
7. Remove coil packs
8. Remove P/S pump
9. Remove Alt
10. Remove crank sensor wire completely
11. Remove crank pulley bolt, reinstall 2 flywheel bolts to use as leverage
12. Remove crank pulley
13. Remove valve cover
14. Remove timing cover
15. Remove belt tensioner
16. Remove passenger side motor mount
17. Remove crank sensor ring
18. Remove VVTI sensor from head
19. Remove timing gear from crank
20. Remove oil pan
21. Remove gear from oil pump
22. Remove oil pump with chain and oil pump crank gear
23. Remove balance shaft cover
24. Remove balance shafts and bearings
25. Remove timing chain tensioner
26. Remove timing chain
27. Remove cam shafts , be sure not to roll over motor unless you have secured or documented the camshaft bucket locations
28. Remove head bolts working from outer to inner
29. Remove head
30. Remove lower crank case
31. Remove rods & pistons
32. Remove crank paying attention to #3 bearing shims locati
IMG_0017.jpg?t=1326855982
IMG_0026.jpg?t=1326856182
List of Changes and Mods:
Deleted balance shafts
Had the whole rotating assemble balanced (flywheel,crank,crank pulley,rods,pistons)
Had all the internal parts (crank,pistons,rods,bearings) cryogenically frozen for additional strength
Replace the valves with stainless steel ones (thanks Dezod)
Replaced the valve springs with dual wound REV (thanks Dezod)
Replaced the valve spring retainers with titanium ones (thanks Dezod)
Had the head ported and polished for more flow
Installed ARP head bolts
Ceramic coated the turbo exhaust housing (thermal protection and good looks)
Ceramic coated the exhaust manifold and downpipe (thermal protection and good looks)
Ceramic coated all the I/C pipes (thermal protection and good looks)
Replaced the rods with “H” beam K-1 rods with Clevite bearings (thanks Dezod)
Replaced the Pistons with forged Wiseco 9:1 (thanks Dezod)
Honed cylinders
Resurfaced flywheel
Install Toyota TOB
Install Centerforce DFX 6 puck Clutch
Installed Polyurethane motor mounts (thanks Dezod)
Powder coated the valve cover (cosmetic)
APR X-1 (Allan Phillips Racing) engine management (special thanks Dezod)
The engine is running very well, the clutch is amazing with a near factory feel but 6 puck sprung. I am working through a few X-1 issues but nothing major.
I am only running 10.5 psi at low boost and 15 psi on high until spring when I take off my Winter tires.
__________________
Last edited by MR_LUV; 05-13-2021 at 09:57 AM. Reason: Awarded 10 Yr Badge

 01-16-2012, 06:21 AM
#4

Just my take from experience.
I remove the intake manifold before pulling the engine out
I unbolt the power steering pump from the motor and leave it in the engine bay with the hoses connected
I unplug all of the electrical connectors first
also not sure why you pulled the wiring harness from the car?
I remove the intake manifold before pulling the engine out
I unbolt the power steering pump from the motor and leave it in the engine bay with the hoses connected
I unplug all of the electrical connectors first
also not sure why you pulled the wiring harness from the car?
01-16-2012, 07:20 AM
#5

Just my take from experience.
I remove the intake manifold before pulling the engine out
I unbolt the power steering pump from the motor and leave it in the engine bay with the hoses connected
I unplug all of the electrical connectors first
also not sure why you pulled the wiring harness from the car?
I remove the intake manifold before pulling the engine out
I unbolt the power steering pump from the motor and leave it in the engine bay with the hoses connected
I unplug all of the electrical connectors first
also not sure why you pulled the wiring harness from the car?
i always pull engine harness aswell its 5 connectors and a grommet vs disconnecting each sensor, removing the intake manifold to reach the rear connectors. but yea next time i pull mine out sometime in oct i will unbolt the intake manifold, its always a tight squeexe getting it out when its still on once i bent the metal fram that hold the windsheild cowling because the manifold got caught while lifting engine out


Thread
Thread Starter
Forum
Replies
Last Post
asurjc
Scion xD Aero & Exterior
10
04-10-2021 07:44 PM