
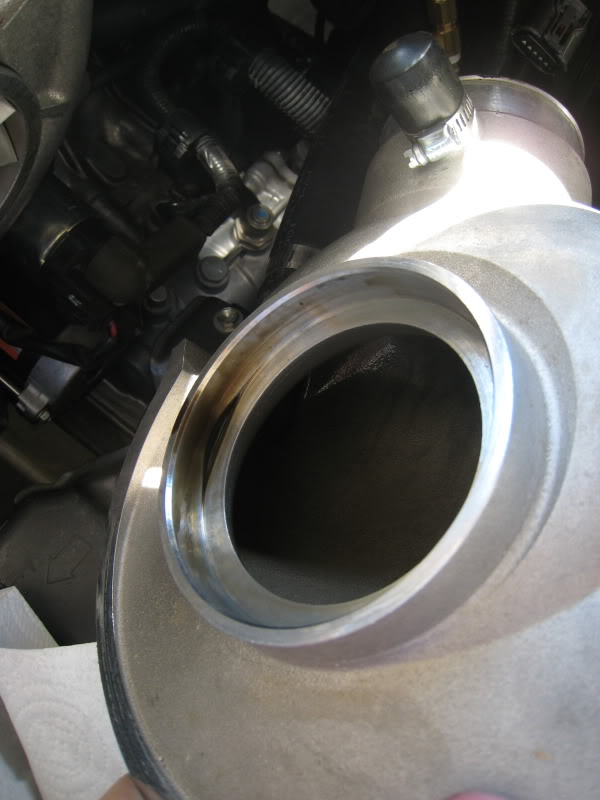
Supercharger parts


I was searching around this morning trying to find a repalcement impeller seal for my SC since it started to leak and was the only seal i didn't repalce. I found a garage that is making their own seal for the impeller on vortechs SCs. After talking with them on the phone they said the size is the same on all the vortechs except the huge ones. I am going to buy it and see how it works out but I also found an interesting part they make that could be a drop in replacement for the SC guys.
The seal:
http://www.928motorsports.com/parts/vortech_seals.php

The drop in impeller, too bad it isn't for our size of SC.
http://www.928motorsports.com/parts/...h_impeller.php
and their rebuild kit:
http://www.928motorsports.com/parts/...ebuild_kit.php
The seal:
http://www.928motorsports.com/parts/vortech_seals.php
The drop in impeller, too bad it isn't for our size of SC.
http://www.928motorsports.com/parts/...h_impeller.php
and their rebuild kit:
http://www.928motorsports.com/parts/...ebuild_kit.php


Nice find, what if I only want this one?:

The other one is the input shaft seal, which I already replaced, I only need the impeller seal, do you know if they sell them separate? thanks.
The other one is the input shaft seal, which I already replaced, I only need the impeller seal, do you know if they sell them separate? thanks.


That's going to be hard, cause from what I remember the seal behind the impeller only comes out the other way, so you'll have to take the SC apart and remove the shafts and bearings to get to it, as for me it will be easy since I already have the entire thing apart lol.....good luck and let us know how it goes. Small tip, the impeller will not just slide out once the nut comes off(just in case you didn't know this, nut is reverse threated) you have to take 2 propane torches to it evenly , once its heated up enough it will just slide out and you're good to go, same procedure to reinstall, if you want more tips which I got from Jaime from Vortech let me know, thanks.....
I got the seal in today after some hang ups. When I opened it up it had a bunch more oil again. This seal had really gone on mine.
You can see here a the chip inthe plastic spring collar.
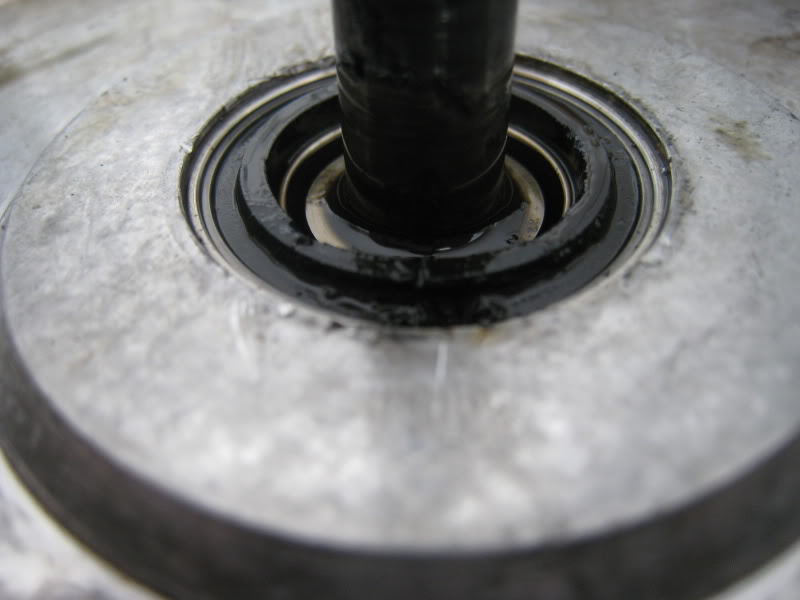
Little side by side.
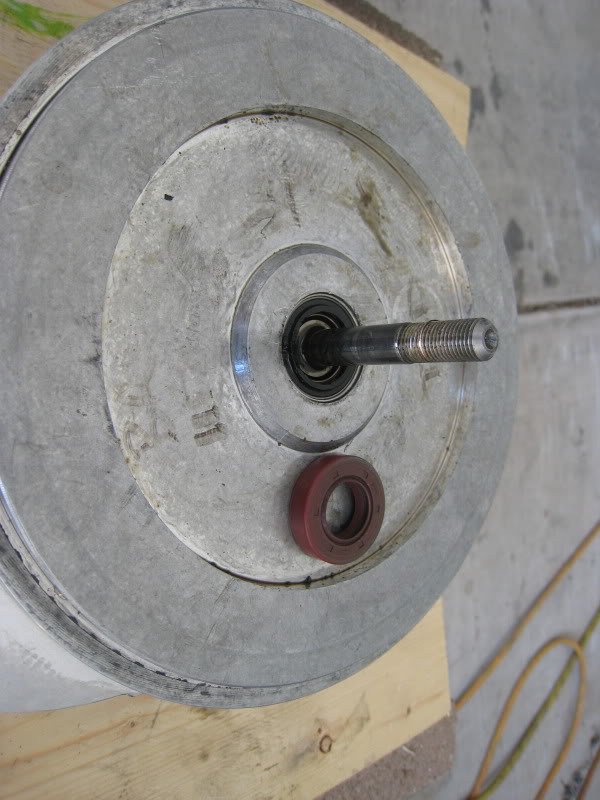

Installed, it sits lower than the old one but that is because it isn't supposed to make surface contact with the large washer anymore.
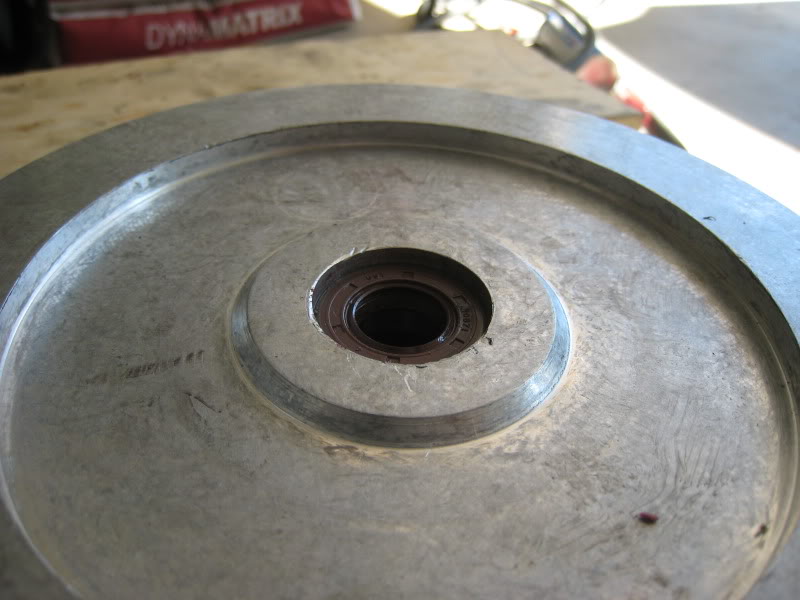
Was only able to test drive it so much today but I didn't hear any oil slinging at high RPM like I was before.
You can see here a the chip inthe plastic spring collar.
Little side by side.
Installed, it sits lower than the old one but that is because it isn't supposed to make surface contact with the large washer anymore.
Was only able to test drive it so much today but I didn't hear any oil slinging at high RPM like I was before.
Last edited by AZGuy; Oct 30, 2010 at 05:46 AM.
The first time I took it apart to the replace the bearrings I detroyed the inner output bearing. If you have good bearings in there you need to let the large gear float and drop out with the output shaft as you press or hammer it out so you save your bearing, just be careful there.
I did plan on taking it apart with weekend to see if I was getting any oil into the intake anymore but with the very little bit of oil smell I am getting now it looks liek it is fixed now but just want to verify.
I am just happy now I have access to replacement parts for all the parts of this thing and now have a good confidence in its working and components and am no longer shy in yanking it off to check it out.

Member
Joined: Sep 2010
Posts: 44
From: Mia305
alright sounds good any pics when taking that rear part off?? i've done it before but just to replace the big bearings and the other seal but no that one and i try to take that off so i could get to the small bearings but i couldnt so i just left those and change the big ones only.. anyways if you have any pics just try to post it for me so i can have an idea cause im just doing all of this for a friend that s/c is not even mine but im the one who does the labor lol
I am pretty bad about taking pictures during my work, just not how I enjoy working on cars. You can reference the seal repair from this site to get it torn down most of the way then you need to remove the nut on the impeller, remember it is reverse threaded. Then you will want to support housing along the sides and do not obstruct the gears so they can BOTH drop as you remove the output shaft. Use a brass dowel and beat the shaft out making sure as it comes out the output shaft bearing does not even touch the large gear. You can reference these sources which are for vortech chargers in general which is what ours is besides the additional shaft we have.
http://www.starrland.com/Supercharge...%202-22-08.pdf
Some visuals:
http://jobyteknik.homeip.net/corvett...arger_rebuild/
And how NOT to do it, you will notice how he destroyed the inner output shaft bearing because he allowed it to interfere with the large gear:
http://forums.corral.net/forums/show...=780865&page=2
Figured I would dump this info here.
You can get parts for our supercahrger here, full rebuilds AND impellers. I am going to call them to see if they are just replacements or if they are upgrades.
http://www.superchargerrebuild.com/?page_id=6
You can get parts for our supercahrger here, full rebuilds AND impellers. I am going to call them to see if they are just replacements or if they are upgrades.
http://www.superchargerrebuild.com/?page_id=6

Senior Member
SL Member
Joined: Feb 2008
Posts: 552
From: San Jose, CA
I am pretty bad about taking pictures during my work, just not how I enjoy working on cars. You can reference the seal repair from this site to get it torn down most of the way then you need to remove the nut on the impeller, remember it is reverse threaded. Then you will want to support housing along the sides and do not obstruct the gears so they can BOTH drop as you remove the output shaft. Use a brass dowel and beat the shaft out making sure as it comes out the output shaft bearing does not even touch the large gear. You can reference these sources which are for vortech chargers in general which is what ours is besides the additional shaft we have.
http://www.starrland.com/Supercharge...%202-22-08.pdf
Some visuals:
http://jobyteknik.homeip.net/corvett...arger_rebuild/
And how NOT to do it, you will notice how he destroyed the inner output shaft bearing because he allowed it to interfere with the large gear:
http://forums.corral.net/forums/show...=780865&page=2
http://www.starrland.com/Supercharge...%202-22-08.pdf
Some visuals:
http://jobyteknik.homeip.net/corvett...arger_rebuild/
And how NOT to do it, you will notice how he destroyed the inner output shaft bearing because he allowed it to interfere with the large gear:
http://forums.corral.net/forums/show...=780865&page=2
-a lot of good info hear-
Senior Member
SL Member
Joined: Feb 2008
Posts: 552
From: San Jose, CA
Wasn't quite sure the best place to put this but wanted it out there for guys who may be having issues with slipping belts. I used this stuff on my belt and it is like glue. I got a little bit of it on my paint and I had to use 4 applications of tar and bug remover to get it off. I am going to order a second bottle to make sure I have plenty on hand.
http://www.realspeedautomotive.com/psi-ib.html

http://www.realspeedautomotive.com/psi-ib.html