
How-to: Install front coaxial speakers

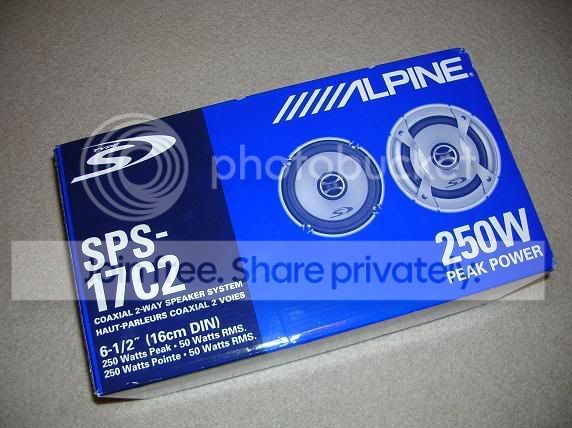
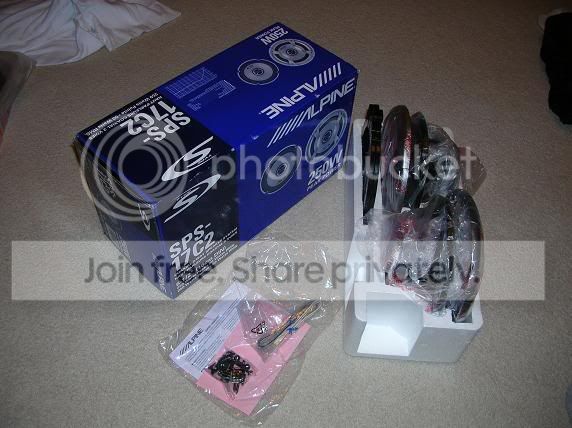
I thought it was rather ridiculous that no one had created a how-to for swapping the stock front speakers for aftermarket ones, as speakers are a common way to enhance sound quality. So, I documented my own journey as I replaced the stockers with a pair of 6.5" Alpine SPS-17C2 aftermarket units. Please note that this is merely a guide for your efforts, and that I am not an audio pro in any way, shape, or form. If you attempt this install realize that if you mess up, it is on you to fix it! I am not responsible for any damage you may inflict on your car, speakers, or person while you do this.
With that aside, let us begin our process.
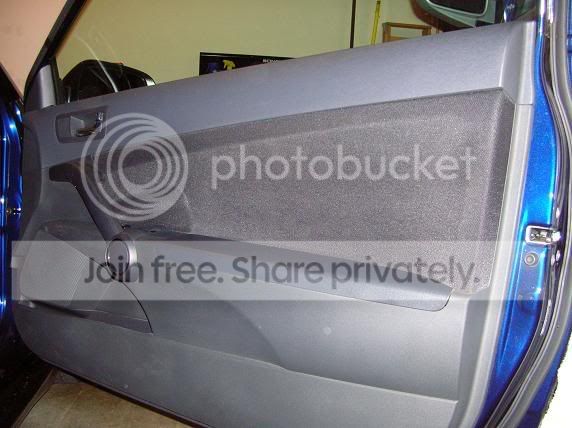
Section 1: Door Panel Removal
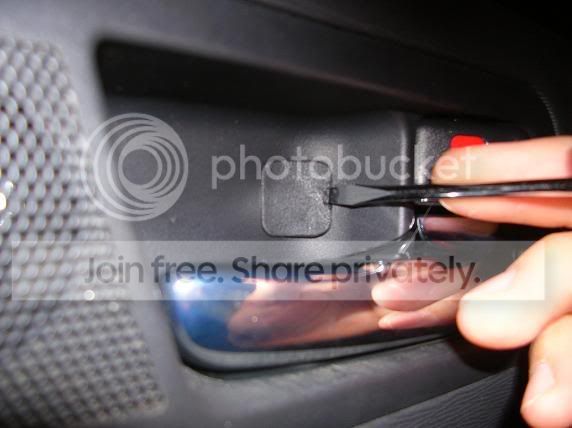
The door panels of our car don't put up much of a fight. They're held in by a total of 3 screws and 16 snapping clips. Start off by using your fingernails to pull the front half of the door handle away from the door, starting at the non-circular end and moving towards the circle.

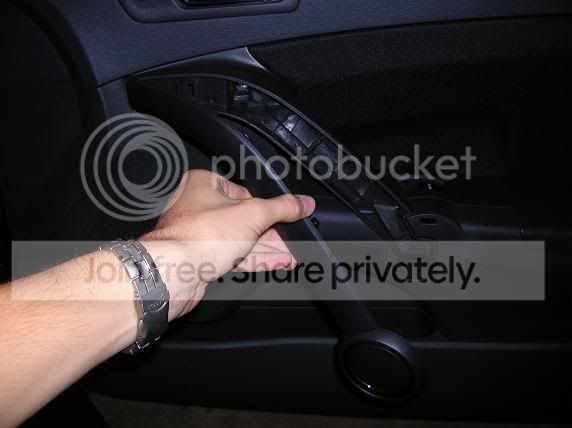
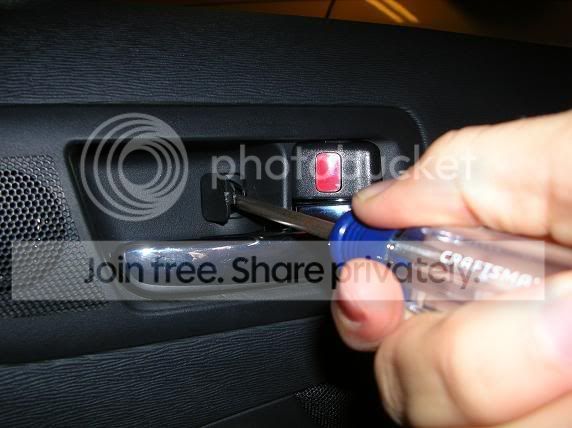
With the handle off, two Phillips head screws will be exposed; one is at the front of the handle (toward the engine), the other at the rear, sunk in.
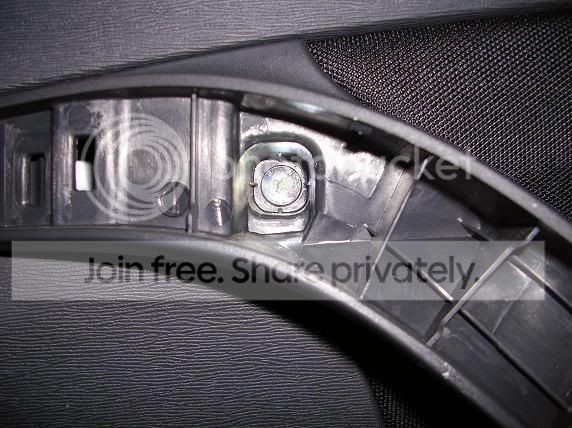

After you remove those, address the smaller Phillips head screw behind the little sneak panel at the door handle.
With the 3 screws removed, it's time to unsnap this bad boy. Start at the bottom of the door, at the corner closer to the engine. Pull firmly and it should pop out without much fuss. Work out hands around the bottom of the door, then up the back edge, then move to the front, above the handle, and it will pop free.


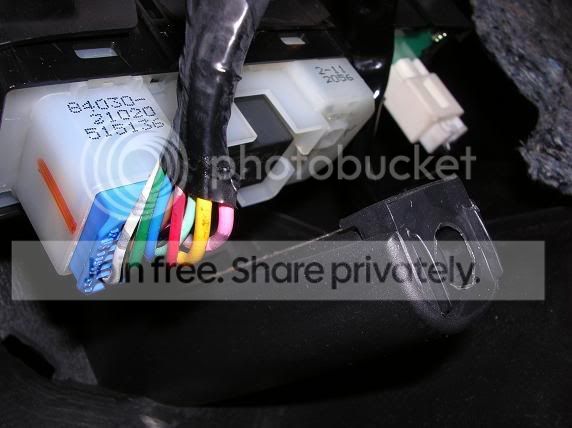
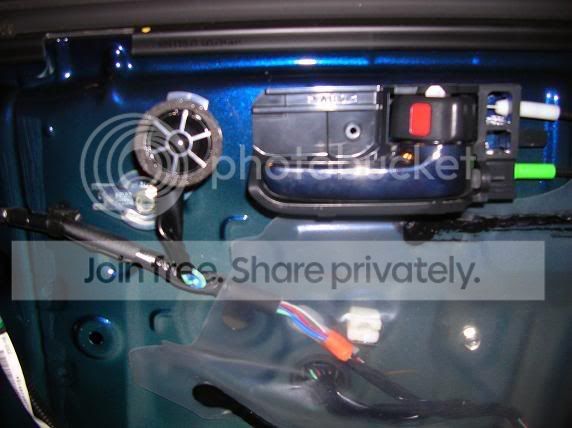
The window and door lock controls are connected via harness. I stuck the camera down and got a 'looking-up' view of the plugged in connectors. The passenger side (pictured) has two small harnesses that are simply popped out, while the driver's side has one larger one.
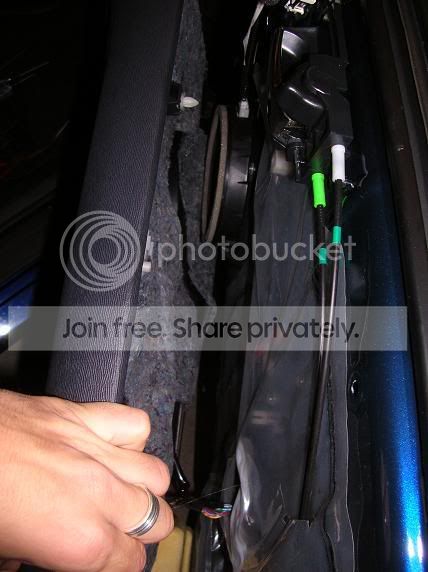
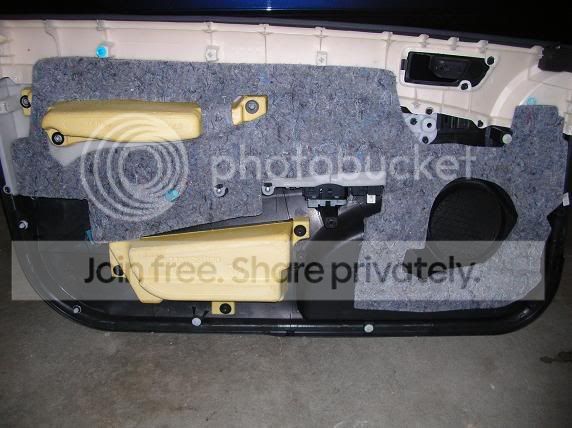
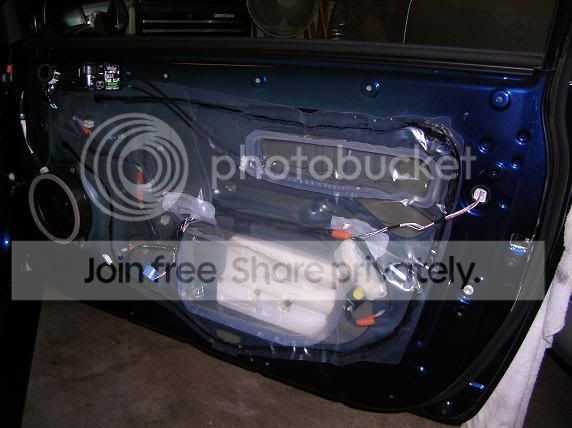
The door should be free. Here's the back side of the panel, and the new exposed door.
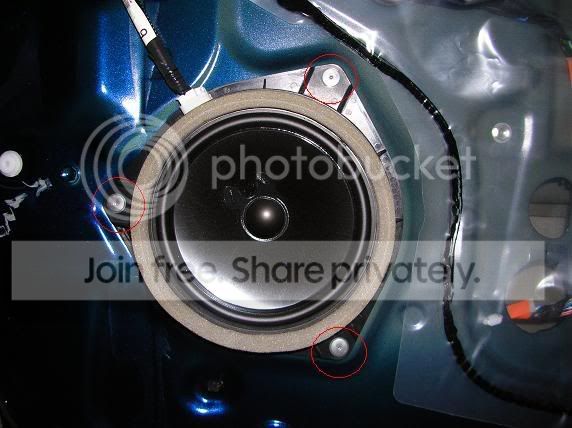
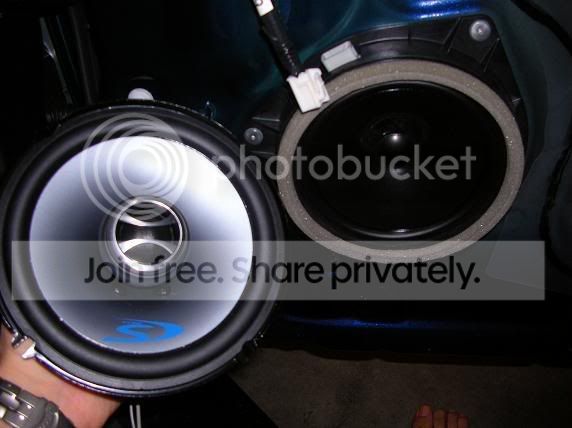
Here's a look at the dumb stock speaker and the factory tweeter.
Section 2: Removing the Stocker
The first picture of the stock speaker has the rivets circled in red. Why they didn't just make the dumb speakers screw in is beyond me. Instead, they used metal-plastic rivets to make this install a pain in the butt. Before we get to the speaker removal, let us take a look at the stock speaker-bracket unit.

As you can see, the distance between the face of the speaker and the metal of the door is 1 inch. That is why 3/4" to 1" MDF brackets have to be either fabbed up or bought.
I didn't get pictures of the next part, but you'll need to get a nice drill and drill out the rivets. In my case, the metal head was ripped off by the drill. After that the speaker could be pried from the door. I used a small flathead screwdriver to get right behind each rivet, then rotated it to push the speaker away from the door. After the speaker comes off with a moderate amount of force, the rivet bodies will need to be removed. You can drill them, pull on them with pliers, use a punch and hammer, or use a combination of the three. With all 6 rivets (3 per side) only a bad memory, it's time to fab up the MDF mounts.
Section 3: Making MDF Mounts
You can go two ways with this: you can either buy some very nice premade mounts, or make your own out of 3/4" thick MDF (medium-density fiberboard). If you aren't too keen on fabricating, check out
http://www.yoursciontc.com/forums/in...showtopic=5506 and
http://www.edesignaudio.com/edv2/pro...products_id=76 .
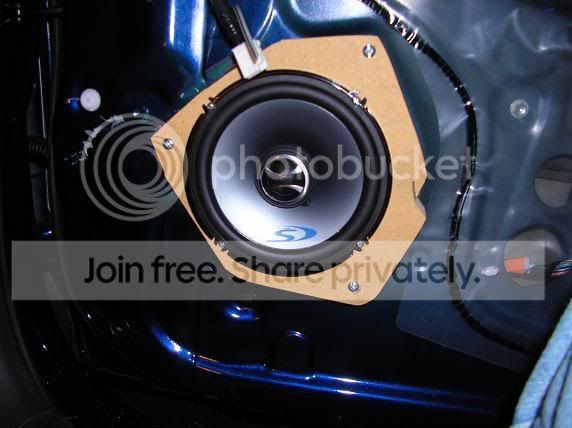
If you're more hands-on and feel like saving a few bucks, read on. Use the stock speaker as a trace guide.
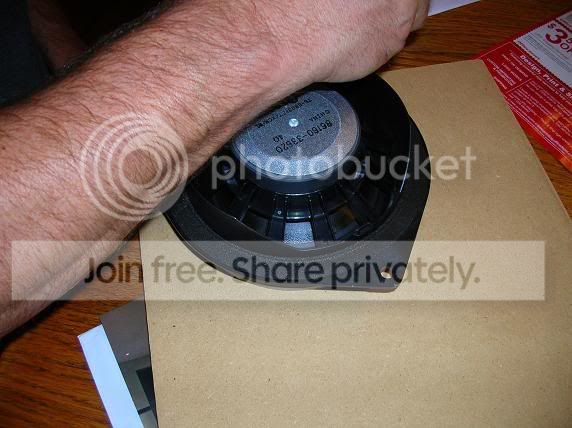
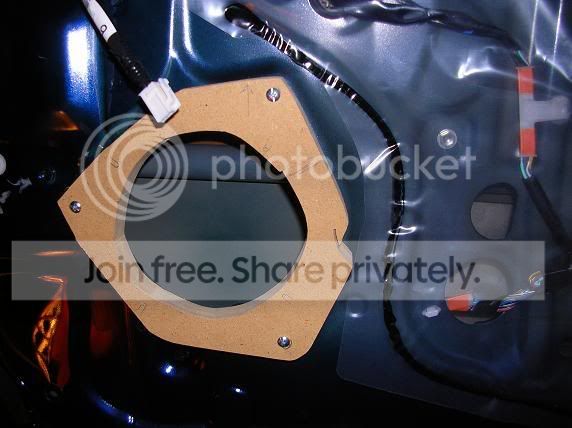
Use some sort of woodcutting device (I used a jigsaw) to cut the MDF to the traced shape. The shape of the hole for my new speaker was determined by the Alpine-provided mount bracket. In my case, we drilled three holes in the MDF bracket that lined up with the metal mounts of the door; we mounted the bracket first, with nuts and bolts (1.25" length I believe), then used four screws to secure the speaker directly to the MDF. It is important to note that the wires on the new speaker need to escape from beneath the MDF in some way; we drilled a hole to run them in the thin side of the MDF, as you will see in a picture below.
Passenger side:
Driver's side:
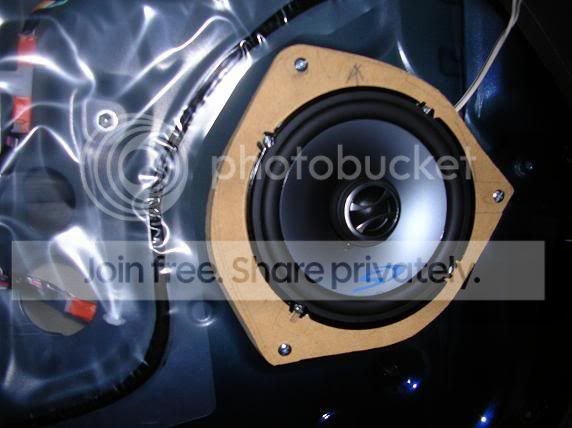
Obviously I'm no master craftsman when it comes to MDF. Luckily, you don't have to be for this project. The speaker wires can be seen escaping the MDF in that last picture; hopefully you can see what I meant by drilling a hole for the wires in the MDF.
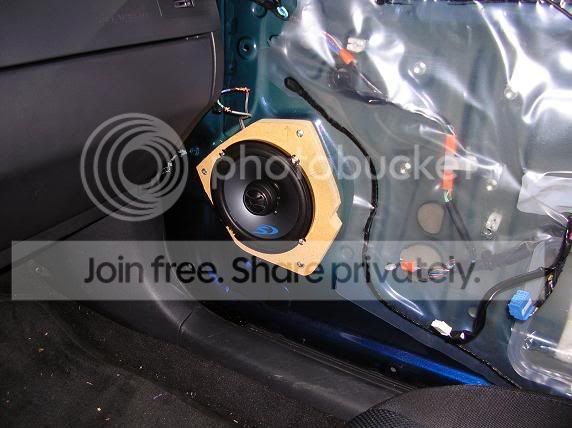
I forgot to put the cute Alpine speaker decoration-grille deals on the speakers when I screwed them in, but I don't mind. You won't either, because the speakers are practically invisible behind the door panels.
Section 4: Reconnection and Reassembly
After you've cranked the nuts and bolts between the MDF and the door tight, then screwed down the speaker very snugly so that nothing moves or even looks like it'd want to rattle, you can connect the stock speaker wires (in a harness) to the new speaker wires. For the car's harness:
Left speaker:: Pink + / Purple -
Right speaker:: Light Green + / Blue -
Solder them, tape them, do what you will. Go ahead and test them to make sure that everything's fine and dandy. When all is well, replace the door panels. I found that the best way was to reconnect the harnesses (it's an awkward manuever), then orient the panel using the door handle. The easiest clips to pop back in are along the back side of the door, nearer to the handle. Just push and snap everything along the borders back into place. Then replace the screws, and snap on the handle.
The speakers should be all but invisible behind the stock grating and stuff, but if you use a camera with flash you will see this:

The MDF is impossible to see without flash, so don't worry. With your new sound system you'll be the envy of everyone around you, no matter how cool they think they are. :D

You're done! Enjoy them!
Obviously, there's more than one way to approach this install. You can mount the speakers in any number of ways, MDF was what I read about on SL and I can recommend it to you for this application. Speakers are all a little different in their mounting methods as well, and you'll need to adjust accordingly.
I came across an issue with the factory tweeter. The Alpine packaging warns against running the stock tweeter with the aftermarket woofer and tweeter; I was fine with that, and disconnected the harness that runs directly to the tweeter before I turned on the speakers for the first time. It took a few minutes of non-working new speakers to realize that the harness leading to the stock tweeter has to be hooked up to run the entire front speakers. I'm not good with audio stuff at all, so I don't know how bad it is to run multiple tweeters, but I also don't know how to unhook the factory one while retaining front speaker function.
I've been told that running all-new speaker wiring will solve that problem, but again, I don't know how to wire everything and I wouldn't really know where to start with that. I wanted drop-in replacements for the stock units, and that's what I finished with. The new Alpines sound great in combination with my also recently-installed Pioneer DEH-P6800MP head unit.
If you are intimidated by this install, just realize that I have never been an audio guy. Until Christmas, I despised all wiring and hated audio stuff, and didn't understand it. I'm slowly learning, and I managed to wire and install both a new head unit and new speakers-- there's a good chance that with patience (and your girlfriend's dad's good tools) you can do this yourself.
If anyone has any questions, suggestions, corrections, or recommendations of a better/alternate method, feel free to post them up for everyone's benefit.
With that aside, let us begin our process.
Section 1: Door Panel Removal
The door panels of our car don't put up much of a fight. They're held in by a total of 3 screws and 16 snapping clips. Start off by using your fingernails to pull the front half of the door handle away from the door, starting at the non-circular end and moving towards the circle.
With the handle off, two Phillips head screws will be exposed; one is at the front of the handle (toward the engine), the other at the rear, sunk in.
After you remove those, address the smaller Phillips head screw behind the little sneak panel at the door handle.
With the 3 screws removed, it's time to unsnap this bad boy. Start at the bottom of the door, at the corner closer to the engine. Pull firmly and it should pop out without much fuss. Work out hands around the bottom of the door, then up the back edge, then move to the front, above the handle, and it will pop free.
The window and door lock controls are connected via harness. I stuck the camera down and got a 'looking-up' view of the plugged in connectors. The passenger side (pictured) has two small harnesses that are simply popped out, while the driver's side has one larger one.
The door should be free. Here's the back side of the panel, and the new exposed door.
Here's a look at the dumb stock speaker and the factory tweeter.
Section 2: Removing the Stocker
The first picture of the stock speaker has the rivets circled in red. Why they didn't just make the dumb speakers screw in is beyond me. Instead, they used metal-plastic rivets to make this install a pain in the butt. Before we get to the speaker removal, let us take a look at the stock speaker-bracket unit.
As you can see, the distance between the face of the speaker and the metal of the door is 1 inch. That is why 3/4" to 1" MDF brackets have to be either fabbed up or bought.
I didn't get pictures of the next part, but you'll need to get a nice drill and drill out the rivets. In my case, the metal head was ripped off by the drill. After that the speaker could be pried from the door. I used a small flathead screwdriver to get right behind each rivet, then rotated it to push the speaker away from the door. After the speaker comes off with a moderate amount of force, the rivet bodies will need to be removed. You can drill them, pull on them with pliers, use a punch and hammer, or use a combination of the three. With all 6 rivets (3 per side) only a bad memory, it's time to fab up the MDF mounts.
Section 3: Making MDF Mounts
You can go two ways with this: you can either buy some very nice premade mounts, or make your own out of 3/4" thick MDF (medium-density fiberboard). If you aren't too keen on fabricating, check out
http://www.yoursciontc.com/forums/in...showtopic=5506 and
http://www.edesignaudio.com/edv2/pro...products_id=76 .
If you're more hands-on and feel like saving a few bucks, read on. Use the stock speaker as a trace guide.
Use some sort of woodcutting device (I used a jigsaw) to cut the MDF to the traced shape. The shape of the hole for my new speaker was determined by the Alpine-provided mount bracket. In my case, we drilled three holes in the MDF bracket that lined up with the metal mounts of the door; we mounted the bracket first, with nuts and bolts (1.25" length I believe), then used four screws to secure the speaker directly to the MDF. It is important to note that the wires on the new speaker need to escape from beneath the MDF in some way; we drilled a hole to run them in the thin side of the MDF, as you will see in a picture below.
Passenger side:
Driver's side:
Obviously I'm no master craftsman when it comes to MDF. Luckily, you don't have to be for this project. The speaker wires can be seen escaping the MDF in that last picture; hopefully you can see what I meant by drilling a hole for the wires in the MDF.
I forgot to put the cute Alpine speaker decoration-grille deals on the speakers when I screwed them in, but I don't mind. You won't either, because the speakers are practically invisible behind the door panels.
Section 4: Reconnection and Reassembly
After you've cranked the nuts and bolts between the MDF and the door tight, then screwed down the speaker very snugly so that nothing moves or even looks like it'd want to rattle, you can connect the stock speaker wires (in a harness) to the new speaker wires. For the car's harness:
Left speaker:: Pink + / Purple -
Right speaker:: Light Green + / Blue -
Solder them, tape them, do what you will. Go ahead and test them to make sure that everything's fine and dandy. When all is well, replace the door panels. I found that the best way was to reconnect the harnesses (it's an awkward manuever), then orient the panel using the door handle. The easiest clips to pop back in are along the back side of the door, nearer to the handle. Just push and snap everything along the borders back into place. Then replace the screws, and snap on the handle.
The speakers should be all but invisible behind the stock grating and stuff, but if you use a camera with flash you will see this:
The MDF is impossible to see without flash, so don't worry. With your new sound system you'll be the envy of everyone around you, no matter how cool they think they are. :D
You're done! Enjoy them!
Obviously, there's more than one way to approach this install. You can mount the speakers in any number of ways, MDF was what I read about on SL and I can recommend it to you for this application. Speakers are all a little different in their mounting methods as well, and you'll need to adjust accordingly.
I came across an issue with the factory tweeter. The Alpine packaging warns against running the stock tweeter with the aftermarket woofer and tweeter; I was fine with that, and disconnected the harness that runs directly to the tweeter before I turned on the speakers for the first time. It took a few minutes of non-working new speakers to realize that the harness leading to the stock tweeter has to be hooked up to run the entire front speakers. I'm not good with audio stuff at all, so I don't know how bad it is to run multiple tweeters, but I also don't know how to unhook the factory one while retaining front speaker function.
I've been told that running all-new speaker wiring will solve that problem, but again, I don't know how to wire everything and I wouldn't really know where to start with that. I wanted drop-in replacements for the stock units, and that's what I finished with. The new Alpines sound great in combination with my also recently-installed Pioneer DEH-P6800MP head unit.
If you are intimidated by this install, just realize that I have never been an audio guy. Until Christmas, I despised all wiring and hated audio stuff, and didn't understand it. I'm slowly learning, and I managed to wire and install both a new head unit and new speakers-- there's a good chance that with patience (and your girlfriend's dad's good tools) you can do this yourself.
If anyone has any questions, suggestions, corrections, or recommendations of a better/alternate method, feel free to post them up for everyone's benefit.


Junior Member
Joined: Aug 2006
Posts: 7
From: Denton Texas
is it possible to install 6.5's into the xb w/o buying spacers or making them? thank you in avance for any info i've been searching all morning for help on this. I bought a pair of 6/5's just the other day and I am planning to put them ASAP.
Jamie
Jamie


Senior Member
SL Member
Scinergy
Joined: Dec 2007
Posts: 1,139
From: Scion Heaven
Is it best to use nuts and bolts, or screws to affix the mdf board to the door. I have the elemental designs baffle and I'm going to the hardware store after work.
also, what diameter bolts fit the holes where the rivets were?
also, what diameter bolts fit the holes where the rivets were?
Senior Member
SL Member
Joined: Oct 2005
Posts: 309
From: Southwest Houston
Thanks for the DIY. I woke up one morning to discover a medium pizza sized dent on my driver side door. Tried using the ding king on it but sucker wouldn't budge. So girlfriend and I have decided to take the door panel off and push the dent out from the inside. Hopefully I wont fudge this up too bad.

Senior Member

SL Member
Scion Evolution
Joined: Oct 2005
Posts: 5,277
From: Andersen AFB, Guam
Nice diy. Only issue I see is the spacers.
In about 3-6 months they will end up falling apart. MDF is bad to use unless you paint them or treat them. They will get water logged and fall apart.
I will try and find pictures of people it has happened to.
In about 3-6 months they will end up falling apart. MDF is bad to use unless you paint them or treat them. They will get water logged and fall apart.
I will try and find pictures of people it has happened to.
Senior Member
SL Member
Scion Evolution
Joined: Feb 2006
Posts: 566
From: Chicago, IL
Originally Posted by Nick06tC
Nice diy. Only issue I see is the spacers.
In about 3-6 months they will end up falling apart. MDF is bad to use unless you paint them or treat them. They will get water logged and fall apart.
I will try and find pictures of people it has happened to.
In about 3-6 months they will end up falling apart. MDF is bad to use unless you paint them or treat them. They will get water logged and fall apart.
I will try and find pictures of people it has happened to.

