DIY Inner CV Boot replacement (w/pics)
 06-27-2011, 04:00 AM
#1
Senior Member
SL Member
Thread Starter
iTrader: (4)

Join Date: Sep 2007
Location: Baytown, TX
Posts: 442
First of all, mods I apologize for posting in the wrong section. I could not post this in tech and diy section for some reason. But you are more then welcome to move it  I thought this DIY could be helpful to some users on SL.
Second of all,it's not a mystery that folks with slammed tC's or any other overlowered cars frequently replace their axles. Personally, I've had the pleasure of replacing three sets in the time frame of 12 months. Granted,this has cost me a small fortune. Honesty, I'm sick of it! But there is NO way I'm raising my car
The biggest challenge with replacing axles is time and energy, and the quality itself. I've had a sets from car parts discount and cardone and both were a pile of disappointment . All sets were vibrating like crazy, under acceleration, starting to click and leak grease in no time at all. Thus, I've decided to go back to OEM axles. There is no point in replacing an axle if it does not click yet. Changing CV boots is so much easier in my opinion and cheaper too ($150 for both axles vs. $50 for 2 inner boot kits). I strongly suggest you to stay away from cheap remanufactured axles. I'd rather pick up low milege OEM axles, rebuild them and put them in. Normally changing axles requires a bunch of tools, draining your transmission oil, breaking loose axle nuts and pulling out axles. Thats not including cost of damaging something on top of it like seals, drain plugs, bolts, or even worse the differential itself. The passenger's is a cakewalk, on the other hand the driver's side is labor intensive and time consuming
 .
.
So here is a way to get your axles fixed with minimum time,money and tools required and less parts damaged in process of installation. If you have all plastic splash guards removed already, that would make this job even easier.
Tools Needed:
-17mm wrench or socket
-flat-head screwdriver
-needle-nose pliers
-hammer
-torque wrench (optional,but recommended)
-jack and 2 stands
-gloves,paper towels,plastic bags
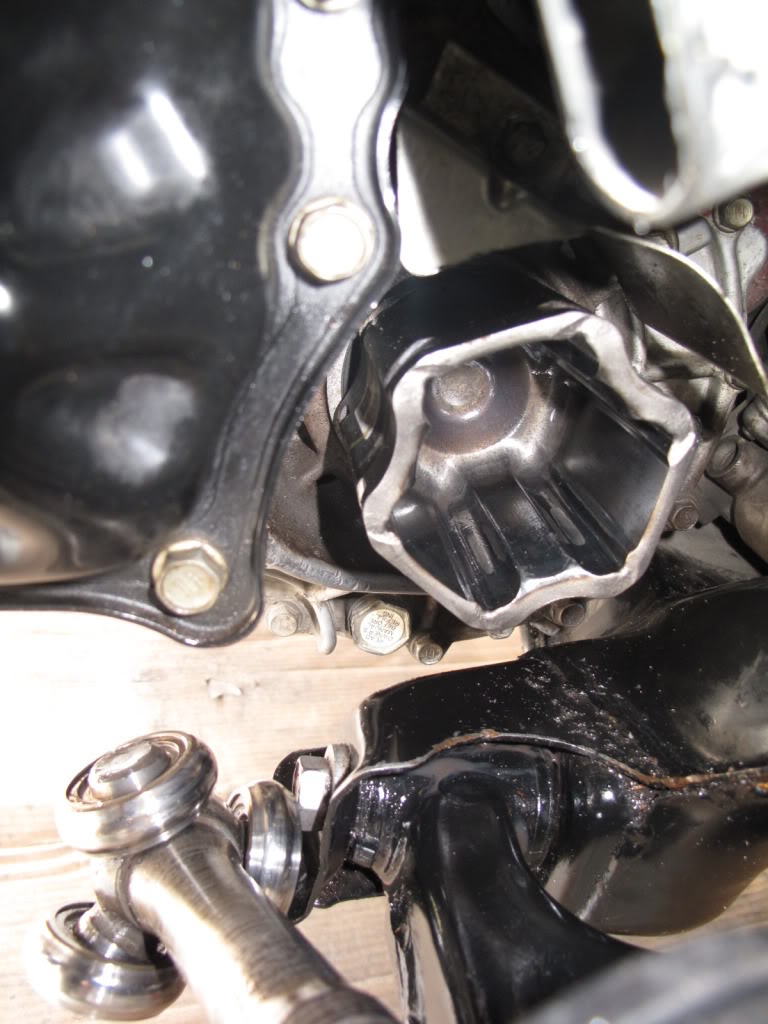
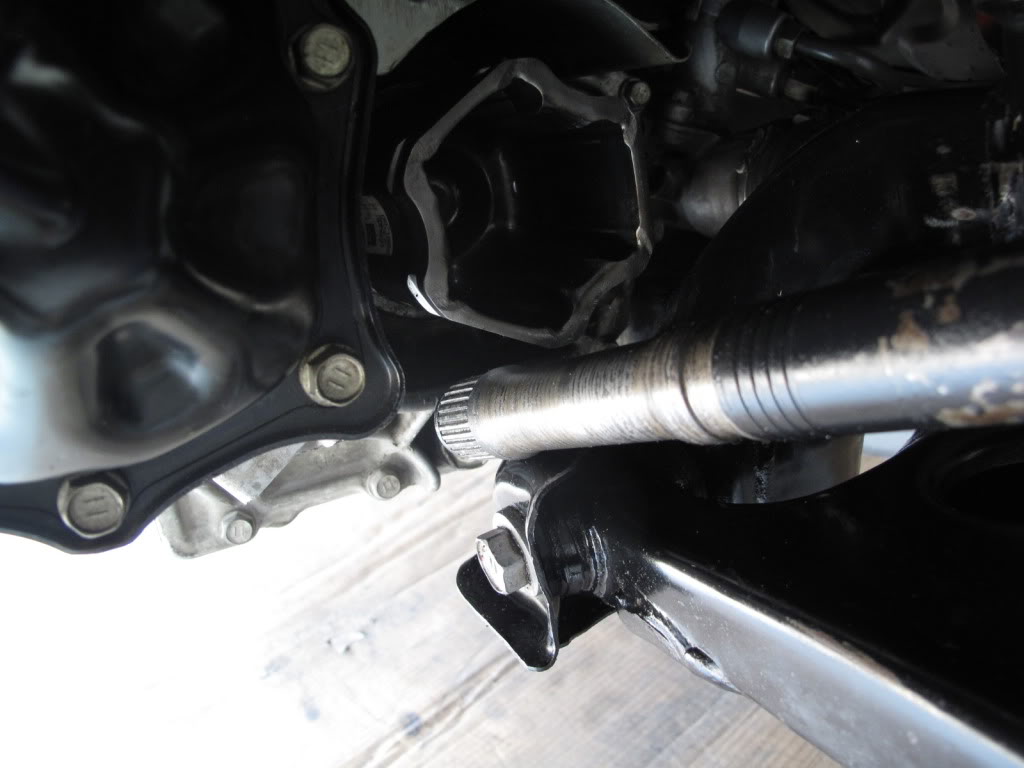
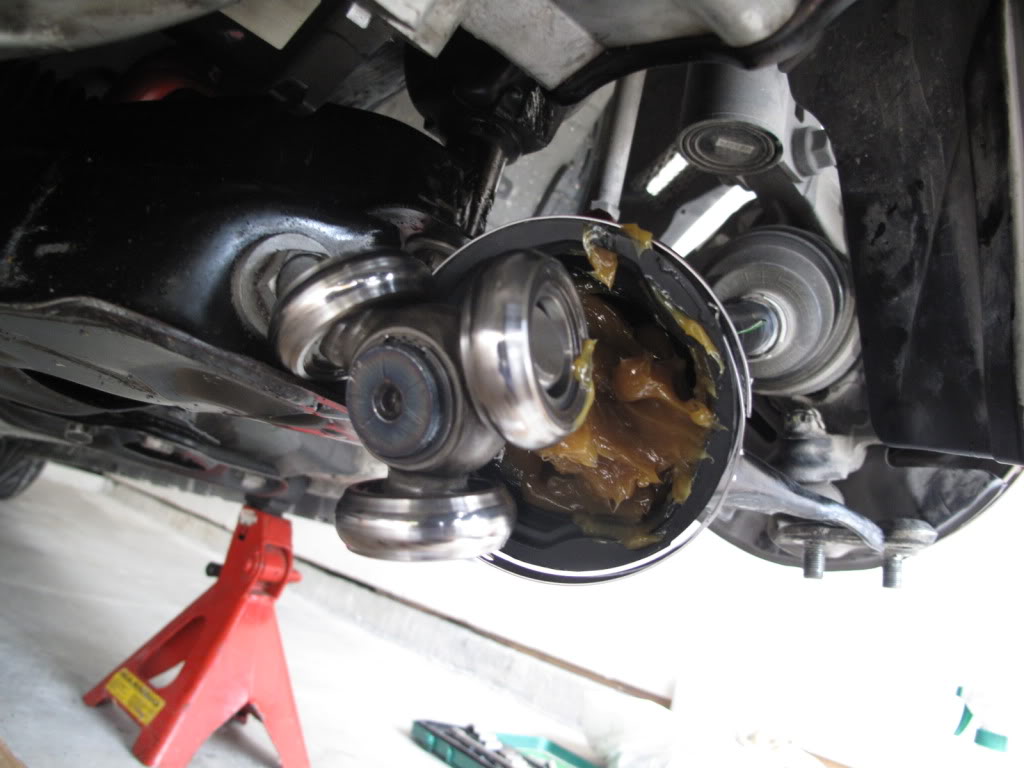
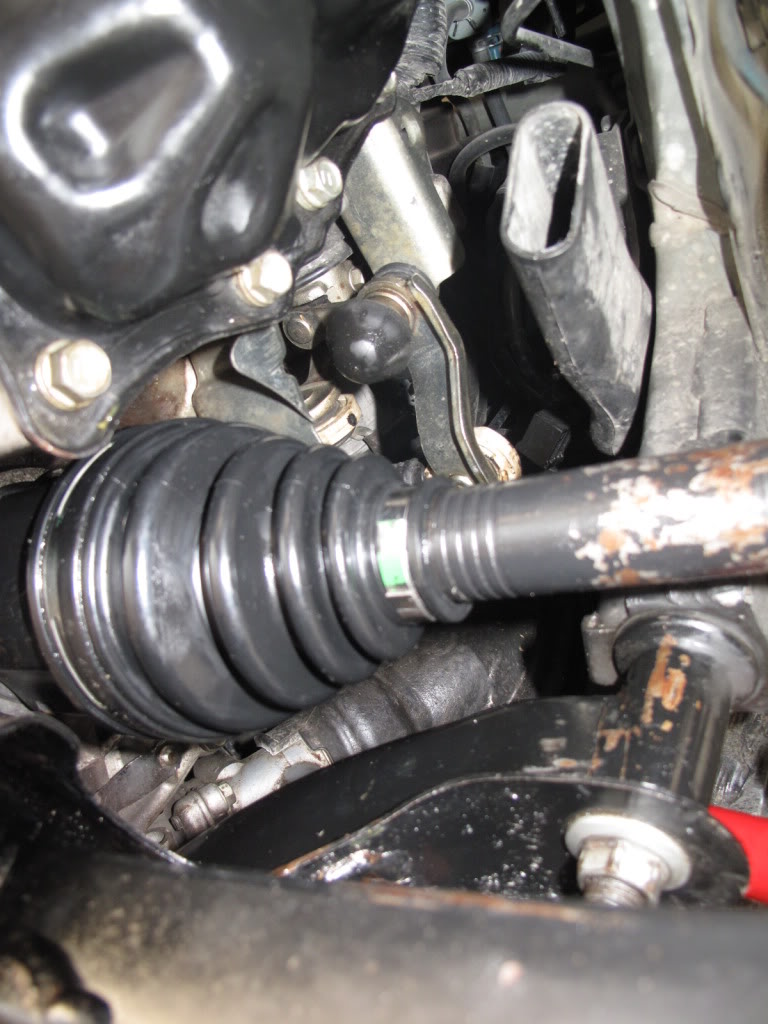
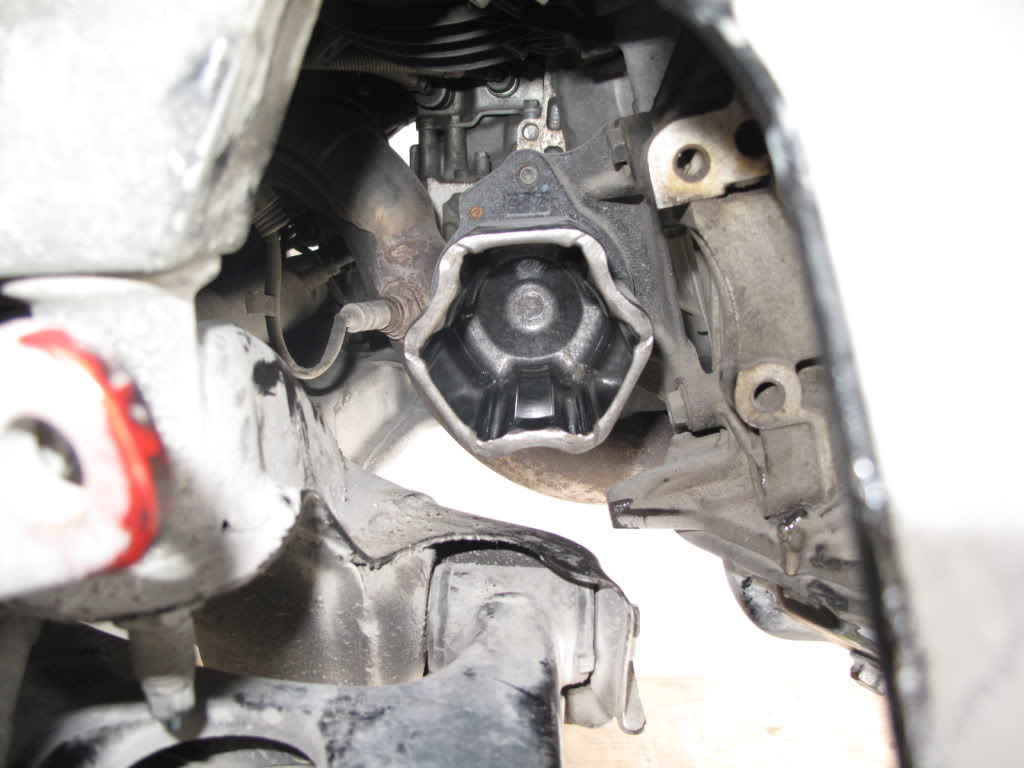
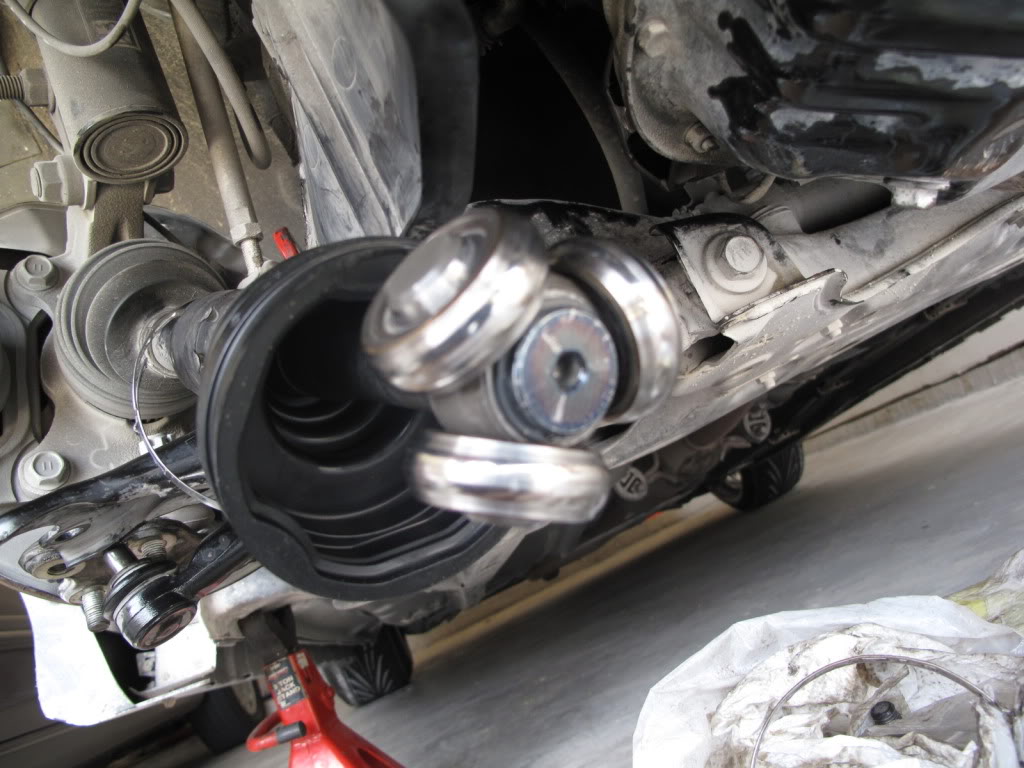
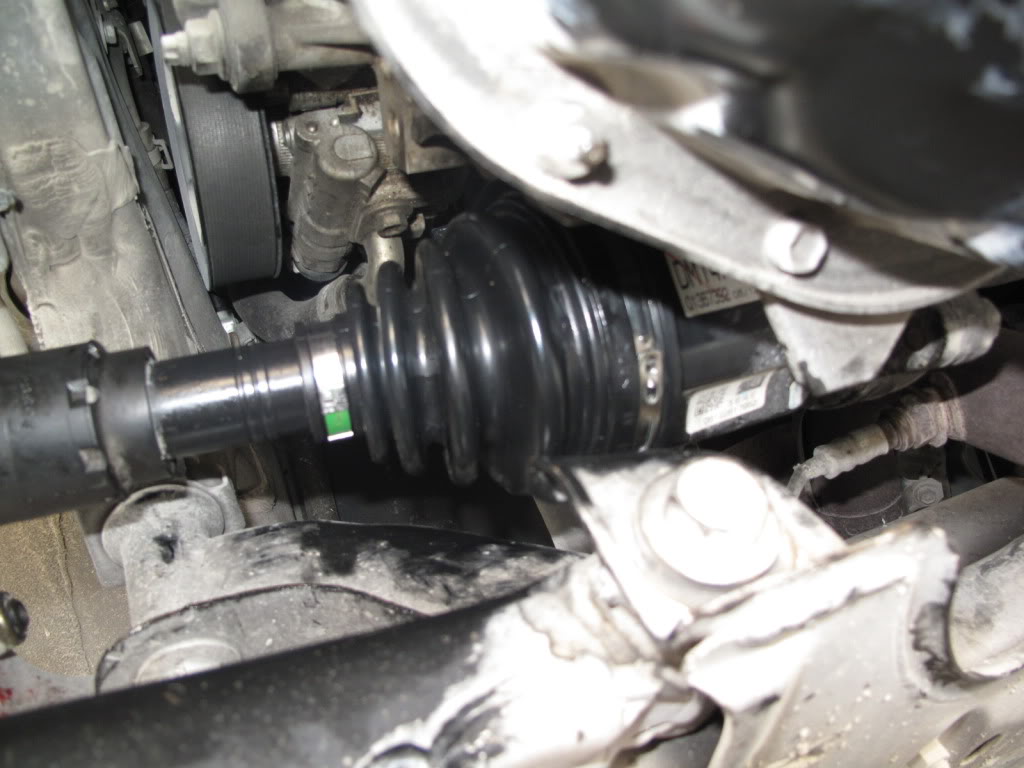
I assume that you have jacked up your tC already and your front wheels are off. Here's what a busted CV boot looks like. .....grease everywhere!
At this point,you should clean the grease up with an all-purpose cleaner (i.e. simple green).

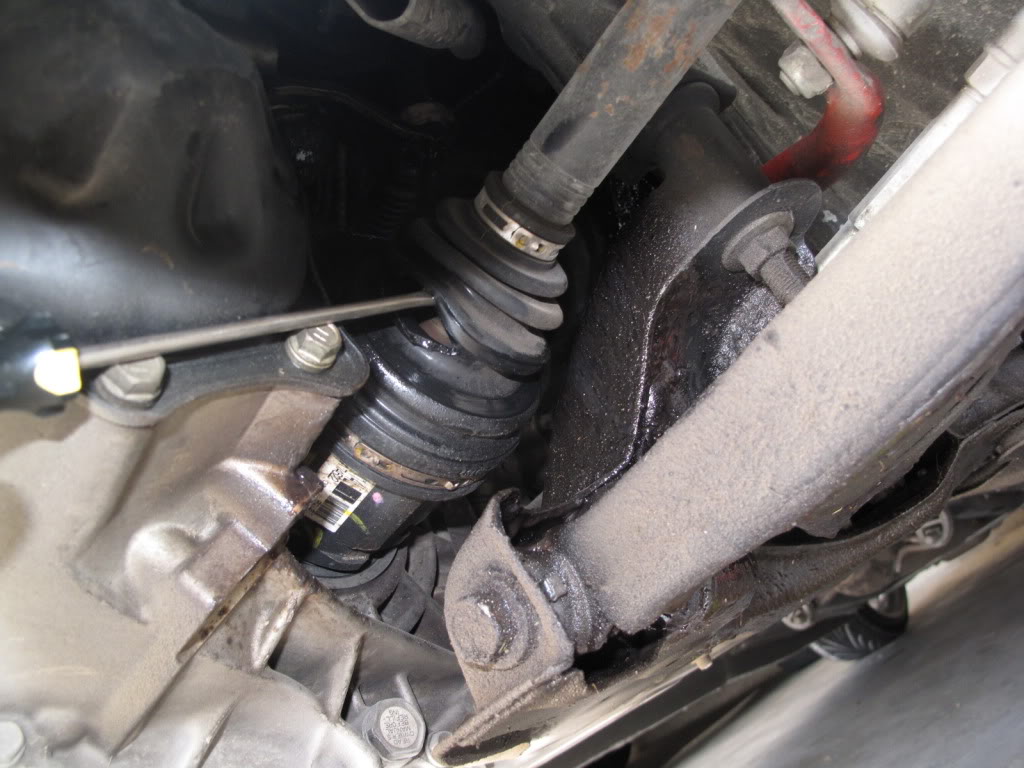
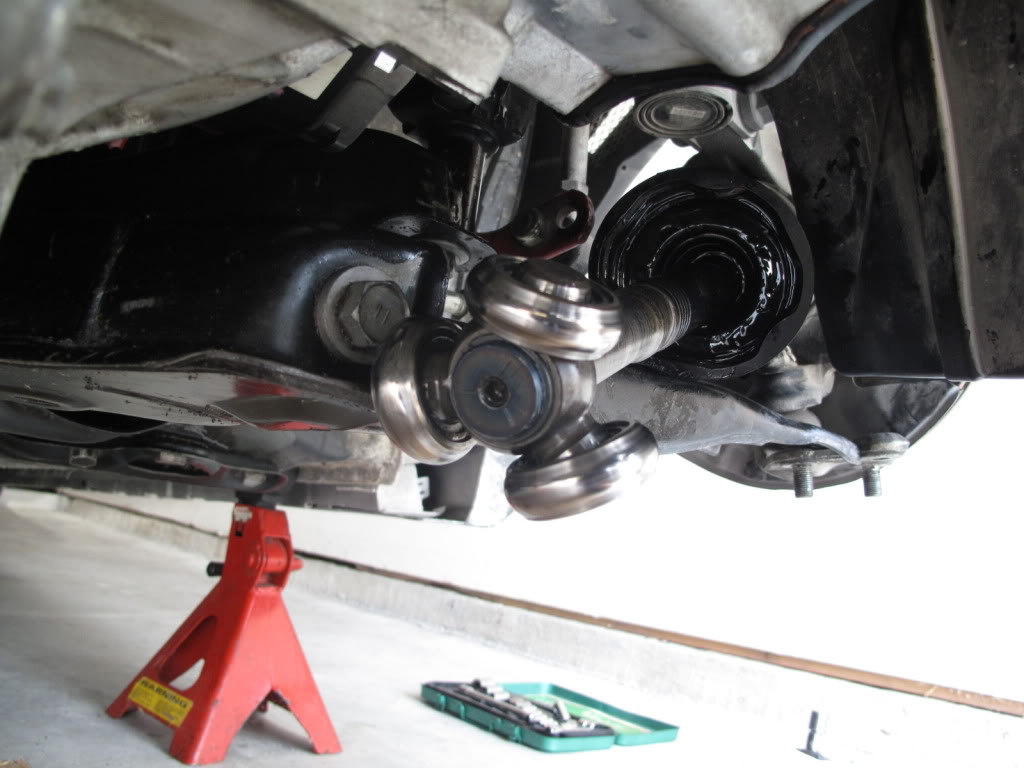
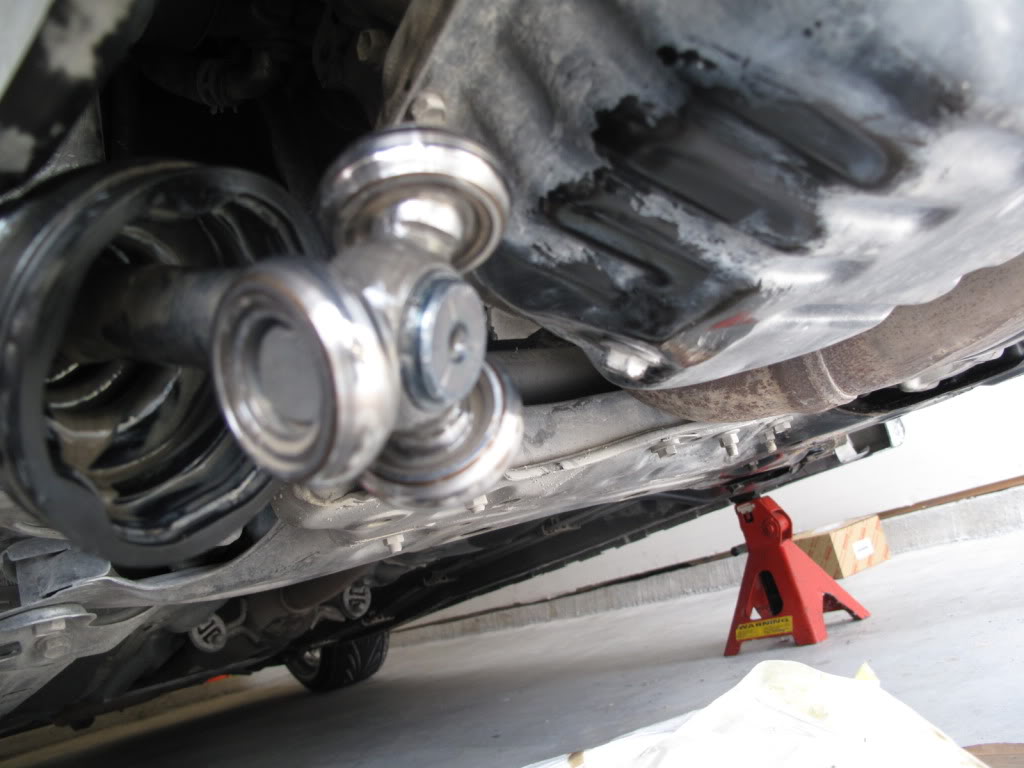
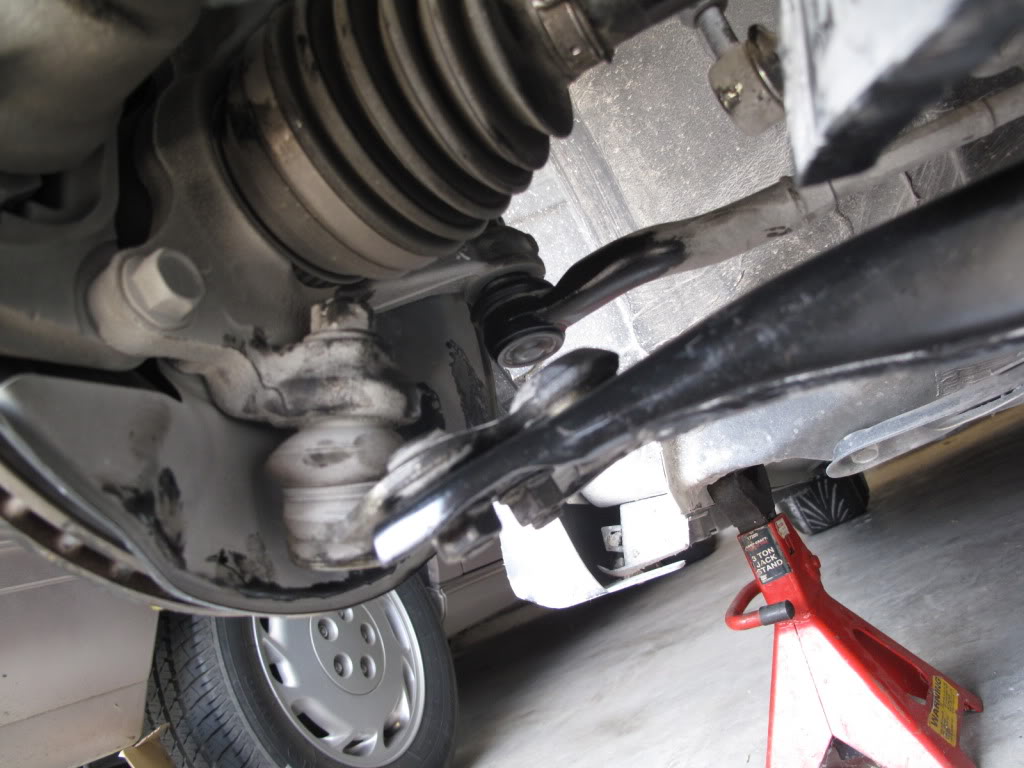
First you need to disconnect tie rod from the steering knuckle. Remove the cotter pin using needle-nose pliers and then get the castle nut off with 17mm wrench/socket. I do not have a special tool for tie rod removal but I strongly recommend you to rent one at autoparts store. It works just like a c-clamp. DO NOT get the one that looks like a fork unless you want to replace your tie rods.
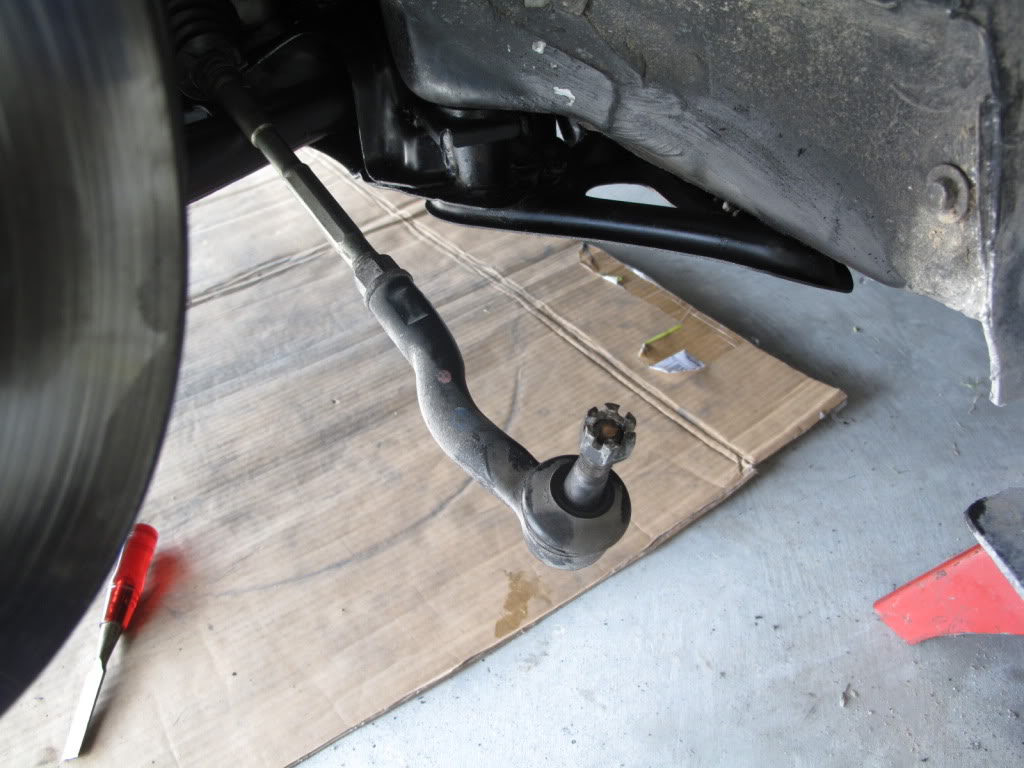
All I had to do is back off the castle nut a little bit until it is flush and hit it with the hammer a couple of times. It came right off. Tie rod is off:
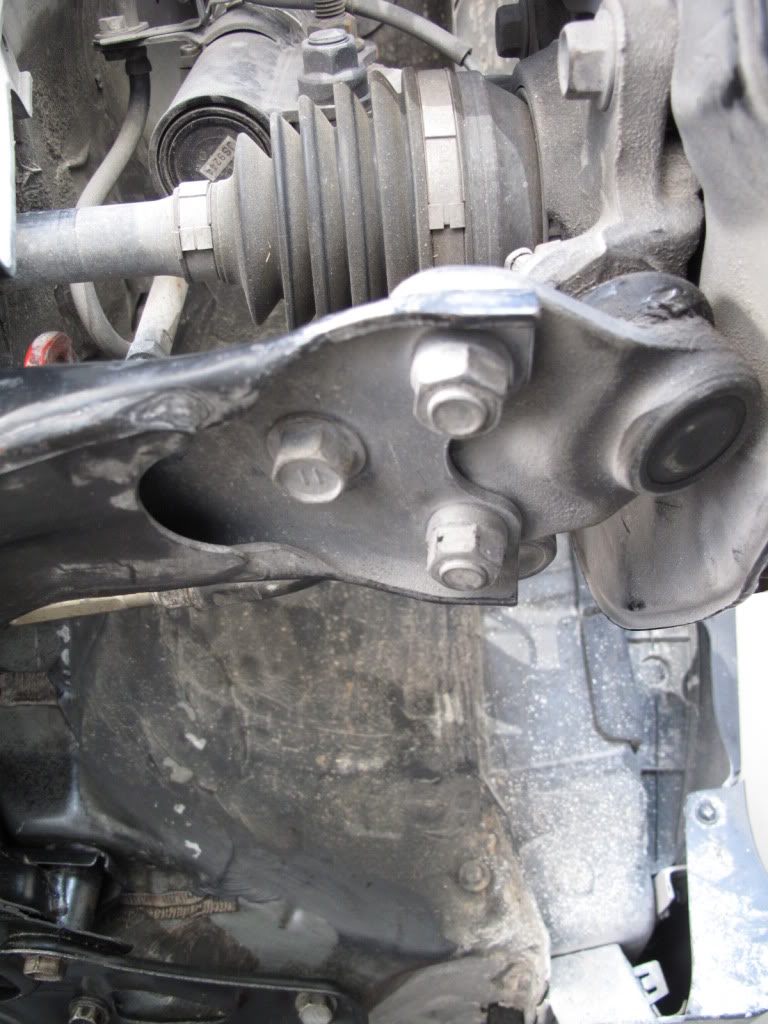
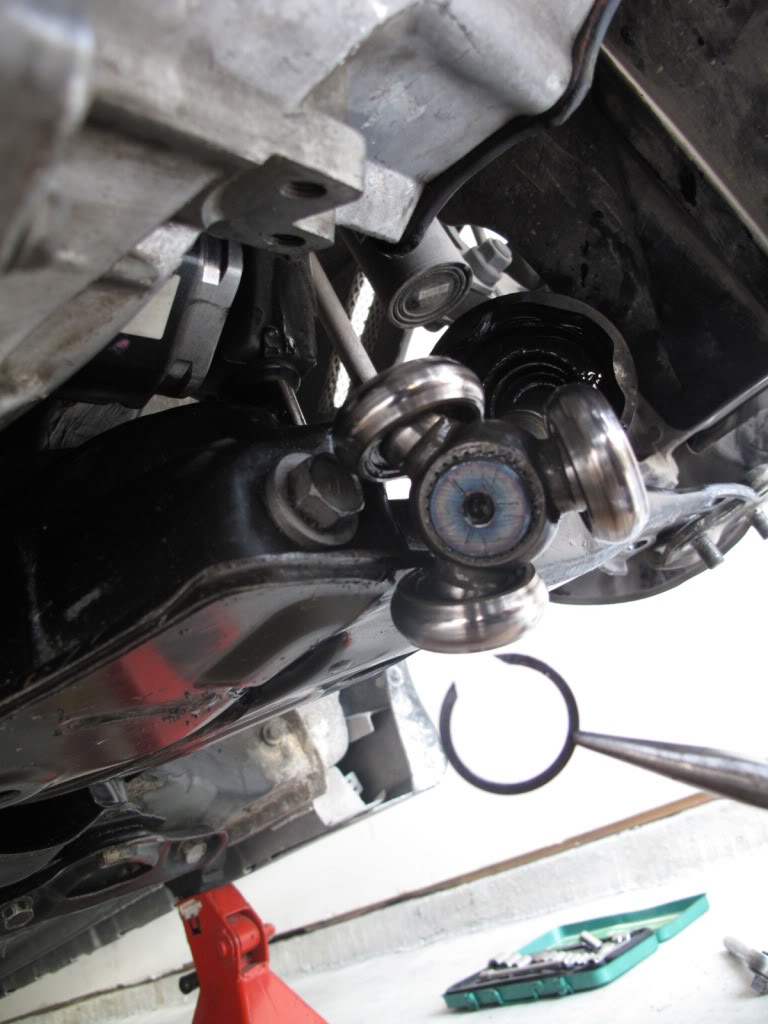
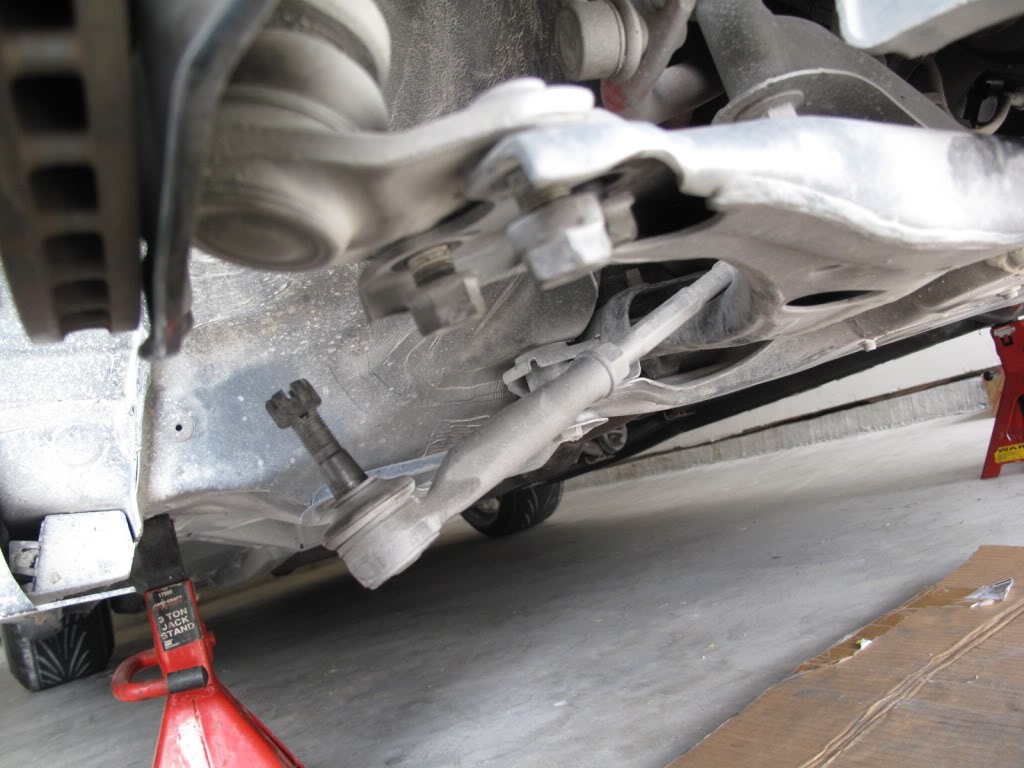
Next step is to disconnect lower ball joint from the lower arm assembly. There is one 17mm bolt and two nuts connecting them together. Go ahead and take them off and then separate lower arm from ball joint. Be careful not to damage ball joint rubber seal. Mine is damaged already as you can see.
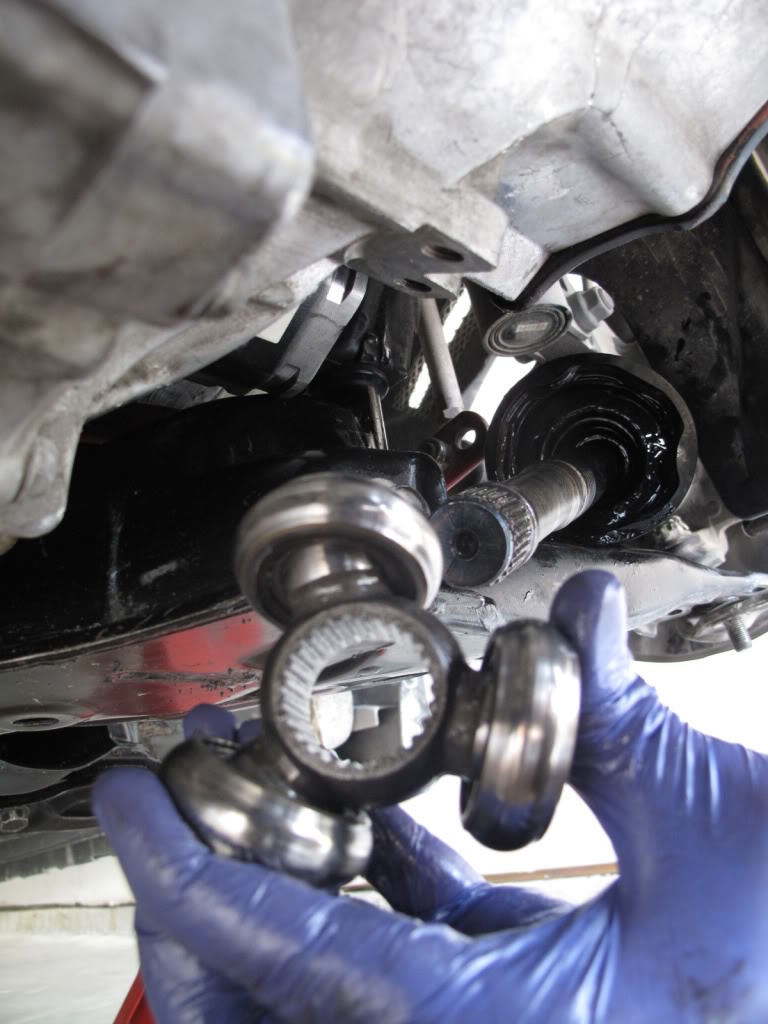
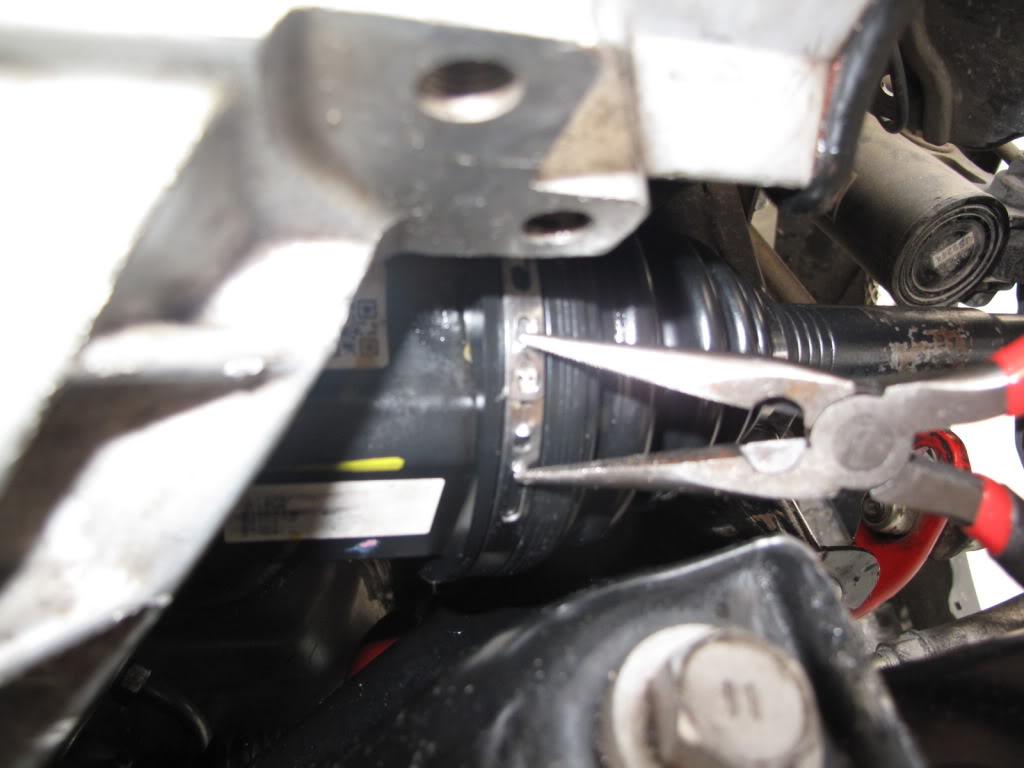
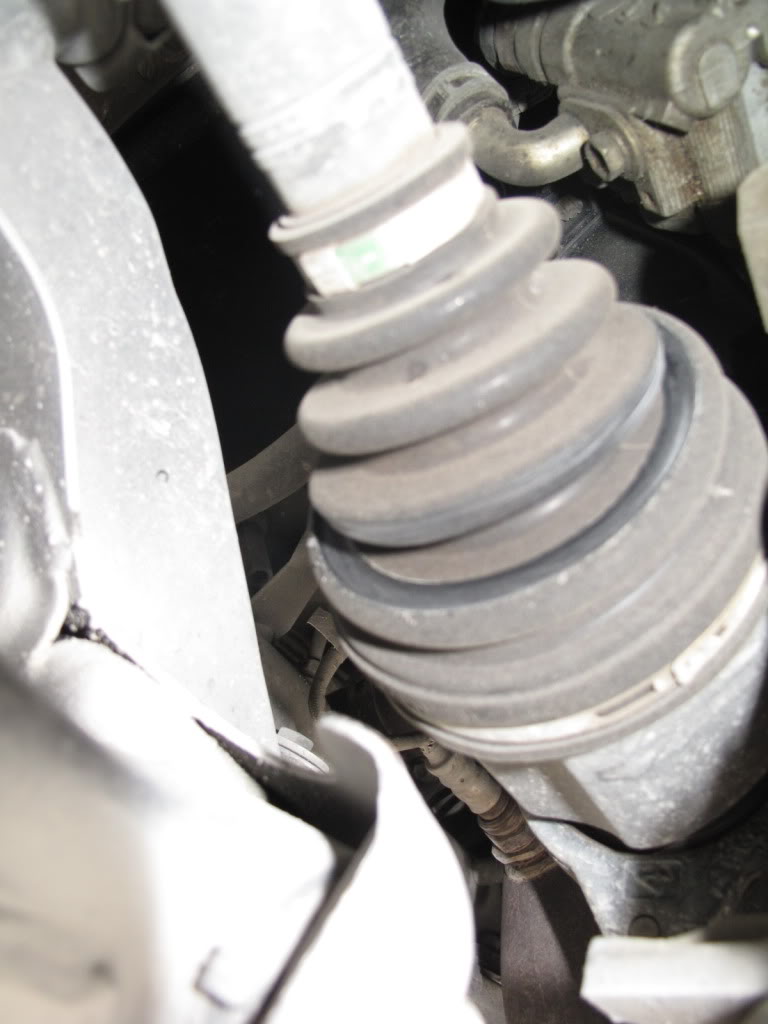
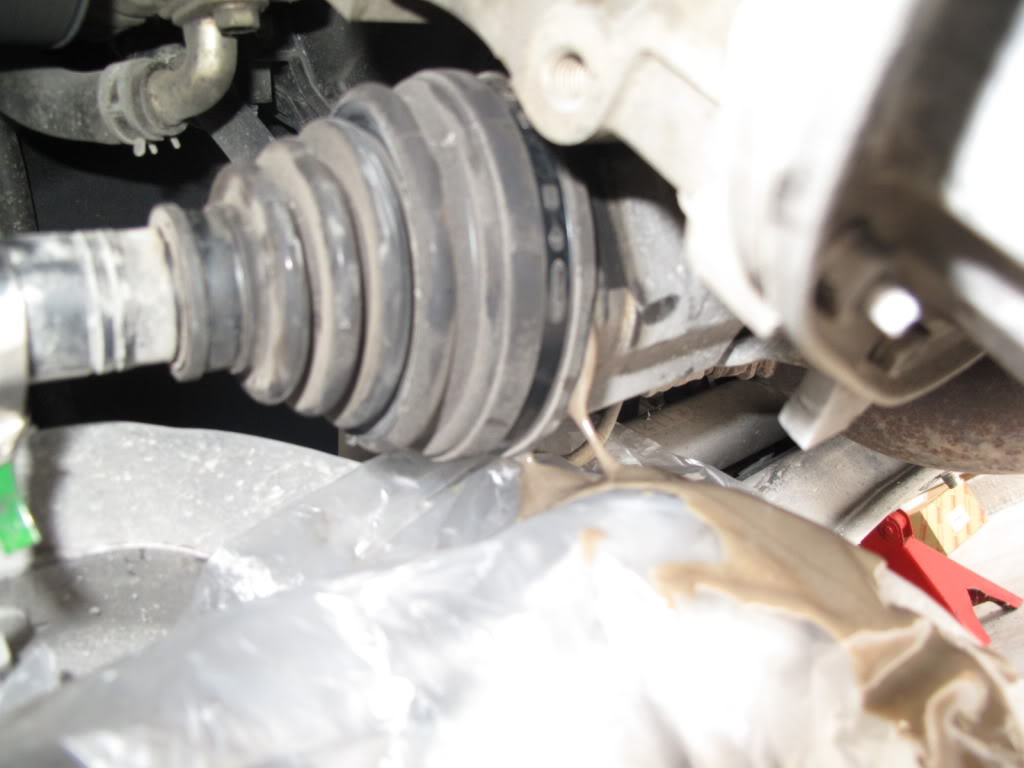
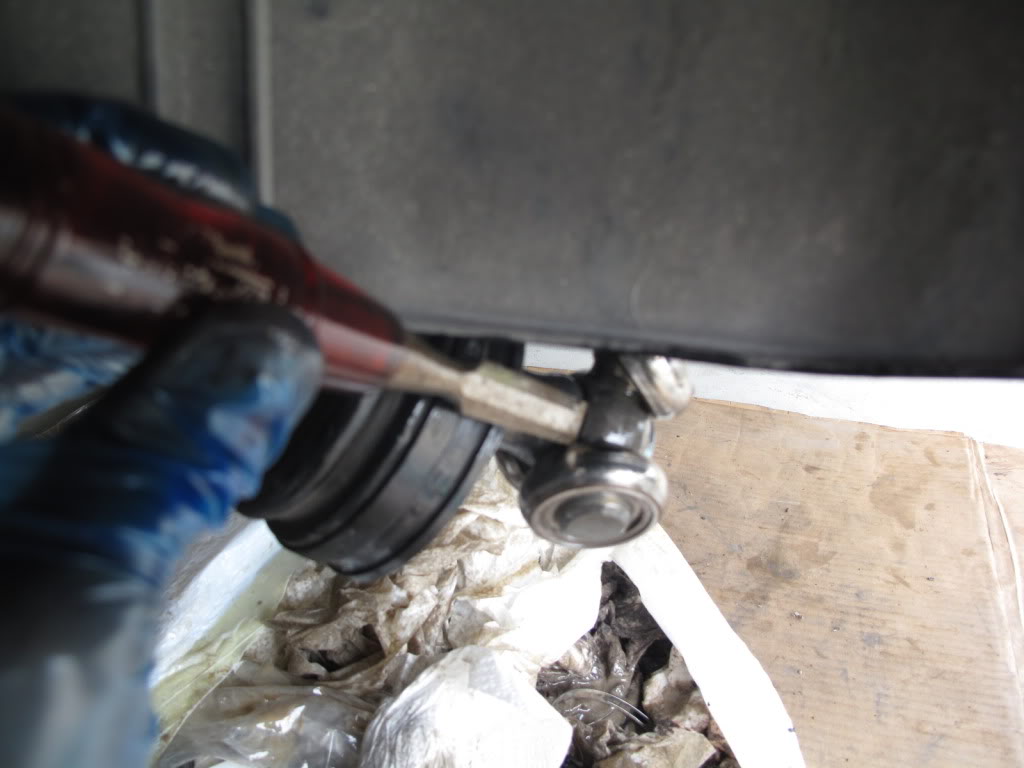
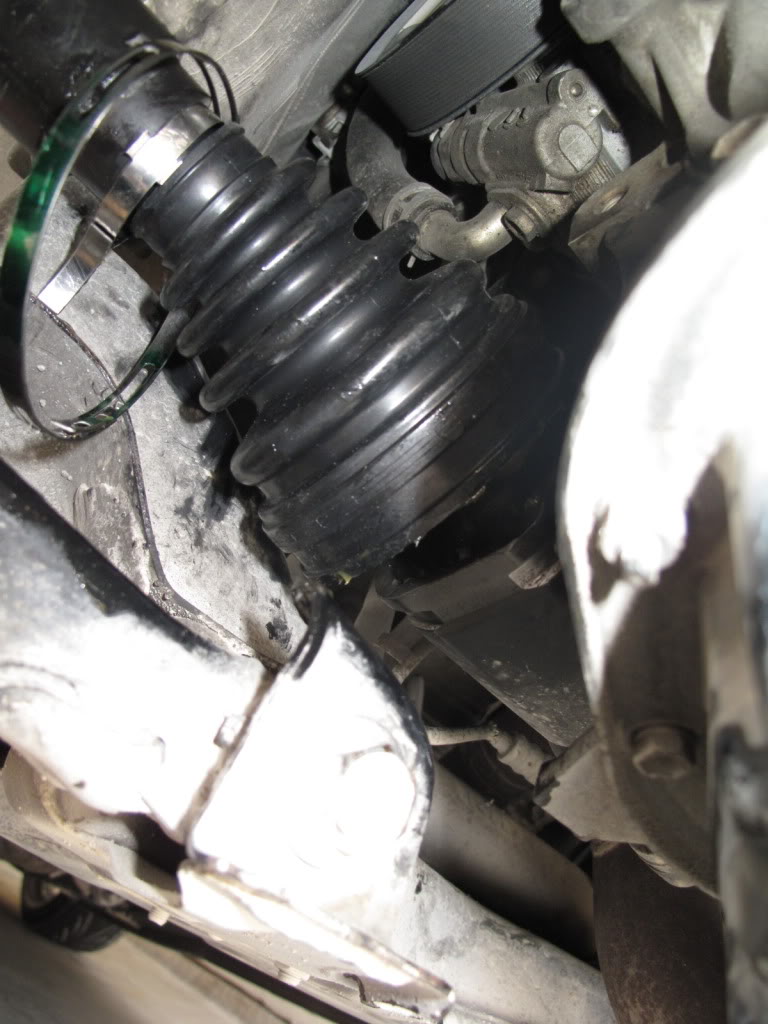
Now it's time to take both of the boot bands off. You can use needle-noise pliers to squeeze the band and screwdriver to pop it loose. Bands on your axles could look different from the ones on the picture. Just find a way to get them off or cut them off.
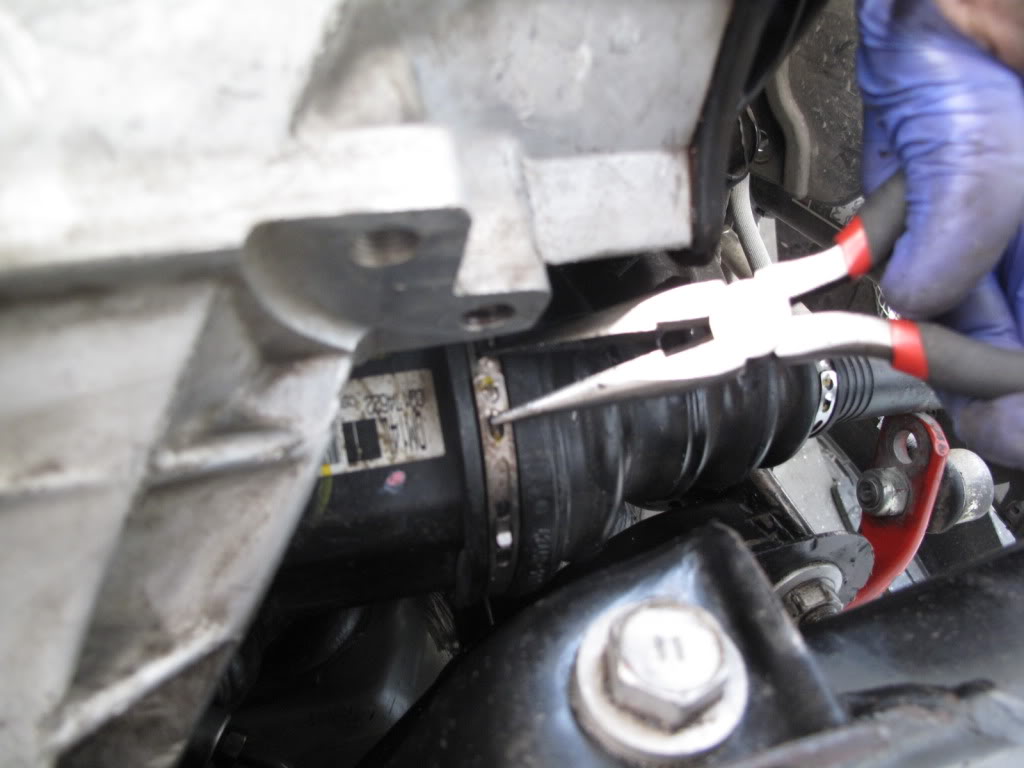
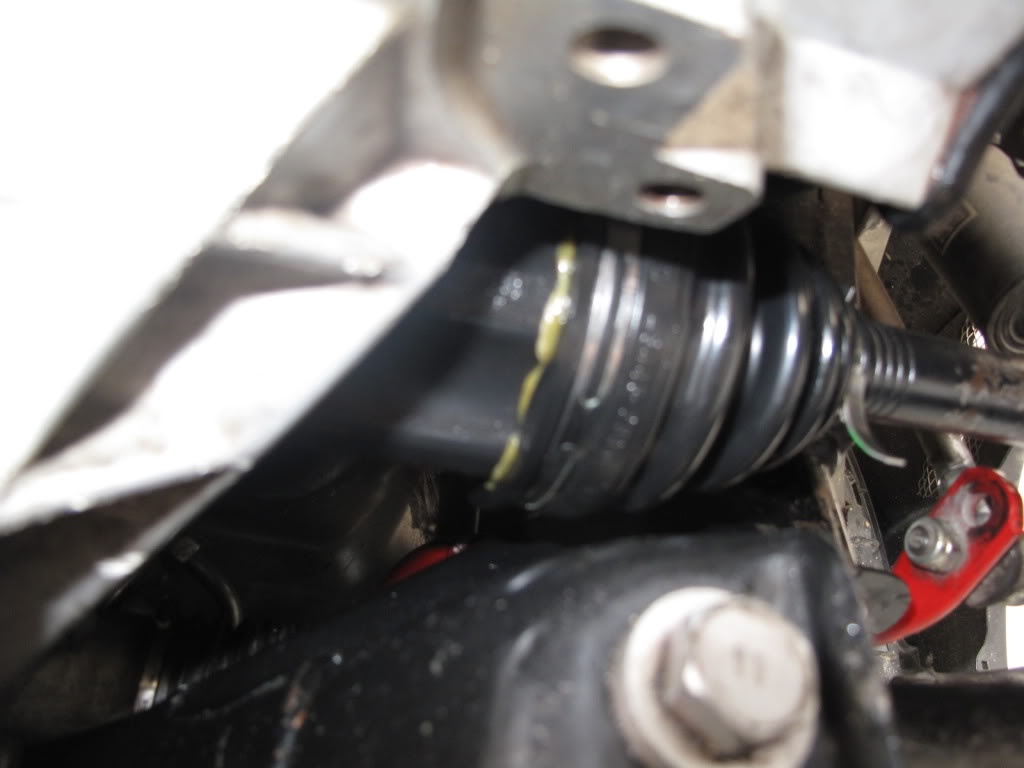
Bands are off:
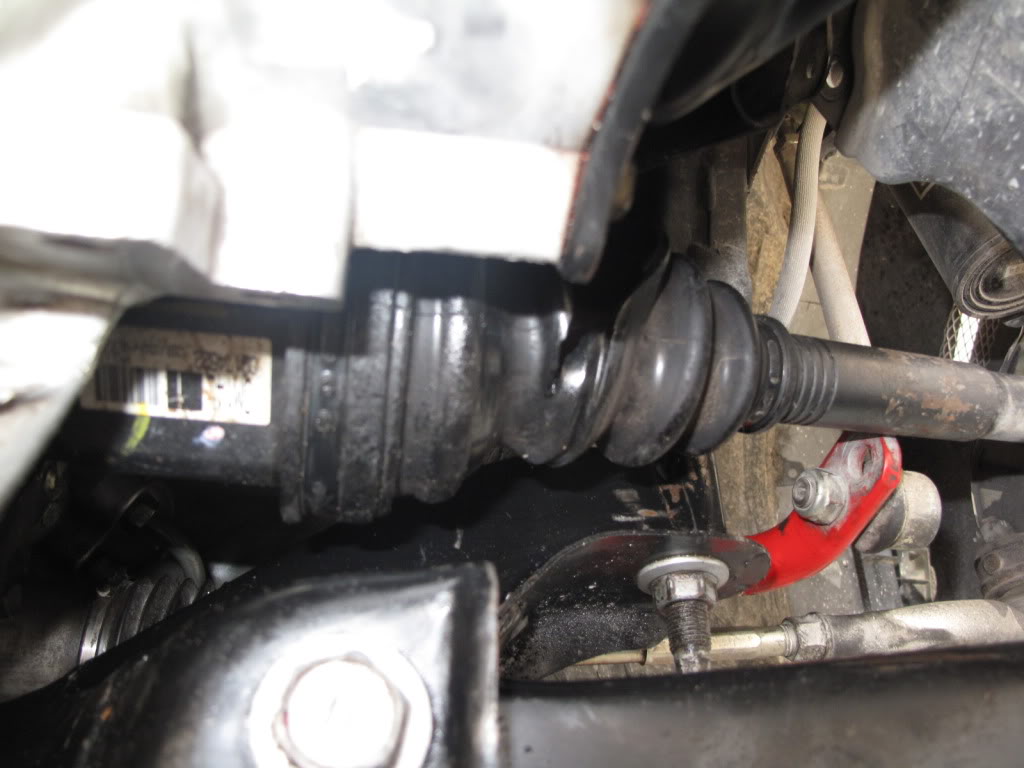
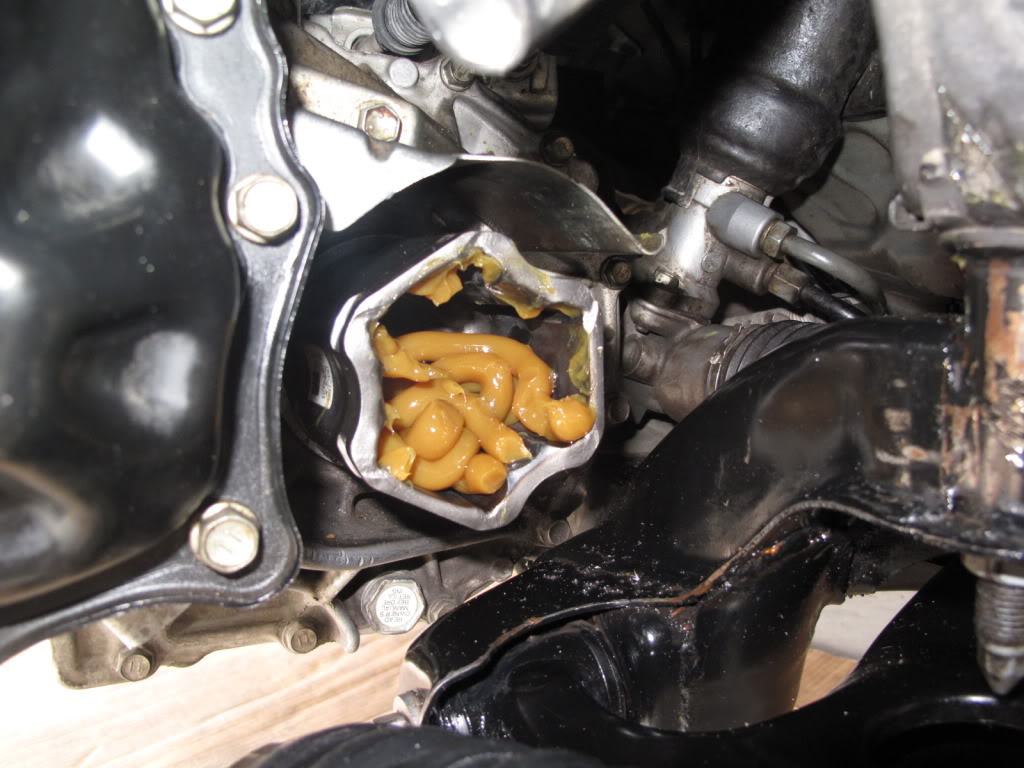
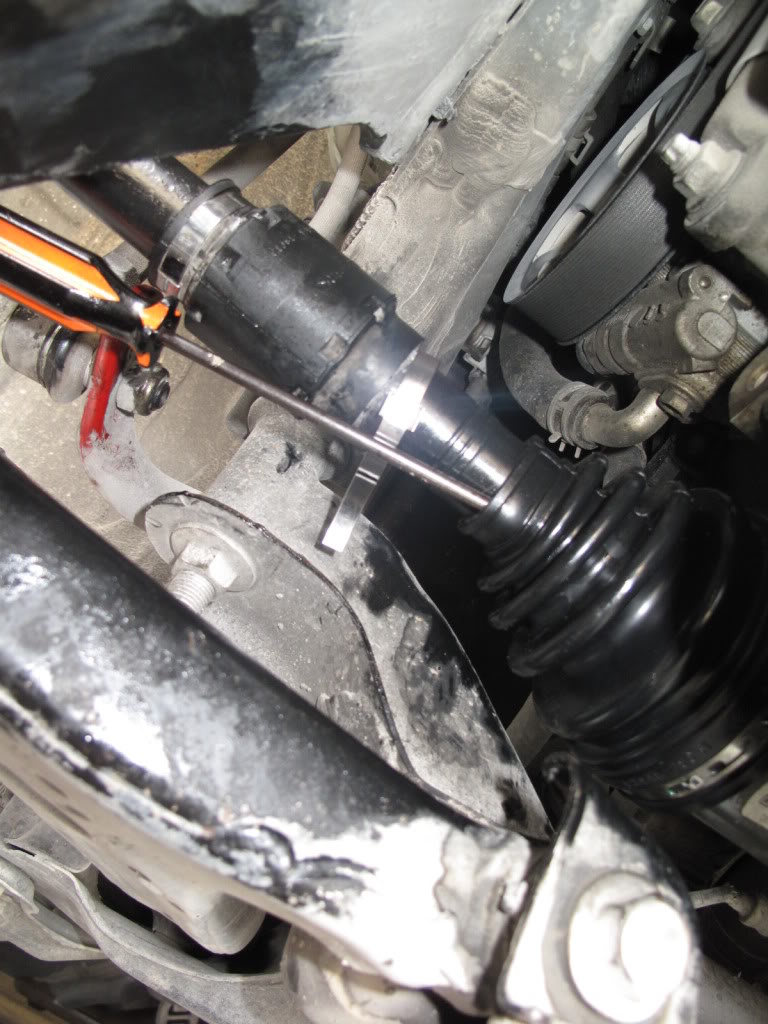
Next part is going to be really messy get your paper towels and plastic bags ready. Pull the boot back a little. Some more grease will come out. Clean it up if you want. Now you should be able to slide out the axle shaft out of inner joint assembly. Be careful not to damage ball bearing on the spider. Once it's completely out, get it at the bottom under transmission where you can easily work with it. Clean the grease
out of inner joint and ball bearings.
Take a look at the spider. There's a snap ring you need to remove in order to get it off the shaft. Use pliers and a flathead screw driver for this. Don't worry if you stretch or bend it, the boot kit will include a new one. Once the ring is removed, the spider should slide right off the shaft.
Pay close attention to the placement of spider. It goes on the shaft only one way. Remove the old boot from the shaft.
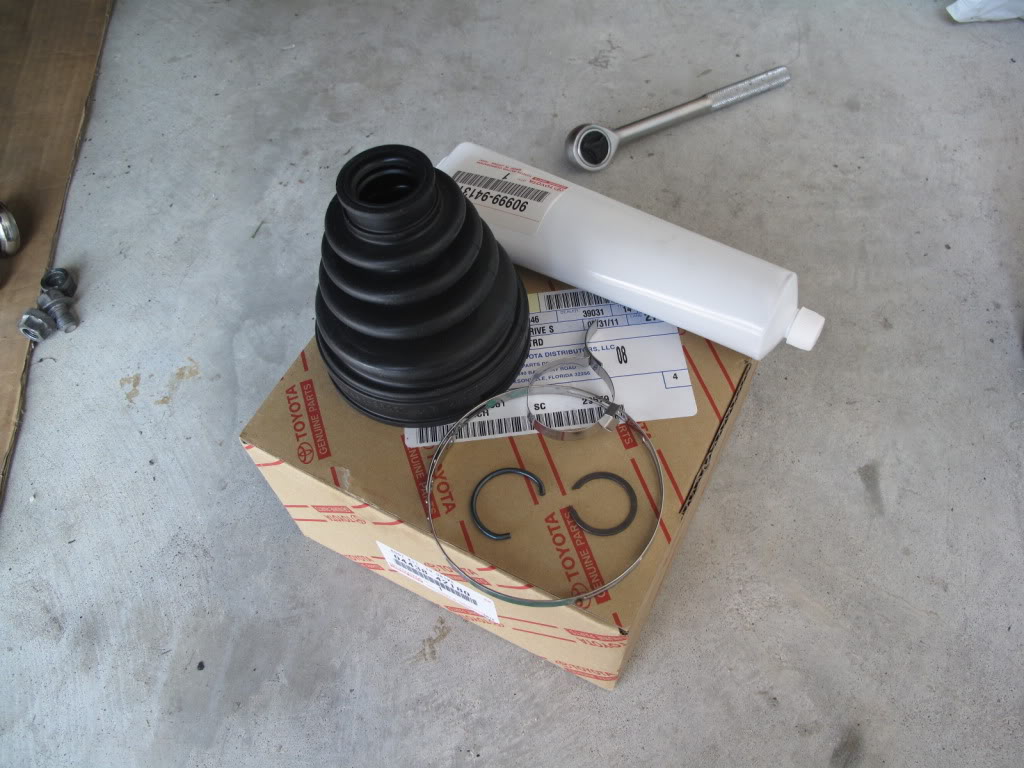
Here is what OEM Toyota inner boot kit looks like (boot, grease, 2 bands, snap ring and c-ring). I got 2 of those for under $50 shipped from trdsparks .
.
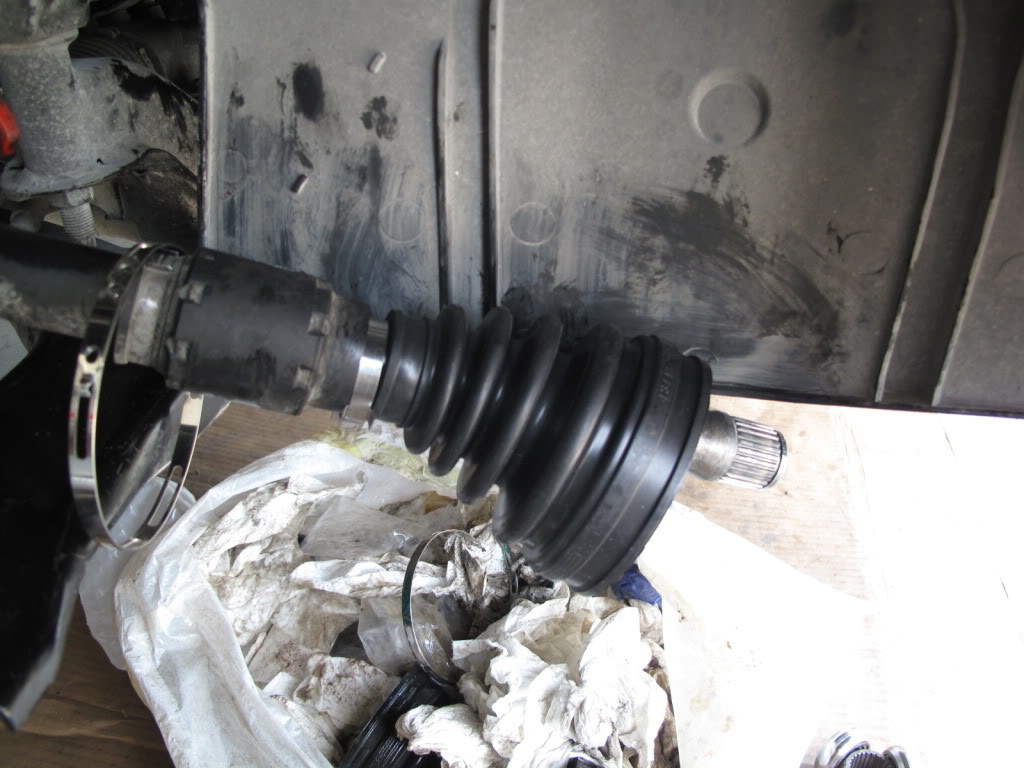
Now it's time to put everything back together. Start with a new boot and both bands.
Then the spider and a new snap ring.
Back to messy part again. Squeeze half a tube of grease inside the boot and another half inside the inner joint.
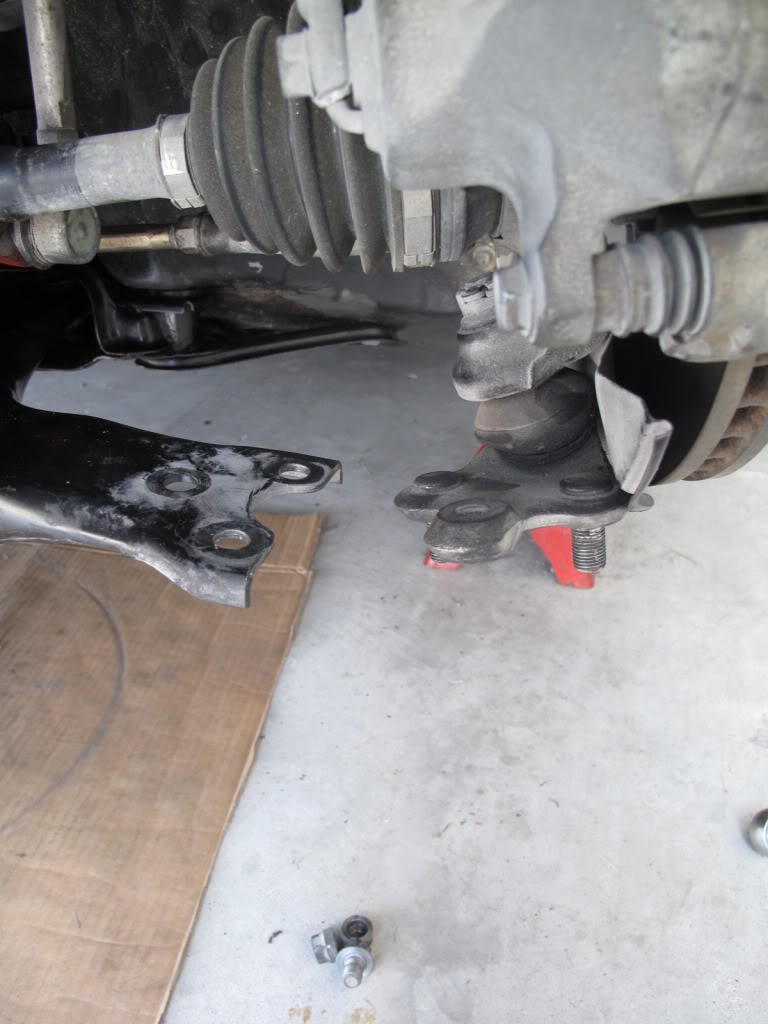
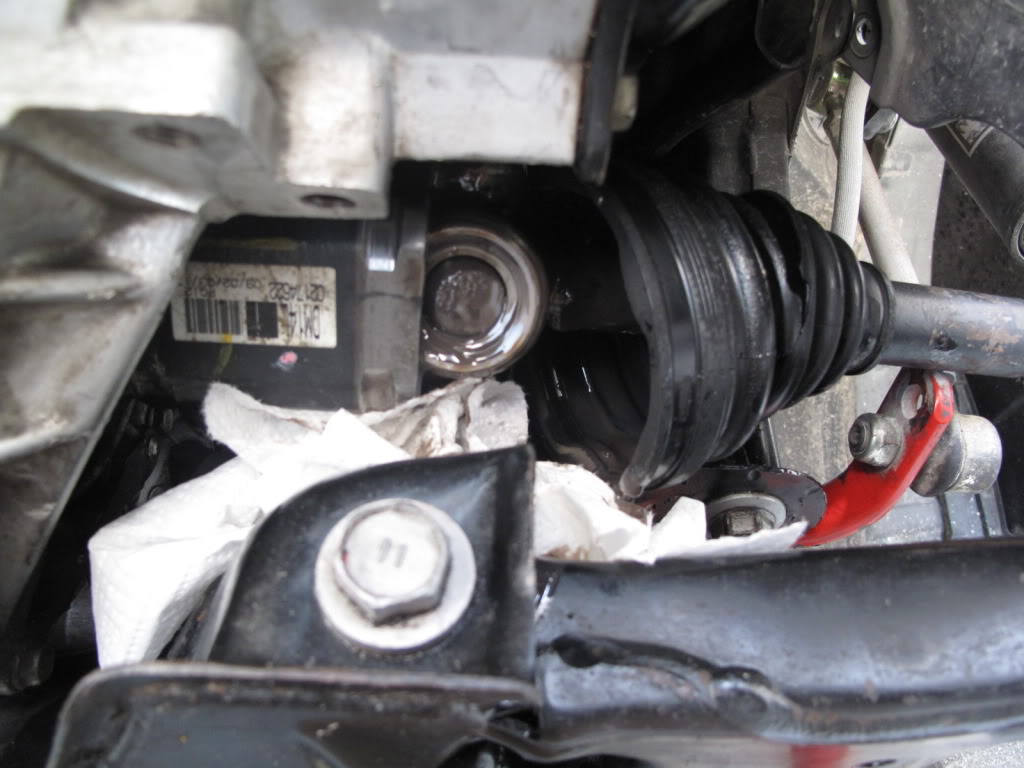
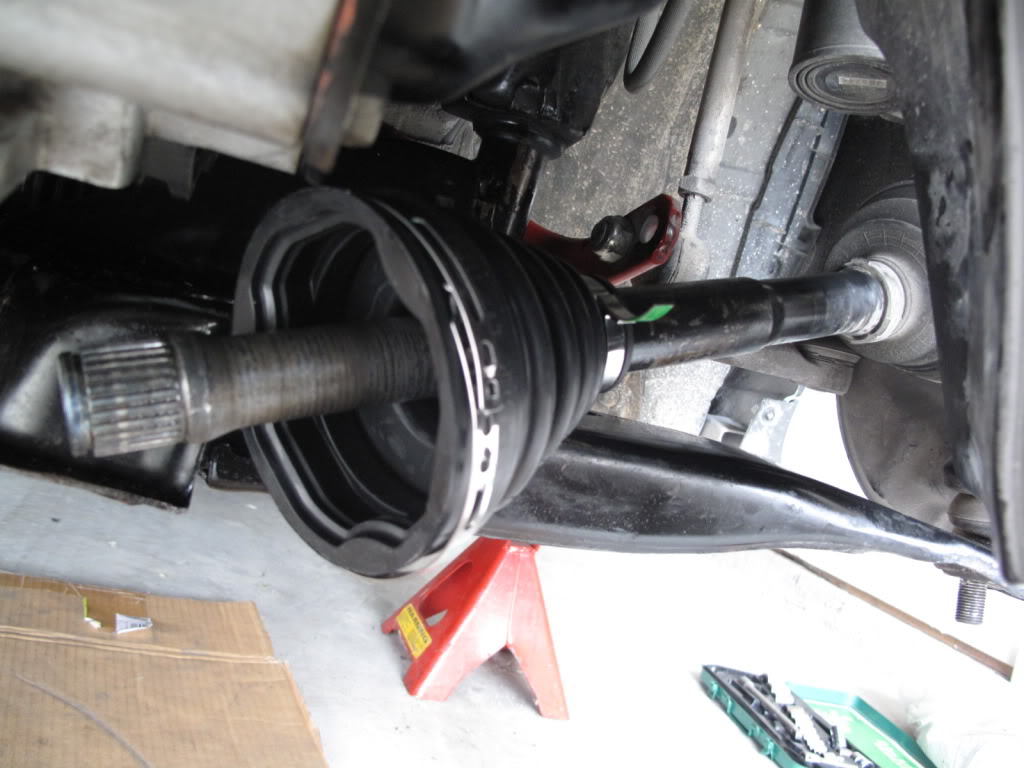
Then allign the shaft with inner joint and slide it back in there. Again, be careful not to damage bearing on the spider. At this point you want to secure the steereng knuckle. Go ahead and connect lower ball joint back to lower arm and steering knuckle to tie rod. Put in a 17mm bolt and two nuts and 1 castle nut for tie rod. Just hand tight for now, you can torque it later. Then allign the boot with inner joint and slide it on. Make sure boot sits inside grooves on the inner joint and on the shaft also.
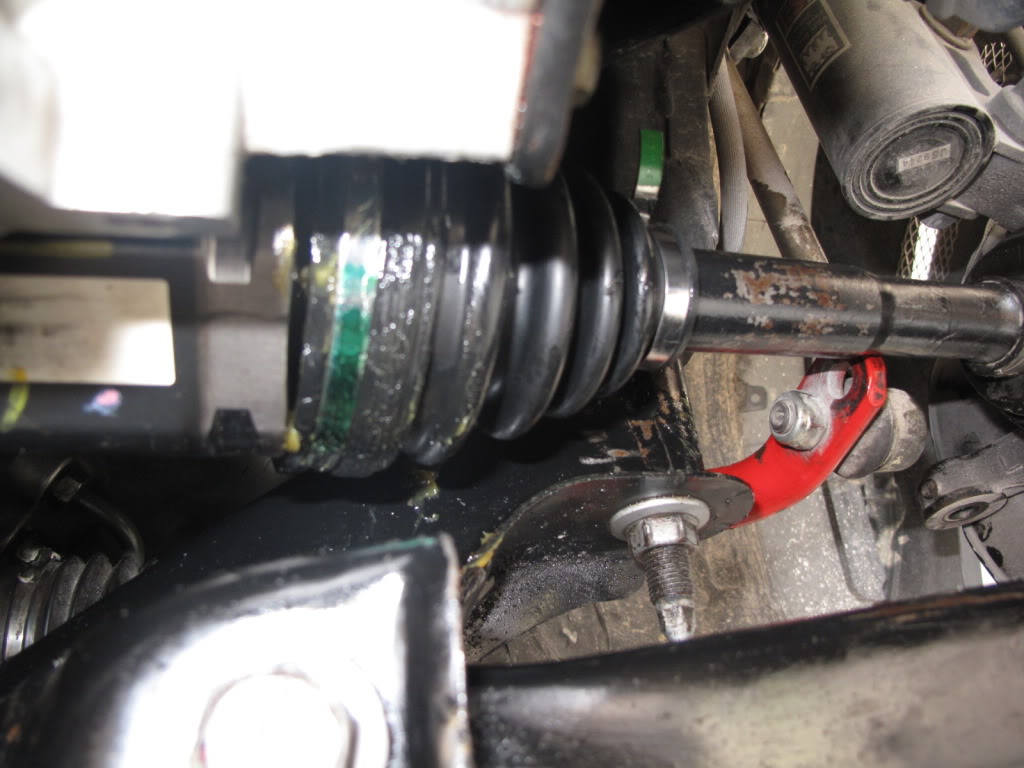
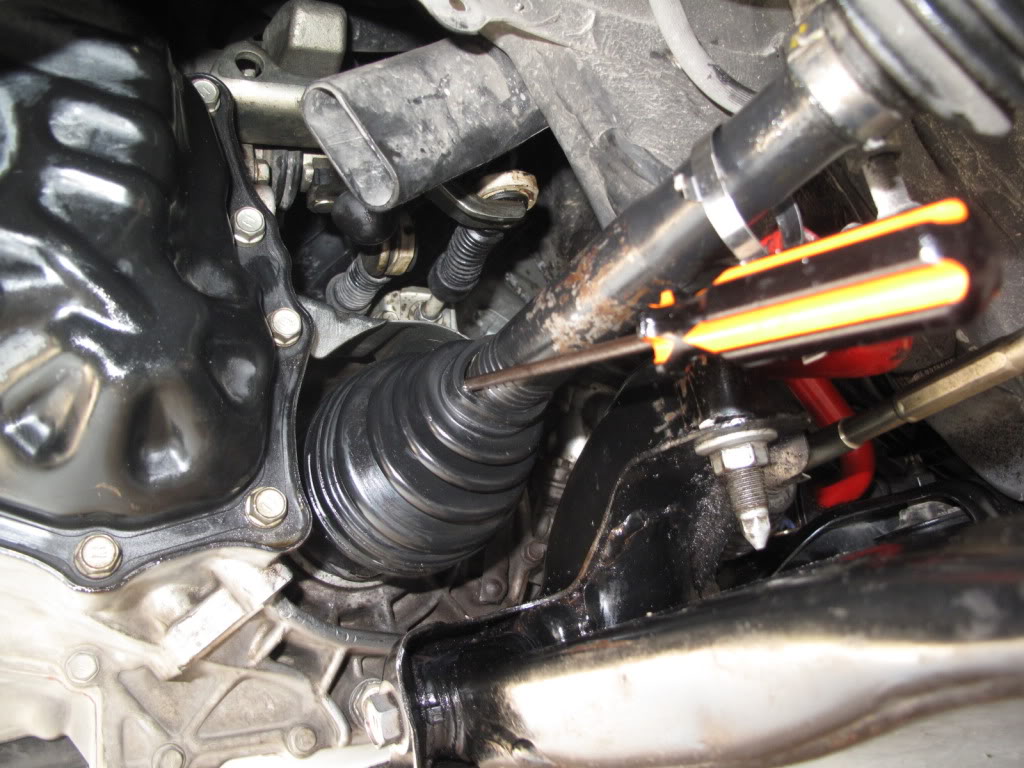
Next step is to secure the boot with bands. Start with the big one it should be really easy. Squeeze it really tight with needle nose pliers until two opposite teeth overlap and catch each other. Wipe off all extra grease that came out under the pressure. Now before you start on the small band I suggest you to slide in a small screwdriver beetwen the shaft and boot to let the air out. Close the small band all the way and bend tabs in to secure it in place. Wipe the grease off the shaft, boot and other parts again.
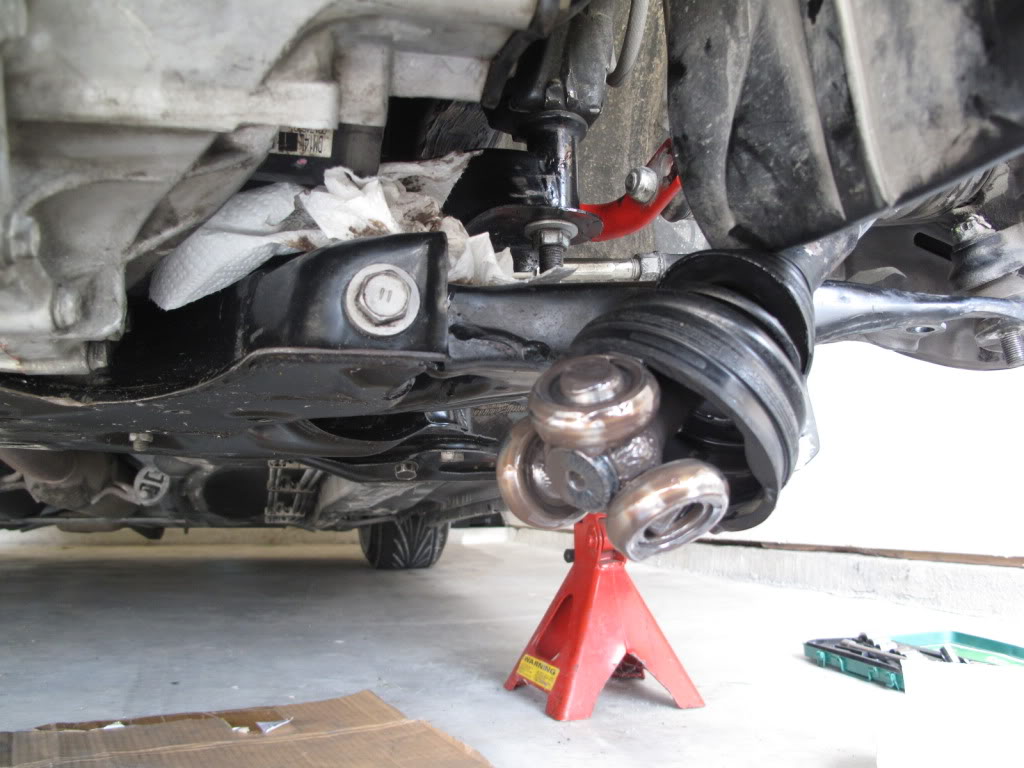
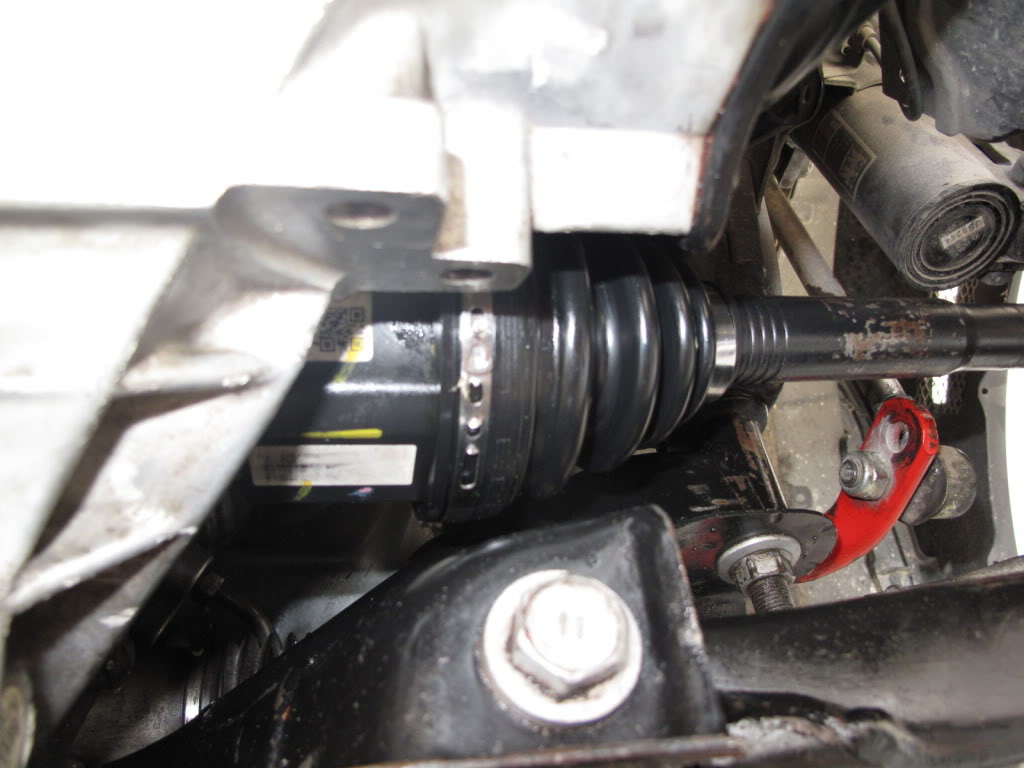
Now, the final and most important step . Torque down all nuts and bolt: Lower ball joint 17mm 2 nuts and bolt 66 ft.lb, tie rod end 17 mm castle nut 36 ft.lb. then put in cotter pin.
And that's it for the driver side. Congratulations!
The passanger side is exactly the same as the driver's side. I'm not going to go in detail, just post some pictures with the description.
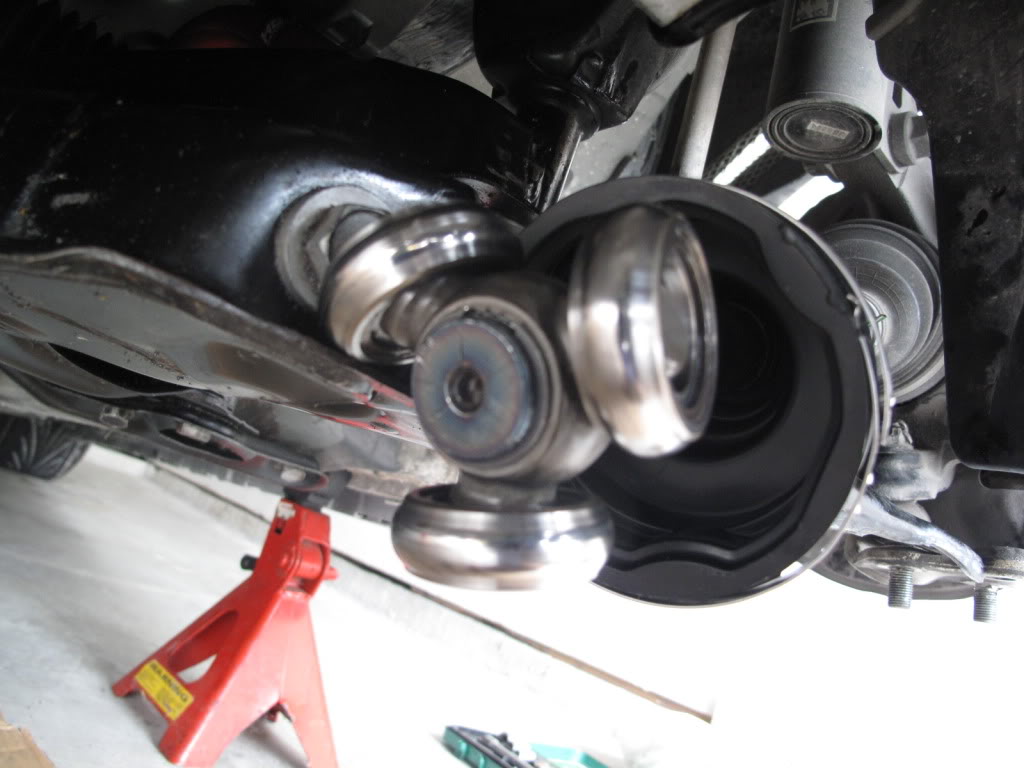
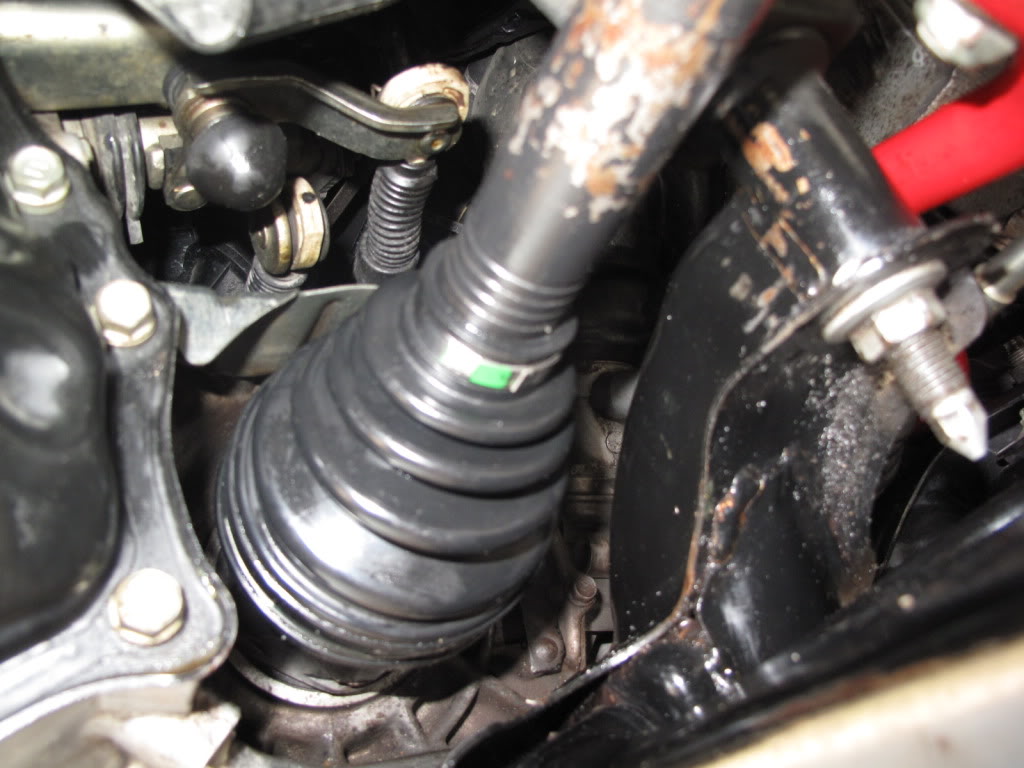
Anyways, the boot hasn't ripped yet but you can see it's about to.
Undo two 17mm nuts and 1 bolt on the bottom of the lower arm and 1 castle nut for tie rod. Disconnect lower arm and tie rod.
Place an oil catch pan or some plastig bags under the axle. Remove bands and pull the boot of the inner joint. Let the grease drain. Pull the shaft out of the inner joint. Clean everything up.
Remove the snap ring and slide the spider off the shaft. I forgot to mention earlier, but you might have to use a chisel to get the spider off. Be careful not to damage splines on the shaft.
Replace the old boot with a new one. Make sure you put both bands on too. Then put the spider and snap ring back on. Half a tube of grease in the boot another half in the inner joint. Slide the shaft inside the inner joint. Connect the lower arm to lower ball joint and tie rod to steering knuckle.
Next slide the boot on and secure it with the big band. Let the air out of the boot and put the small band on. Wipe off the grease. Torque down all the nuts and bolt: Lower ball joint 17mm two nuts and bolt 66 ft.lb, tie rod end 17 mm castle nut 36 ft.lb. then put in cotter pin.
That's it! You should be good for another few months , depending on the slammage of your ride. Just remember to check it frequently, like your oil. As you can see it's so much better to work with the complete boot rather than a ripped one and grease all over your car.
I thought this DIY could be helpful to some users on SL.Second of all,it's not a mystery that folks with slammed tC's or any other overlowered cars frequently replace their axles. Personally, I've had the pleasure of replacing three sets
The biggest challenge with replacing axles is time and energy, and the quality itself. I've had a sets from car parts discount and cardone and both were a pile of disappointment
So here is a way to get your axles fixed with minimum time,money and tools required and less parts damaged in process of installation. If you have all plastic splash guards removed already, that would make this job even easier.
Tools Needed:
-17mm wrench or socket
-flat-head screwdriver
-needle-nose pliers
-hammer
-torque wrench (optional,but recommended)
-jack and 2 stands
-gloves,paper towels,plastic bags
I assume that you have jacked up your tC already and your front wheels are off. Here's what a busted CV boot looks like.
.....grease everywhere!At this point,you should clean the grease up with an all-purpose cleaner (i.e. simple green).
First you need to disconnect tie rod from the steering knuckle. Remove the cotter pin using needle-nose pliers and then get the castle nut off with 17mm wrench/socket. I do not have a special tool for tie rod removal but I strongly recommend you to rent one at autoparts store. It works just like a c-clamp. DO NOT get the one that looks like a fork unless you want to replace your tie rods
All I had to do is back off the castle nut a little bit until it is flush and hit it with the hammer a couple of times. It came right off. Tie rod is off:
Next step is to disconnect lower ball joint from the lower arm assembly. There is one 17mm bolt and two nuts connecting them together. Go ahead and take them off and then separate lower arm from ball joint. Be careful not to damage ball joint rubber seal. Mine is damaged already as you can see
Now it's time to take both of the boot bands off. You can use needle-noise pliers to squeeze the band and screwdriver to pop it loose. Bands on your axles could look different from the ones on the picture. Just find a way to get them off or cut them off.
Bands are off:
Next part is going to be really messy get your paper towels and plastic bags ready. Pull the boot back a little. Some more grease will come out. Clean it up if you want. Now you should be able to slide out the axle shaft out of inner joint assembly. Be careful not to damage ball bearing on the spider. Once it's completely out, get it at the bottom under transmission where you can easily work with it. Clean the grease
out of inner joint and ball bearings.
Take a look at the spider. There's a snap ring you need to remove in order to get it off the shaft. Use pliers and a flathead screw driver for this. Don't worry if you stretch or bend it, the boot kit will include a new one. Once the ring is removed, the spider should slide right off the shaft.
Pay close attention to the placement of spider. It goes on the shaft only one way. Remove the old boot from the shaft.
Here is what OEM Toyota inner boot kit looks like (boot, grease, 2 bands, snap ring and c-ring). I got 2 of those for under $50 shipped from trdsparks
Now it's time to put everything back together. Start with a new boot and both bands.
Then the spider and a new snap ring.
Back to messy part again. Squeeze half a tube of grease inside the boot and another half inside the inner joint.
Then allign the shaft with inner joint and slide it back in there. Again, be careful not to damage bearing on the spider
Next step is to secure the boot with bands. Start with the big one it should be really easy. Squeeze it really tight with needle nose pliers until two opposite teeth overlap and catch each other. Wipe off all extra grease that came out under the pressure. Now before you start on the small band I suggest you to slide in a small screwdriver beetwen the shaft and boot to let the air out. Close the small band all the way and bend tabs in to secure it in place. Wipe the grease off the shaft, boot and other parts again.
Now, the final and most important step
. Torque down all nuts and bolt: Lower ball joint 17mm 2 nuts and bolt 66 ft.lb, tie rod end 17 mm castle nut 36 ft.lb. then put in cotter pin. And that's it for the driver side. Congratulations!
The passanger side is exactly the same as the driver's side. I'm not going to go in detail, just post some pictures with the description.
Anyways, the boot hasn't ripped yet but you can see it's about to.
Undo two 17mm nuts and 1 bolt on the bottom of the lower arm and 1 castle nut for tie rod. Disconnect lower arm and tie rod.
Place an oil catch pan or some plastig bags under the axle. Remove bands and pull the boot of the inner joint. Let the grease drain. Pull the shaft out of the inner joint. Clean everything up.
Remove the snap ring and slide the spider off the shaft. I forgot to mention earlier, but you might have to use a chisel to get the spider off. Be careful not to damage splines on the shaft.
Replace the old boot with a new one. Make sure you put both bands on too. Then put the spider and snap ring back on. Half a tube of grease in the boot another half in the inner joint. Slide the shaft inside the inner joint. Connect the lower arm to lower ball joint and tie rod to steering knuckle.
Next slide the boot on and secure it with the big band. Let the air out of the boot and put the small band on. Wipe off the grease. Torque down all the nuts and bolt: Lower ball joint 17mm two nuts and bolt 66 ft.lb, tie rod end 17 mm castle nut 36 ft.lb. then put in cotter pin.
That's it! You should be good for another few months
, depending on the slammage of your ride. Just remember to check it frequently, like your oil. As you can see it's so much better to work with the complete boot rather than a ripped one and grease all over your car.


 07-07-2011, 07:13 PM
#10
Senior Member
SL Member

Join Date: May 2009
Posts: 458
they rip beause when you lower your car the axel changes its angle and causes the boot to bunch up and rub against itself. I recently ordered some "stretch boots" which are a softer rubber and made to stretch, im hoping this will solve by CV boot issue...
07-08-2011, 05:49 AM
#14
Senior Member
CinSity Scions
SL Member
iTrader: (1)

Join Date: Aug 2006
Location: Union City, CA
Posts: 1,160
great writeup too! wish i had this before i spent hours of trial and error trying to figure out how to replace my boot...
02-22-2012, 05:31 PM
#17
did my passenger side boot this past weekend, but now i need to get a kit for my driver side since i didnt notice it was leaking when i checked before ordering... great DIY! what is the c-ring for though??
