Turbo / Show Car Part Out Link - ProjectTC2 Build Thread


 12-19-2011, 04:03 AM
#42
Senior Member
SL Member
Thread Starter
iTrader: (1)

Join Date: Nov 2011
Location: Jacksonville, FL
Posts: 1,267
Yea i've got the stock toyo's on my 18x9.5's, and the stretch looks nice but it's a bit too much for my taste. And i'm very pleased with my AEM intake so far. Compared to the Takeda it's significantly better in my opinion. In high RPM's it sounds rediculously good. And it makes a tiny whine when you shift. Sounds good 
12-19-2011, 03:00 PM
#43
I love that whistle they make, had an aem intake on my 4runner. Def gonna grab one of these now, I was thinking of getting the weapon r short ram in titanium just for the color haha but I think going the performance route would be a better idea.
Yea i've got the stock toyo's on my 18x9.5's, and the stretch looks nice but it's a bit too much for my taste. And i'm very pleased with my AEM intake so far. Compared to the Takeda it's significantly better in my opinion. In high RPM's it sounds rediculously good. And it makes a tiny whine when you shift. Sounds good
12-19-2011, 08:09 PM
#44
Senior Member
SL Member

Join Date: Sep 2011
Location: Chandler
Posts: 132

 12-20-2011, 02:36 PM
#45
Senior Member
SL Member
Thread Starter
iTrader: (1)
Join Date: Nov 2011
Location: Jacksonville, FL
Posts: 1,267
The light output is slightly less from the fogs and the mirrors, but the tails are 100% the same. I got an extra coat on the fogs and the mirrors, so I think that extra coat just slightly crossed the light output line.
But I just painted my front emblem and wrapped the back plastic in Carbon Fiber vinyl! I origionally did the front emblem the same color as my engine gold, but it was slightly different from my rims so it clashed. So I decided to go with black!
I'll be painting my rear emblem hopefully later today or tomorrow!
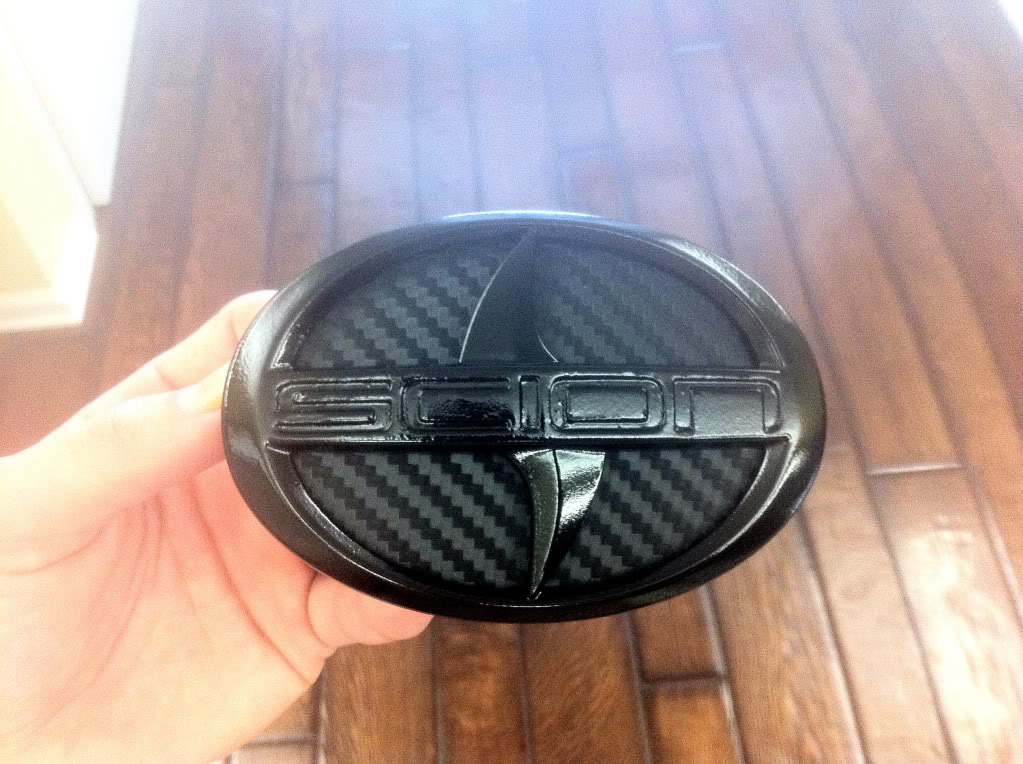
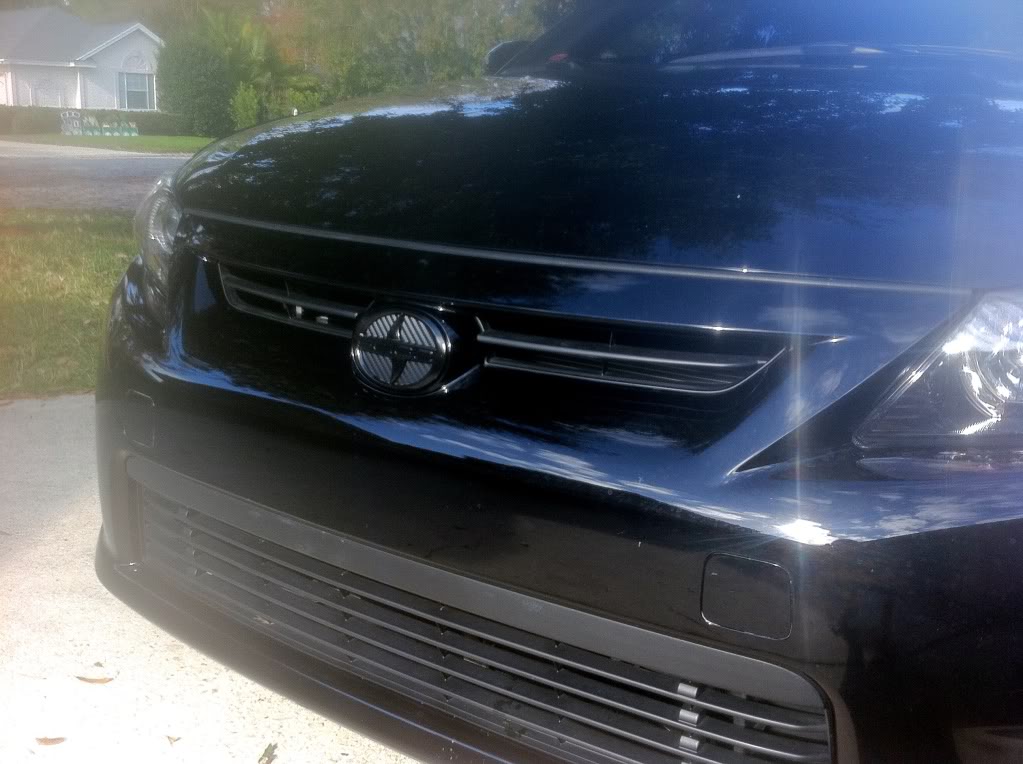
12-20-2011, 02:52 PM
#46
nice combo....looks great!
The light output is slightly less from the fogs and the mirrors, but the tails are 100% the same. I got an extra coat on the fogs and the mirrors, so I think that extra coat just slightly crossed the light output line.
But I just painted my front emblem and wrapped the back plastic in Carbon Fiber vinyl! I origionally did the front emblem the same color as my engine gold, but it was slightly different from my rims so it clashed. So I decided to go with black!
I'll be painting my rear emblem hopefully later today or tomorrow!


But I just painted my front emblem and wrapped the back plastic in Carbon Fiber vinyl! I origionally did the front emblem the same color as my engine gold, but it was slightly different from my rims so it clashed. So I decided to go with black!
I'll be painting my rear emblem hopefully later today or tomorrow!
12-20-2011, 06:02 PM
#47

quick question regarding the engine cover paint... did you just use standard paint and heat treat it like the link for the xb or did you actually use high heat paint and if you used regular paint how is it holding up since done
12-21-2011, 03:31 AM
#48
Member
SL Member

Join Date: Nov 2011
Posts: 57
can't believe the carbon fiber thing i did actually caught on lol not planning on painting the letters? lol it does catch some eyes :D
but i was wondering if you could follow up on your tail light tinting and if it was removable and for the most part how you even did it
lol not planning on painting the letters? lol it does catch some eyes :Dbut i was wondering if you could follow up on your tail light tinting and if it was removable and for the most part how you even did it
12-21-2011, 03:48 AM
#49
Senior Member
SL Member
Thread Starter
iTrader: (1)
Join Date: Nov 2011
Location: Jacksonville, FL
Posts: 1,267
For my engine cover, I used high temp gold engine enamel. And it looks exactly the same as the day I painted it. I didn't heat treat it like that guide says, and also I didn't sand it because I didn't want to wear it down, I just used adhesion promoter first.
As for the tint, everyone keeps asking me about it think about the clear coat on your car. Basically all it is, is the same clear coat that covers your whole car, mixed with a tiny can of black colorant, it's like tint for paint. You can find little cans of it at hobby stores for model cars and stuff. All I did was mix the can of clear coat with a small amount of the colorant, and I sprayed thin layers until it was the shade I wanted. As for applying, you need a professional style paint gun that will hold jars of paint. If you don't have one, ask a body shop to do it for you, but make sure they know exactly what you want. If you take the lights off an hand them to them, they'll usually prep and paint them for like $40-$50 a set. (a set meaning tail lights, fog lights, side markers, etc.)
As for the tint, everyone keeps asking me about it
12-21-2011, 04:42 AM
#50
any help would be great as soon as i get my new tc (since my 2011 was just totaled) im looking at redoing all my pieces a candy red and wanted to know if anyone has seen a high heat candy red or if painting it with just candy red and heat treating it like in the tutorial would work
12-25-2011, 11:21 PM
#52
Senior Member
SL Member
Thread Starter
iTrader: (1)
Join Date: Nov 2011
Location: Jacksonville, FL
Posts: 1,267
So just thought i'd update my thread! I ordered my GGP Motor Mount on the 22nd, but I have yet to recieve any information or a tracking number on that, so I have no idea what's happening with that! And thismorning I finally gave in and ordered my Seibon Carbon Fiber TS Hood! Will post pictures as soon as I get one of these installed!
01-12-2012, 05:54 PM
#53
Senior Member
SL Member
Thread Starter
iTrader: (1)
Join Date: Nov 2011
Location: Jacksonville, FL
Posts: 1,267
Finally got my Hood in yesterday! Was kind of annoying to install because of the Windshield Wiper Fluid Sprayer things, but it was worth it!


And one more of my rear, because I finally used a good camera

And one more of my rear, because I finally used a good camera

 01-25-2012, 02:45 AM
#56
Senior Member
SL Member
Thread Starter
iTrader: (1)
Join Date: Nov 2011
Location: Jacksonville, FL
Posts: 1,267
My Tsudo S2 Catback Exhaust is on the way! (Thanks to biglilsteve!) And so are my Torque Solutions Exhaust Hangers! Hopefully will be installing everything on monday night, so stay tuned for pics / video!
And Finally got a name for her! Cleopatra, sexy, egyptian = win
And Finally got a name for her! Cleopatra, sexy, egyptian = win
 01-25-2012, 03:25 AM
#59
Senior Member
SL Member
Thread Starter
iTrader: (1)
Join Date: Nov 2011
Location: Jacksonville, FL
Posts: 1,267
Thanks! Only problem is it's thinner than stock and has no insullation, so you can hear the annoying mechanical engine noise when the hoods closed. Hoping an exhaust and motor mount will fix this!
Haha yeaa I was actually considering changing them to black with gold TRD logo's on there. I think the gold and red and blue lights might be too many colors
Haha yeaa I was actually considering changing them to black with gold TRD logo's on there. I think the gold and red and blue lights might be too many colors
01-25-2012, 03:28 AM
#60
Senior Member
SL Member

Join Date: Sep 2011
Posts: 553