
DIY: Mounting cold cathodes to the Oh Sh*t handles...56k no


Senior Member
SL Member
Joined: Jun 2006
Posts: 795
From: Houston, TX
Yes thats what you would have to do, but I would try and find out where that wire runs to so you dont have to take the headliner off. See if anyone knows which side the dome light wire goes down. You might be able to pop off the dome light cover and see what color and which direction the wires go. Then tap into them in an area thats easier to access.

Senior Member
SL Member
Joined: Jul 2006
Posts: 167
From: Indianapolis (Naptown)
Obviously there is a wire running from the doors to the dome light circuit, or the light wouldn't come on when you opened the doors. If I wired all the lights and had them running on their own power, shouldn't I be able to find that connection from the door and splice in to it to turn them on and off? That would avoid splicing in at the dome light itself.
That is probably a convulated way to say the same thing DMAN said..
That is probably a convulated way to say the same thing DMAN said..
Thread Starter
Senior Member

SL Member
Joined: Nov 2005
Posts: 1,527
From: Surf City SoCal
Originally Posted by Sesh1975
Originally Posted by surfcitylocal
Originally Posted by honey0bucket
Originally Posted by TXboxdriver
made by Sunbeam Tech
most computer stores carry this brand
they are on sale @ www.coolerguys.com http://www.coolerguys.com/840556056843.html
each package has 2 handles
yes they are lit with LED's
they are a whopping $6 a pair before shipping
most computer stores carry this brand
they are on sale @ www.coolerguys.com http://www.coolerguys.com/840556056843.html
each package has 2 handles
yes they are lit with LED's
they are a whopping $6 a pair before shipping
Installed yet?


Senior Member
Scion Apocalypse
SL Member
Joined: Mar 2005
Posts: 617
From: Anchorage, AK
Those light up handles would be a great mod for any XB.. go ahed and install those *****! Because if they look nice, i'll be doing this too!
BTW, great write up, this is the way all tech articles should be!
BTW, great write up, this is the way all tech articles should be!
Thread Starter
Senior Member
SL Member
Joined: Nov 2005
Posts: 1,527
From: Surf City SoCal
Originally Posted by DiStUrBeD_AzN
Hey surfcitylocal, do you mind going over how to splice power for me? I need to splice power for my handle bars now... I cant seem to figure out how to use my damn mini add a circuit.
As for wiring the power. You can run a wire from the pos battery terminal with an in line fuse through the firewall and then wire that to the pos side of the switch. Use anyone of the factory provided ground locations (there's one under the driver side kick panel) to run your ground lead for the switch. From there run your leads to the converters. I know it sucks without pics. I'm doing an installation on one of the Scinergy members OSH's today. I'll get some pics of the switch install to help.

Thread Starter
Senior Member
SL Member
Joined: Nov 2005
Posts: 1,527
From: Surf City SoCal
OK, with all the shows and stuff I haven't installed the handles yet. This will be put to the back of my list since I'm doing the wing, A piller gauges, mirror covers and a few other things before the SE show in San Diego. The handles will fit but in my opinion they will not look as good as the stock handles with the cold cathodes added. I'll update when I can.


Senior Member
SL Member
Joined: Jun 2006
Posts: 795
From: Houston, TX
Want to get a nice even glow w/ the LED's so that you can still use the handle? Heres my write up. Check it out :D
http://forums.scionzone.com/smf/index.php?topic=2070.0

http://forums.scionzone.com/smf/index.php?topic=2070.0


Senior Member

SL Member
Joined: Aug 2006
Posts: 298
From: Whittier, CA
They're done!
Off

On!

Off again...

On again!

Tapped 3amp fuse in one of the open spots and grounded on that little screw to the side

And I worked late into the night as you can see by my worklights setup...

Switch-a-roonie

The switch I got at Radio Shack... the fuses and piggybacks I got at Pep Boys and all the wire I got from a local audio shop.
I�ve got to say, doing this on my own was awesome and to all those who want to do this but feel they should take it somewhere, don't! It took me a whole day to wire it because I didn't know what I was doing, but now I'm sure I could get it all done in one day, maybe a little less.
Thanks surfcitylocal for the great write up and I'll be sure to show them to you at the next So Cal meet!
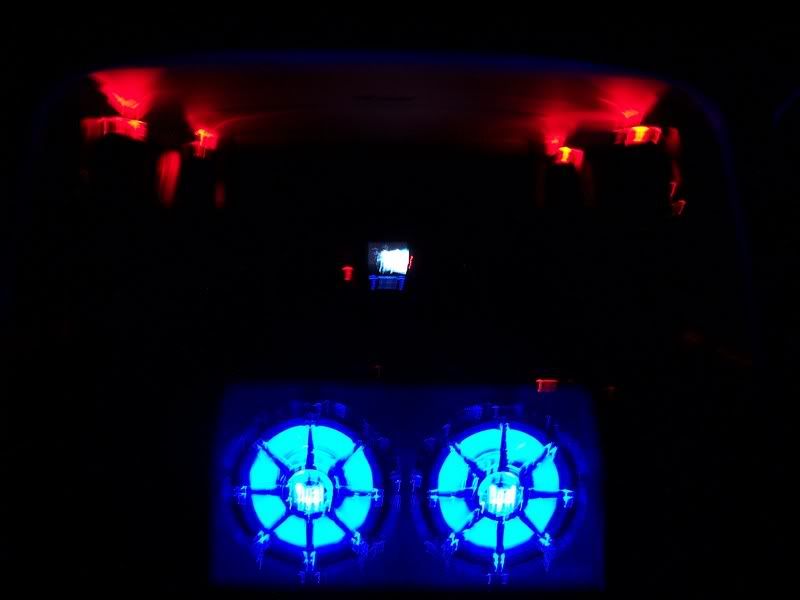
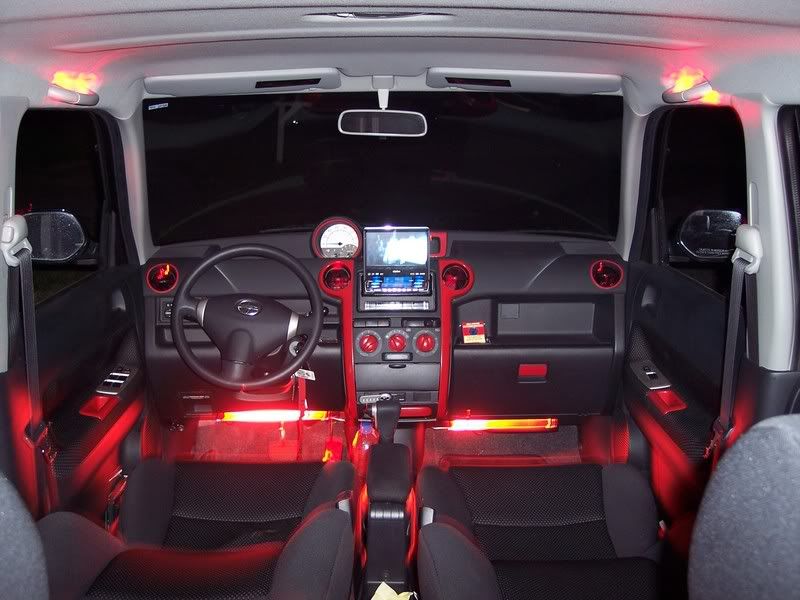
The Night Pictures!


The pictures don't really do it justice, which I'm sure you're all aware. They do illuminate quite nicely when you're inside... although my switch does tend to hit me square in the right eye
Off
On!
Off again...
On again!
Tapped 3amp fuse in one of the open spots and grounded on that little screw to the side
And I worked late into the night as you can see by my worklights setup...
Switch-a-roonie
The switch I got at Radio Shack... the fuses and piggybacks I got at Pep Boys and all the wire I got from a local audio shop.
I�ve got to say, doing this on my own was awesome and to all those who want to do this but feel they should take it somewhere, don't! It took me a whole day to wire it because I didn't know what I was doing, but now I'm sure I could get it all done in one day, maybe a little less.
Thanks surfcitylocal for the great write up and I'll be sure to show them to you at the next So Cal meet!
The Night Pictures!
The pictures don't really do it justice, which I'm sure you're all aware. They do illuminate quite nicely when you're inside... although my switch does tend to hit me square in the right eye


Senior Member
SL Member
Joined: Mar 2005
Posts: 212
did mine weekend before last. i actually recessed them into the handle which took a bit more work than i anticipated. my daughter is fascinated with them(she's 20months old)
not sure if i can get anymore or not but i have a 4 or 5 fuse self contained add on that using 8ga lead right to the oe battery terminal and using the cruise control harness split loom went through the fire-wall with the pig tail and using the gardner bender(or whatever) swithes from lowes in the stock switch panel made for a clean install on the power side and of course used the same routing as the oe poster for the remaining wiring.
a side note not sure if anyone mentioned it before but when i lenghtened the cathods harnesses i made sure to solder every connection and noted no descernable decrease in light output


Senior Member
Scikotics
SL Member
Joined: Jun 2006
Posts: 391
From: San Jose, CA
I just ordered a set of the clear handles that have the led's inside them from www.jab-tech.com The cost for 2 pairs and regular ground shipping from OK to CA was $22.84. They cost a couple bucks more there than on www.coolerguys.com but I only saw blue available on that site. Blue, green, and red are available on jab-tech. Can't wait for them to get here!