CustomxB.com 4 piece grill set install W/ PICS
 03-08-2010, 07:51 AM
#1

This is not a hard install, but it does help to have someone helping you when removing and reinstalling the bumper.
TOOLS YOU WILL NEED:
1.Standard screwdriver (Flathead)
2.10mm socket
3.Ratchet
4.Zip ties (small ones) BLACK
5.Dikes (wire cutters)
6.Drill and 1/8� drill bit (just big enough to put a small zip tie through
7.Drop cloth *to lay the bumper on
8.A friend *to help with the bumper

9.Camera to take pictures
Step 1: OPEN HOOD.
Step 2: REMOVE THE RADIATOR DIVERSION PANEL.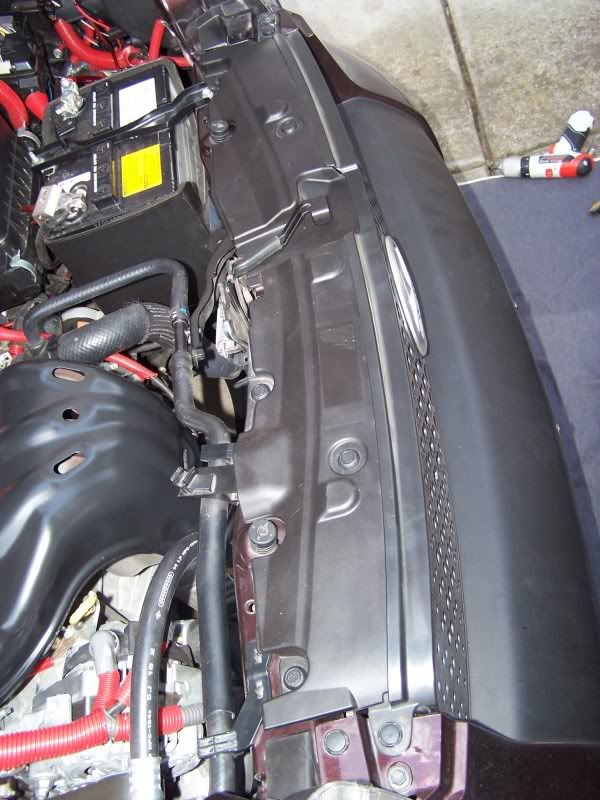

Step 3: REMOVE THE UPPER GRILL.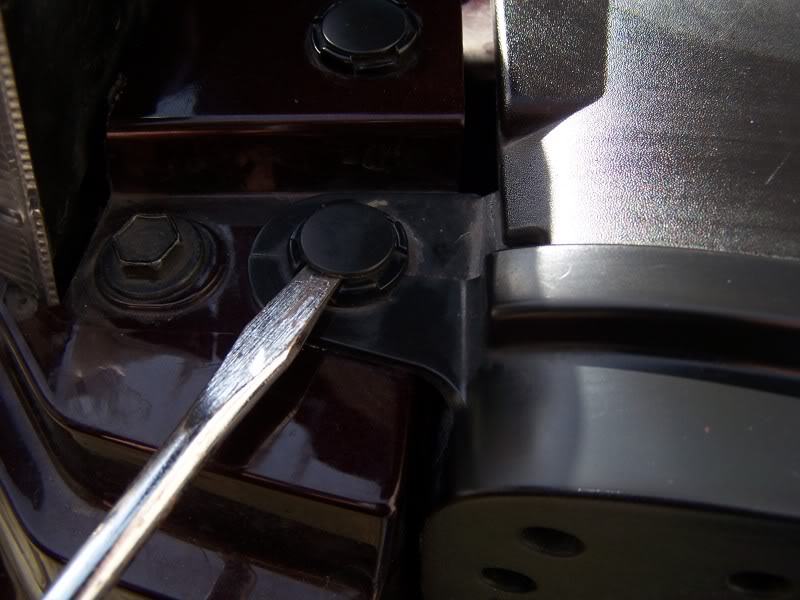
Step 4: REMOVE BUMPER.
*Have someone help you with this step. It makes it easier. Also have a drop cloth laid out so you don�t scratch up the paint on the bumper once it is off the car.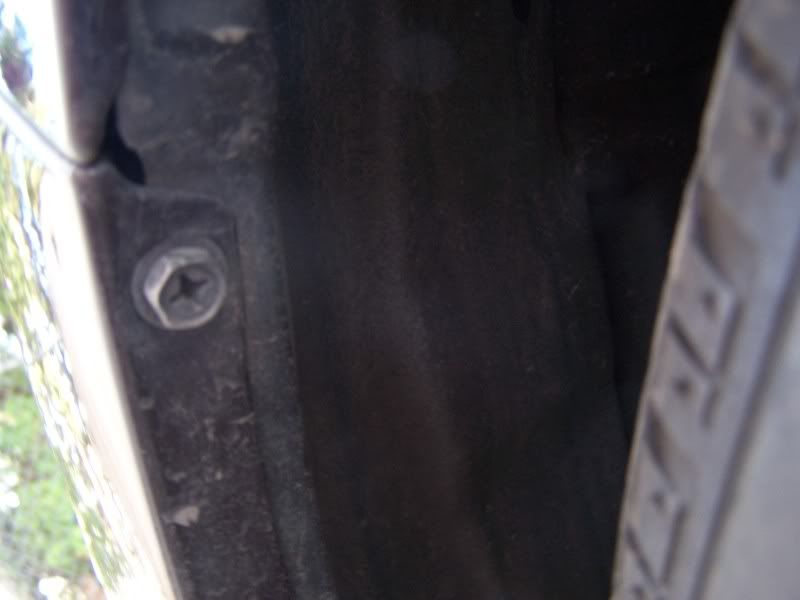


Step 5: REMOVE THE BOTTOM GRILL.

Step 7: INSTALLING THE BOTTOM GRILL.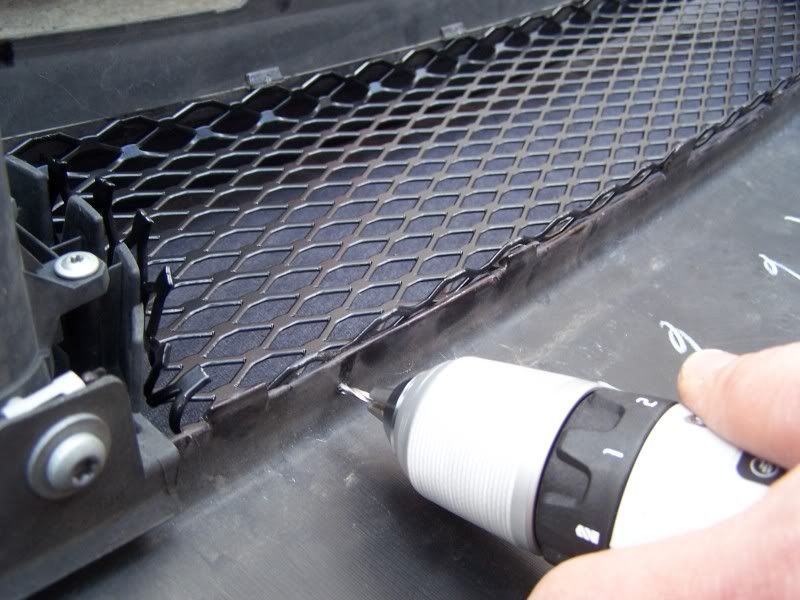


Step 8: INSTALLING THE SIDE VENTS.


Step 9: INSTALL UPPER GRILL.

Step10: INSTALL AIR DIVERSION PANEL.
FINAL STEP: TAKE A STEP BACK AND MARVEL AT YOUR WORK
TOOLS YOU WILL NEED:
1.Standard screwdriver (Flathead)
2.10mm socket
3.Ratchet
4.Zip ties (small ones) BLACK
5.Dikes (wire cutters)
6.Drill and 1/8� drill bit (just big enough to put a small zip tie through
7.Drop cloth *to lay the bumper on
8.A friend *to help with the bumper
9.Camera to take pictures
Step 1: OPEN HOOD.
 DUH..
DUH.. 
Step 2: REMOVE THE RADIATOR DIVERSION PANEL.
- Push in the center of the retainer pins and then pull them out (5).
Step 3: REMOVE THE UPPER GRILL.
- Using a standard (flat blade) screw driver remove the other two retainer pins holding the upper grill in place.
- Reach your hand behind the upper grill and push down on the pins holding the bottom of the grill to the bumper.
- Remove upper grill
Step 4: REMOVE BUMPER.
*Have someone help you with this step. It makes it easier. Also have a drop cloth laid out so you don�t scratch up the paint on the bumper once it is off the car.
- Start by removing the bolts on the splash guard under the front bumper. (7) *10mm
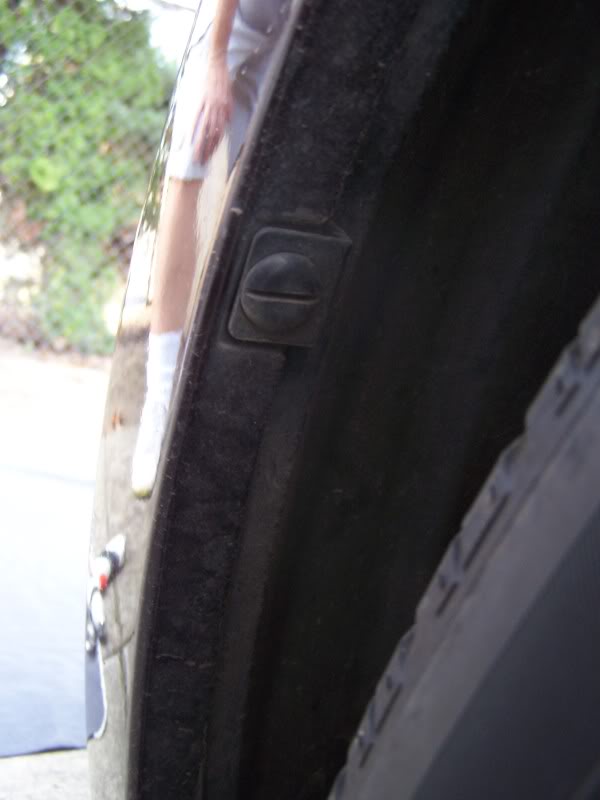
- Remove the bolt holding the bumper to the fender well. (1 on each side)*10mm
- Remove the 1 retainer clip in each fender well.
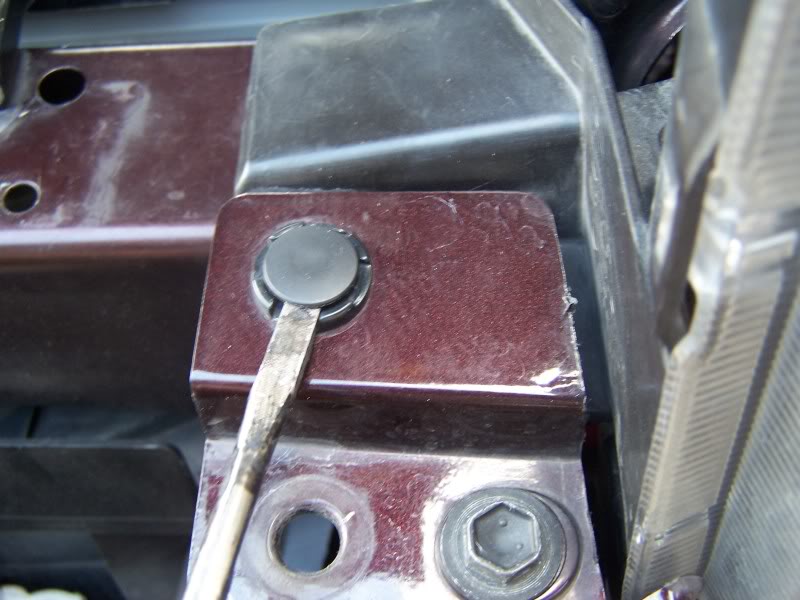
- Remove the bolt on the top of the bumper next to the headlights. (1 on each side) *10mm
- Remove the retainer clip next to the bolt by the headlight using a standard (flat blade) screwdriver. (one on each side)
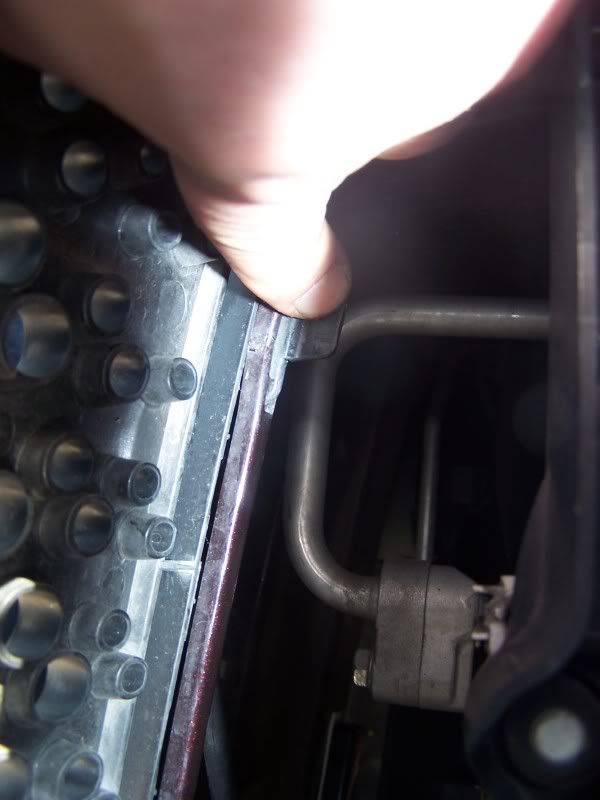
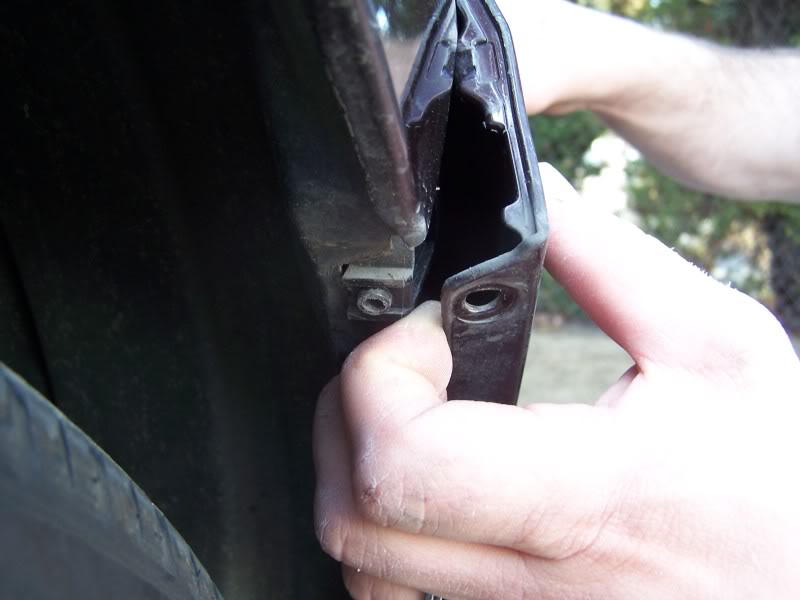
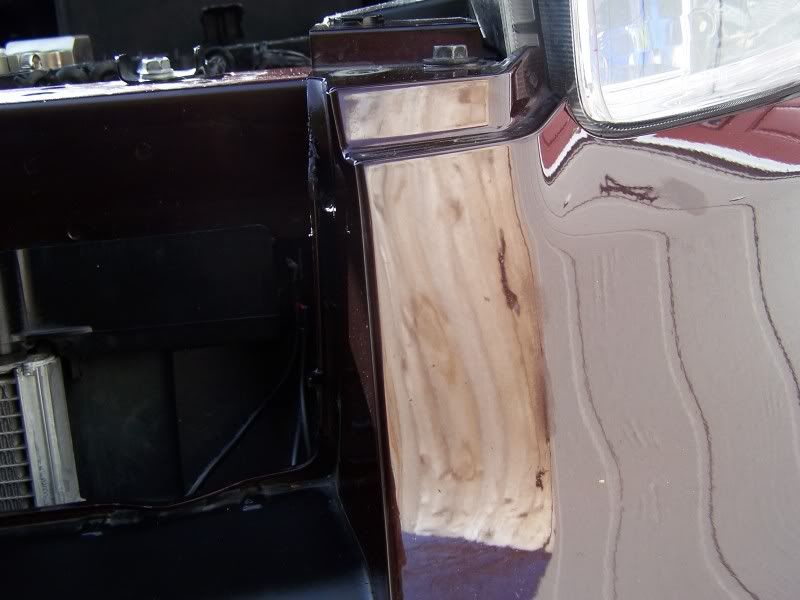
- VERY CAREFULLY pull one side of the bumper away from the fender at the fender well, working your way down the seam. You will have to use some force if this is the first time you have had the bumper off, BUT BE CAREFUL.
- Repeat on the other side
- IF you have fog lights BE CAREFUL when removing the bumper. Disconnect the fog lights.
Step 5: REMOVE THE BOTTOM GRILL.
- With the bumper face down on the ground (or work bench) push the plastic retaining clips towards the outside of the grill to release it from the bumper.

- *using a standard screwdriver might help
- Step 6: REMOVE THE BUMPER �VENTS�.
- With the bumper face down on the ground (or work bench) push the plastic retaining clips towards the outside of the grill to release it from the bumper.(6)
- Repeat for the other vent.
Step 7: INSTALLING THE BOTTOM GRILL.
- Place the new grill in the stock grill location and see where you will have to drill holes.
- CAREFULLY drill holes about every 6-10 inches through the lip on the bumper all the way around.
- Loosely attach all the zip ties ( I used 10 ) and align the grill to your preference
- Once you are happy with the grill�s orientation finish securing the zip ties. . Clip the ends of the zip ties off with the dikes
Step 8: INSTALLING THE SIDE VENTS.
- Place the new grill in the stock side grill location and decide where you are going to drill the holes * I had to bend these side grill just a little bit to get them to fit just right.
- Place the new grill in the stock grill location and see where you will have to drill holes.
- VERY CAREFULLY drill holes through the bumper tabs that held the stock panels in place, and one through the top.
- Loosely attach all the zip ties ( I used 7 per grill ) and align the grill to your preference.
- Once you are happy with the grill�s orientation finish securing the zip ties. Clip the ends of the zip ties off with the dikes.
Step 9: INSTALL UPPER GRILL.
- Drill 1 hole in the channel on each side of the grill opening about 2/3 of the way up. * BE CAREFUL not to scratch the paint.
- Insert Upper grill into place making sure that the edges of the grill fit in the channels on either side and on the bottom.
- Loosely attach zip ties on each side where you drilled the holes.
- Loosely attach zip ties on the bottom of the grill through the holes that held the stock grill in place.
- Using the holes where the air diversion panel sits loosely attach zip ties in these locations.
- Once you are happy with the alignment start securing the zip ties from the BOTTOM center first, clipping the ends as you go.
Step10: INSTALL AIR DIVERSION PANEL.
- Put the air diversion panel back in place and install the retainer pins that hold it in. DO NOT push the center of these pins all the way in. make sure the center is FLUSH with the rest of the pin. Some of these pins will not be attached to anything, this is ok. They held the stock grill but are not necessary for the new grill.
FINAL STEP: TAKE A STEP BACK AND MARVEL AT YOUR WORK
- Enjoy your new grills


 03-08-2010, 02:47 PM
#4
Senior Member
SL Member

Join Date: Nov 2008
Location: Tampa, Florida
Posts: 120
I like that look the only thing that i would do is get some flat black spray paint and spray everything that is shiny black so it does not stand out as much. But other then that i like it a lot.


 03-09-2010, 04:09 PM
#10
Senior Member
SL Member

Join Date: Nov 2007
Location: Bay Area, CA
Posts: 1,008
I really don't mean to offend, but that looks like utter crap... I commend the OP's work, but that mesh wire looks like you picked it up at Home Depot, Lowes, or some military excess store that's used for soldiers to climb over during training...

I hope you're not talking about this one below... Again, I don't mean to offend, but it reminds me of a step on an escalator... IMO, the stock grill looks better than either of these two grills...


I hope you're not talking about this one below... Again, I don't mean to offend, but it reminds me of a step on an escalator... IMO, the stock grill looks better than either of these two grills...
03-09-2010, 04:22 PM
#11
You should have your eyes checked if you think the stock grill looks better than either.
Starting your post with "I dont mean to offend", does not absolve you of what you say next, especially when you mean to offend. There are ways to offer opinion, without insulting the OP, which is what you are doing. Try learning some tact.
And yes, I think this looks a helluva lot better than stock. Finally, ya know what thay say opinions are like...
03-09-2010, 04:41 PM
#12
Senior Member
SL Member
Join Date: Nov 2007
Location: Bay Area, CA
Posts: 1,008
I don't mean to offend, but is that a leather bra on the hood???  I like it.
How's my tact now? The pic you posted still looks like an escalator to me. I've seen that exact same billet grill on trucks, mustangs, camaros, etc. (you name it). I just think the OEM looks better because it doesn't stick out like a sore thumb, looking more "out of place," than "better."
How's my tact now? The pic you posted still looks like an escalator to me. I've seen that exact same billet grill on trucks, mustangs, camaros, etc. (you name it). I just think the OEM looks better because it doesn't stick out like a sore thumb, looking more "out of place," than "better."
03-10-2010, 02:34 AM
#13
Member
SL Member

Join Date: Feb 2010
Location: South Florida
Posts: 87
Im gonna have to agree, that looks really really cheap.. Looks like you can bend it with your bare hands and whats up with having to ziptie it on?!?! Shoulda went GrillCraft...
 03-10-2010, 02:44 AM
#15
The grills came SILVER. I had them powder coated.
PAINT?? over Powder coating?? NO WAY!!!! :o it is a LOW gloss powder. I wasn't a fan of the matte or flat black they had.
PAUL!!!! HI-YA- the web site in the title is still being made. their other site is www.customtC.com OR you can email them at mail@customtC.com
let them know that you saw my DIY when you contact them.
yes. similar material.
billet is nice, but not the look I wanted. if I was going a different route then definitely billet.
DOOD. Thank you for your honesty. You are entitled to your opinion. you don't have to drive my car.. but.. WOW.. REALLY? stock grills are better?? no way.
Thanks everyone for the feedback. it's much appreciated.
PAUL!!!! HI-YA- the web site in the title is still being made. their other site is www.customtC.com OR you can email them at mail@customtC.com
let them know that you saw my DIY when you contact them.
yes. similar material.
billet is nice, but not the look I wanted. if I was going a different route then definitely billet.
Thanks everyone for the feedback. it's much appreciated.
03-10-2010, 04:17 AM
#16
Senior Member
SL Member
Join Date: Nov 2007
Location: Bay Area, CA
Posts: 1,008
D
 03-10-2010, 10:18 PM
#18
www.customxB.com should be up and running by the end of April.. they also run www.customtC.com and can be reached via email: mail@customtC.com

Thread
Thread Starter
Forum
Replies
Last Post
xBrelease08
Scion xB 2nd-Gen Wheel & Tire
12
02-29-2016 05:39 AM
mischman
PPC: Exterior / Styling
2
09-15-2015 03:38 PM