How To: Remove Wiper Arms, Upper+Lower Wiper Cowls, & Motor Assy
 04-24-2010, 03:38 PM
#1
Senior Member
SL Member
Thread Starter

Join Date: Sep 2009
Location: Atlanta, GA
Posts: 116
I just spent 2 days off doing a few interior enhancements one of which, included running an Amp power wire. To do this, I had to remove the whole wiper setup to gain access
to the firewall grommet mentioned in cobaltbravo's dash removal thread. This would probably also help for those of you needing to access the front strut towers.
Here's how I did it:
Begin by pulling the caps off of the wiper arm bolts. Mine took a pretty good pull.
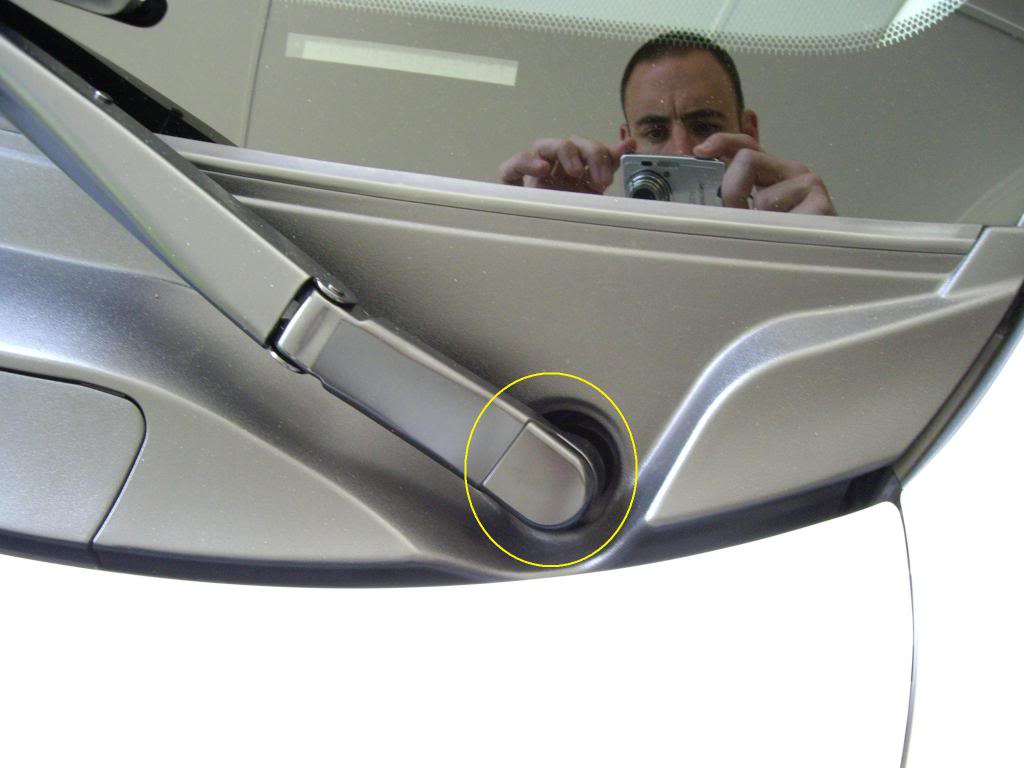
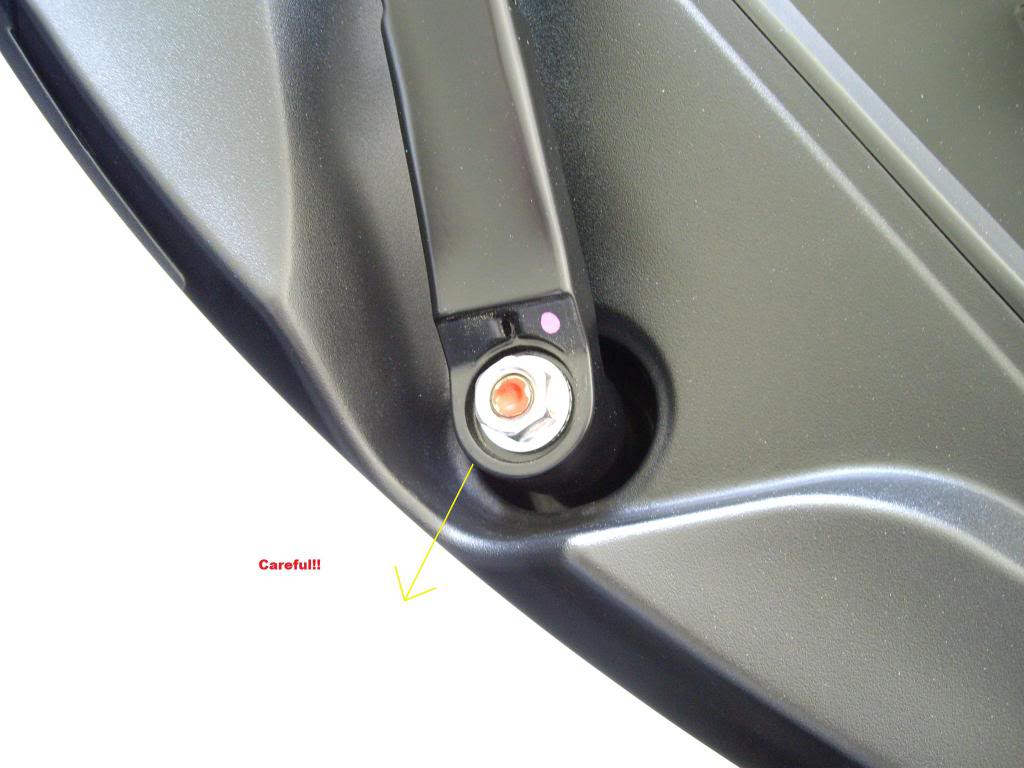
Next, remove the wiper arm nuts. BE CAREFUL as you unscrew the driver side nut if using a socket because the wiper cowl has a built in chute (see arrow)
that will send the nut where you really don't want to have to go to retrieve it if it falls out of the socket.
(if this happens to you, see the note at the bottom of this post)
Once you have the wiper nut off, grasp the lower part of the arm and pull hard while shaking gently. The arm should come loose after a bit.
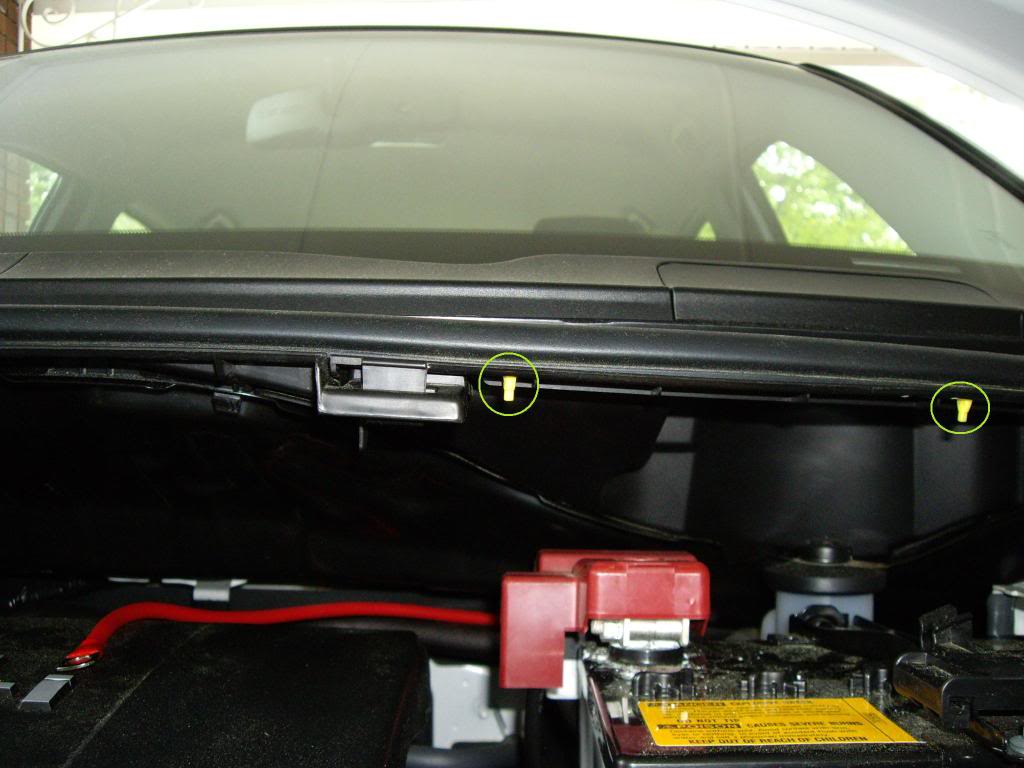
Now, raise the hood and detach the weatherstripping from the upper wiper cowl by disengaging the yellow clips.
After you have set the weatherstripping aside, remove the brake fluid reservoir access by disengaging the 2 clips at the forward end.

Next, remove the fasteners at each forward corner of the cowl by pulling the center pin up first, and then the entire fastener.
Now, snap out all of the retention clips that secure the upper cowl to the lower cowl. There are a lot of them so make sure that each one is fully released before you proceed (I broke one).
Next, gently remove the upper wiper cowl. I found it easiest to rest the hood on my head so I could lower the hood peg out of the way.
(At this point, I removed the battery because it was going to have to come out anyway for what I was doing. Plus, it was getting in my way.)
This will now expose the wiper motor and driving assembly. To remove this, disengage the 2 motor wiring harness clips and remove the 2 black bolts securing
the motor assembly to the lower cowl. Once the bolts are removed, gently slide the whole assembly in the direction of the arrow and pull it away from the firewall.
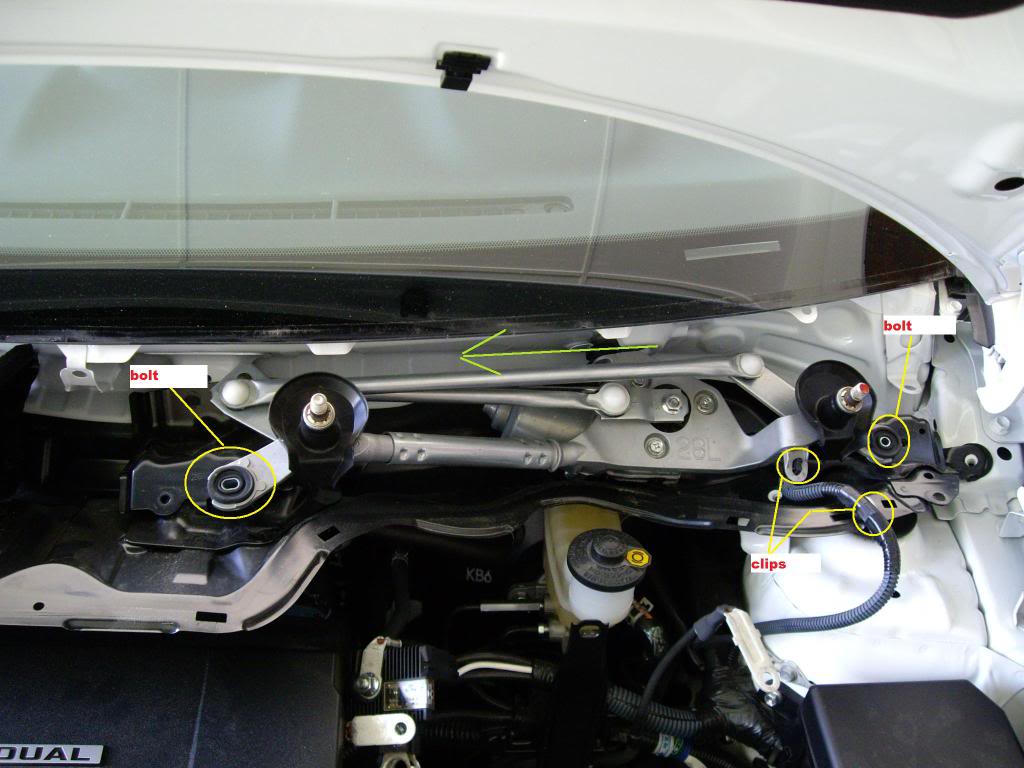
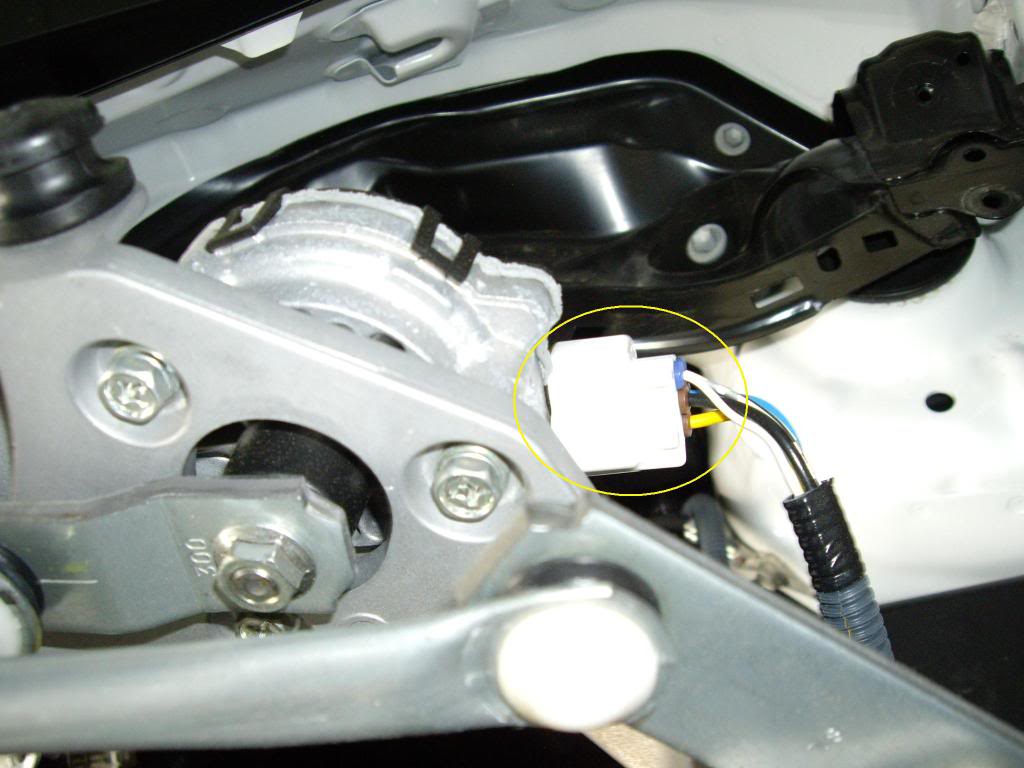
Next, remove the wire harness plug from the wiper motor so the whole assembly can be set aside.
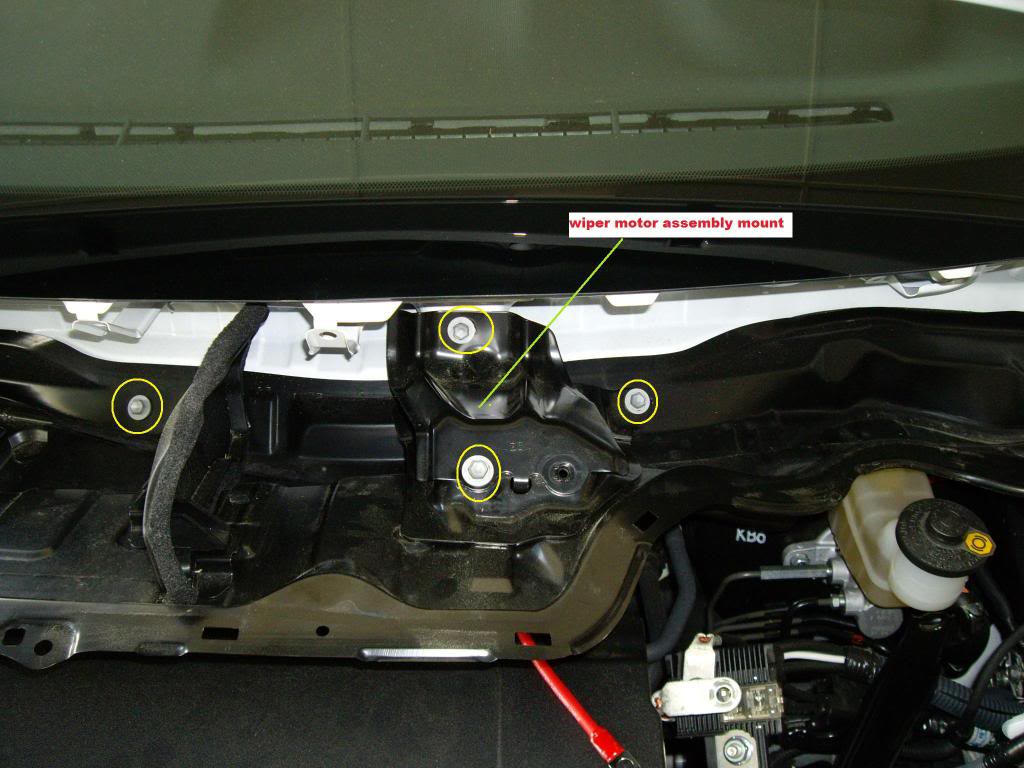
Now, on to the lower wiper cowl: Remove the 2 10mm bolts securing the wiper assembly mount to the lower cowl and
then remove the rest of the bolts securing the lower cowl to the firewall (there are 10 total including the 2 I just mentioned).
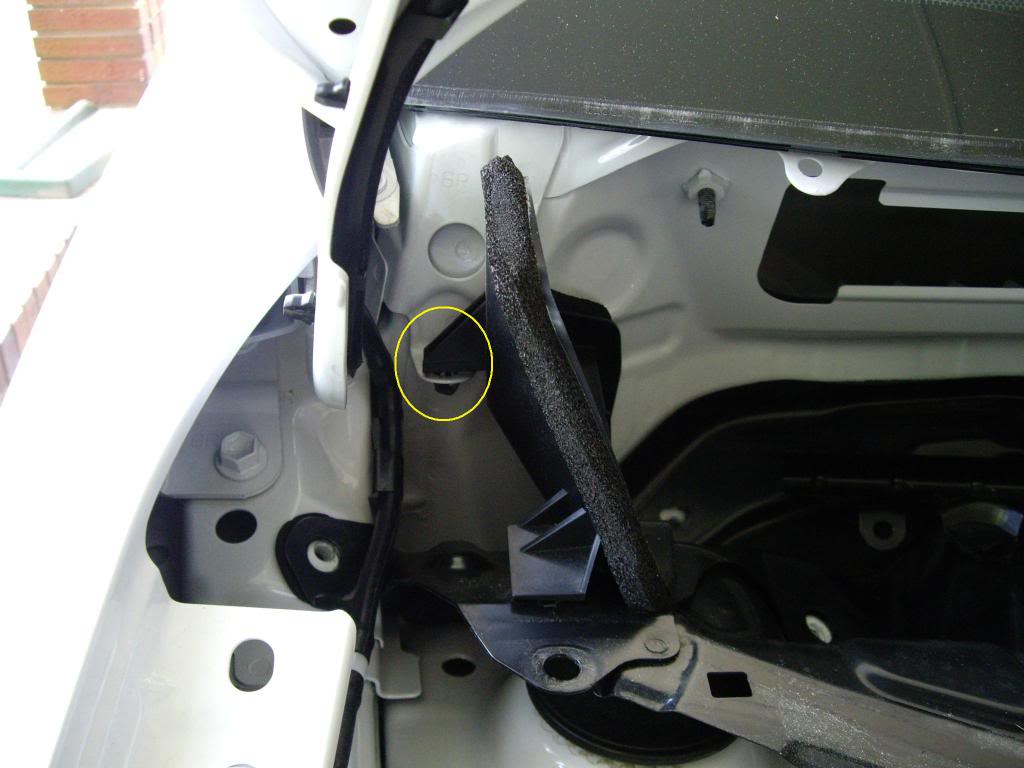
Lastly, remove the one lone plastic clip on the passenger side next to the hood hinge before removing the entire lower cowl.
And there you have it. Re-assembly in reverse order of course. Since the wiper studs are grooved, it is pretty easy to get the arms right back in the orientation they were in when you took them off.
NOTE:
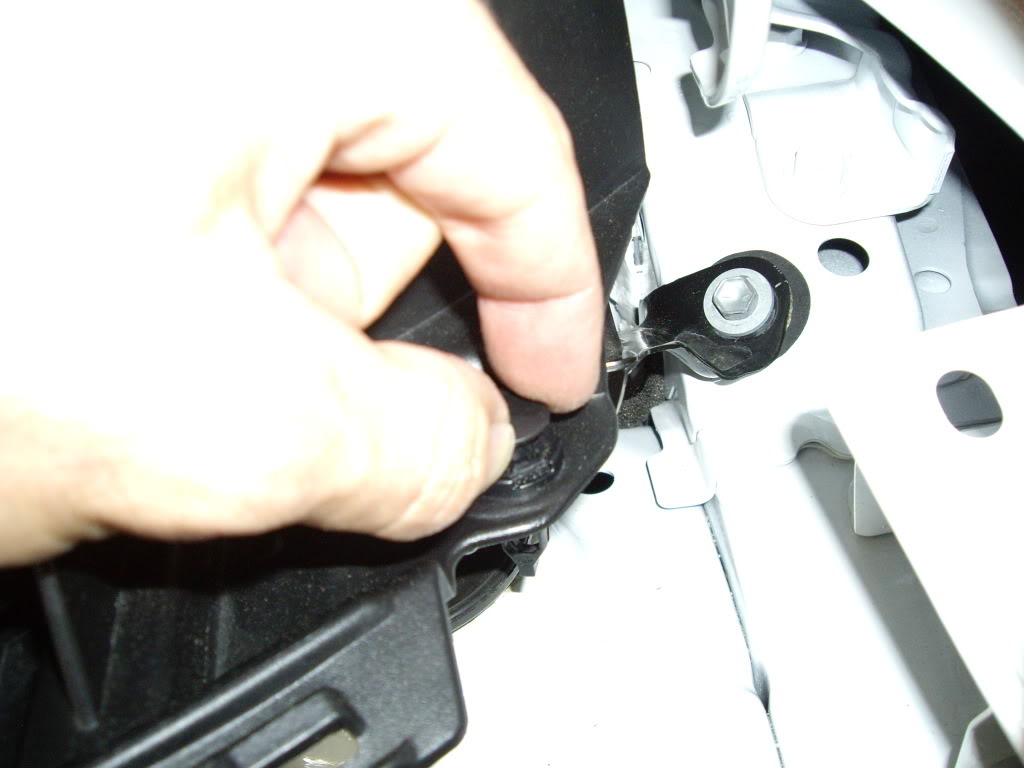
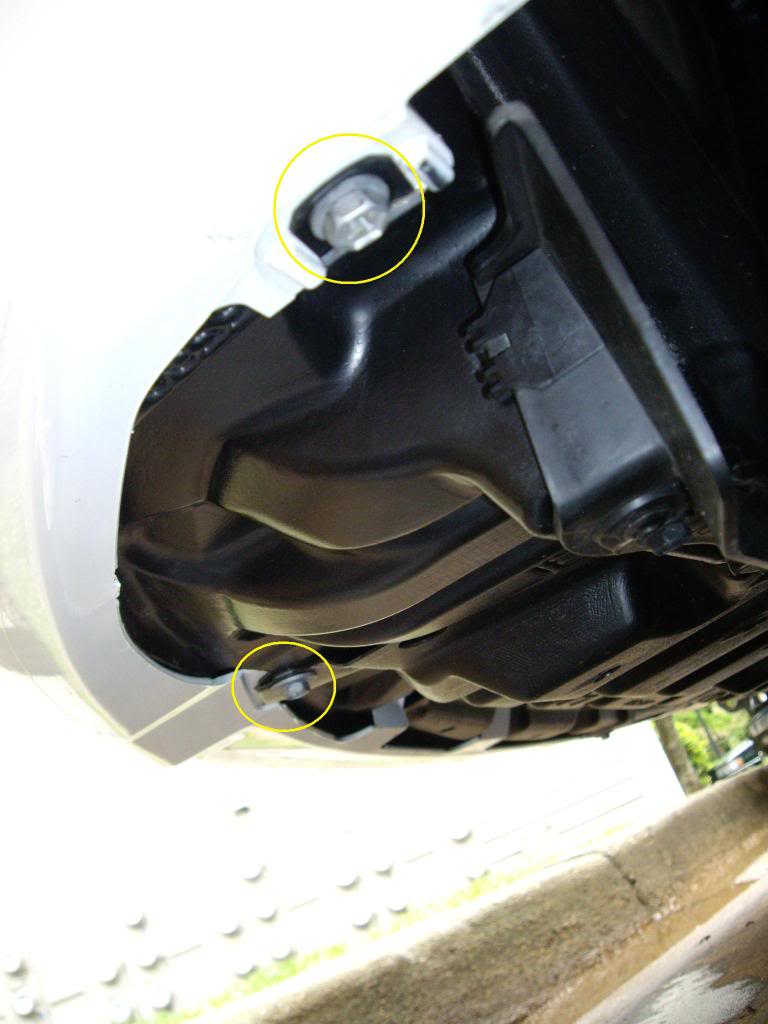
If the driver side washer arm nut fell down where I mentioned, here's probably what will happen: If your car is sitting on a level surface, you will hear the nut bounce off a few things under the hood. After a substantial amount of searching, you will find it just barely visible resting precariously on the back of the headlight assembly behind the parking/turn signal lamp deep into the quarter panel. Try to get a hold of it here because it gets worse if you can't......If while reaching for the bolt you manage to knock it off the back of the headlight,(as I did) hopefully you will hear a couple more bounces ending with a hollow 'THUD.' This is the sound of the nut finally coming to rest in the deep hollow created by the wheel well splash-guard and the front bumper. To get to this location, remove the 2 gray bolts circled. This should give you enough room to gently separate the splash-guard from the bumper to get your hand up in there to grab the nut.
to the firewall grommet mentioned in cobaltbravo's dash removal thread. This would probably also help for those of you needing to access the front strut towers.
Here's how I did it:
Begin by pulling the caps off of the wiper arm bolts. Mine took a pretty good pull.
Next, remove the wiper arm nuts. BE CAREFUL as you unscrew the driver side nut if using a socket because the wiper cowl has a built in chute (see arrow)
that will send the nut where you really don't want to have to go to retrieve it if it falls out of the socket.
(if this happens to you, see the note at the bottom of this post)
Once you have the wiper nut off, grasp the lower part of the arm and pull hard while shaking gently. The arm should come loose after a bit.
Now, raise the hood and detach the weatherstripping from the upper wiper cowl by disengaging the yellow clips.
After you have set the weatherstripping aside, remove the brake fluid reservoir access by disengaging the 2 clips at the forward end.
Next, remove the fasteners at each forward corner of the cowl by pulling the center pin up first, and then the entire fastener.
Now, snap out all of the retention clips that secure the upper cowl to the lower cowl. There are a lot of them so make sure that each one is fully released before you proceed (I broke one).
Next, gently remove the upper wiper cowl. I found it easiest to rest the hood on my head so I could lower the hood peg out of the way.
(At this point, I removed the battery because it was going to have to come out anyway for what I was doing. Plus, it was getting in my way.)
This will now expose the wiper motor and driving assembly. To remove this, disengage the 2 motor wiring harness clips and remove the 2 black bolts securing
the motor assembly to the lower cowl. Once the bolts are removed, gently slide the whole assembly in the direction of the arrow and pull it away from the firewall.
Next, remove the wire harness plug from the wiper motor so the whole assembly can be set aside.
Now, on to the lower wiper cowl: Remove the 2 10mm bolts securing the wiper assembly mount to the lower cowl and
then remove the rest of the bolts securing the lower cowl to the firewall (there are 10 total including the 2 I just mentioned).
Lastly, remove the one lone plastic clip on the passenger side next to the hood hinge before removing the entire lower cowl.
And there you have it. Re-assembly in reverse order of course. Since the wiper studs are grooved, it is pretty easy to get the arms right back in the orientation they were in when you took them off.
NOTE:
If the driver side washer arm nut fell down where I mentioned, here's probably what will happen: If your car is sitting on a level surface, you will hear the nut bounce off a few things under the hood. After a substantial amount of searching, you will find it just barely visible resting precariously on the back of the headlight assembly behind the parking/turn signal lamp deep into the quarter panel. Try to get a hold of it here because it gets worse if you can't......If while reaching for the bolt you manage to knock it off the back of the headlight,(as I did) hopefully you will hear a couple more bounces ending with a hollow 'THUD.' This is the sound of the nut finally coming to rest in the deep hollow created by the wheel well splash-guard and the front bumper. To get to this location, remove the 2 gray bolts circled. This should give you enough room to gently separate the splash-guard from the bumper to get your hand up in there to grab the nut.
Last edited by MR_LUV; 06-26-2021 at 09:20 AM. Reason: Awarded 10 Yr Badge
 04-24-2010, 11:49 PM
#2
Senior Member
SL Member

Join Date: Nov 2004
Location: McDonald, PA
Posts: 506
Beautiful !!!!!!!!!!
The only thing I would mention is:
Before pulling the wiper arm off, and after removing the nut, try to mark it's location on the splined wiper shaft. If you are a spline or two off, the wiper might hit the A pillar, or bottom out on the cowl, when in use on a rainy day.
Thanks for the GREAT write-up !!!!!!!!!

 04-25-2010, 06:06 AM
#4
Senior Member
Wagonistas
SL Member

Join Date: Mar 2005
Location: AZ
Posts: 4,080
Nice write up...I've taken mine off before using the same methods you described...To make sure your wiper arms go back in the same place just use blue painters tape and mark underneath the bottom of each blades on the front windshield...Mods should sticky this...
04-26-2010, 12:42 AM
#5
Senior Member
SL Member
Thread Starter
Join Date: Sep 2009
Location: Atlanta, GA
Posts: 116
Beautiful !!!!!!!!!!
The only thing I would mention is:
Before pulling the wiper arm off, and after removing the nut, try to mark it's location on the splined wiper shaft. If you are a spline or two off, the wiper might hit the A pillar, or bottom out on the cowl, when in use on a rainy day.
Thanks for the GREAT write-up !!!!!!!!!
The only thing I would mention is:
Before pulling the wiper arm off, and after removing the nut, try to mark it's location on the splined wiper shaft. If you are a spline or two off, the wiper might hit the A pillar, or bottom out on the cowl, when in use on a rainy day.
Thanks for the GREAT write-up !!!!!!!!!
05-14-2010, 12:30 AM
#6
Senior Member
SL Member
Thread Starter
Join Date: Sep 2009
Location: Atlanta, GA
Posts: 116
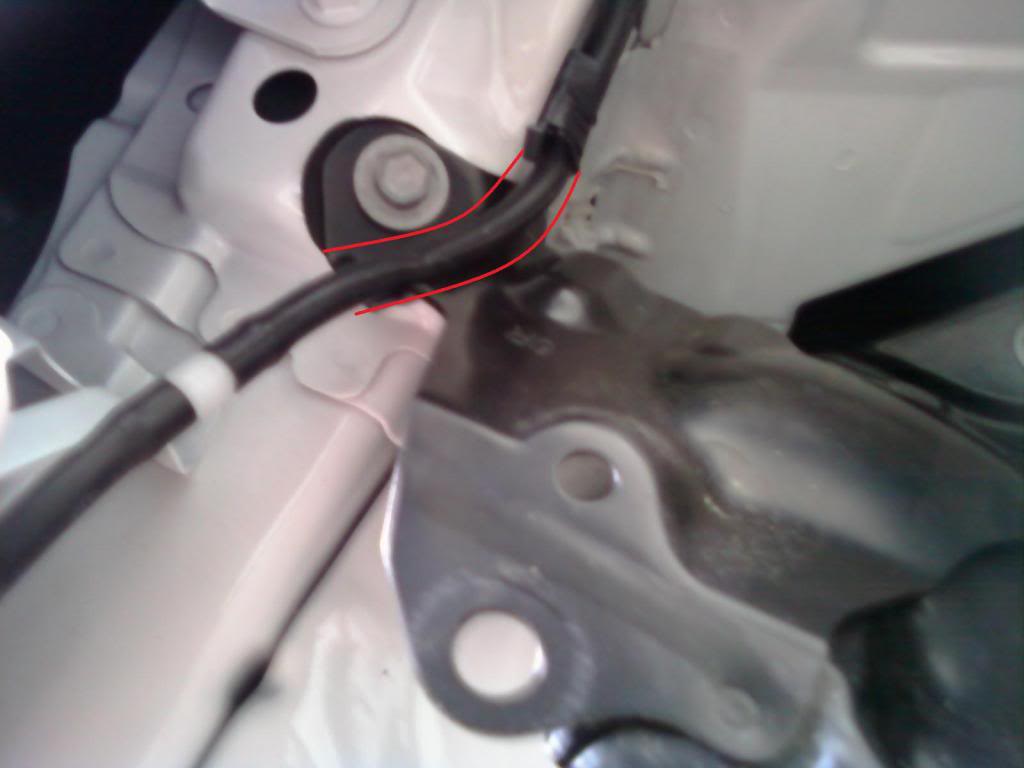
I should also add that when you're re-installing the lower wiper cowl, do pay close attention to the orientation of the front washer fluid line on the passenger side corner. The cowl should go UNDER the line not on top of it. If you accidentally place it on top, the washer line will be squished and kinked so as to not allow any washer fluid to get to the front windshield squirters. This is probably obvious to most of you but it wasn't to me......(cell phone pic)
 02-25-2018, 09:33 PM
#8
Banned
SL Member

Join Date: May 2016
Posts: 121
02-26-2018, 10:48 AM
#9
Administrator

SL Member
Administrator

Join Date: Dec 2007
Location: State of Confusion: CA
Posts: 2,583
Instead of criticizing the AGE of the thread, you should concentrate on the CONTENT. FYI, there are many Owners with cars that are 8 years old or less that may find the information useful.
It has over 15,000 views Including Yours. You seem to have a problem with older threads:
Sticky DIY-Under Seat Subwoofer Install: what I did (pic heavy) with over 41,000 views.
If you are Clueless, Read the OP's 1st post in the Top of this Thread above ▲▲ LOOK UP! ▲▲ Smh..
Administrator
____
It has over 15,000 views Including Yours. You seem to have a problem with older threads:
Sticky DIY-Under Seat Subwoofer Install: what I did (pic heavy) with over 41,000 views.
If you are Clueless, Read the OP's 1st post in the Top of this Thread above ▲▲ LOOK UP! ▲▲ Smh..
Administrator
____
Last edited by MR_LUV; 02-21-2020 at 05:45 AM.


Thread
Thread Starter
Forum
Replies
Last Post
18TTony
Scion xA/xB 1st-Gen Drivetrain & Power
2
05-10-2016 02:25 AM