2008 xB Reverse Camera Install: Step by Step..
 12-08-2018, 08:49 AM
#1
Junior Member
Thread Starter

Join Date: Nov 2018
Posts: 7
Here is a tutorial on the installation of a Reverse Camera on a 2008 xB. The installation assumes the display is in the dash,
camera will be mounted close to license plate on hatch back door, and the camera will be powered by the reverse light.
Tools and Materials: (in the order they'll be used)
1) Medium Flathead screwdriver and either a large Flathead or 8in+ panel clip tool.
2) Drill and metal drill bit a little bigger than the camera connector. Drill bits to mount camera if needed.
3) A narrow plumbers snake or 3 feet of stiff but flexible rod that can pass around rear window frame.
4) Electrical tape and electrical connectors, preferably T-tapes.
5) A piece of cloths hanger, narrow wire, or stick about a foot long.
6) A spoon with a flat smooth rounded handle or equivalent flat stick to push wires into roof cover.
7) 10mm socket to remove the tire jack tray and rear cleat.
 A sharp Awl like rod to poke as hole thru a rubber boot.
9) Optional; a rubber grommet or other means to seal around the drill hole.
Over view of Main Installation:
1) Mount camera and drill thru door.
2) Run wires thru hatch door and set up wire connections.
3) Pass wires thru umbilical boot.
4) Run wires in roof to dashboard.
5) Run wires inside rear door jam panels to reverse light
Over View of wires:
1) A reverse signal wire that goes from the reverse light dashboard display
2) Camera wire that goes from the camera to the display
3) Power wire, in our case power is drawn from the reverse signal wire
3) Ground wire that connects to backup light ground wire(or any part of the chassis).
Note: The reverse wire needs to come close enough to the power wire to be able to connect the two. This setup powers the camera only
when the backup lights turn on. If you want the camera on all the time, then don't join it to reverse signal wire and instead bring it to the dash and connect it an ACC wire.
Installation:
Step 1: Remove rear hatch door panels
There are two panels. The large bottom panel with 13 clips and the top 3rd brake light panel with 4 clips. To remove bottom panel, put a small Flathead screwdriver in the notch near the top of the panel on the passenger's side. carefully pry up on it so that you
can insert a panel tool or large screwdriver and pry up to disengage the closest clip. You may be able to insert your hand and push up to disengage clip but you might damage the panel or break the clips. Repeat on next closest clip until panel comes off.
Do the same for the upper panel. The notch is on the drivers side. Be careful prying because there is a wire to 3rd brake light.
Disconnect this harness by pressing on tab and pulling out.
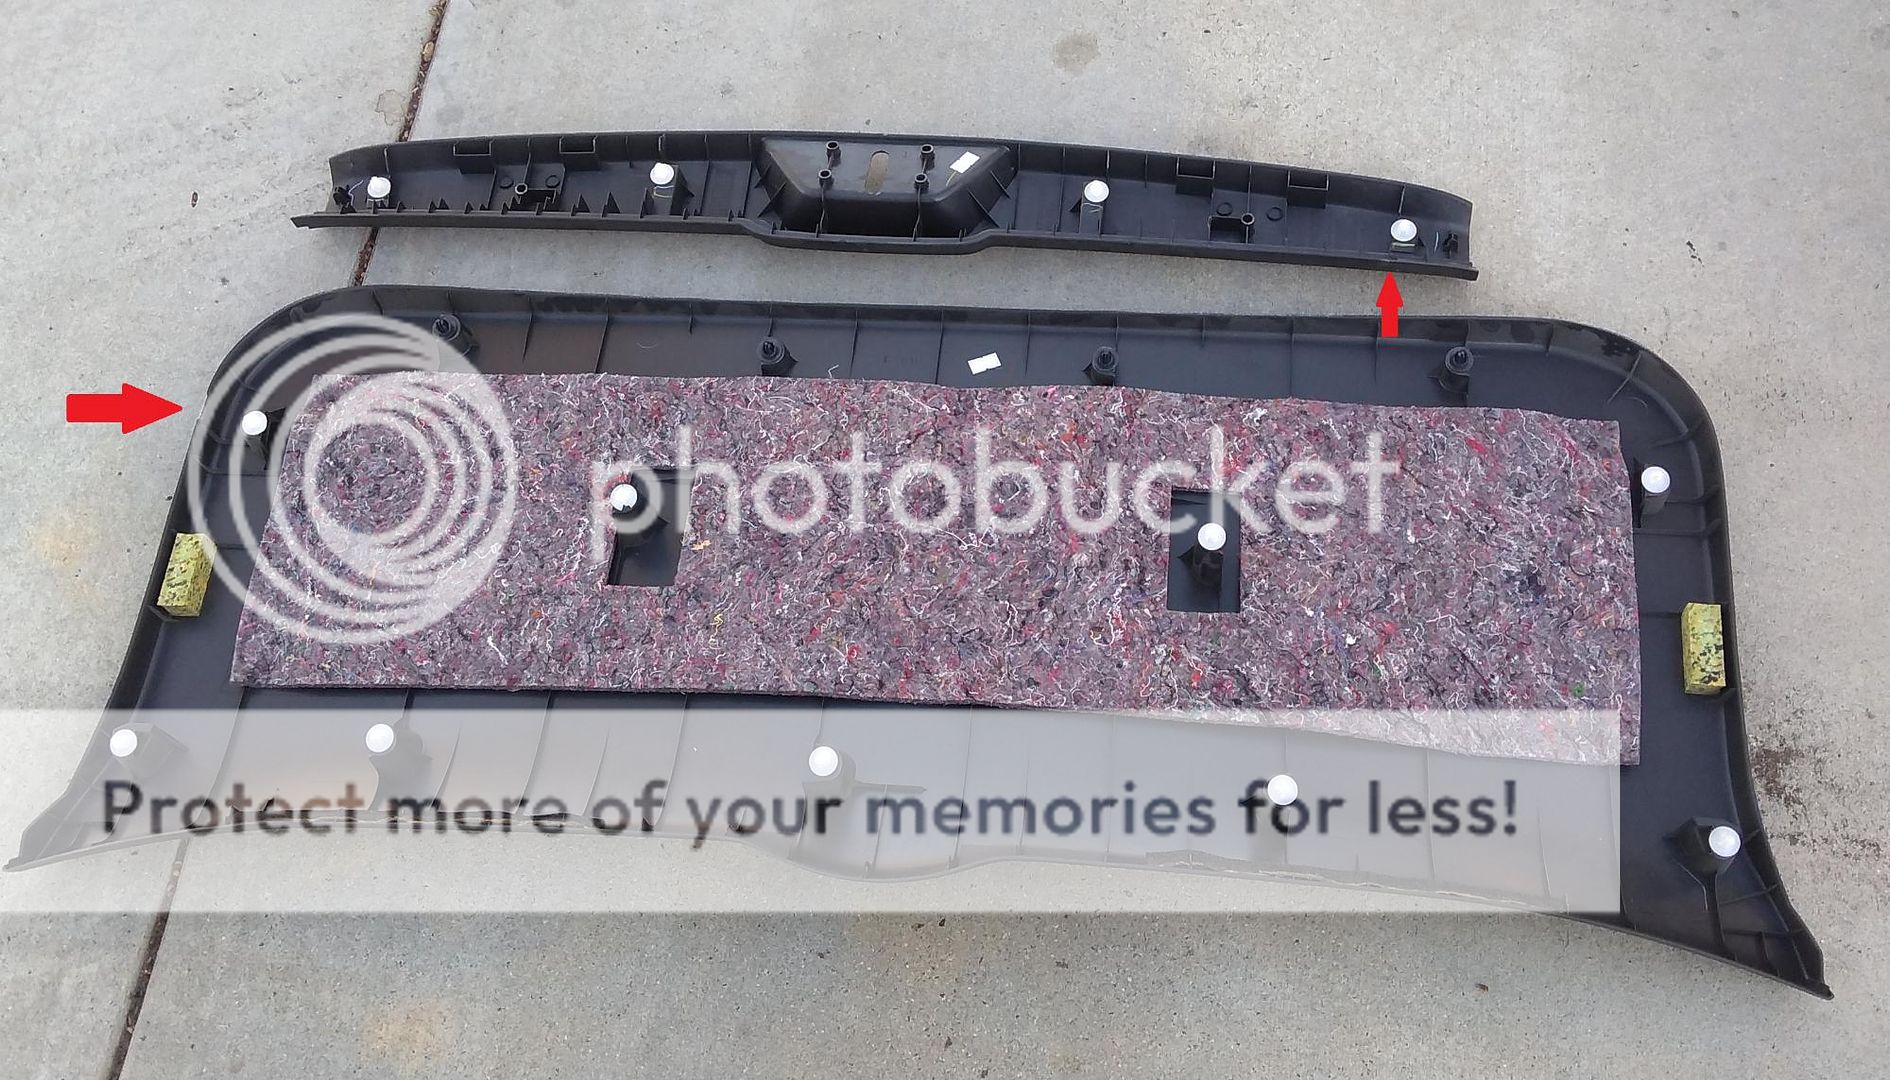
Pic: Location of clips and notches
Step 2: Mounting Camera and drilling thru door
Locate where the camera is to be mounted and drill holes if needed and mount. Make sure to drill in an area that doesn't damage
anything inside. Next drill a hole near the camera and pass the wires inside. The inside area should be accessible to fish the
wires out. Seal around the hole by cutting on side of a grommet and passing it thru the wires and into the hole or use window
caulking. If the hole is very small, you can wrap the wire in electrical tape to thicken it and press it into the hole to seal.
Step 3: Setting up the wires and routing it thru the hatch door.
Check to make sure all wires are long enough before installing and add extra wire if needed. Run your wires to the opening at the bottom of hatch door on the passengers side. Splice in the power wire to the reverse signal wire(T-taps work great).
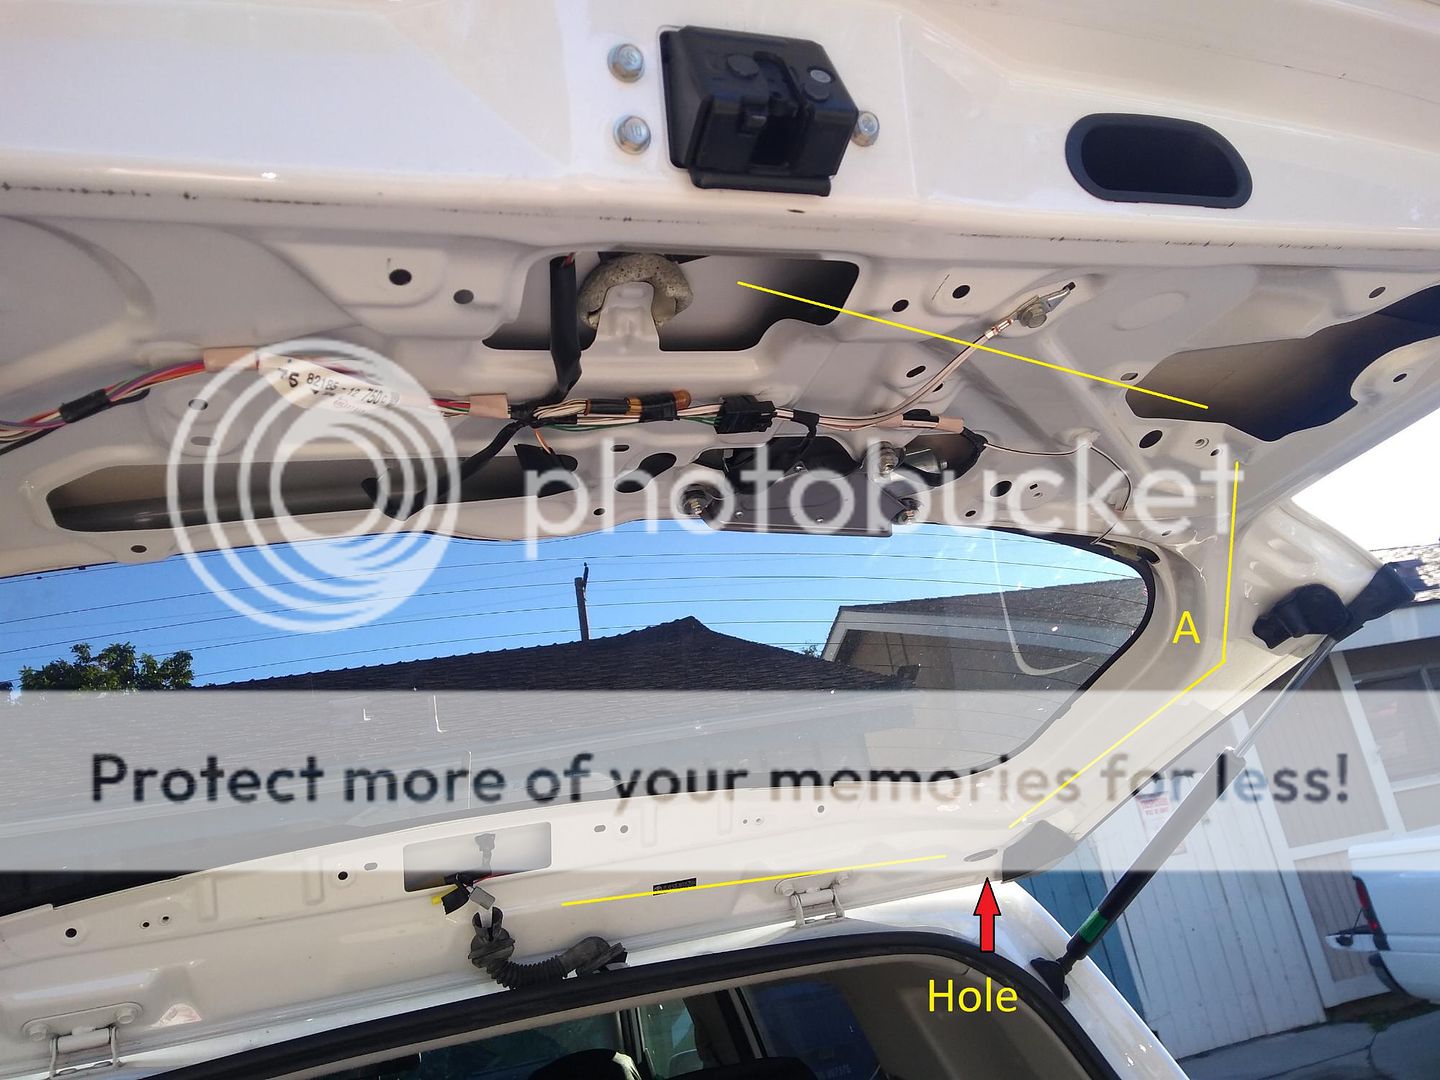
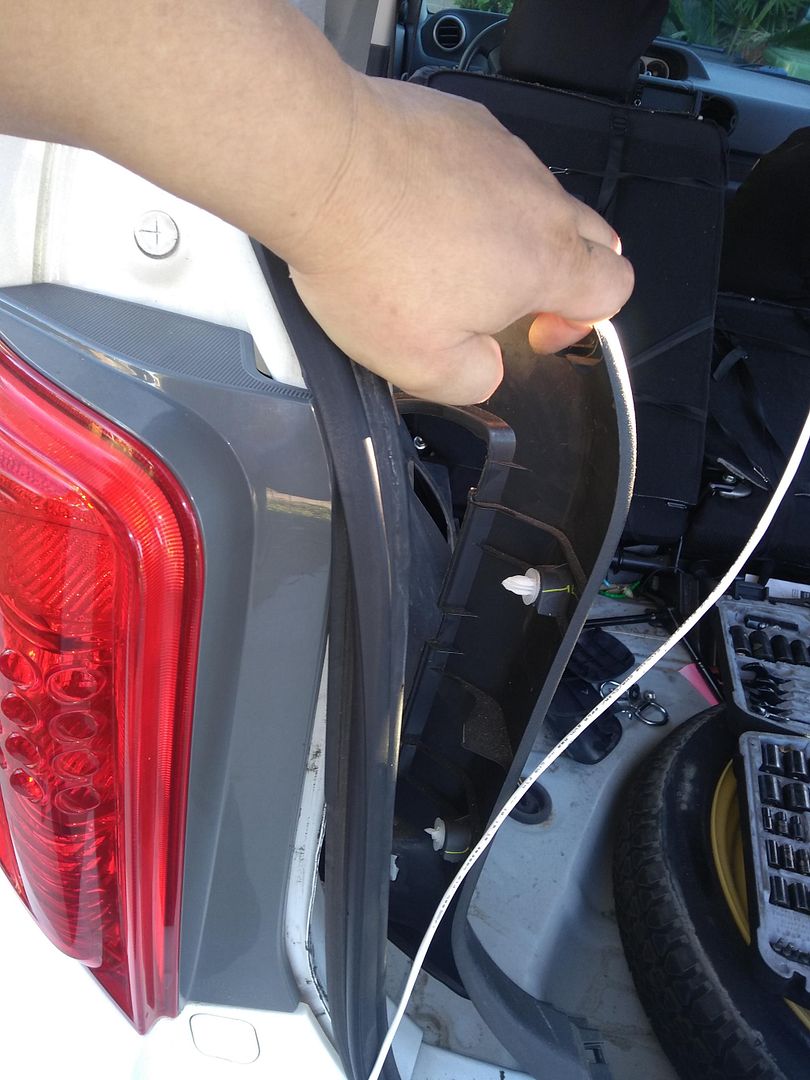
Next, remove the hole plug at the top passenger side of hatch door and run a snake from the hole to the opening where the wires are. It will be hard to get the snake past the bend at window("A" in picture) but wiggling it around will get it thru.
Use electrical tape and tape all the wires to the snake. stagger all the connectors so that the bundle is as narrow and flexible as possible. Make the head as snag free as possible. Next, slowly fish the wires thru feed the wires on the opening side while pulling on the hole side.
Once thru, untape and pull all the wires thru the hole. Now insert the snake thru the top center opening in hatch and snake it to the hole. Use your fingers to thread it out the hole. Re-tape the wires and fish it thru again.
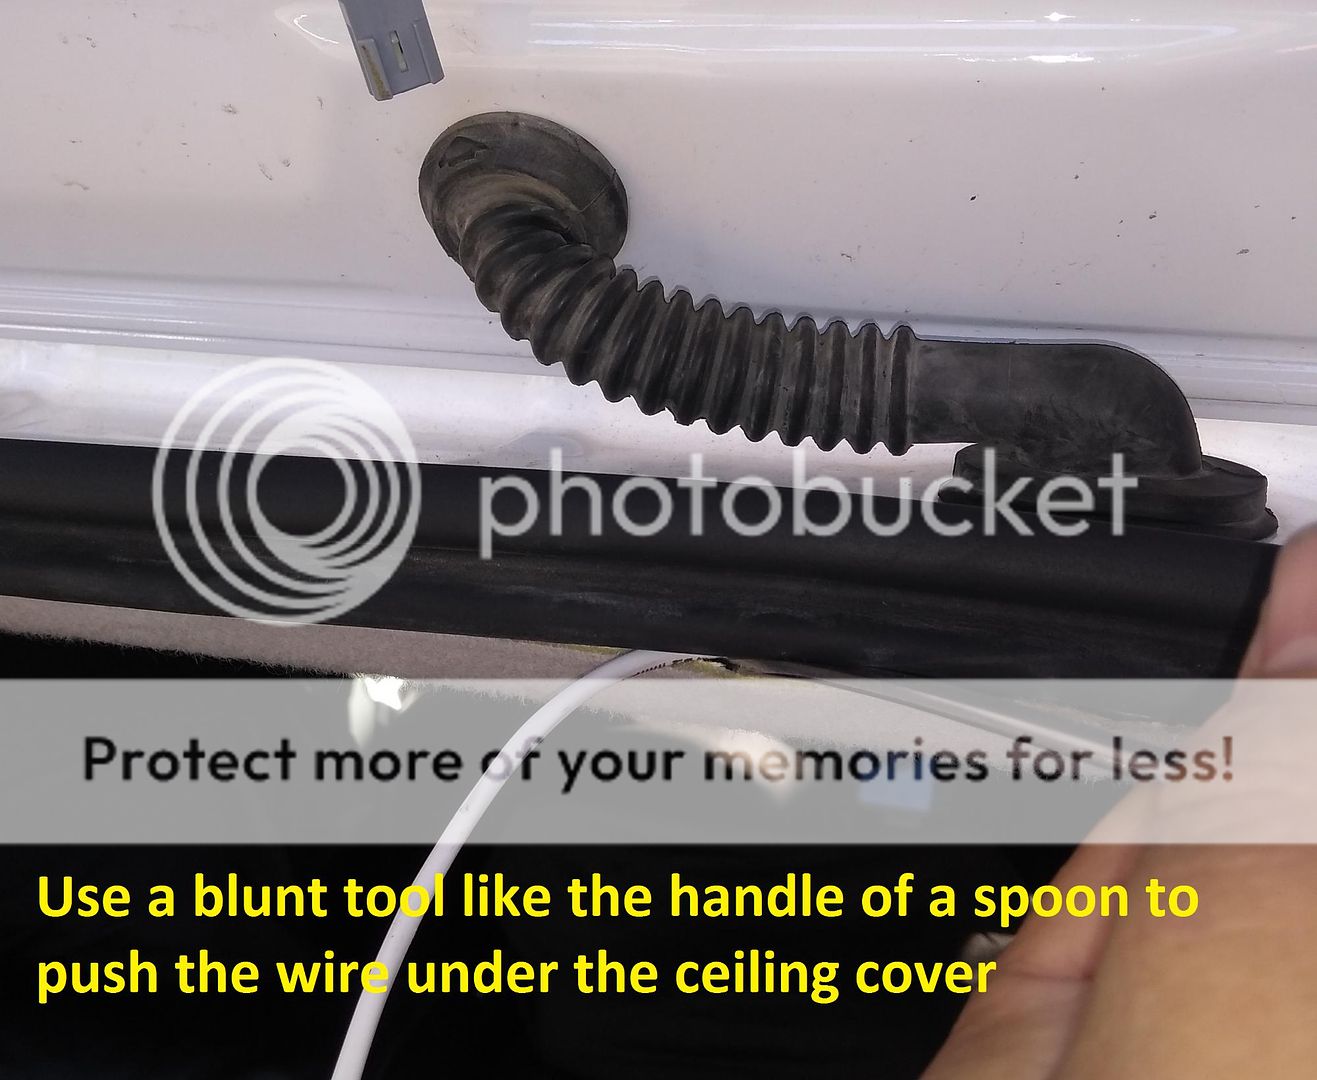
Step 4: Threading wires thru Umbilical boot to roof disconnect the ends of umbilical boot at top by gently prying them off. If the plastic collar on the bottom part comes off with boot, remove it because it makes passing the wires harder.
Next. take a coat hanger wire or thin rod and stick it thru the boot.Tape the wires to the wire and gently and slowly pull it thru.

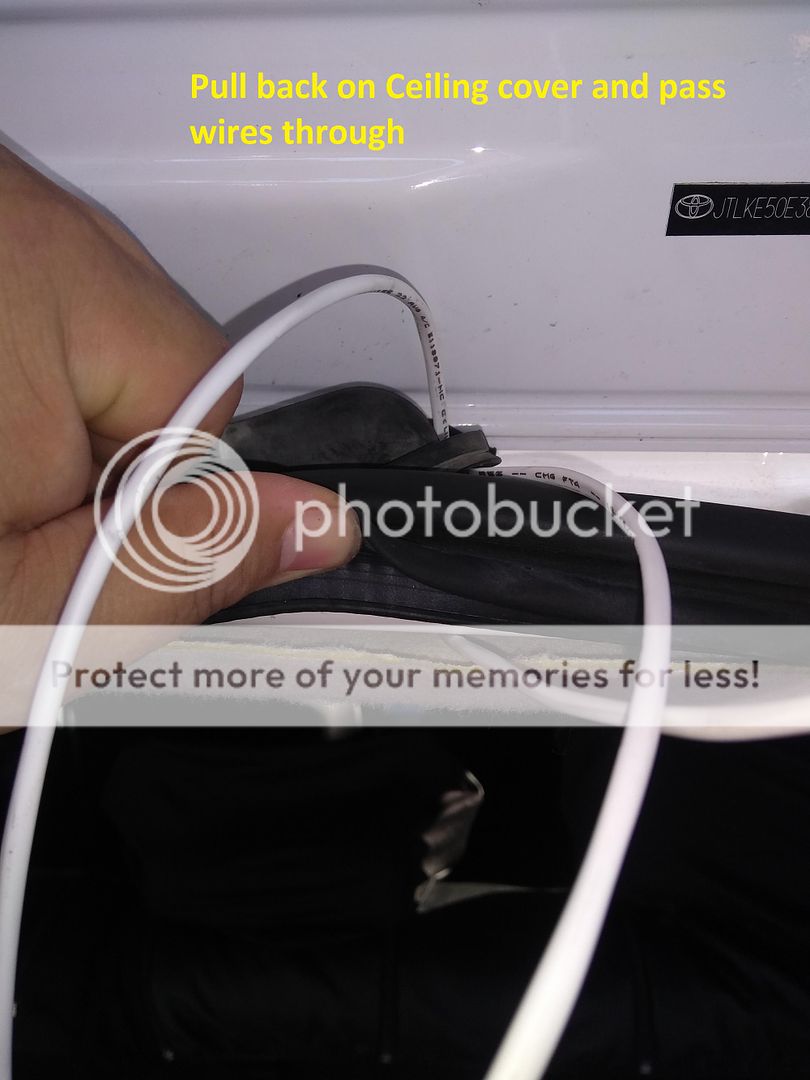
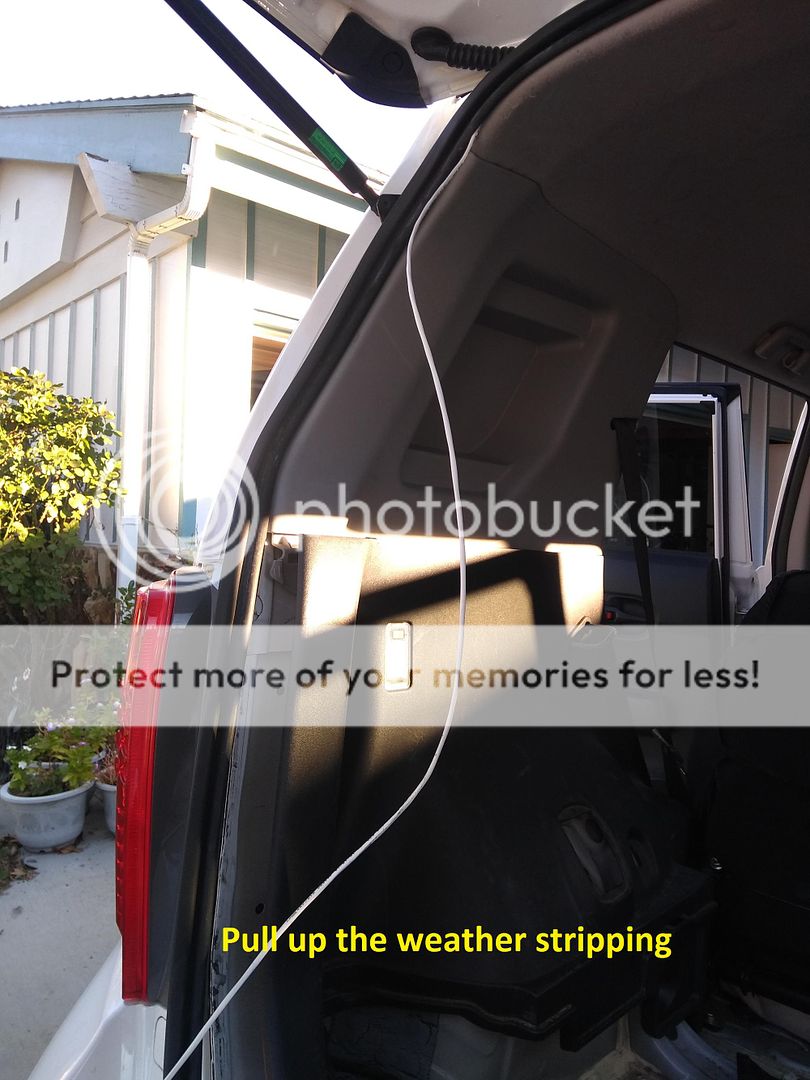
Now, move up the top weather seal and pull down the roof liner(cover) just enough to get a finger in. Push the wires thru the roof hole and pull all the wires thru.
Step 5: Wires to dashboard.
Take the camera and one end of the reverse signal wire and using the handle of your spoon, start pushing the wires inside the roof liner edge along the passenger side then down the passenger side front door jam.
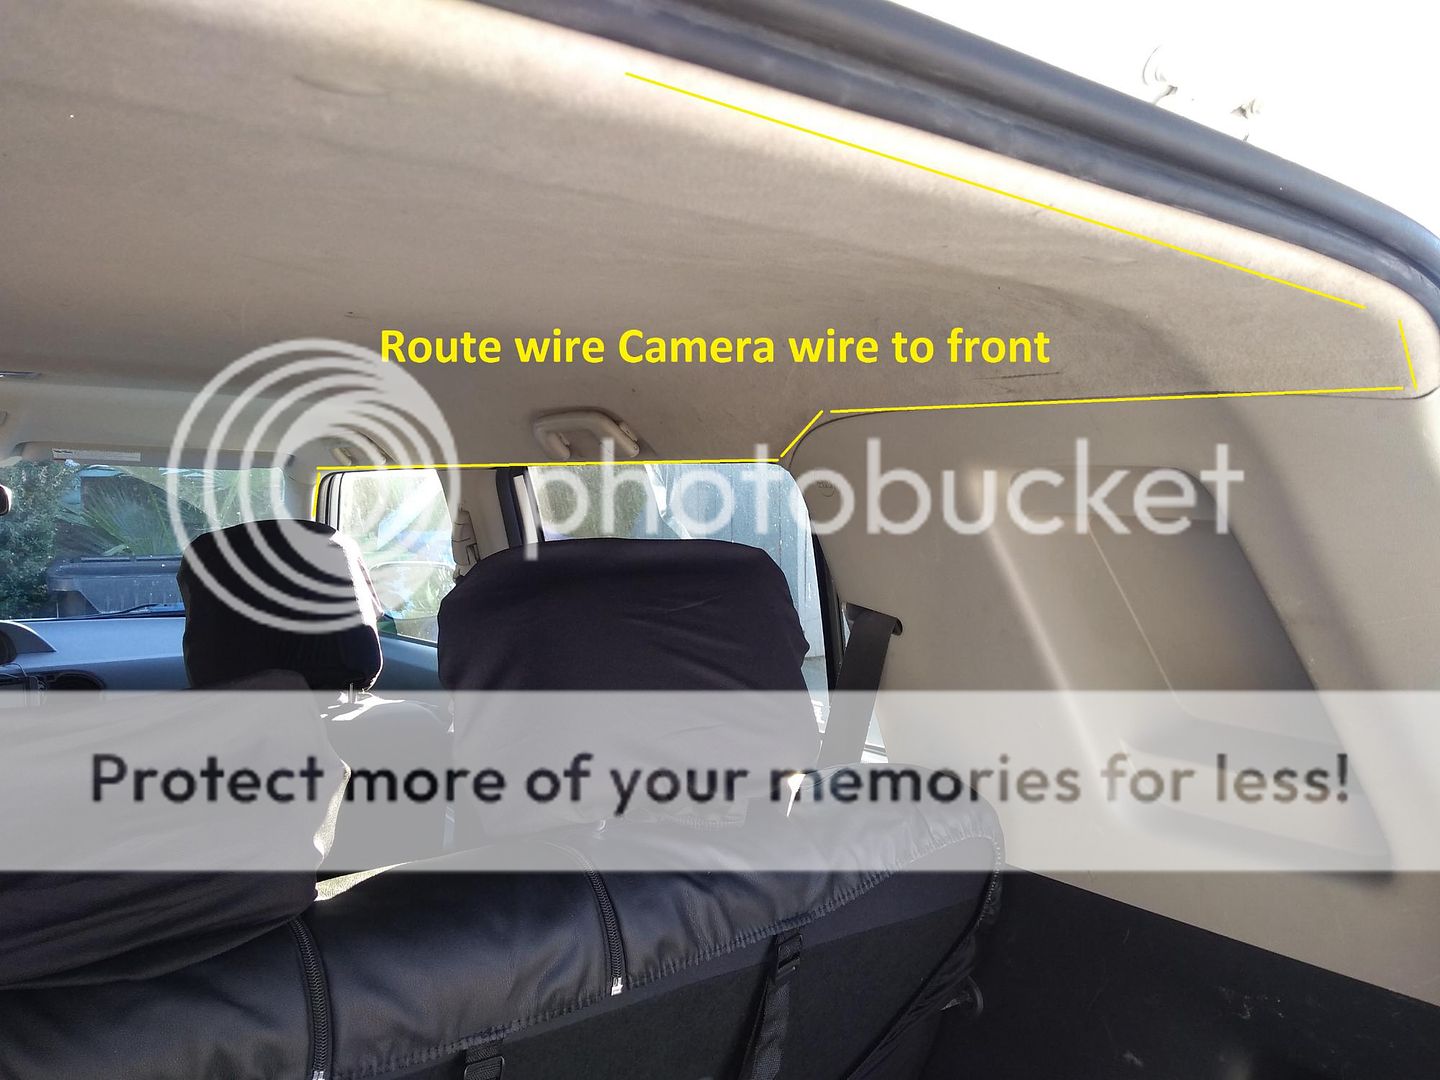
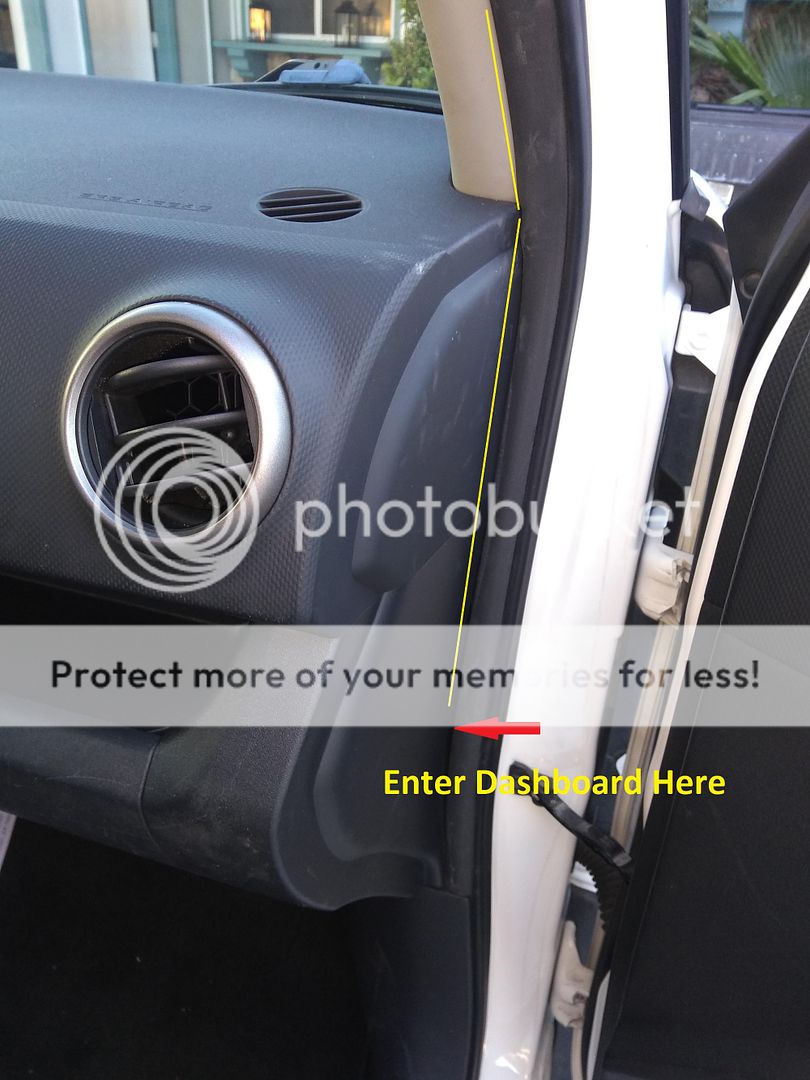
At about the glove box height, you can pass the wires thru to the dashboard. Wrap electric tape on the wire connector and make a little lead with the tape to help pull it thru. First, remove glove box by squeezing in its sides and pulling it out.
Next, push the side of the dashboard to make a small gap and thread the lead thru. While maintaining the gap, reach into the glove box opening and pull the lead to get the connector thru. Now run the wires to the display and connect.
camera will be mounted close to license plate on hatch back door, and the camera will be powered by the reverse light.
Tools and Materials: (in the order they'll be used)
1) Medium Flathead screwdriver and either a large Flathead or 8in+ panel clip tool.
2) Drill and metal drill bit a little bigger than the camera connector. Drill bits to mount camera if needed.
3) A narrow plumbers snake or 3 feet of stiff but flexible rod that can pass around rear window frame.
4) Electrical tape and electrical connectors, preferably T-tapes.
5) A piece of cloths hanger, narrow wire, or stick about a foot long.
6) A spoon with a flat smooth rounded handle or equivalent flat stick to push wires into roof cover.
7) 10mm socket to remove the tire jack tray and rear cleat.
9) Optional; a rubber grommet or other means to seal around the drill hole.
Over view of Main Installation:
1) Mount camera and drill thru door.
2) Run wires thru hatch door and set up wire connections.
3) Pass wires thru umbilical boot.
4) Run wires in roof to dashboard.
5) Run wires inside rear door jam panels to reverse light
Over View of wires:
1) A reverse signal wire that goes from the reverse light dashboard display
2) Camera wire that goes from the camera to the display
3) Power wire, in our case power is drawn from the reverse signal wire
3) Ground wire that connects to backup light ground wire(or any part of the chassis).
Note: The reverse wire needs to come close enough to the power wire to be able to connect the two. This setup powers the camera only
when the backup lights turn on. If you want the camera on all the time, then don't join it to reverse signal wire and instead bring it to the dash and connect it an ACC wire.
Installation:
Step 1: Remove rear hatch door panels
There are two panels. The large bottom panel with 13 clips and the top 3rd brake light panel with 4 clips. To remove bottom panel, put a small Flathead screwdriver in the notch near the top of the panel on the passenger's side. carefully pry up on it so that you
can insert a panel tool or large screwdriver and pry up to disengage the closest clip. You may be able to insert your hand and push up to disengage clip but you might damage the panel or break the clips. Repeat on next closest clip until panel comes off.
Do the same for the upper panel. The notch is on the drivers side. Be careful prying because there is a wire to 3rd brake light.
Disconnect this harness by pressing on tab and pulling out.
Pic: Location of clips and notches
Step 2: Mounting Camera and drilling thru door
Locate where the camera is to be mounted and drill holes if needed and mount. Make sure to drill in an area that doesn't damage
anything inside. Next drill a hole near the camera and pass the wires inside. The inside area should be accessible to fish the
wires out. Seal around the hole by cutting on side of a grommet and passing it thru the wires and into the hole or use window
caulking. If the hole is very small, you can wrap the wire in electrical tape to thicken it and press it into the hole to seal.
Step 3: Setting up the wires and routing it thru the hatch door.
Check to make sure all wires are long enough before installing and add extra wire if needed. Run your wires to the opening at the bottom of hatch door on the passengers side. Splice in the power wire to the reverse signal wire(T-taps work great).
Next, remove the hole plug at the top passenger side of hatch door and run a snake from the hole to the opening where the wires are. It will be hard to get the snake past the bend at window("A" in picture) but wiggling it around will get it thru.
Use electrical tape and tape all the wires to the snake. stagger all the connectors so that the bundle is as narrow and flexible as possible. Make the head as snag free as possible. Next, slowly fish the wires thru feed the wires on the opening side while pulling on the hole side.
Once thru, untape and pull all the wires thru the hole. Now insert the snake thru the top center opening in hatch and snake it to the hole. Use your fingers to thread it out the hole. Re-tape the wires and fish it thru again.
Step 4: Threading wires thru Umbilical boot to roof disconnect the ends of umbilical boot at top by gently prying them off. If the plastic collar on the bottom part comes off with boot, remove it because it makes passing the wires harder.
Next. take a coat hanger wire or thin rod and stick it thru the boot.Tape the wires to the wire and gently and slowly pull it thru.
Now, move up the top weather seal and pull down the roof liner(cover) just enough to get a finger in. Push the wires thru the roof hole and pull all the wires thru.
Step 5: Wires to dashboard.
Take the camera and one end of the reverse signal wire and using the handle of your spoon, start pushing the wires inside the roof liner edge along the passenger side then down the passenger side front door jam.
At about the glove box height, you can pass the wires thru to the dashboard. Wrap electric tape on the wire connector and make a little lead with the tape to help pull it thru. First, remove glove box by squeezing in its sides and pulling it out.
Next, push the side of the dashboard to make a small gap and thread the lead thru. While maintaining the gap, reach into the glove box opening and pull the lead to get the connector thru. Now run the wires to the display and connect.
Last edited by MR_LUV; 12-09-2018 at 03:48 AM. Reason: Becomes a Sticky
 12-08-2018, 08:50 AM
#2
Junior Member
Thread Starter
Join Date: Nov 2018
Posts: 7
Step 6: Wires to backup lights.
Run the other end of reverse wire and ground ir along drivers side rear door jam.
Remove the center panel at bottom of rear door jam - it has four clips. Remove the cargo floor cover to get to tire jack tray.
Remove the two 10mm nuts and pull the tray out.
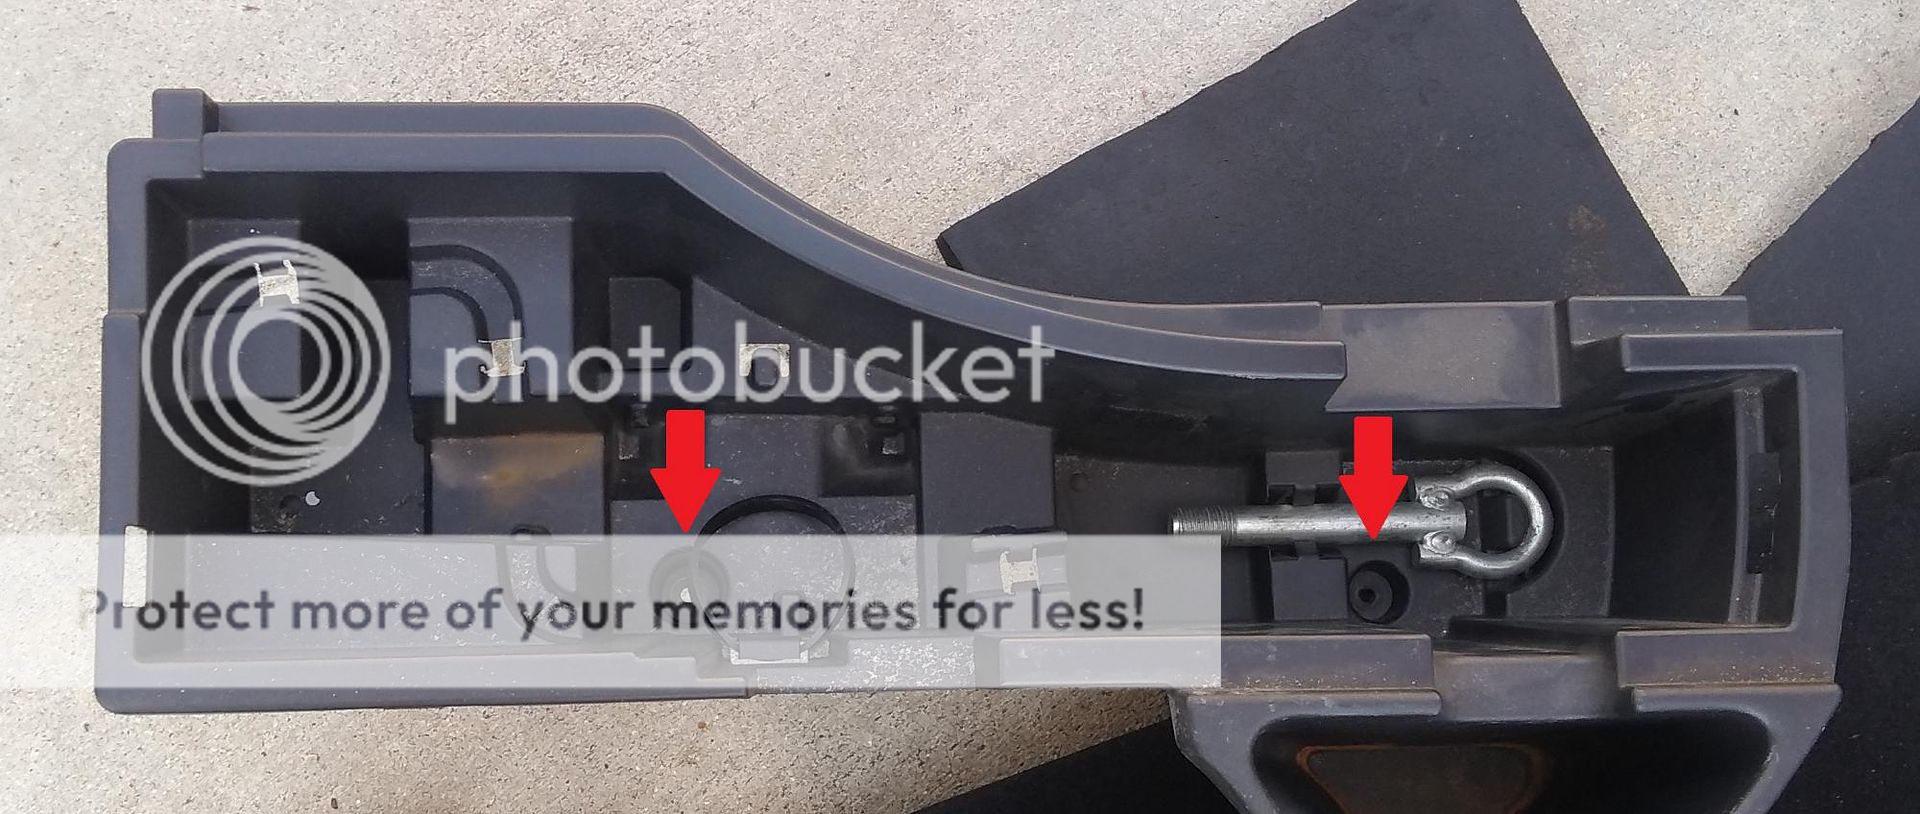
Remove the 10mm bolt holding the cargo loop. The backup light wire boot is in the behind the bottom corner of rear panel.
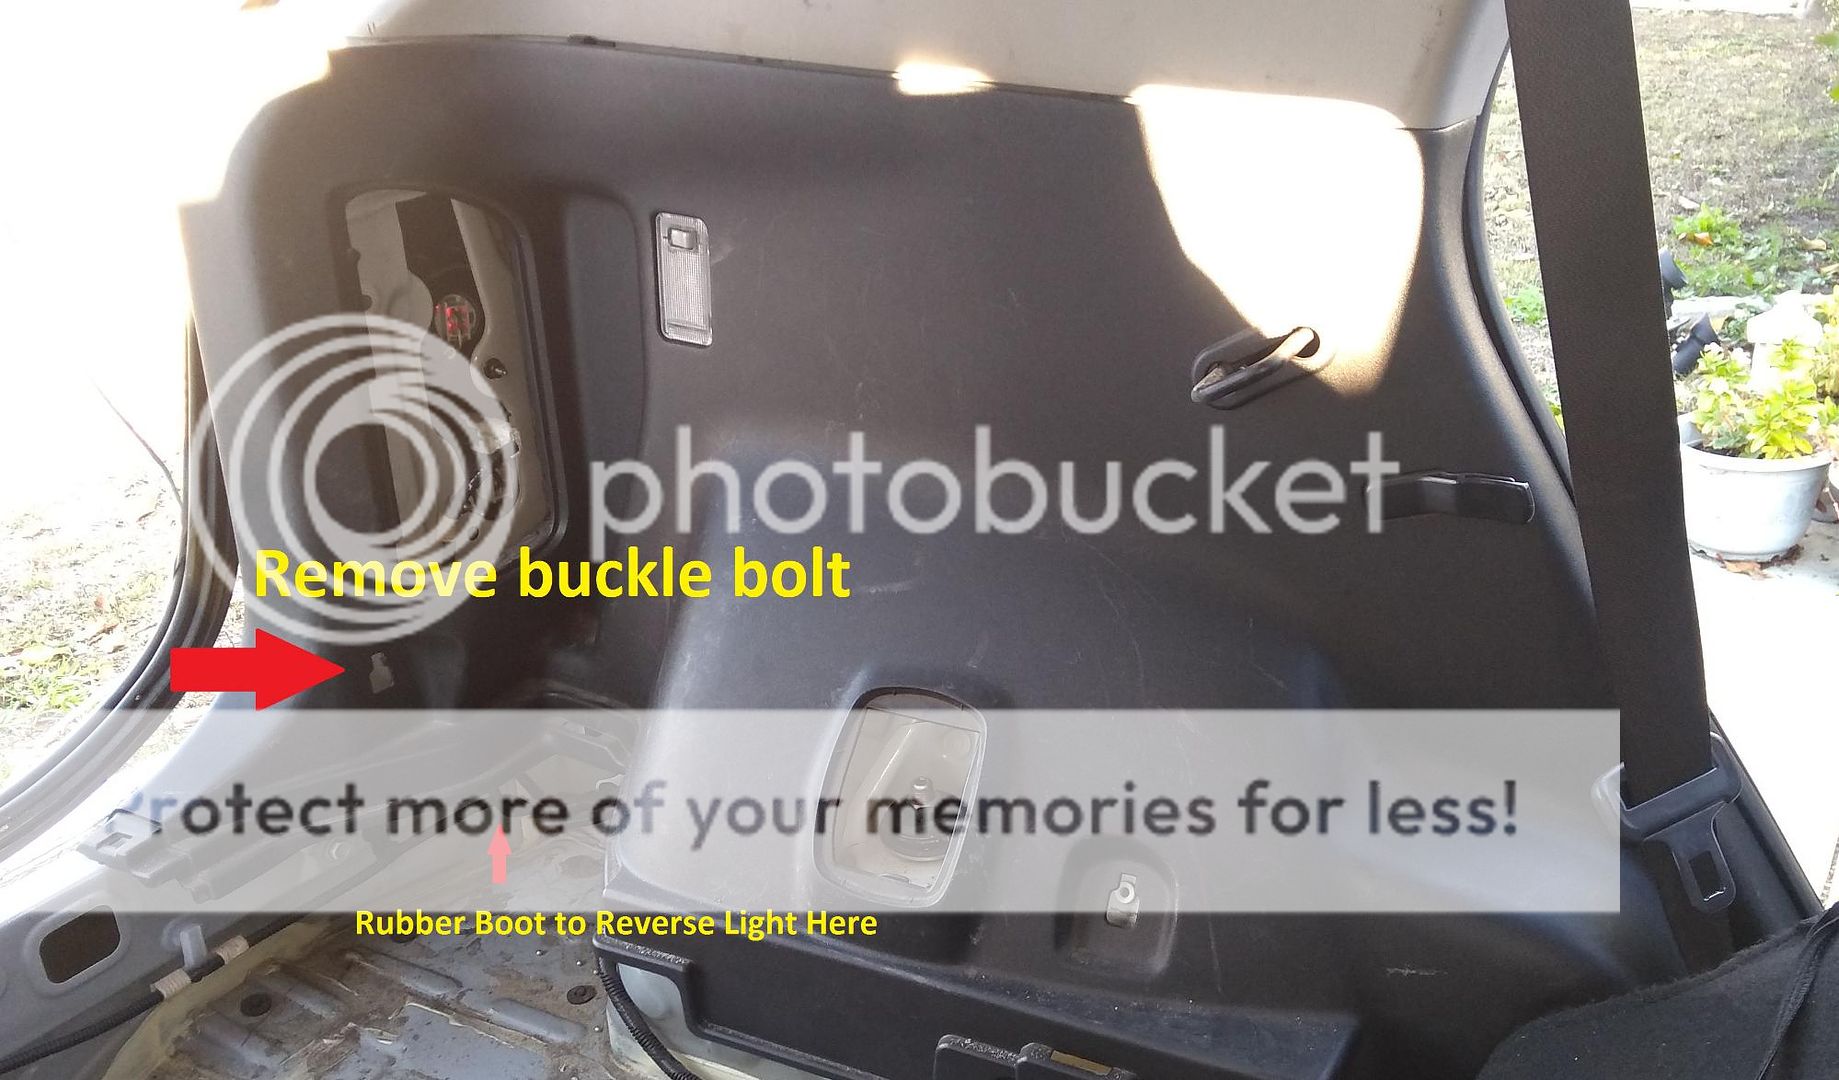
Pull gently on the rear panel to disengage two clips. The whole panel need not be taken off, we only need room to run the wires.
Find the backup light boot by reaching under the bumper and feeling your way along from the backup light tracing the wires up to where they enter the cargo area thru the boot. Now, reach around from the cargo side thru the opening in the panel with your other hand
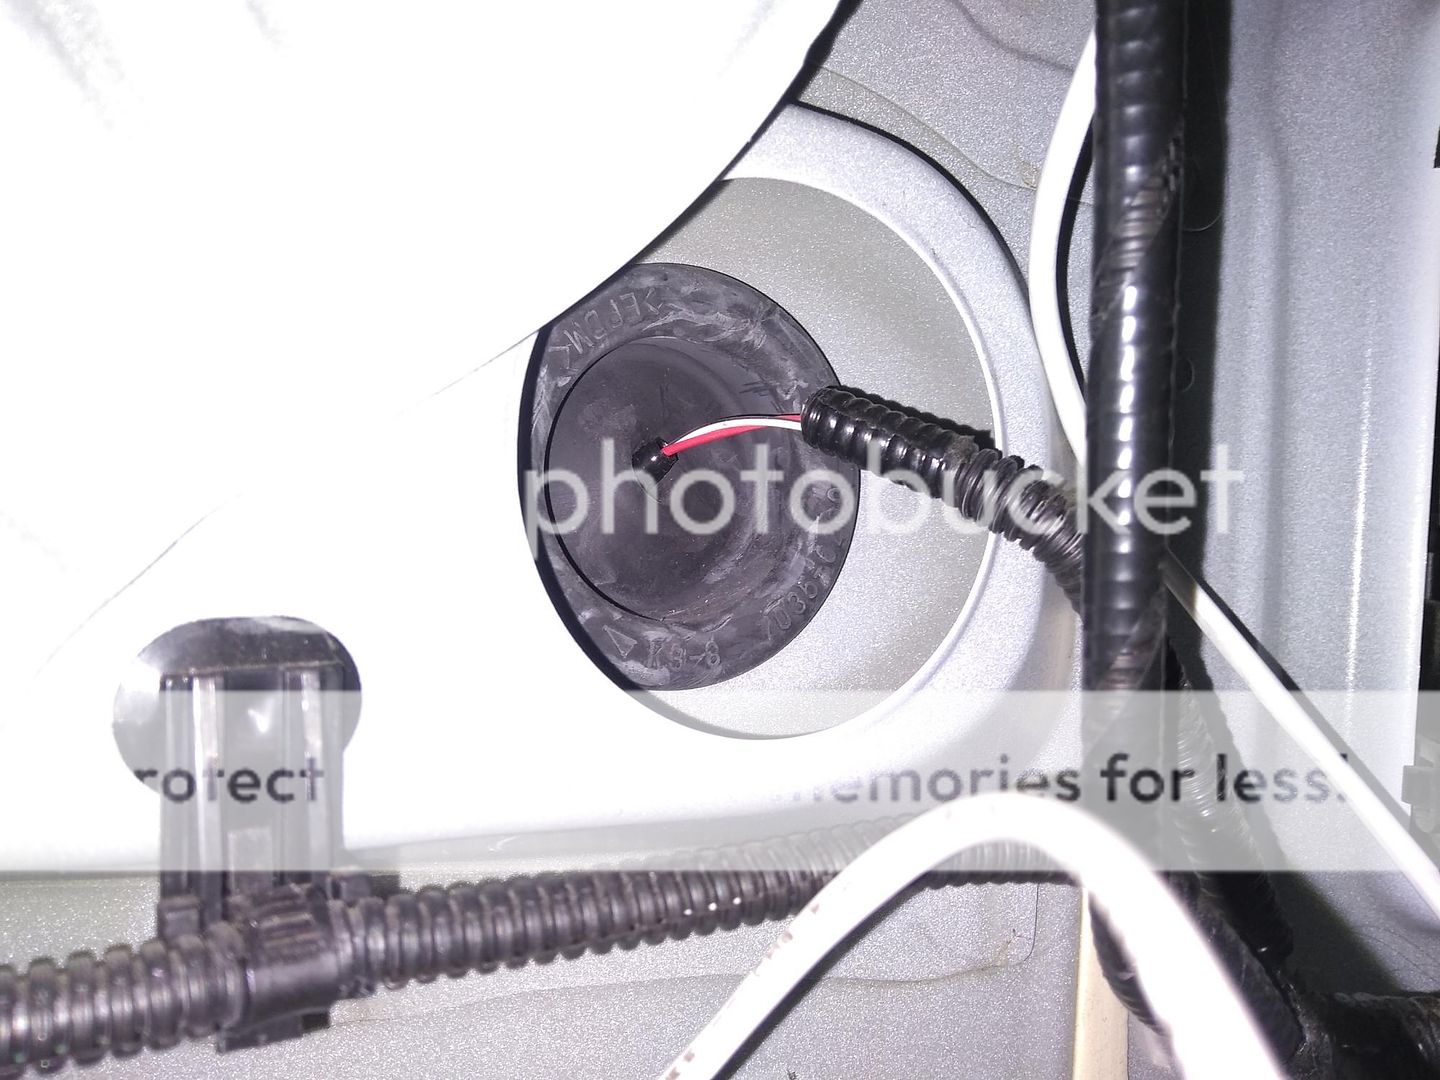
and feel around until both hands touch to locate the boot from inside. Next, tape the wires to a sharp rod like an Awl. Make sure the sharp tip is exposed and the bundle is as stream line as possible. Push the Awl thru near the edge of the rubber boot
being careful not the damage the any wires. The boot is very strong and elastic so no sealing is necessary. While the Awl is still pushed thru, pull as much of the wire to the outside as possible forming a loop on the other side. then pull out the Awl just
enough to be able to untape the wires without pulling the loop back thru. Now pull all the wire thru and T-Tap it into the back light wires. The back light wire colors are: reverse wire is red or green and the ground wire is black or white.
Now, go test the system and if everything is OK, put everything back back together.
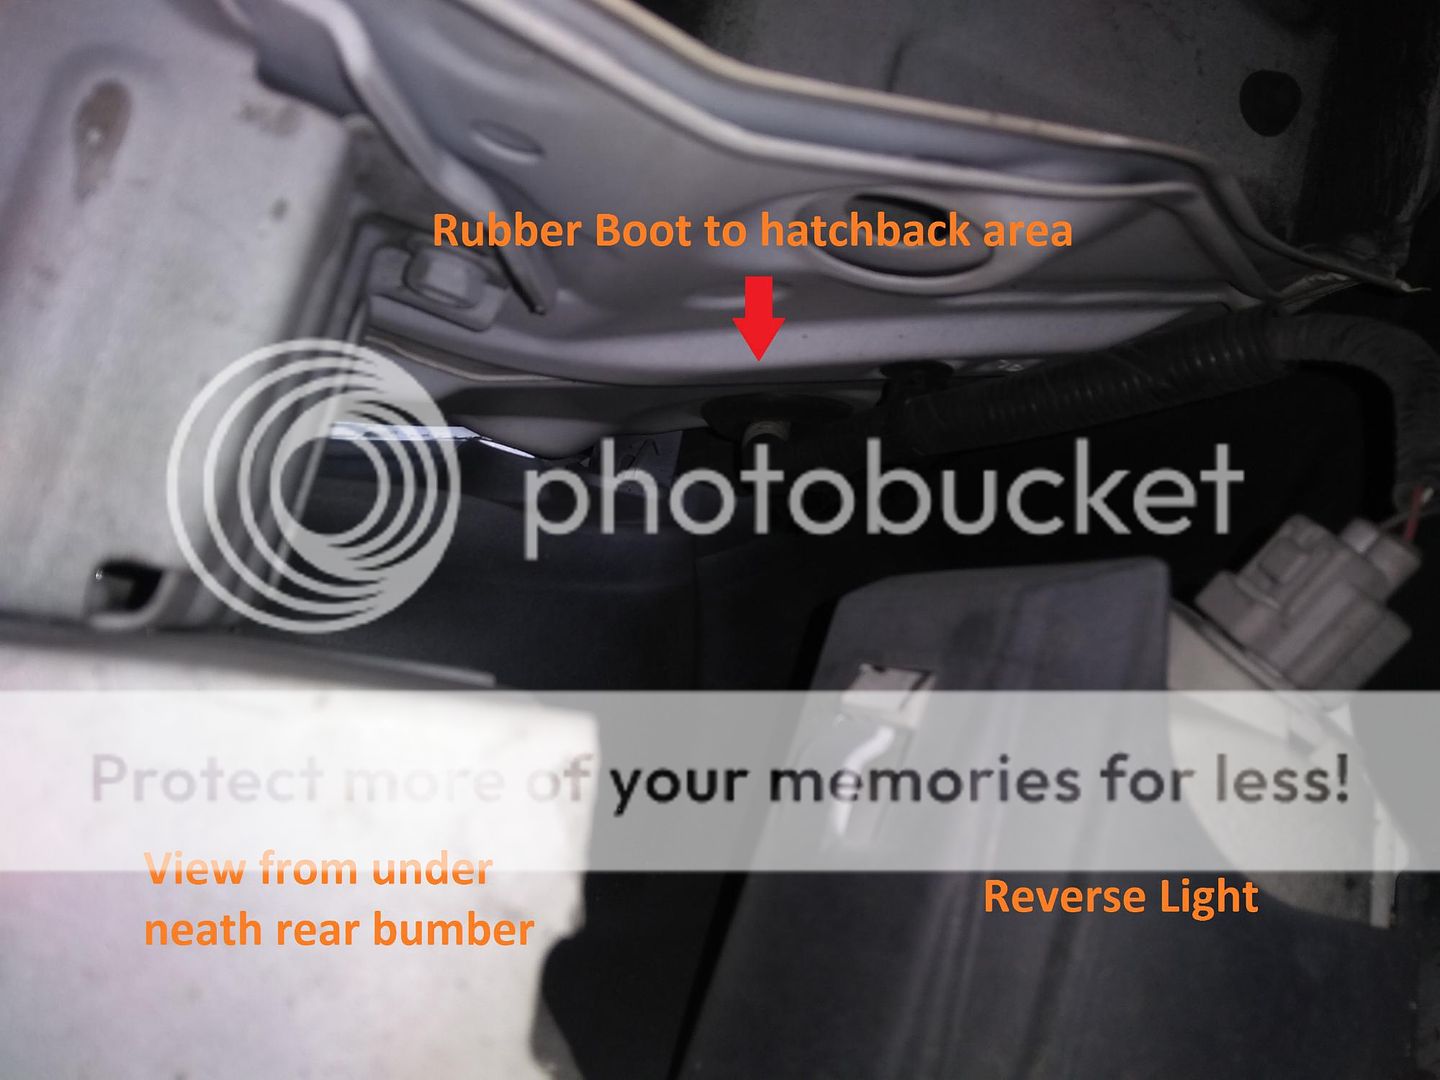
View from under bumper.
View from inside, probably can't see it unless the whole panel is removed.
_______________________________
Run the other end of reverse wire and ground ir along drivers side rear door jam.
Remove the center panel at bottom of rear door jam - it has four clips. Remove the cargo floor cover to get to tire jack tray.
Remove the two 10mm nuts and pull the tray out.
Remove the 10mm bolt holding the cargo loop. The backup light wire boot is in the behind the bottom corner of rear panel.
Pull gently on the rear panel to disengage two clips. The whole panel need not be taken off, we only need room to run the wires.
Find the backup light boot by reaching under the bumper and feeling your way along from the backup light tracing the wires up to where they enter the cargo area thru the boot. Now, reach around from the cargo side thru the opening in the panel with your other hand
and feel around until both hands touch to locate the boot from inside. Next, tape the wires to a sharp rod like an Awl. Make sure the sharp tip is exposed and the bundle is as stream line as possible. Push the Awl thru near the edge of the rubber boot
being careful not the damage the any wires. The boot is very strong and elastic so no sealing is necessary. While the Awl is still pushed thru, pull as much of the wire to the outside as possible forming a loop on the other side. then pull out the Awl just
enough to be able to untape the wires without pulling the loop back thru. Now pull all the wire thru and T-Tap it into the back light wires. The back light wire colors are: reverse wire is red or green and the ground wire is black or white.
Now, go test the system and if everything is OK, put everything back back together.
View from under bumper.
View from inside, probably can't see it unless the whole panel is removed.
_______________________________
Last edited by MR_LUV; 12-09-2018 at 03:59 AM. Reason: Made into a Sticky


 12-09-2018, 09:38 PM
#5
Junior Member
Thread Starter
Join Date: Nov 2018
Posts: 7
Extra Info: The gear I chose and why
I decided to include this help people decide what they want to look for as well as what they want to avoid.
AUTO-VOX Cam 6

1) Very good ratings and price ($20)
2) Camera and harness wire are separate so they can be install individually.
3) Connector from camera to harness is very narrow - only needs a 7/32in drill hole through hatch door.
4) Camera mounts behind the license plate making it hidden and easy to install.
5) Camera adjustment is by bending the mount which is very effective. The swiveling types can go out of adjustment when you slam the hatch shut.
The one drawback is there is no built in LED but, my work around was to install a brighter LED back light. Besides, those camera LEDs are not replaceable when they burn out. The back light bulb is readily available and easily replaced.
LED Auxbeam 7440
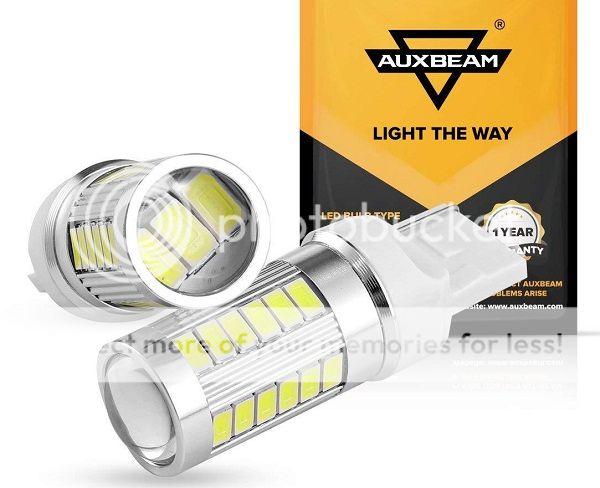
I needed this because my camera didn't have built in LED so it was a bit grainy looking at night. These LEDs are about three times brighter the stock ones at 800 lumens and use less than half the power.
Installation is easy, reach under the bumper and twist out the back light assembly. Pull out old bulb and press in the LED.
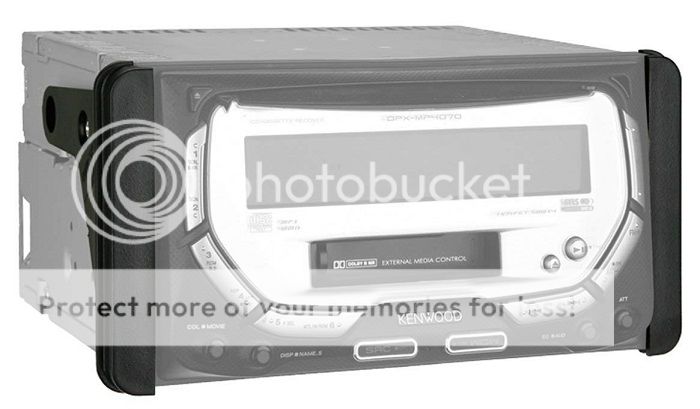
BOSS Audio BV9364B

This is a nice affordable unit but I'm only talking about it to cover an installation aspect that you might face. 1) It had a rear USB on a 3in lead. I bought a 2 foot USB male to female cable and ran from radio to glove box so I connect my flash drives there.
2) the unit is not flush with dash but instead sticks out just a little. It doesn't look bad but caused an installation issue because the dash kit was designed to wrap in front of the stereo. So make sure your stereo and dash kit are compatible or can be modified to fit together.
Metra 95-8202
I bought this dash kit because their aren't many choices. Some kits that say fits 2008 Scion xB are wrong and simply don't fit. Be aware that many dash kits are designed to fit many cars and require cutting off sections or snapping of tabs so check return polices before buying. I bought using Amazon Prime and had no problem returning a dash kit that didn't fit and I broke off some tabs. This Metra kit requires using and modifying the old stereo mounts that unscrews by 4 screws on each side. You have to grind off four positioning notches on each mounts by a grinder wheel, Dremel tool or file. Sandpaper won't work. Also, if your stereo stick out a bit, this dash kit won't fit without modifications. You will need a belt sander or disk sander - if these are hand held types than you also need some kind of vice to hold them stationary (I used a Black & Decker Workmate). I had to sand off the lip at the front of the dash kit because my stereo stuck out past the dash so this lip rather than covering the front of the stereo was hitting the side of it and spreading out more than it should making it too wide to pass through the vent/stereo panel. It was a bit tricky and dangerous to hold the small dash kit against the spinning sanding wheel. Because of its shape, you can't mount the dash kit on a vice and hand sanding would take hours.
_____________________________________________
I decided to include this help people decide what they want to look for as well as what they want to avoid.
AUTO-VOX Cam 6
1) Very good ratings and price ($20)
2) Camera and harness wire are separate so they can be install individually.
3) Connector from camera to harness is very narrow - only needs a 7/32in drill hole through hatch door.
4) Camera mounts behind the license plate making it hidden and easy to install.
5) Camera adjustment is by bending the mount which is very effective. The swiveling types can go out of adjustment when you slam the hatch shut.
The one drawback is there is no built in LED but, my work around was to install a brighter LED back light. Besides, those camera LEDs are not replaceable when they burn out. The back light bulb is readily available and easily replaced.
LED Auxbeam 7440
I needed this because my camera didn't have built in LED so it was a bit grainy looking at night. These LEDs are about three times brighter the stock ones at 800 lumens and use less than half the power.
Installation is easy, reach under the bumper and twist out the back light assembly. Pull out old bulb and press in the LED.
BOSS Audio BV9364B
This is a nice affordable unit but I'm only talking about it to cover an installation aspect that you might face. 1) It had a rear USB on a 3in lead. I bought a 2 foot USB male to female cable and ran from radio to glove box so I connect my flash drives there.
2) the unit is not flush with dash but instead sticks out just a little. It doesn't look bad but caused an installation issue because the dash kit was designed to wrap in front of the stereo. So make sure your stereo and dash kit are compatible or can be modified to fit together.
Metra 95-8202
I bought this dash kit because their aren't many choices. Some kits that say fits 2008 Scion xB are wrong and simply don't fit. Be aware that many dash kits are designed to fit many cars and require cutting off sections or snapping of tabs so check return polices before buying. I bought using Amazon Prime and had no problem returning a dash kit that didn't fit and I broke off some tabs. This Metra kit requires using and modifying the old stereo mounts that unscrews by 4 screws on each side. You have to grind off four positioning notches on each mounts by a grinder wheel, Dremel tool or file. Sandpaper won't work. Also, if your stereo stick out a bit, this dash kit won't fit without modifications. You will need a belt sander or disk sander - if these are hand held types than you also need some kind of vice to hold them stationary (I used a Black & Decker Workmate). I had to sand off the lip at the front of the dash kit because my stereo stuck out past the dash so this lip rather than covering the front of the stereo was hitting the side of it and spreading out more than it should making it too wide to pass through the vent/stereo panel. It was a bit tricky and dangerous to hold the small dash kit against the spinning sanding wheel. Because of its shape, you can't mount the dash kit on a vice and hand sanding would take hours.
_____________________________________________
Last edited by MR_LUV; 12-10-2018 at 02:16 AM. Reason: made into Sticky

Thread
Thread Starter
Forum
Replies
Last Post
tbone587
Scion xA/xB 1st-Gen ICE & Interior
17
01-10-2005 03:26 AM

