
Oznium Halo install! Pics and helpful info! CAUTION big pics


Thread Starter
Senior Member
SL Member
Joined: Mar 2007
Posts: 957
From: South Jersey
First off let me start off by saying that I followed xIxAMxHOLLYWOODx DIY write up and it was a great and very helpful write up so thanks!!
https://www.scionlife.com/forums/viewtopic.php?t=176590
Well everything went fine only broke 1 ring and that was it!!! It took me 4 hours to do the install the rings and that was taking my time. If you can I would suggest trying to light your rings up asap to make sure that they work. I made this mistake baked my headlight and put it all back toether just to pull it back together because my large ring broke somehow and I didnt know. So I would of been done in about 4 hours but with that set back it took me about 5 hours which still isnt bad.
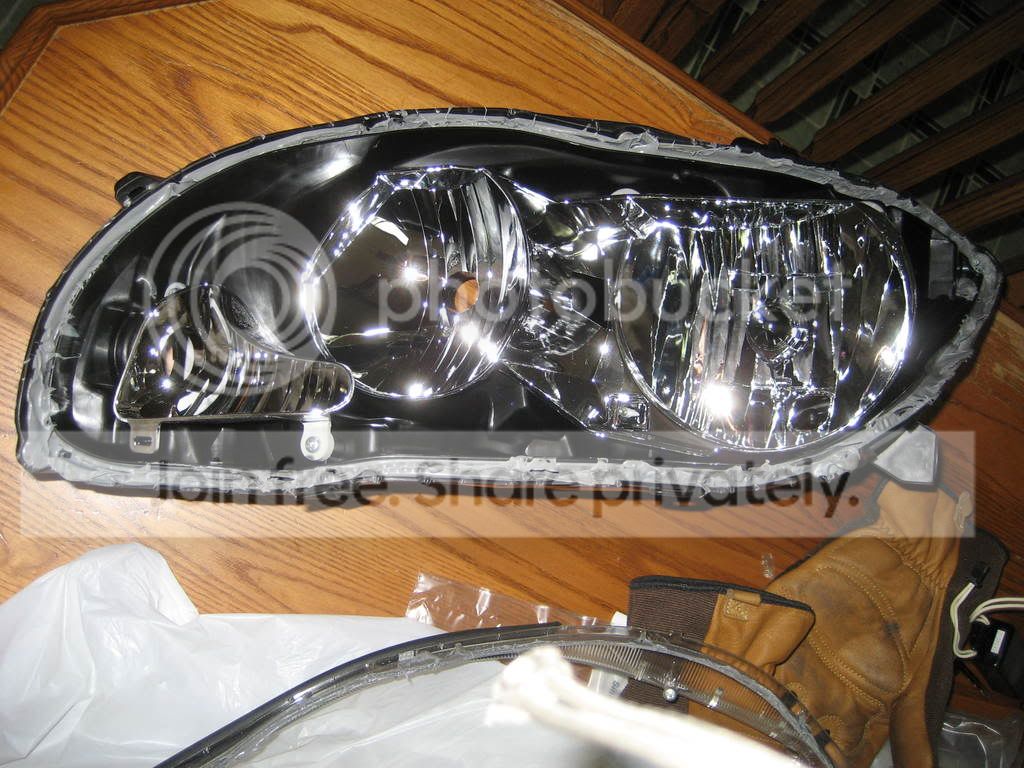
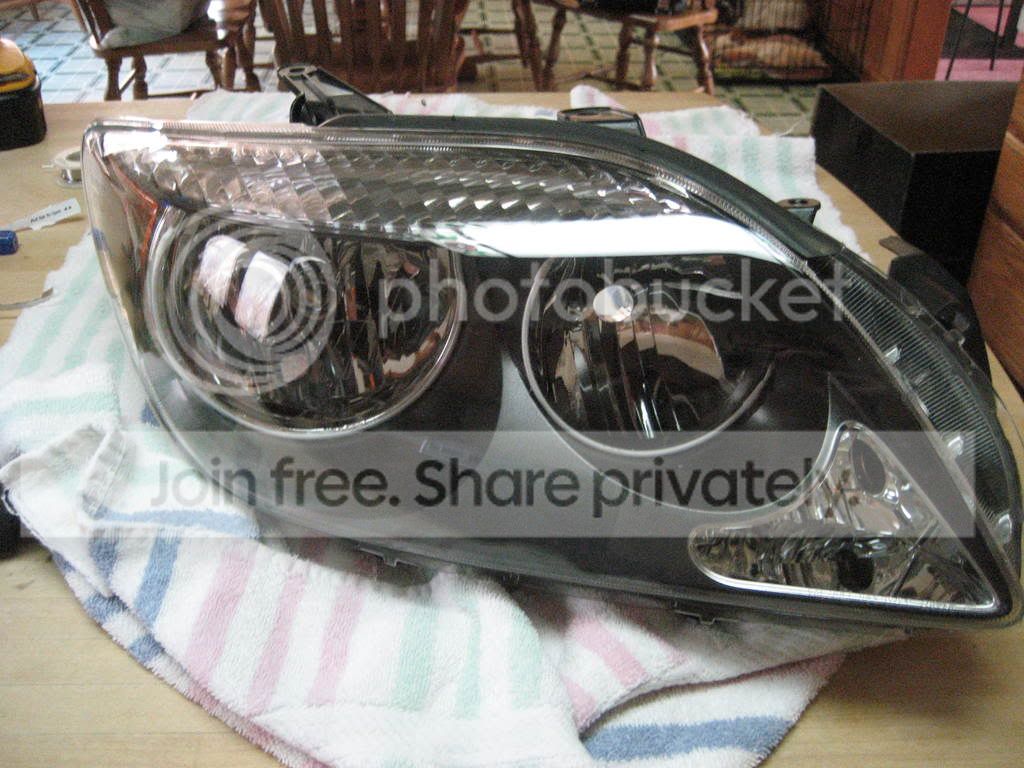
First off I started by baking the headlights and pullin the housings apart. Wasnt so hard at all just like everyone keeps saying just take your time and be careful with what you are doing. I found out that if you dont have a friend to help you then make one fast!!!!! I had my brother help me and with two people it just makes thing alot easier!!!!
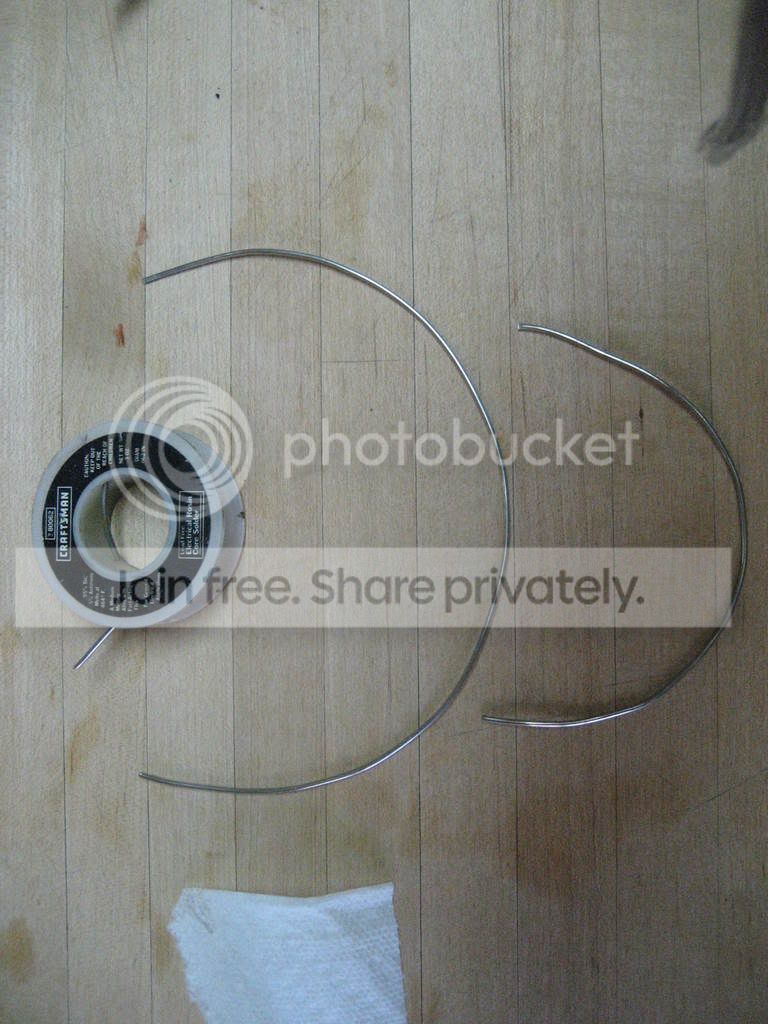
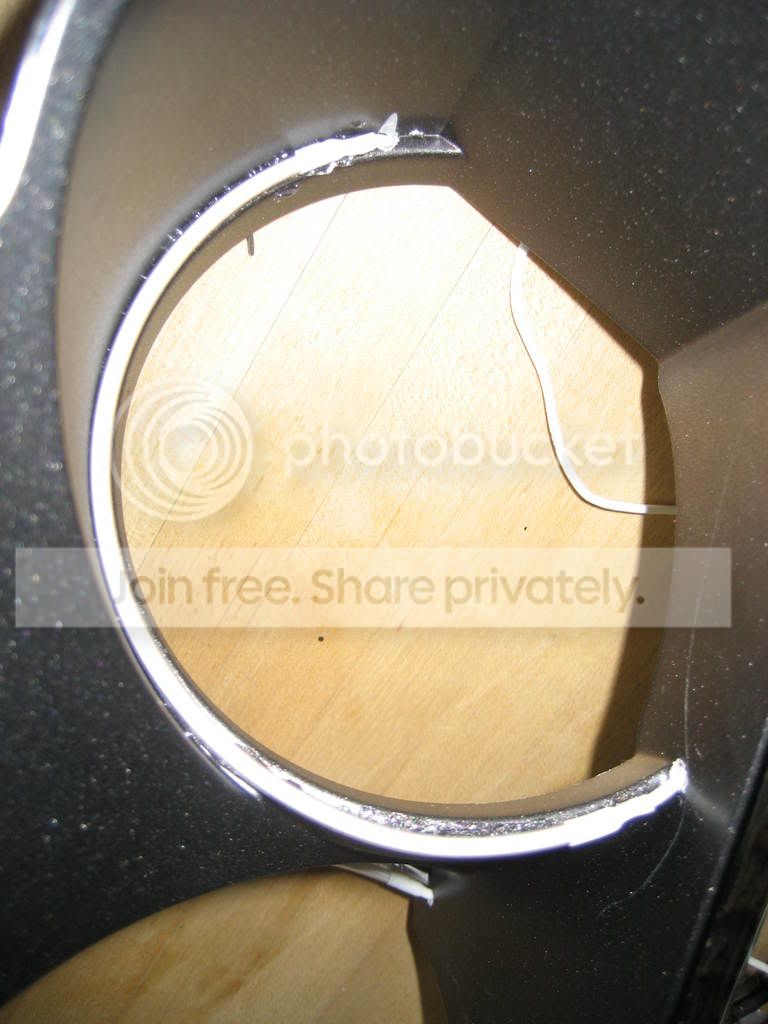
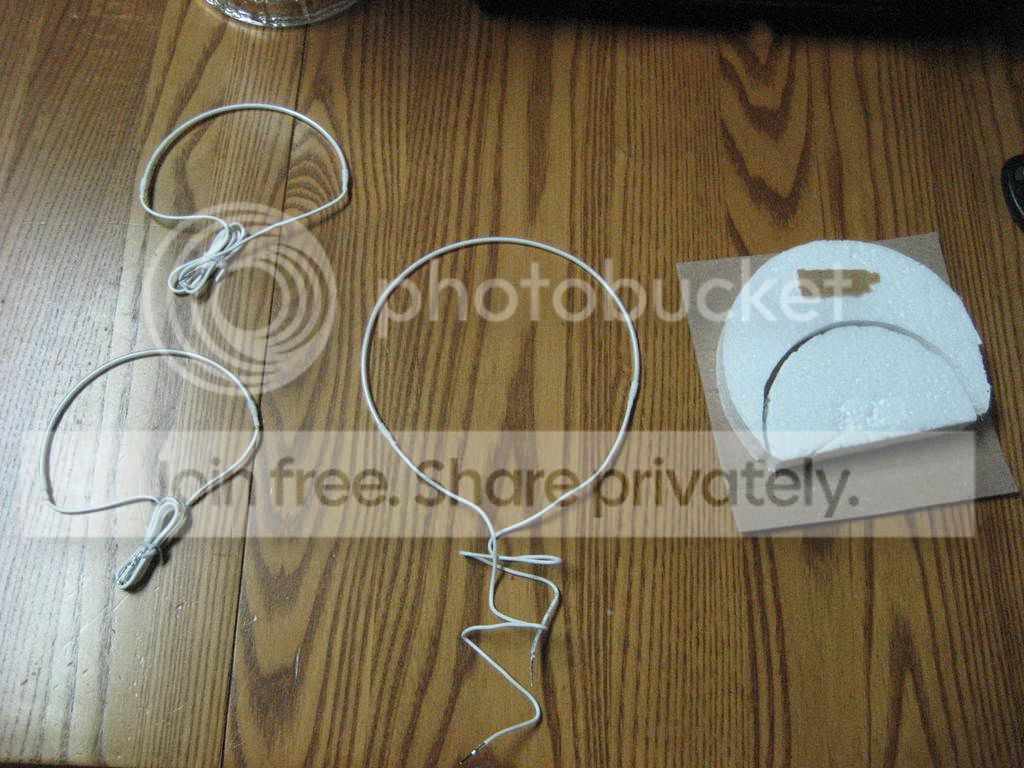
Now that I had them apart it was time to test fit the rings. I think this is the step where everyone gets into trouble with braking the rings. To do this I got a sodder roll and cut them the exact size of the ring I was going to put in. By doing this I could set them in the housing and kinda eye up where I had to drill the holes for the wires. This REALLY helped me out alot by getting my holes as close as possible that way I had as least as possible of wire showing. SO if you are going to be doing this to your headlight I would highly recomend doing this step!!! Just saves your self alot of pain!!!
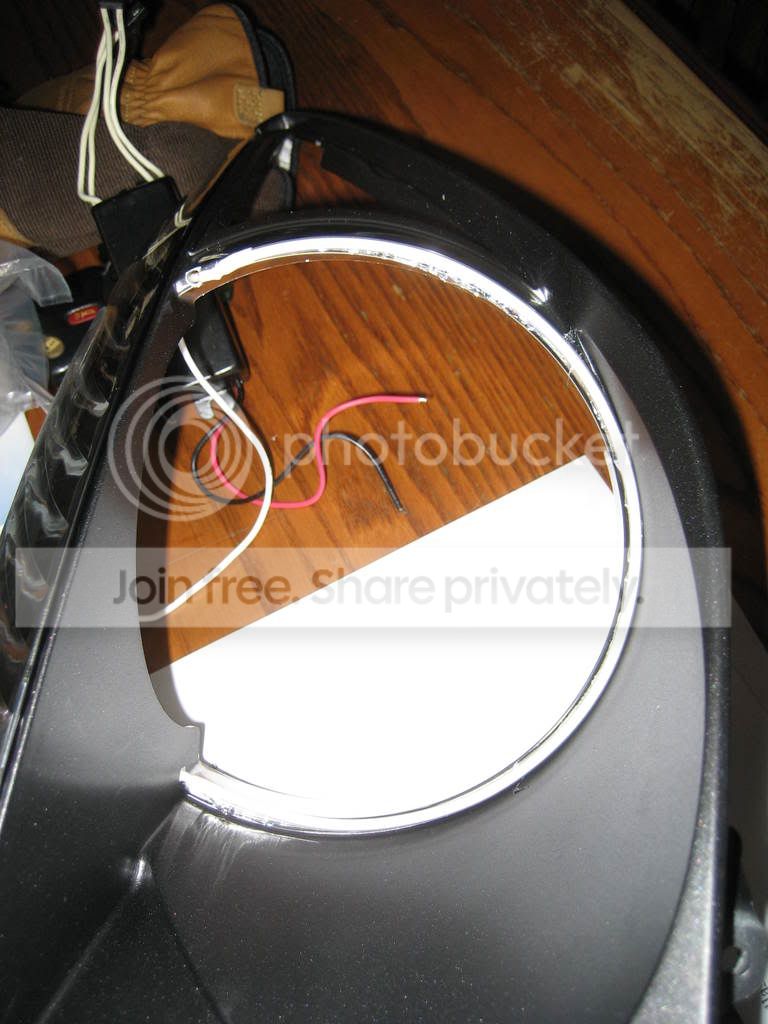
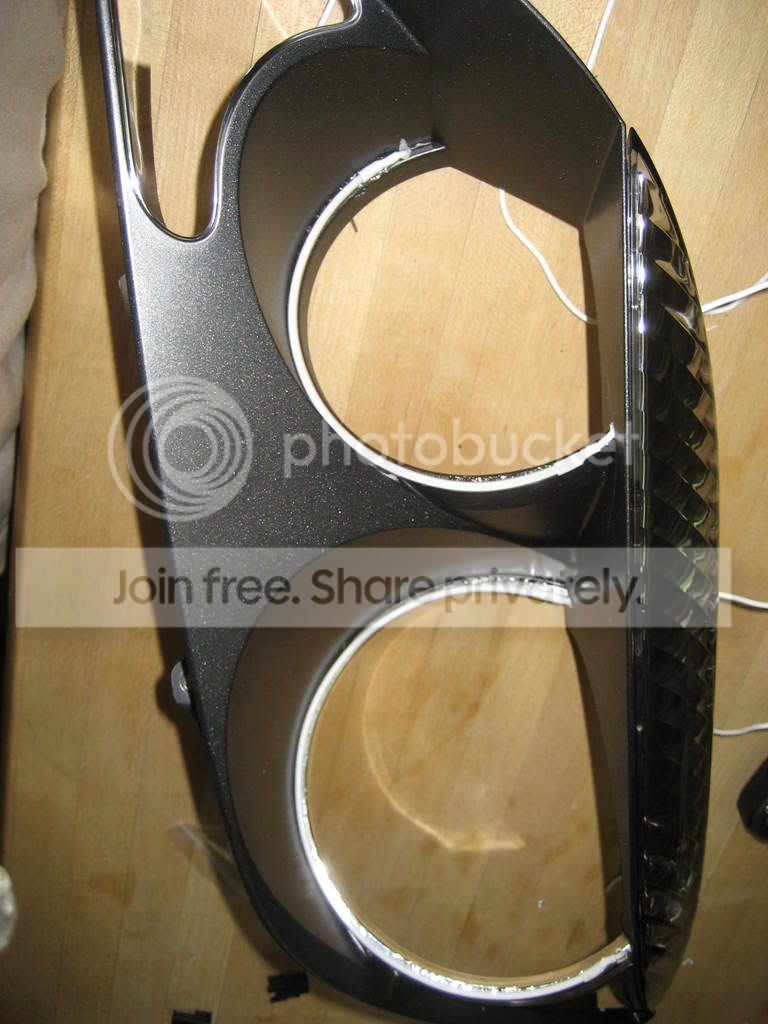
Now once I got this done I installed the rings by first feeding the wires through the back of the housing. This is where your new friend comes into as a big help!!!! I had my brother pull the wires in slowly as I position the rings and GENTLY sent them into the housing. If I had to make slight adjustment I went ahead and carfully pulled on the wires. Here are some pics so that you can see kinda of where the holes for the wires are.
Big ring
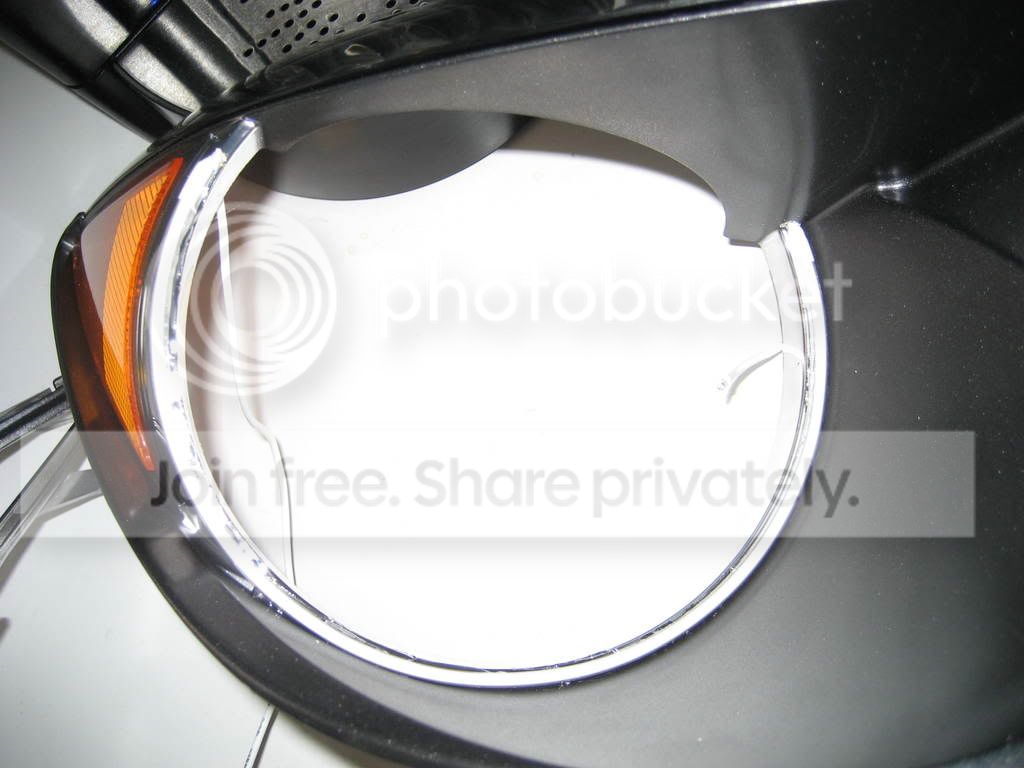
Small ring
Here is a pic of both of the rings installed in the housing
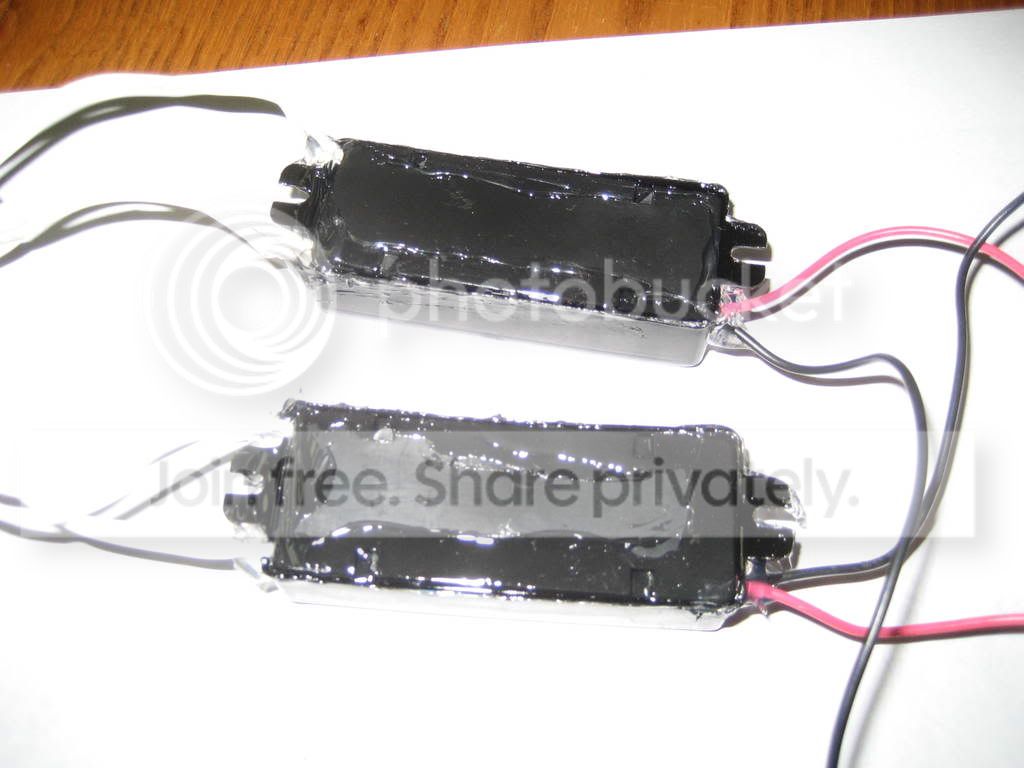
For the transformers I chose NOT put them in the headlight it self and I am going to mount them somewhere where water is going to be least as possible. So since I am mounting them outside the sealed headlight I went ahead a silicone the crap out of them trying to keep the water out so we will see how that goes.
Pic of the transformers
So I have 1 set of small rings and 1 large ring left over so I will sell them to the first person who wants them. Looking to get $15 plus shipping.
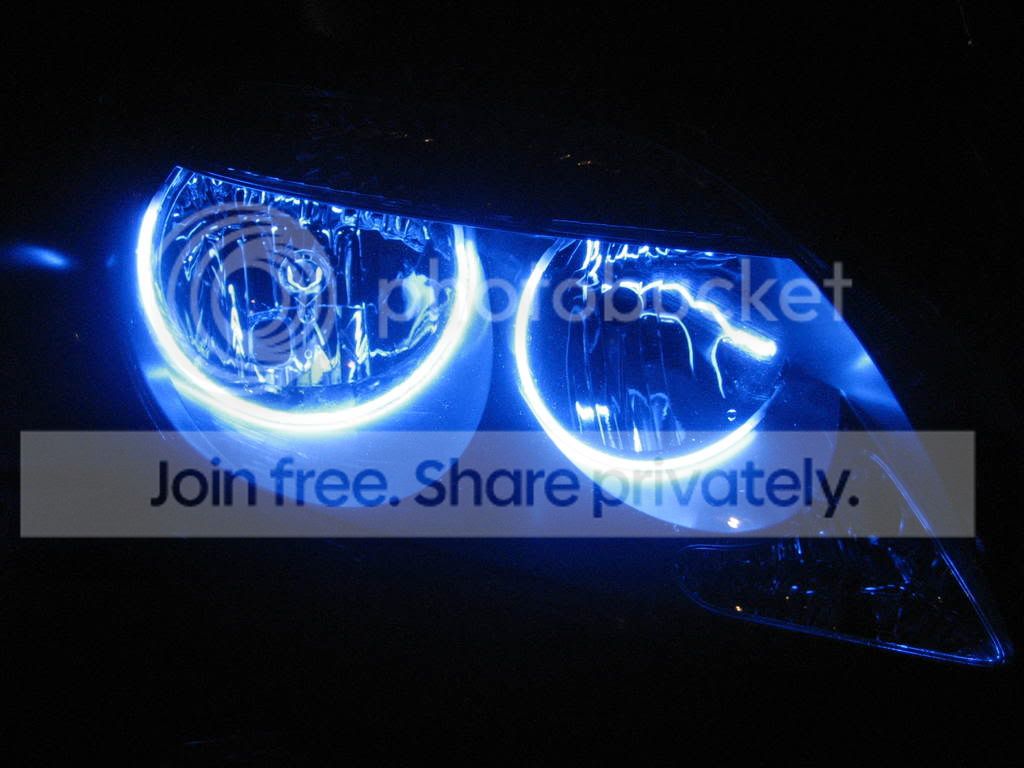
Finally here is the finished product!!!!
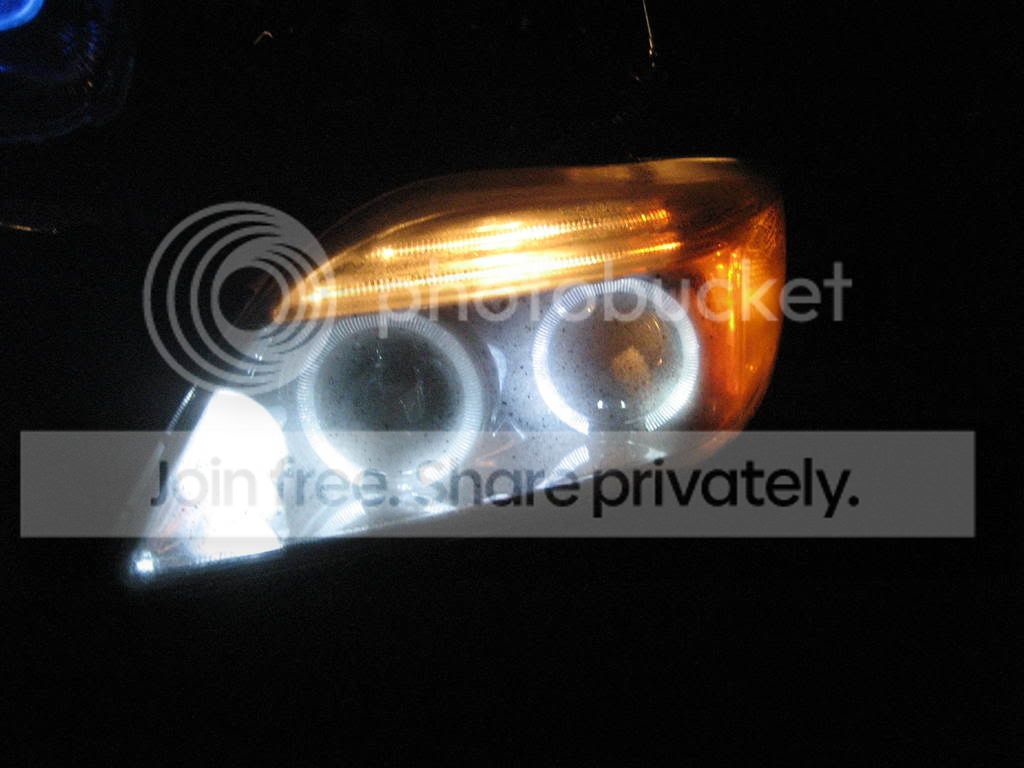
I have a set of anzos so I wanted to show you guys the difference in lighting which is HUGE!!!!!!!!!!!
Before
After
I will be installing them on the car sometime next week I have the relays coming from Oznium, HID bulbs coming from Hahn at 3BSpec and I have a set of fiderglass eyelids coming from NIAbodykits.com
Once I get all this stuff and get it installed on the car Ill post some pics up so you guys can see the final outcome!!!!!
Hope some of this info helps some of you guys that are planning to do this!!!
Remember just take your time!!
Chris
https://www.scionlife.com/forums/viewtopic.php?t=176590
Well everything went fine only broke 1 ring and that was it!!! It took me 4 hours to do the install the rings and that was taking my time. If you can I would suggest trying to light your rings up asap to make sure that they work. I made this mistake baked my headlight and put it all back toether just to pull it back together because my large ring broke somehow and I didnt know. So I would of been done in about 4 hours but with that set back it took me about 5 hours which still isnt bad.
First off I started by baking the headlights and pullin the housings apart. Wasnt so hard at all just like everyone keeps saying just take your time and be careful with what you are doing. I found out that if you dont have a friend to help you then make one fast!!!!! I had my brother help me and with two people it just makes thing alot easier!!!!
Now that I had them apart it was time to test fit the rings. I think this is the step where everyone gets into trouble with braking the rings. To do this I got a sodder roll and cut them the exact size of the ring I was going to put in. By doing this I could set them in the housing and kinda eye up where I had to drill the holes for the wires. This REALLY helped me out alot by getting my holes as close as possible that way I had as least as possible of wire showing. SO if you are going to be doing this to your headlight I would highly recomend doing this step!!! Just saves your self alot of pain!!!
Now once I got this done I installed the rings by first feeding the wires through the back of the housing. This is where your new friend comes into as a big help!!!! I had my brother pull the wires in slowly as I position the rings and GENTLY sent them into the housing. If I had to make slight adjustment I went ahead and carfully pulled on the wires. Here are some pics so that you can see kinda of where the holes for the wires are.
Big ring
Small ring
Here is a pic of both of the rings installed in the housing
For the transformers I chose NOT put them in the headlight it self and I am going to mount them somewhere where water is going to be least as possible. So since I am mounting them outside the sealed headlight I went ahead a silicone the crap out of them trying to keep the water out so we will see how that goes.
Pic of the transformers
So I have 1 set of small rings and 1 large ring left over so I will sell them to the first person who wants them. Looking to get $15 plus shipping.
Finally here is the finished product!!!!
I have a set of anzos so I wanted to show you guys the difference in lighting which is HUGE!!!!!!!!!!!
Before
After
I will be installing them on the car sometime next week I have the relays coming from Oznium, HID bulbs coming from Hahn at 3BSpec and I have a set of fiderglass eyelids coming from NIAbodykits.com
Once I get all this stuff and get it installed on the car Ill post some pics up so you guys can see the final outcome!!!!!
Hope some of this info helps some of you guys that are planning to do this!!!
Remember just take your time!!
Chris


If you want to hook them up without the relays you can. Just splice into you daytime running lights and they work fine. Be careful on the which wires are positive and negative.

Thread Starter
Senior Member
SL Member
Joined: Mar 2007
Posts: 957
From: South Jersey
Originally Posted by aryan13
If you want to hook them up without the relays you can. Just splice into you daytime running lights and they work fine. Be careful on the which wires are positive and negative.


Senior Member
Scikotics
SL Member
Joined: Jun 2006
Posts: 416
From: .:The:Bay:Area:.
Originally Posted by mattieg
Mario i like the clear corners and the LED;s on the top. Reminds me of the Audi R8. How did you do it?
I did the clear corners by buying that thing from home depot and cutting it :


and for the top LEDs I used the led strip from oznium but i DO NOT recommend them because they stopped working after about 2months (I am guessing because of the vibration since they were poorly made). So if you want to do that mod you are better off making your own led strip that is more durable


I will probably bake my headlights again and make my own led strip once it gets warmer


Senior Member
Scikotics
SL Member
Joined: Jun 2006
Posts: 416
From: .:The:Bay:Area:.
oh c'mon ^_^ Share your secret with a fan from the bay area ^_^
PM pretty please? lol
hehe if not I guess I will see them when I eventually decide to change the color of the gauges and come for a visit ^_^
PM pretty please? lol
hehe if not I guess I will see them when I eventually decide to change the color of the gauges and come for a visit ^_^