DIY-Hatch Handle Repair
 03-03-2010, 02:19 AM
#1
Senior Member
SL Member
Thread Starter
iTrader: (1)

Join Date: Oct 2005
Location: Nor Cal Native in Okinawa
Posts: 1,263
After a few years worth of seeing posts where people have broken their hatch bezel (handle) I decided to create a write-up. Hopefully this information will help people avoid paying the dealer for something they can fix themselves.
First things first, you will notice that this guide does not show how to remove the bezel (or, what's left) from the vehicle. To remove it open the hatch, look inside the hatch for some panels to take out. Remove the panels and look inside for the 10mm nuts holding the bezel on. Also, the rubber covered switch mechanism will need to be unscrewed from the bezel and secured.
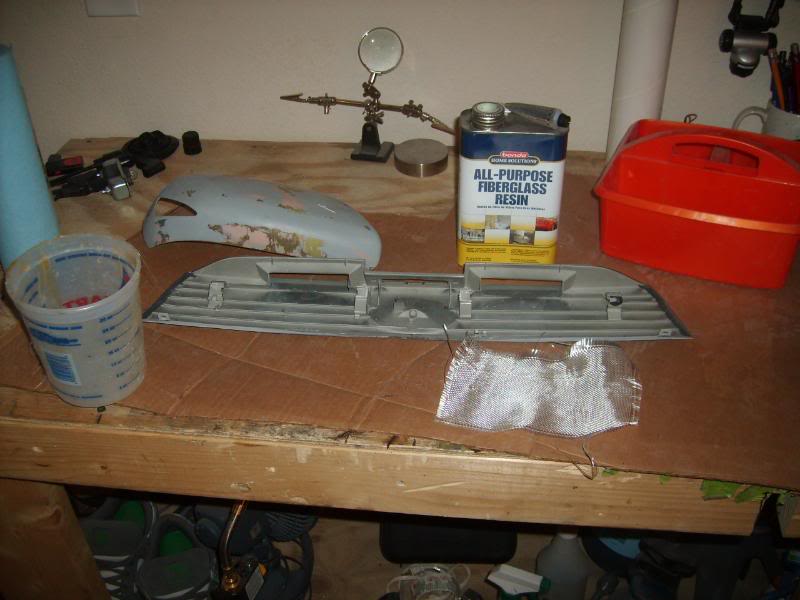
List of supplies:
Fiberglass resin (Wal Mart)
Fiberglass Mat (Wal Mart)
Acetone (Wal Mart)
Dremel or coarse sandpaper (80 grit is good)
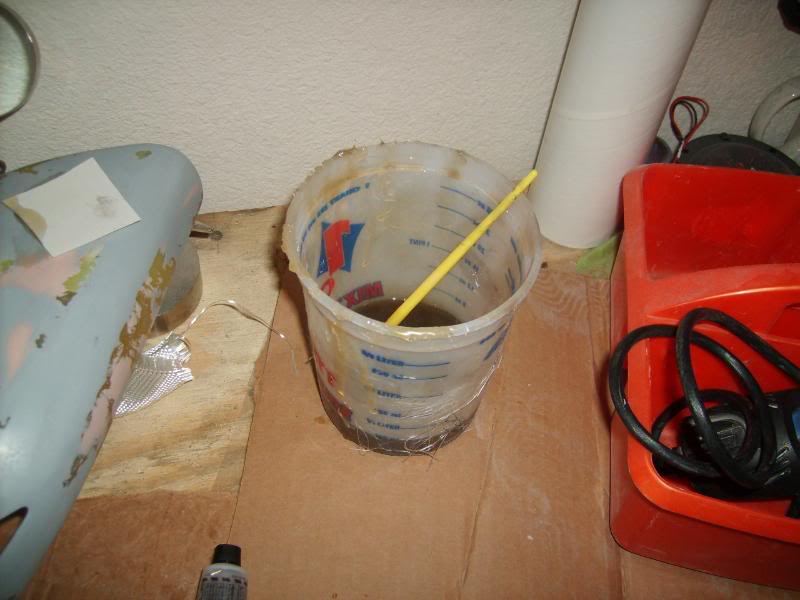
Cup for mixing
Small paint brush
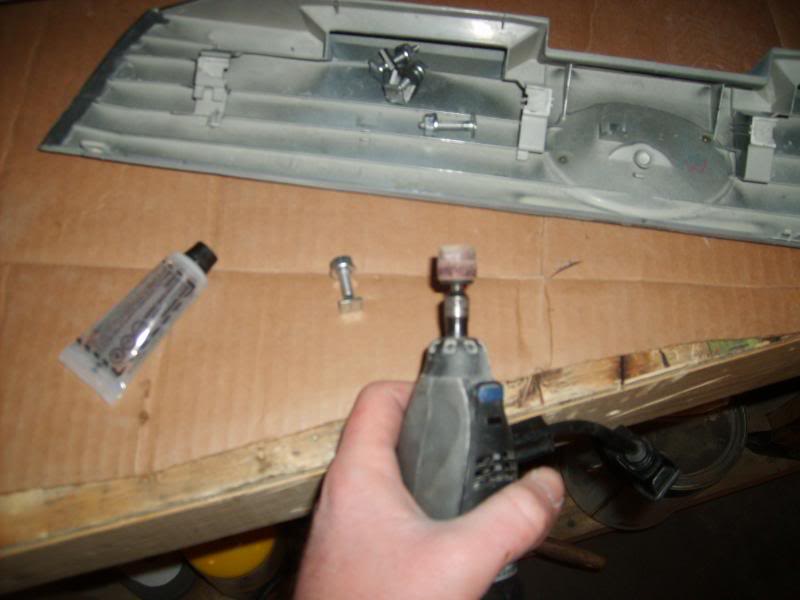
Now that you have the goods, wipe off the heads of the bolts and their corresponding location on the bezel. You wan't to make sure that the fiberglass will adhere properly.
Next take your abrasive paper or Dremel and "scuff" the surface of the bolt head, and if you can the spots on the bezel.
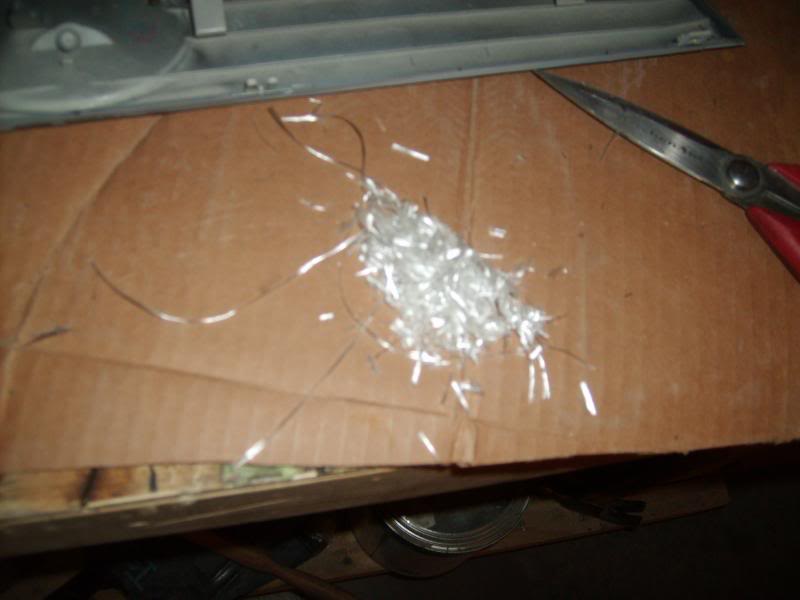
Next step, roll some fiberglass into a tube shape. Once rolled take some scissors and lightly trim the edge of the F.G. to produce a small pile of F.G. fibers.
Now, pour out about 4 ounces of resin (I used 6, but I'd rather have too much). The instructions on the resin should tell you how much catalyst (hardener) to add.
I use 14 drops per ounce and I actually count the drops. It does not take that long and I don't have to worry about resin not curing, and worse, removing uncured resin.
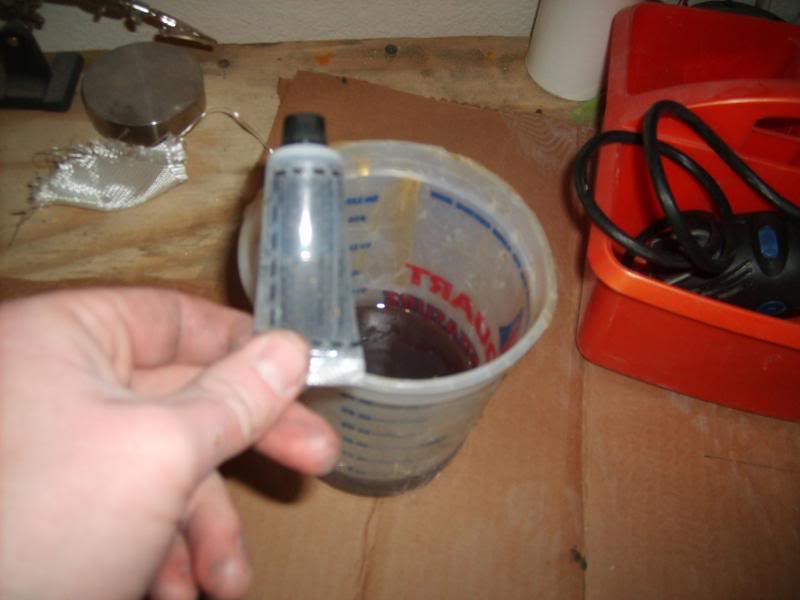
Now, mix your resin. Once mixed throw in the F.G. shavings. If you go the super cheap route and use only resin the repair will not last long at all (and if it does, good for you).
The F.G. cloth will tend to clump, that's OK, and also why you should mix the resin BEFORE adding the cloth fibers.
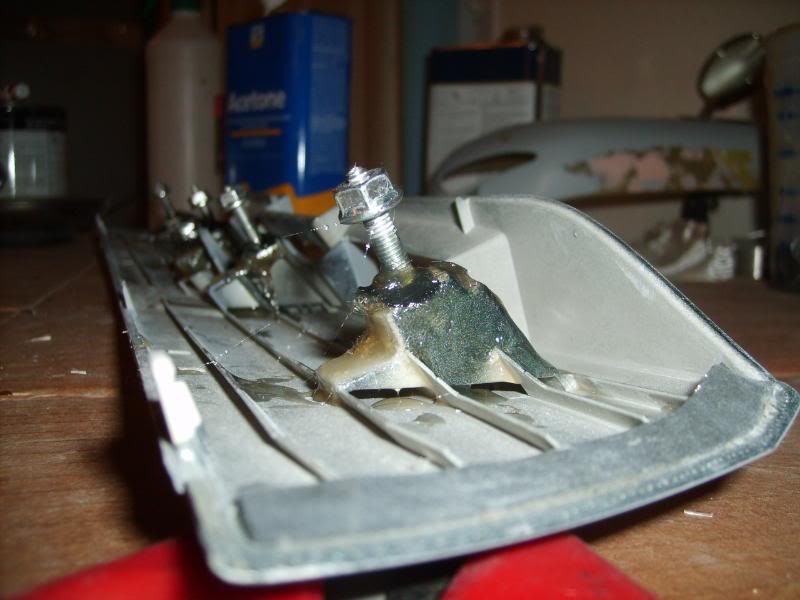
So you have your mixture. Paint a little coating on the bezel where the bolt retainers broke off, try to get a small "clump" of fibers on there. Apply a bit to the bolt head, but remember to try and keep resin off of the threads,
that may create a headache later when tightening the nuts. So go ahead and put the bolt onto it's place on the bezel. Make sure to get the bolt good and centered, and press out any small bubbles that may have become entrapped.
Lastly, you have plenty of resin left, so try and get some nice little clumps of F.G. out of the mix and place it around the base of each bolt. When you are done it should look something like this...
End notes, don't mess with anything on the bezel until it has cured for 24 hours. OK, the reason is because if you screw with it and the resin has not cured then the repair is no good as it will not cure to it's full strength. Wait the 24 hours, and if you have the piece outside where the temp gets below 50 degrees Fahrenheit then consider bringing the piece inside before starting the work. Cold=waiting forever to cure. Do not be mistaken by the remaining resin in your mixing cup, like most hardening chemicals resin cures faster in a corrugated mass than when it is spread out.
If you happen to get any resin on the screw threads and it cures there is only one way I know of to clean them without possibly breaking the repair. After the resin has cured use the "wire wheel" attachment on the Dremel and carefully clean the threads.
The wire wheel will only remove the resin and not damage the threads.
After everything is done and well cured apply a bit of silicone to the resin and attach the bezel to the car. Don't over tighten the nuts, and try not to pull like crazy on the handle when opening the hatch cause that's how you got here in the first place.
Good luck, God bless, and have fun!
First things first, you will notice that this guide does not show how to remove the bezel (or, what's left) from the vehicle. To remove it open the hatch, look inside the hatch for some panels to take out. Remove the panels and look inside for the 10mm nuts holding the bezel on. Also, the rubber covered switch mechanism will need to be unscrewed from the bezel and secured.
List of supplies:
Fiberglass resin (Wal Mart)
Fiberglass Mat (Wal Mart)
Acetone (Wal Mart)
Dremel or coarse sandpaper (80 grit is good)
Cup for mixing
Small paint brush
Now that you have the goods, wipe off the heads of the bolts and their corresponding location on the bezel. You wan't to make sure that the fiberglass will adhere properly.
Next take your abrasive paper or Dremel and "scuff" the surface of the bolt head, and if you can the spots on the bezel.
Next step, roll some fiberglass into a tube shape. Once rolled take some scissors and lightly trim the edge of the F.G. to produce a small pile of F.G. fibers.
Now, pour out about 4 ounces of resin (I used 6, but I'd rather have too much). The instructions on the resin should tell you how much catalyst (hardener) to add.
I use 14 drops per ounce and I actually count the drops. It does not take that long and I don't have to worry about resin not curing, and worse, removing uncured resin.
Now, mix your resin. Once mixed throw in the F.G. shavings. If you go the super cheap route and use only resin the repair will not last long at all (and if it does, good for you).
The F.G. cloth will tend to clump, that's OK, and also why you should mix the resin BEFORE adding the cloth fibers.
So you have your mixture. Paint a little coating on the bezel where the bolt retainers broke off, try to get a small "clump" of fibers on there. Apply a bit to the bolt head, but remember to try and keep resin off of the threads,
that may create a headache later when tightening the nuts. So go ahead and put the bolt onto it's place on the bezel. Make sure to get the bolt good and centered, and press out any small bubbles that may have become entrapped.
Lastly, you have plenty of resin left, so try and get some nice little clumps of F.G. out of the mix and place it around the base of each bolt. When you are done it should look something like this...
End notes, don't mess with anything on the bezel until it has cured for 24 hours. OK, the reason is because if you screw with it and the resin has not cured then the repair is no good as it will not cure to it's full strength. Wait the 24 hours, and if you have the piece outside where the temp gets below 50 degrees Fahrenheit then consider bringing the piece inside before starting the work. Cold=waiting forever to cure. Do not be mistaken by the remaining resin in your mixing cup, like most hardening chemicals resin cures faster in a corrugated mass than when it is spread out.
If you happen to get any resin on the screw threads and it cures there is only one way I know of to clean them without possibly breaking the repair. After the resin has cured use the "wire wheel" attachment on the Dremel and carefully clean the threads.
The wire wheel will only remove the resin and not damage the threads.
After everything is done and well cured apply a bit of silicone to the resin and attach the bezel to the car. Don't over tighten the nuts, and try not to pull like crazy on the handle when opening the hatch cause that's how you got here in the first place.
Good luck, God bless, and have fun!
Last edited by MR_LUV; 02-14-2018 at 12:30 PM. Reason: typo

 03-03-2010, 04:15 AM
#3
Senior Member
SL Member
Thread Starter
iTrader: (1)
Join Date: Oct 2005
Location: Nor Cal Native in Okinawa
Posts: 1,263
Hey thanks. I figured if I had to fix mine, I might as well try to help the comunity. I am however, toying withe idea of fabbing a metal handle that will also act as a 3rd b.l. delete. Well see....


 05-28-2011, 09:54 AM
#7
Senior Member
Scikotics
SL Member

Join Date: Feb 2006
Location: Port Arthur, Texas
Posts: 591
Awesome DIY! Mine just broke but not because of pulling on the handle. Mine broke because of the stereo pounding the hell out of it! I'm going to do this fix and then I think I'm going to add some dynamat to the back for extra protection from vibration. My hatch is completley sound proofed and there was still enough vibration to completley break this piece off!

 12-12-2013, 02:57 AM
#11
Senior Member
SL Member

Join Date: Oct 2005
Posts: 102
For posterity's sake, the hatch bezel is now the subject of an "warranty enhancement" or in other words they will replace it for you or compensate you for the cost of the repair if you have already had it repaired.
https://www.scionlife.com/forums/sho...d.php?t=225854
https://www.scionlife.com/forums/sho...d.php?t=225854


Thread
Thread Starter
Forum
Replies
Last Post
Drey
Scion tC 1G Suspension & Handling
39
01-30-2018 01:49 AM

