HID Install (HIDExtra)
 06-29-2009, 10:26 PM
#1
Senior Member
Fail, INC
Scikotics
SL Member
MN Scions
Thread Starter

Join Date: Feb 2009
Location: Burnsville, Minnesota
Posts: 995
So I know HID's are simple to install, but this DIY is to show how truly easy it is. I made this DIY specifically for the HIDextra kit, and I hope this helps. HIDextra is an amazing company that I would recommend to anyone. The customer service and quality are excellent, and the price is purely unbeatable.
Let's get this thing on the road.
(pictures will be posted below instructions)
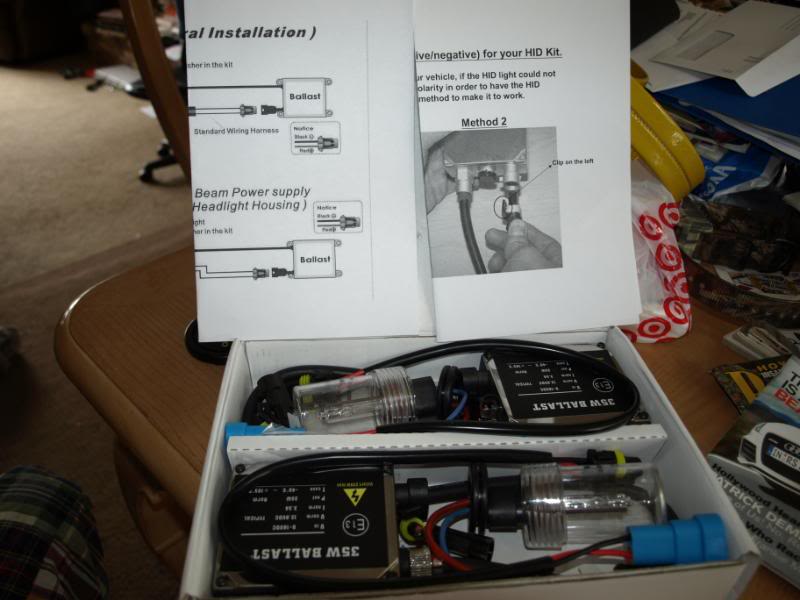
So this is the box that your kit will come in.
It will include everything necessary.
Step one: Take out the old bulb. (I have an 07, so I am using the 9006 size, but the instructions are the same for different years)
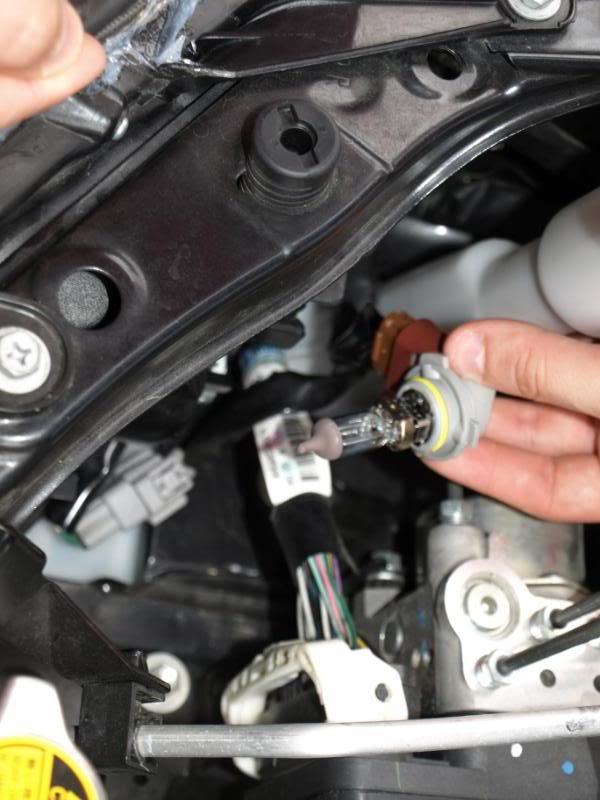
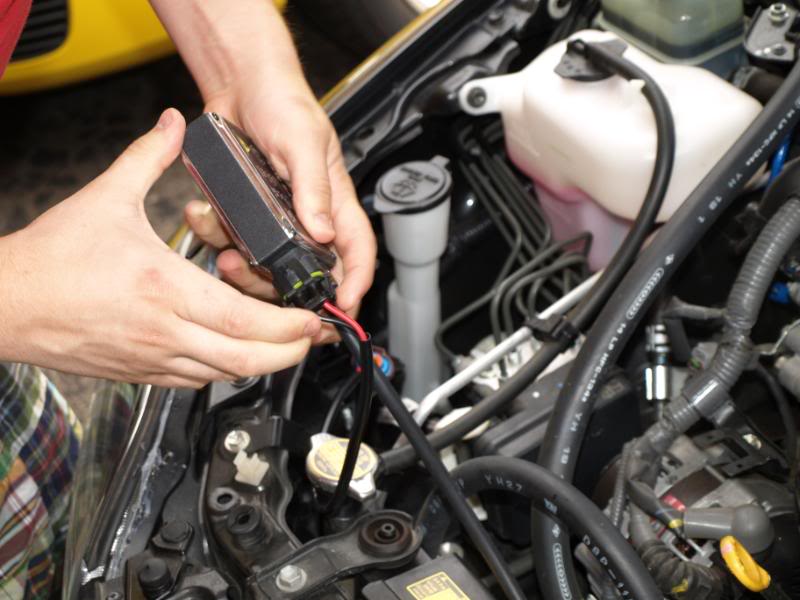
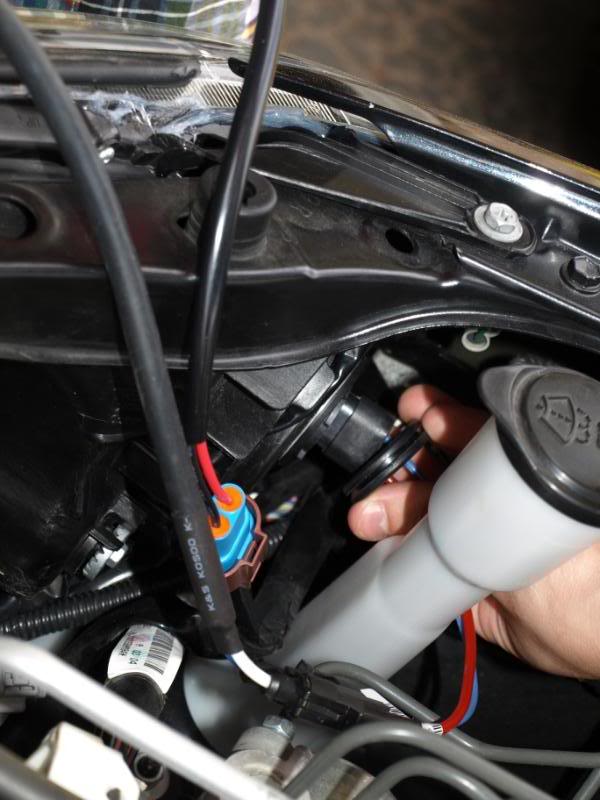
Step two: take one of the wiring harnesses and plug it into the connection you just freed up.
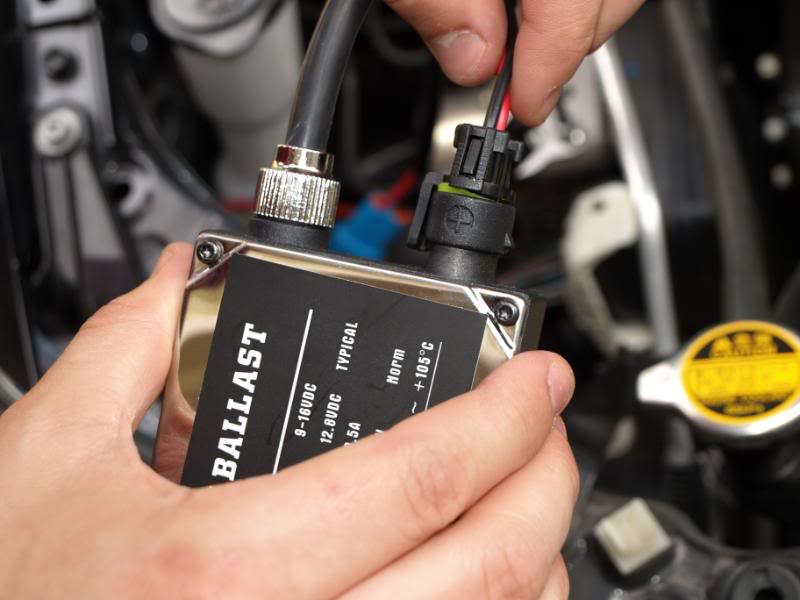
Step three: Take one of the ballasts, and plug the other end of the harness into the open slot on the ballast.
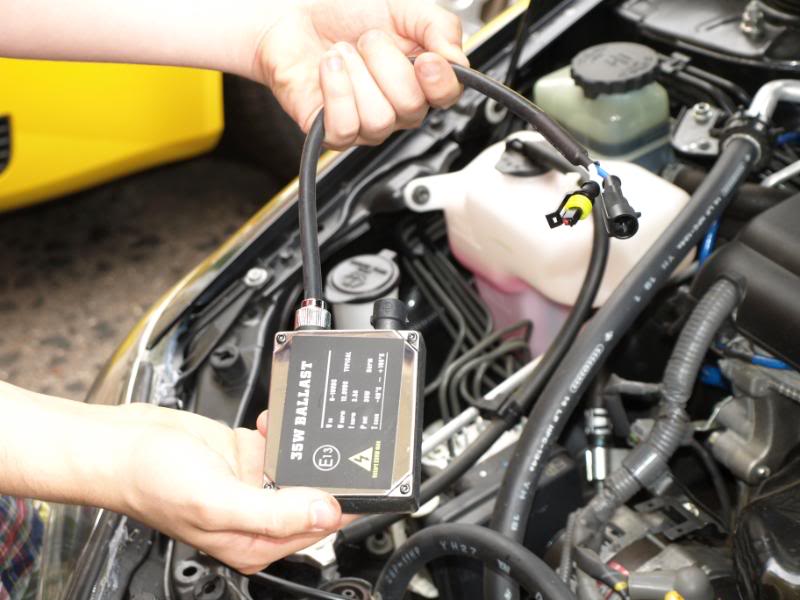
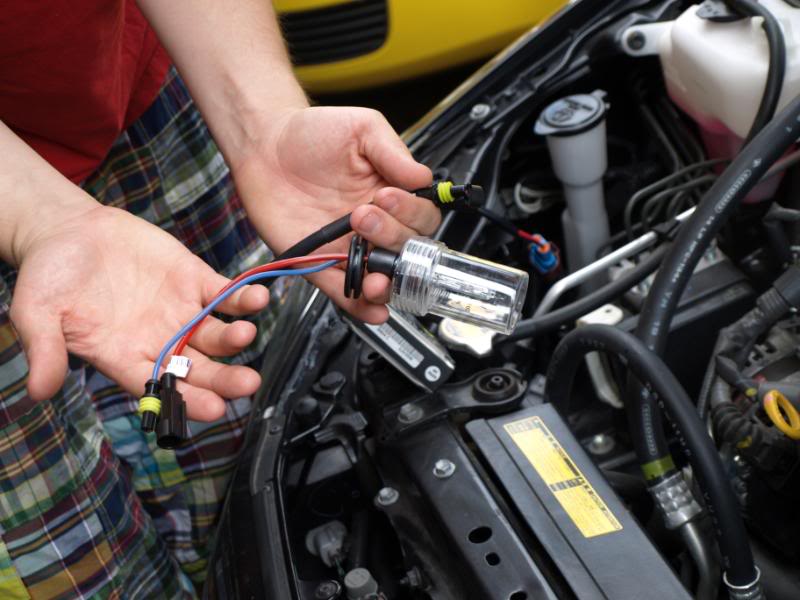
Step four: Take the last piece in the kit: the bulb and connect wires. There will be a wire exiting the ballast that splits into two smaller clips.
Connect the two clips from the wire on the bulb to the wires from the ballast.

Step five: now that everything is connected, turn on your lights and make sure they work.
If they do not, you have to reverse the polarity of your HID's. All this means is: when you connected the wire [into] the ballast, unplug it and flip it around, then re-insert it.
Step six: Once you're sure everything is connected and working, you're going to want to re-insert the bulb into the opening. Be sure that whenever you're handling bulbs, NEVER touch them with your skin. You WILL ruin the bulbs.
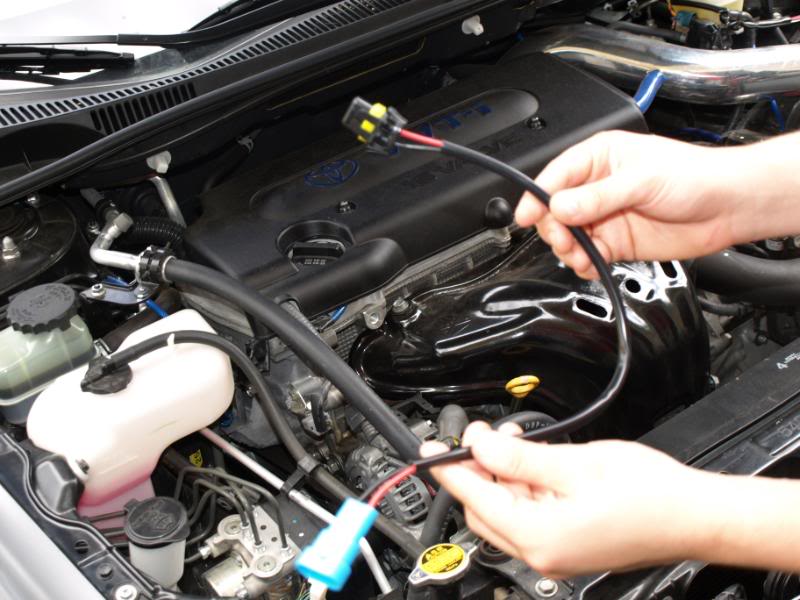
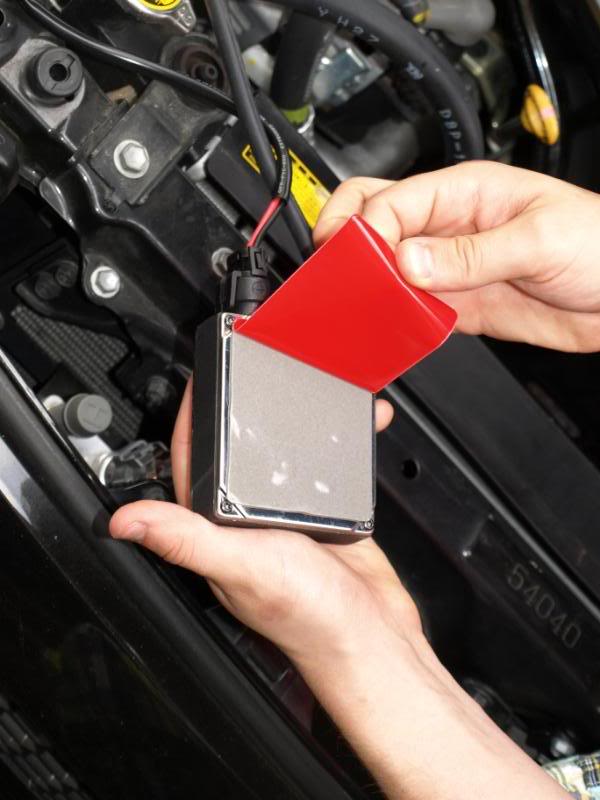
Step seven: With everything hooked up, you're going to want to "hide" your ballasts and wires. This wasn't too big of a concern to me, so you can modify this step to better suit you.
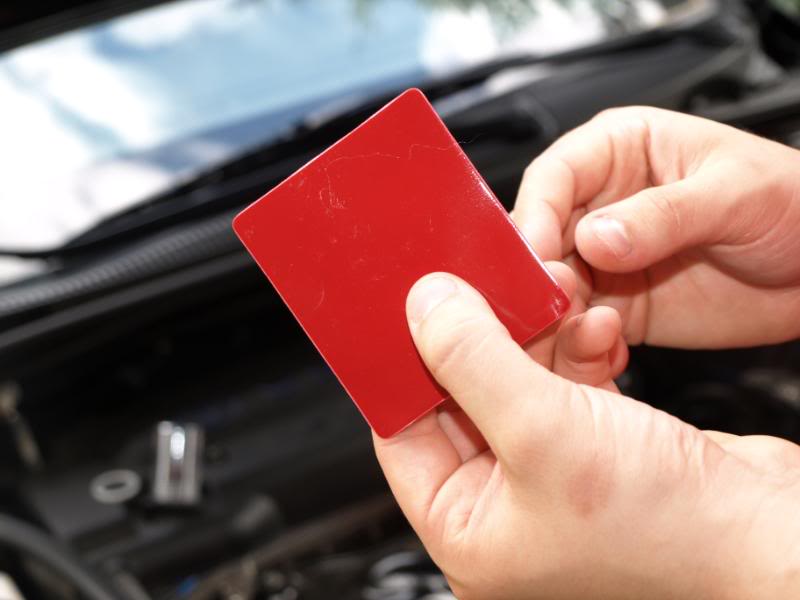
The kit will come with a double sided mounting patch. I just decided to mount it to the flatest surface I could find. On the left side, you can see where I did, and on the right, I just mounted it to the back side of the battery.
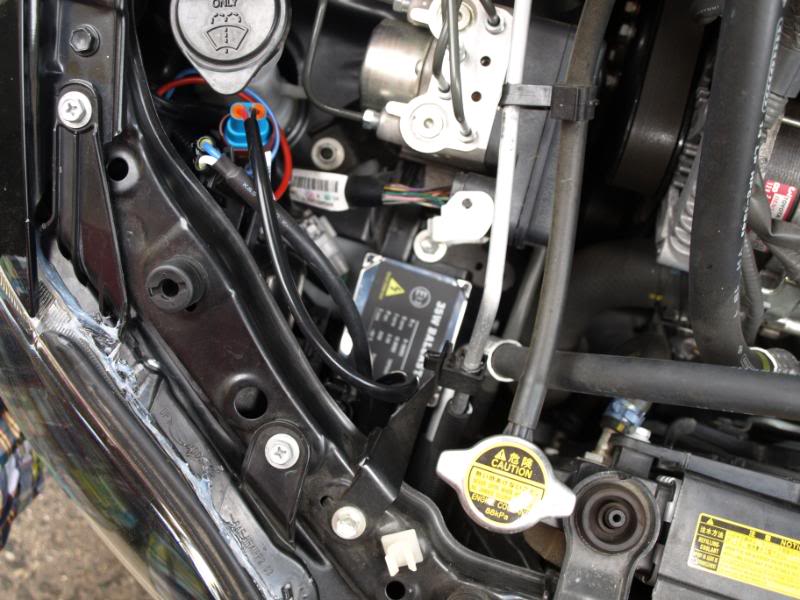
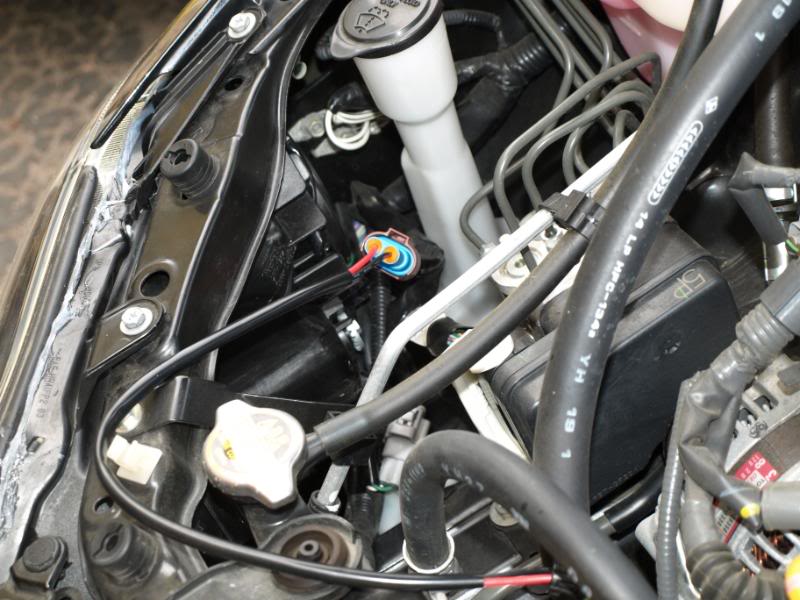
Step eight: Once the ballasts are hidden, you'll want to tuck the wires somewhere. BE CAREFUL: you do not want to place them in the way of moving parts. there are belts spinning all around so you want to be careful
I just tucked mine down below. The kit does come with zip-ties to better accomodate picky people.
Step nine: repeat on the other side, and enjoy!!
Let's get this thing on the road.
(pictures will be posted below instructions)
So this is the box that your kit will come in.
It will include everything necessary.
Step one: Take out the old bulb. (I have an 07, so I am using the 9006 size, but the instructions are the same for different years)
Step two: take one of the wiring harnesses and plug it into the connection you just freed up.
Step three: Take one of the ballasts, and plug the other end of the harness into the open slot on the ballast.
Step four: Take the last piece in the kit: the bulb and connect wires. There will be a wire exiting the ballast that splits into two smaller clips.
Connect the two clips from the wire on the bulb to the wires from the ballast.
Step five: now that everything is connected, turn on your lights and make sure they work.
If they do not, you have to reverse the polarity of your HID's. All this means is: when you connected the wire [into] the ballast, unplug it and flip it around, then re-insert it.
Step six: Once you're sure everything is connected and working, you're going to want to re-insert the bulb into the opening. Be sure that whenever you're handling bulbs, NEVER touch them with your skin. You WILL ruin the bulbs.
Step seven: With everything hooked up, you're going to want to "hide" your ballasts and wires. This wasn't too big of a concern to me, so you can modify this step to better suit you.
The kit will come with a double sided mounting patch. I just decided to mount it to the flatest surface I could find. On the left side, you can see where I did, and on the right, I just mounted it to the back side of the battery.
Step eight: Once the ballasts are hidden, you'll want to tuck the wires somewhere. BE CAREFUL: you do not want to place them in the way of moving parts. there are belts spinning all around so you want to be careful
I just tucked mine down below. The kit does come with zip-ties to better accomodate picky people.
Step nine: repeat on the other side, and enjoy!!

 06-29-2009, 11:14 PM
#3

Like this one?
https://www.scionlife.com/forums/viewtopic.php?t=103095

Tis OK though b/c the installs are a tiny bit different and you got a bit more detail.
https://www.scionlife.com/forums/viewtopic.php?t=103095
Tis OK though b/c the installs are a tiny bit different and you got a bit more detail.

 06-30-2009, 03:13 PM
#11
 06-30-2009, 07:24 PM
#12
Senior Member
Fail, INC
Scikotics
SL Member
MN Scions
Thread Starter
Join Date: Feb 2009
Location: Burnsville, Minnesota
Posts: 995
Originally Posted by FLINTstone
if you cant hook up a set of HIDs Mr. kphyle22, then you dont belong near a car.

the whole point was to really show how simple it was.
For those who asked, you can find HIDextra's thread in the Sponsored Sales section,
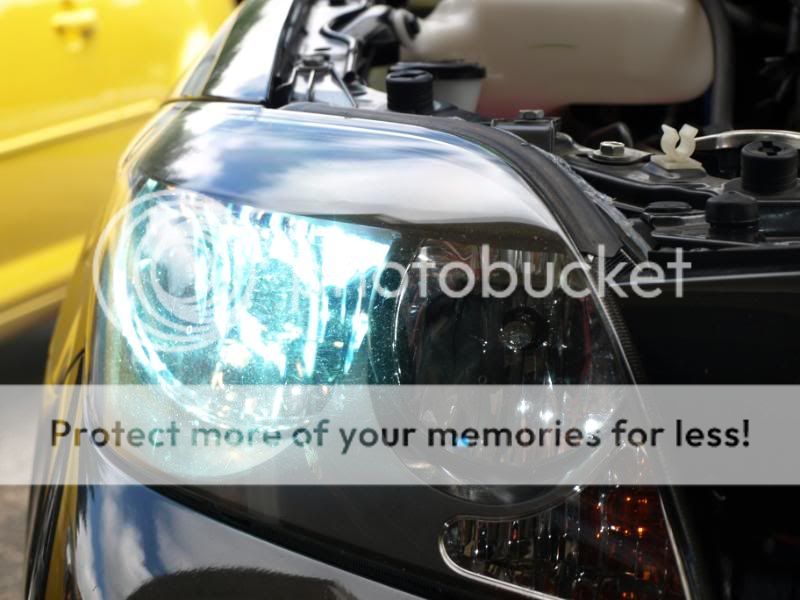
and I went with the 8000k kit. I went with the 8000K because my friend did the week before and they are really a nice color.


 07-06-2009, 10:09 PM
#19

Originally Posted by FLINTstone
if you cant hook up a set of HIDs Mr. kphyle22, then you dont belong near a car.
When my low beam didn't turn on at night, I thought the bodyshop stole my HID.
Then i had to rewire it myself.