Strut Brace Install (Rear, DME)
 05-04-2007, 05:45 PM
#1


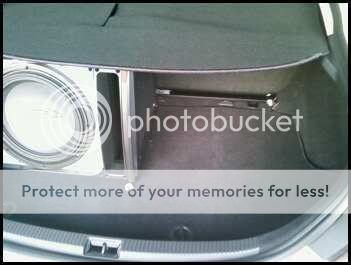
this one was a little more involved and just some things i would like to point out. i had the Greddy Rear Strut bar before hand so my panels where already cut and thats why in some pics you will see blue strut bar end caps.
also i didnt get that many pictures because they arent really needed i got the main ones so that you would get the understanding of it, its really simple and shouldnt take anyone more then 20 min for the FIRST time you do it. this one took me 10.. slightly longer then the front but if you have the bar in your trunk, you can do it on your lunch break lol.
ok anyways. same tools as the front: 14mm. flat head and phillips head, but this time grab a 10 mm also.
another thing i noticed was this install is easier if the bar is UNASSEMBLED! meaning leave it in 3 parts 2 end caps and the middle bar. just my $.02.
ok start by emptying your trunk area, floor cover, spare tire, and the 2 pockets on each side of the spare.
next move to the side panels and remove teh screw (phillips) above the hanger (??)

then move to your right and take the flat head and pop this clip out.

now move downwards and take this hanger out with the 10mm

now you should be able to take the panel off by pulling out.
repeat for other side.
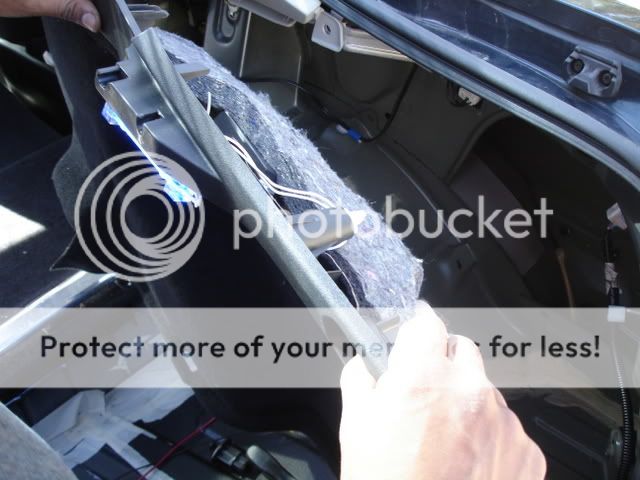
i couldn't get pics of this so im gonna explain it to my best power.... the panel that has the flap that goes over the rear seats with them folded flat... remove that. its common sense as to how to do it, but take that out (and you will see why i say install the bar in 3 parts) there is i think 2 or 4 10mm bolts that hold a clip on to it and then it should just be able to be pulled straight up. that will give you more room to access the rear strut bolts.
now locate the strut bolts and remove them with the 14mm socket (there is 6 all together just like the front, but in the rear there is 2 in the front and 1 on the other side)
now that you have located them. remove them :D
ok sweet. you u have all the bolts off.
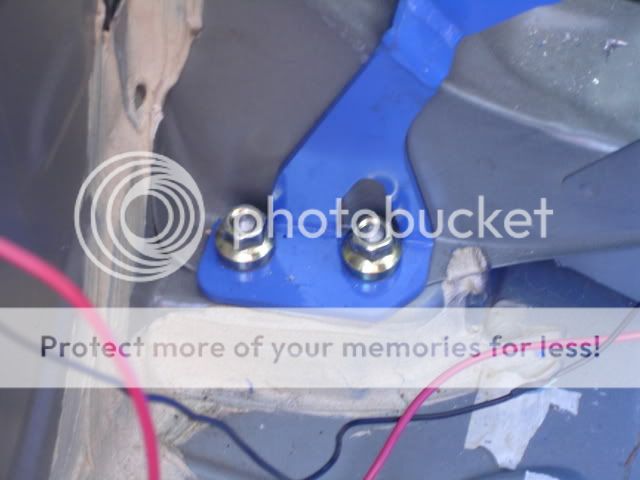
now place the DME end cap in
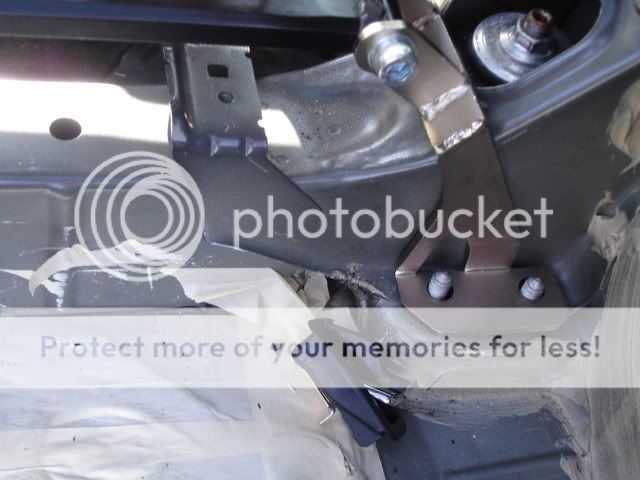
ok and now with the DME ends in you can figure out where you have to cut the side panels. i made the mistake of completely cutting the whole square around the mounts out but the right after i cut, i realized that it would look 100x better if i just cut a little flap and let the flap chill over the end mounts which would give it a cleaner look. so cut away and once your done you can put the panel that goes inbetween the seat and the trunk back, then secure the bar in place. now attach the panels back in just like you took them out (but backwards ) and the put the stuff back in the trunk and take a look at the sexy new rear strut bar. :D
again dont forget to check out www.nonstoptuning.com for unbeliveable parts and hit them up on aim @ NSTonAIM where you can get any questions about their products on the spot from the best people there. and if you talk with mike, tell him that davedave sent you
link for front strut bar clicky
also i didnt get that many pictures because they arent really needed i got the main ones so that you would get the understanding of it, its really simple and shouldnt take anyone more then 20 min for the FIRST time you do it. this one took me 10.. slightly longer then the front but if you have the bar in your trunk, you can do it on your lunch break lol.
ok anyways. same tools as the front: 14mm. flat head and phillips head, but this time grab a 10 mm also.
another thing i noticed was this install is easier if the bar is UNASSEMBLED! meaning leave it in 3 parts 2 end caps and the middle bar. just my $.02.
ok start by emptying your trunk area, floor cover, spare tire, and the 2 pockets on each side of the spare.
next move to the side panels and remove teh screw (phillips) above the hanger (??)
then move to your right and take the flat head and pop this clip out.
now move downwards and take this hanger out with the 10mm
now you should be able to take the panel off by pulling out.
repeat for other side.
i couldn't get pics of this so im gonna explain it to my best power.... the panel that has the flap that goes over the rear seats with them folded flat... remove that. its common sense as to how to do it, but take that out (and you will see why i say install the bar in 3 parts) there is i think 2 or 4 10mm bolts that hold a clip on to it and then it should just be able to be pulled straight up. that will give you more room to access the rear strut bolts.
now locate the strut bolts and remove them with the 14mm socket (there is 6 all together just like the front, but in the rear there is 2 in the front and 1 on the other side)
now that you have located them. remove them :D
ok sweet. you u have all the bolts off.
now place the DME end cap in
ok and now with the DME ends in you can figure out where you have to cut the side panels. i made the mistake of completely cutting the whole square around the mounts out but the right after i cut, i realized that it would look 100x better if i just cut a little flap and let the flap chill over the end mounts which would give it a cleaner look. so cut away and once your done you can put the panel that goes inbetween the seat and the trunk back, then secure the bar in place. now attach the panels back in just like you took them out (but backwards
again dont forget to check out www.nonstoptuning.com for unbeliveable parts and hit them up on aim @ NSTonAIM where you can get any questions about their products on the spot from the best people there. and if you talk with mike, tell him that davedave sent you
link for front strut bar clicky
 05-04-2007, 09:52 PM
#2
Senior Member
SL Member

Join Date: Mar 2007
Location: Martinsburg, WV
Posts: 177
I made my own rear strut tie bar on my lunch breaks at work I didnt have to do anything with the bolts in the front, I just used the rear bolts a lot less work i think. I can tell a big difference in the handling like whwn you hit a turn hard theres no more body roll in the rear at all.
The only thing i dont like is the nuts dont get full thread when you tighten it down, but its been on my car for 5 months and no problems.
The only thing i dont like is the nuts dont get full thread when you tighten it down, but its been on my car for 5 months and no problems.
05-05-2007, 01:22 AM
#3

i know that you probably contribute a lot of useful information to this site, but these two install threads you made are worthless. They say what all the other install threads say, and at the very least you could have showcased the product, and introduced a useful perspective since these products are relatively new.
If i am missing pictures on my screen forgive me, but all I see in this thread are some pictures of the side panels of the car, and the end brackets of the bar.
No comments about the quality, fit and finish, any immediate impressions, did the rattles go away (if you had any), does the rear feel any different, if this mainly a show mod and the functionality of a paper weight, does it make you go "oh my goodness"? lol.
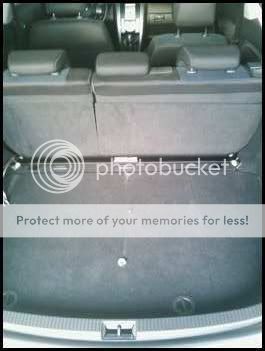
At the very very least, you could have took a picture of the full bar or how it compliments the trunk area when everything was back installed...
Again if I am missing pictures on my computer screen forgive me.
If i am missing pictures on my screen forgive me, but all I see in this thread are some pictures of the side panels of the car, and the end brackets of the bar.
No comments about the quality, fit and finish, any immediate impressions, did the rattles go away (if you had any), does the rear feel any different, if this mainly a show mod and the functionality of a paper weight, does it make you go "oh my goodness"? lol.
At the very very least, you could have took a picture of the full bar or how it compliments the trunk area when everything was back installed...
Again if I am missing pictures on my computer screen forgive me.
05-05-2007, 04:54 AM
#4
Senior Member
Team ScionTific

SL Member

Join Date: Apr 2006
Location: Miami, FL
Posts: 1,943
Originally Posted by Kratos
No comments about the quality, fit and finish, any immediate impressions, did the rattles go away (if you had any), does the rear feel any different, if this mainly a show mod and the functionality of a paper weight, does it make you go "oh my goodness"? lol.
At the very very least, you could have took a picture of the full bar or how it compliments the trunk area when everything was back installed...
At the very very least, you could have took a picture of the full bar or how it compliments the trunk area when everything was back installed...
05-05-2007, 04:31 PM
#5
i appologize for the pictures, i dont have a camera of my own but both bars have an amazing finish and most of you know that strut bars arent the most important suspension mod, they are mostly for looks and what not. you wouldnt notice the performance from them untill higher speeds. but i love the finish on them and they look great. again. i appologize that the amount of pictures in the thread dont meet up to your standards, and if i can get my hands on a camera i will take more pictures. its not a hard install and i noted above that i dont have a lot of pictures. so about the you coulda taken pics of this or that or what not, no i couldnt have because i dont have a camera, i had my friend take pics of what he could, but he was working on his car too not just mine, so under the circumstances thats all i could have gotten 

 05-19-2007, 04:08 AM
#8
Originally Posted by neolusions
no pictures of the actual rear strut bar. Just a question. do theses bar make the rear seats unuseable.?
11-02-2008, 03:34 AM
#9
Senior Member
SL Member

Join Date: Apr 2008
Location: New Jersey
Posts: 1,345
this is the biggest pita to install i lost 3 clips between rear speakers my rear quarter panel and broke 3 because they wouldnt clip back in so i tried to punch them in and they just would shadder. i think this is because when you cut the slits in the trunk liner can not sit back were it was originaly i picked up more clips and finaly got it instailed

 01-07-2009, 01:08 AM
#12

i just installed my greddy rear strut, installation was pretty simple, though it was tought to take out interior panels they seem to be stuck and the bolts were a little hard to take out but i managed in the end it payed off, test drove it and it feels more rigid great product i recommend any1 to buy this.


Thread
Thread Starter
Forum
Replies
Last Post
kleecker
Scion xB 2nd-Gen Suspension & Handling
3
01-09-2015 02:26 PM
hampton1100
Scion tC 2G Suspension & Handling
2
01-02-2015 08:13 PM
TheRedBox
Scion xA/xB 1st-Gen Drivetrain & Power
31
12-02-2003 04:53 PM

