


A/C Control Color Change


Senior Member


SL Member
Joined: Feb 2004
Posts: 2,650
From: Sipping haterade.

http://www.oznium.com/corvette-led-door-switches.php
Those are the same plugs we have in the xB. Anyone looking at doing this with LEDs should look at this.
Those are the same plugs we have in the xB. Anyone looking at doing this with LEDs should look at this.


Junior Member
Joined: Sep 2005
Posts: 10
From: Jacksonville, Florida
Success!
Just to add to the foray, I successfully changed my amber lights over to blue LEDs last night. It was a pretty simple affair, I'll post more details if anyone cares.
Basically, I was sitting in a friend's dorm room, bored. We decided to go to Wal-mart. Well, I saw a package of Tire-flys for like 4 bucks. We bought them, ripped them apart, soldered some resistors to the LED so as not to fry them (I'm not sure what kind they were, if details are wanted I'll get them). Anyway, here's the proof in the pictures.
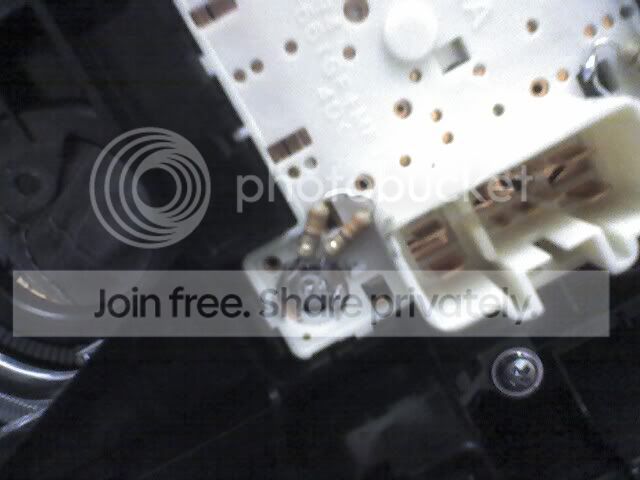
Resistors.

Blue-1

Blue-2
And for the record, be careful when pulling off the dash piece. I was having a hard time with the cable connecting the A/C switches, and I managed to smack myself in the face with the dash when it finally came lose. Bled for a good 20 minutes.
Well, let me know what you guys think, and as I said, if more details can be put down if anyone wants.
Basically, I was sitting in a friend's dorm room, bored. We decided to go to Wal-mart. Well, I saw a package of Tire-flys for like 4 bucks. We bought them, ripped them apart, soldered some resistors to the LED so as not to fry them (I'm not sure what kind they were, if details are wanted I'll get them). Anyway, here's the proof in the pictures.
Resistors.
Blue-1
Blue-2
And for the record, be careful when pulling off the dash piece. I was having a hard time with the cable connecting the A/C switches, and I managed to smack myself in the face with the dash when it finally came lose. Bled for a good 20 minutes.
Well, let me know what you guys think, and as I said, if more details can be put down if anyone wants.
Junior Member
Joined: Sep 2005
Posts: 10
From: Jacksonville, Florida
Originally Posted by Max
iratelizard, I am highly interested in this. The LEDS look pretty bright in the pics. The bulb covers I got now just aren't cutting it.
Let me make a couple of calls about the resistors; I'll post back with the exact info.
I'll tell you now, I'm not 100% satisfied with it yet, but I think that it may just be due to the way the LEDs are aimed. Otherwise, it looks hella good.
At the end of the day, it was a super cheap mostly reversable mod.
Just so you know: there issoldering involved.

Senior Member


SL Member
Joined: Dec 2004
Posts: 4,971
From: Atlanta, GA
Originally Posted by iratelizard
Originally Posted by Max
iratelizard, I am highly interested in this. The LEDS look pretty bright in the pics. The bulb covers I got now just aren't cutting it.
Let me make a couple of calls about the resistors; I'll post back with the exact info.
I'll tell you now, I'm not 100% satisfied with it yet, but I think that it may just be due to the way the LEDs are aimed. Otherwise, it looks hella good.
At the end of the day, it was a super cheap mostly reversable mod.
Just so you know: there issoldering involved.
Junior Member
Joined: Sep 2005
Posts: 10
From: Jacksonville, Florida
Originally Posted by Max
Originally Posted by iratelizard
Originally Posted by Max
iratelizard, I am highly interested in this. The LEDS look pretty bright in the pics. The bulb covers I got now just aren't cutting it.
Let me make a couple of calls about the resistors; I'll post back with the exact info.
I'll tell you now, I'm not 100% satisfied with it yet, but I think that it may just be due to the way the LEDs are aimed. Otherwise, it looks hella good.
At the end of the day, it was a super cheap mostly reversable mod.
Just so you know: there issoldering involved.
Here's the product: you can get em' at Walmart, Target, wherever fine overpriced car crap is sold.
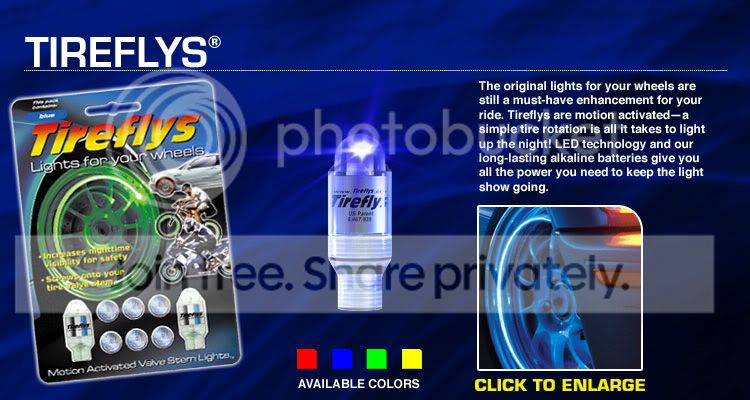
Now, the next thing you'll need is a pack of Resistors from Radio Shack. they were $0.99, for like 5. You'll only need four.
330 ohm 1/2W 5% Carbon Film Resistor pk/5
$0.99 Brand: RadioShack
Catalog #: 271-1113 Model: 271-1113
Now, here's what we did.
Broke apart the TireFlies, they come apart REAL easily. You'll be left with a circuit board and a stack of three batteries. discard the batteries, and use your soldering iron to seperate the LED from the PCB board. I probably don't have to tell you, but be careful not to melt the LED...
From there, clip the resistor down a bit so that it won't be difficult to close up the compartment upon completion.
Head out to your Scion, and remove the dash as previously instructed on page 1 of the forum. The only difference (Which i]may[/i] have been covered already )is that you will need a small flat-head screwdriver to gently insert into the gray bulb area and turn. You'll find that this will release the bulb and allow for it to easily be removed. You'll now be faced with copper pads, at an easy-to-work-with twelve volts.
Now, set up your circuit just like the one in the picture. Left copper pad to resistor, to resistor, to LED, to right copper pad.
You're gonna hate me for this, but that's all I remember. Personal reccomendation: jury rig it up to ensure the proper polarity for your LED and Resistors. before you do your final solder-job. I believe the smaller end inside the LED (you'll have to look inside, but trust me, it's easy when you know what I'm talking about) is positive.
Check back a little later on, there's a good chance that I will update with a little more info. the guy I was with last night is the real electronics guru, but I can' seem to raise his lazy ___ on the phone. when I talk to him I'll post back again, he'll remember more detail than I did. Remember, however, that LEDs are pretty strong little beasts. even if you miswire them, so long as you remove current from them quickly, you can swap and use them again.
Either way, you now have a shopping list to work from. ^-^
Senior Member
SL Member
Joined: Dec 2004
Posts: 4,971
From: Atlanta, GA
Let me get this straight:
There are four total resistors, two on each LED. The resistors are in series with the LED, not parallel.
Can I ask why you used two resistors when one would do the trick
There are four total resistors, two on each LED. The resistors are in series with the LED, not parallel.
Can I ask why you used two resistors when one would do the trick
Junior Member
Joined: Sep 2005
Posts: 10
From: Jacksonville, Florida
Originally Posted by Max
Let me get this straight:
There are four total resistors, two on each LED. The resistors are in series with the LED, not parallel.
Can I ask why you used two resistors when one would do the trick
There are four total resistors, two on each LED. The resistors are in series with the LED, not parallel.
Can I ask why you used two resistors when one would do the trick
the reason why we used two is because one of the 330 Ω. resistors would put about 33ma through the LED, where the max an LED can handle is about 20ma. Now, we're thinking that a single 470 Ω resistor will do the trick, since it'll put out almost exactly at 20ma. So, they'll be brighter than the ones I have rigged up right now.
Senior Member
SL Member
Joined: Dec 2004
Posts: 4,971
From: Atlanta, GA
Wait a minute, wouldn't a 600 ohm resistor be ideal? 12V/600Ohm=20mA, right?
If I am wrong with assuming the voltage is at 12V, I'll put in a 470 ohm resistors in series.
I am probably going to work on it on Monday.
I can post pics when I get it done.
If I am wrong with assuming the voltage is at 12V, I'll put in a 470 ohm resistors in series.
I am probably going to work on it on Monday.
I can post pics when I get it done.
Junior Member
Joined: Sep 2005
Posts: 10
From: Jacksonville, Florida
Originally Posted by Max
Wait a minute, wouldn't a 600 ohm resistor be ideal? 12V/600Ohm=20mA, right?
If I am wrong with assuming the voltage is at 12V, I'll put in a 470 ohm resistors in series.
I am probably going to work on it on Monday.
I can post pics when I get it done.
If I am wrong with assuming the voltage is at 12V, I'll put in a 470 ohm resistors in series.
I am probably going to work on it on Monday.
I can post pics when I get it done.
So, let's make our respective changes and compare notes, eh?
Senior Member
SL Member
Joined: Dec 2004
Posts: 4,971
From: Atlanta, GA
Well... I don't have a voltmeter, so I am gonna go with the conservative side and get somewhere around a 690 ohm if I can.
13.8V/20mA=690ohm
The amount of light I am getting now is very low, and it's not as blue as I would like. It's more turquoise.
I'm also gonna do some looking around RadioShack for perhaps some white or UV LEDs.
I'll update this thread when done. It'll be a couple days.
13.8V/20mA=690ohm
The amount of light I am getting now is very low, and it's not as blue as I would like. It's more turquoise.
I'm also gonna do some looking around RadioShack for perhaps some white or UV LEDs.
I'll update this thread when done. It'll be a couple days.
Junior Member
Joined: Sep 2005
Posts: 10
From: Jacksonville, Florida
Originally Posted by Max
Well... I don't have a voltmeter, so I am gonna go with the conservative side and get somewhere around a 690 ohm if I can.
13.8V/20mA=690ohm
The amount of light I am getting now is very low, and it's not as blue as I would like. It's more turquoise.
I'm also gonna do some looking around RadioShack for perhaps some white or UV LEDs.
I'll update this thread when done. It'll be a couple days.
13.8V/20mA=690ohm
The amount of light I am getting now is very low, and it's not as blue as I would like. It's more turquoise.
I'm also gonna do some looking around RadioShack for perhaps some white or UV LEDs.
I'll update this thread when done. It'll be a couple days.
Senior Member
SL Member
Joined: Dec 2004
Posts: 4,971
From: Atlanta, GA
I got it done, but the colors and dispersion are way off. I went with RadioShack LEDs. I may go get the TireFlys, but I have a question: Are the wires coming out of the Leds very long? The way I did mine, I did not solder to the pads, but used the grey screw in holders. Without long leads from the LED, I would have to solder to the pads, and I don't want to do that. If the leads are not very long, I'll order some LEDs from superbrightleds.com, so I'll have to wait a while.