DC Sports 4-1 Header Installation onto xA/xB


 02-26-2010, 11:08 PM
#82
Senior Member
SL Member

Join Date: Sep 2006
Location: Murrieta, CA
Posts: 1,217
Did you put your car up on jacks? I don't have any, only ramps. But my car is low, so in order to drive up on ramps I have to take my front bumper off. Doesn't take long, but still kind of a pain. Even then, the car is only inches from my chest when going for the spring-loaded bolts.
02-27-2010, 04:02 AM
#83
Senior Member
Fail, INC
SL Member
Scinergy
Join Date: Apr 2008
Location: Kansas City, MO
Posts: 956
I used a low-profile high lift jack. Some people call them racing jacks (don't know why). Put the b up in the air about 2 feet in front. Was just enough room to squeeze in with a creeper and hit the spring bolts. We cleaned up the bolts after inspecting them for excessive wear by using more PB Blaster and a wire brush. Cleaning up the bolts really helped with getting them back on.
02-28-2010, 02:37 AM
#85
 02-28-2010, 04:56 AM
#87
yeah, definitely do the manifold first. they are the hardest due to the fact that you cannot see them. they are facing the firewall and are within inches of the firewall causing little room to access. you will be unhappy when you start them because they are just so difficult to take off. be prepared.
03-02-2010, 09:32 PM
#88
Senior Member
SL Member
Join Date: Sep 2006
Location: Murrieta, CA
Posts: 1,217
DONE. I used my wife's makeup mirror to locate all the screws up top, so that wasn't difficult at all. =D
Hardest was definitely the spring-loaded bolts. Even with the breaker bar. There's just not a lot of elbow room down there. But I did manage to get them off, and felt like I could conquer the world after that.
Only bad thing I ran into, were the 2 holes on the bottom of the header. Not only did the maker of the header make the holes too big, but they weren't threaded either!! So I had to go to LOWE'S and pick up (2) 3/8 x 3" GRADE 8 screws, some GRADE 8 washers, and (2) GRADE 8 nuts. With these bolts, I was still able to use the springs off of the OEM bolts. With the OEM bolts being tapered, I wasn't able to apply a nut to them. So after putting my setup of screws/washers/nuts on, I just applied some heavy duty LOCKTITE on the threads by the nut to make sure any vibrations wouldn't loosen the nuts.
So far so good! Everything is still tight. Car only sounds louder when I'm at freeway speeds, which is where I can tell the most difference. It feels like it accelerates much quicker and when I'm going uphill, I don't have to have the pedal to the floor to maintain a 75-80mph speed.
03-03-2010, 04:10 AM
#89
Senior Member
Fail, INC
SL Member
Scinergy
Join Date: Apr 2008
Location: Kansas City, MO
Posts: 956
Yeah, once the header is on... that little 1.5L breathes much easier. Best performance upgrade I've done to mine. Did you get a chance to take some before/during/after pics?
03-03-2010, 04:49 AM
#90
DONE. I used my wife's makeup mirror to locate all the screws up top, so that wasn't difficult at all. =D
Hardest was definitely the spring-loaded bolts. Even with the breaker bar. There's just not a lot of elbow room down there. But I did manage to get them off, and felt like I could conquer the world after that.
Only bad thing I ran into, were the 2 holes on the bottom of the header. Not only did the maker of the header make the holes too big, but they weren't threaded either!! So I had to go to LOWE'S and pick up (2) 3/8 x 3" GRADE 8 screws, some GRADE 8 washers, and (2) GRADE 8 nuts. With these bolts, I was still able to use the springs off of the OEM bolts. With the OEM bolts being tapered, I wasn't able to apply a nut to them. So after putting my setup of screws/washers/nuts on, I just applied some heavy duty LOCKTITE on the threads by the nut to make sure any vibrations wouldn't loosen the nuts.
So far so good! Everything is still tight. Car only sounds louder when I'm at freeway speeds, which is where I can tell the most difference. It feels like it accelerates much quicker and when I'm going uphill, I don't have to have the pedal to the floor to maintain a 75-80mph speed.
Hardest was definitely the spring-loaded bolts. Even with the breaker bar. There's just not a lot of elbow room down there. But I did manage to get them off, and felt like I could conquer the world after that.
Only bad thing I ran into, were the 2 holes on the bottom of the header. Not only did the maker of the header make the holes too big, but they weren't threaded either!! So I had to go to LOWE'S and pick up (2) 3/8 x 3" GRADE 8 screws, some GRADE 8 washers, and (2) GRADE 8 nuts. With these bolts, I was still able to use the springs off of the OEM bolts. With the OEM bolts being tapered, I wasn't able to apply a nut to them. So after putting my setup of screws/washers/nuts on, I just applied some heavy duty LOCKTITE on the threads by the nut to make sure any vibrations wouldn't loosen the nuts.
So far so good! Everything is still tight. Car only sounds louder when I'm at freeway speeds, which is where I can tell the most difference. It feels like it accelerates much quicker and when I'm going uphill, I don't have to have the pedal to the floor to maintain a 75-80mph speed.
03-07-2011, 04:11 PM
#92

This was my weekend project  Did the header, axelback exhaust, & rear sway myself this past weekend... super easy! And my box has 98k!
Did start WD40'n the spring bolts about a week prior. Stock header bolts were all good, can see how people can round the outside nuts since they're a pinch to get to, especially the passenger side. Also removed everything with the engine still luke warm. Spring bolts came off easy for me,donno if I was just too pumped up from everyone's horror stories or what but with a 3/4 drive ratchet and 14" extension they cracked no prob! Keys to this and any job is havin the right tools! Six sided sockets, a swivel socket etc.. The hardest bolts for me were the ones on the stock header bracket! Had to make a pipe extension to put on the end of the ratchet to get the leverage needed to break those.
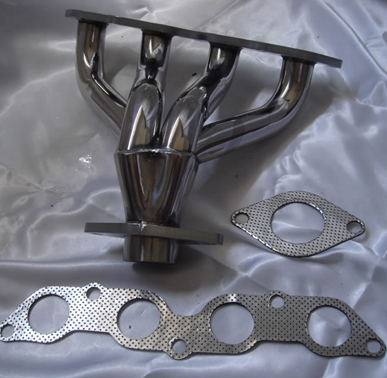
The header I put in is an M2 off ebay. ($41 Shipped )
)
Here's a link: http://cgi.ebay.com/ebaymotors/ws/eB...K%3AMEWNX%3AIT, the bolt holes where the spring bolts are used were not threaded and bigger than the bolts. Couldn't tap the holes or reuse the stock bolts since the threads on the end were basically gone. Found a set of Dodge exhaust bolts at Autozone that worked perfectly with some M8 washers & reusing the stock springs, not the ones in the kit.
 (http://www.autozone.com/autozone/acc...er=223867_0_0_)
Install took about 2hrs just because of the parts store run to figure out the spring bolts. Everything bolted up nice, sound wise you can hardly tell there's a header on it until ya mash the peddle down, then sounds a little like there's a hornets nest under the hood, not obnoxious tho, goes right away soon as ya let off, Love it!
Combined with the Tsudo exhaust it has a great sound when ya get on it! Not too ricey IMO. Just wish someone would have told me how hard it was to get the stock exhaust off the hangers!!!!!
Header & Exhaust + Rear Sway = bout 4 hrs (fought those $#@! hangers for a while) Sway simply bolted right in!
Did start WD40'n the spring bolts about a week prior. Stock header bolts were all good, can see how people can round the outside nuts since they're a pinch to get to, especially the passenger side. Also removed everything with the engine still luke warm. Spring bolts came off easy for me,donno if I was just too pumped up from everyone's horror stories or what but with a 3/4 drive ratchet and 14" extension they cracked no prob! Keys to this and any job is havin the right tools! Six sided sockets, a swivel socket etc.. The hardest bolts for me were the ones on the stock header bracket! Had to make a pipe extension to put on the end of the ratchet to get the leverage needed to break those.
The header I put in is an M2 off ebay. ($41 Shipped
Here's a link: http://cgi.ebay.com/ebaymotors/ws/eB...K%3AMEWNX%3AIT, the bolt holes where the spring bolts are used were not threaded and bigger than the bolts. Couldn't tap the holes or reuse the stock bolts since the threads on the end were basically gone. Found a set of Dodge exhaust bolts at Autozone that worked perfectly with some M8 washers & reusing the stock springs, not the ones in the kit.
(http://www.autozone.com/autozone/acc...er=223867_0_0_) Install took about 2hrs just because of the parts store run to figure out the spring bolts. Everything bolted up nice, sound wise you can hardly tell there's a header on it until ya mash the peddle down, then sounds a little like there's a hornets nest under the hood, not obnoxious tho, goes right away soon as ya let off, Love it!
Combined with the Tsudo exhaust it has a great sound when ya get on it! Not too ricey IMO. Just wish someone would have told me how hard it was to get the stock exhaust off the hangers!!!!!
Header & Exhaust + Rear Sway = bout 4 hrs (fought those $#@! hangers for a while) Sway simply bolted right in!
03-07-2011, 04:34 PM
#93
Senior Member
SL Member
Scion Evolution

Join Date: Sep 2006
Posts: 414
nice, but did you have to remove the heat shield?..if so: get back under there and wrap the header with heat tape wrap and/or make sure the linkage is out of the way...I put a header in a long time ago and didn't think nothing of it...about a year later my linkage was fried from heat...was really weird how long it took but was a costly mistake....so an ounce of prevention will be worth it!
03-07-2011, 06:21 PM
#94
Yeah was concerned about that... pulled the little rubber power steering line out of the way, needed heavier ties to pull the linkage out of the way, so even with the metal sleeves on the linkages they're still in danger huh... I've heard others say they were concerned but your the first that's said they burned up on ya  wish I'd of wrapped them up b4 I installed them it would have been easier
 07-24-2017, 02:48 PM
#96
Junior Member

Join Date: Dec 2016
Posts: 3
Man you make this look so easy! And thanks for the great tutorial. I have a 05 xb. My heat shield rattles like crazy and the dognut gasket is Rusty and dry like a potato chip. I would like to switch out the exhaust manifold and though your tutorial is pretty thorough I was hoping that you could tell me every single part that o would need to do this? Other than the header that you bought. Do I need a aftermarket heat shield? And what parts would I have to buy as far as all gaskets, nuts and bolts, clamps, etc to install this with all new parts? I'm not a mechanic though I am gonna go to school for it and take it from there. This is my favorite car that I've ever owned and I want to install everything on my own. I have a habit of getting into something and not educating myself as to "all parts that I need" and that usually is a problem. Anyway,- any info/ list that you could provide would really be appreciated.Eithwr way, thanks for the post. It gives me hope and got me motivated to do this install, be patient and ask those who know before I screw up another install effort. Thanks again!

Thread
Thread Starter
Forum
Replies
Last Post
Chimmy3
Scion xA/xB 1st-Gen Drivetrain & Power
202
06-06-2014 11:20 PM
WeSellCarParts
Exclusive Sponsored Sales
194
10-01-2011 02:50 PM
08, 1717321020, dc, header, headers, install, installation, installing, jack, points, scion, sports, xa, xb, xd

