
DIY A/C Knob LED Step By Step (With Pictures)


Thread Starter
Member
SL Member
Joined: Mar 2008
Posts: 97
From: Maui, HI
Ok First of all this is gonna be my first DIY im attempting... Also the pics are taken with a camera phone so it may be a little blurry but its what I had... Sorry 
Alrite here we go..
Before we start make SURE all your ***** are all the way 2 the LEFT. If they are in the middle when you take the button out, when reinstalling the alignment may get messed up!
(Dont worry I changed my speed dial all the way after I took the pic! I forgot! )
)
1. Pop off the AC vents that surround the radio. This can be done by using some pressure and pulling on the top and bottom parts of the vents. This is the easiest panel 2 remove so it shouldnt be 2 hard.
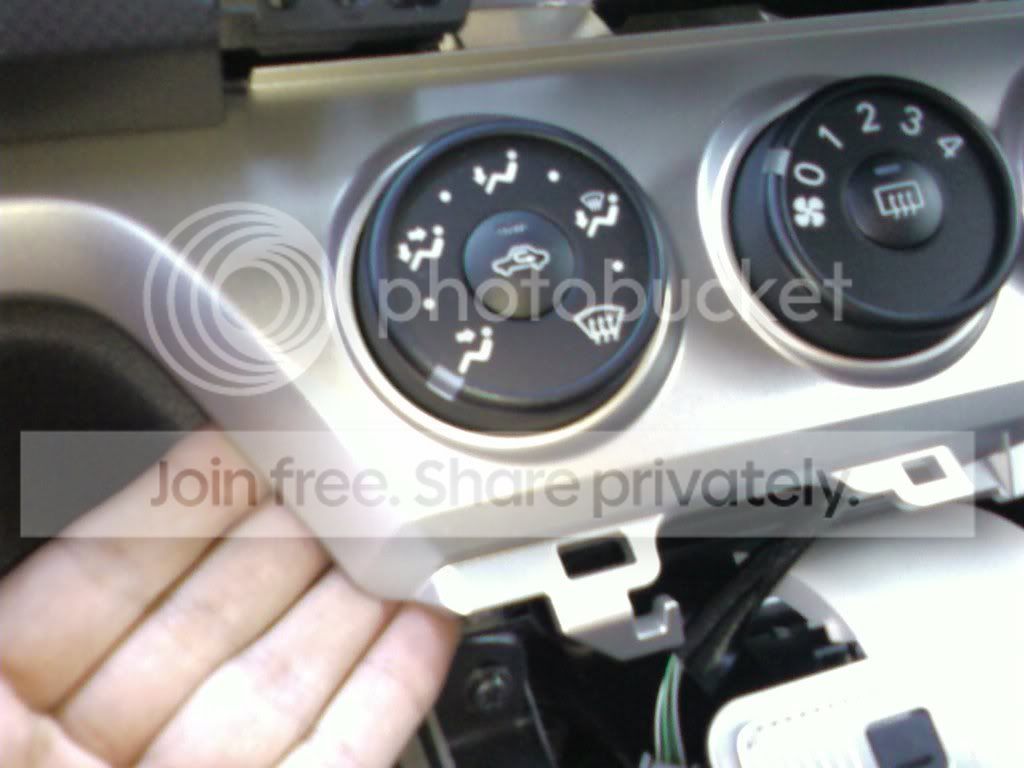
2. Now that the vents are off it should look like the picture below. You see those 2 arrows pointing to that other panel? Pull on that on both sides till it pops out.

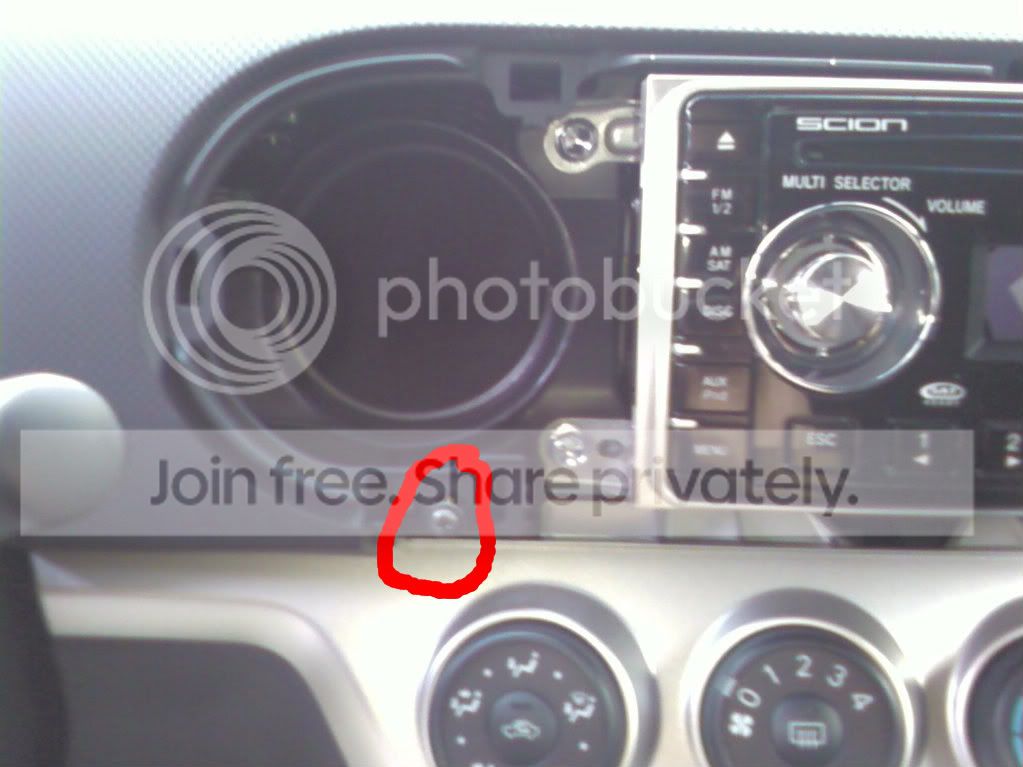
3.Now that that panel is out it should reveal some screws. Look at the picture below and unscrew the screw that is circled. It is under the left ac vent.
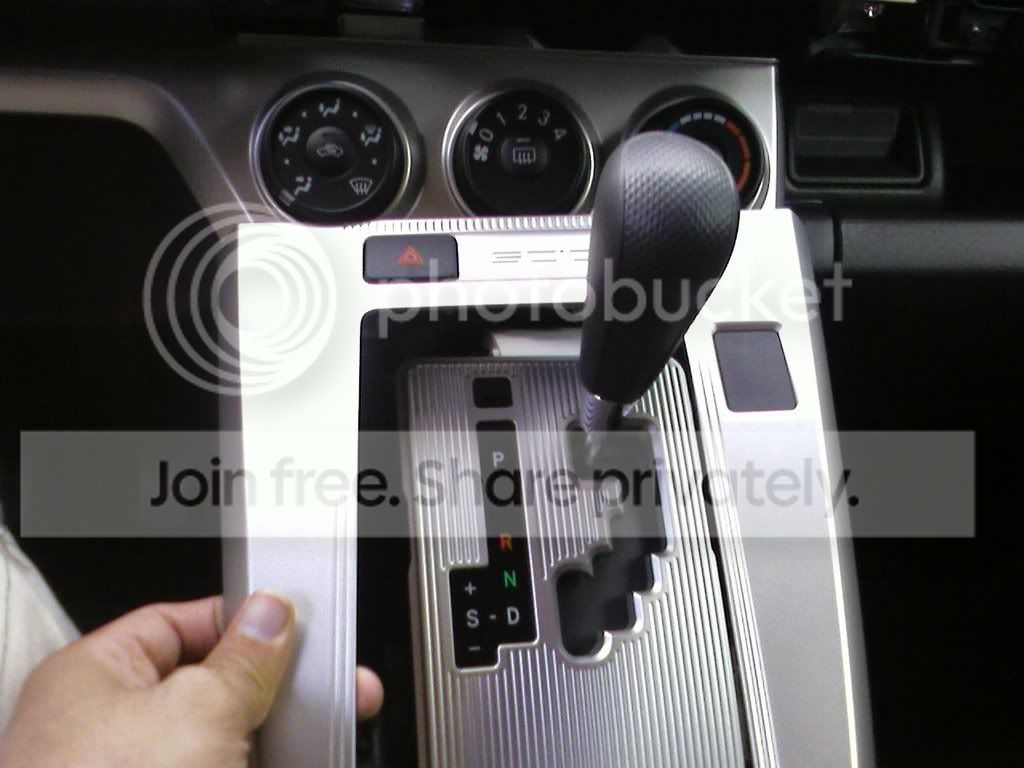
4.Now that thats off you have 2 remove the center shifter panel. To do this grasp the bottom of the silver dash and pull up SLOWLY then you may need to pull the left and right sides up. Basically just jiggle it up if you have 2. The picture below shows what part your aiming for.
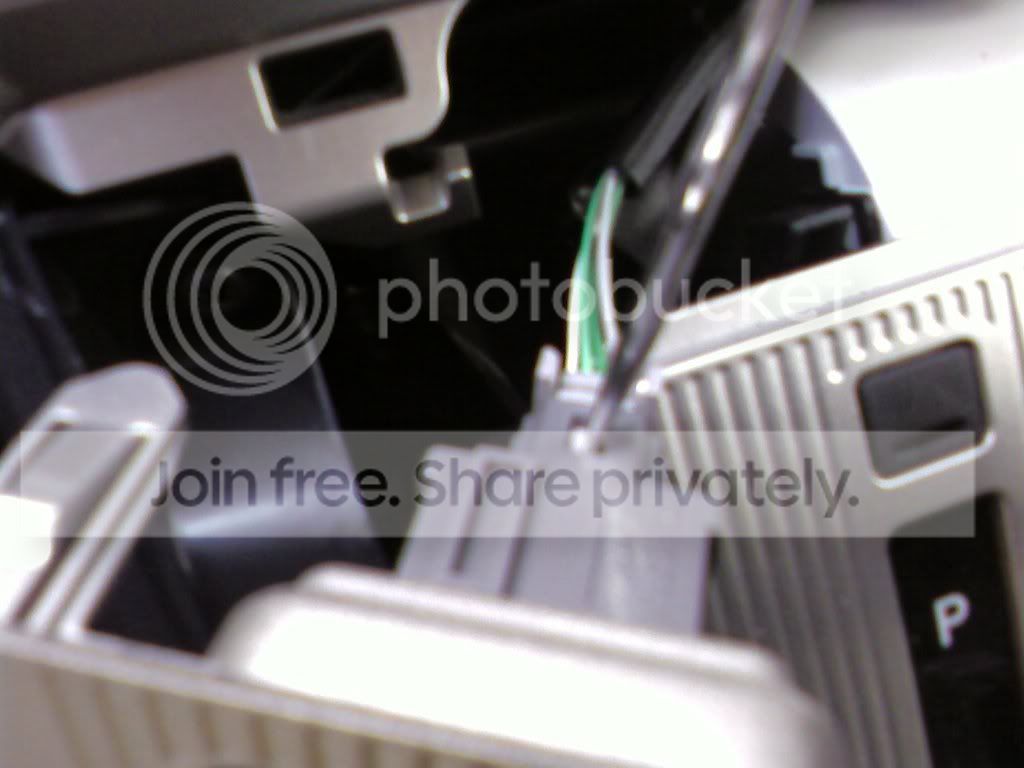
5.Now that you got that pulled up you will see a wire going into the hazard light button. This is when you use a small flat head screwdriver to push in on the tab and the plug will pop right out. Picture below if need help.
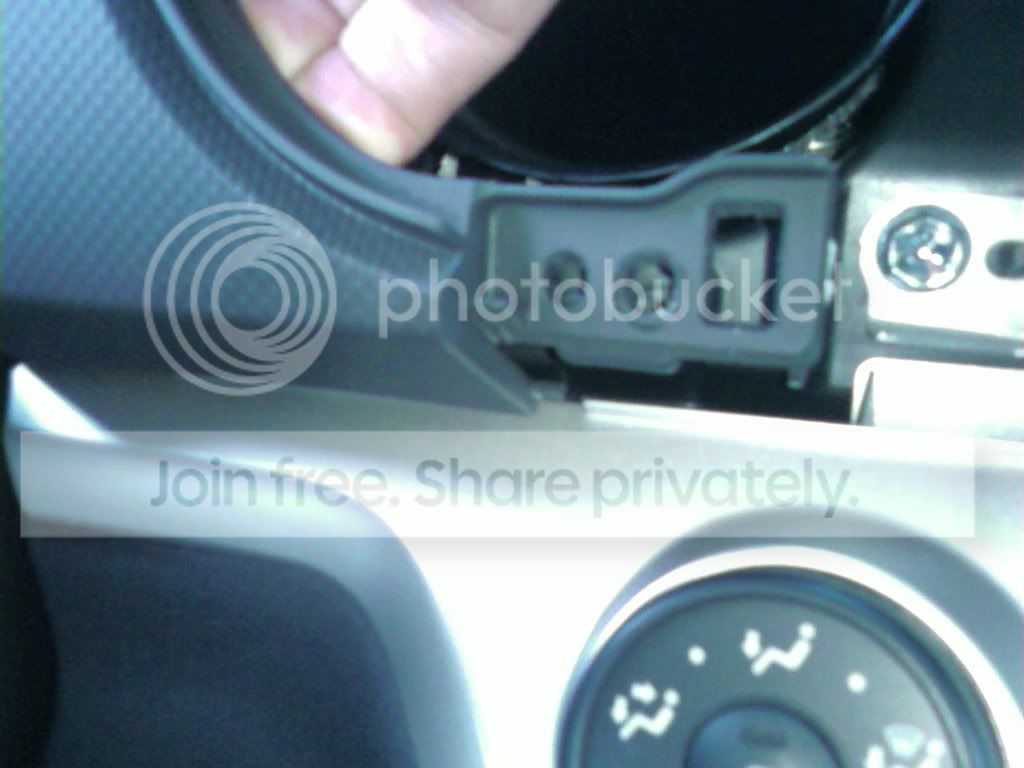
6.Ok so now that thats off put it on the side. Now move back to the top where you just took off the screw and pull on that piece JUST A LITTLE! Just enough so that you can pop out the ac control panel. Picture Below...
7.Ok so when that panels a little loose grab the ac panel and slowly pop it out grabbing both sides and popin it out slowly. Picture below...
8.Now that the ac panel is poped out you will see 3 plugs going into each seperate button of the panel. Use your screwdriver again and press the tabs in and the wire will pop out easily. (Sorry I forgot to take a picture here... But Im sure you wont miss the plugs!)
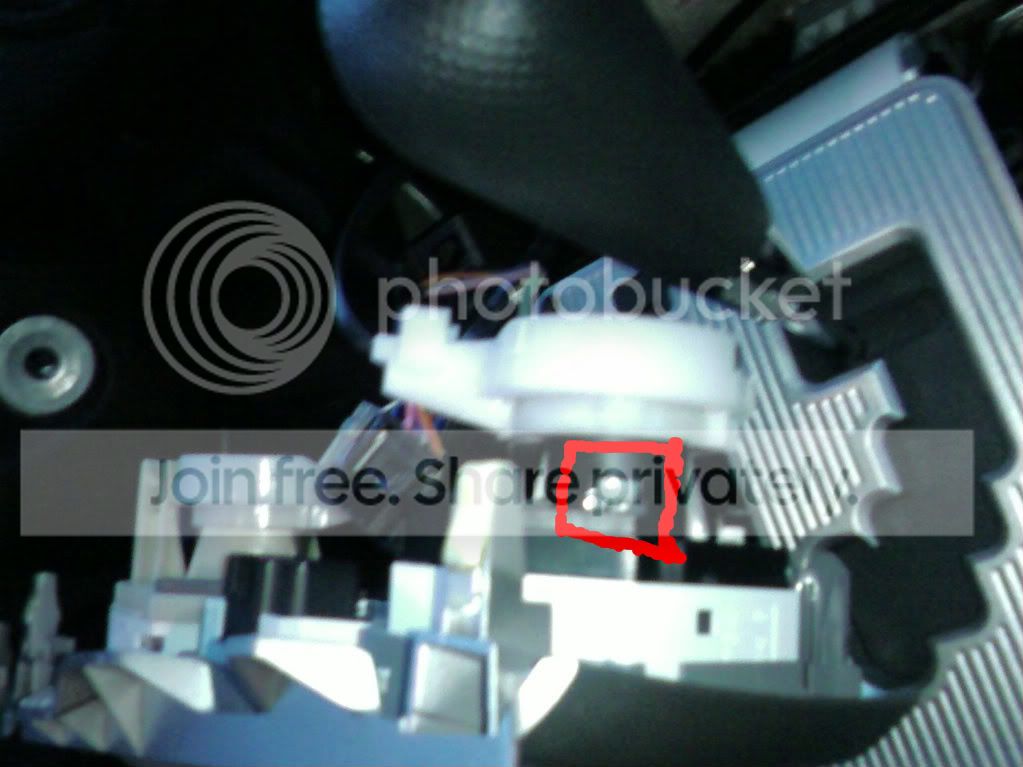
9.When the plugs are out flip the ac panel upside down so you can look at it from the top. Look at the center button which is the speed button. You will see something orange that can be turned. Use the screwdriver and turn it just a little so it becomes unfastened and then flip the panel so it will fall out. Picture below...

10. The LED should look like this when it pops out...
11. When that LED is out pop the LED's that you got into that same slot. Connect the plugs back but there is no need 2 pop it back into place... Just plug the wires back so it can have power. Now turn your car back on and turn on ur headlights and if you have light.. GREAT! But if not take out the LED and turn it 180 Degrees, pop it back in and try it again.
12.After the test remove the plugs again. Now work on the right button which is the HEAT button. This one is a little different.. You will see a white collar around the top with a wire leading out... DONT TOUCH THE WIRE!!!... All we need 2 do is pop the tabs again using the screwdriver. The tabs are located 180 degrees apart. Picture Below...
13.After popin that piece out you should see the middle with the same exact LED as step 9. Take out the LED and replace with new one. ALSO while popin the white collar back into place MAKE SURE THE ***** ON THE FRONT ARE ALLLL THE WAY 2 THE LEFT! If you dont do this and they are not all the way 2 the left the alignment of the button will be off! Remember 2 Test! Once again if it doesnt work dont panic... Just take it out and flip it 180 Degrees and try again.
14. Once you got that side done do the exact same thing on the left button!
15. Once all the LEDS are in and you think it works Turn the car on turn your lights on and see if they all light up!
16. Now just put all the panels back and do this SLOWLY... You dont want 2 break anything be patient ...
...
If you did everything correctly it should look like this! (LoL My buttons on my radio arent really green.. I have no idea y it came out like that... Its the camera phone!)

Parts Needed...
- Small Flathead screwdriver
- Phillips Screwdriver
- 3 Wedge LED Instrument Panel Bulbs Type B...
I got mine from http://autolumination.com/74.htm (Only type B will fit)
Major props go out 2 jimmbomb 4 goin with me step by step through installin my LEDS. Theres no way I coulda done it w/o his help!
Enjoy your new LEDS!
Alrite here we go..
Before we start make SURE all your ***** are all the way 2 the LEFT. If they are in the middle when you take the button out, when reinstalling the alignment may get messed up!
(Dont worry I changed my speed dial all the way after I took the pic! I forgot!
1. Pop off the AC vents that surround the radio. This can be done by using some pressure and pulling on the top and bottom parts of the vents. This is the easiest panel 2 remove so it shouldnt be 2 hard.
2. Now that the vents are off it should look like the picture below. You see those 2 arrows pointing to that other panel? Pull on that on both sides till it pops out.
3.Now that that panel is out it should reveal some screws. Look at the picture below and unscrew the screw that is circled. It is under the left ac vent.
4.Now that thats off you have 2 remove the center shifter panel. To do this grasp the bottom of the silver dash and pull up SLOWLY then you may need to pull the left and right sides up. Basically just jiggle it up if you have 2. The picture below shows what part your aiming for.
5.Now that you got that pulled up you will see a wire going into the hazard light button. This is when you use a small flat head screwdriver to push in on the tab and the plug will pop right out. Picture below if need help.
6.Ok so now that thats off put it on the side. Now move back to the top where you just took off the screw and pull on that piece JUST A LITTLE! Just enough so that you can pop out the ac control panel. Picture Below...
7.Ok so when that panels a little loose grab the ac panel and slowly pop it out grabbing both sides and popin it out slowly. Picture below...
8.Now that the ac panel is poped out you will see 3 plugs going into each seperate button of the panel. Use your screwdriver again and press the tabs in and the wire will pop out easily. (Sorry I forgot to take a picture here... But Im sure you wont miss the plugs!)
9.When the plugs are out flip the ac panel upside down so you can look at it from the top. Look at the center button which is the speed button. You will see something orange that can be turned. Use the screwdriver and turn it just a little so it becomes unfastened and then flip the panel so it will fall out. Picture below...
10. The LED should look like this when it pops out...
11. When that LED is out pop the LED's that you got into that same slot. Connect the plugs back but there is no need 2 pop it back into place... Just plug the wires back so it can have power. Now turn your car back on and turn on ur headlights and if you have light.. GREAT! But if not take out the LED and turn it 180 Degrees, pop it back in and try it again.
12.After the test remove the plugs again. Now work on the right button which is the HEAT button. This one is a little different.. You will see a white collar around the top with a wire leading out... DONT TOUCH THE WIRE!!!... All we need 2 do is pop the tabs again using the screwdriver. The tabs are located 180 degrees apart. Picture Below...
13.After popin that piece out you should see the middle with the same exact LED as step 9. Take out the LED and replace with new one. ALSO while popin the white collar back into place MAKE SURE THE ***** ON THE FRONT ARE ALLLL THE WAY 2 THE LEFT! If you dont do this and they are not all the way 2 the left the alignment of the button will be off! Remember 2 Test! Once again if it doesnt work dont panic... Just take it out and flip it 180 Degrees and try again.
14. Once you got that side done do the exact same thing on the left button!
15. Once all the LEDS are in and you think it works Turn the car on turn your lights on and see if they all light up!
16. Now just put all the panels back and do this SLOWLY... You dont want 2 break anything be patient
If you did everything correctly it should look like this! (LoL My buttons on my radio arent really green.. I have no idea y it came out like that... Its the camera phone!)
Parts Needed...
- Small Flathead screwdriver
- Phillips Screwdriver
- 3 Wedge LED Instrument Panel Bulbs Type B...
I got mine from http://autolumination.com/74.htm (Only type B will fit)
Major props go out 2 jimmbomb 4 goin with me step by step through installin my LEDS. Theres no way I coulda done it w/o his help!
Enjoy your new LEDS!


Senior Member
SL Member
Joined: Jul 2007
Posts: 967
From: St Louis
Yes. very good work, maui...... Hope this lands in our "tech" section too!!!
For more DIY's, goto the top of the page.... where you see. 'vehicles' 'forums' 'features'......
scroll down on the 'features' column & you'll see 'TECH"....... try the tech section// alot of DIY"s there!!! jh
For more DIY's, goto the top of the page.... where you see. 'vehicles' 'forums' 'features'......
scroll down on the 'features' column & you'll see 'TECH"....... try the tech section// alot of DIY"s there!!! jh

Thread
Thread Starter
Forum
Replies
Last Post
poppyljg
Scion xA/xB 1st-Gen ICE & Interior
18
Feb 13, 2004 01:35 AM
Besk_one
Scion xA/xB 1st-Gen Drivetrain & Power
0
Nov 18, 2003 05:41 AM