
Side mirror removal

Thread Starter
Senior Member

SL Member
Joined: Nov 2005
Posts: 1,527
From: Surf City SoCal
Here is the process used to remove the side mirrors on the Scion iQ.
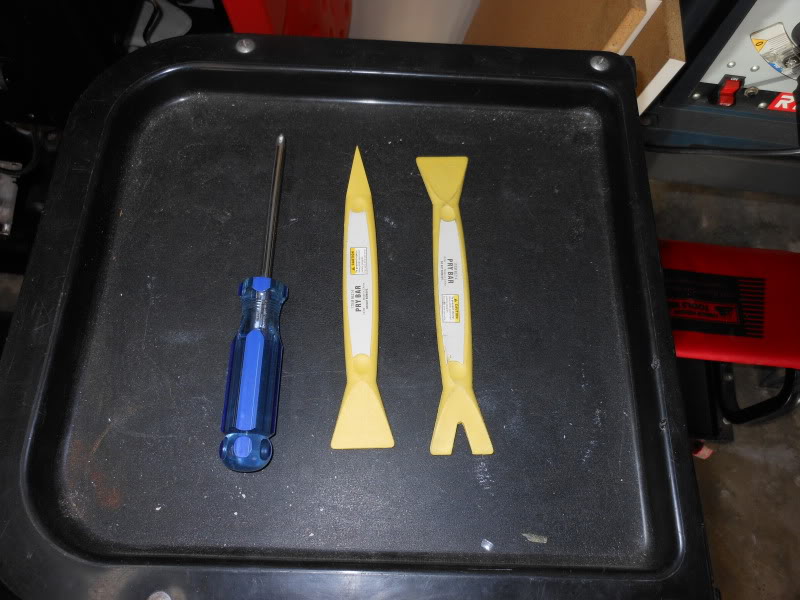
Tools required...
Philips screw driver, assorted interior removal tools
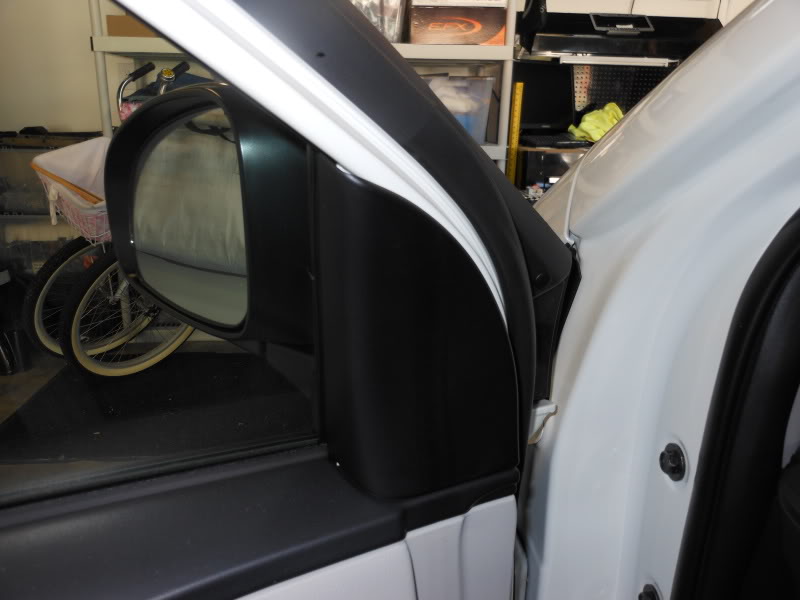
Remove this small triangular piece from the front edge of the door, easy to pull off with your hands...

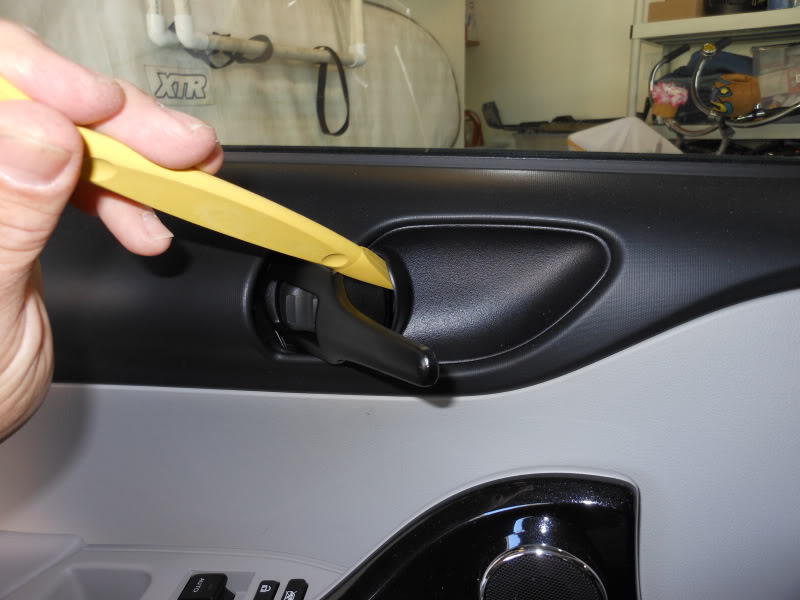
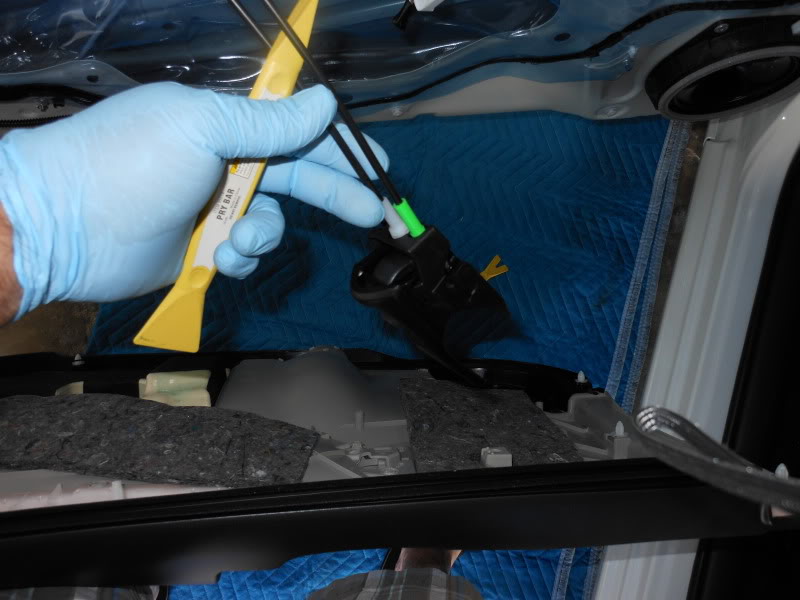
Remove the door latch backing plate by prying the trailing edge with a plastic pry tool...
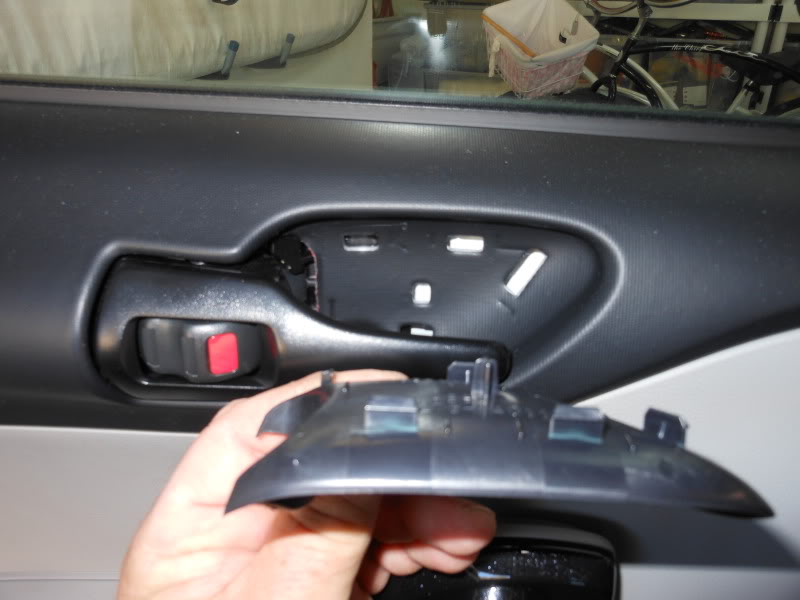
Remove the retaining screw from the exposed door latch area...
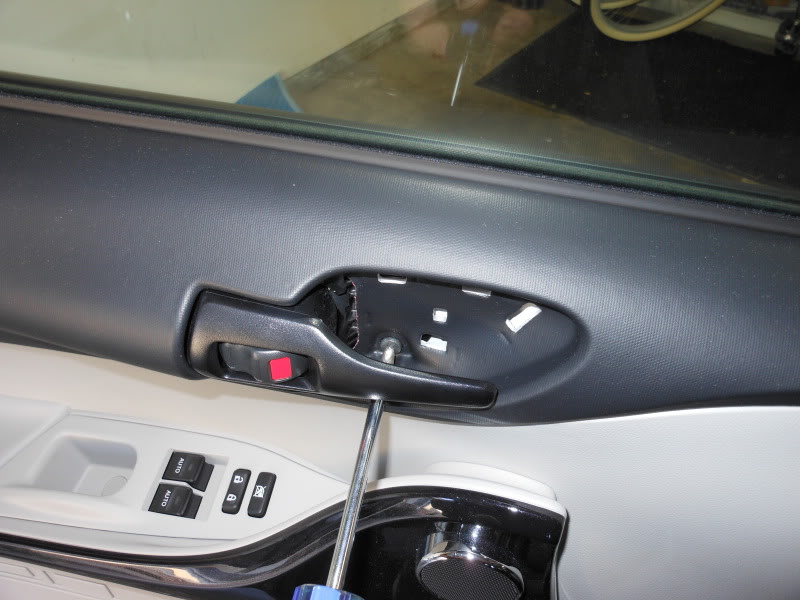
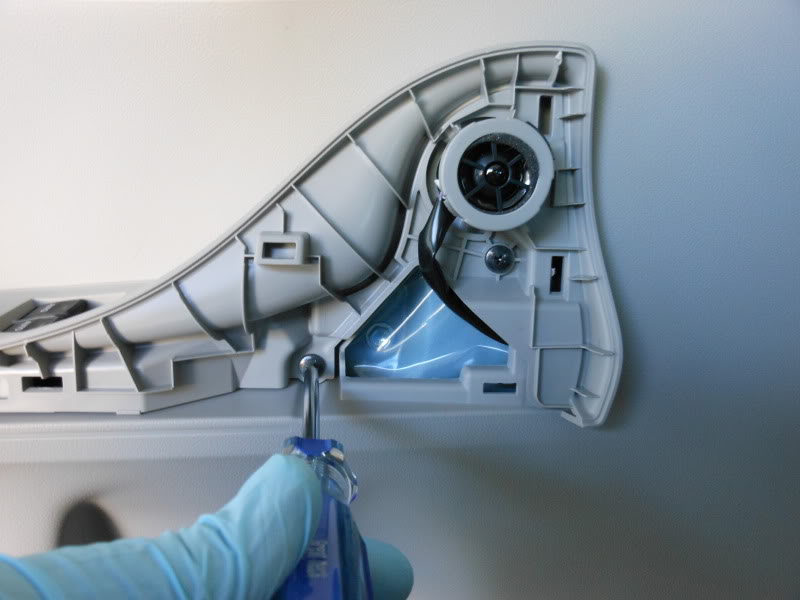
Use a small pry tool to lift the circular cover located inside the arm rest grab handle...
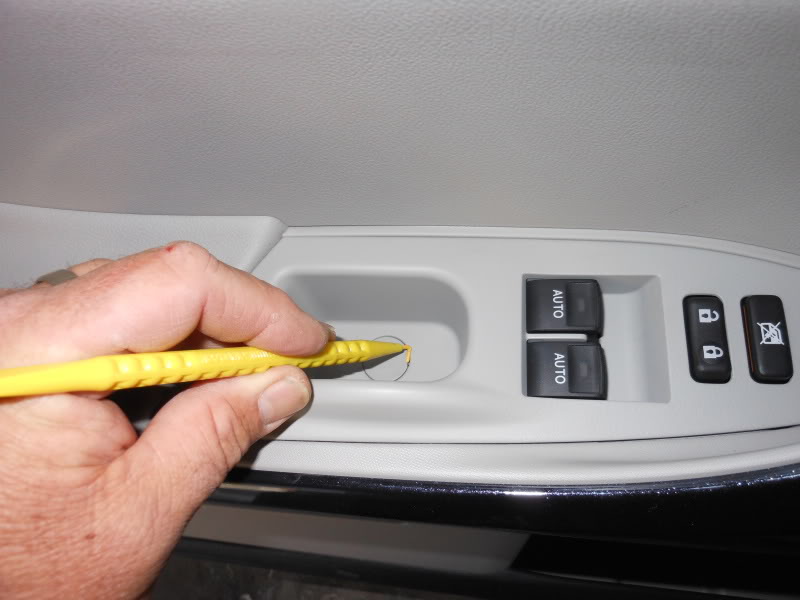
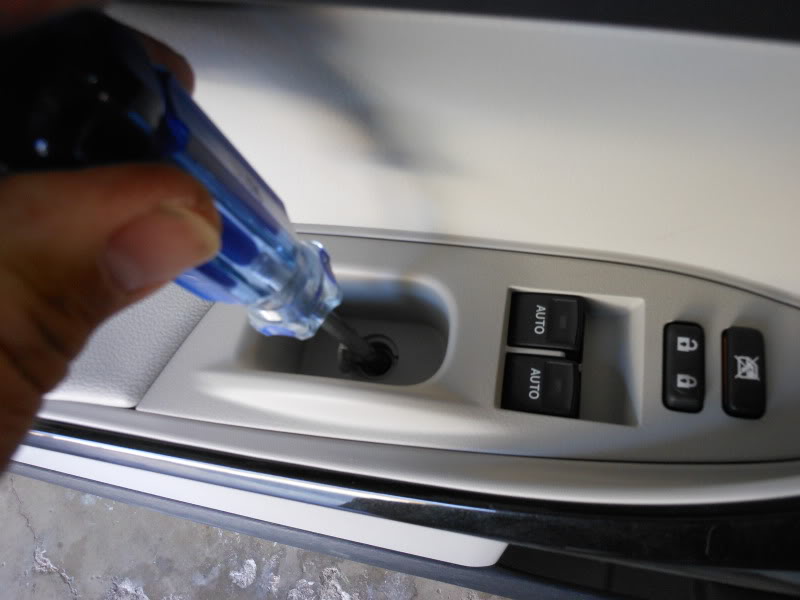
Remove the now exposed screw from the grab handle...
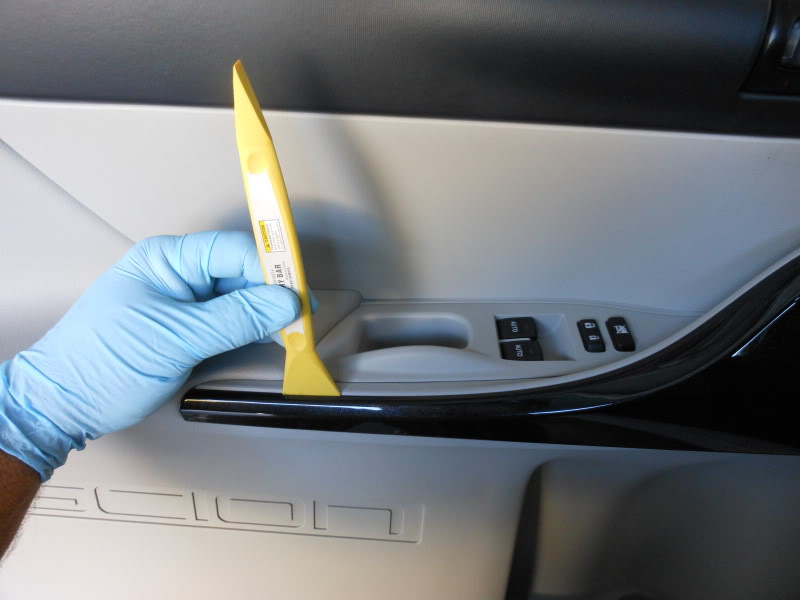
Using a plastic pry tool remove the arm rest cover plate. This piece is tough to pull off but it has nothing holding it other than plastic tabs...
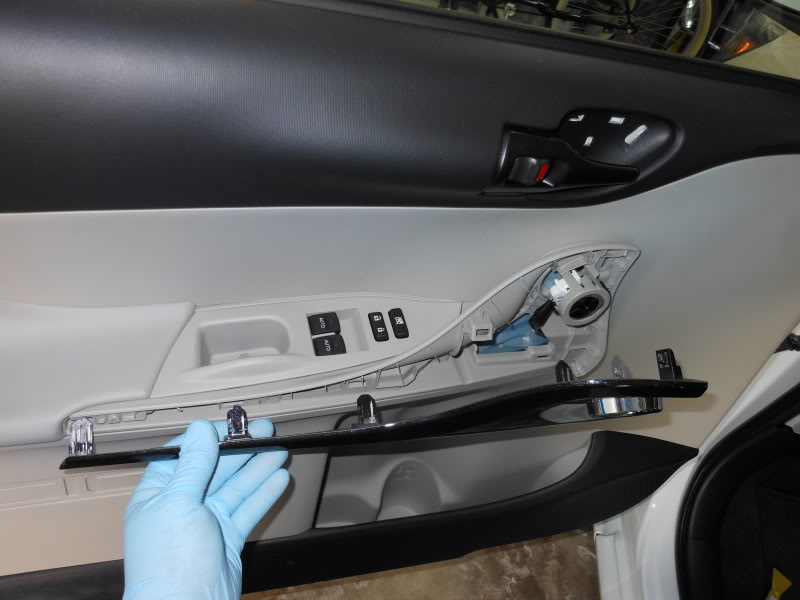
Remove the two screws behind the arm rest panel...
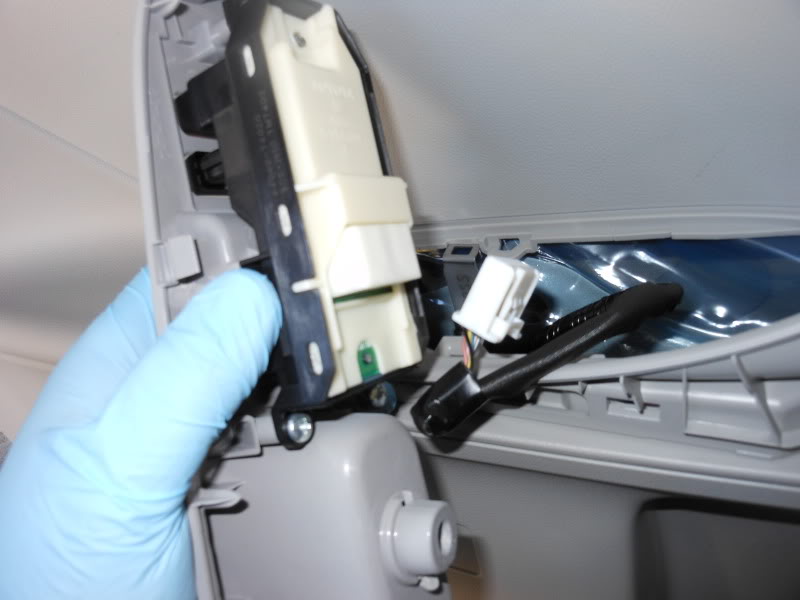
The door panel can be removed without this next step but I find it easier to manage holding the door panel with the window switch disconnected. Lift the window switch body from the door panel...
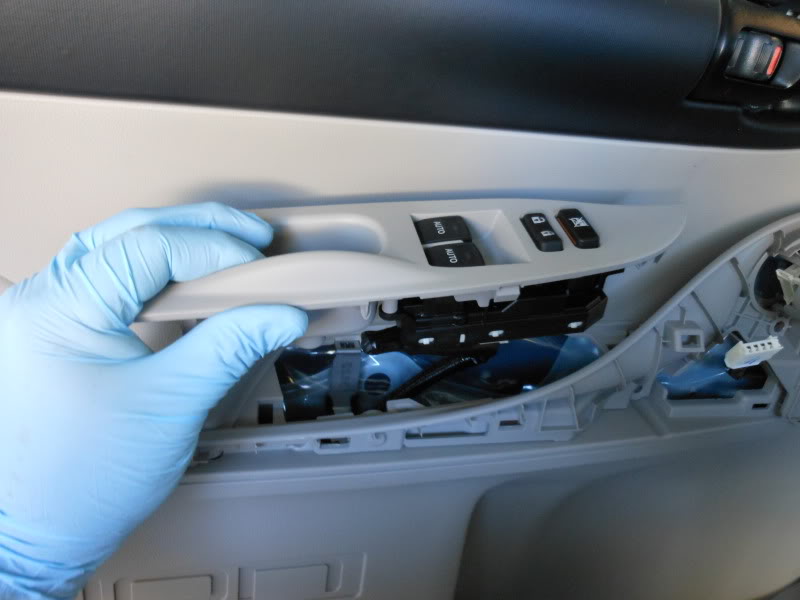
Disconnect the wire loom plug from the window switch...
Disconnect the wire loom plug from the dome tweeter speakers...
Grab the door panel at the lowest corner and pull, the small plastic tabs that hold the panel on will pop loose for you. Work your way around the door...

Remove the door latch from the door panel by sliding the plastic tabs from their mounting holes...
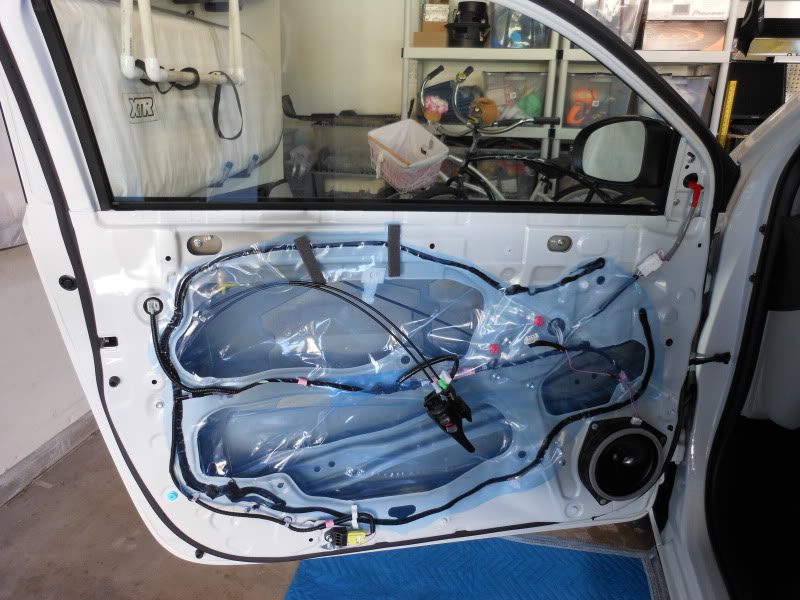
The door with the panel removed...
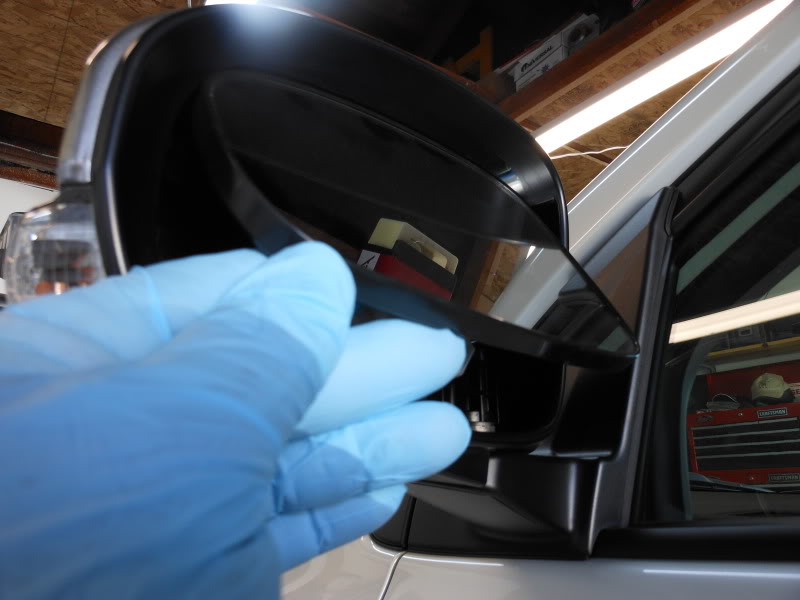
Grasp the mirror panel firmly and pull up. It will take some force to remove the panel from the clips behind it. Keep even steady pressure on the mirror panel until it pulls clear of the clips...
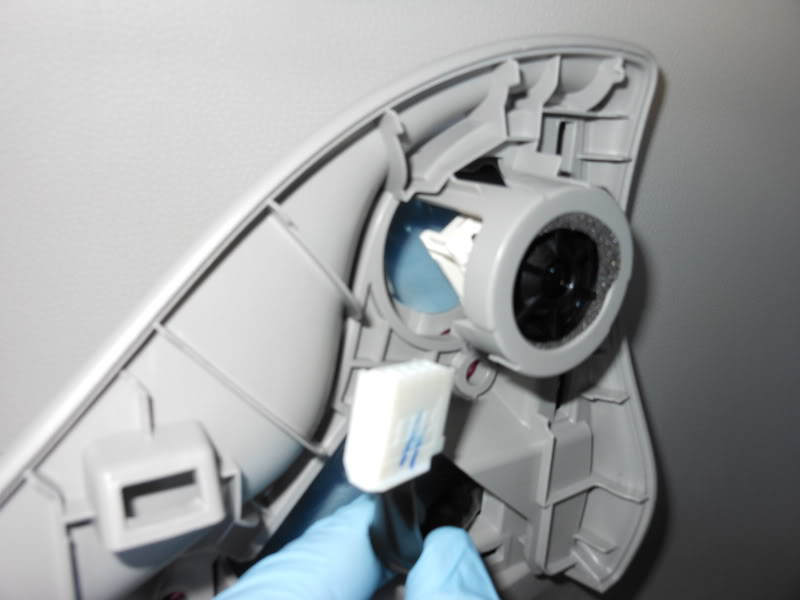
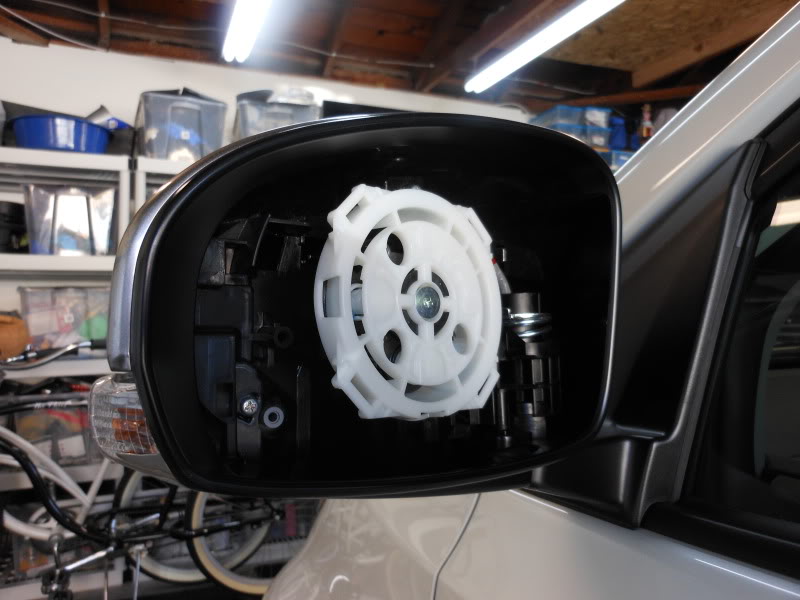
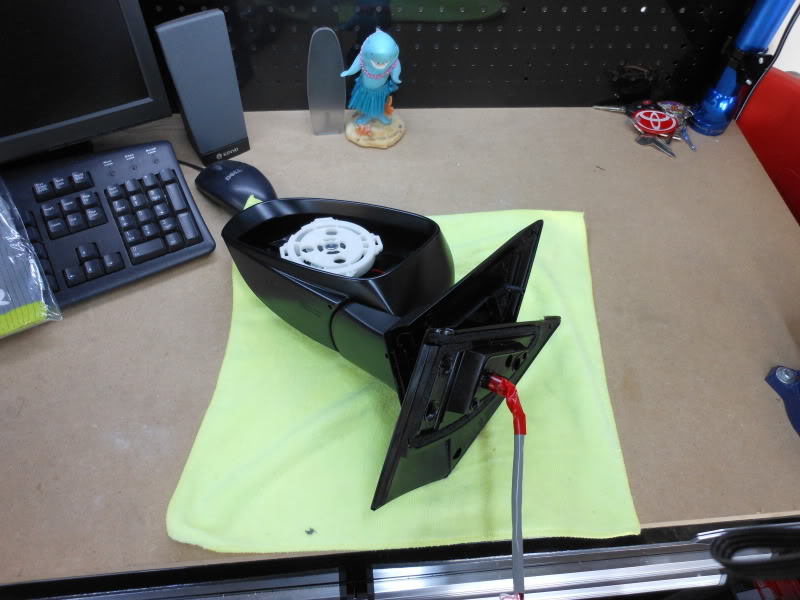
The inside of the mirror housing...
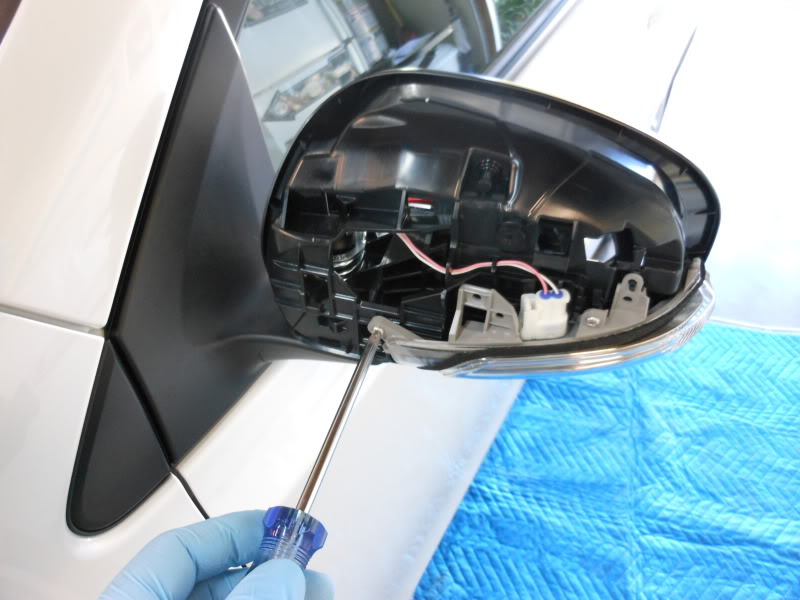
Remove the retaining screws with a Philips screw driver...
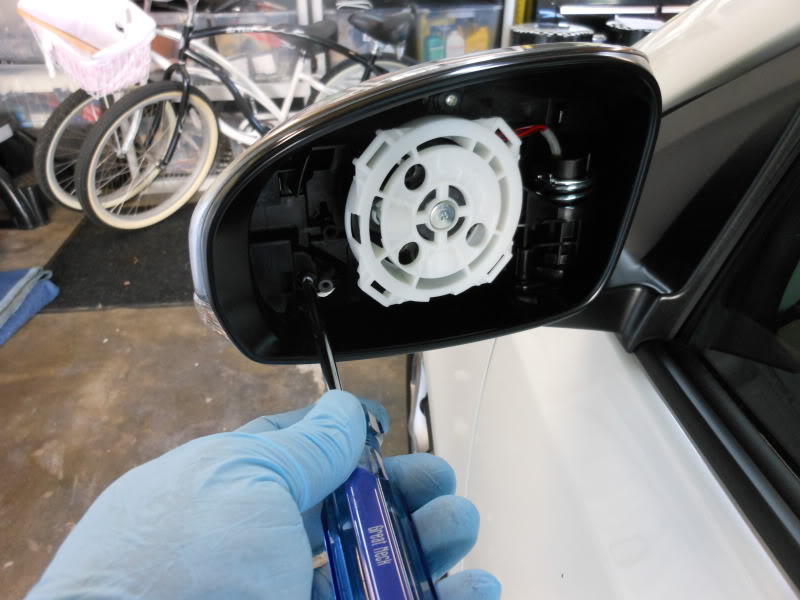
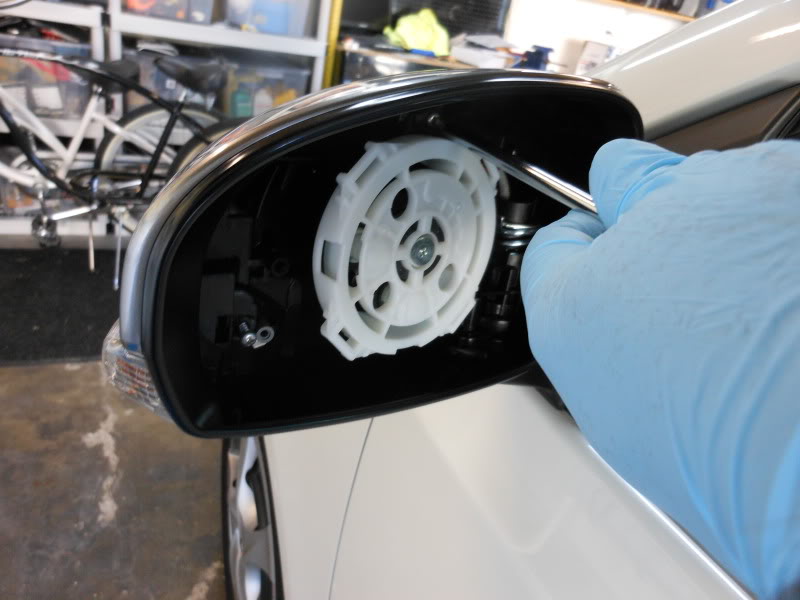
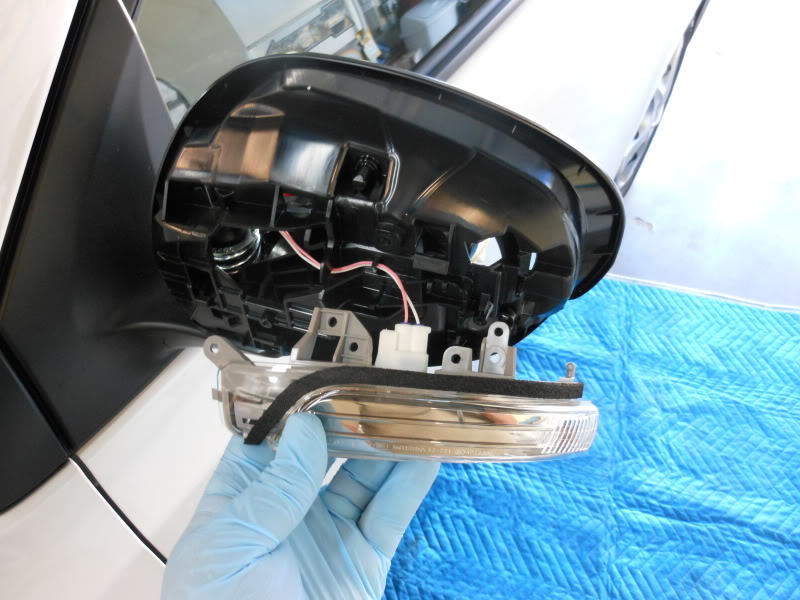
The front cover may now be removed from the mirror housing...
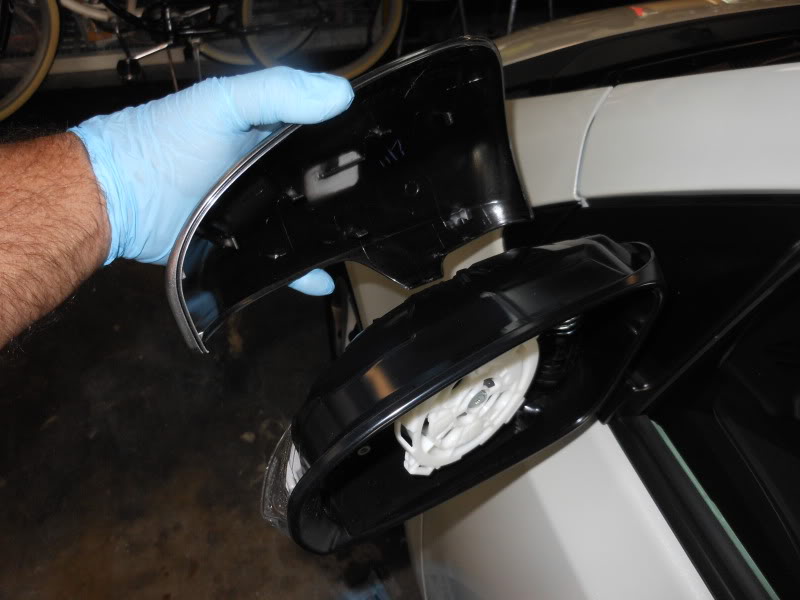
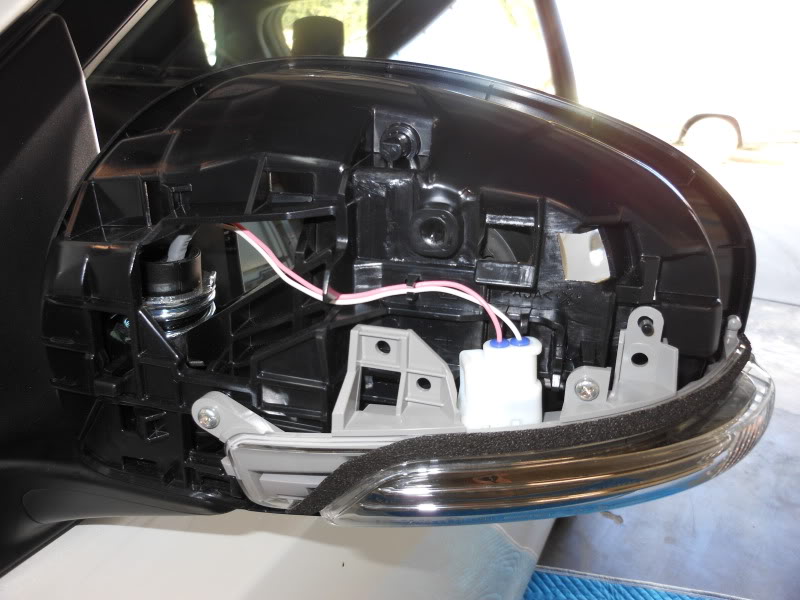
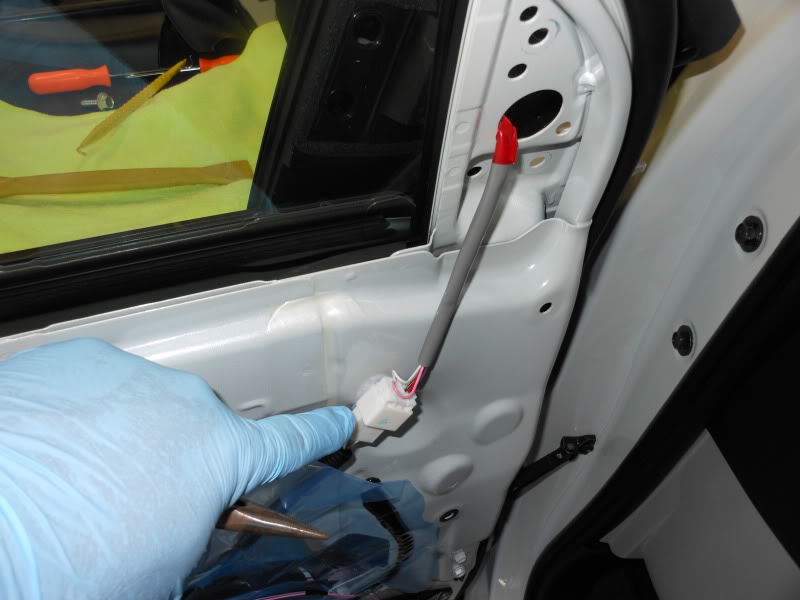
Remove the wire loom connector from the mirror housing...
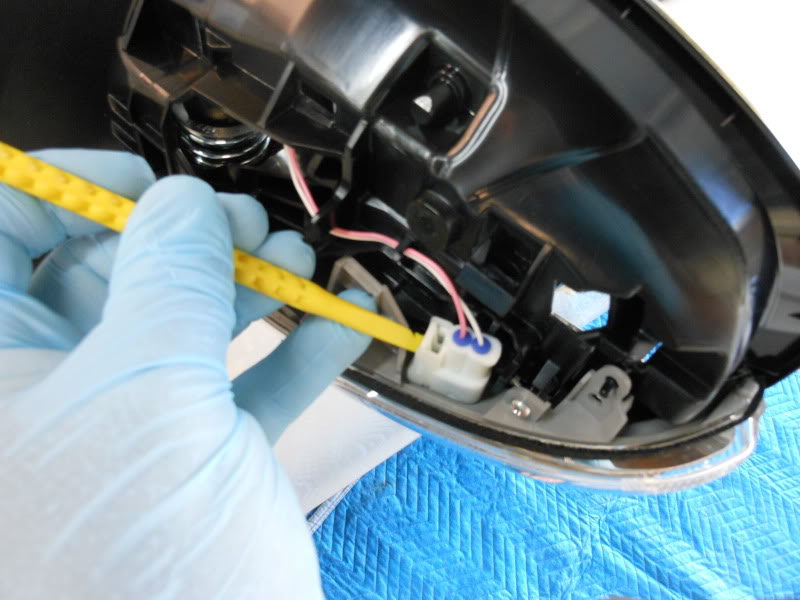
The stock turn signal lamps are removed using a Philips screw driver...

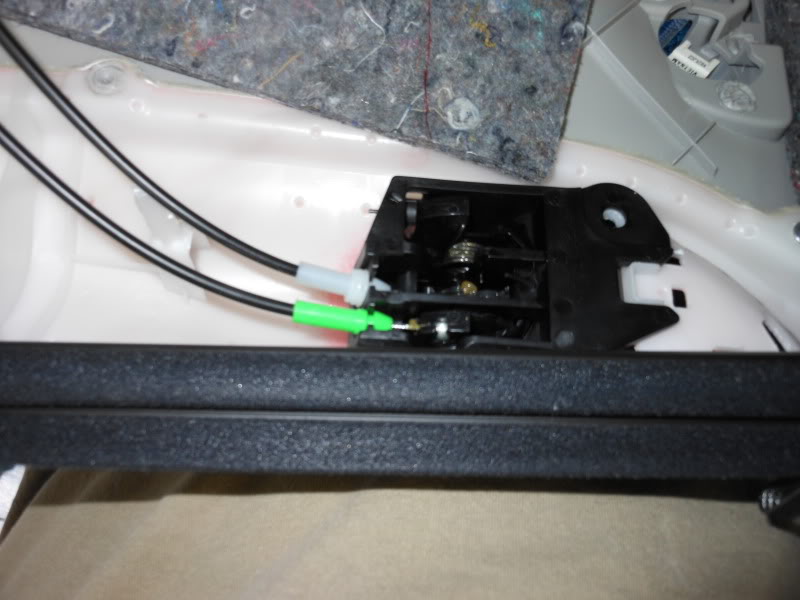
If you wish to remove the entire mirror housing from the vehicle use a 10mm socket on the three inside bolts...
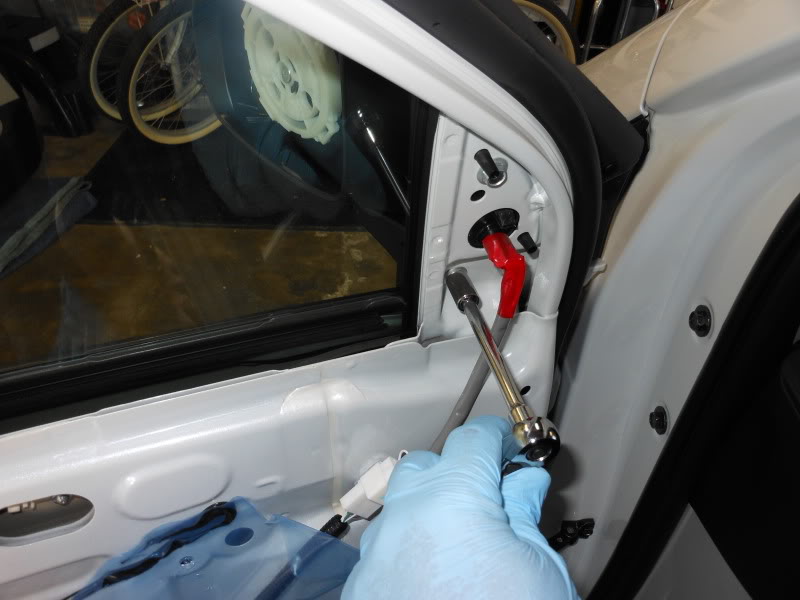
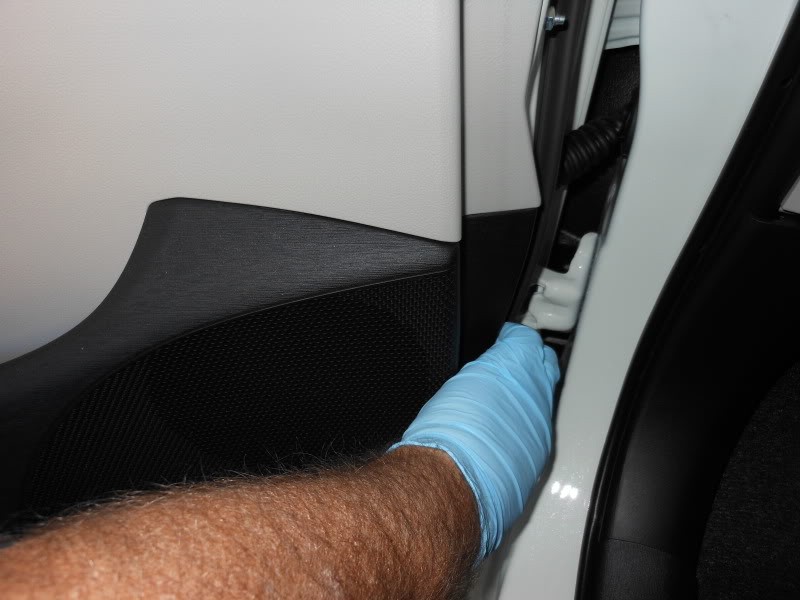
Remove the small plastic pin that holds the weather stripping on the door...

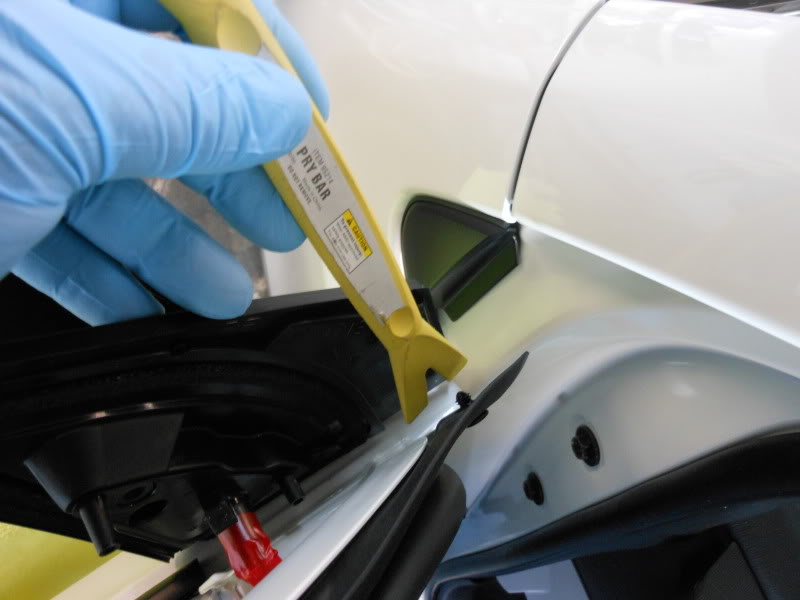
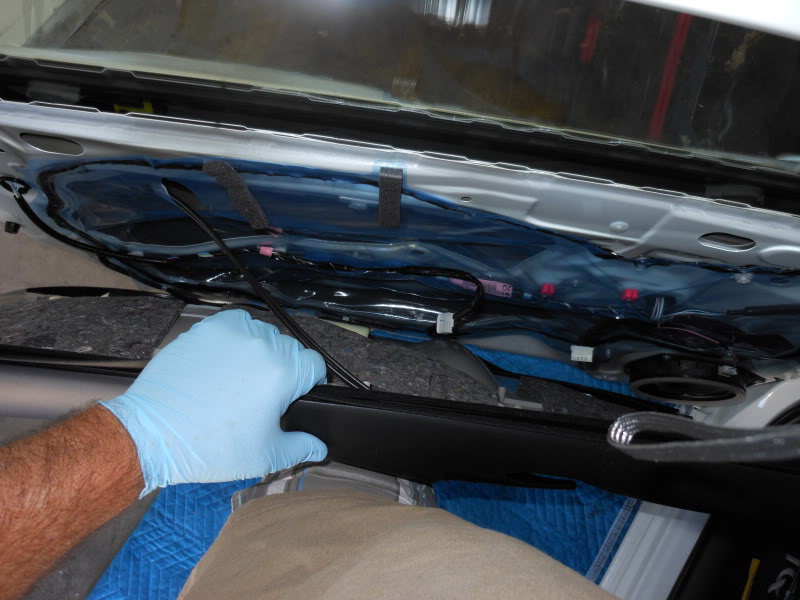
Disconnect the wire loom connector from the plug...
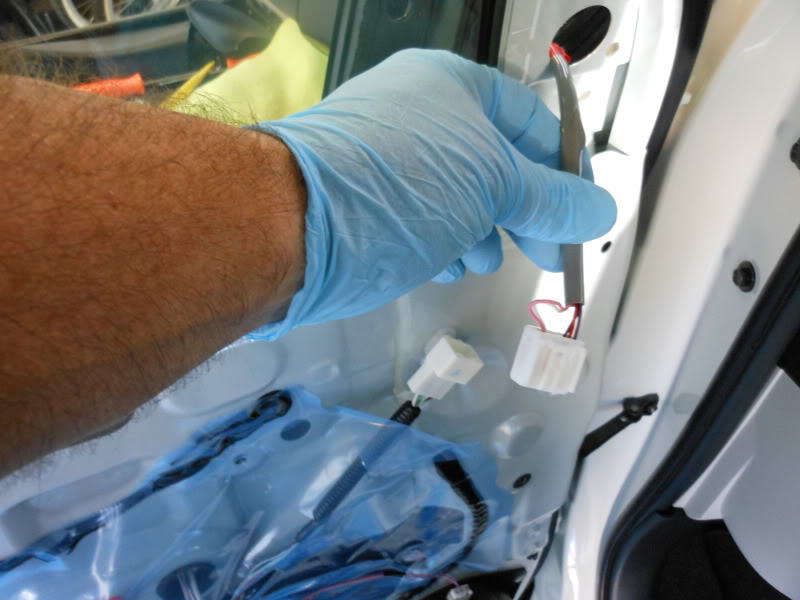
Your mirror housing is now removed from the door...
Tools required...
Philips screw driver, assorted interior removal tools
Remove this small triangular piece from the front edge of the door, easy to pull off with your hands...
Remove the door latch backing plate by prying the trailing edge with a plastic pry tool...
Remove the retaining screw from the exposed door latch area...
Use a small pry tool to lift the circular cover located inside the arm rest grab handle...
Remove the now exposed screw from the grab handle...
Using a plastic pry tool remove the arm rest cover plate. This piece is tough to pull off but it has nothing holding it other than plastic tabs...
Remove the two screws behind the arm rest panel...
The door panel can be removed without this next step but I find it easier to manage holding the door panel with the window switch disconnected. Lift the window switch body from the door panel...
Disconnect the wire loom plug from the window switch...
Disconnect the wire loom plug from the dome tweeter speakers...
Grab the door panel at the lowest corner and pull, the small plastic tabs that hold the panel on will pop loose for you. Work your way around the door...
Remove the door latch from the door panel by sliding the plastic tabs from their mounting holes...
The door with the panel removed...
Grasp the mirror panel firmly and pull up. It will take some force to remove the panel from the clips behind it. Keep even steady pressure on the mirror panel until it pulls clear of the clips...
The inside of the mirror housing...
Remove the retaining screws with a Philips screw driver...
The front cover may now be removed from the mirror housing...
Remove the wire loom connector from the mirror housing...
The stock turn signal lamps are removed using a Philips screw driver...
If you wish to remove the entire mirror housing from the vehicle use a 10mm socket on the three inside bolts...
Remove the small plastic pin that holds the weather stripping on the door...
Disconnect the wire loom connector from the plug...
Your mirror housing is now removed from the door...

Junior Member
Joined: Dec 2012
Posts: 3
From: East Bay
Taz...you're the man. I'm a definite novice when it comes to cars...and I just ask for a little DIY help...and this is beyond my expectation. Taz...thank you man. If I ever see you around...drinks on me. Thanks for the write up.
Thread Starter
Senior Member
SL Member
Joined: Nov 2005
Posts: 1,527
From: Surf City SoCal

Thread
Thread Starter
Forum
Replies
Last Post
SkillFreeJake
Scion tC 2G Aero & Exterior
17
Jul 27, 2015 12:34 AM
mischadoll
Maintenance & Car Care
3
Mar 9, 2015 05:48 AM