Turbo Toyotas: Vegas Style! Pics and --NEW-- Dyno inside!
 08-10-2007, 04:21 AM
#1
Senior Member
SL Member
Thread Starter

Join Date: Aug 2004
Location: VEGAS BABY!
Posts: 9,061
TURBO TOYOTAS! <= Linky!
-------------------------------------------------------------------------------------
NEW DYNO SHEETS!
First sheet is boost...you can see when boost comes on and how steady it is at booth the 9psi setting and the 6psi setting:

Next sheet is the actuall dyno graph...solid line is 6psi and dotted line is 9psi:
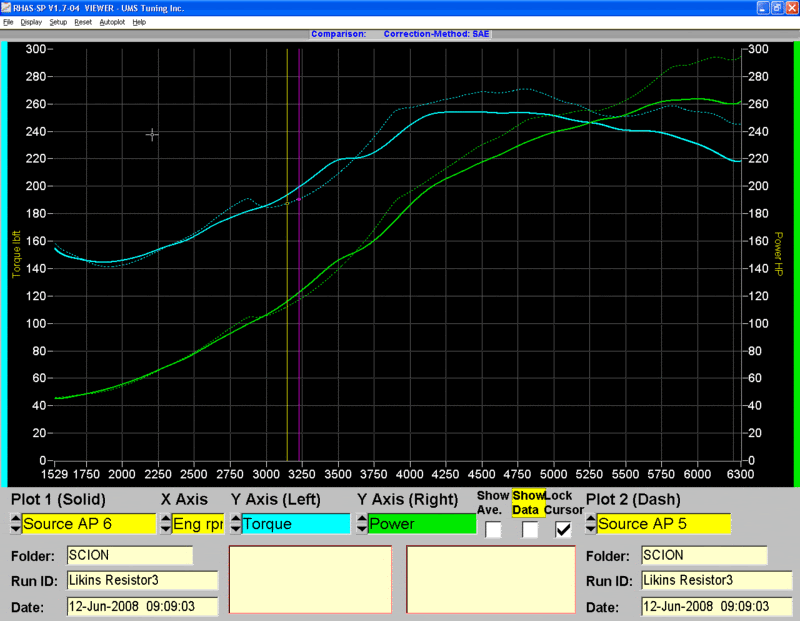
enjoy!
-------------------------------------------------------------------------------------
Dyno first: 252whp at 5psi

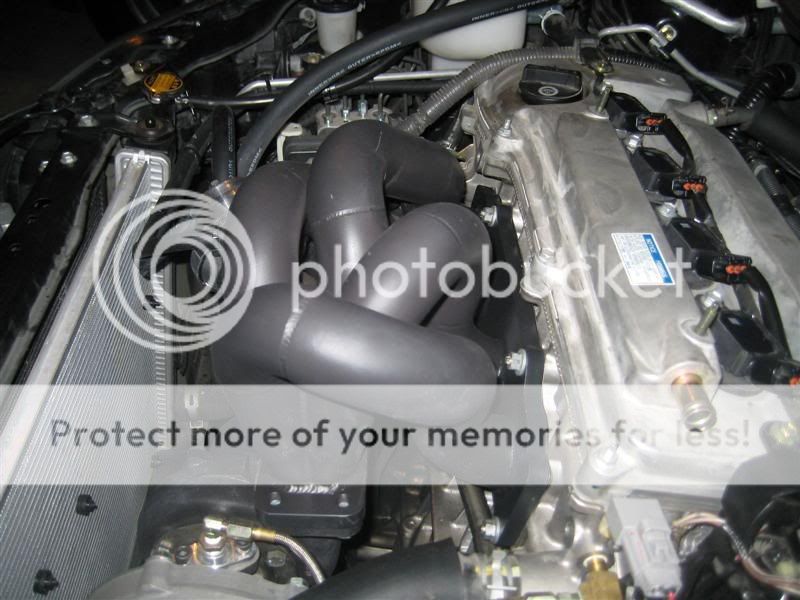
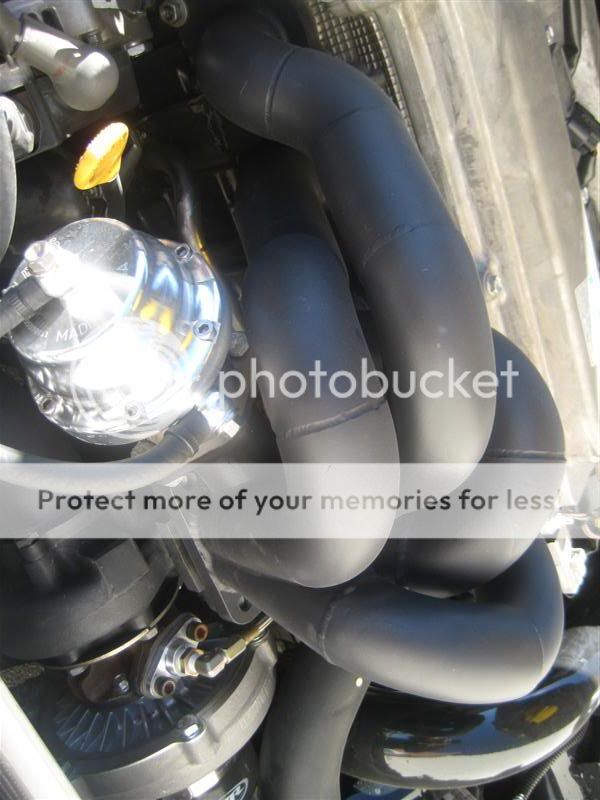
A snail and some worms:

Full shot:
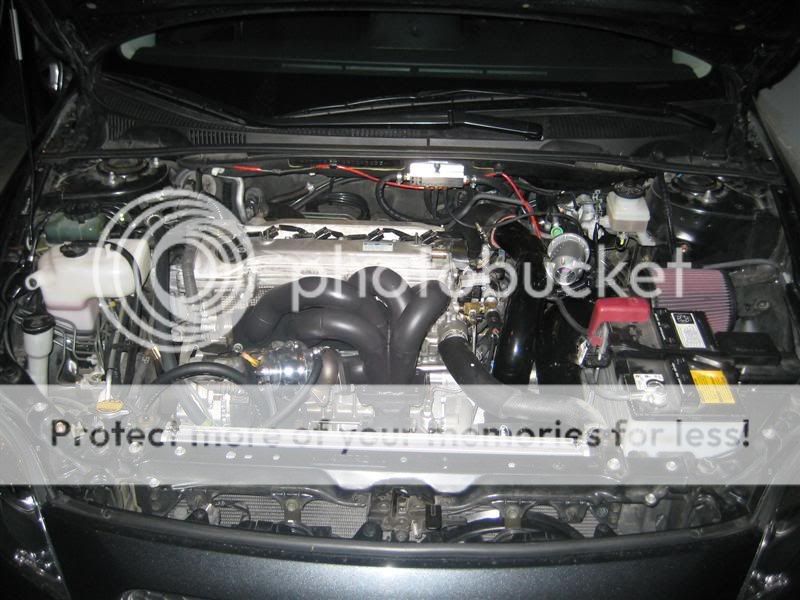
Here's my favorite shot:
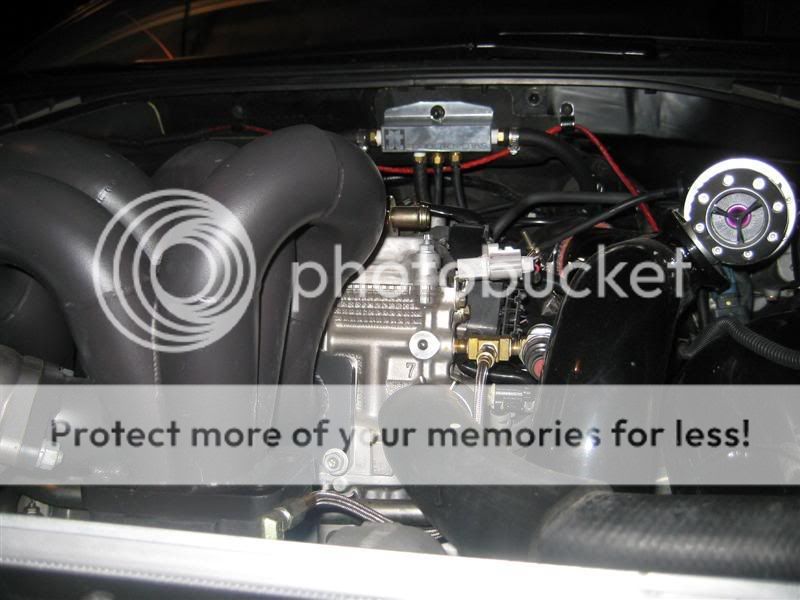
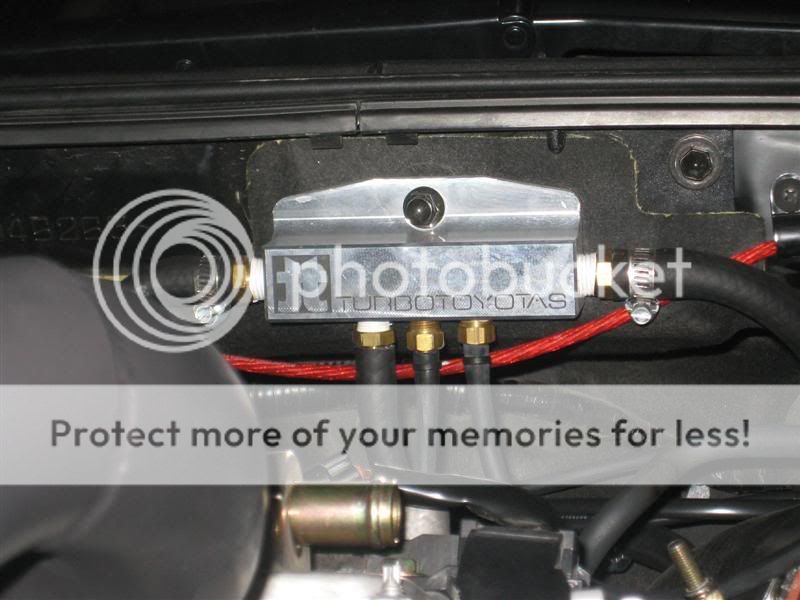
And the Vacum block. Pretty sweet!
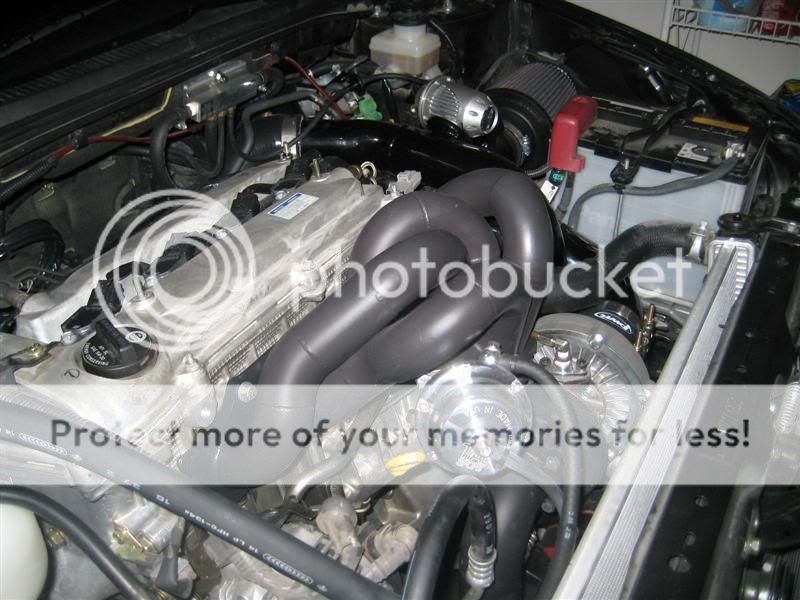
But I'm sure this is all anyone wants to see:


Someone wanted to see pics of the clearance with fans in front, so here's that:

Fans up front:

No cutting for the intercooler:

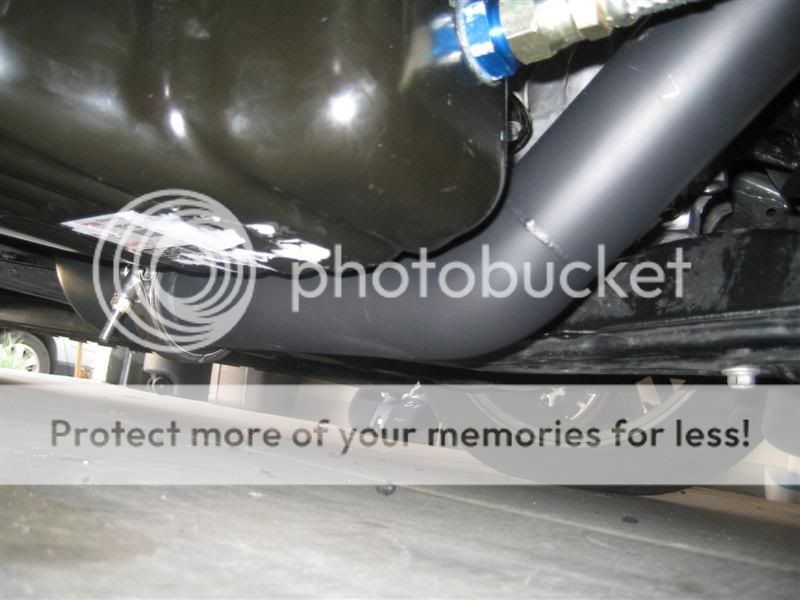
Kit includes a 2.5 inch down AND S-pipe:
That oil pan fitting had the dump tube blasting on it and was leaking.

Got it welded:

Intercooler:

Hot side pipe hanging low:

See:

Cold side REALLY low:

See:

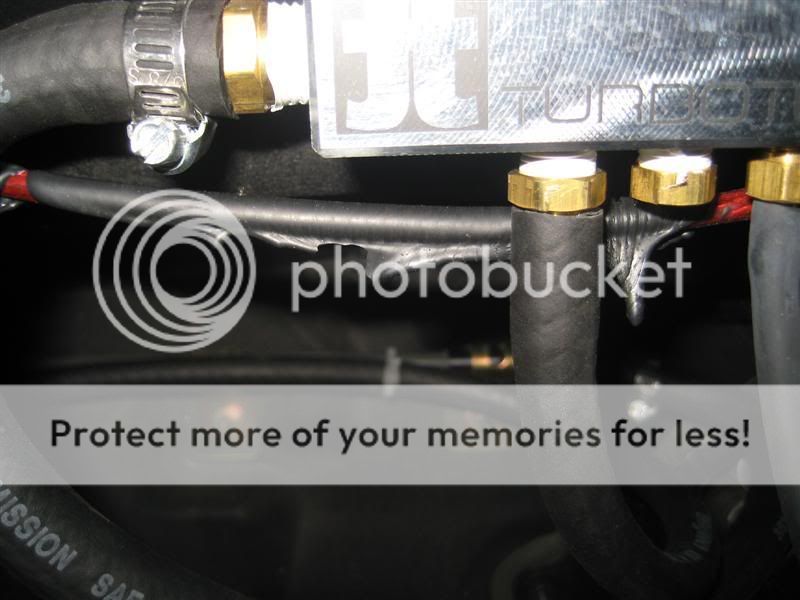
Oh, and this $hit gets HOT too! Check out the melted plastic wire loom:
Here is my ATI Gaugepod from outside:

Gaugepod from the side:
and Gaugepod from inside. Those switches were going to be for scramble boost and datalogging, but we didn't do that, so they are non funcioning switches:

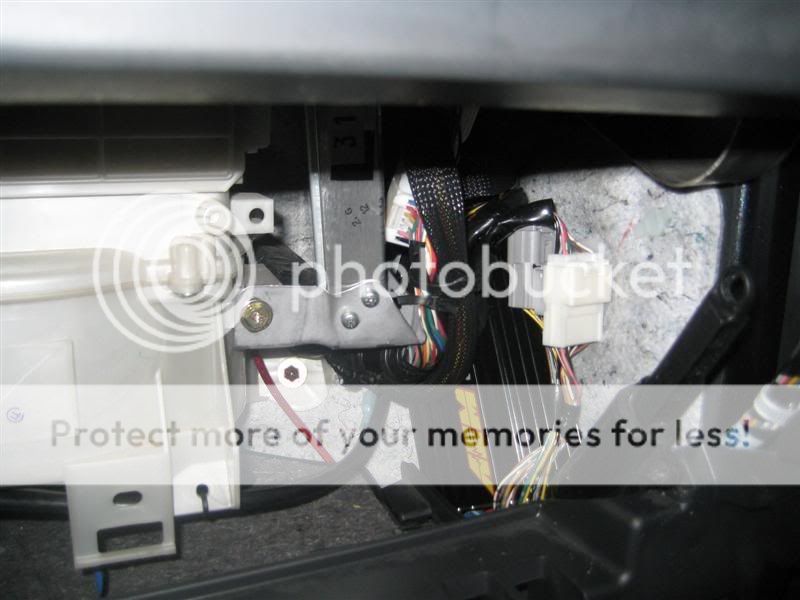
But check out the SWEET AEM F/IC install! They pulled the stock ECU out and rotated it so they could mount the AEM behind the glove box! Then routed the usb cable down the side and left it under the floor mat, so we can just plug up and log or tune!
And here is a wink from my installer:

He says the bumper should be on there!:

Well, what do you think?
Edit:
OK, here is the full rundown on how much this has costed me:
I was one of the first testers for Todds bushing kit so he gave me a special introductory price as well as hooking me up good prices on some other goodies.
Stage 1 bushing with HKS SSQ: $3100
650cc RC Injectors: $300
AEM Wideband: $249.39
AEM Tru Boost: $246.88
AEM Oil Pressure: $168.40
Manifold heat coat: $100
Downpip heat coat: $75
Turbine Houseing heat coat: $35
shipping: $60
Install: $250
Oil Pan: $100
Greddy Sandwich Adapter: $50
Oil Return Bung: $12.50
Eneos Oil: $50
Oil Filter: $6
Install gauges and tighten kit: $200
Weld oil return bung: $85
Install F/IC and dynotuneing: $300
AEM F/IC: $414
AEM F/IC Harness: $310
NGK 2 step colder plugs: $35
ATI GaugePod: $95
That comes to $6242.17 so far, and I might have missed a couple things.
Next on my list is a comp stage 4 clutch and then upping the boost and getting retuned for more power.
=============================================================
Update December 26, 2007
=============================================================
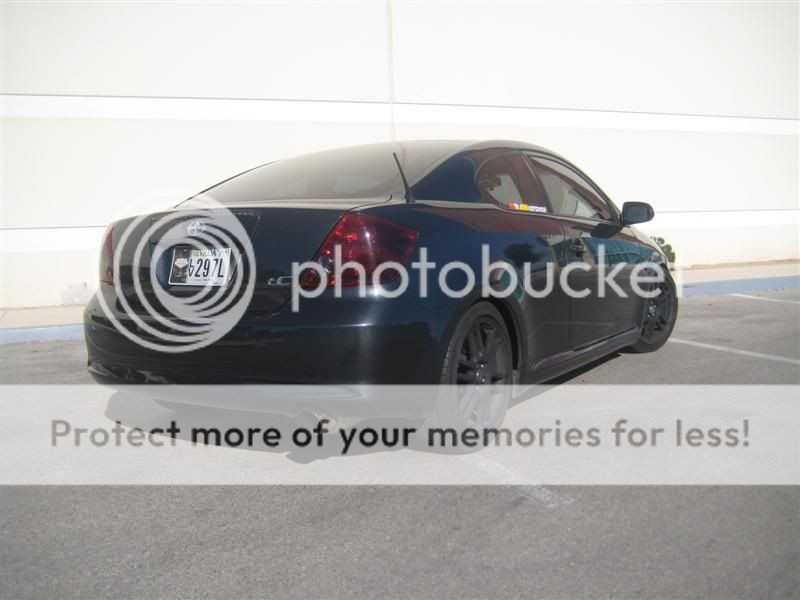
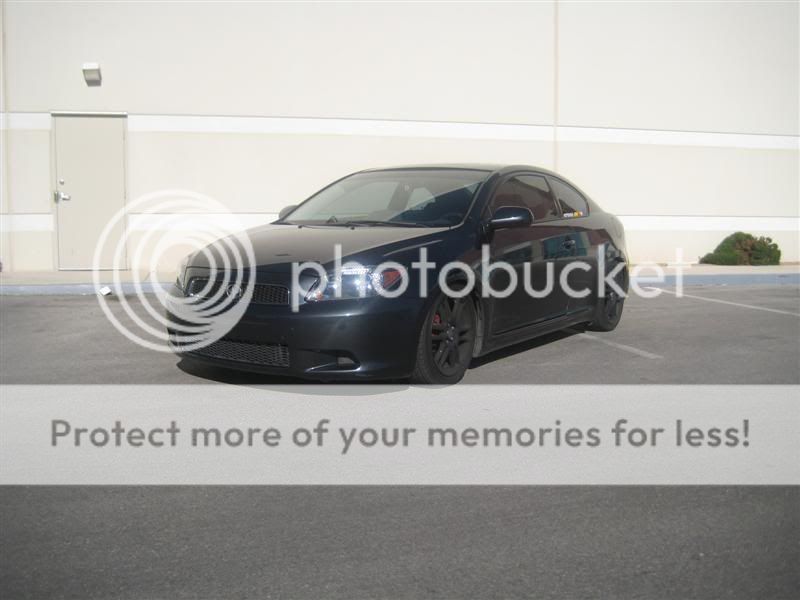
Did a little photoshoot last week so you all could see what the rest of my car looks like! Enjoy and Happy Birthday Jesus!


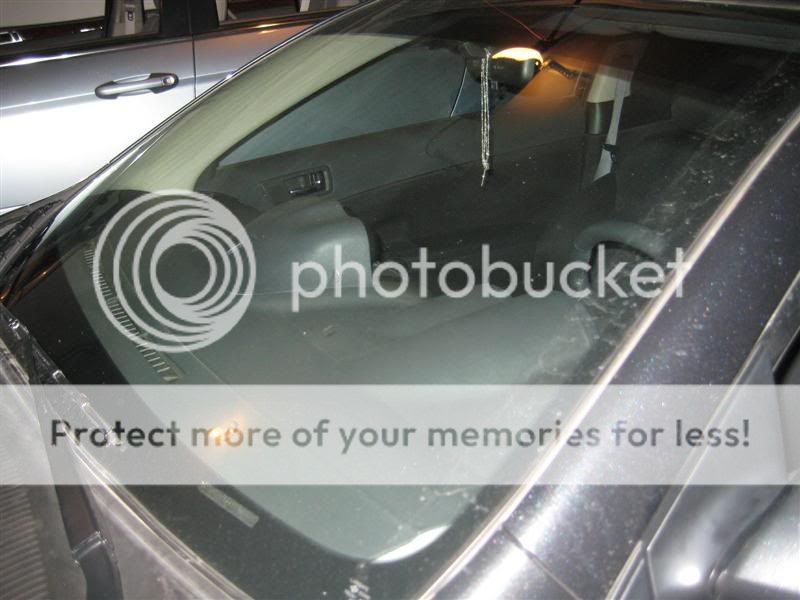
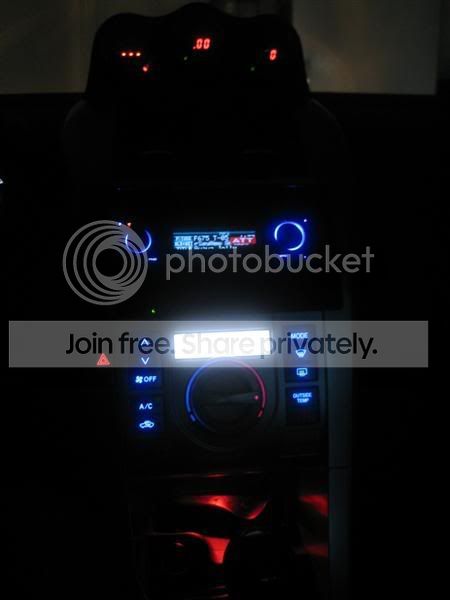
Finaly swapped my interior lots with LEDs thanks to Sean of http://www.ledmod.com/
Stock gauges, lights and head unit:


New LEDs!
Gauges:

HVAC, Head Unit, red cubby and AEM gauges:
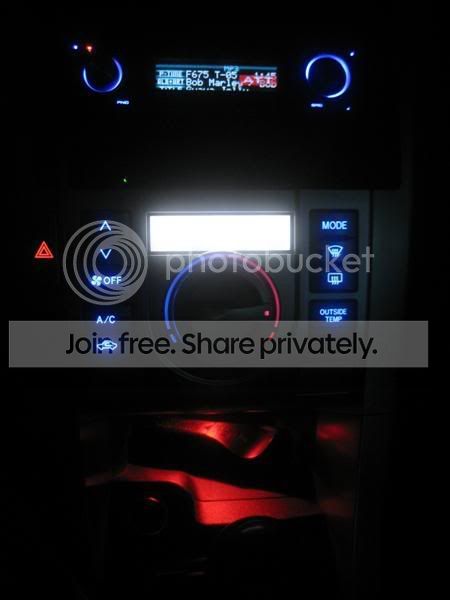
Full Shot:

Dome and Map LEDs:

Closeup of Dome LEDs:


What do you think?
-------------------------------------------------------------------------------------
NEW DYNO SHEETS!
First sheet is boost...you can see when boost comes on and how steady it is at booth the 9psi setting and the 6psi setting:
Next sheet is the actuall dyno graph...solid line is 6psi and dotted line is 9psi:
enjoy!
-------------------------------------------------------------------------------------
Dyno first: 252whp at 5psi
A snail and some worms:
Full shot:
Here's my favorite shot:
And the Vacum block. Pretty sweet!
But I'm sure this is all anyone wants to see:
Someone wanted to see pics of the clearance with fans in front, so here's that:
Fans up front:
No cutting for the intercooler:
Kit includes a 2.5 inch down AND S-pipe:
That oil pan fitting had the dump tube blasting on it and was leaking.
Got it welded:
Intercooler:
Hot side pipe hanging low:
See:
Cold side REALLY low:
See:
Oh, and this $hit gets HOT too! Check out the melted plastic wire loom:
Here is my ATI Gaugepod from outside:
Gaugepod from the side:
and Gaugepod from inside. Those switches were going to be for scramble boost and datalogging, but we didn't do that, so they are non funcioning switches:
But check out the SWEET AEM F/IC install! They pulled the stock ECU out and rotated it so they could mount the AEM behind the glove box! Then routed the usb cable down the side and left it under the floor mat, so we can just plug up and log or tune!
And here is a wink from my installer:
He says the bumper should be on there!:
Well, what do you think?
Edit:
OK, here is the full rundown on how much this has costed me:
I was one of the first testers for Todds bushing kit so he gave me a special introductory price as well as hooking me up good prices on some other goodies.
Stage 1 bushing with HKS SSQ: $3100
650cc RC Injectors: $300
AEM Wideband: $249.39
AEM Tru Boost: $246.88
AEM Oil Pressure: $168.40
Manifold heat coat: $100
Downpip heat coat: $75
Turbine Houseing heat coat: $35
shipping: $60
Install: $250
Oil Pan: $100
Greddy Sandwich Adapter: $50
Oil Return Bung: $12.50
Eneos Oil: $50
Oil Filter: $6
Install gauges and tighten kit: $200
Weld oil return bung: $85
Install F/IC and dynotuneing: $300
AEM F/IC: $414
AEM F/IC Harness: $310
NGK 2 step colder plugs: $35
ATI GaugePod: $95
That comes to $6242.17 so far, and I might have missed a couple things.
Next on my list is a comp stage 4 clutch and then upping the boost and getting retuned for more power.
=============================================================
Update December 26, 2007
=============================================================
Did a little photoshoot last week so you all could see what the rest of my car looks like! Enjoy and Happy Birthday Jesus!
Finaly swapped my interior lots with LEDs thanks to Sean of http://www.ledmod.com/
Stock gauges, lights and head unit:
New LEDs!
Gauges:
HVAC, Head Unit, red cubby and AEM gauges:
Full Shot:
Dome and Map LEDs:
Closeup of Dome LEDs:
What do you think?


 08-10-2007, 04:35 AM
#5
Senior Member
SL Member

Join Date: Jan 2006
Location: Team SOLO
Posts: 8,961
looks great. maybe time to re-run the power cable you have. don't want that shorting out.
also why do you have it ploted whp vs. mph. those seem completely non related to each other. and yeah those pipes low have me worried
also why do you have it ploted whp vs. mph. those seem completely non related to each other. and yeah those pipes low have me worried
08-10-2007, 04:46 AM
#6
Senior Member
SL Member

Join Date: Dec 2006
Location: @ home
Posts: 2,191
nice meaty nice. can you send a close of pic of the gauge pod. i just cant see it sitting flush. mine seems to be a little too big.
i dont know what to say. im amazed. just you wait until i get mine....
i dont know what to say. im amazed. just you wait until i get mine....
08-10-2007, 05:22 AM
#7
Senior Member
SL Member
Thread Starter
Join Date: Aug 2004
Location: VEGAS BABY!
Posts: 9,061
Originally Posted by GammaTNT
nice pics,
Can ur installer do mine? i will pay him in M&M. lol
Can ur installer do mine? i will pay him in M&M. lol
I've rubbed that cold side pipe quite a few times. I'm dropped on hothckis.
The install actually took a long time cause we ran into some issues.
I started taking everything apart the night before, and could not get one header bolt off, nor the oil pan.
Todd got there the next morning and took both off in a matter of a half our or so.
We didn't have all the tools neccessary, especially for the HKS BOV, so it took a few trips to find what we needed.
Then, the hot side IC pipe didn't fit. To short on top. We cut an inch and a half off the bottom to make it fit, but since we removed the beed roll, I had to take it easy until my new pipes arrived. Yes, I said pipe(s)! The intake pipe had the mount for the MAF backwards (thanks zpi) so we had to shave it, turn it and zip tie it down till that pipe came in. Todd replaced the 2.5 inch pipe with a 3inch, so it was a little harder to get on, but it worked out for the better.
And the oil pan tap was a little off the mark, so the wastegate dumptube was hitting it. We cut that, but it ended up blowing right on the oil pan fitting, causeing the plastic washer to leak. I took it off completely for tuning, but I cut it straight and put it back on last night, since the new one won't be in till next week or so.
The electrical guy didn't show up either, so I was running stock injectors and no gauges!!!
A week or so later, my new pipes are in, and it's off to the tuner!
Well, my tuner has never had a tC before, so there was a bit of a learning curve which he has not gotten past yet. First, he had to install all the gauges, weld the oil pan cause of the leak, and tighten a bunch of stuff cause it was rattling. He also had an issue with the injectors not fitting, or at least not fitting how he was used to.
Then the dyno broke! (damn scion life curse!)
So, almost a week later and we are finally tuning. Runs like a champ. He actually got it up to 320hp or so at 8psi, but there was a bad hiccup at 4k rpm. But at 5psi, everything was smooth, so that's where we currently are.
I wanted to be at 300-350 on the stock motor, untill I build for 400. But my tuner needs to get to know the tc better first.
I'm still having some issues with my CEL rich code coming on every other day, and my AFRs bouncing around a bit, so I'm hopeing I can get a better tune going. Wish me luck.
OH, and I dont' know why the graph is like that. That is what he gave me. I wanted one with rpms across the bottom, but it was late, and I didn't have my car for a week, so I just wanted to go and drive my car!


 08-10-2007, 03:36 PM
#11
Senior Member
SL Member

Join Date: Jan 2007
Location: Los Angeles
Posts: 1,149
Congrats bro  Glad to see your finally boosted. That is some really nice power for 5 psi. Do you have any pics of the intercooler on without the front bumper on the car? I'd like to see how they routed your piping. Congrats again bro!
08-10-2007, 04:07 PM
#12
Senior Member
SL Member
Thread Starter
Join Date: Aug 2004
Location: VEGAS BABY!
Posts: 9,061
olahalo:
If you would ever come to the meet, you could see it first hand! but yeah, they removed that bottom plate, and it fits pretty good. I wouldn't say FLUSH, but it does look pretty stock.
Jeff:
Well, I scrape it pulling into my driveway if I dont' pull it at just the right angle and my wheels turned just right. If I pulled in fromt eh passengers side instead, then I'd have no issues. There is also 2 exits from my office. I dont' take one of them at all anymore!!!
jrod:
I think I did take one of the IC on with the bumper off, but I'll have to check when I get home. If I find it, I'll post up.

 08-10-2007, 07:03 PM
#15
Senior Member
SL Member
Thread Starter
Join Date: Aug 2004
Location: VEGAS BABY!
Posts: 9,061
Originally Posted by paul_dezod
So what is your opinion of the driveability on the FIC?
How is your FIC Turbo test coming along?