
3rd Brake Light - tc


Thread Starter
Senior Member

SL Member
Joined: Sep 2004
Posts: 1,533
From: Mountain View, CA
****** Revised 6/30/05****************
Hi everyone.
I've just about finished my modification for the third brake light of the tc; you know, the one where only the center 6" of a 2' length lights up. Without further ado, here are the before and after shots.
BEFORE

AFTER
OK, finally got around to getting pictures of the revised tailights. Here you go.


Bright huh
NOTES;
- Instead of using the normal LED's, I used LED's from LS-diodes.com.
- They have red LED's that put out 14,000 mcd vs. the normal 5000 mcd most LED's put out.
- I used 5 LED's per side for a total of 10 LED's for the light.
- I used a 1/2 Watt 22 ohm resistor instead of the standard 1/4 Watts resistor to keep from burning out the LED's and resistor.
- Credit to Tim (ScionTim aka, EvilScionDude) and ScionJohn for helping me out with the wiring of the lights.
***DANGER, WILL ROBINSON, DANGER********
DO NOT TRY TO REMOVE THE TAIL LIGHT BY COOKING IT IN THE OVEN! It doesn't work because the 3rd tail light uses special glue that has a much higher melting temperature than the plastic the light is made out of. I have accidently warped the original prototype tailight I'd made while cooking it.
Tools / Material Needed
Soldering Iron
Solder
Knife / razor blades
Phillips head screwdriver
10mm socket wrench or equivalent
Drill with drill-bit 5mm in diameter
10 X 14,000 mcd LED's 5mm. I strongly recommend the THC3 LED's from LS-diodes.com
2 X 22 or 33 ohm 1/2 Watt Resistors
Wiring - I would say 24-26 gauge stranded wire is fine. I would also recommend several different colors to avoid confusing yourself.
Clear silicone sealant caulk - the stuff you normally use to seal the grouting in a bathroom.
Tools/ Equipment STRONGLY recommended
Wire Strippers
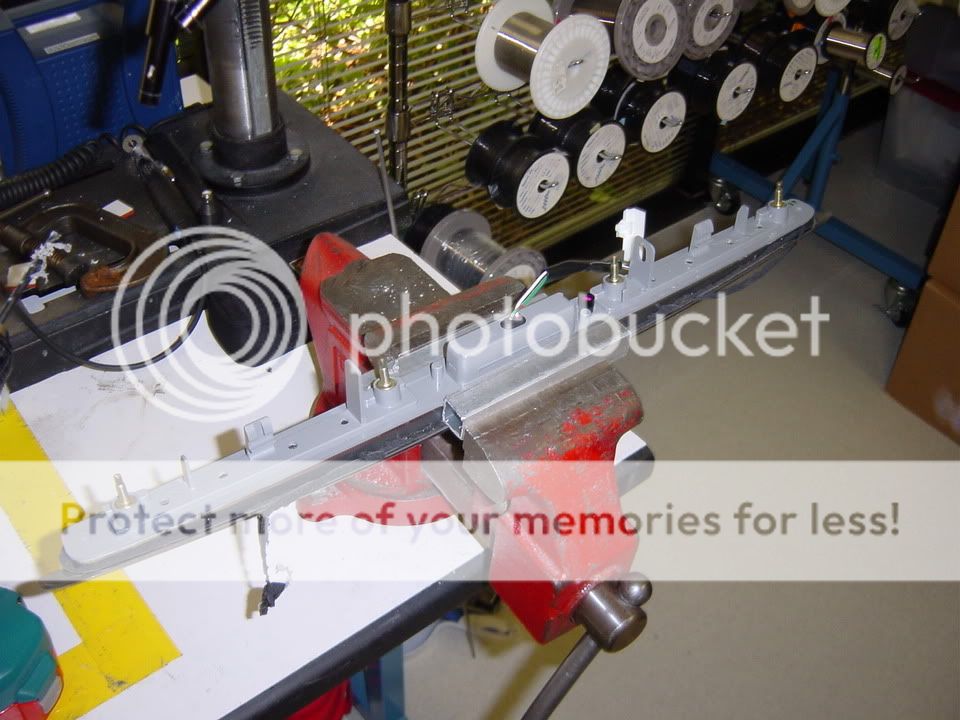
A big woodworking/ metalworking clamp bolted to a table.
Here's a picture of the back of the light....
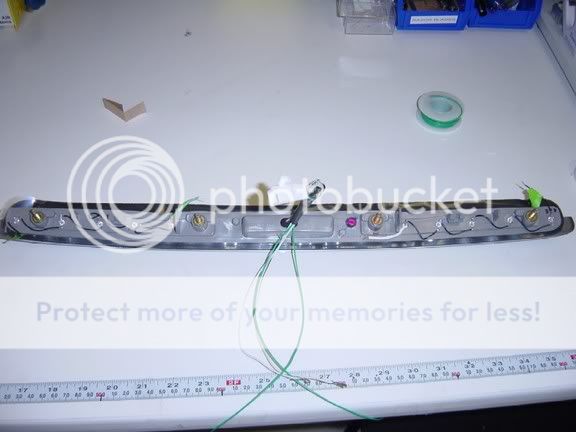
I drilled through the back of the light with a simple cordless drill. The plastic is just ABS on the back and is fairly soft.
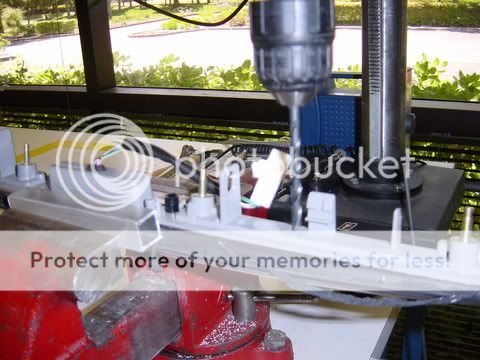
I made 10 holes in the back of the light, 5mm in diameter.
I put the LED's in the holes that I drilled. I recommend that you place them in the same orientation, with the + side all facing the same way so you don't get confused. I glued them in using Loctite.
I then soldered the appropriate legs to each other in serial. NOTE: I think this would be real easy to screw up if you had the LED's loose in the light because the LED's might rotate. If you feed power through an LED backwards, it will just burn out or the circuit won't work. I can't remember.
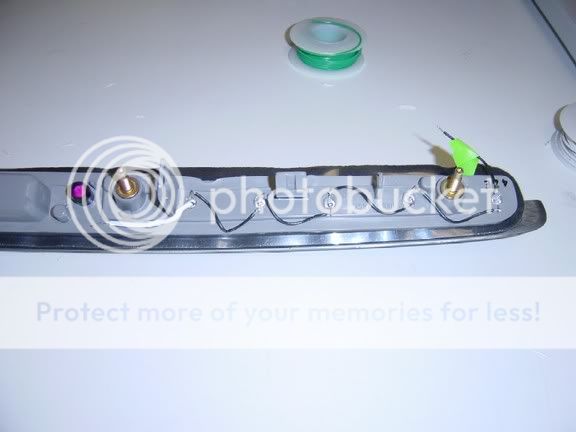
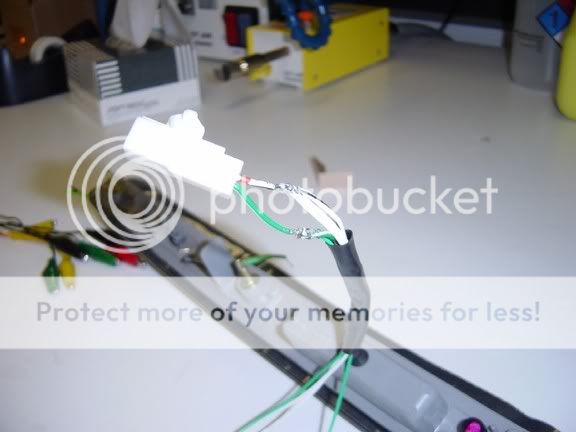
I then just spliced in power and ground to the existing wiring that goes to the third brake light. Incidently, Green is POWER and White is GROUND. Although, if you try this on your car, I would say you should check it yourself with a multimeter.
So the whole thing lights up now. If I had to build it a third time, I would drill the holes for the LED's a little higher on the back of the light. Drilling them exactly in the middle kind of mounts them in a funny place. There's still plenty of reflection but I think I could have made it look even brighter.
Ed
Disclaimer: I and Scionlife make no guarentees of the safety, efficacy, workability, practicality, or point of attempting to do this modification. Sueing me will get you nowhere because I have no money. Sueing Scionlife may net you enough for cab fare. Maybe.
Hi everyone.
I've just about finished my modification for the third brake light of the tc; you know, the one where only the center 6" of a 2' length lights up. Without further ado, here are the before and after shots.
BEFORE
AFTER
OK, finally got around to getting pictures of the revised tailights. Here you go.
Bright huh
NOTES;
- Instead of using the normal LED's, I used LED's from LS-diodes.com.
- They have red LED's that put out 14,000 mcd vs. the normal 5000 mcd most LED's put out.
- I used 5 LED's per side for a total of 10 LED's for the light.
- I used a 1/2 Watt 22 ohm resistor instead of the standard 1/4 Watts resistor to keep from burning out the LED's and resistor.
- Credit to Tim (ScionTim aka, EvilScionDude) and ScionJohn for helping me out with the wiring of the lights.
***DANGER, WILL ROBINSON, DANGER********
DO NOT TRY TO REMOVE THE TAIL LIGHT BY COOKING IT IN THE OVEN! It doesn't work because the 3rd tail light uses special glue that has a much higher melting temperature than the plastic the light is made out of. I have accidently warped the original prototype tailight I'd made while cooking it.
Tools / Material Needed
Soldering Iron
Solder
Knife / razor blades
Phillips head screwdriver
10mm socket wrench or equivalent
Drill with drill-bit 5mm in diameter
10 X 14,000 mcd LED's 5mm. I strongly recommend the THC3 LED's from LS-diodes.com
2 X 22 or 33 ohm 1/2 Watt Resistors
Wiring - I would say 24-26 gauge stranded wire is fine. I would also recommend several different colors to avoid confusing yourself.
Clear silicone sealant caulk - the stuff you normally use to seal the grouting in a bathroom.
Tools/ Equipment STRONGLY recommended
Wire Strippers
A big woodworking/ metalworking clamp bolted to a table.
Here's a picture of the back of the light....
I drilled through the back of the light with a simple cordless drill. The plastic is just ABS on the back and is fairly soft.
I made 10 holes in the back of the light, 5mm in diameter.
I put the LED's in the holes that I drilled. I recommend that you place them in the same orientation, with the + side all facing the same way so you don't get confused. I glued them in using Loctite.
I then soldered the appropriate legs to each other in serial. NOTE: I think this would be real easy to screw up if you had the LED's loose in the light because the LED's might rotate. If you feed power through an LED backwards, it will just burn out or the circuit won't work. I can't remember.
I then just spliced in power and ground to the existing wiring that goes to the third brake light. Incidently, Green is POWER and White is GROUND. Although, if you try this on your car, I would say you should check it yourself with a multimeter.
So the whole thing lights up now. If I had to build it a third time, I would drill the holes for the LED's a little higher on the back of the light. Drilling them exactly in the middle kind of mounts them in a funny place. There's still plenty of reflection but I think I could have made it look even brighter.
Ed
Disclaimer: I and Scionlife make no guarentees of the safety, efficacy, workability, practicality, or point of attempting to do this modification. Sueing me will get you nowhere because I have no money. Sueing Scionlife may net you enough for cab fare. Maybe.


Thread Starter
Senior Member
SL Member
Joined: Sep 2004
Posts: 1,533
From: Mountain View, CA
Oops, yes,
it is DONE!
Not terribly difficult after alll...
I re-did the whole thing using my original tailiight. It looks pretty tight. The bubls are nice and bright, However, I do think that I placed them too low on the light, so all the light doesn't go exactly out the back. But the whole thing lights up now like crazy.
I will post pics when I get some time. I used LED's from LS-diodes.com, the ones called "THC3" which put out 14,000 millicandelas of light (which is about equal to the stock lights on the tc 3rd brake light),


Thread Starter
Senior Member
SL Member
Joined: Sep 2004
Posts: 1,533
From: Mountain View, CA
Ok gents,
The new LED's look as bright as the old ones. I have also revised the instructions slightly.
Your results may vary. If you have questions, PM me or just post here.
Ed
The new LED's look as bright as the old ones. I have also revised the instructions slightly.
Your results may vary. If you have questions, PM me or just post here.
Ed

Senior Member
SL Member
Joined: Oct 2005
Posts: 640
From: Englishman in New Jersey
OK I just received 18 THC3's from http://www.lsdiodes.com/THC3/ my plan over this weekend was to basically duplicate this mod but with more LED's on each side - it's an attempt to get a uniform strip across the back rather than individual dots.
Does anyone electrically minded have any input on this many LED's in this setting. Should it affect things at all?
Also, does anyone know if the new wiring is kept away from water, or do I need to look into waterproofing or sealant?
Anything else to addd before i start drilling holes in my 3 week old car.
:D
BTW: I just touched an LED to a 5v square battery (you know the regular clock battery ones) and boy do these throw off a lot of light, I'm planning on taking photo's of the whole install, so maybe have some up tomorrow, or Sunday.

Banned
SoCal tC Club
SL Member
Joined: Mar 2005
Posts: 1,873
From: A-Town
isntead of doing that i just got rid of it *shrug*
http://img.photobucket.com/albums/v7...cleantrunk.jpg
i hated that 3rd brake light
but thats godo though very nice
-taek
http://img.photobucket.com/albums/v7...cleantrunk.jpg
i hated that 3rd brake light
but thats godo though very nice
-taek
