Web Electric turn signal/drl mod....now with DIY


Thread Starter
Senior Member
SL Member
Team N.V.S.
Joined: Dec 2005
Posts: 1,823
hi everyone. i just finished installing the web electric turn signal/drl module. it costs $39.95 with free shipping. order here.
http://www.webelectricproducts.com/products.htm
i ordered the pruis kit but all the modules are the same. its the drl-1
its works beautifully.
what this module does is makes your turn signals work as the daytime running lights (drl). when you use the turn signal/ hazards it will still function as the turn signals. when you turn off the turn signals it goes back to drl.
it can be wired so that it shuts off when the park lights are activated but that would kinda defeat the purpose of why alot of us would want it in the first place for the tc. (the park lights suck stock).
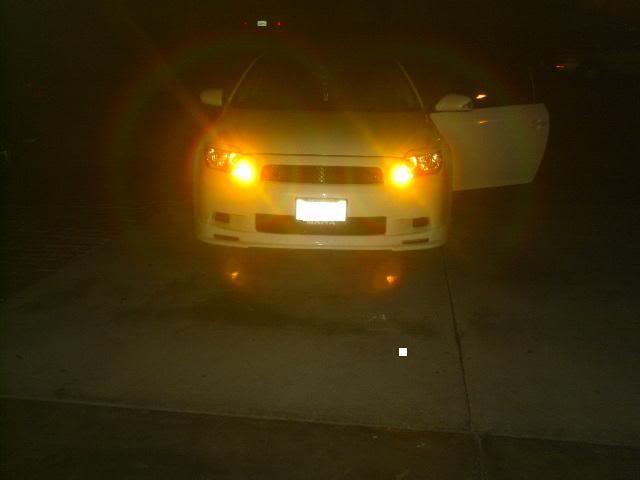
i got some hyper yellow bulbs so they function like foglights from the dc-2 teggies (jdm version.)
here is the diy. almost complete. didn't have time to snap the hook up of the power wire. will get that tomorrow. forgive me if it looks a lil crappy (especially some of the pics). first time at doin this.
now,as with all diy's, if you mess up something on your car im not responsible for that. do this mod at your own risk. if you hook up everthing like you're supposed to then it will all work out.
Tools needed:
ratchet with 10mm socket/short extension or phillips screwdriver
flathead screwdriver
floorjack and jackstands
wire cutter/crimper/stripper
test light (if you don't know which wire the acc is.)
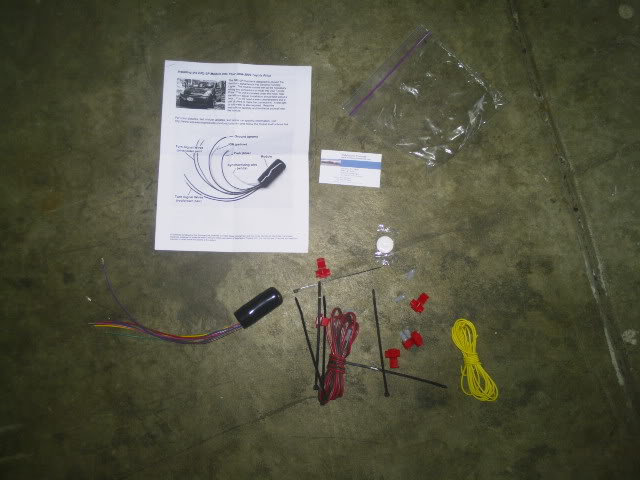
k, fresh out of the package here are the contents. the module is the black thing with all the wires attached to it. for some reason there is a single mint in the kit that says "thank you" on the back. lol. wierd.
first thing to do is to remove the front bumper. start at the top clips. remove the 5 clips with a flathead.

next, remove the side 10mm screws with ratchet and 10mm socket or phillips screwdriver (you will need to turn the wheel in for each side you work on to have room)
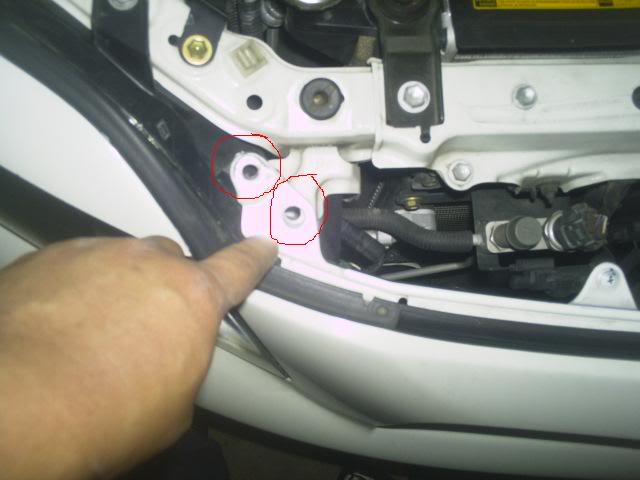
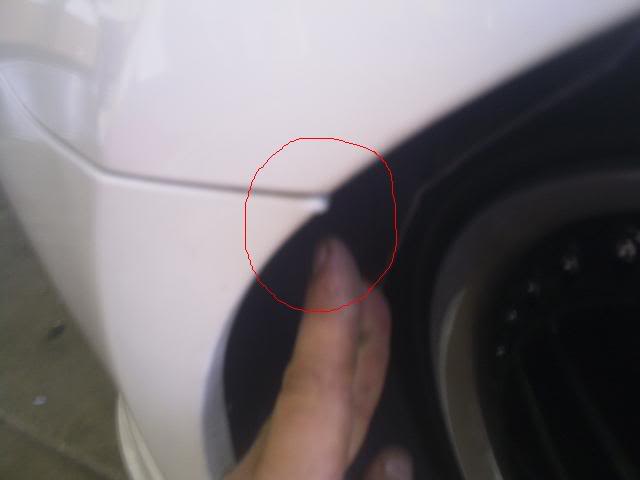
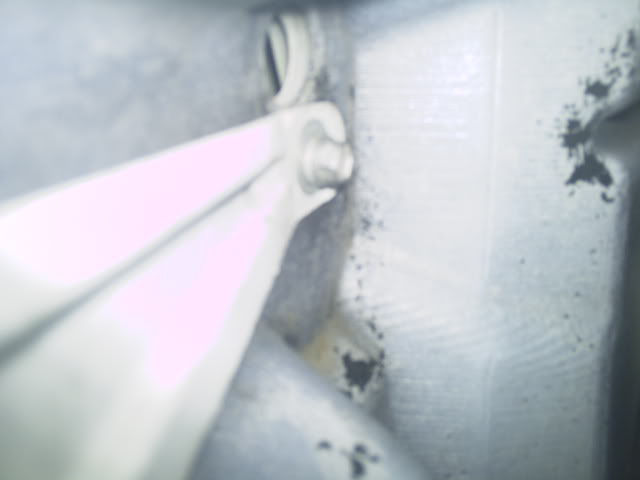
next pull back on the plastic fender liner and locate and remove the 10mm screw holding the corner of the bumper together (one on each side) use ratchet with 10mm socket and short extension.
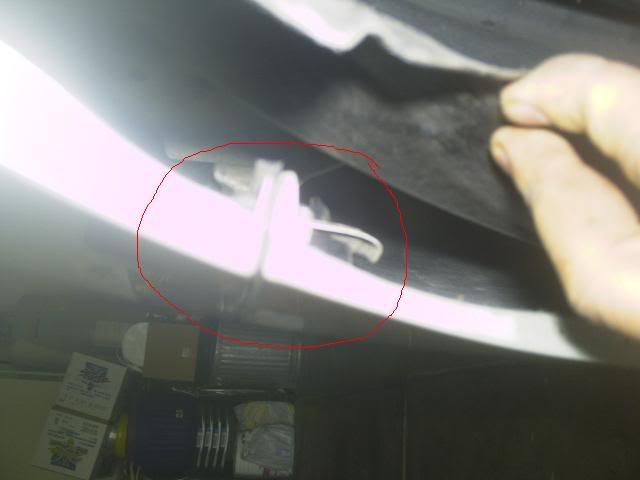
next remove the two 10mm bolts on the bottom and all of the 10mm screws holding the splash guard onto the bumper with the 10mm socket and ratchet. (i did it without jacking up the car but it will be alot easier if you jack the car up on some jackstands.)
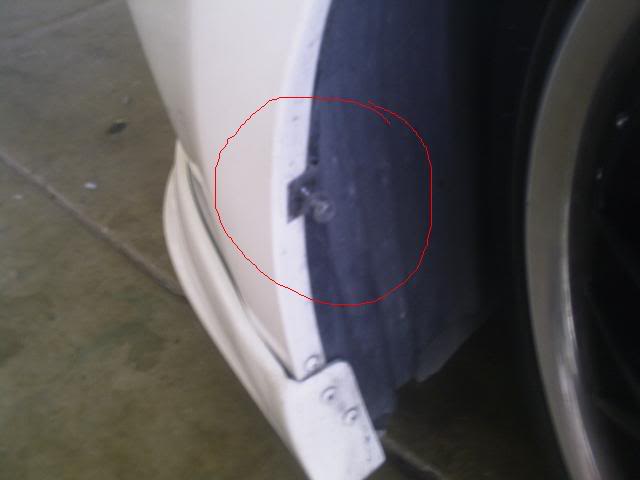
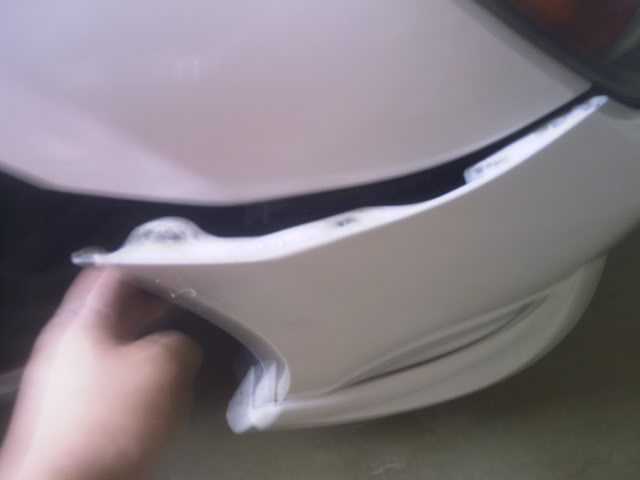
next pull on each side of the bumper and it will pop out of the tabs like this.
next pull on the middle of the bumper straight toward you and it should come right off. (if you took all of the screws and tabs out.)

k, at this point, this is how it looks with the bumper off. next take the foam bumper shock absorber off by pulling straight towards you.
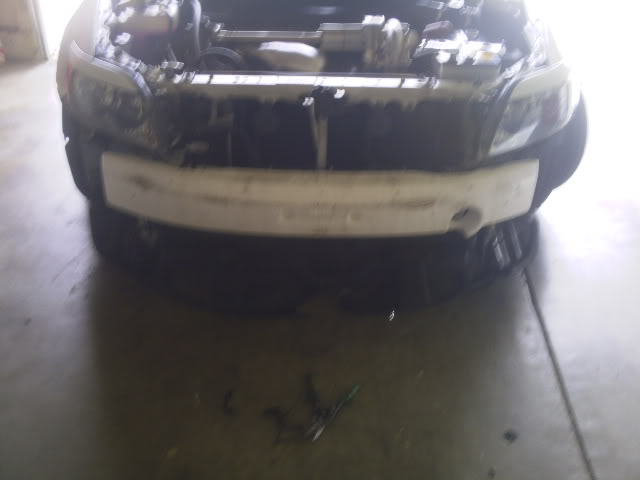
next find the left turn signal socket located here. we will be installing the drl module on this side of the car.
next remove the socket and pull it behind the headlight like this (so there is more room to work with when removing the electrical tape and cutting the wires)
next remove the upper part of the socket so you don't scratch or damage the bulb by pressing in this tab and pulling up on the top of the socket. it also makes it easier to slip behind the headlight cuz the socket will be skinnier when the top is removed.
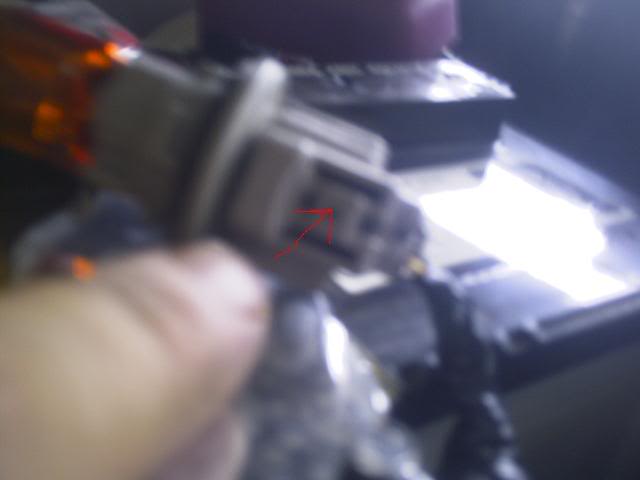
it should look like this when seperated.
next remove the electrical tape surrounding the wires for the turn signal socket.
take this piece of plastic covering off.
(a)use a razor (carefully) to cut straight down the plastic cover and pull the wires out like this.
(b) forgot to mention that this thing clips to the headlight. sorry.
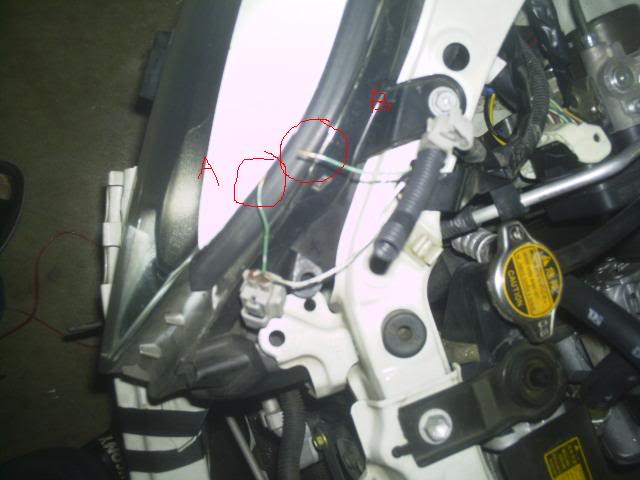
locate the yellow wire and cut it in half like this. strip bout a half inch of plastic off each end of the yellow wire with a wire stripper.
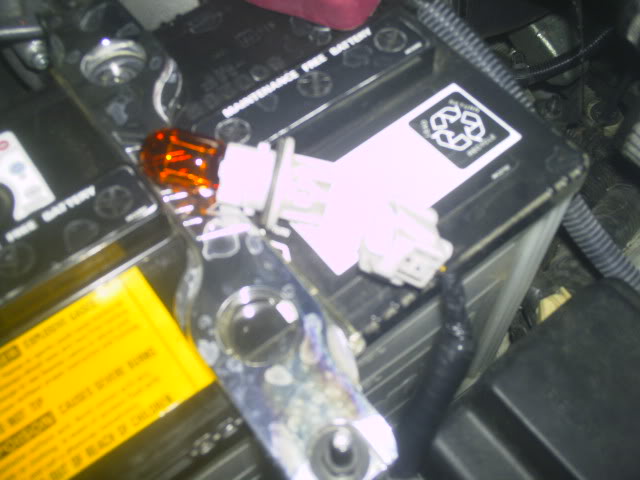
here hook the wires up like this. use the supplied wire twist nuts.
a) hook up the violet(purple) wire to socket end of the yellow wire.
b) hook up the pink wire to the wire harness side of the yellow wire.
c) use the wire tap and tap into the white/black stripe wire with the green wire.
make sure you tape up your connections with electrical tape.
bunch everything in this area together and electrical tape it. now run the turn signal socket and the module back through to where the turn signal socket plugs into the headlight at. be extra careful not to dent the module when doing this or it might damage the module internally.
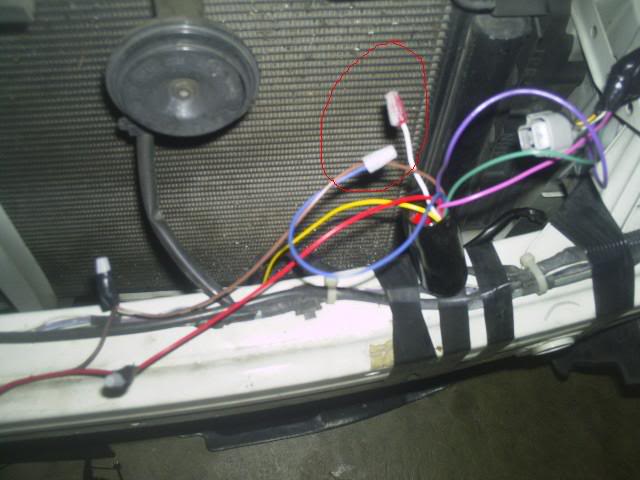
k, next grab the red/brown extension wire from the kit. the wire color is all messed up in the picture but its supposed to be red/brown. separate and strip bout a half inch off the tips of the wire like this with a wire stripper.
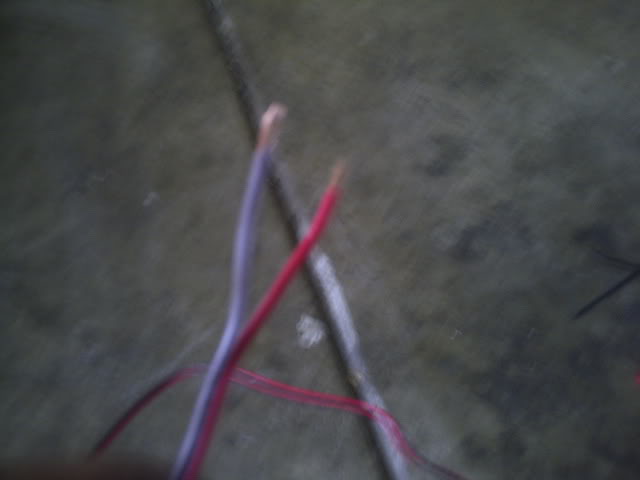
connect the red and brown extension wires to the same color wires from the module.
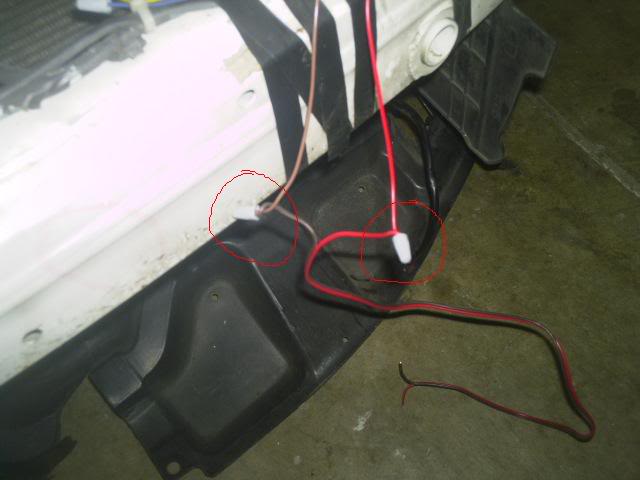
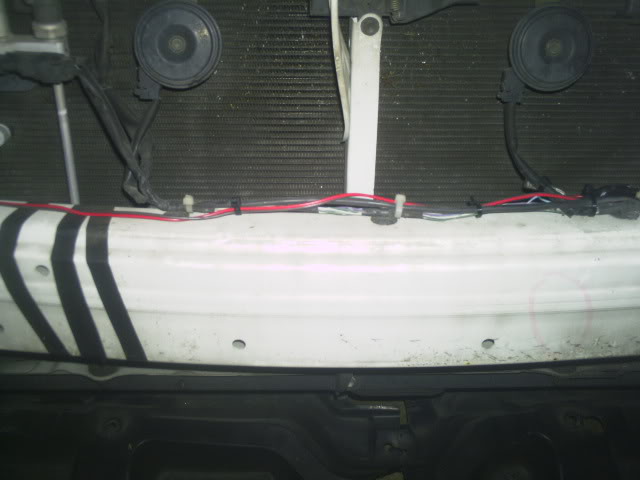
with the module next to the left turn light socket hole of the left headlight run the red and brown extension wire across the top of the bumper support and cut the wire like this. (leave a lil bit longer than how i have cut it so you have more room to work with)
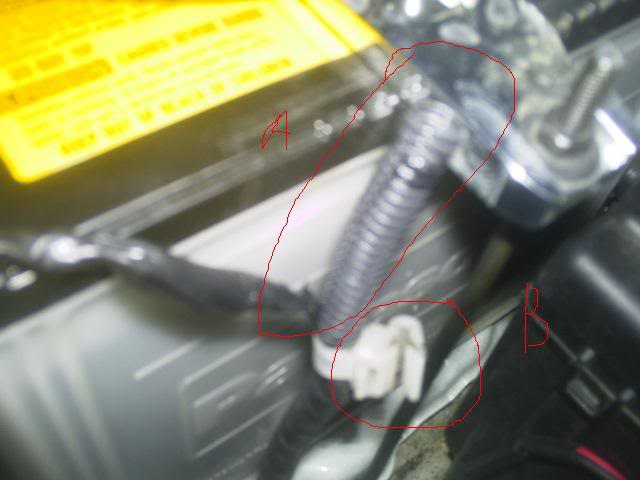
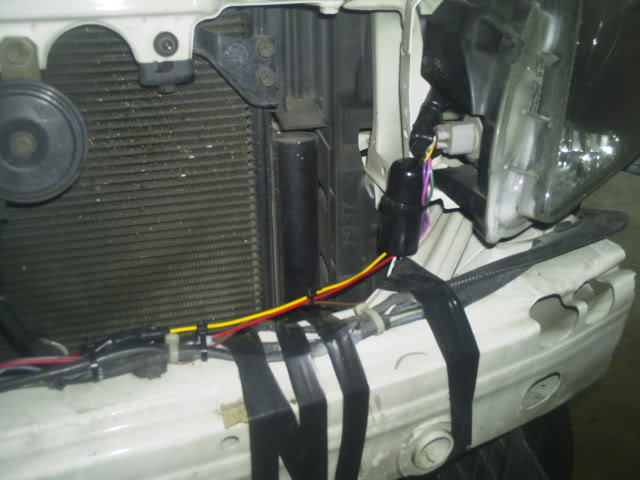
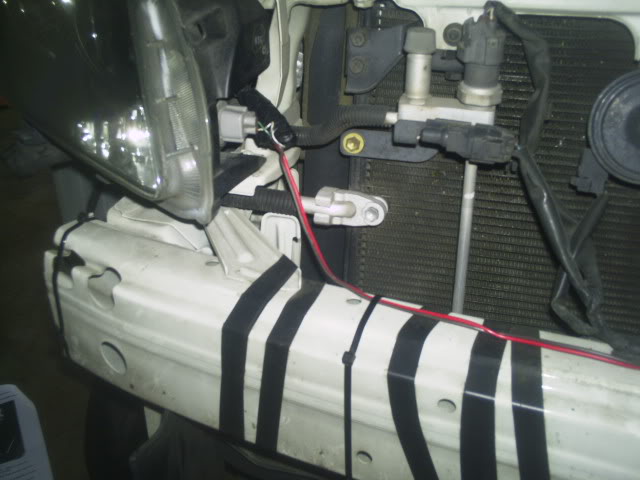
(a)run the red and brown wire under the radiator support like this and strip a half inch off the end of the wire plastic with the wire stripper.
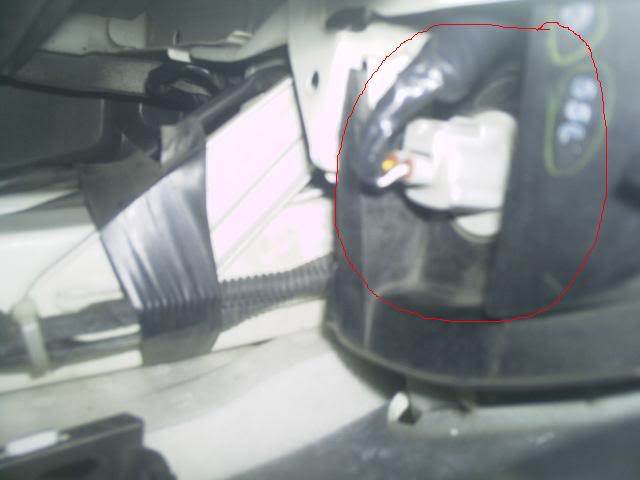
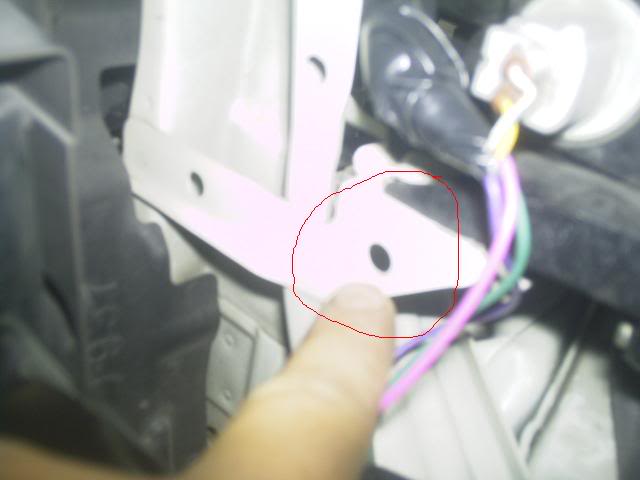
(b) be careful of the bracket circled on the left in this picture when you pull the right turn signal socket behind the right headlight in the next step. if you don't pull the socket to the right of the bracket when pulling it behind the headlight, the wire for the socket will be caught behind the bracket and it will be hard to put the socket back through to where it plugs into the headlight.
next remove the right side turn signal socket, pull through the back of the right headlight and remove the tape like you did on the left side. unplug the top of the socket like on the left side.
find the green wire and cut the wire in half. strip bout half inch off the ends of the wire.
a)connect the brown wire to this end.
b)connect the red wire to this end.
tape everything up and run the turn signal sock back through to where it mounts in the headlight.
now cap off the blue and white wires. we will not be using them.
the blue wire is what turns off the drl function when the parking lights are on. if you want it to do that then simply attach the blue wire to the power wire of the parking light. (the small bulb on the bottom of the low beams.)
the white wire is used to turn off the drl function when the turn signals are in use. it is a safety function. the way i have it hooked up (or not hooked up) is the way most drl's work. one turn signal blinks while the other one stays lit. with this wire connected to ground when one turn signal blinks the other one gets turned off.
if you want the latter simply ground this white wire.
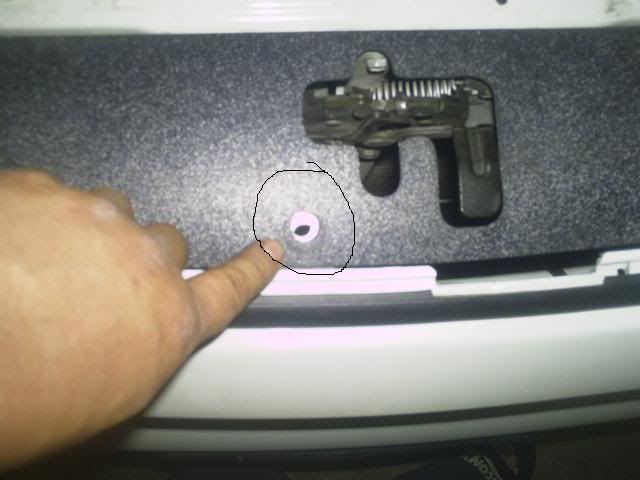
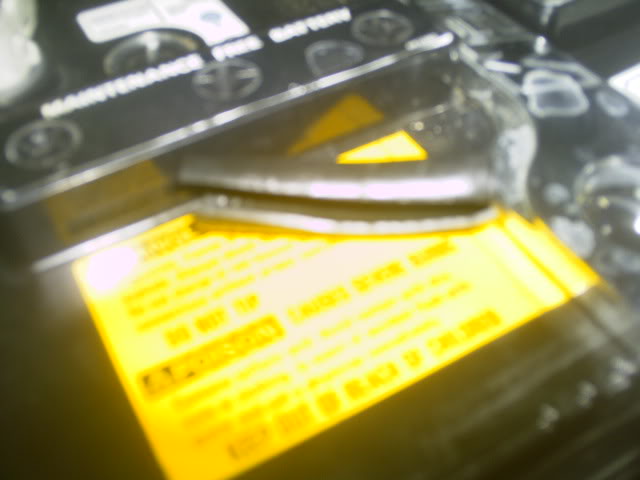
next find this hole next to the left side turn signal socket.
place the module next to this hole and zip tie it there with the supplied zip tie.
the module should look like this when mounted. make sure the module is mounted with the wires facing down so that if water does splash up on it it won't pool where the wires are and short out the module.
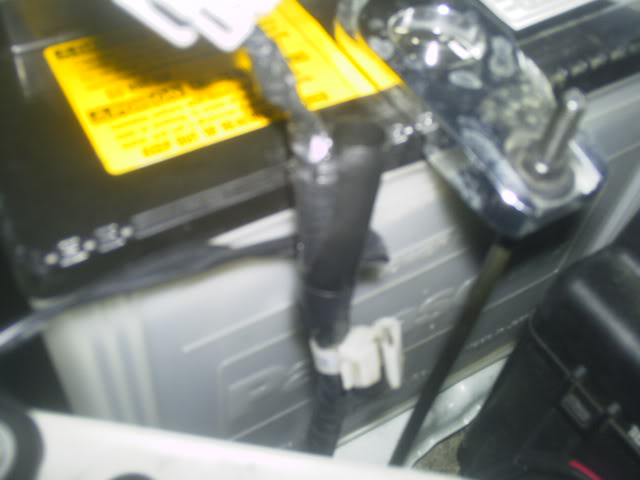
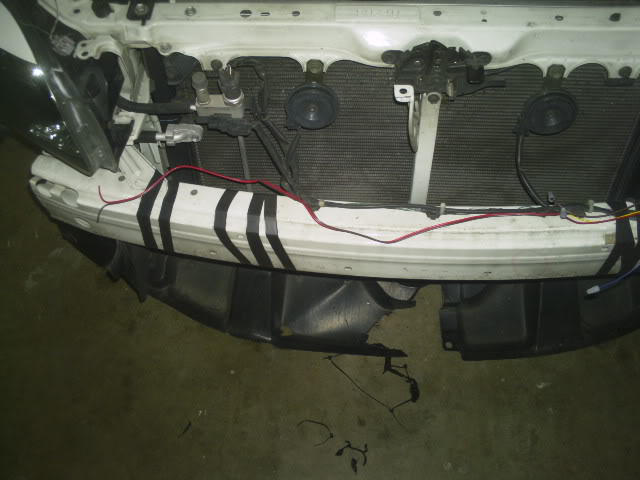
next use the supplied zip ties and secure the red/brown wire to the bumper support like this
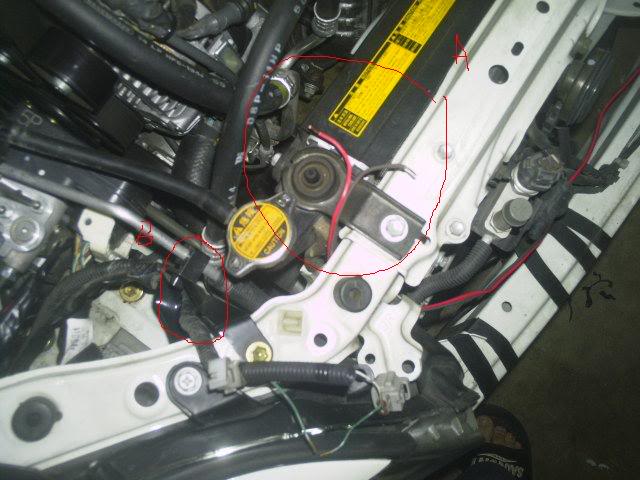
next run a power wire (ign acc located behind radio) through the firewall and run it through the engine compartment and connect to the yellow wire of the module. (will get pictures tomorrow)
k, by now everything should be wired. plug the top of the sockets back into the base, re insert the sockets back in the headlights and test the lights. the turn signals should come on within 5 seconds of turning the key to the ACC position. they are delayed in turning on. it is normal.
next test the turn signals for proper operation.
if all is well slap the bumper back on in reverse of removal procedure and enjoy the new lights.
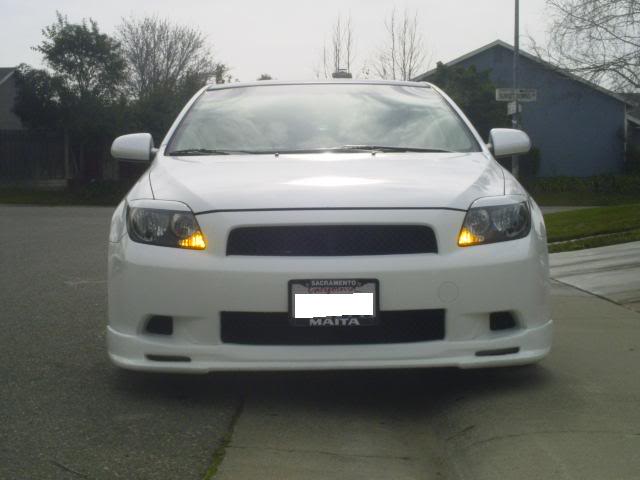
daytime pics
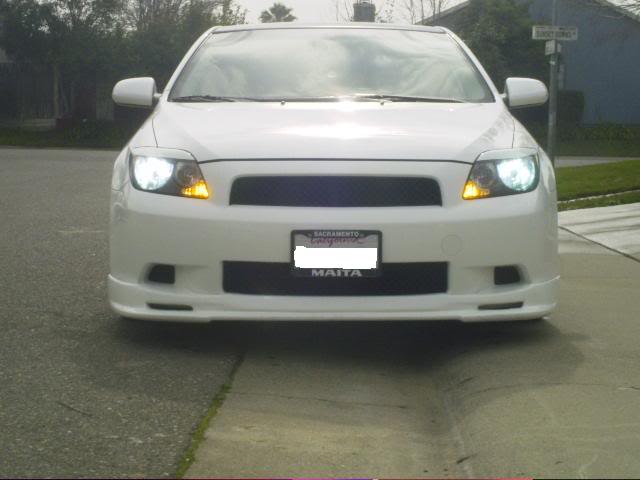
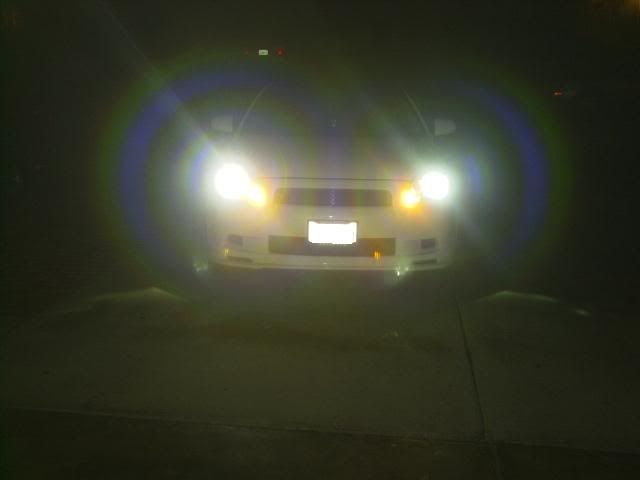
night time pics
http://www.webelectricproducts.com/products.htm
i ordered the pruis kit but all the modules are the same. its the drl-1
its works beautifully.
what this module does is makes your turn signals work as the daytime running lights (drl). when you use the turn signal/ hazards it will still function as the turn signals. when you turn off the turn signals it goes back to drl.
it can be wired so that it shuts off when the park lights are activated but that would kinda defeat the purpose of why alot of us would want it in the first place for the tc. (the park lights suck stock).
i got some hyper yellow bulbs so they function like foglights from the dc-2 teggies (jdm version.)
here is the diy. almost complete. didn't have time to snap the hook up of the power wire. will get that tomorrow. forgive me if it looks a lil crappy (especially some of the pics). first time at doin this.
now,as with all diy's, if you mess up something on your car im not responsible for that. do this mod at your own risk. if you hook up everthing like you're supposed to then it will all work out.
Tools needed:
ratchet with 10mm socket/short extension or phillips screwdriver
flathead screwdriver
floorjack and jackstands
wire cutter/crimper/stripper
test light (if you don't know which wire the acc is.)
k, fresh out of the package here are the contents. the module is the black thing with all the wires attached to it. for some reason there is a single mint in the kit that says "thank you" on the back. lol. wierd.
first thing to do is to remove the front bumper. start at the top clips. remove the 5 clips with a flathead.
next, remove the side 10mm screws with ratchet and 10mm socket or phillips screwdriver (you will need to turn the wheel in for each side you work on to have room)
next pull back on the plastic fender liner and locate and remove the 10mm screw holding the corner of the bumper together (one on each side) use ratchet with 10mm socket and short extension.
next remove the two 10mm bolts on the bottom and all of the 10mm screws holding the splash guard onto the bumper with the 10mm socket and ratchet. (i did it without jacking up the car but it will be alot easier if you jack the car up on some jackstands.)
next pull on each side of the bumper and it will pop out of the tabs like this.
next pull on the middle of the bumper straight toward you and it should come right off. (if you took all of the screws and tabs out.)
k, at this point, this is how it looks with the bumper off. next take the foam bumper shock absorber off by pulling straight towards you.
next find the left turn signal socket located here. we will be installing the drl module on this side of the car.
next remove the socket and pull it behind the headlight like this (so there is more room to work with when removing the electrical tape and cutting the wires)
next remove the upper part of the socket so you don't scratch or damage the bulb by pressing in this tab and pulling up on the top of the socket. it also makes it easier to slip behind the headlight cuz the socket will be skinnier when the top is removed.
it should look like this when seperated.
next remove the electrical tape surrounding the wires for the turn signal socket.
take this piece of plastic covering off.
(a)use a razor (carefully) to cut straight down the plastic cover and pull the wires out like this.
(b) forgot to mention that this thing clips to the headlight. sorry.
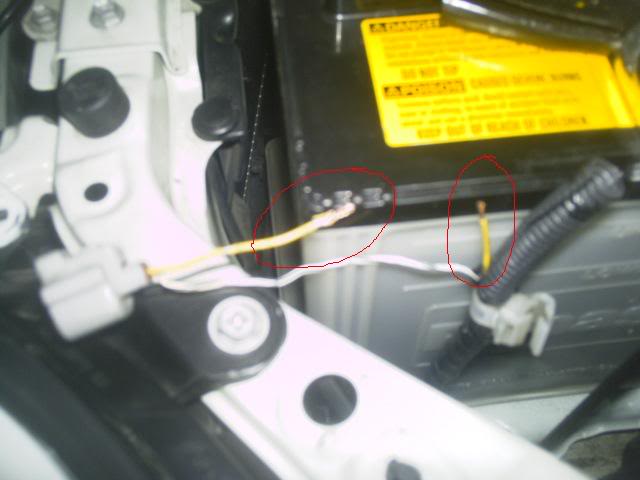
locate the yellow wire and cut it in half like this. strip bout a half inch of plastic off each end of the yellow wire with a wire stripper.
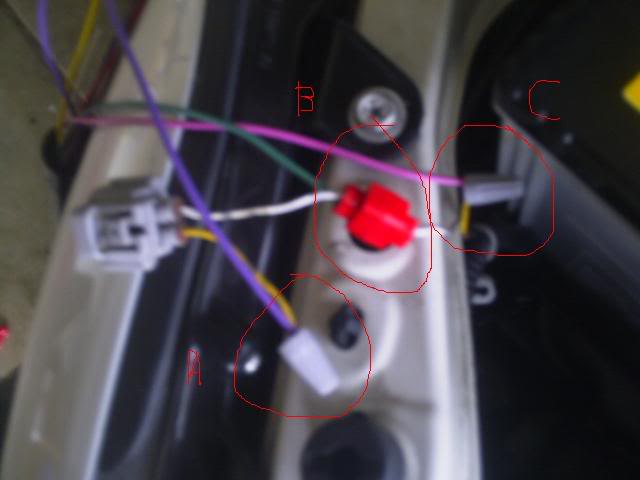
here hook the wires up like this. use the supplied wire twist nuts.
a) hook up the violet(purple) wire to socket end of the yellow wire.
b) hook up the pink wire to the wire harness side of the yellow wire.
c) use the wire tap and tap into the white/black stripe wire with the green wire.
make sure you tape up your connections with electrical tape.
bunch everything in this area together and electrical tape it. now run the turn signal socket and the module back through to where the turn signal socket plugs into the headlight at. be extra careful not to dent the module when doing this or it might damage the module internally.
k, next grab the red/brown extension wire from the kit. the wire color is all messed up in the picture but its supposed to be red/brown. separate and strip bout a half inch off the tips of the wire like this with a wire stripper.
connect the red and brown extension wires to the same color wires from the module.
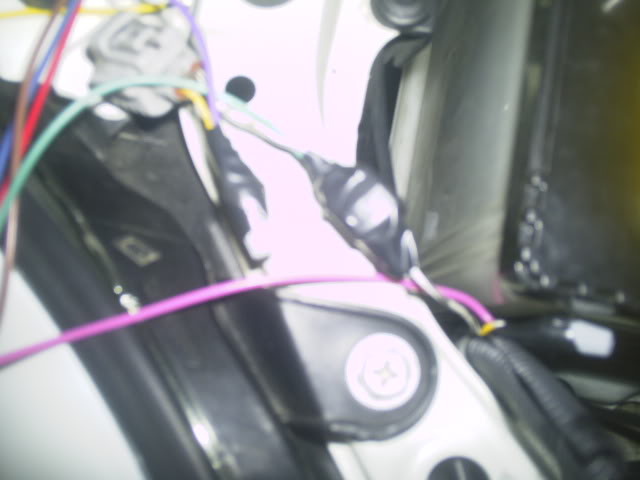
with the module next to the left turn light socket hole of the left headlight run the red and brown extension wire across the top of the bumper support and cut the wire like this. (leave a lil bit longer than how i have cut it so you have more room to work with)
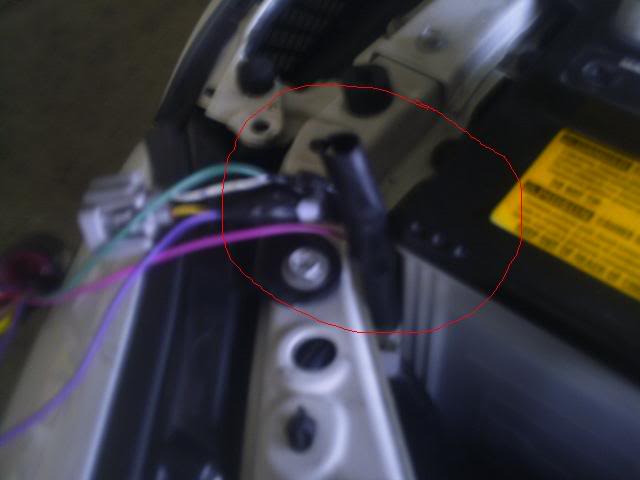
(a)run the red and brown wire under the radiator support like this and strip a half inch off the end of the wire plastic with the wire stripper.
(b) be careful of the bracket circled on the left in this picture when you pull the right turn signal socket behind the right headlight in the next step. if you don't pull the socket to the right of the bracket when pulling it behind the headlight, the wire for the socket will be caught behind the bracket and it will be hard to put the socket back through to where it plugs into the headlight.
next remove the right side turn signal socket, pull through the back of the right headlight and remove the tape like you did on the left side. unplug the top of the socket like on the left side.
find the green wire and cut the wire in half. strip bout half inch off the ends of the wire.
a)connect the brown wire to this end.
b)connect the red wire to this end.
tape everything up and run the turn signal sock back through to where it mounts in the headlight.
now cap off the blue and white wires. we will not be using them.
the blue wire is what turns off the drl function when the parking lights are on. if you want it to do that then simply attach the blue wire to the power wire of the parking light. (the small bulb on the bottom of the low beams.)
the white wire is used to turn off the drl function when the turn signals are in use. it is a safety function. the way i have it hooked up (or not hooked up) is the way most drl's work. one turn signal blinks while the other one stays lit. with this wire connected to ground when one turn signal blinks the other one gets turned off.
if you want the latter simply ground this white wire.
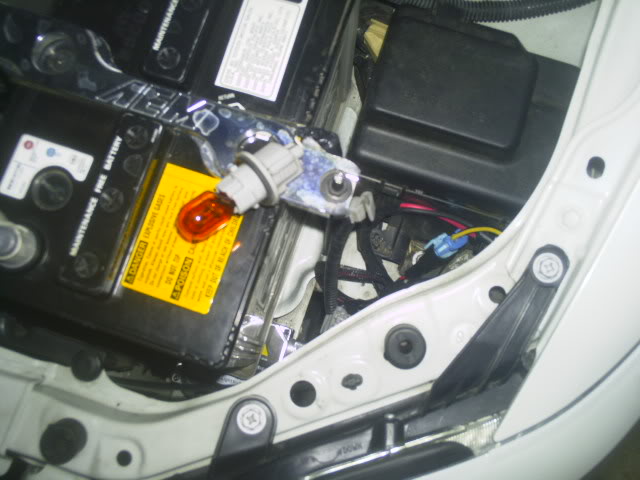
next find this hole next to the left side turn signal socket.
place the module next to this hole and zip tie it there with the supplied zip tie.
the module should look like this when mounted. make sure the module is mounted with the wires facing down so that if water does splash up on it it won't pool where the wires are and short out the module.
next use the supplied zip ties and secure the red/brown wire to the bumper support like this
next run a power wire (ign acc located behind radio) through the firewall and run it through the engine compartment and connect to the yellow wire of the module. (will get pictures tomorrow)
k, by now everything should be wired. plug the top of the sockets back into the base, re insert the sockets back in the headlights and test the lights. the turn signals should come on within 5 seconds of turning the key to the ACC position. they are delayed in turning on. it is normal.
next test the turn signals for proper operation.
if all is well slap the bumper back on in reverse of removal procedure and enjoy the new lights.
daytime pics
night time pics
Last edited by tc-guy; Feb 11, 2010 at 10:23 PM.

Thread Starter
Senior Member
SL Member
Team N.V.S.
Joined: Dec 2005
Posts: 1,823
thats cool ack. its not for everyone. some will like it some won't. alot of ppl was tryin to figure out how to keep the turn signals on along with the headlights so i thought i would share this.
constructive criticism is welcome.
it looks 10x better in person tho.
constructive criticism is welcome.
it looks 10x better in person tho.


Thread Starter
Senior Member
SL Member
Team N.V.S.
Joined: Dec 2005
Posts: 1,823
it works just like the new tundra drl's except i have it wired where it won't turn off or get dim when you turn on the parking lights.


Thread Starter
Senior Member
SL Member
Team N.V.S.
Joined: Dec 2005
Posts: 1,823
unfortunately i don't think it will. xb2 bulbs are dual filament. don't know on the led's tho. i could be wrong.


Thread Starter
Senior Member
SL Member
Team N.V.S.
Joined: Dec 2005
Posts: 1,823
yeah im sure it could be wired to work for high beams. just wire it exactly the same as above but hook the blue wire up to the parking light power wire so when the low beams are in use the high beam drl shuts off until you manually turn on the high beams with the switch.
i have no clue concerning if the 9005 led bulbs will work tho.
also i don't know if the higher current of the headlight bulbs will cause any issues. if there too much current running through the module it could damage it. don't know till you try tho. good luck.
i have no clue concerning if the 9005 led bulbs will work tho.
also i don't know if the higher current of the headlight bulbs will cause any issues. if there too much current running through the module it could damage it. don't know till you try tho. good luck.
Last edited by tc-guy; Feb 11, 2010 at 02:35 PM.
bringing this back up... i've been wanting to wire up my turn signals as DRL's only and put some LED strips in the eyebrows and have those as my turn signals.
could i still buy this kit and wire everything up other than the signal option part and just use the stock turn signals as DRLs???
if i can, which steps would i not have to do? or if i can't, does anyone know which fuse i can tap into to make the turn signals work as DRLs? im thinking the ignition switch might be a good option but i just want to ask to make sure...