Turbonetics Turbo Install (B_Real45) Update 6/12/09
 09-15-2008, 11:49 PM
#1
Senior Member
SL Member
Thread Starter
Join Date: Dec 2007
Location: South Florida
Posts: 2,603
Okay here's my thread. This will be a rolling update thread on my experience with the Turbonetics Turbo Kit. Every opinion I make in this thread is my own - based on my past experiences, and my current experience. I will remain as unbiased as possible and give you the good as well as the bad.
This thread will always have updates in the first post, first page. Thread Title will have date of most recent update.
So with that out of the way, here we go....
Weekend of 9/13/08
The turbo was originally planned for install the prior week - weekend of 9/06/08. Due to Hurricane Ike, the install was delayed. Not only was it delayed, but this meant I couldn't do it with one of my best friends in his garage unless I wanted to wait two more weeks. Since I've been waiting long enough - I ended up going to my GF's dad's place to do the install.
Here's the initial tear-down:

I covered the exhaust ports so I wouldn't get any dirt and other foreign objects in there:

Here's the Mishimoto radiator... it's a beautiful unit:

A shot of the radiator in - with stock fans:

Here's a pic of the drill bit size you'll need to start a hole for tapping the manifold for EGT bung (Autometer EGT):

Pic of the manifold ready for drill and tap - sorry didn't get pics of right after:

Here's the heart of it all (for those not knowing - it's a T04E 50trim / T3 .48 AR Stage 2 Ball-Bearing):

Back side of turbo - notice the newer turbos have wet center-housings and a red backplate:

Water lines installed on turbo:

Turbo mounted for a mock-up:

More mock-ups:


Water lines installed to in/out of coolant lines using 5/8" T's supplied by Turbonetics.. very nice I might add. I had originally thought the lines would be too long, but they were just fine.

Here's what's needed to fit Mishimoto radiator with stock fans on a Turbonetics Kit.. you see there's a notch that needs to be made on the shroud:

Pic of the intercooler. Notice on the newer kits, the "Spearco" logo has been replaced with "Turbonetics". It's still a Spearco core.. I actually used some Acetone to remove the logo.

Here's the mock up of the boost solenoid from my Gizzmo MS-IBC boost controller:

Just to show you the wiring mess from the Innovate Lambda LC-1 wideband:

Here's a nice clean install of the supplied LED and Calibration button for the LC-1 wideband:

The kit's fitment was actually pretty good except for two areas. One was the down-pipe bracket (we'll get to that in a bit), and the other was the cold pipe fitting too close to the front body shell (as you can see I used some rubber to help.. and please excuse the blurry pic):

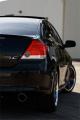
Here's a pic of the kit installed - before testing and whatnot:

Another pic (you can see the EGT bung and sensor installed):

Pic of TurboToyotas vac block (Thanks Todd!) and the Gizzmo solenoid both installed:

Mishimoto radiator cap and safety chain:

Pic of gauges and what not... sorry for the blurry pic again:

All done - but where's the intercooler, yo?!

There it is! I had reservations before about having my IC showing.. and I thought about painting it black. But after the install, I found out the stock grill fits perfectly.. so problem solved!

So there you have it.. my install weekend. Here is a list of a couple of problems with the kit in particular:
1.) MAF screws were kinda crappy - they're small and use a hex wrench... can easily be stripped so be careful!
2.) Down-pipe has a bracket that's supposed to bolt to the block where the stock bracket was. This couldn't happen for me.. so it's left there but it's tight against the block and not making any noise. I'll probably have the shop that's doing my exhaust modify it.
3.) Cold pipe too close to the frame/body shell. I used a rubber hose, split one end, and used it as a cushion with some zip-ties. All good now.
4.) Exahust manifold needed to be "altered" a little. The far left edge, closest to alternator, the manifold would get caught on there, making fitment an issue. A grinding stone on a Dremel worked out well. Sorry I forgot to take a pic of this. Wasn't too big of an issue.. just wished T'netics would've done it themselves.
5.) Tapping the oil pan was hard as a ****. There wasn't too much clearance between the lower support (holding radiator) and the pan.. so I couldn't get much momentum on my swing. It eventually happend and turned out great. I used JB Weld around the fitting just to be extra safe. I'll try and get pics of this later some time.
6.) For whatever reason, one of the injector harnesses had different butt-connectors on them.. and it was really hard to crimp. Sure enough, this crimp had failed and it caused the engine to throw a Cyl 3 Misfire code. I changed the butt-connector and everything was gravy.
7.) The O2 boss extender supplied is knocking against the frame - and it only happens when I'm slipping the clutch in 1st gear or reverse since those usually the only times the exhaust can shake a bit. This is probably the only issue that is kind of annoying.
Wow - so that looks like a lot of negatives. But in all honesty, none of those issues were a big deal. They made install a bit longer than expected, but none of the issues couldn't be resolved in a manner to which I was not pleased.
The Turbonetics Turbo Kit seems to be an excellent fitting kit with some minor issues. So far the car feels great, but I'm on stock exhaust. I'm on 8psi right now, and I won't turn up the boost until I get on a dyno. As of right now my LC-1 shows me at 11.5 - 11.7 at WOT, so I think I'll stay there. Who knows, maybe the LC-1 is off and needs another calibration.
So feel free to share your thoughts and comments - and please be sure to check out this front page for any updates, good or bad.
9/23/08 - Mini update
This is just a mini update regarding my BOV and turbo spool.
So I've been driving around and the car feels good. But being familiar with turbos of various sizes on different engines, I'm beginning to think the car isn't spooling as fast as it should. I mean - in 2nd gear I do spin the tires once the rpms are close to 3500rpm, but that's crap for a ball bearing turbo and a .48AR Stage 2 wheel!
I took out my 1/2" wrench and a 5/32" allen wrench (I think - off the top of my head) and loosened the lock-nut and proceeded to tighten the spring on the BOV. Now here's a bit of clarification regarding BOVs and their sounds:
-Lots of people mistaken a "flutter" sound of the BOV to be compressor surge. This is not so. You're hearing air pulses come out of the BOV - the BOV is not shut tight to cause compressor surge.
-So to test your BOV spring's tension, build pressure close to "0" psi boost and let off. If you hear your BOV loudly, then the spring is too loose. To test if it's too tight, build to about 3psi and let off. If it doesn't sound like a normal whoosh, and you hear "chirp chirp chirp" then you have compressor surge.
-Both Compressor surge and the lack of a properly adjusted BOV spring can lead to premature turbo failure. Compressor surge is pretty obvious, the built up pressure doesn't go anywhere but where it came from.. ouch. But a BOV that is too loose will make the turbo work much harder to get over that leak threshold. It's like having a major boost leak.. well it is.
-Not all BOVs sound the same (duh.) so make sure you're very familiar with the way your BOV sounds. IE an HKS SSQV can easily be mistakened for surging sometimes because their sound can be pretty high pitched. As long as your BOV is releasing pressure as it should, you're fine.
So back to my update - after the adjustment, HOLY COW. I can barely stay out of boost! What a huge difference this was.. and I still have more room to play with because I can still hear the BOV when I let off around -10 vac. The car feels ridiculously quicker..
After finishing my adjustments, I think my next step with the BOV is to connect the bottom port of the Raptor to the compressor port (which I currently have blocked off). This will hopefully make the BOV react a bit faster.. Stay tuned..
10/23/08 - Semi Frustrated update
So the original shop I was going to get my Unichip tuned are being dicks. To make a long story short, they promised me a price for an exhaust install and a tune - then when it came time for me to schedule everything, they increased the price by a few hundred dollars. This wasn't the most upsetting part - what was the most upsetting part was their "take-it-or-leave-it" attitude. I cannot and will not use them now.
So what am I to do? Well I decided on buying an AEM F/IC and a harness. I'll try and get it going just good enough so I can drive it to a tuner. I'll create another post and ask some locals here to see who they'd recommend tuning a F/IC.
Hopefully some updates with some substance will be in the near future.
10/29/08 - Exhaust and Dyno Update
Here's some more pics for you guys.
T'netics kit @ 8psi w/ stock exhaust:

As you can see, the tune looks pretty lean! I spoke with T'netics about this and they sent me a new Unichip. It's the same deal, still lean. More on this later..
So I've been itching to put an exhaust on - I now have a 3" mandrel bent S-pipe, and 3" mandrel bent cat-back with a 18" Vibrant resonator and a 18"x5" Magnaflow 3" muffler.
T'netics kit @ 9ish psi w/ 3" exhaust (Psi increased due to exhaust):

Not bad.. but look at how lean it is! I'm trying to stay off boost until I can get this figured out. I'm going to try to replace my primary O2 sensor to see if that helps..
Anyhow, here are pics of the exhaust.. I love this exhaust and I love the tip.. it's near perfect IMO.


Let me know what you guys think..
Weekend of 1/19/09 Update
So it's been a while since I've done anything (power-wise) to the car. Well today I installed a Walbro 255lph intank pump. This really doesn't do anything for me right now, but I'm planning on getting the AEM F/IC installed soon and getting it tuned. I'm shooting for 300whp at 10-12psi. This pump is not necessarily needed - but it's a security blanket for me. You can go HERE to see the DIY - no pictures this time - sorry.
Next on the list is the ES Motor mounts and the AEM F/IC.
Weekend of 5/11/09 Update
Okay it's been about 4 months since my last update and my ES mounts are STILL not in! lol... but I do have some new things to share.
I did a bit of tuning this past weekend with a friend of mine. He was driving as I fiddled on the laptop with the F/IC software.
My car ends up idling nicer at just under 1000ms for injector response timing. Remember this will be different for each make of injector so my figure may or may not work for you. I have Siemens 630cc injectors and their advertised injector response time is 1.14ms at 14V. After a number of pulls, I finally got my car to about 12-11.5 AFR during WOT at 10psi. At partial throttle it's around 12-12.5 AFR. The car feels great so far. I didn't really mess with the timing map. The map I have in there now is just a linear decrease in timing up to -4 degrees at 10psi, regardless of rpm.
One thing I've noticed was that the car needed much more fuel between 3200 to 4600rpm. I'm guessing this is because that's where our main part of our torque curve is.. did anyone else notice the same in their fuel maps? It'll be a little while before I get on a dyno to see what my results are.
Also - my next update should include brake work. To be continued...
6/10/09 - Wilwood BBK Installed
So I finally got around to installing the Wilwood BBK. First I must say this kit is pretty nice and when purchased from HotrodUSA.com, it comes with SS lines for the front.
Let's get on with some pics..
Rotor in box:

Safety-wire cut into 9-9.5" strips to make install a little quicker:

Wire twister tool (GET THIS TOOL for this project.. it's a time-saver):

Properly safety-wired bolts:

Caliper aligned:

Installed:

The BBK feels really good. I would like to bleed the system again because I feel there's a little bit of air in. Not much because it's still pretty firm and stops on a dime, but just for my sake of mind I'll bleed it again.
I'll try and get more pics when I finally wash my car.. she hasn't been pampered in a while.
3/05/10 - Mini update
Wow it's been a while since I've updated - and for good reason. So besides the normal stresses of everyday life (job you hate, wedding plans, *still* house shopping), I finally fully break in the motor after 3000 miles and several oil changes. I street tune the car with the FIC to about 16psi and the car is running really strong. I end up taking the car to a dyno so I can finish up some tuning. After about an hour worth of tuning, the car makes a strange sound on the last pull and will not start up right away! It won't hold idle... looking around, I was relieved to find that the tube from the PCV to the intake manifold had popped off... What a relief! However, I noticed that my coolant overflow was literally overflowing.. not a good sign. Immediately I'm thinking head-gasket. Well after a week or so of normal driving, I notice my car smoking a little at stop lights and my coolant levels keep dropping. Definitely burning coolant. Now I'm ____ed.. a new rebuild an my head-gasket goes.. wtf.
My car is dropped off at Olympic so they can tear it down for further inspection. The results were typical for a headlift and overheating (temps were monitored during dyno so I'm baffled). The head needed to be shaved level and the block needed to be decked. However one part was VERY intriguing.. one of the cam lobes had grounded down to nothing!

Not sure how this happened - but the cam also damaged some of the followers:

So now the head is rebuilt with BC Stage 2T cams. The block is put back together (after 2months at the shop.. I don't even want to get started on that). Tomorrow I'm heading back to Olympic to finish up a few more things.. gonna relocate the battery to the trunk and install a catch can.
So now, the car will be using the same Dezod head with BC Stg 2T cams, Dezod Block, Cometic HG, Hydra (finally), and a new custom spec turbo. I'm reusing the housings from the older Tnetics 50trim though.. ;)
Hopefully this time around my luck will be a little better. I'll probably provide some pics next week or so. I can't stand having to break in the motor again.. 3k miles of break in is so damn boring.
3/09/10 - Update
Just a few pics of the recent changes.. Put a coat of paint on the valve cover, installed a catch can, relocated the battery...


And.. and intercooler upgrade..


So the car is done mechanically. We tried getting her to idle the other night but it felt like she was fighting it the whole time. Now we'll try moving the cam sensor closer to the BC cam dowel pins to see if it'll help. More to come soon hopefully...
This thread will always have updates in the first post, first page. Thread Title will have date of most recent update.
So with that out of the way, here we go....
Weekend of 9/13/08
The turbo was originally planned for install the prior week - weekend of 9/06/08. Due to Hurricane Ike, the install was delayed. Not only was it delayed, but this meant I couldn't do it with one of my best friends in his garage unless I wanted to wait two more weeks. Since I've been waiting long enough - I ended up going to my GF's dad's place to do the install.
Here's the initial tear-down:
I covered the exhaust ports so I wouldn't get any dirt and other foreign objects in there:
Here's the Mishimoto radiator... it's a beautiful unit:
A shot of the radiator in - with stock fans:
Here's a pic of the drill bit size you'll need to start a hole for tapping the manifold for EGT bung (Autometer EGT):
Pic of the manifold ready for drill and tap - sorry didn't get pics of right after:
Here's the heart of it all (for those not knowing - it's a T04E 50trim / T3 .48 AR Stage 2 Ball-Bearing):
Back side of turbo - notice the newer turbos have wet center-housings and a red backplate:
Water lines installed on turbo:
Turbo mounted for a mock-up:
More mock-ups:
Water lines installed to in/out of coolant lines using 5/8" T's supplied by Turbonetics.. very nice I might add. I had originally thought the lines would be too long, but they were just fine.
Here's what's needed to fit Mishimoto radiator with stock fans on a Turbonetics Kit.. you see there's a notch that needs to be made on the shroud:
Pic of the intercooler. Notice on the newer kits, the "Spearco" logo has been replaced with "Turbonetics". It's still a Spearco core.. I actually used some Acetone to remove the logo.
Here's the mock up of the boost solenoid from my Gizzmo MS-IBC boost controller:
Just to show you the wiring mess from the Innovate Lambda LC-1 wideband:
Here's a nice clean install of the supplied LED and Calibration button for the LC-1 wideband:
The kit's fitment was actually pretty good except for two areas. One was the down-pipe bracket (we'll get to that in a bit), and the other was the cold pipe fitting too close to the front body shell (as you can see I used some rubber to help.. and please excuse the blurry pic):
Here's a pic of the kit installed - before testing and whatnot:
Another pic (you can see the EGT bung and sensor installed):
Pic of TurboToyotas vac block (Thanks Todd!) and the Gizzmo solenoid both installed:
Mishimoto radiator cap and safety chain:
Pic of gauges and what not... sorry for the blurry pic again:
All done - but where's the intercooler, yo?!
There it is! I had reservations before about having my IC showing.. and I thought about painting it black. But after the install, I found out the stock grill fits perfectly.. so problem solved!
So there you have it.. my install weekend. Here is a list of a couple of problems with the kit in particular:
1.) MAF screws were kinda crappy - they're small and use a hex wrench... can easily be stripped so be careful!
2.) Down-pipe has a bracket that's supposed to bolt to the block where the stock bracket was. This couldn't happen for me.. so it's left there but it's tight against the block and not making any noise. I'll probably have the shop that's doing my exhaust modify it.
3.) Cold pipe too close to the frame/body shell. I used a rubber hose, split one end, and used it as a cushion with some zip-ties. All good now.
4.) Exahust manifold needed to be "altered" a little. The far left edge, closest to alternator, the manifold would get caught on there, making fitment an issue. A grinding stone on a Dremel worked out well. Sorry I forgot to take a pic of this. Wasn't too big of an issue.. just wished T'netics would've done it themselves.
5.) Tapping the oil pan was hard as a ****. There wasn't too much clearance between the lower support (holding radiator) and the pan.. so I couldn't get much momentum on my swing. It eventually happend and turned out great. I used JB Weld around the fitting just to be extra safe. I'll try and get pics of this later some time.
6.) For whatever reason, one of the injector harnesses had different butt-connectors on them.. and it was really hard to crimp. Sure enough, this crimp had failed and it caused the engine to throw a Cyl 3 Misfire code. I changed the butt-connector and everything was gravy.
7.) The O2 boss extender supplied is knocking against the frame - and it only happens when I'm slipping the clutch in 1st gear or reverse since those usually the only times the exhaust can shake a bit. This is probably the only issue that is kind of annoying.
Wow - so that looks like a lot of negatives. But in all honesty, none of those issues were a big deal. They made install a bit longer than expected, but none of the issues couldn't be resolved in a manner to which I was not pleased.
The Turbonetics Turbo Kit seems to be an excellent fitting kit with some minor issues. So far the car feels great, but I'm on stock exhaust. I'm on 8psi right now, and I won't turn up the boost until I get on a dyno. As of right now my LC-1 shows me at 11.5 - 11.7 at WOT, so I think I'll stay there. Who knows, maybe the LC-1 is off and needs another calibration.
So feel free to share your thoughts and comments - and please be sure to check out this front page for any updates, good or bad.
9/23/08 - Mini update
This is just a mini update regarding my BOV and turbo spool.
So I've been driving around and the car feels good. But being familiar with turbos of various sizes on different engines, I'm beginning to think the car isn't spooling as fast as it should. I mean - in 2nd gear I do spin the tires once the rpms are close to 3500rpm, but that's crap for a ball bearing turbo and a .48AR Stage 2 wheel!
I took out my 1/2" wrench and a 5/32" allen wrench (I think - off the top of my head) and loosened the lock-nut and proceeded to tighten the spring on the BOV. Now here's a bit of clarification regarding BOVs and their sounds:
-Lots of people mistaken a "flutter" sound of the BOV to be compressor surge. This is not so. You're hearing air pulses come out of the BOV - the BOV is not shut tight to cause compressor surge.
-So to test your BOV spring's tension, build pressure close to "0" psi boost and let off. If you hear your BOV loudly, then the spring is too loose. To test if it's too tight, build to about 3psi and let off. If it doesn't sound like a normal whoosh, and you hear "chirp chirp chirp" then you have compressor surge.
-Both Compressor surge and the lack of a properly adjusted BOV spring can lead to premature turbo failure. Compressor surge is pretty obvious, the built up pressure doesn't go anywhere but where it came from.. ouch. But a BOV that is too loose will make the turbo work much harder to get over that leak threshold. It's like having a major boost leak.. well it is.
-Not all BOVs sound the same (duh.) so make sure you're very familiar with the way your BOV sounds. IE an HKS SSQV can easily be mistakened for surging sometimes because their sound can be pretty high pitched. As long as your BOV is releasing pressure as it should, you're fine.
So back to my update - after the adjustment, HOLY COW. I can barely stay out of boost! What a huge difference this was.. and I still have more room to play with because I can still hear the BOV when I let off around -10 vac. The car feels ridiculously quicker..
After finishing my adjustments, I think my next step with the BOV is to connect the bottom port of the Raptor to the compressor port (which I currently have blocked off). This will hopefully make the BOV react a bit faster.. Stay tuned..
10/23/08 - Semi Frustrated update
So the original shop I was going to get my Unichip tuned are being dicks. To make a long story short, they promised me a price for an exhaust install and a tune - then when it came time for me to schedule everything, they increased the price by a few hundred dollars. This wasn't the most upsetting part - what was the most upsetting part was their "take-it-or-leave-it" attitude. I cannot and will not use them now.
So what am I to do? Well I decided on buying an AEM F/IC and a harness. I'll try and get it going just good enough so I can drive it to a tuner. I'll create another post and ask some locals here to see who they'd recommend tuning a F/IC.
Hopefully some updates with some substance will be in the near future.
10/29/08 - Exhaust and Dyno Update
Here's some more pics for you guys.
T'netics kit @ 8psi w/ stock exhaust:
As you can see, the tune looks pretty lean! I spoke with T'netics about this and they sent me a new Unichip. It's the same deal, still lean. More on this later..
So I've been itching to put an exhaust on - I now have a 3" mandrel bent S-pipe, and 3" mandrel bent cat-back with a 18" Vibrant resonator and a 18"x5" Magnaflow 3" muffler.
T'netics kit @ 9ish psi w/ 3" exhaust (Psi increased due to exhaust):
Not bad.. but look at how lean it is! I'm trying to stay off boost until I can get this figured out. I'm going to try to replace my primary O2 sensor to see if that helps..
Anyhow, here are pics of the exhaust.. I love this exhaust and I love the tip.. it's near perfect IMO.
Let me know what you guys think..
Weekend of 1/19/09 Update
So it's been a while since I've done anything (power-wise) to the car. Well today I installed a Walbro 255lph intank pump. This really doesn't do anything for me right now, but I'm planning on getting the AEM F/IC installed soon and getting it tuned. I'm shooting for 300whp at 10-12psi. This pump is not necessarily needed - but it's a security blanket for me. You can go HERE to see the DIY - no pictures this time - sorry.
Next on the list is the ES Motor mounts and the AEM F/IC.
Weekend of 5/11/09 Update
Okay it's been about 4 months since my last update and my ES mounts are STILL not in! lol... but I do have some new things to share.
I did a bit of tuning this past weekend with a friend of mine. He was driving as I fiddled on the laptop with the F/IC software.
My car ends up idling nicer at just under 1000ms for injector response timing. Remember this will be different for each make of injector so my figure may or may not work for you. I have Siemens 630cc injectors and their advertised injector response time is 1.14ms at 14V. After a number of pulls, I finally got my car to about 12-11.5 AFR during WOT at 10psi. At partial throttle it's around 12-12.5 AFR. The car feels great so far. I didn't really mess with the timing map. The map I have in there now is just a linear decrease in timing up to -4 degrees at 10psi, regardless of rpm.
One thing I've noticed was that the car needed much more fuel between 3200 to 4600rpm. I'm guessing this is because that's where our main part of our torque curve is.. did anyone else notice the same in their fuel maps? It'll be a little while before I get on a dyno to see what my results are.
Also - my next update should include brake work. To be continued...
6/10/09 - Wilwood BBK Installed
So I finally got around to installing the Wilwood BBK. First I must say this kit is pretty nice and when purchased from HotrodUSA.com, it comes with SS lines for the front.
Let's get on with some pics..
Rotor in box:
Safety-wire cut into 9-9.5" strips to make install a little quicker:
Wire twister tool (GET THIS TOOL for this project.. it's a time-saver):
Properly safety-wired bolts:
Caliper aligned:
Installed:
The BBK feels really good. I would like to bleed the system again because I feel there's a little bit of air in. Not much because it's still pretty firm and stops on a dime, but just for my sake of mind I'll bleed it again.
I'll try and get more pics when I finally wash my car.. she hasn't been pampered in a while.
3/05/10 - Mini update
Wow it's been a while since I've updated - and for good reason. So besides the normal stresses of everyday life (job you hate, wedding plans, *still* house shopping), I finally fully break in the motor after 3000 miles and several oil changes. I street tune the car with the FIC to about 16psi and the car is running really strong. I end up taking the car to a dyno so I can finish up some tuning. After about an hour worth of tuning, the car makes a strange sound on the last pull and will not start up right away! It won't hold idle... looking around, I was relieved to find that the tube from the PCV to the intake manifold had popped off... What a relief! However, I noticed that my coolant overflow was literally overflowing.. not a good sign. Immediately I'm thinking head-gasket. Well after a week or so of normal driving, I notice my car smoking a little at stop lights and my coolant levels keep dropping. Definitely burning coolant. Now I'm ____ed.. a new rebuild an my head-gasket goes.. wtf.
My car is dropped off at Olympic so they can tear it down for further inspection. The results were typical for a headlift and overheating (temps were monitored during dyno so I'm baffled). The head needed to be shaved level and the block needed to be decked. However one part was VERY intriguing.. one of the cam lobes had grounded down to nothing!
Not sure how this happened - but the cam also damaged some of the followers:
So now the head is rebuilt with BC Stage 2T cams. The block is put back together (after 2months at the shop.. I don't even want to get started on that). Tomorrow I'm heading back to Olympic to finish up a few more things.. gonna relocate the battery to the trunk and install a catch can.
So now, the car will be using the same Dezod head with BC Stg 2T cams, Dezod Block, Cometic HG, Hydra (finally), and a new custom spec turbo. I'm reusing the housings from the older Tnetics 50trim though.. ;)
Hopefully this time around my luck will be a little better. I'll probably provide some pics next week or so. I can't stand having to break in the motor again.. 3k miles of break in is so damn boring.
3/09/10 - Update
Just a few pics of the recent changes.. Put a coat of paint on the valve cover, installed a catch can, relocated the battery...
And.. and intercooler upgrade..
So the car is done mechanically. We tried getting her to idle the other night but it felt like she was fighting it the whole time. Now we'll try moving the cam sensor closer to the BC cam dowel pins to see if it'll help. More to come soon hopefully...
Last edited by B_Real45; 03-09-2010 at 11:54 PM.


 09-16-2008, 12:15 AM
#7
Senior Member
SL Member
Thread Starter
Join Date: Dec 2007
Location: South Florida
Posts: 2,603
Originally Posted by SoFloTC
NICE ROB!! soon we shall have a nice cruise! although my tune wont be for like 3 weeks .. urs is probably coming a little sooner.
Thanks everyone for your comments.
09-16-2008, 12:20 AM
#9
Senior Member
SL Member


Join Date: Sep 2007
Location: You All Ready Know_..
Posts: 6,187
i know how that goes... i bought a pure breed mini daschund month ago and im getting another pure breed long haired mini daschund next week... lets just say id have all my motor building money if it wasnt for these pups! haha
 09-16-2008, 04:01 AM
#13
Senior Member
SL Member
Scion Evolution

Join Date: Feb 2005
Location: Motor City
Posts: 2,860
Originally Posted by B_Real45
Yamaha,
What were your initial thoughts of the kit when you first got it?
What were your initial thoughts of the kit when you first got it?
As a kit its great. I just had bad luck with the turbos. I went custom but my brother still is running on the turbonetics kit for over 2 years now. We upgreaded his to a water turbo and its been doing good for about a year at 10psi 310whp 315wtq.

 09-16-2008, 02:03 PM
#17
Senior Member
SL Member

Join Date: Aug 2005
Posts: 879
My kit fit very well except for the downpipe bracket also.
Make sure you get that downpipe bracket installed eventually or your putting pressure on the downpipe welds. I've been trouble free for over a year with the stock oil cooled turbo. Water cooled, you'll be fine.
Congratulations on the kit and good luck.
Make sure you get that downpipe bracket installed eventually or your putting pressure on the downpipe welds. I've been trouble free for over a year with the stock oil cooled turbo. Water cooled, you'll be fine.
Congratulations on the kit and good luck.

 09-16-2008, 05:57 PM
#20
Senior Member
teamNJCT
Fresh Crew
SL Member
iTrader: (1)

Join Date: Mar 2007
Location: Parsippany, NJ
Posts: 16,646
Originally Posted by tCtCtC
clean as flip.
i say take off the lower grille and let that FMIC shine
i say take off the lower grille and let that FMIC shine