


Custom Fiberglass Enclosure


Thread Starter

Joined: Mar 2005
Posts: 388
From: Toms River, NJ
 Custom Fiberglass Enclosure
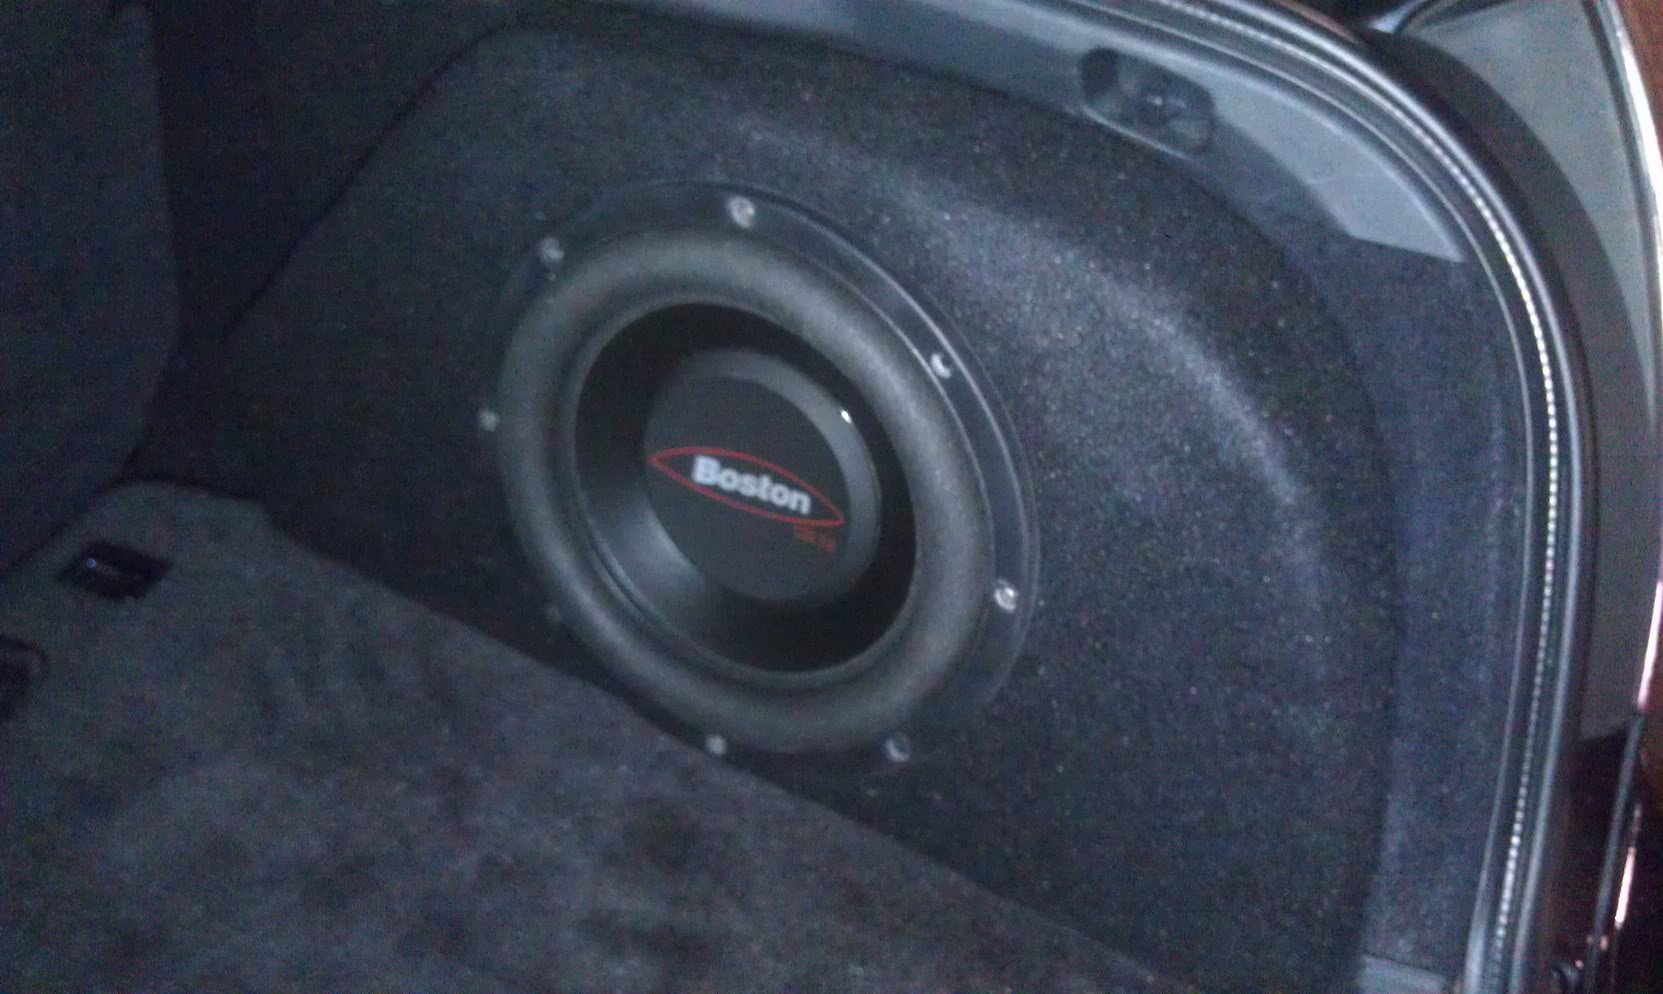
This is my first time fiberglassing anything and wanted to show you guys what I did and get your opinions on it. I used a bazooka sub enclosure and gutted the insides. I then cut a good portion of it off and went to town with the resin and cloth. This thing got heavy quick and is very strong. I finished it all up by wrapping it up in some carpet. It's holding a 10" Boston Acoustics G310-44 subwoofer and is being powered by a Rockford Fosgate P500-1bd.
I don't have many in progress shots since my hands were pretty busy the whole time.


I don't have many in progress shots since my hands were pretty busy the whole time.
Last edited by qbnlykwhoa; Mar 23, 2012 at 12:33 PM.


Thread Starter
Joined: Mar 2005
Posts: 388
From: Toms River, NJ

Very nice for a first attempt. From just the picture, and if I didn't know any better I'd believe it was a mass produced stealthbox or similar.
Starting with the bazooka tube gave you a nice even surround effect, and I bet it was a ton easier to get it spotted in the position you wanted.
Again, great work!
Starting with the bazooka tube gave you a nice even surround effect, and I bet it was a ton easier to get it spotted in the position you wanted.
Again, great work!
Thread Starter
Joined: Mar 2005
Posts: 388
From: Toms River, NJ
Well technically it was my second attempt. The first time the ring wasn't flush and my measurments were off some so I had a hard time screwing the sub into the enclosure. This time I triple measured everything and took my time. Well it took about two days to get it all done.
This is what it looked like the first time around, but it just wasn't good enough:
I will have to say that one of the hardest things is mixing the resin and hardener properly. During the morning it was cold and it was taking longer to cure giving me more time to work with it. Once the sun came out and it started to get warm the resin was hardening in the mixing cup before I could apply it all. I had to keep adjusting the amount of hardener I was using.
Now I have the itch to make another. Or maybe make some kick panels or sail tweet pods.
This weekend I will be deadening the hatch, trunk, doors, and rear panels as well as installing some Polk DB6501 components in the front.
This is what it looked like the first time around, but it just wasn't good enough:
I will have to say that one of the hardest things is mixing the resin and hardener properly. During the morning it was cold and it was taking longer to cure giving me more time to work with it. Once the sun came out and it started to get warm the resin was hardening in the mixing cup before I could apply it all. I had to keep adjusting the amount of hardener I was using.
Now I have the itch to make another. Or maybe make some kick panels or sail tweet pods.
This weekend I will be deadening the hatch, trunk, doors, and rear panels as well as installing some Polk DB6501 components in the front.

Member

Joined: Nov 2011
Posts: 37
Loving your box. Fiberglass is beyond my skill level at this point. Not to mention I lack a proper workspace and tools to attempt such a thing. I'll end up buying a similar one some day. I would just need to have a grille for mine which I can't do with my current old school Kicker Solo s10d and the boxes out there. Not to mention getting the propper airspace correct on a low tollerance speaker. When I update, I can progress.
Anyway... Keep us posted on this project. I love watching stereo projects. I'm going to be putting in some infinty components later this month, and I'm always curious to see where/how people mount the crossovers and tweeters in he door. Sooo pics of those things would help me out if you could.
Anyway... Keep us posted on this project. I love watching stereo projects. I'm going to be putting in some infinty components later this month, and I'm always curious to see where/how people mount the crossovers and tweeters in he door. Sooo pics of those things would help me out if you could.
Thread Starter
Joined: Mar 2005
Posts: 388
From: Toms River, NJ
Loving your box. Fiberglass is beyond my skill level at this point. Not to mention I lack a proper workspace and tools to attempt such a thing. I'll end up buying a similar one some day. I would just need to have a grille for mine which I can't do with my current old school Kicker Solo s10d and the boxes out there. Not to mention getting the propper airspace correct on a low tollerance speaker. When I update, I can progress.
Anyway... Keep us posted on this project. I love watching stereo projects. I'm going to be putting in some infinty components later this month, and I'm always curious to see where/how people mount the crossovers and tweeters in he door. Sooo pics of those things would help me out if you could.
Anyway... Keep us posted on this project. I love watching stereo projects. I'm going to be putting in some infinty components later this month, and I'm always curious to see where/how people mount the crossovers and tweeters in he door. Sooo pics of those things would help me out if you could.
There does seem to be a lack of DIY's or walkthroughs of the door panels for crossover installs. I will try my best to snap some shots when I do it. I usually end up getting so into it that I don't take any pictures just to finish faster. I wish I would have taken some pictures of the enclosure fabrication stages. I was so excited that I used every minute working on it and did not snap any shots.
.
Thread Starter
Joined: Mar 2005
Posts: 388
From: Toms River, NJ
Thread Starter
Joined: Mar 2005
Posts: 388
From: Toms River, NJ
Progressed a little this weekend, didn't have too much time...
Built a rack to mount the amps on and deadened the hatch and trunk floor.
Deadened real good behind the sub enclosure and all the way to the outer body panels. I only have 50 sq ft of Audio Technix using it conservatively. Still want to wrap the front doors. In the back alone I used about 20 sq ft.
I also deadened inside the enclosure a little just to try it out and the results sound great.
I took the door panel off and I was playing around with crossover location and I think I am going to mount them behind the kick panel/under dash area. It's easier and If I want to adjust the crossover I don't have to take the door panel off. Running the cable through the rubber grommet was another pain in the ___ until I realized you can unplug the cables and pull the grommet out. I only got one woofer in and wired it to radio power for now. Will hook the crossovers and other components up this weekend.
These are the pictures I have so far.
One thing I notice too is a high pitch squeal coming from the rockford amp. It's coming from the amp itself and not the speakers so I don't know if the distribution block is the culprit. You can't hear it from the front especially with the floor back on but I know it's there and wasn't there before.
Enough babble, here are some pictures...

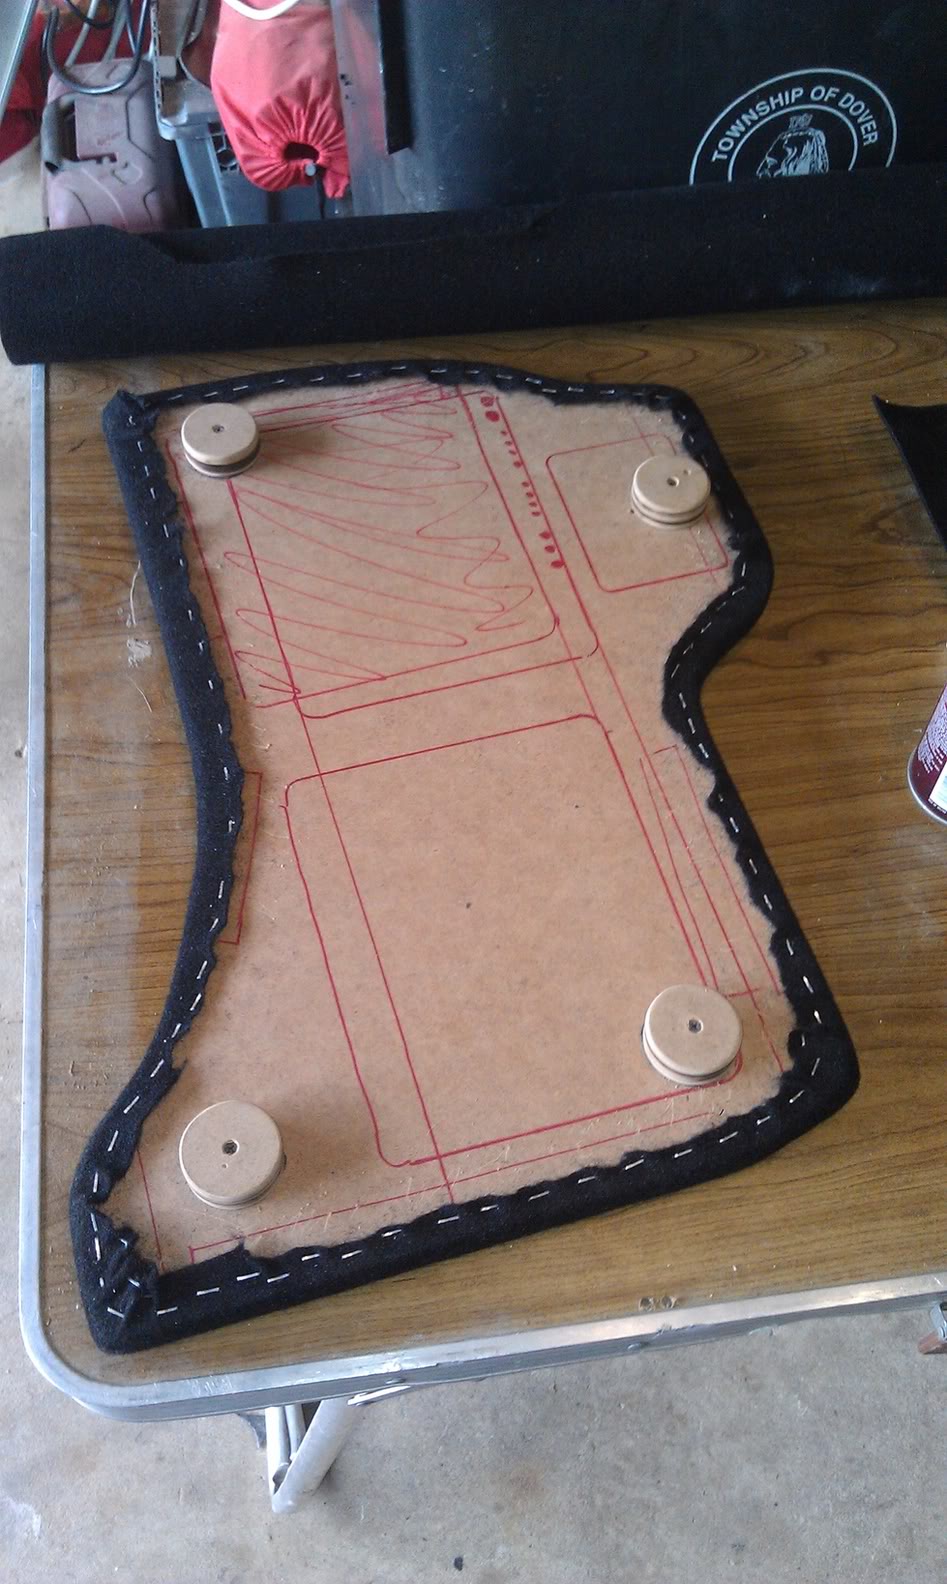
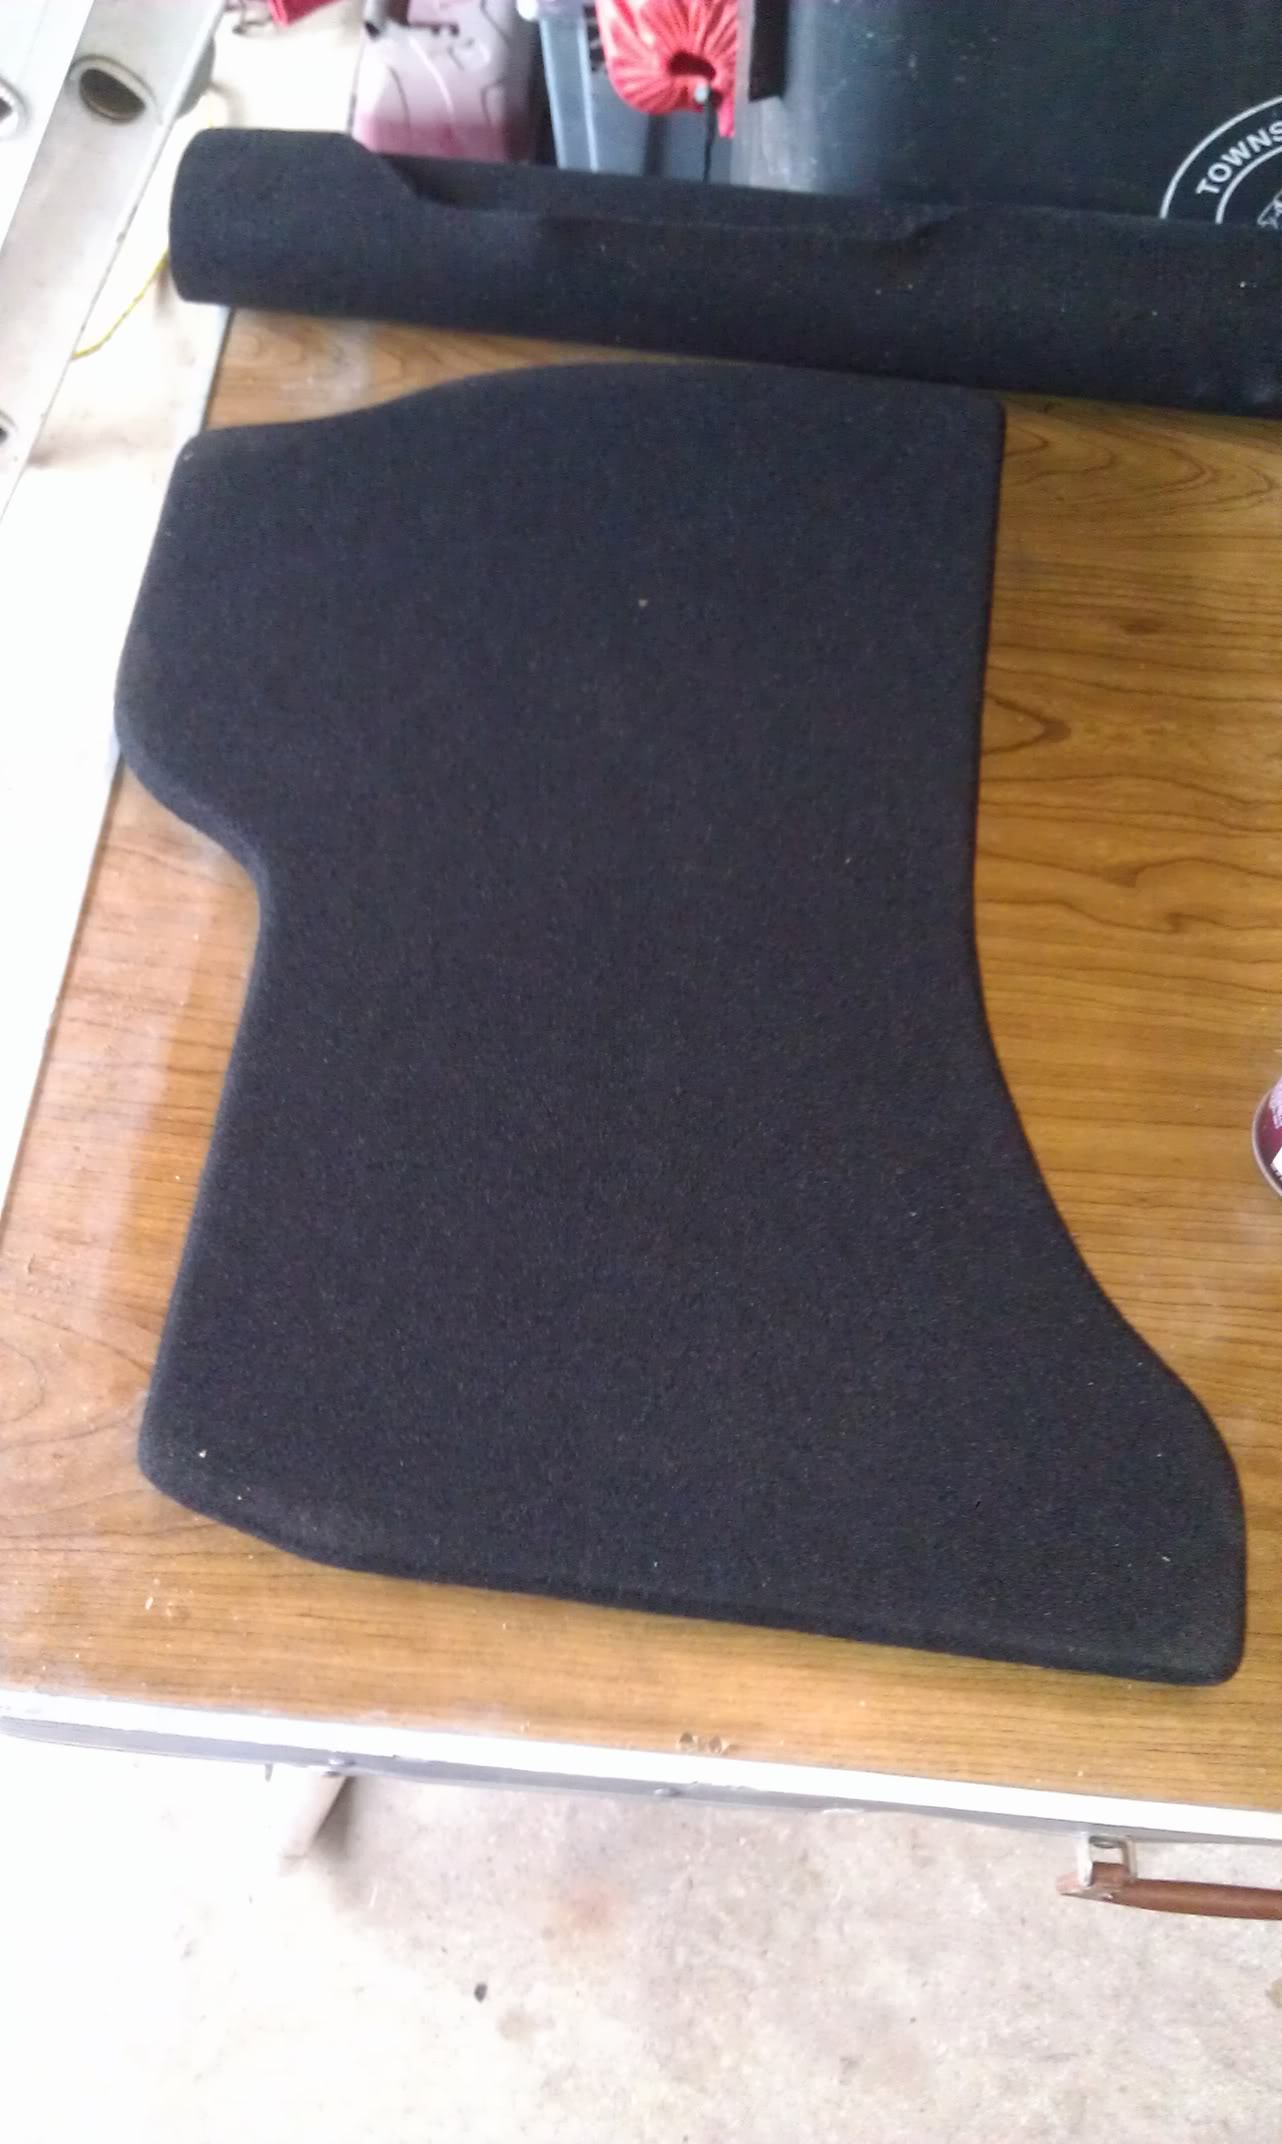
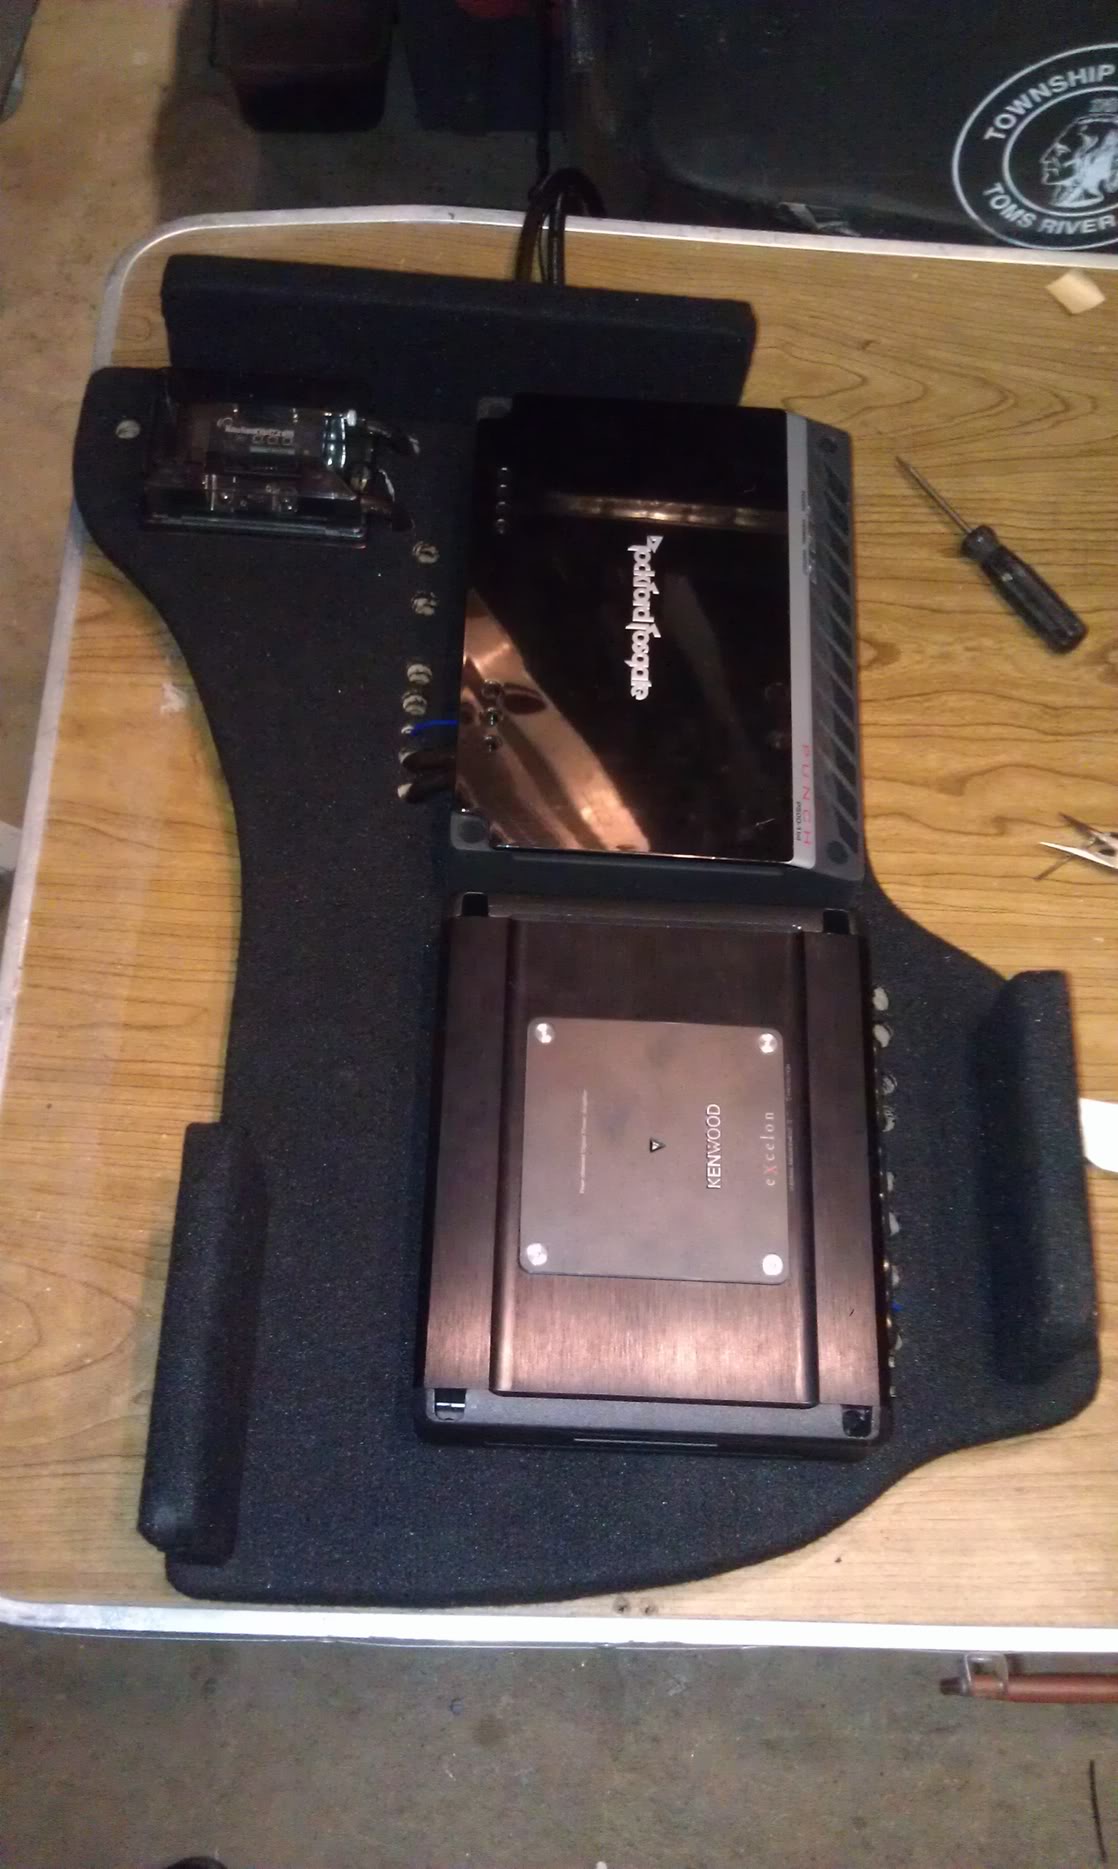
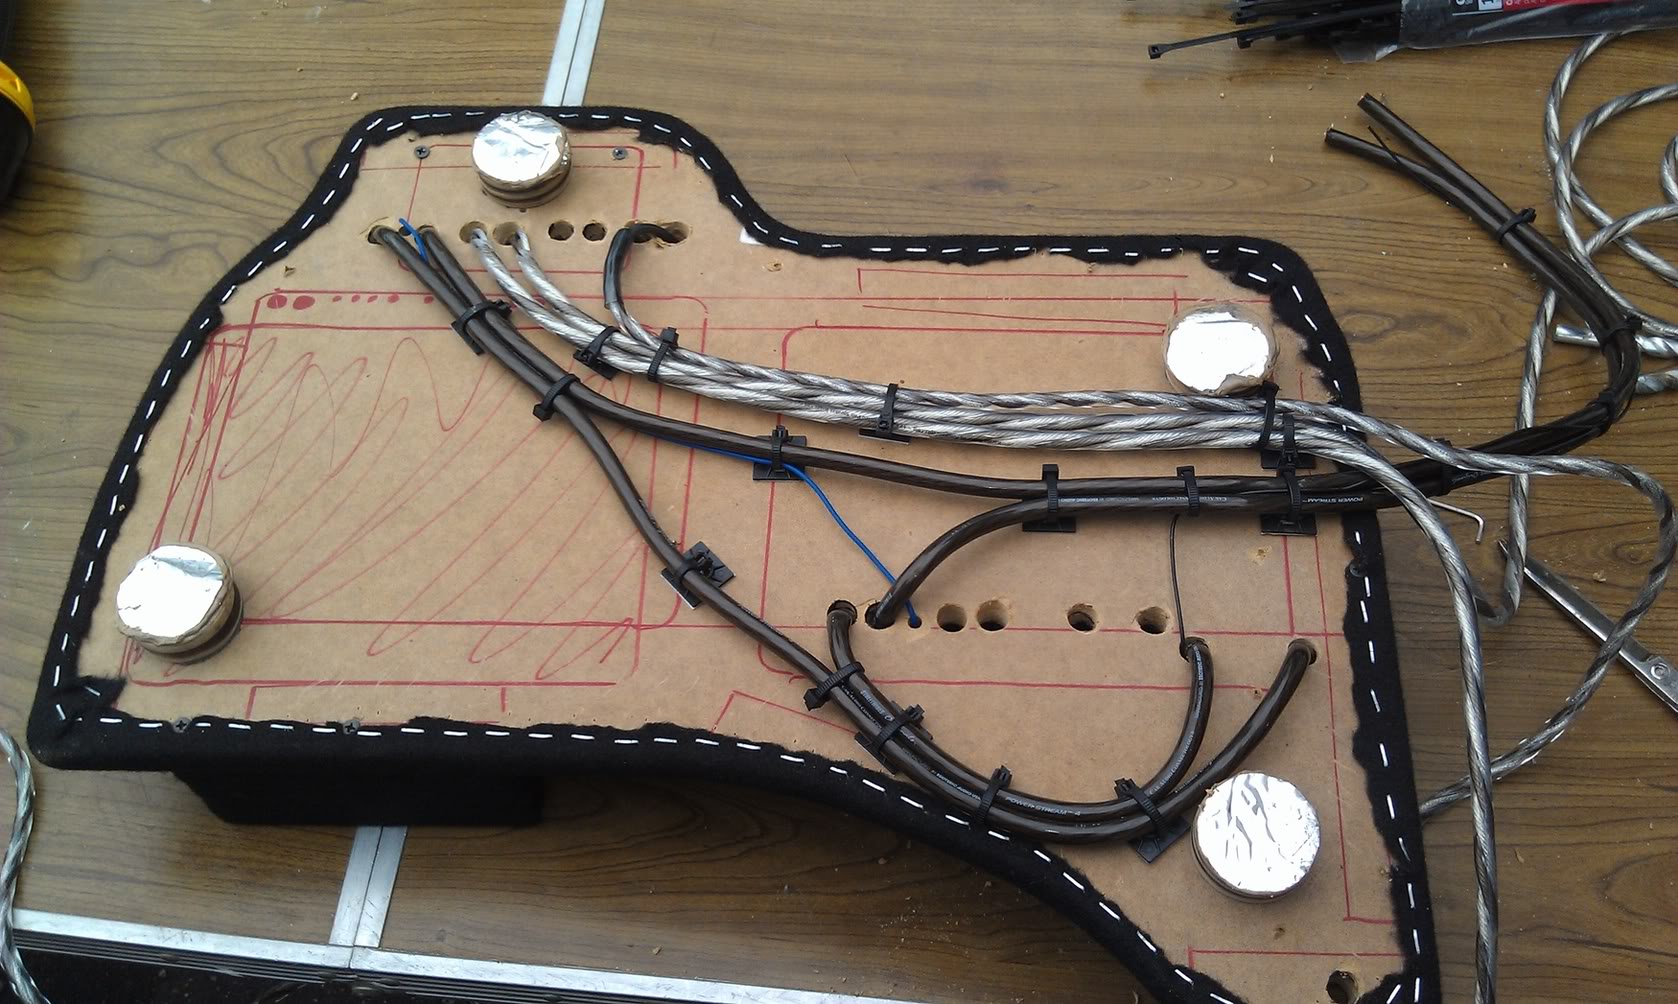
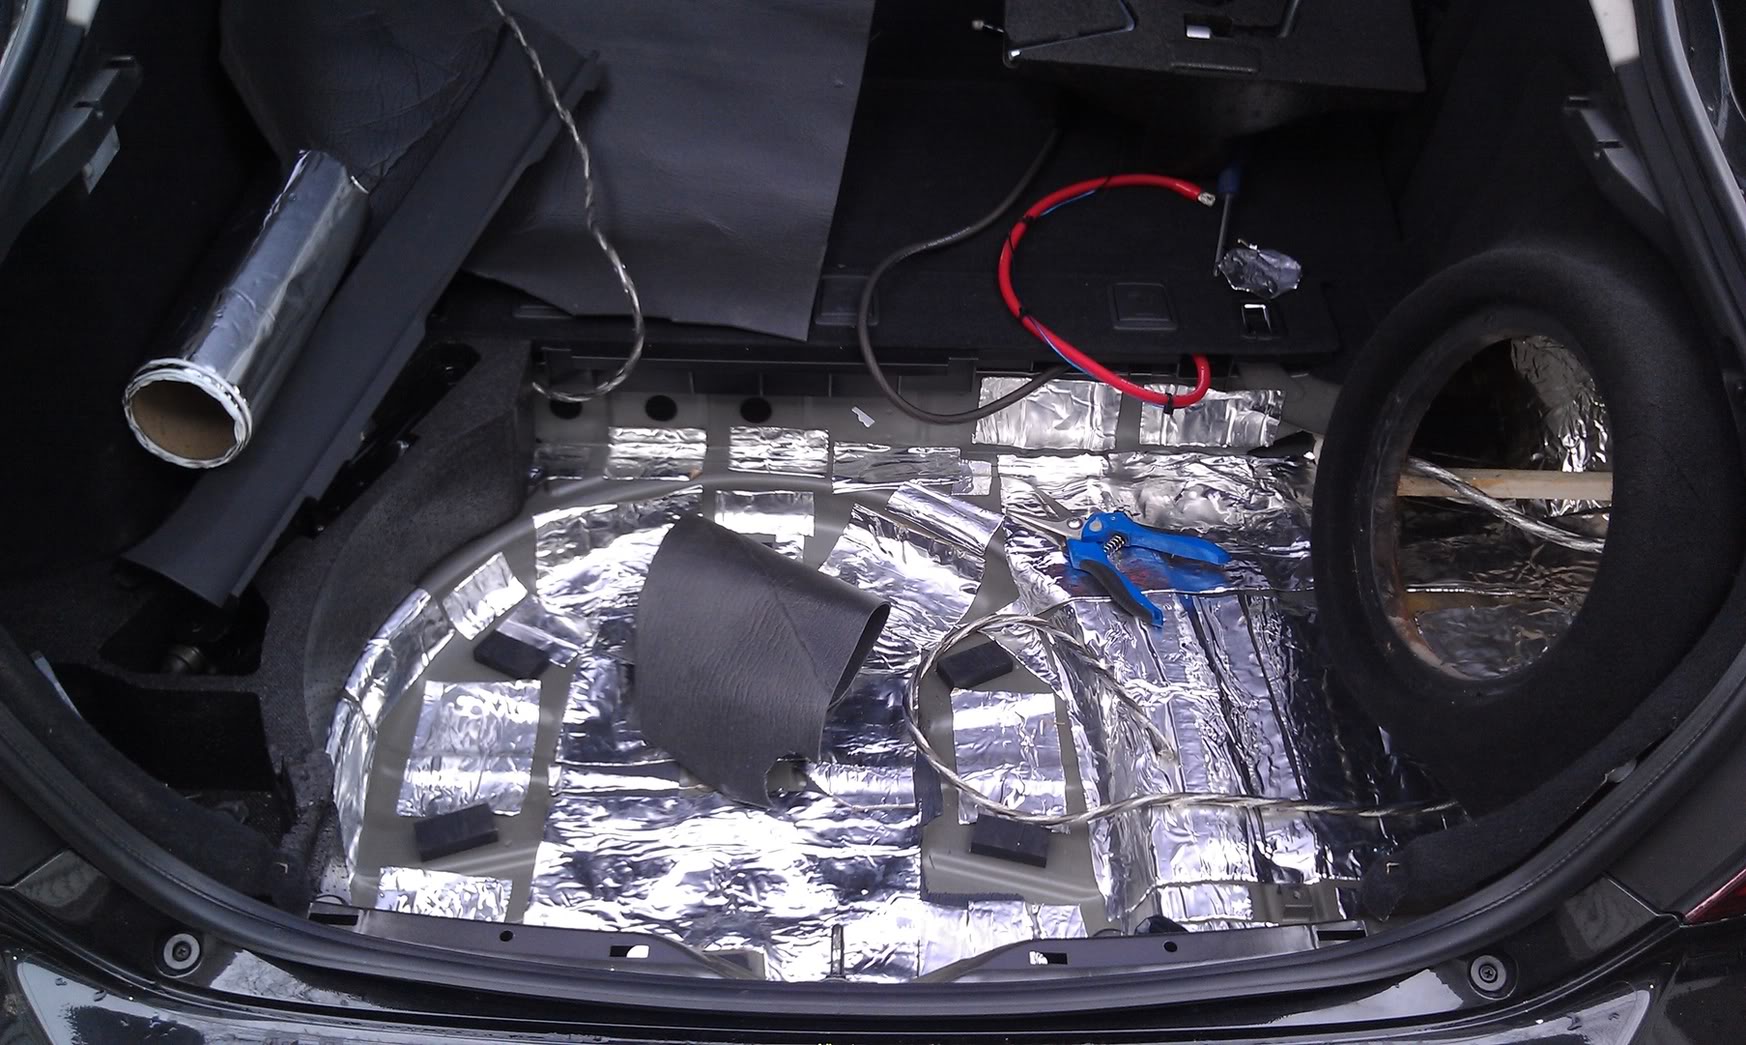
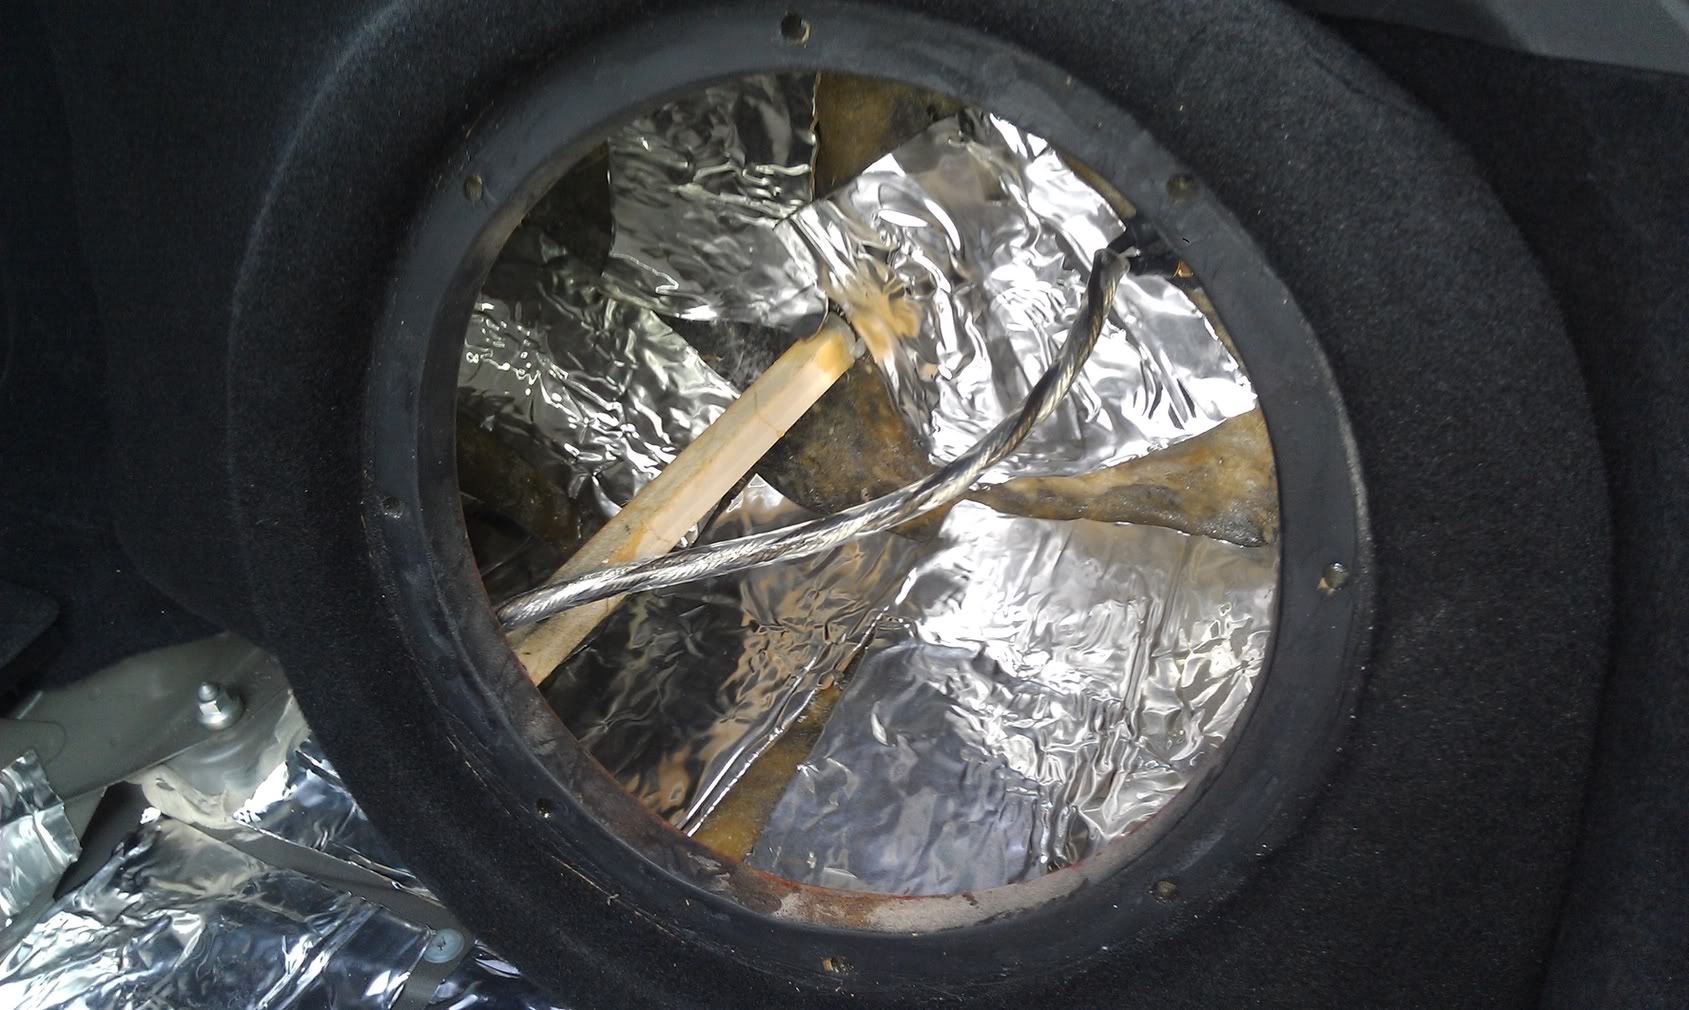
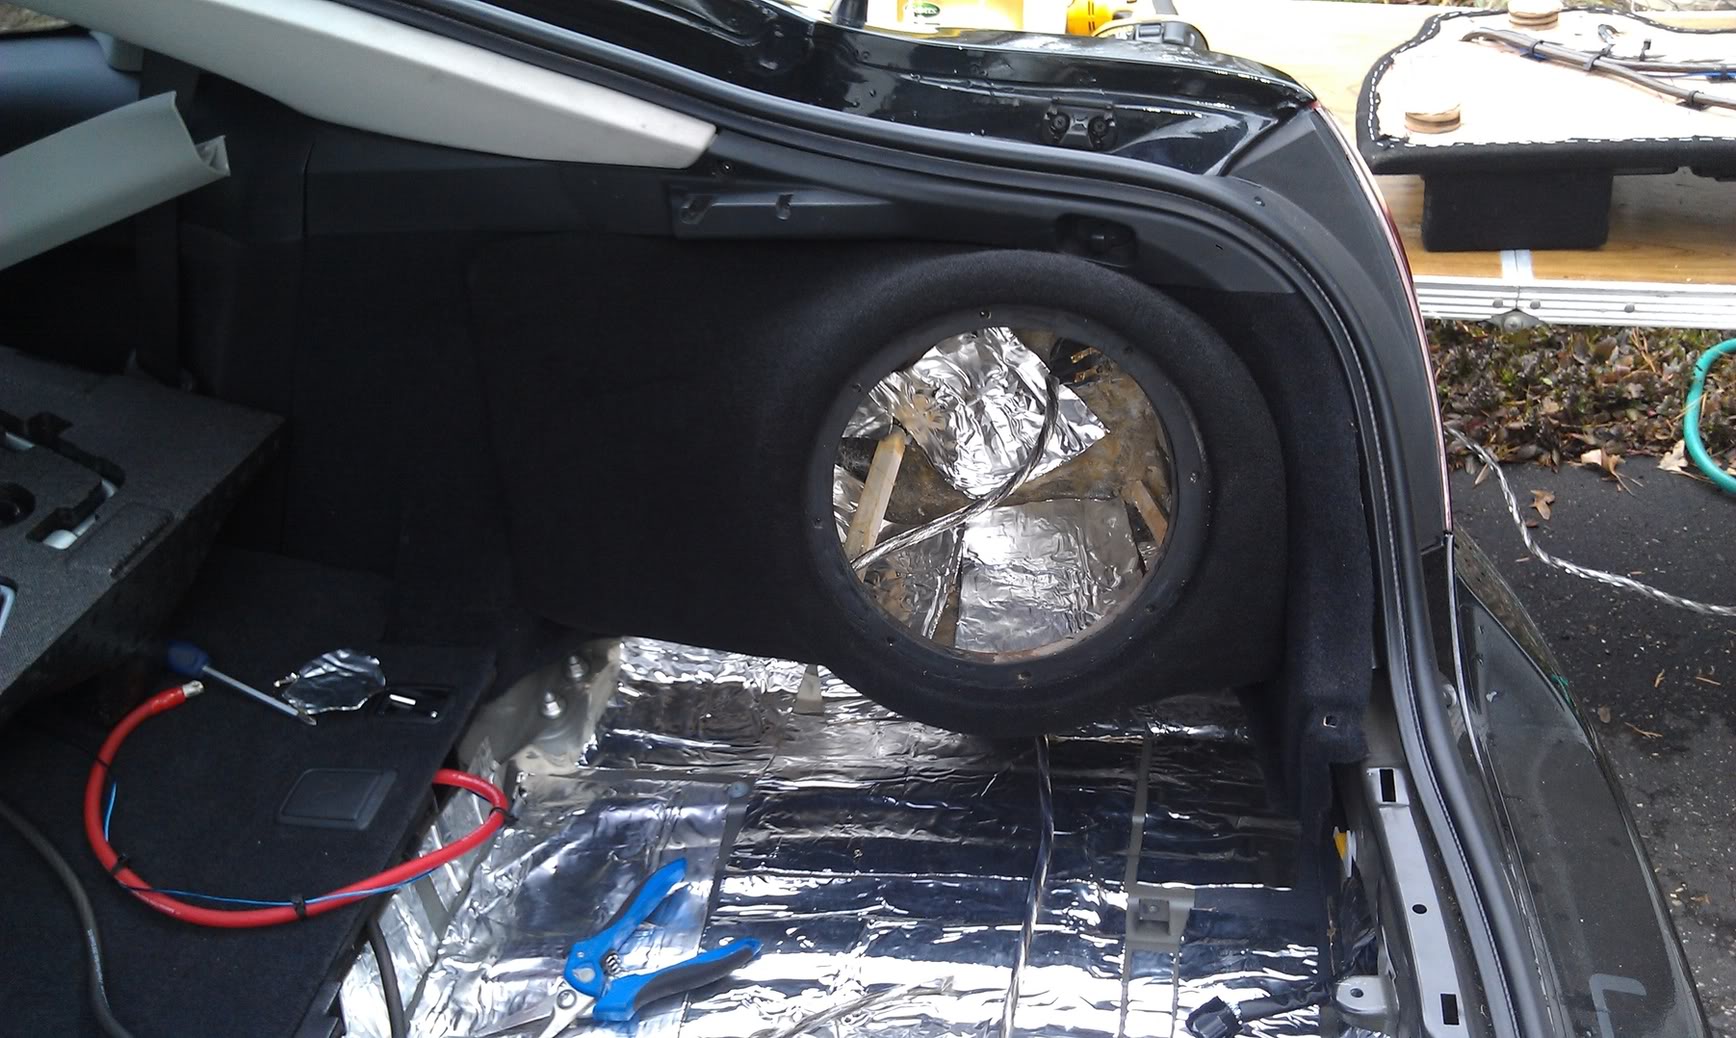
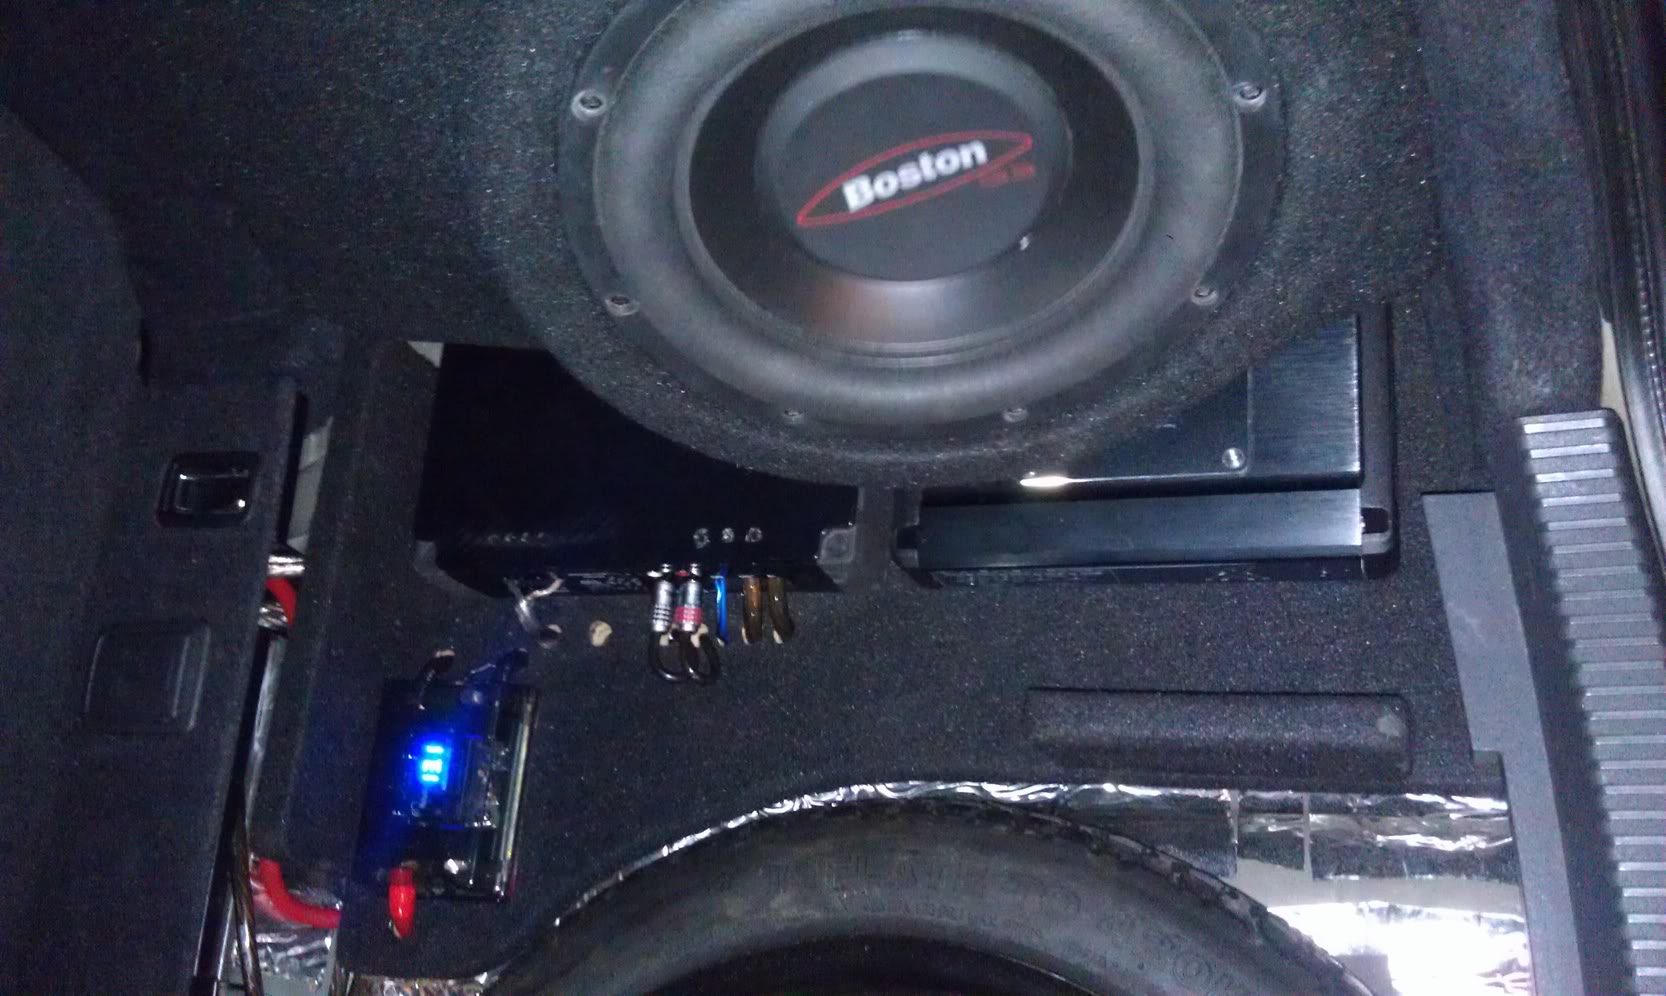

Built a rack to mount the amps on and deadened the hatch and trunk floor.
Deadened real good behind the sub enclosure and all the way to the outer body panels. I only have 50 sq ft of Audio Technix using it conservatively. Still want to wrap the front doors. In the back alone I used about 20 sq ft.
I also deadened inside the enclosure a little just to try it out and the results sound great.
I took the door panel off and I was playing around with crossover location and I think I am going to mount them behind the kick panel/under dash area. It's easier and If I want to adjust the crossover I don't have to take the door panel off. Running the cable through the rubber grommet was another pain in the ___ until I realized you can unplug the cables and pull the grommet out. I only got one woofer in and wired it to radio power for now. Will hook the crossovers and other components up this weekend.
These are the pictures I have so far.
One thing I notice too is a high pitch squeal coming from the rockford amp. It's coming from the amp itself and not the speakers so I don't know if the distribution block is the culprit. You can't hear it from the front especially with the floor back on but I know it's there and wasn't there before.
Enough babble, here are some pictures...


Thread Starter
Joined: Mar 2005
Posts: 388
From: Toms River, NJ
Thanks guys..
I started mouting the components and ran into some issues with the kenwood amp so right now they are running off of the HU. They sound very nice for just being powered by the HU. I decied to place the crossovers under dash above the kickpanels and just runt he cables into the doors. Makes like easier. Will have pics of that once they are all hooked up and functional.
In the mean time I started making some custom sails to mount the tweeters. The tweeters can swivel in the mount. Should have them finished, painted, and mounted by the weekend. Below you will see them covered in a layer of glazing spot putty. Thank god for my mouse sander
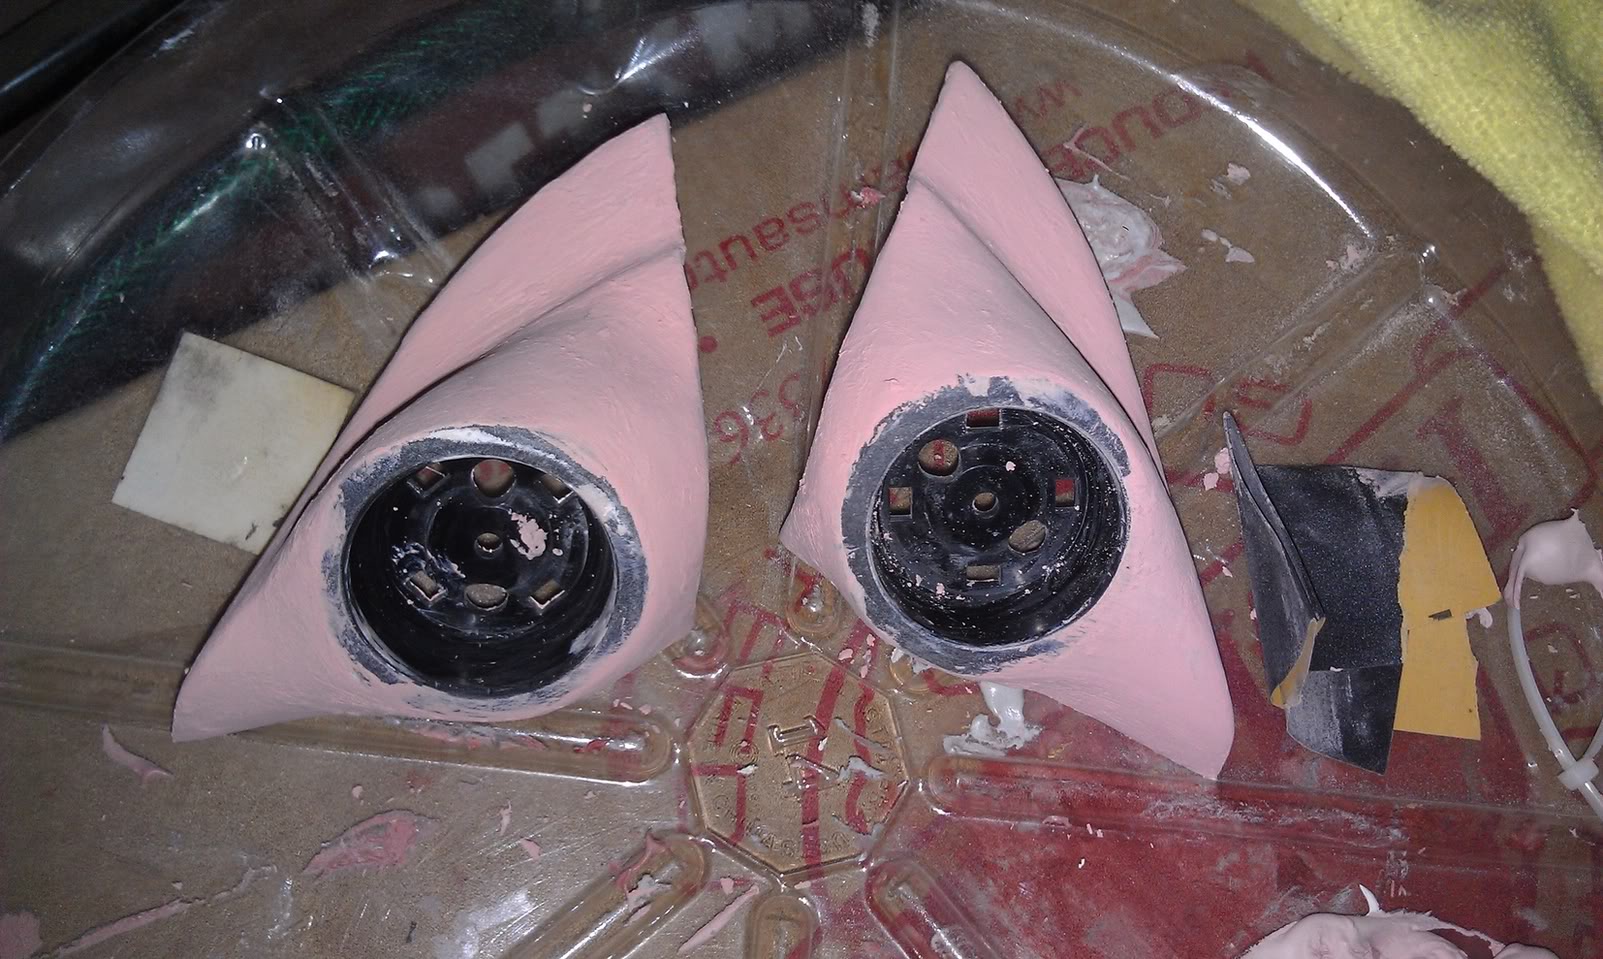
I started mouting the components and ran into some issues with the kenwood amp so right now they are running off of the HU. They sound very nice for just being powered by the HU. I decied to place the crossovers under dash above the kickpanels and just runt he cables into the doors. Makes like easier. Will have pics of that once they are all hooked up and functional.
In the mean time I started making some custom sails to mount the tweeters. The tweeters can swivel in the mount. Should have them finished, painted, and mounted by the weekend. Below you will see them covered in a layer of glazing spot putty. Thank god for my mouse sander


Thread
Thread Starter
Forum
Replies
Last Post
SloTC1
PPC: Engine / Drivetrain
14
Aug 16, 2018 02:45 PM
vi3tb0i09
PPC: Engine / Drivetrain
2
Sep 23, 2015 08:32 PM
