
Custom tC Bride Interior Build Thread


Thread Starter
Senior Member
SL Member
Joined: Mar 2006
Posts: 205
From: Kansas City
I thought it was a good idea for me to post a build thread on the work ive been doing over the Winter season, ive seen a lot of interior build threads on SL and so i pretty much tried to go out of the normal builds that some SL members do,
i wanted to build a interior that would last for years and years and that would never get old even 10 years from now. i wanted to build my idea around the JDM aftermarket scene.
Over the past 6 months ive been online doing research about the different styles that ppl are in to both over in Japan and in the US, i know the tC isnt offered in Japan however ive seen a lot of very nice built tC's that have JDM influence,
I had a lot of help from local friends in the local Scion Club of KCMO and a lot of help from SL members and CIB members and local car guys.
This project was a huge under taking because i not only had to learn how to uninstall all of it myself i had to find respectable shop in my area to do some of the upholstery work that i dont know how to do.
Once i found all the right parts and shops to do some of the work, i got started on the build.
I'm posting some pics of the work ive been doing, but i cant take all the credit, the rest goes to my friend Fernando Mojica (05 xB BSP) and North KC auto trim and my GF for dealing with my project and all the late nights
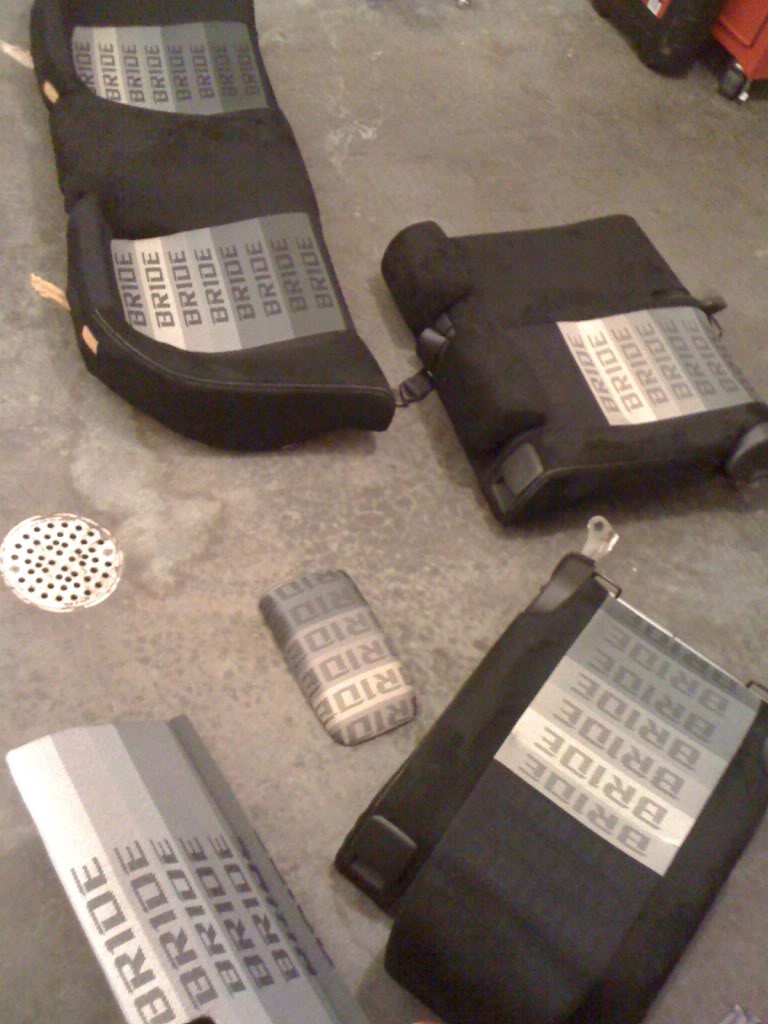
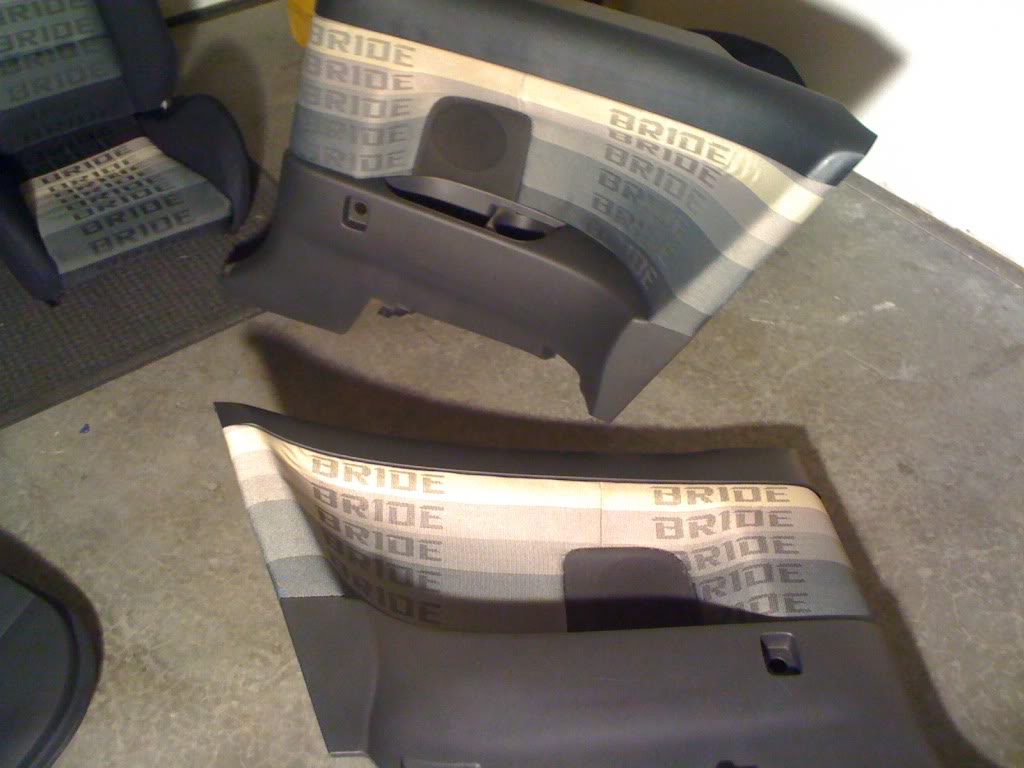
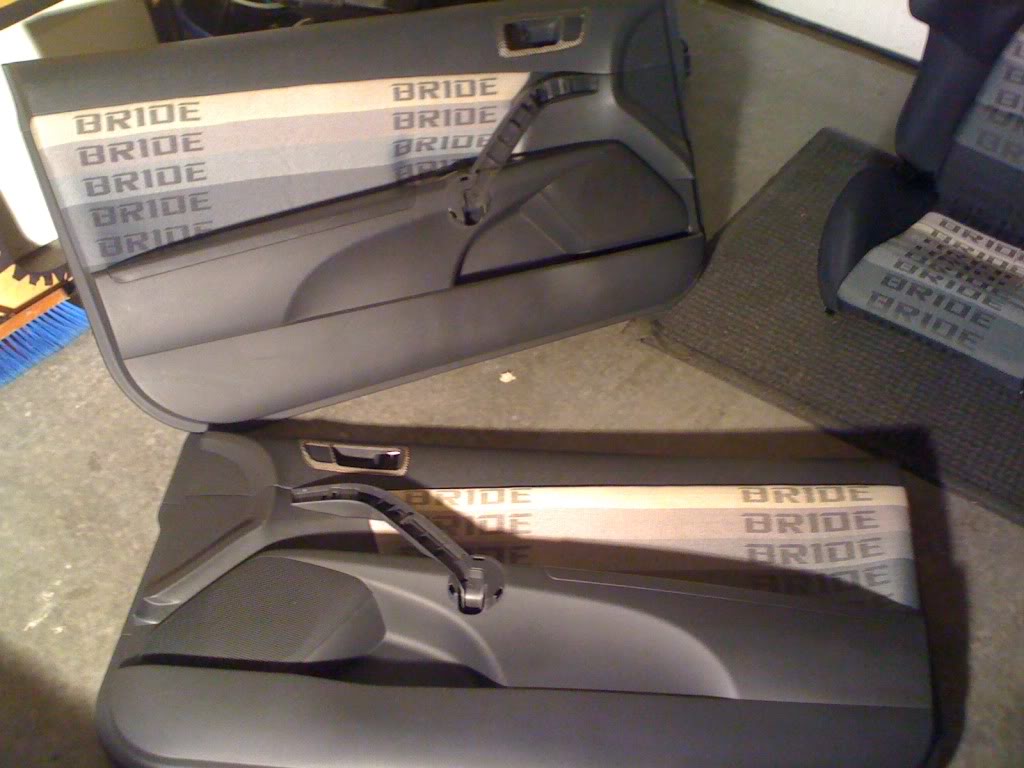
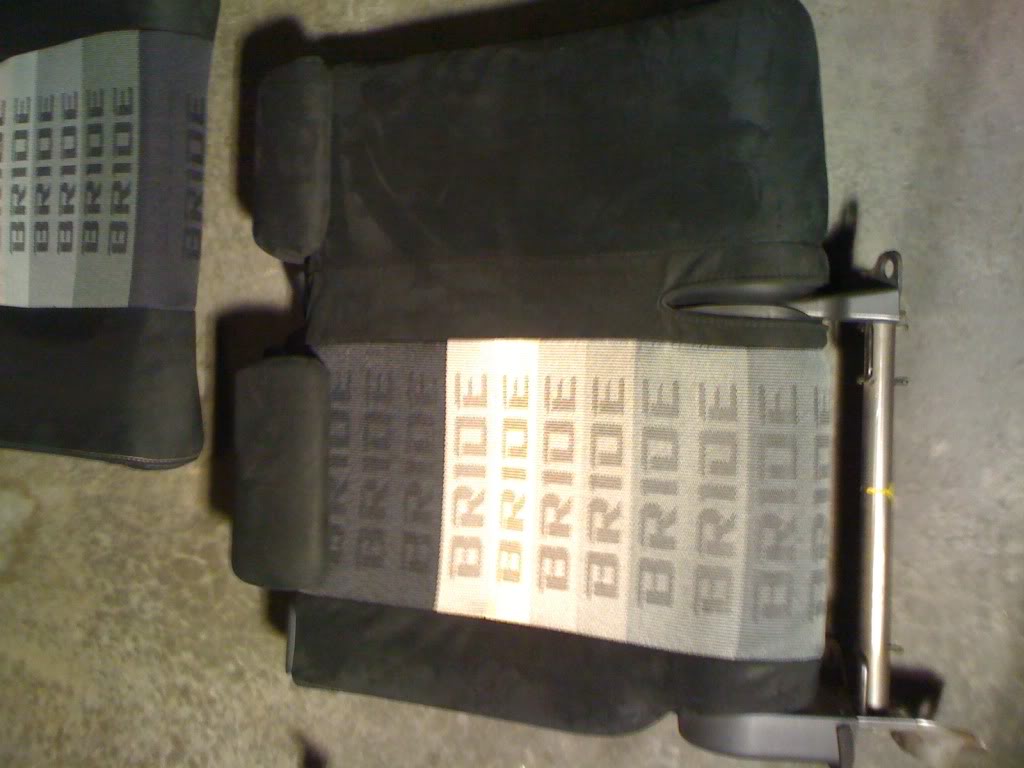
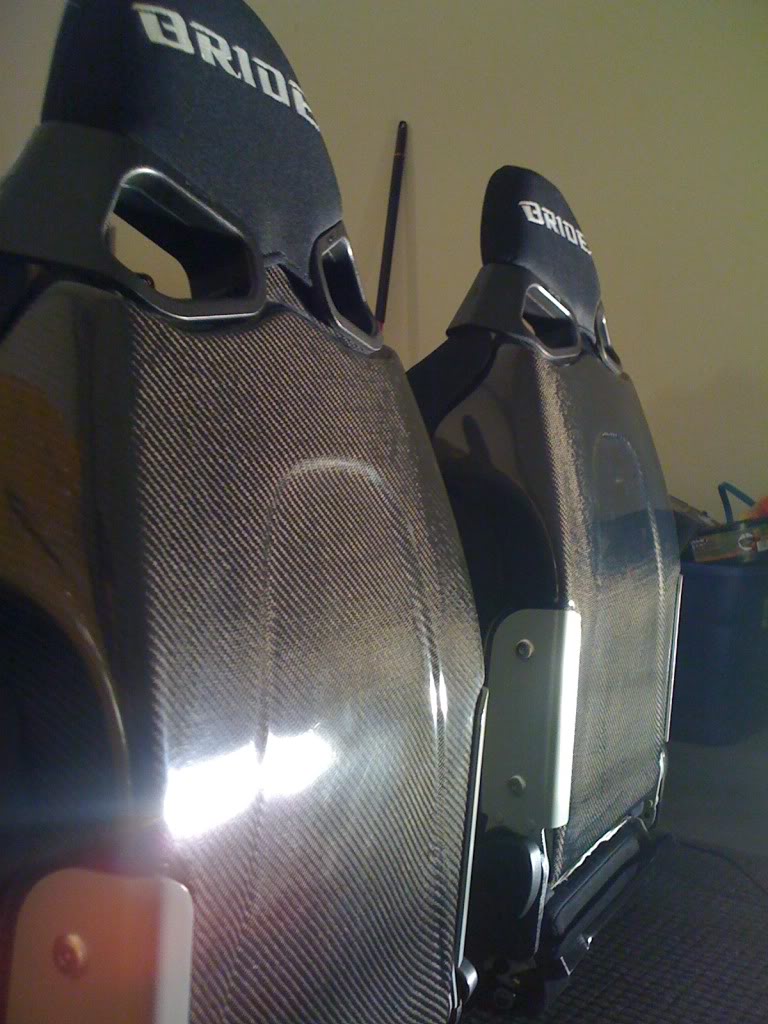
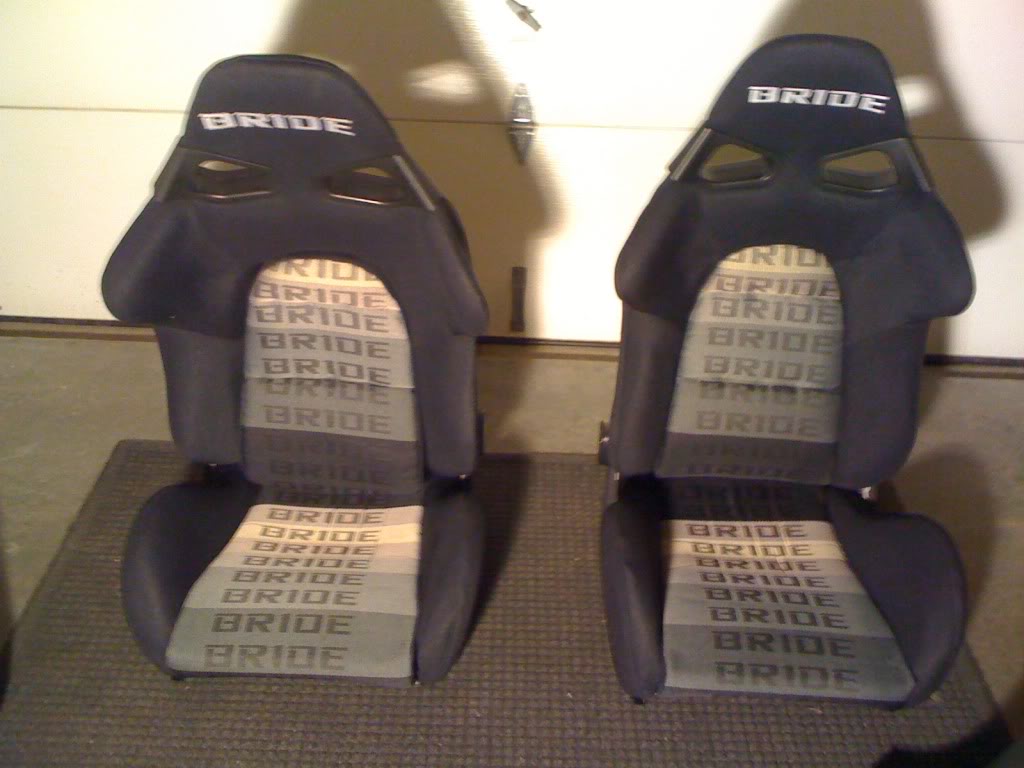
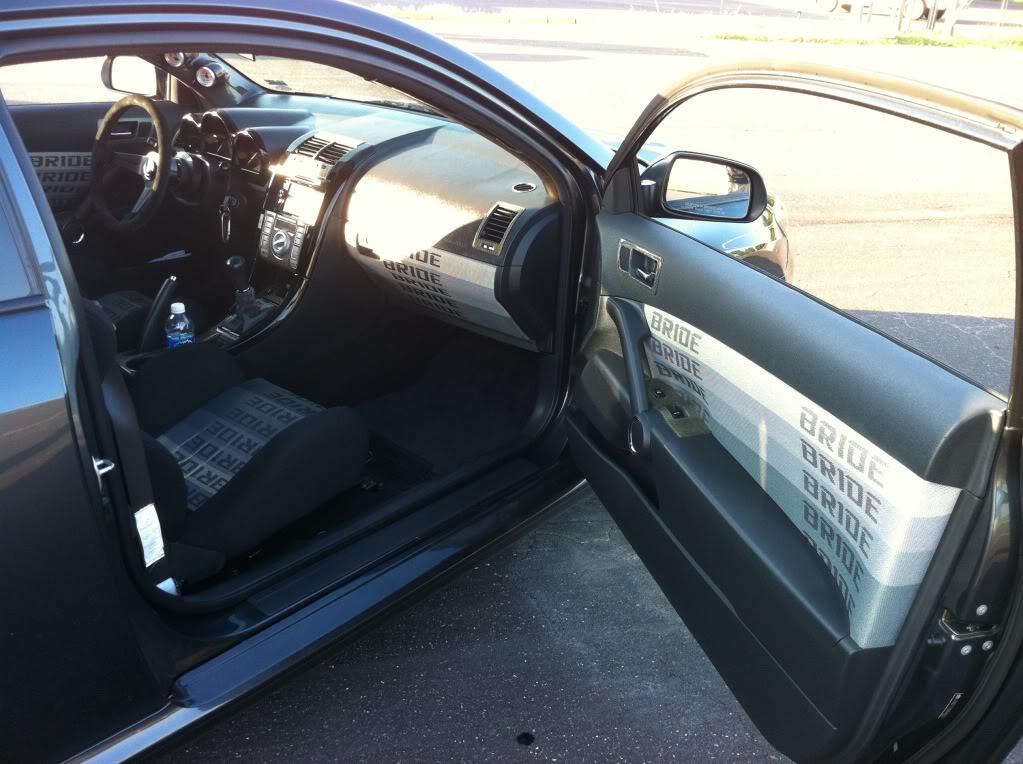
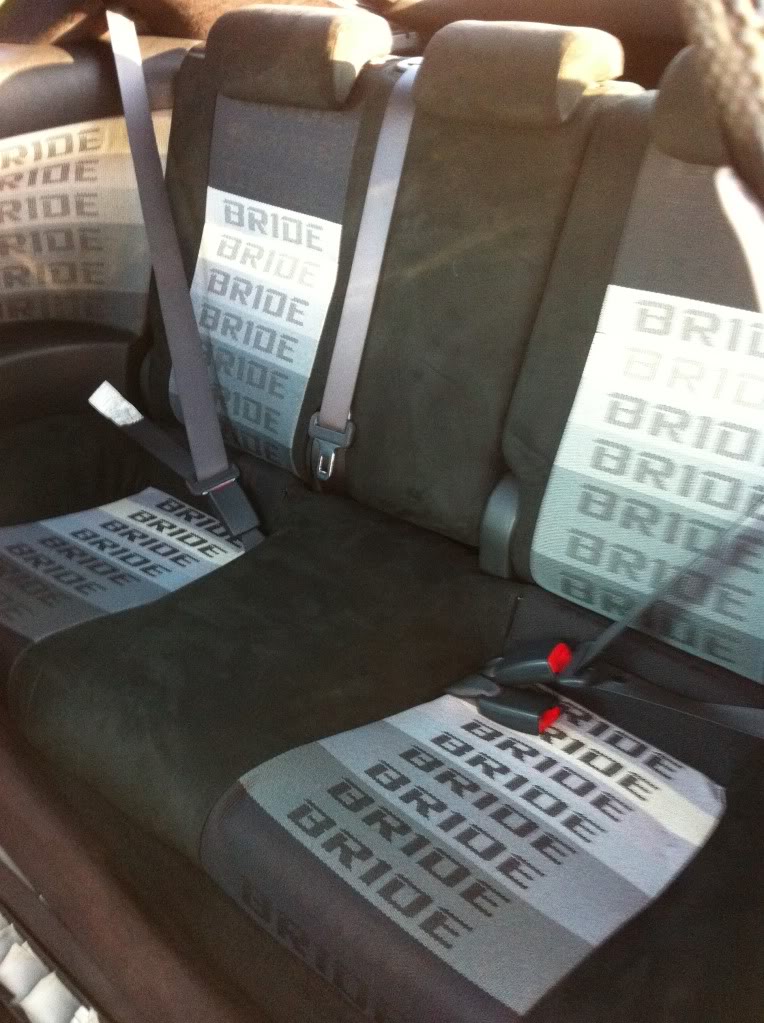
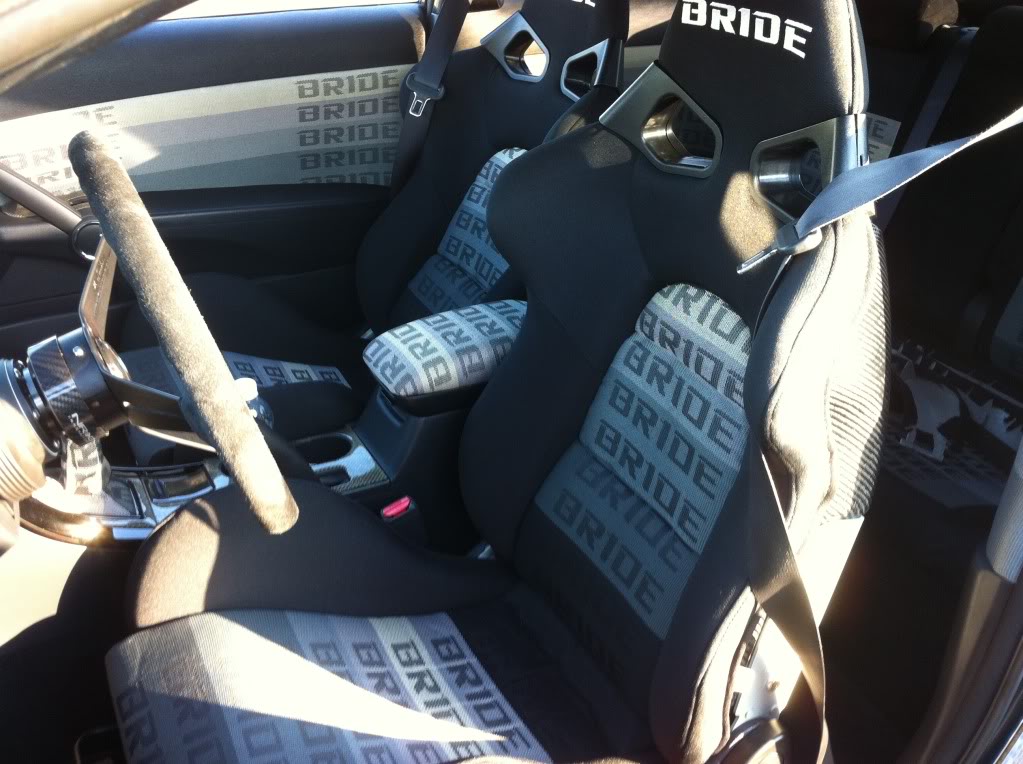
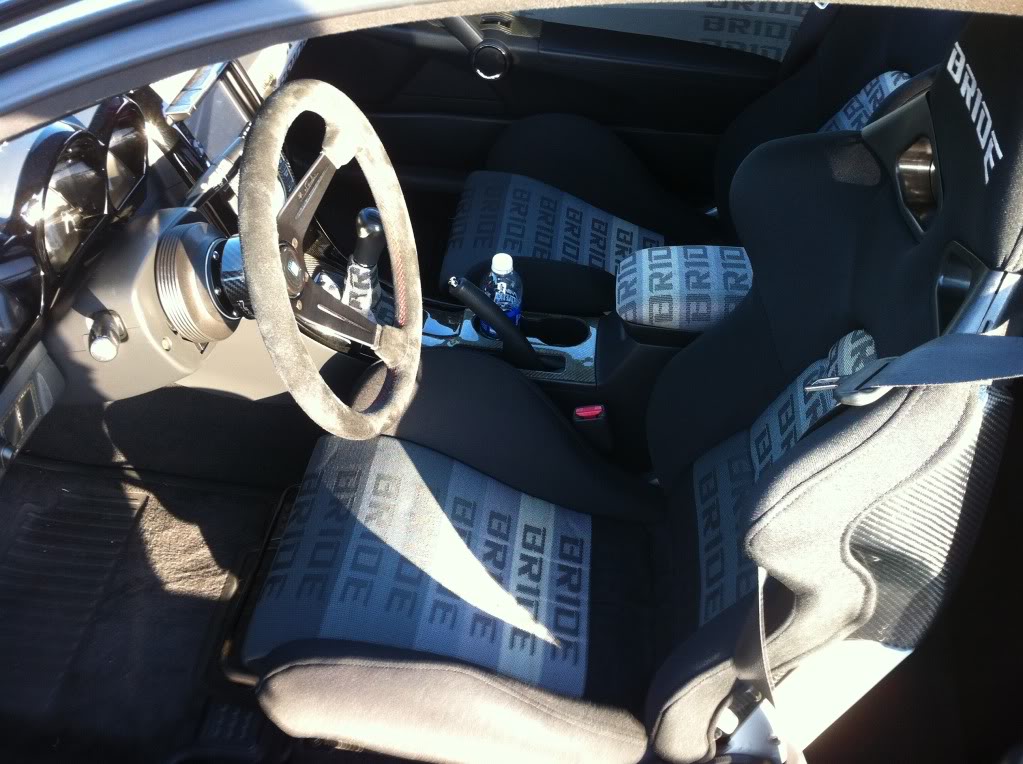
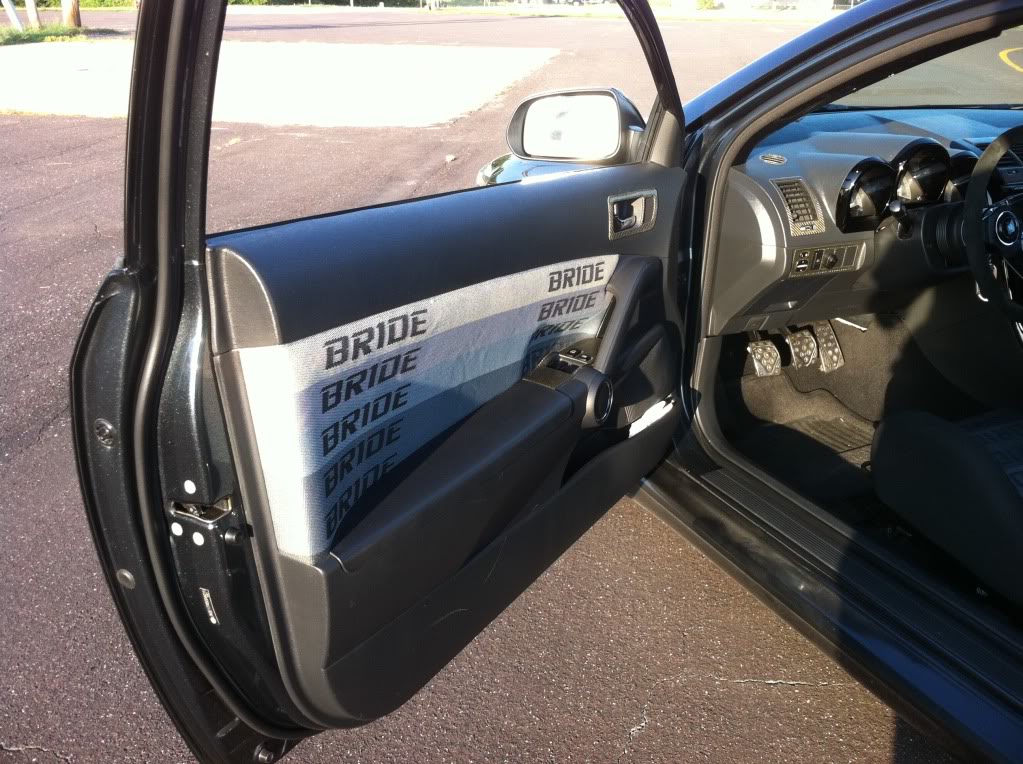
here are the pics
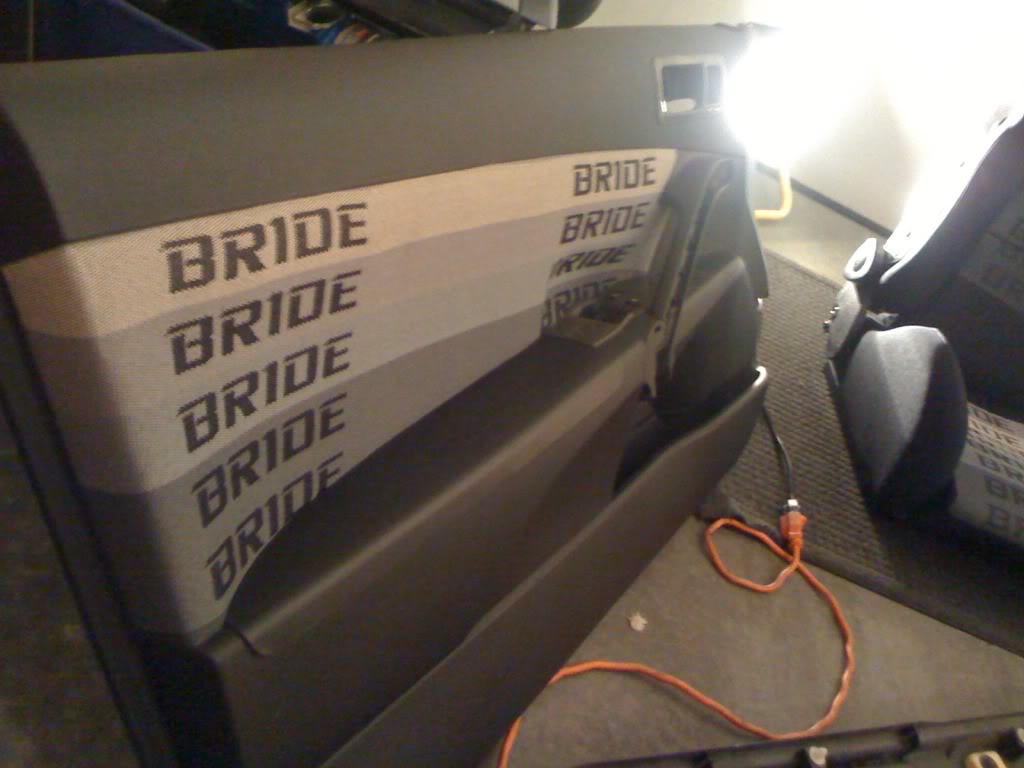
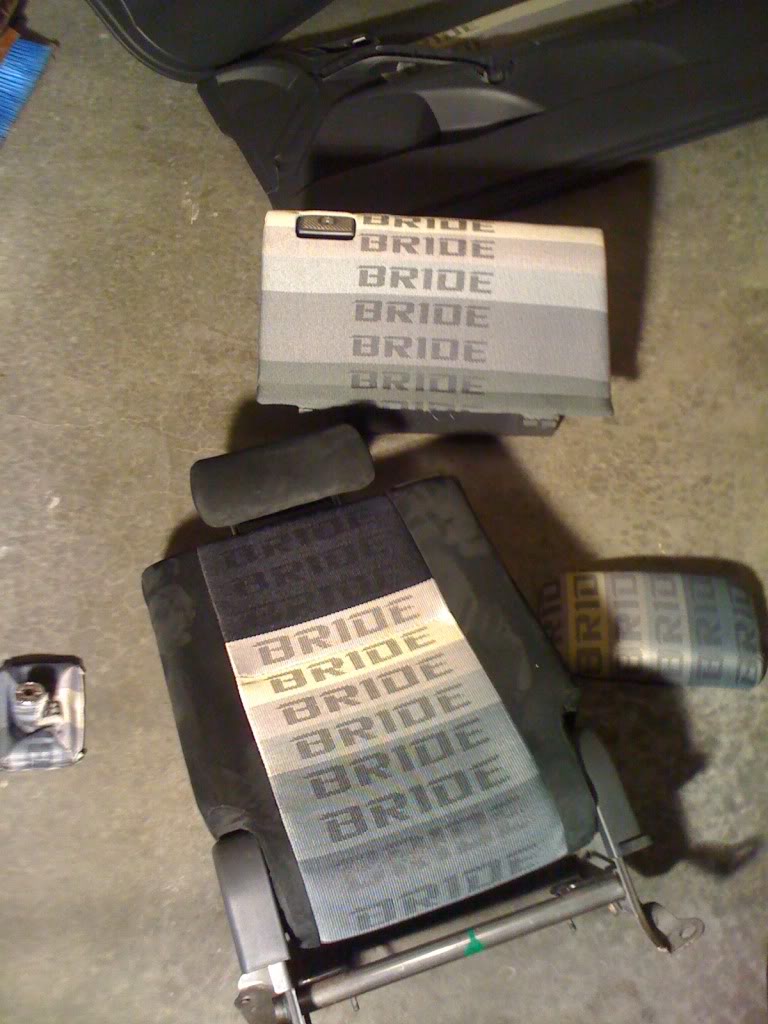
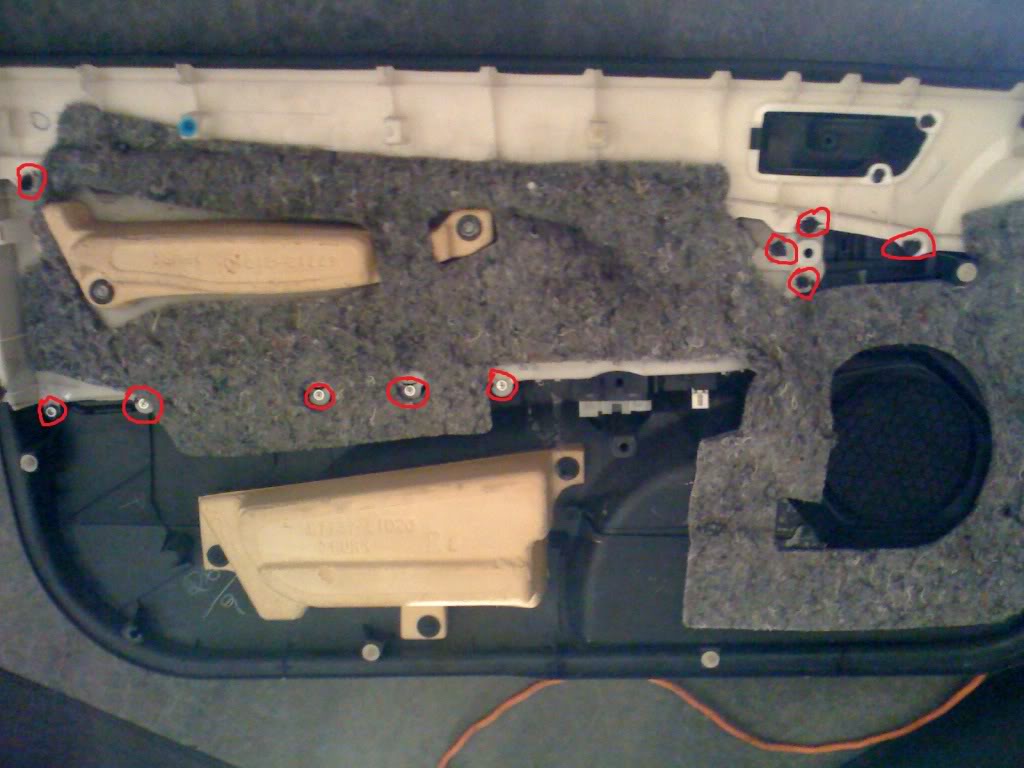
this next pic i added the red circles to indicate where the plastics rivets are on the rear of the panels, there are about 7 or 8 plastics rivets that had to be melted down
in order to reupholster the panels, I took them apart and Fernando put them back together after the Bride fabric had been applied.


Next stage is to do sound deadening were the rear seat is, im currently waiting on custom brackets from Wedge Engineering for the front seats
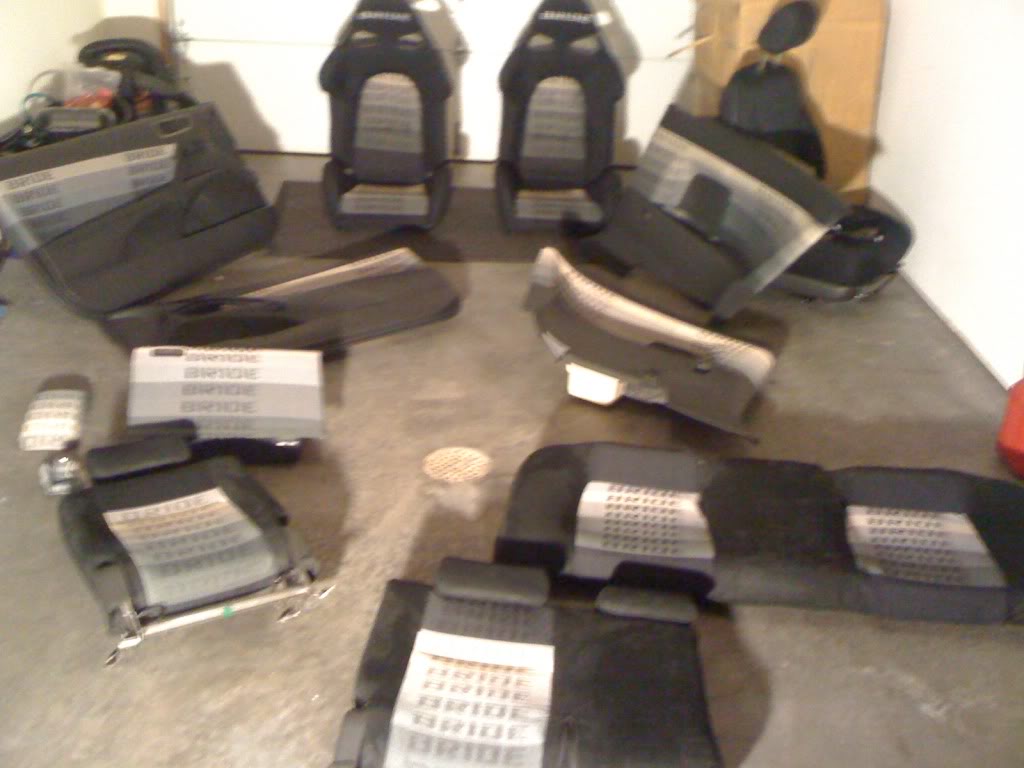
ok so it took me a little longer than i had expected to complete in new interior but after months and months of waiting and customizing and measuring, and headache after headache, its FINISHED!!!
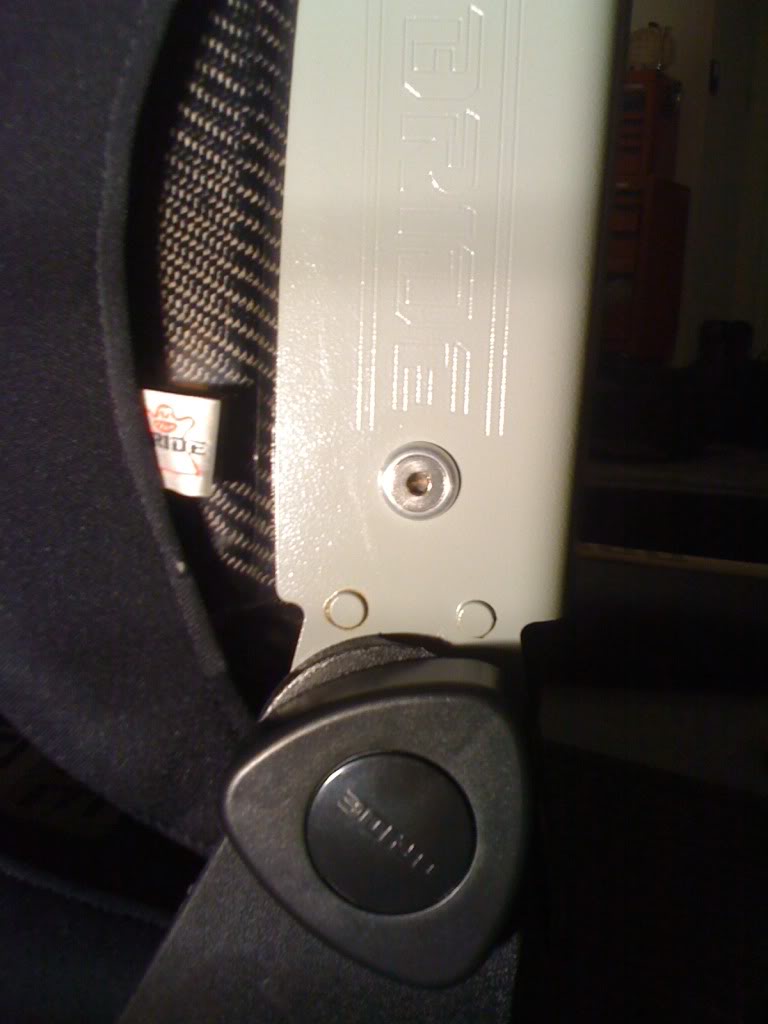
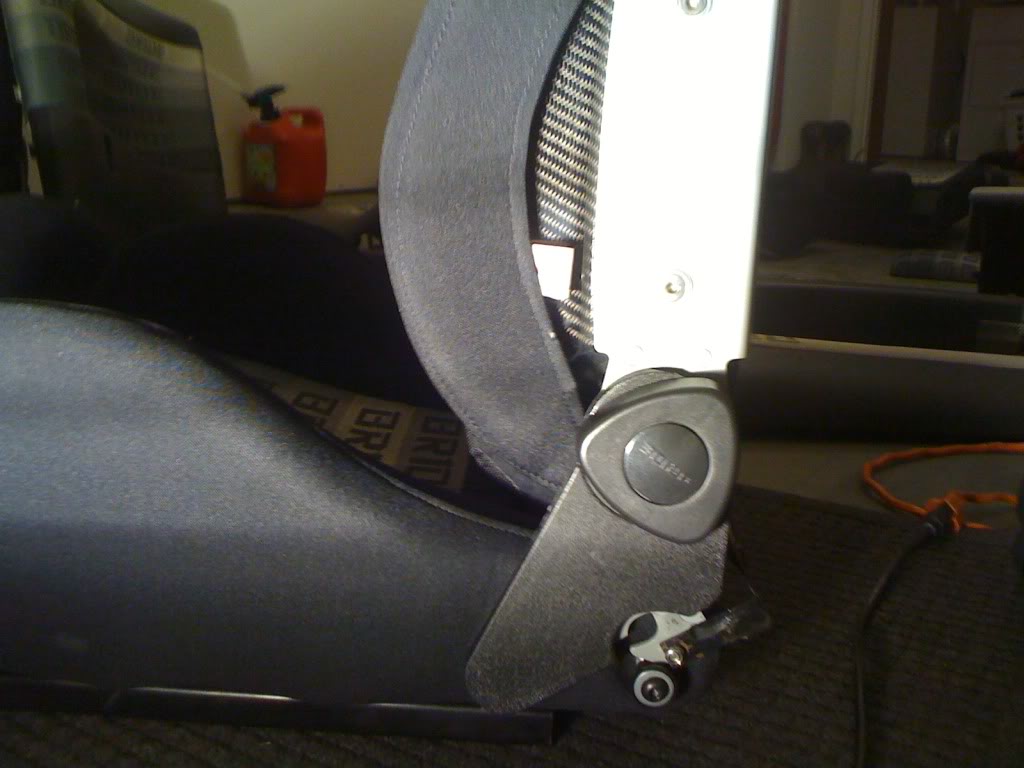
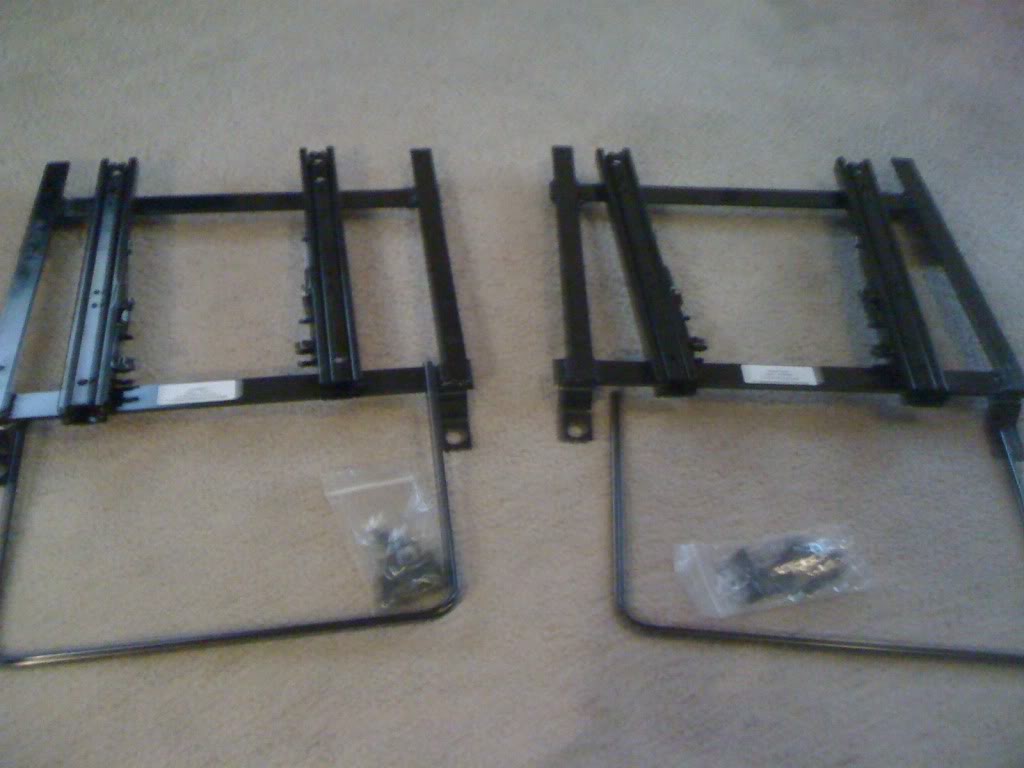
The last pic I took is of the famous Wedge Engineering Brackets and Recardo Sliders!!! Need to say Huge PITA!!!!!
Hope you guys like the work, let me know what you think.
i wanted to build a interior that would last for years and years and that would never get old even 10 years from now. i wanted to build my idea around the JDM aftermarket scene.
Over the past 6 months ive been online doing research about the different styles that ppl are in to both over in Japan and in the US, i know the tC isnt offered in Japan however ive seen a lot of very nice built tC's that have JDM influence,
I had a lot of help from local friends in the local Scion Club of KCMO and a lot of help from SL members and CIB members and local car guys.
This project was a huge under taking because i not only had to learn how to uninstall all of it myself i had to find respectable shop in my area to do some of the upholstery work that i dont know how to do.
Once i found all the right parts and shops to do some of the work, i got started on the build.
I'm posting some pics of the work ive been doing, but i cant take all the credit, the rest goes to my friend Fernando Mojica (05 xB BSP) and North KC auto trim and my GF for dealing with my project and all the late nights
here are the pics
this next pic i added the red circles to indicate where the plastics rivets are on the rear of the panels, there are about 7 or 8 plastics rivets that had to be melted down
in order to reupholster the panels, I took them apart and Fernando put them back together after the Bride fabric had been applied.
Next stage is to do sound deadening were the rear seat is, im currently waiting on custom brackets from Wedge Engineering for the front seats
ok so it took me a little longer than i had expected to complete in new interior but after months and months of waiting and customizing and measuring, and headache after headache, its FINISHED!!!
The last pic I took is of the famous Wedge Engineering Brackets and Recardo Sliders!!! Need to say Huge PITA!!!!!
Hope you guys like the work, let me know what you think.
Last edited by MR_LUV; Dec 4, 2017 at 06:53 PM. Reason: typos

I think I would've gone with a different color, however, mentioning that you wanted the design to be timeless I suppose a more neutral color was fitting. Awesome idea! Looks like a quality build with no expenses spared, good job!


Thread Starter
Senior Member
SL Member
Joined: Mar 2006
Posts: 205
From: Kansas City
thanks guys for the comments, i had a interior shop lay all the fabric for the panels, the glove box idea was a last minute idea,i actually had to order more bride fabric so it took an additional three week cuz of shipping and install time.
i actually didnt wrap any of it myself, i just took apart the panels which come apart is three sections.
as for the glove box pics ill post more today, Kenny at NKC Auto Trim really did a great job on the glove box
i actually didnt wrap any of it myself, i just took apart the panels which come apart is three sections.
as for the glove box pics ill post more today, Kenny at NKC Auto Trim really did a great job on the glove box
Last edited by MR_LUV; Dec 4, 2017 at 06:56 PM.
Thread Starter
Senior Member
SL Member
Joined: Mar 2006
Posts: 205
From: Kansas City
to answer your question chrisb319, the installer had to make a form or mold if you will of cardboard to get the edges around the handle of the glove box and he used a round molding tool for the outside edges


Thread Starter
Senior Member
SL Member
Joined: Mar 2006
Posts: 205
From: Kansas City
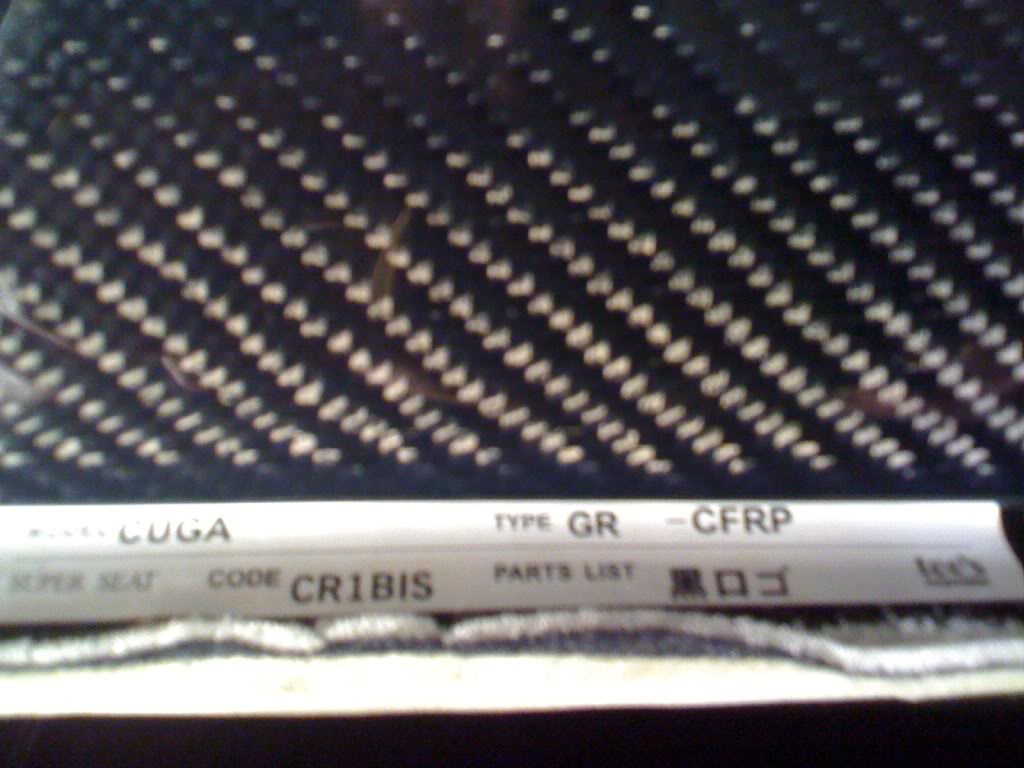
Sorry guys been away for a bit, i bought the fabric on two different sites, nengunmotorsports.com and a bride wholesaler of ebay, i was kind of worried about the quality with the fabric but it all turned out to be legit fabric,
horizontal cut with thin padding on the back like it should be, half way thru the reupholstering install i had to order more fabric thru Nengun, so all in all $400 worth of fabric plus the reupholstering price,
still waiting on seat brackets/ sliders from wedge they were on a month back order from Germany, i guess Recaro is having trouble keeping up with orders.
Last edited by MR_LUV; Dec 4, 2017 at 06:58 PM.


