


DIY Walkthru in progress--tC Light up door sills.


Thread Starter
Senior Member


Scikotics
SL Member
Joined: Sep 2005
Posts: 1,990
From: Orlando, FL
 DIY Walkthru in progress--tC Light up door sills.
Supplies needed
Drill bit
Door sills
connectors
Prepping the area
First you remove the factory door sills because these are replacement pieces.
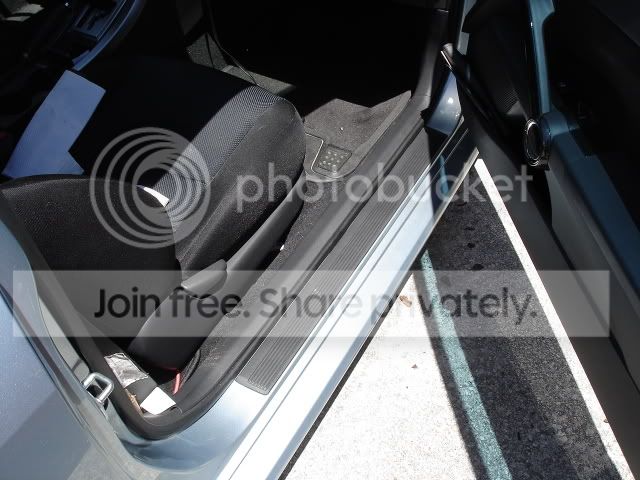
Before
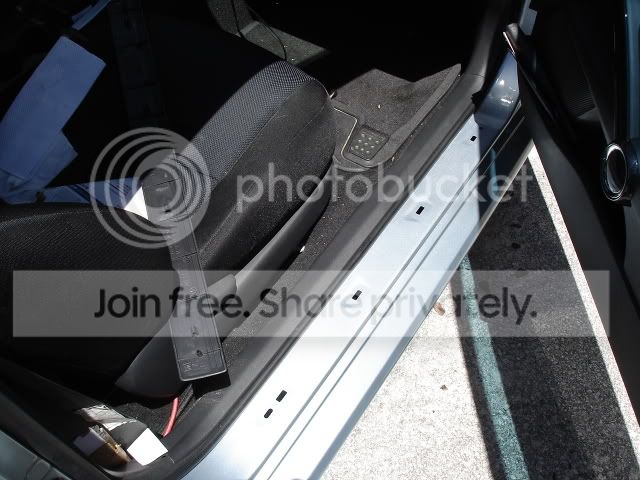
After
You will need to lift the rubber weather striping, and the interior door sill in order to run the wires.
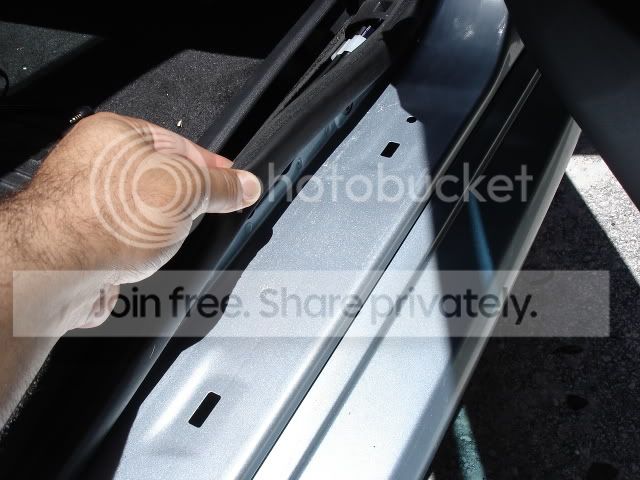
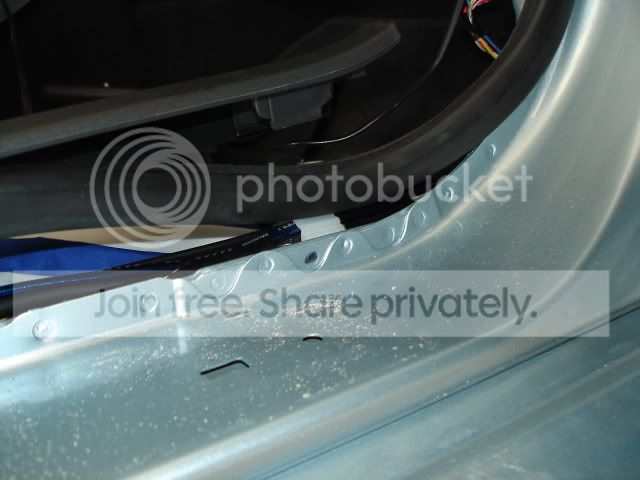
Note the black dot in the picture below. This is where you will drill a small hole to run the wiring into the car. The door sills are placed to give you an idea where the hole should be in relation to the sills.
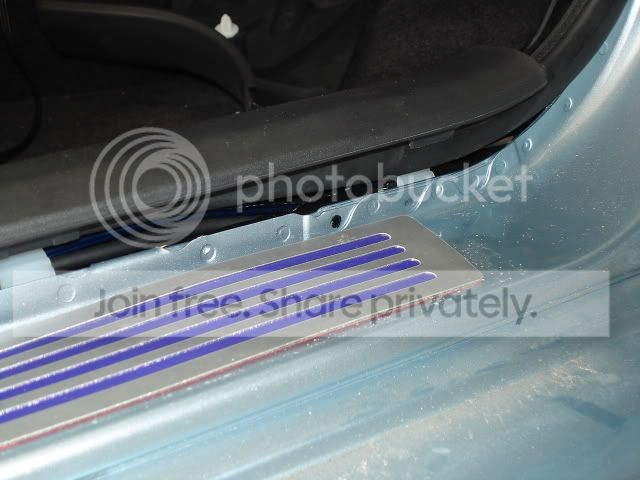
Drill the hole out making sure not to leave any sharp edges. Clean up the whole area. Wipe the surfaces that will come in contact with the tape with alcohol then allow to dry.
Attaching door sills
Running the wires
Attaching the wires
Drill bit
Door sills
connectors
Prepping the area
First you remove the factory door sills because these are replacement pieces.
Before
After
You will need to lift the rubber weather striping, and the interior door sill in order to run the wires.
Note the black dot in the picture below. This is where you will drill a small hole to run the wiring into the car. The door sills are placed to give you an idea where the hole should be in relation to the sills.
Drill the hole out making sure not to leave any sharp edges. Clean up the whole area. Wipe the surfaces that will come in contact with the tape with alcohol then allow to dry.
Attaching door sills
Running the wires
Attaching the wires


Senior Member
SL Member
Team ScioNRG
Joined: Jul 2006
Posts: 559
Awriite, getting closer to the release of the sills (I'm on the list for a pair of red ones). Do you suggest sealing the hole with silicone or some other sealant, since it will effectively be a hole outside the seal of the weatherstripping?
I'm also looking forward to the wiring part, specifically which circuit will feed the sills.
I'm also looking forward to the wiring part, specifically which circuit will feed the sills.
Thread Starter
Senior Member
Scikotics
SL Member
Joined: Sep 2005
Posts: 1,990
From: Orlando, FL
Originally Posted by arbnpx
Awriite, getting closer to the release of the sills (I'm on the list for a pair of red ones). Do you suggest sealing the hole with silicone or some other sealant, since it will effectively be a hole outside the seal of the weatherstripping?
I'm also looking forward to the wiring part, specifically which circuit will feed the sills.
I'm also looking forward to the wiring part, specifically which circuit will feed the sills.
Thread Starter
Senior Member
Scikotics
SL Member
Joined: Sep 2005
Posts: 1,990
From: Orlando, FL
Originally Posted by Fsu1dolfan
3 weeks and still waiting?? Whats new??
November/December is a really busy month for me so please be a little patient with me.


Senior Member
Scikotics
SL Member
Joined: Feb 2005
Posts: 1,396
Originally Posted by CXT
Originally Posted by Fsu1dolfan
3 weeks and still waiting?? Whats new??
November/December is a really busy month for me so please be a little patient with me.


Member
SL Member
Joined: Oct 2006
Posts: 60
From: Northern Virginia
I finished installing mine, but one of my transformers smoked (not sure how). I'm replacing the transformer and hoping I don't have a short somewhere that killed it.
Installing these things is SUPER simple if you see the picture that I think CXT posted a while back showing where the positive and negative connections go to tap into the dome lights that activate when you open the door.
It was as simple as drilling holes large enough to put the connectors through the lip that the weather strip sits on, then running the connections under the strip that leads to the panels on the driver and passenger side of the floor, where you can leave your little black transformer box (maybe 2" squared) and the wires just need to connect to the documented spots in the fuse box.
All I needed to get were some terminal clips from Radio Shack that I crimped the wires onto for the positive connection and the negative connection was already spliced for my security system, so I just soldered the negative wires together and onto the wire and insulated.
It's a pretty simple install, but I'd recommend a fuse for sure :-) I didn't have an appropriate fuse on hand, but who knows, it might have saved that transformer if I really did have a short that killed it. I suspect that my transformer was a dud though.
Anyway, at least the driver side looks pretty cool at night. During the day, the blue EL tape you can see under the seal doesn't look that hot (little flashy for my taste), but it's cool nonetheless.
Installing these things is SUPER simple if you see the picture that I think CXT posted a while back showing where the positive and negative connections go to tap into the dome lights that activate when you open the door.
It was as simple as drilling holes large enough to put the connectors through the lip that the weather strip sits on, then running the connections under the strip that leads to the panels on the driver and passenger side of the floor, where you can leave your little black transformer box (maybe 2" squared) and the wires just need to connect to the documented spots in the fuse box.
All I needed to get were some terminal clips from Radio Shack that I crimped the wires onto for the positive connection and the negative connection was already spliced for my security system, so I just soldered the negative wires together and onto the wire and insulated.
It's a pretty simple install, but I'd recommend a fuse for sure :-) I didn't have an appropriate fuse on hand, but who knows, it might have saved that transformer if I really did have a short that killed it. I suspect that my transformer was a dud though.
Anyway, at least the driver side looks pretty cool at night. During the day, the blue EL tape you can see under the seal doesn't look that hot (little flashy for my taste), but it's cool nonetheless.
Thread Starter
Senior Member
Scikotics
SL Member
Joined: Sep 2005
Posts: 1,990
From: Orlando, FL
This is the picture you are referring to.

Did you wire both sides to that?
Because I beleive I found a spot on the passengers side to wire that side, and not have to run the wires.
How about some pictures? I am curious as to how the final product turned out.
Did you wire both sides to that?
Because I beleive I found a spot on the passengers side to wire that side, and not have to run the wires.
How about some pictures? I am curious as to how the final product turned out.

Senior Member
SL Member
Joined: Jul 2006
Posts: 2,320
Originally Posted by CXT
Originally Posted by Fsu1dolfan
3 weeks and still waiting?? Whats new??
November/December is a really busy month for me so please be a little patient with me.

414 hp/317 ft·lbf of raw German fury

