
Sw20strike's Build(new pics page 4)


Thread Starter
Member
SL Member
Joined: Dec 2006
Posts: 85
From: Newport News VA
March 23 continuing into early morning March 24
Didn't really get much done. Picked up a couple of material. Came home realized I didn't have any body filler so went back out to get some. Started to work on shaving the rear hatch garnish.
I started by heating around the emblem with a heat gun and then gently prying at it to take it off. Afterwards cleaned off the rest of the tape with some rubbing alcohol.
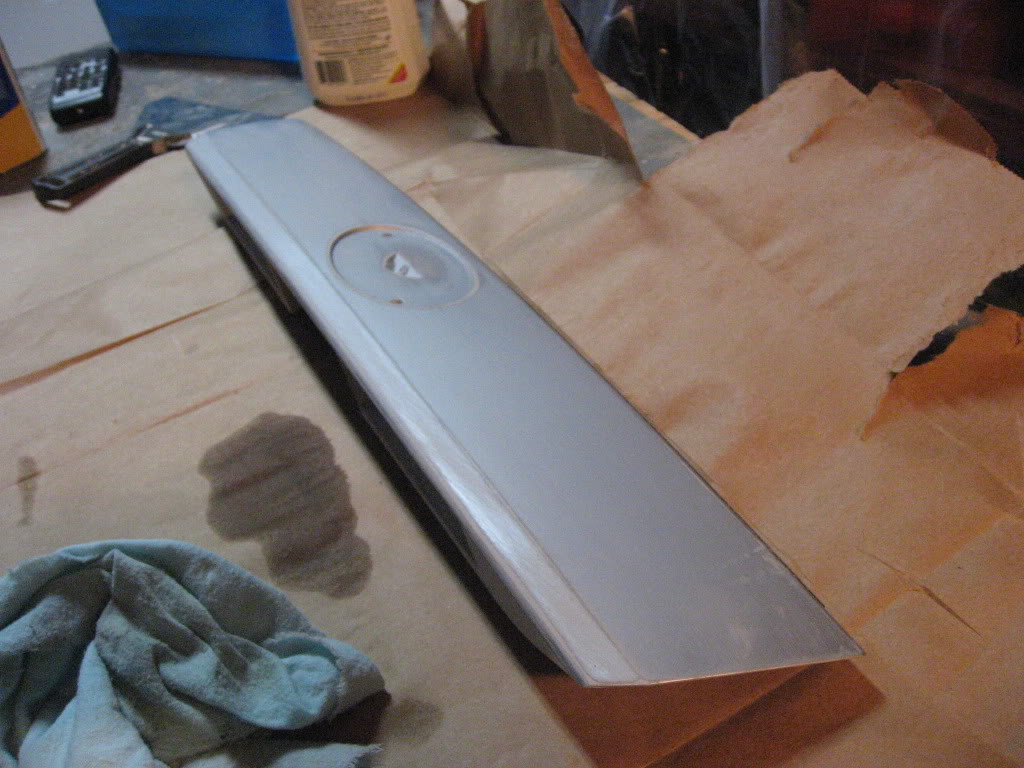
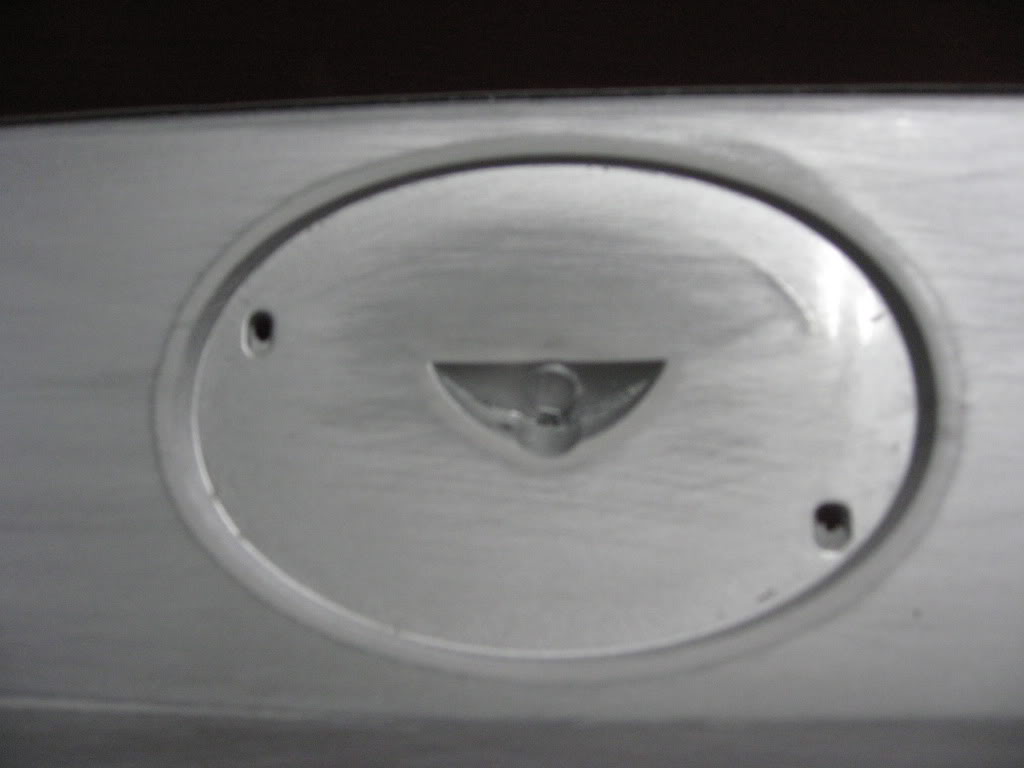
Close up of the recessed area where eblem was originally.
Afterwards started going to town on it with some 120 grit sand paper. I didn't have and 180 grit laying around and 220 grit just wasn't cutting it for me. Slowly but surely I felt it was rough enough to lay down some filler.

After letting it dry for a while I went back to town sanding it down.
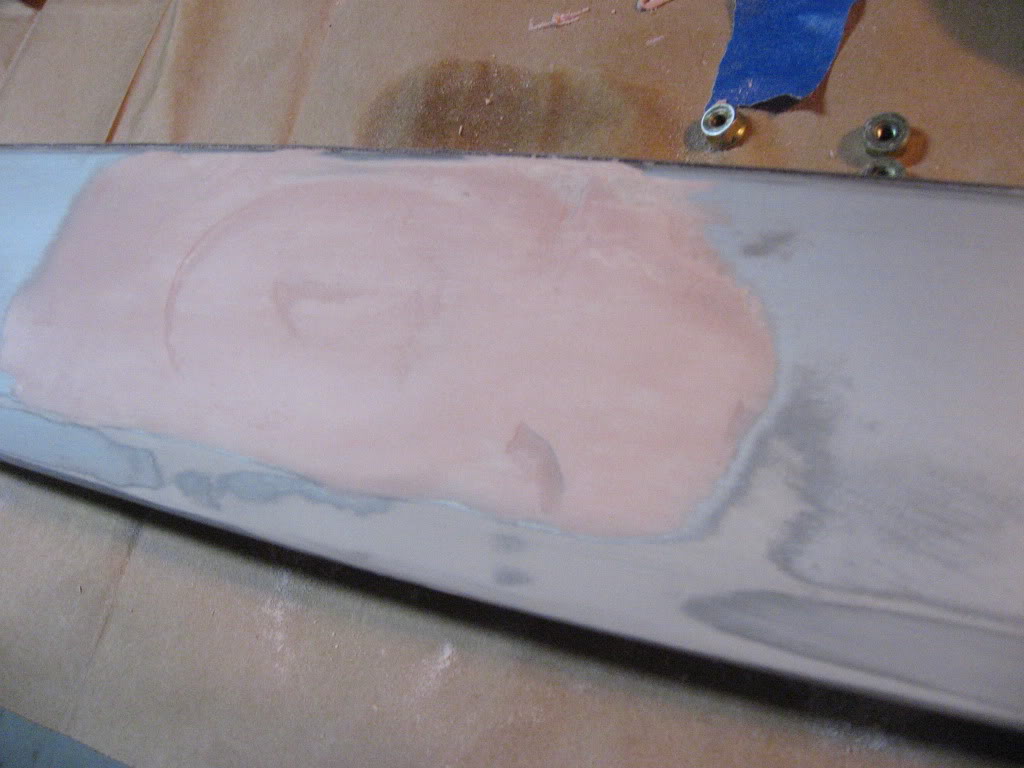
Afterwards I cleaned off the excess dust and went to lay down another layer of filler. I then of course let it dry and then yep you guess it, started sanding again.
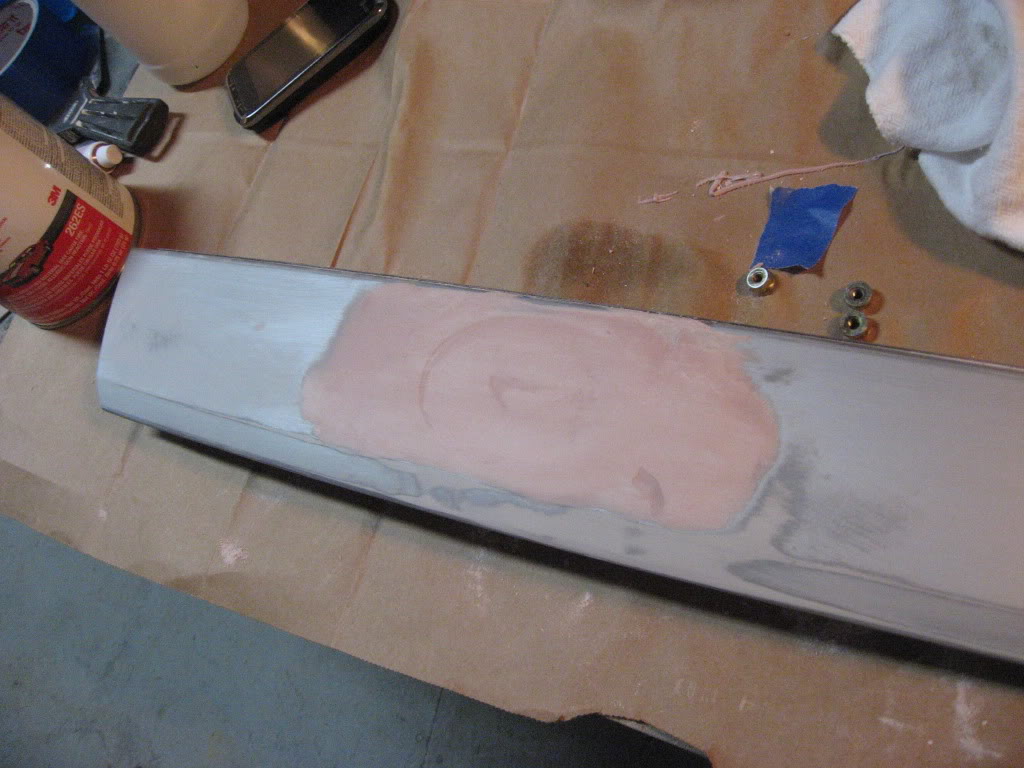
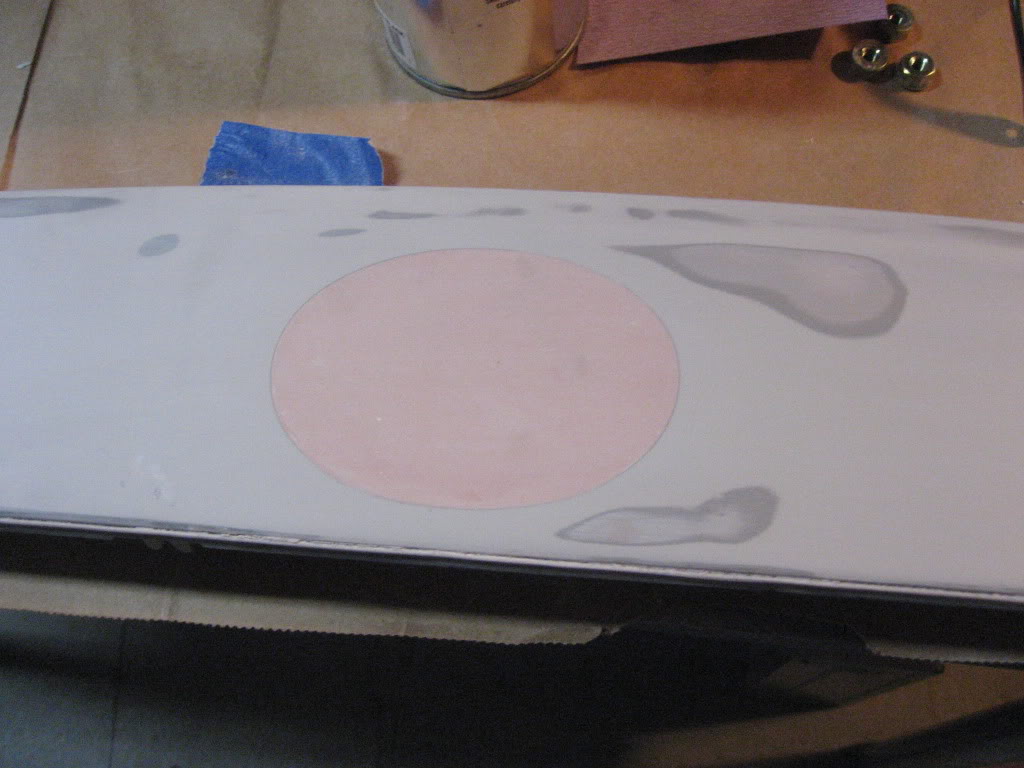
BY this time the middle was filled and I continued to sand down the rough edges and all the excess away.
You can start to see where the circle was filled. I decided to keep sanding to make it as smooth as possible and made all the filler the same tint of pink so i know it isn't raised in any certain area.
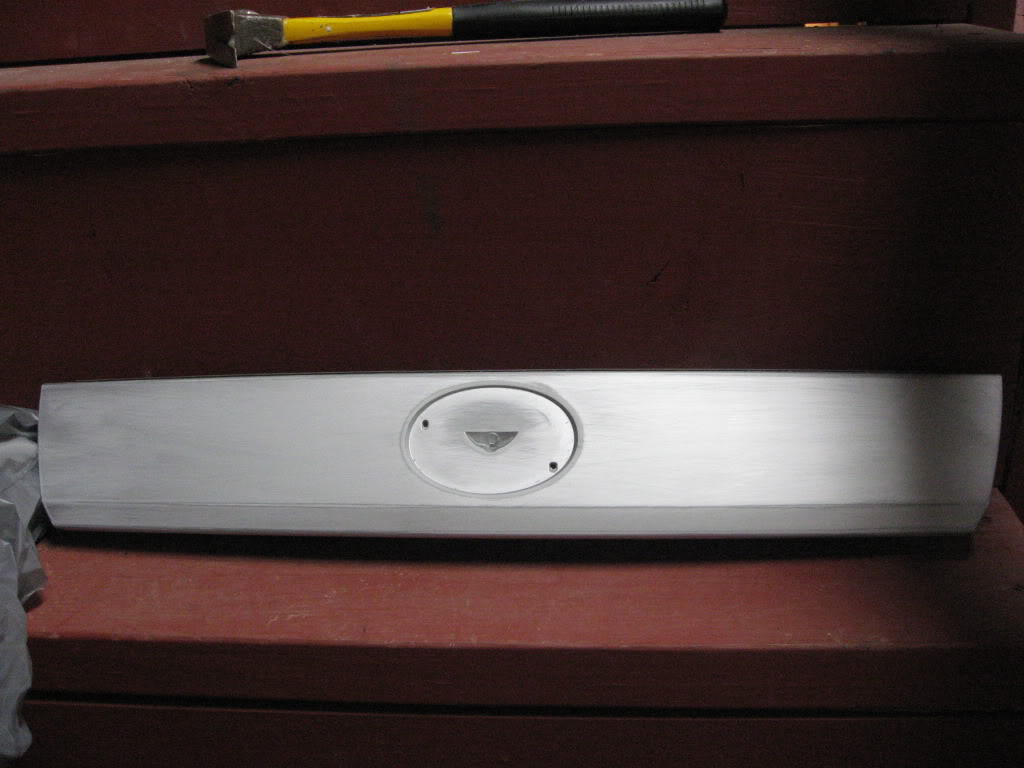
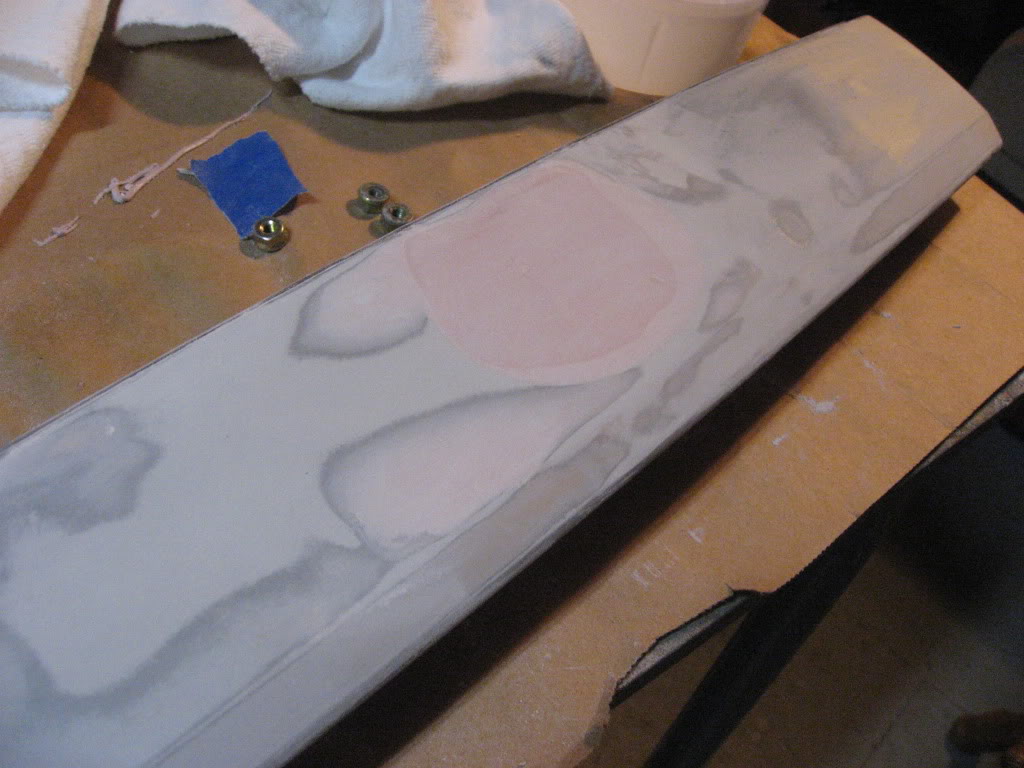
After making it all smooth I went one last time over everything with some 320 grit paper for a finishing touch before it gets prepped and everything in the paint shop.
Finished Pic of the recessed area on the garnish
Didn't really get much done. Picked up a couple of material. Came home realized I didn't have any body filler so went back out to get some. Started to work on shaving the rear hatch garnish.
I started by heating around the emblem with a heat gun and then gently prying at it to take it off. Afterwards cleaned off the rest of the tape with some rubbing alcohol.
Close up of the recessed area where eblem was originally.
Afterwards started going to town on it with some 120 grit sand paper. I didn't have and 180 grit laying around and 220 grit just wasn't cutting it for me. Slowly but surely I felt it was rough enough to lay down some filler.
After letting it dry for a while I went back to town sanding it down.
Afterwards I cleaned off the excess dust and went to lay down another layer of filler. I then of course let it dry and then yep you guess it, started sanding again.
BY this time the middle was filled and I continued to sand down the rough edges and all the excess away.
You can start to see where the circle was filled. I decided to keep sanding to make it as smooth as possible and made all the filler the same tint of pink so i know it isn't raised in any certain area.
After making it all smooth I went one last time over everything with some 320 grit paper for a finishing touch before it gets prepped and everything in the paint shop.
Finished Pic of the recessed area on the garnish


Thread Starter
Member
SL Member
Joined: Dec 2006
Posts: 85
From: Newport News VA
Well since you're the second one to say something about it. I guess it's back to messin with it tonight. I followed the diy on YSTC or some tC site, but seeing how I got feedback on it already, i guess i'm gonna try and get out all the body filler from the garnish and start laying some fiberglass tonight. Thanks for the input you two. Much appreciated.
Last edited by sw20strike; Mar 25, 2011 at 01:09 AM.
Thread Starter
Member
SL Member
Joined: Dec 2006
Posts: 85
From: Newport News VA
March 25- Decent weather today. Ran some amp wiring, put back together the majority of the interior. Also vacuumed all the dirt from underneath the rear seat. Hotchkis sway bars,and 1 step colder spark plugs came in yesturday. Password JDM tow hook came in today, also managed install that. Bad news is I heard my exhaust is backordered til mid April. Looking into other options for exhaust now. Still awaiting some other parts to come, but got updates on them atleast.
Thread Starter
Member
SL Member
Joined: Dec 2006
Posts: 85
From: Newport News VA
lol nah I'm good joyride i ordered the tanabe n1 catback. Same one I had on the old one, but some reason its on nation wide backorder haha. Looking at either the descendant one or may just wait it out til mid april.
Thread Starter
Member
SL Member
Joined: Dec 2006
Posts: 85
From: Newport News VA
Haven't updated lately. I had to drive down to Florida for an emergency so the build was on hold til I got back. I also previouysly updated I got in the sway bars.
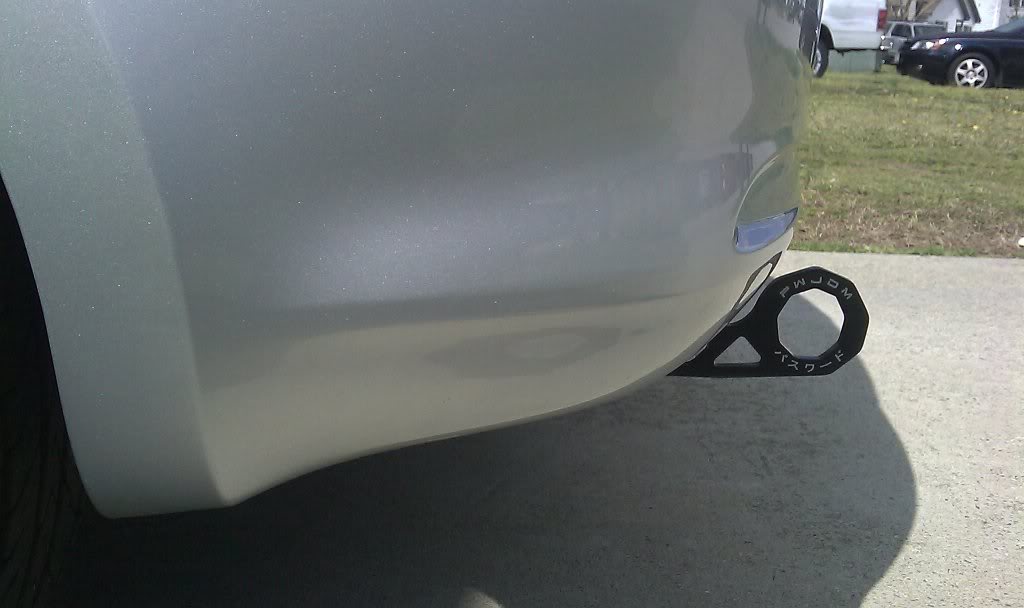
The day before I left, I got in the password jdm tow hook. So went ahead and installed it.
Leaving for Florida

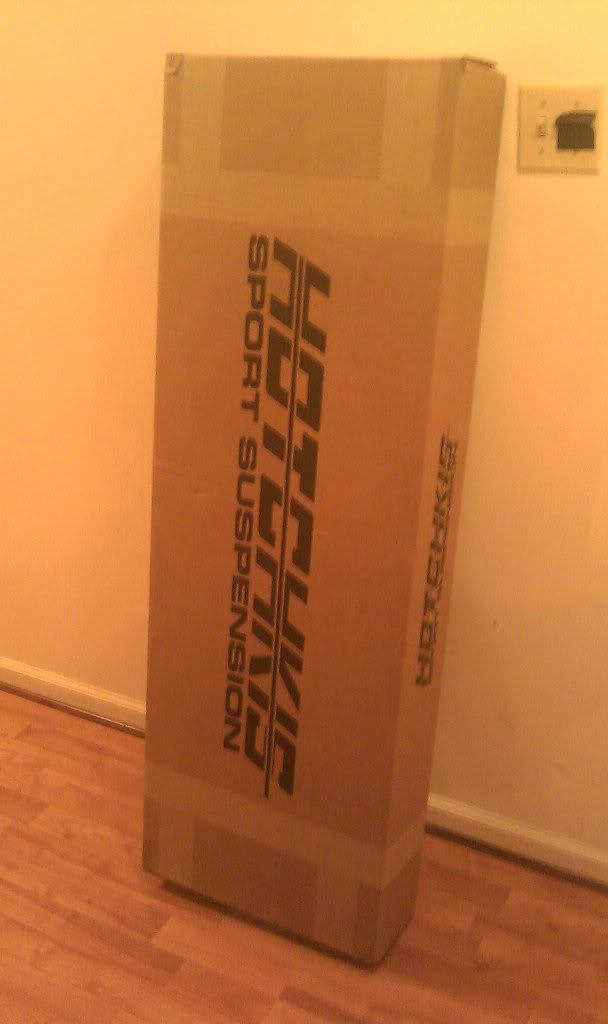
The bad part is I had a lot of parts in shipping, so gave a key to the house to a friend so they can come put whatever got delivered inside. As I was heading out the door, my RS1 lip kit from Racing Solutions arrived.I arrived in Florida Wednesday morning. My friend calls to let me know my rokkor coilovers arrived.Randomly got bored one day and went onto craiglist. Picked up a rear motor mount and some cpillars down there. My friend calls again friday to let me know my speed source motor mounts come in. I leave Florida sunday night, but also got my car tinted before I drove back up. I arrive home Monday afternoon. Exhaust I go to sleep. Later tonight I wake up and see that my World Motorsports exhaust,Axxtion Short throw shifter and Kaminari Flush Mount wing have been delivered.

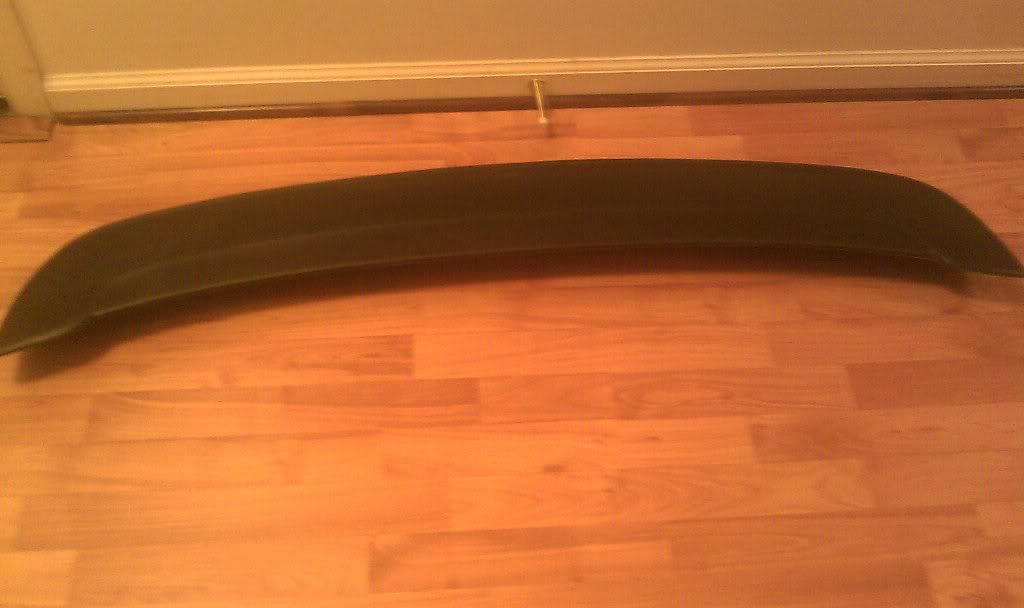
So for the whole week I was gone, new parts arrived. Still waiting for the HIC Roof visor to come in and then all my parts will be here.
So Items that need to be installed onto.
-Turbo Kit
-RS1 Lip kit
-Kami Flush spoiler
-HIC Roof Visor
-APT Fogs
-DME front and rear strut bars
-Hotchkis front and rear sway bars
-Rokkor coilovers
-World motorsports exhaust
-Cpillar bar
-Axxtion STS
-Master bushing kit(may or may not dpeending if I have access to a press)
-Shaved hatch garnish
The plan is to test fit the lip kit,other body pieces and install the coilovers and supension. After I adjust the ride height to where I like it with the lip kit on, I'm going to take off the kit to be sent to get painted and then got get the alignment done. Then after that, I start work on installing the turbo kit. Updates soon I hope.
The day before I left, I got in the password jdm tow hook. So went ahead and installed it.
Leaving for Florida
The bad part is I had a lot of parts in shipping, so gave a key to the house to a friend so they can come put whatever got delivered inside. As I was heading out the door, my RS1 lip kit from Racing Solutions arrived.I arrived in Florida Wednesday morning. My friend calls to let me know my rokkor coilovers arrived.Randomly got bored one day and went onto craiglist. Picked up a rear motor mount and some cpillars down there. My friend calls again friday to let me know my speed source motor mounts come in. I leave Florida sunday night, but also got my car tinted before I drove back up. I arrive home Monday afternoon. Exhaust I go to sleep. Later tonight I wake up and see that my World Motorsports exhaust,Axxtion Short throw shifter and Kaminari Flush Mount wing have been delivered.
So for the whole week I was gone, new parts arrived. Still waiting for the HIC Roof visor to come in and then all my parts will be here.
So Items that need to be installed onto.
-Turbo Kit
-RS1 Lip kit
-Kami Flush spoiler
-HIC Roof Visor
-APT Fogs
-DME front and rear strut bars
-Hotchkis front and rear sway bars
-Rokkor coilovers
-World motorsports exhaust
-Cpillar bar
-Axxtion STS
-Master bushing kit(may or may not dpeending if I have access to a press)
-Shaved hatch garnish
The plan is to test fit the lip kit,other body pieces and install the coilovers and supension. After I adjust the ride height to where I like it with the lip kit on, I'm going to take off the kit to be sent to get painted and then got get the alignment done. Then after that, I start work on installing the turbo kit. Updates soon I hope.

nice. so you ended up going with world motorsports exhaust? what happened with the tsudo? didnt want to wait for it?. cant wait to see all this together. going to look similar to mine now lol with the rs1 kit lol. moving along nicely though cant wait to see it all done.
Thread Starter
Member
SL Member
Joined: Dec 2006
Posts: 85
From: Newport News VA
nice. so you ended up going with world motorsports exhaust? what happened with the tsudo? didnt want to wait for it?. cant wait to see all this together. going to look similar to mine now lol with the rs1 kit lol. moving along nicely though cant wait to see it all done.

Thread Starter
Member
SL Member
Joined: Dec 2006
Posts: 85
From: Newport News VA
Thread Starter
Member
SL Member
Joined: Dec 2006
Posts: 85
From: Newport News VA
It really was
4/6/2011- Installed the shifter cable bushings and the axxtion sts. Axxtion sts reduced the throws 54% and combined with the short throw shifter I already had in the car I'm guessing the throws are now 84% reduced. Still getting used to how short the throws are. Also its taking some time to find neutral haha. Took 5 minutes to get out of the driveway because I felt unsure whether or not I was in the gear I though I was.
4/6/2011- Installed the shifter cable bushings and the axxtion sts. Axxtion sts reduced the throws 54% and combined with the short throw shifter I already had in the car I'm guessing the throws are now 84% reduced. Still getting used to how short the throws are. Also its taking some time to find neutral haha. Took 5 minutes to get out of the driveway because I felt unsure whether or not I was in the gear I though I was.
Thread Starter
Member
SL Member
Joined: Dec 2006
Posts: 85
From: Newport News VA
Dude that is awesome. I'm happy for you. Man I called earlier to complain about the new install. From a dead stop I hate it, but once the car is moving it feels great. Barely any movement from gear to gear now.
Thread Starter
Member
SL Member
Joined: Dec 2006
Posts: 85
From: Newport News VA
April 7,2011
Finally finished catching up in school so started doing actual installs.
Up in the air
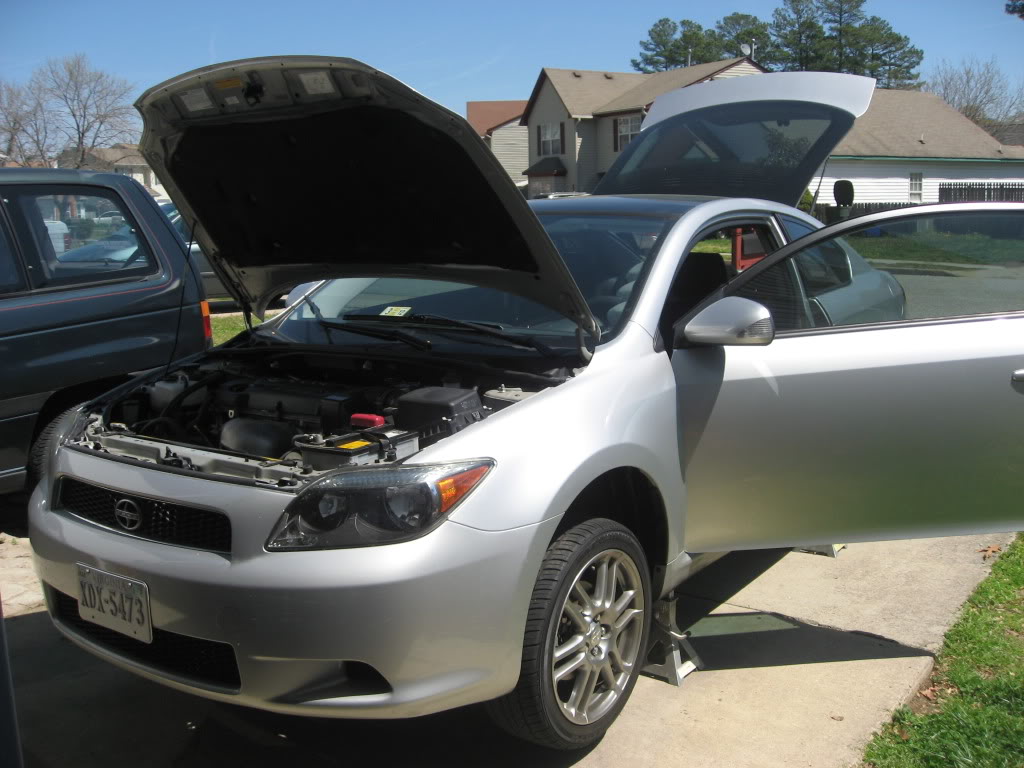
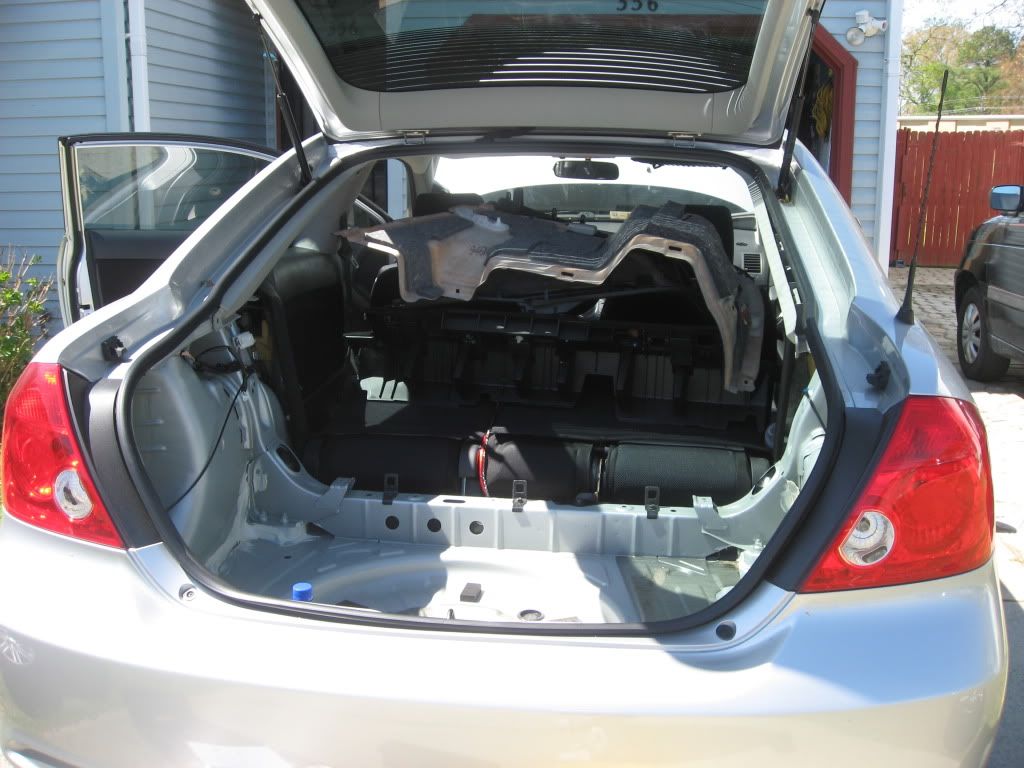
Decided to work from the back and then move forward. Started to tear apart the interior and install the cpillar first.
After ripping everything apart i get the bar to test fit it and where I want to mount it, it doesn't fit. I try all the other mounting options and none work. Ordered the right bar, but recieved the wrong one lol. I then decided to move on under the car.
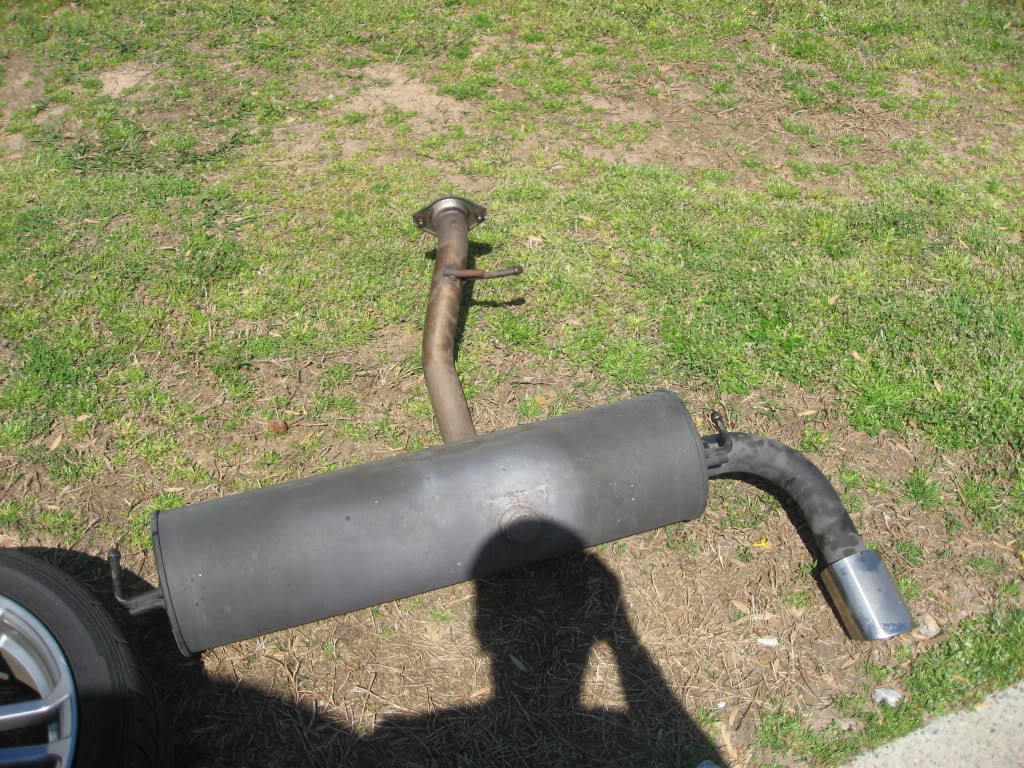
First thing to do is remove the axleback.
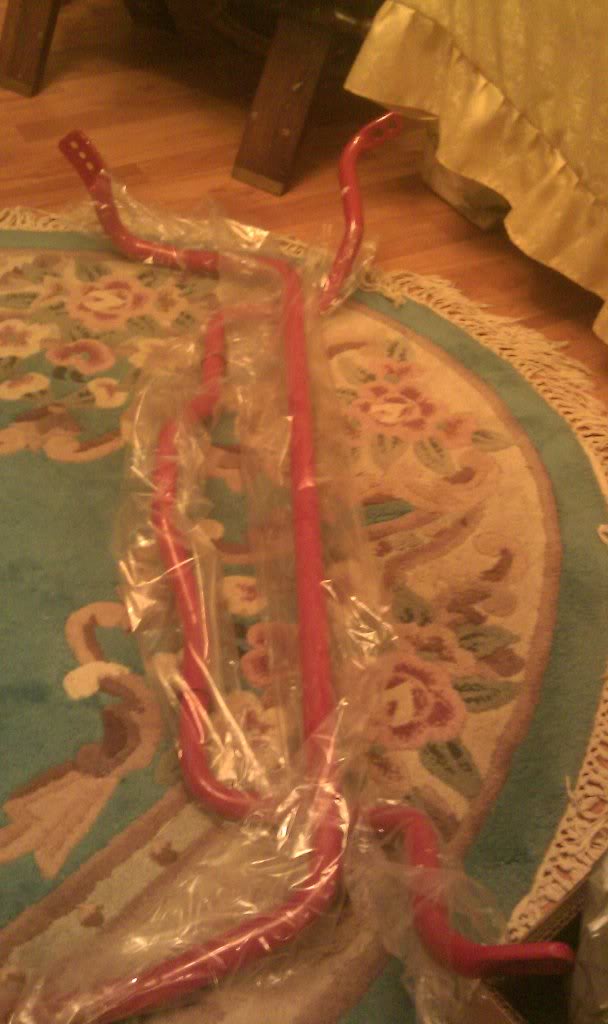
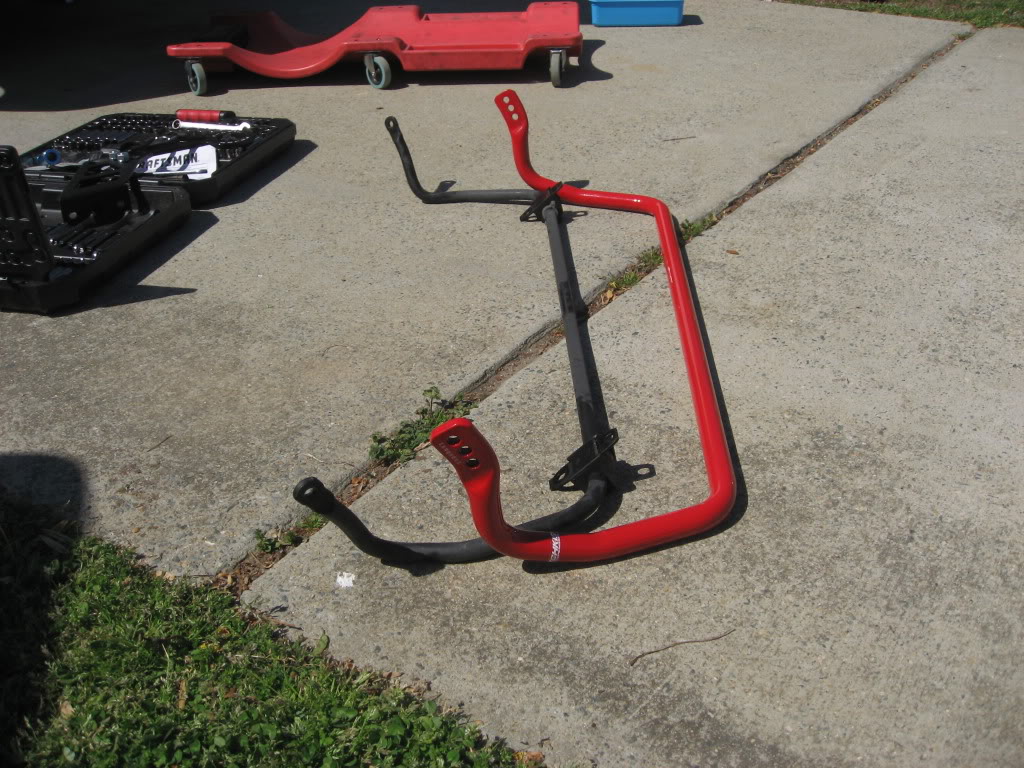
After I took that out I wanted to pull out the stock sway bar and install the hotchkis rear sway.
Couple of pics of the new bar
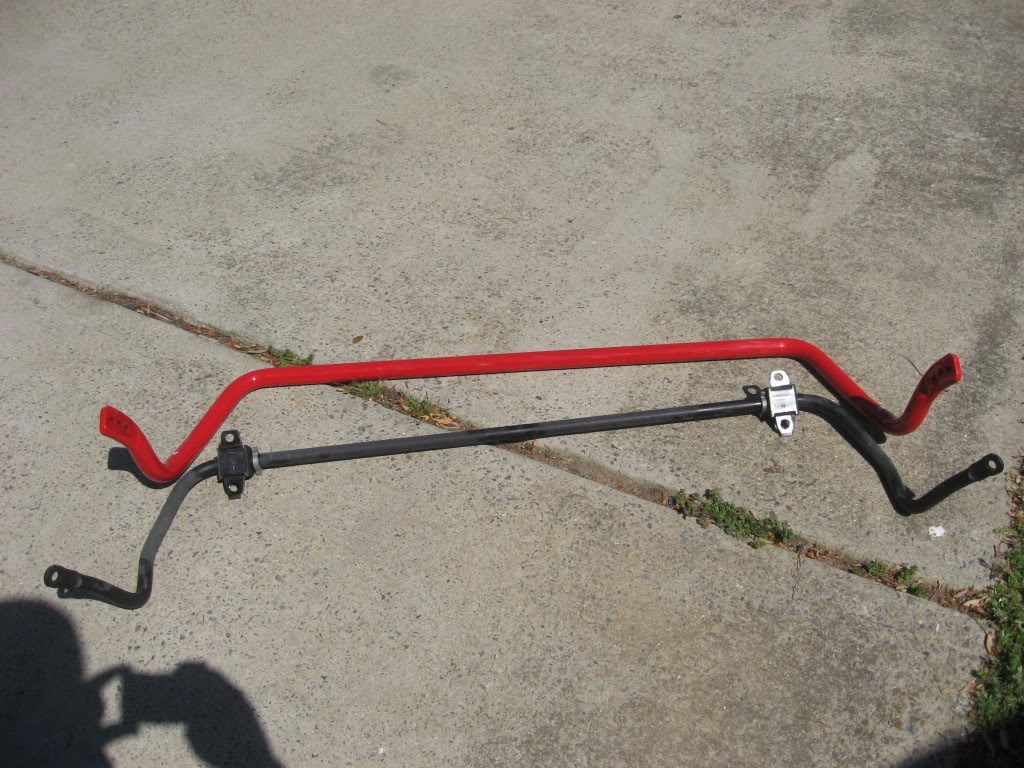
Next to the stock sway bar.
Didn't run into any issues with the install. Except maybe the endlinks may be too short in length to run the innermost setting. Didn't mess with it for too long, but for those of you with this bar did you have any issue with this?
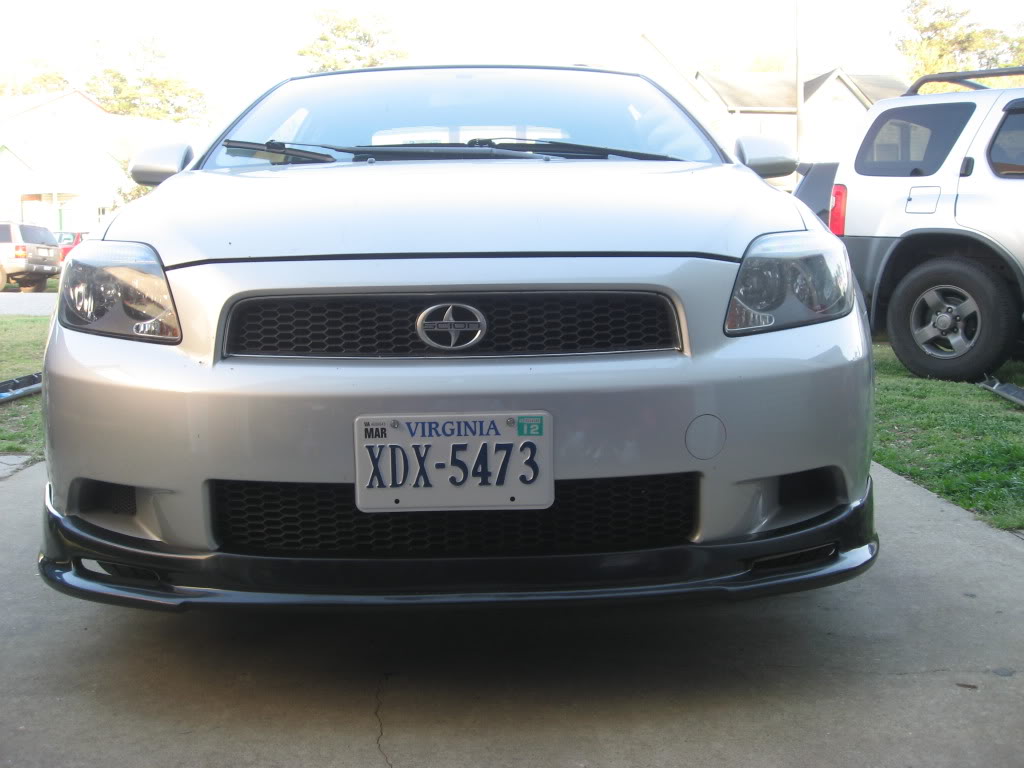
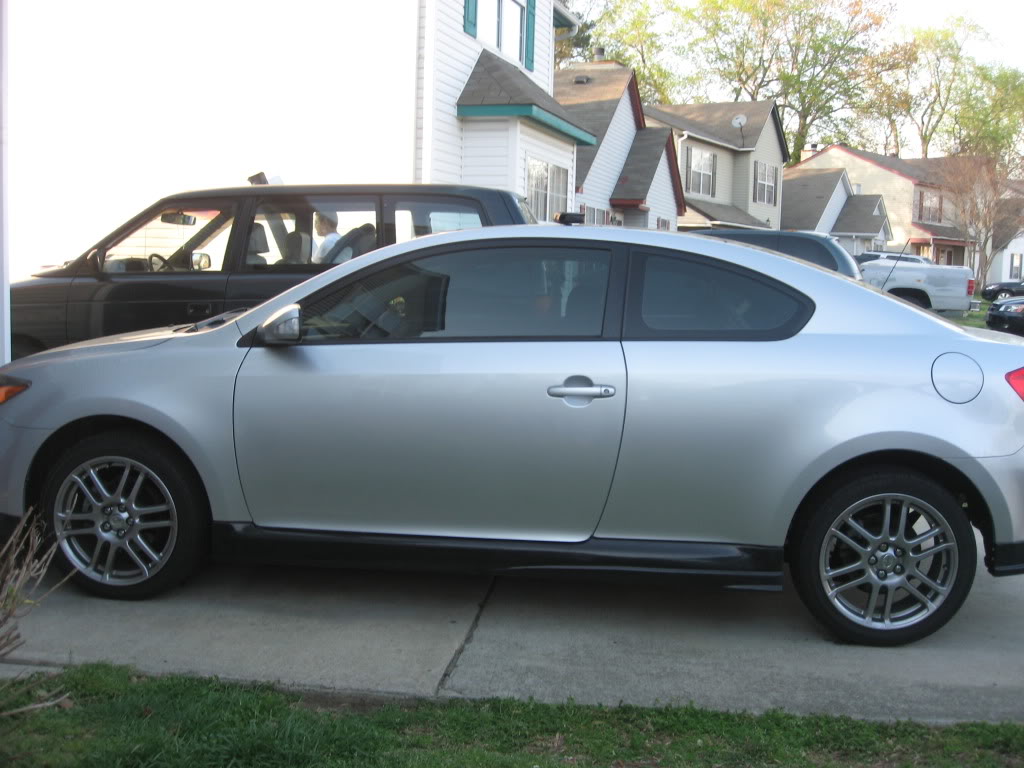
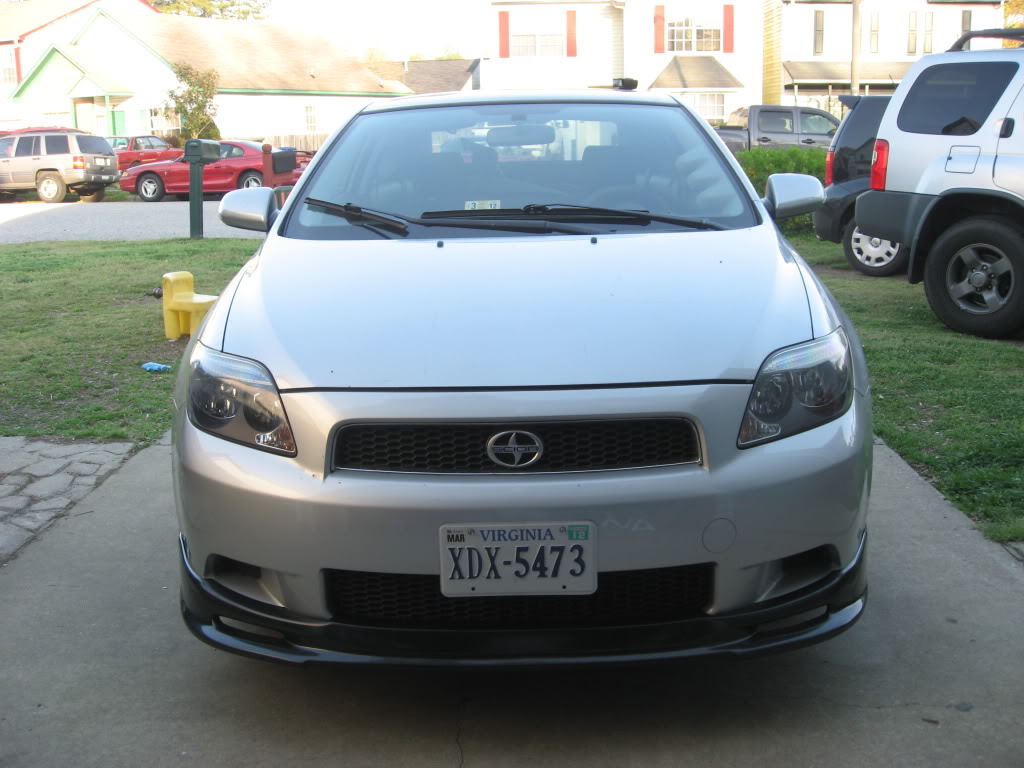
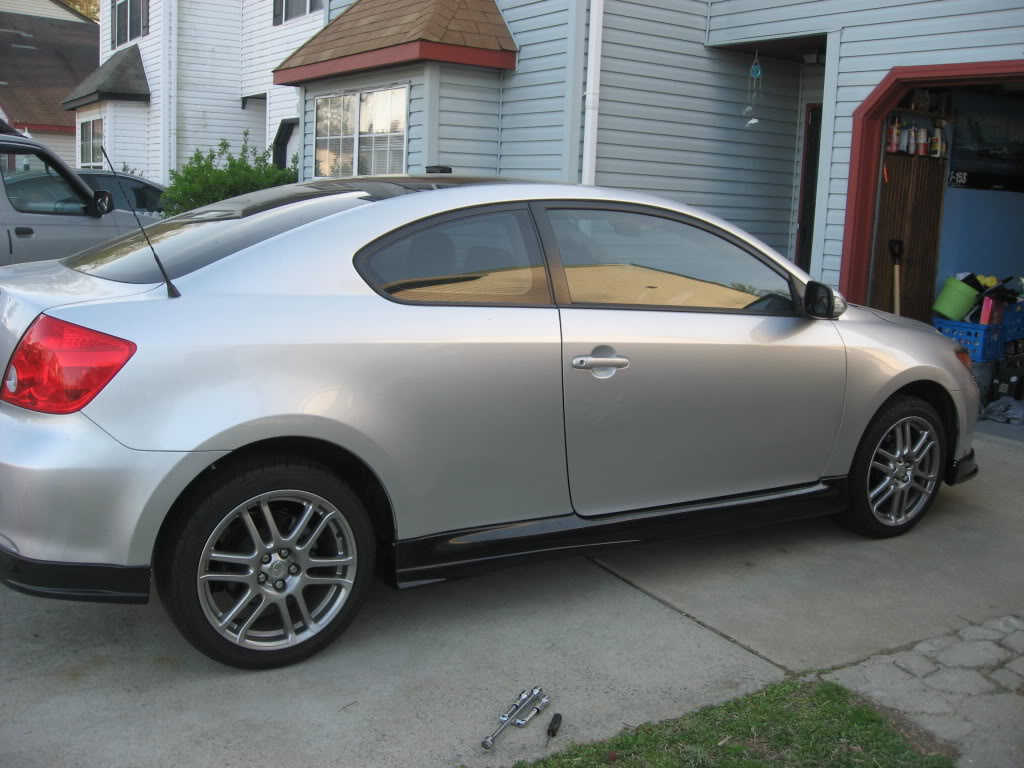
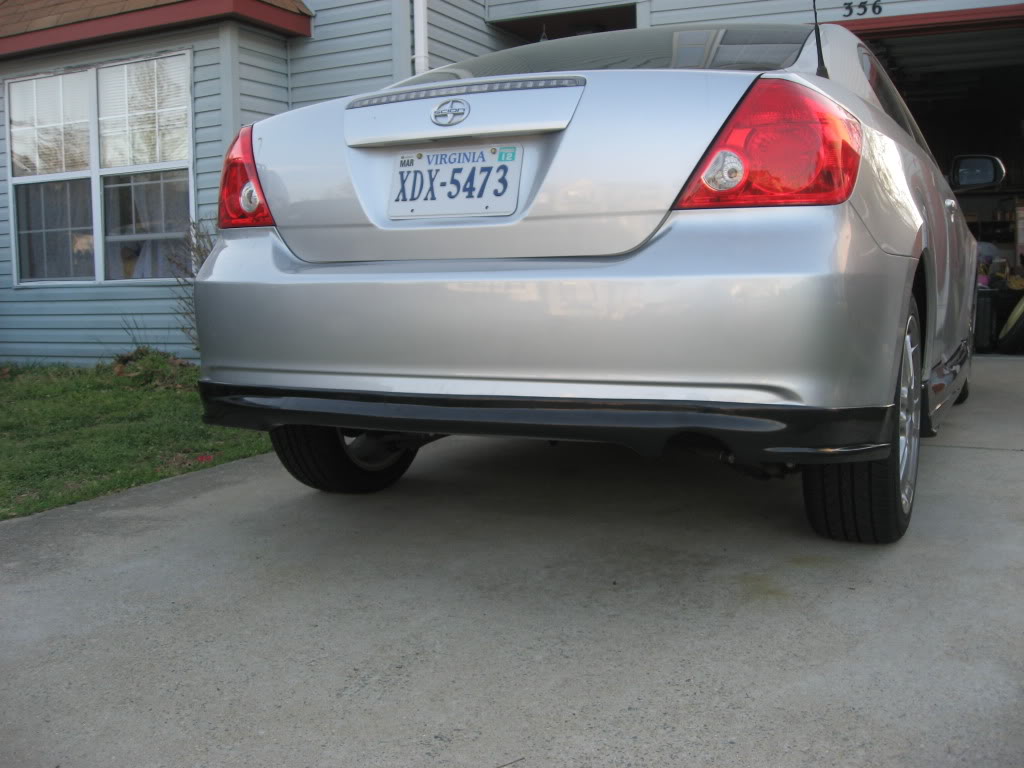
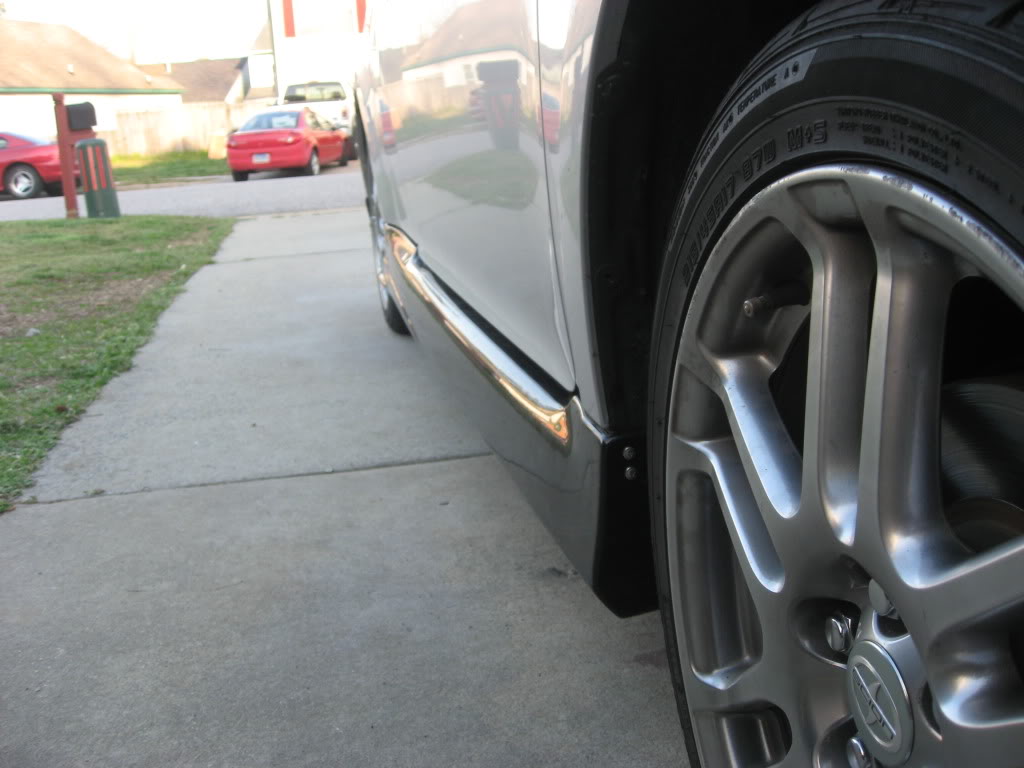
I then was going to install the rear coilovers today, but I figured by the time I gathered all the air tools it would be soon to cleaning up. So instead I test fitted the RS1 lip kit. The fitment was on point. Still not too fond of the mounting hardware it comes with, so will probably switch it out to bolts later when I reinstall it. With the password JDM tow hook it rubs, so will need to lower the bracket on that a little to give it enough room to not rub. The other option for a fix is to make a cut into the lip kit for the tow hook, but I feel that it may make more cracking prone later on. Also the front lip center, where the lower grill is, was a bit too wide, which causes a little gap around the curve. I'm trying to decide whether I want to cut the kit to fit better with the lower grille or run no lower grille at all. Now onto some pics of the kit.
Car is still up in the air.
And now on the ground
Front
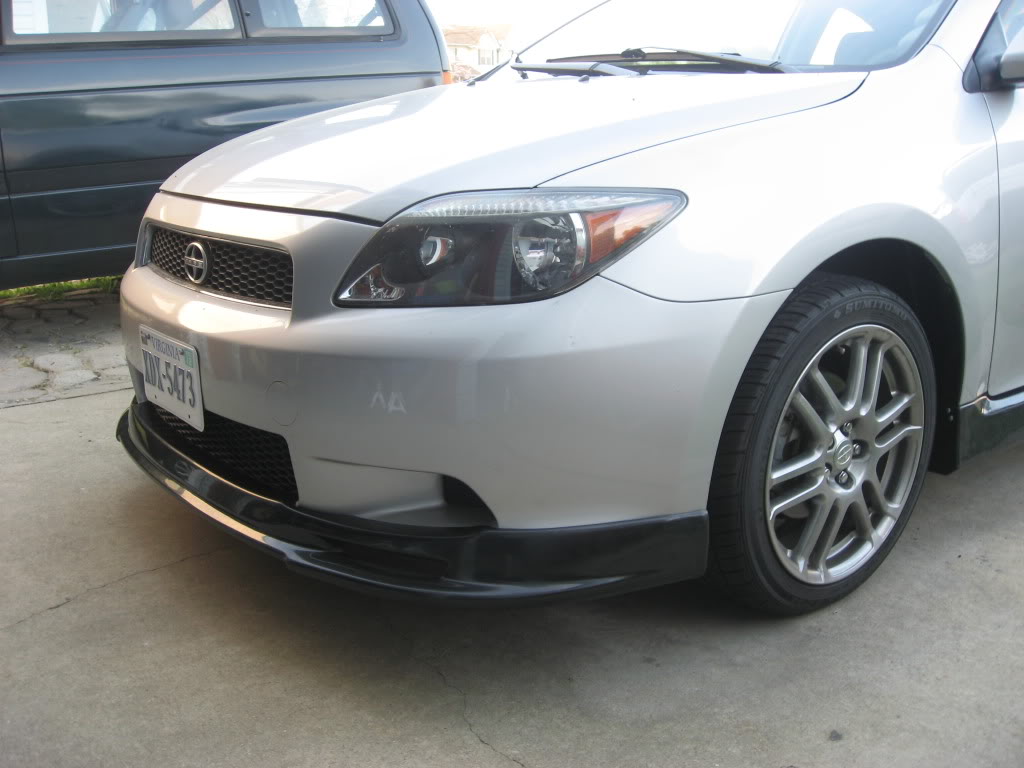
Little gap I'm talking about by the lower grille
Side Profile
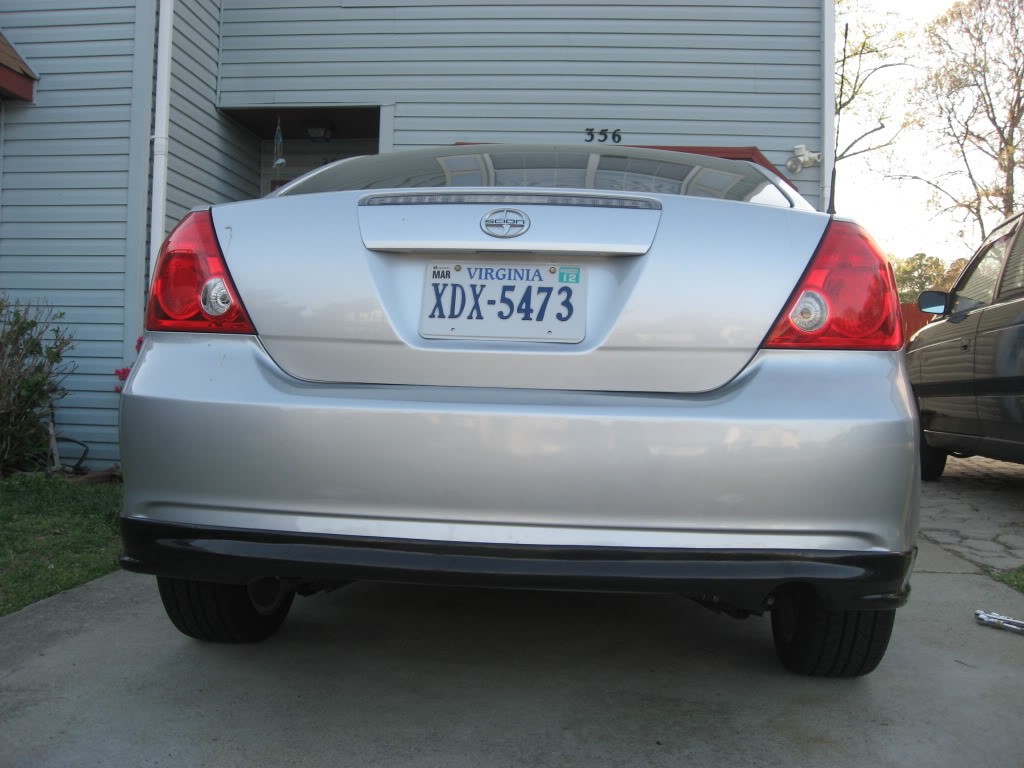
Rear Shot
Fitment on sides(not the greatest picture or angle sorry was rushing to clean up lol)
Please keep in mind that this is a test fit. It will be taken off after I set my ride height and then color matched.
Finally finished catching up in school so started doing actual installs.
Up in the air
Decided to work from the back and then move forward. Started to tear apart the interior and install the cpillar first.
After ripping everything apart i get the bar to test fit it and where I want to mount it, it doesn't fit. I try all the other mounting options and none work. Ordered the right bar, but recieved the wrong one lol. I then decided to move on under the car.
First thing to do is remove the axleback.
After I took that out I wanted to pull out the stock sway bar and install the hotchkis rear sway.
Couple of pics of the new bar
Next to the stock sway bar.
Didn't run into any issues with the install. Except maybe the endlinks may be too short in length to run the innermost setting. Didn't mess with it for too long, but for those of you with this bar did you have any issue with this?
I then was going to install the rear coilovers today, but I figured by the time I gathered all the air tools it would be soon to cleaning up. So instead I test fitted the RS1 lip kit. The fitment was on point. Still not too fond of the mounting hardware it comes with, so will probably switch it out to bolts later when I reinstall it. With the password JDM tow hook it rubs, so will need to lower the bracket on that a little to give it enough room to not rub. The other option for a fix is to make a cut into the lip kit for the tow hook, but I feel that it may make more cracking prone later on. Also the front lip center, where the lower grill is, was a bit too wide, which causes a little gap around the curve. I'm trying to decide whether I want to cut the kit to fit better with the lower grille or run no lower grille at all. Now onto some pics of the kit.
Car is still up in the air.
And now on the ground
Front
Little gap I'm talking about by the lower grille
Side Profile
Rear Shot
Fitment on sides(not the greatest picture or angle sorry was rushing to clean up lol)
Please keep in mind that this is a test fit. It will be taken off after I set my ride height and then color matched.
Senior Member
SL Member
Joined: Jul 2006
Posts: 2,878
From: Central TX
Seen the pics of parts piling up, kind of like what's happening in the living room at the house. It feels good to have parts finally arrive and get a feeling of Christmas or early birthday gifts lol. With the RS1 front lip you say for the center to fit one has to go without the front lower grill or trim the lip? That's not good, but at least if you trim the lip you can keep a close gap to the grill though.