
JP Vizage install on 2006 xA - Updated with pics!!!!


Thread Starter
Senior Member
SL Member
Joined: Nov 2007
Posts: 473
From: Chicago, IL
Here's a few pics of my conversion of the JP front lip for the 2006 xA bumper.
Tools used:
Angle grinder
800 grit sanding wheel (used on fiberglass, wood,etc...)
Files
Emory cloth
Square
Vernier Calipers
Clamps
Work bench/table
Torch
1500 grit sand paper
Super heavy duty double-sided 3m tape
Backing plate for the sanding wheel (i used a grinding disk for this)
First I used the square to mark my cutting lines. I only made 2 marks per side as the lengthwise line is already part of the lip's design. I used the calipers to ensure that the measurements were equal on both sides.
Next I clamped the lip on my work table (this is a dirty job so don't make the same mistake i did - i did this in my dining room cause my garage isn't heated and it was damn cold here in Chicago!!!!)
Next i used the grinder to cut the 2 lines i etched in. Obviously you want to cut on the inside of the line so as to leave yourself a cushion. Once both sides were cut cross-wise, I then rotated the grinder 90 degrees. The spinning sanding wheel is now parallel with the length of the lip. Use full sweeping motions to shave down the material (about 1-1/4" depth-wise and 6" length-wise). This will take a little time. Be careful when you get close to the edges that you cut into at the beginning.
Once you're done, repeat on the other side.
Next file the beginning cuts down to your cutting marks. Do the same across the top of the lip in order to make it flush (there's a small hump where your length-wise cutting line is. Shave material off with the grinder as close as you can to this hump. Be careful because you can ruin the lip. It's better to spend 20 minutes with a file and sand paper to get it right than screw it up in 2 minutes with grinder).
After you've done a nice job, take your bumper off and remove the lower grill to do your test fit (this is currently where I'm at).
I will post pics of this step in the next day or two. I'm waiting on my xenon kit and I don't want to take my bumper off twice. I'll post pics of the xenon install too :-)


Thread Starter
Senior Member
SL Member
Joined: Nov 2007
Posts: 473
From: Chicago, IL
I took the bumper off and removed the lower grill yesterday. I still need to make modifications to the lip. Looks like it might need a little heating to reshape it a bit. I'll pick up this project next week. I've added a few pictures from yesterday. If anyone has done this, please post some info regarding your install of the jp lip on the 2006/2007 bumper.


 But we need allot better pics than you posted on that site. Big tease you are!
Thread Starter
Senior Member
SL Member
Joined: Nov 2007
Posts: 473
From: Chicago, IL
sorry about the pics. was short on time the other day. I'll pick this up again sometime between tomorrow and next week. It's going to take some work to get it to fit - more than i anticipated. I'm no pro at this by any means, so this could turn into a $300 failed experiment :-(
Well it can be done, but I have only seen it on one other 06 xA bumper. They know how to get it done really nice and have the tools to do it. It has to be stretched or melted or something 
Thread Starter
Senior Member
SL Member
Joined: Nov 2007
Posts: 473
From: Chicago, IL
are you talking about WR Racing's 06 xA? I'm not sure if it will need to be stretched yet. Might have to be reshaped a bit. Lucky for my I've got all the right tools; just never done any body work. This could turn out to be a case of "where there's a will, there's a way" or it could be a lesson into why you should go to a professional!
Thread Starter
Senior Member
SL Member
Joined: Nov 2007
Posts: 473
From: Chicago, IL
been busting my hump all day. more grinding, filing, sanding, and now i had to bust out the torch. after hours of all this, i've go it 98% retrofitted. tomorrow i'm hooking up with my body shop "guy" and am leaving all the fine tuning to him. I've added updated pictures. This was no easy feat! Think I might just purchase the 05 bumper for the rear lip!!!!!
Thread Starter
Senior Member
SL Member
Joined: Nov 2007
Posts: 473
From: Chicago, IL
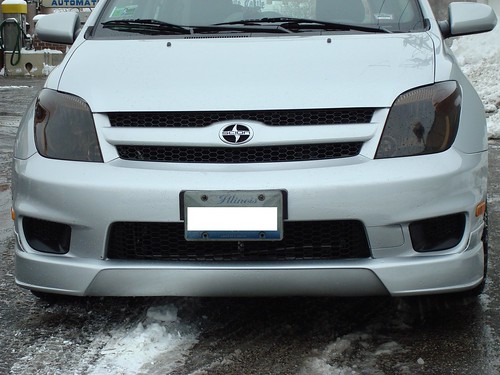
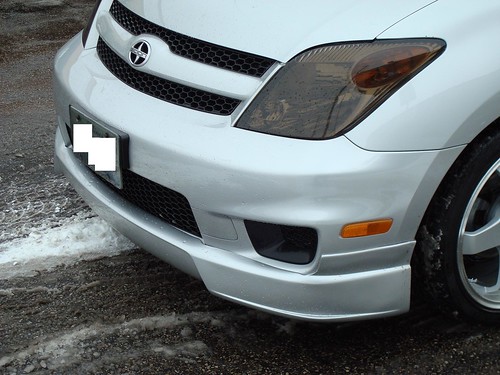
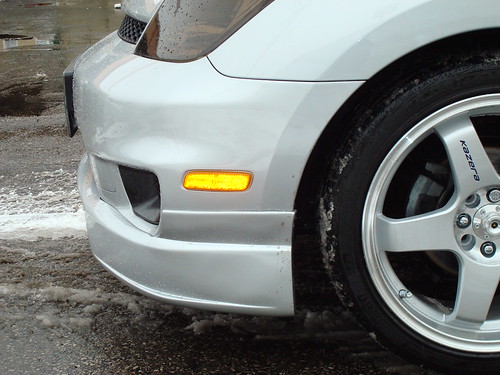
I smoothed out the rough edges yesterday by rough sanding the lip and then using 1500 grit fine sandpaper. I'm dropping it off at the body shop to get painted tomorrow and when it comes back, I'll put some double-sided tape on. Then the final install. I've posted a few more pics. The new pics are of what the final shape of the lip looks like. I regret that i didn't take pics of the lip before i started hacking away. It did take alot of work! I would estimate that I put a good 6 - 8 hours of labor if not more. That's something to keep in mind if anyone wants to have a body shop do the retrofitting. I have NO experience with body work. I just got ____ed at my buddy's kid who is a body pro. After being blown off a few times cause he was too thrashed to get out of bed, I figured the heck with it. If I screw it up, so be it. I might even give the rear lip a shot too! Although I haven't seen what it looks like out of the box, I'm thinking that it might not be as difficult to retrofit. But that's a project way down the road. I'm going to focus on building a motor next and turbo charging it :-D
Thread Starter
Senior Member
SL Member
Joined: Nov 2007
Posts: 473
From: Chicago, IL
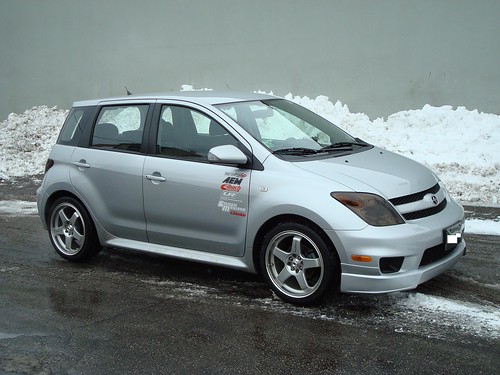
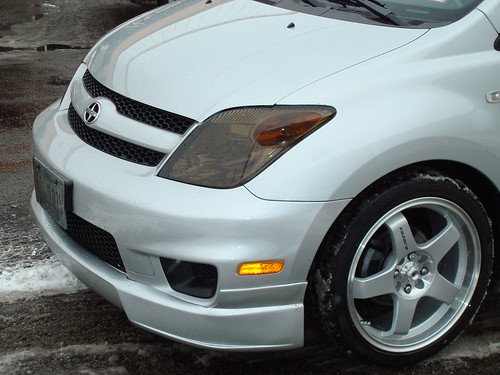
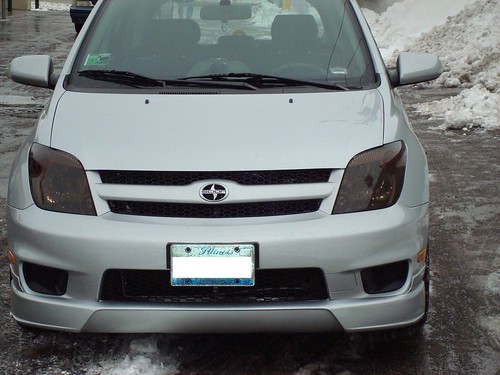
okay. lip is painted and installed. looks nice and makes me real happy that it didn't turn into a $300 mistake :-D Picked up my ride yesterday. I haven't taken pics yet cause we got 10 inches of snow the other day. However, I'm going to run it through the wash and take pics which should be posted this afternoon. Check back later.
Thread Starter
Senior Member
SL Member
Joined: Nov 2007
Posts: 473
From: Chicago, IL
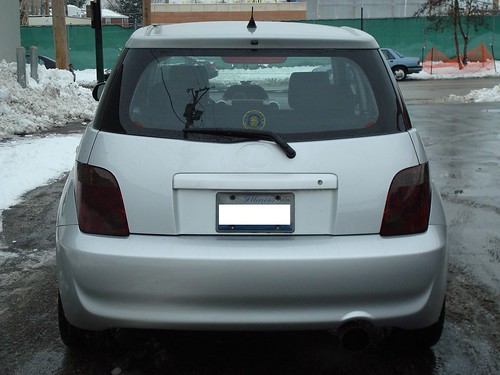
Pics are posted. Click on the link: http://www.flickr.com/photos/23058339@N06/
she definitely needs the JP side skirts. I decided on not doing the rear lip. From the pictures i've seen of the wr xa, it doesn't look like it adds much. i think the front lip and the skirts is what makes the kit.
she definitely needs the JP side skirts. I decided on not doing the rear lip. From the pictures i've seen of the wr xa, it doesn't look like it adds much. i think the front lip and the skirts is what makes the kit.

Senior Member
SL Member
Joined: Jun 2006
Posts: 734
the middle of the lip is kind of weird. Looks like it should be painted black to match the rest of the center. I dunno. I like it if it were painted, but nice job on getting it to fit and being one of the first putting lip kit on an 06. Good work.