


2-Piece CAI Install


Thread Starter
Senior Member


SL Member
Team ScioNRG
Joined: Aug 2005
Posts: 650
From: Guam (the 671)
 2-Piece CAI Install
2 – Piece Cold Air Intake Install xB / xA
** Will work for Injen, AEM, BOMZ, and most other Ebay! Knock-offs **
Scion life disclaimer: if any of you chuckle heads break ruin dismember or blow up your engine cuz you think my install did something to it, think again bucko! You are doing this knowing that any problems or complications arise, its cuz you screwed up, and scionlife.com or myself are safe from legal persecution. if I missed anything or need anything added Mods please do so
tools needed:
Phillips head screw driver
flathead screwdriver
10mm socket with extensions
cold air intake kit with silicone hoses, clamps, tubing, and filter
favorite icy cold drink. i chose corona
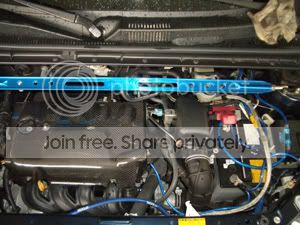
1.) Starting with a clean work area, and some cold ones, start by locating your air intake box, and getting it the hell out of your engine bay! Hint it’s the black ugly thing that looks like a box!
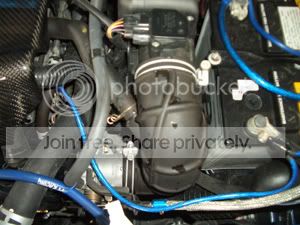
2.) Using Phillips Head Screwdriver remove the screw clips that tighten down the hose to the box, and also the hose to the intake manifold. It’s the two clips you see in the center of the picture.
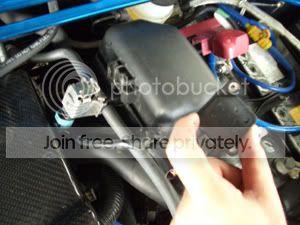
3.) Remove your Air Sensor and also that metal clippie thing that’s on the top of the black box. (All you technical dudes that know what it’s called feel free to chuckle at my use of technical jargon!) Don’t cut wires, just unscrew and unclip. You need to reinstall both these things later.
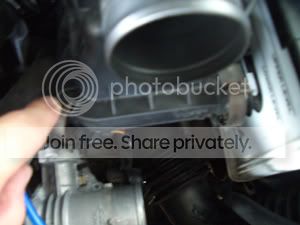
4.) Unlatch the top of the box and then take it off. Remove the inside cotton air filter.
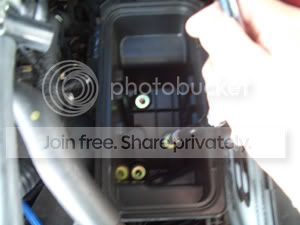
5.) Unbolt the three bolts holding it onto its mounts (10mm) and trace forward the hose that’s on the bottom of the box. It is bolted close to your front grille, 10mm bolt. (Sorry about not having a picture. One two many cold ones by this point)
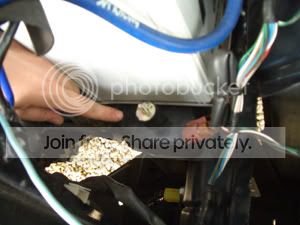
6.) You got two rubber mounts with your kit. One has two threaded posts; one has a threaded post and a threaded hole. The double post mount goes in front of the battery (pointed out in picture) the other mount goes on top of your battery where the tie-down bracket is. Remove the bolt that is holding the bracket down and replace with your new rubber mount.
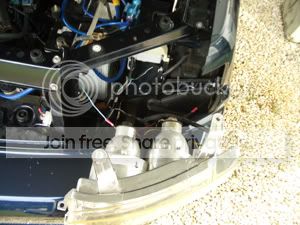
7.) I removed right Headlight to make it easier to install and tighten everything; otherwise it’s tight to get your arms under there! If you don’t know how to remove your headlights, check the other Tech article. It’s a screw in the fender, the bolts under the grille, and then a couple of friction retainers on the headlight housing that keeps it in place, then remove the headlight 4-screw / bolts.
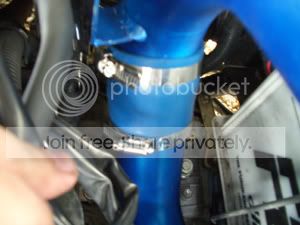
8.) You have 2 pieces of metal tubing, one looks like a U, and the other is slightly L shaped. The L shaped piece (which is longer incase you never passed kindergarten) goes in first, carefully weave it in front of your battery and through out the maze of wiring, until the tube points downish and you can screw the washer and nut onto the rubber mount you just installed. It is easier if you install the silicone tube onto the aluminum tubes before putting them into your engine bay. You will have to wiggle and push them onto the aluminum, and it is easier when you can get a better grip and more leverage.
9.) The U piece comes next and installs onto the other piece and loops into your intake manifold. Tighten down all those screw clips and your tubing is in.
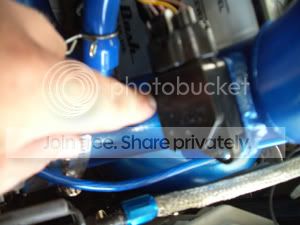
10.) Screw the Sensor back in, where it looks like it fits.
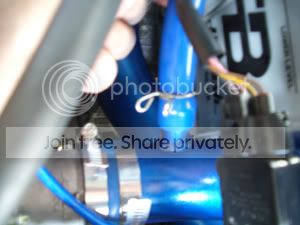
11.) Install your breather hose, you will have to remove your valve cover to do this. It just replace where that OEM black one was. If you like the black one, Fine be that way!
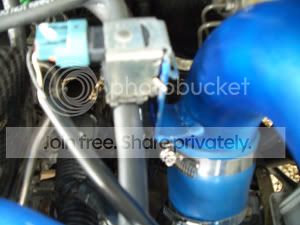
12.) Mount your highly technical metal clippie thing on the supplied post, and I Zip-tied mine down, cuz it didn’t fit as nicely as it used to, and kept popping off after driving around for a little.
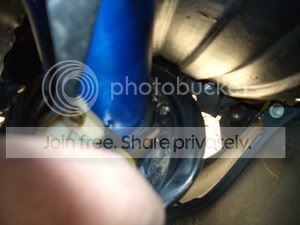
13.) Pop on the air filter and tighten down the retainer clip on it, and your done.
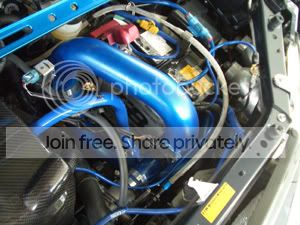
14.) My custom Airbrushed Ebay! Cheapo intake (BOMZ). Around 3300 rpm you really hear her suck in the air, and you can definitely feel the extra kick when you step on the gas, exhaust got louder too. No word yet as to dyno results, or MPG increase / decrease.
** Will work for Injen, AEM, BOMZ, and most other Ebay! Knock-offs **
Scion life disclaimer: if any of you chuckle heads break ruin dismember or blow up your engine cuz you think my install did something to it, think again bucko! You are doing this knowing that any problems or complications arise, its cuz you screwed up, and scionlife.com or myself are safe from legal persecution. if I missed anything or need anything added Mods please do so
tools needed:
Phillips head screw driver
flathead screwdriver
10mm socket with extensions
cold air intake kit with silicone hoses, clamps, tubing, and filter
favorite icy cold drink. i chose corona
1.) Starting with a clean work area, and some cold ones, start by locating your air intake box, and getting it the hell out of your engine bay! Hint it’s the black ugly thing that looks like a box!
2.) Using Phillips Head Screwdriver remove the screw clips that tighten down the hose to the box, and also the hose to the intake manifold. It’s the two clips you see in the center of the picture.
3.) Remove your Air Sensor and also that metal clippie thing that’s on the top of the black box. (All you technical dudes that know what it’s called feel free to chuckle at my use of technical jargon!) Don’t cut wires, just unscrew and unclip. You need to reinstall both these things later.
4.) Unlatch the top of the box and then take it off. Remove the inside cotton air filter.
5.) Unbolt the three bolts holding it onto its mounts (10mm) and trace forward the hose that’s on the bottom of the box. It is bolted close to your front grille, 10mm bolt. (Sorry about not having a picture. One two many cold ones by this point)
6.) You got two rubber mounts with your kit. One has two threaded posts; one has a threaded post and a threaded hole. The double post mount goes in front of the battery (pointed out in picture) the other mount goes on top of your battery where the tie-down bracket is. Remove the bolt that is holding the bracket down and replace with your new rubber mount.
7.) I removed right Headlight to make it easier to install and tighten everything; otherwise it’s tight to get your arms under there! If you don’t know how to remove your headlights, check the other Tech article. It’s a screw in the fender, the bolts under the grille, and then a couple of friction retainers on the headlight housing that keeps it in place, then remove the headlight 4-screw / bolts.
8.) You have 2 pieces of metal tubing, one looks like a U, and the other is slightly L shaped. The L shaped piece (which is longer incase you never passed kindergarten) goes in first, carefully weave it in front of your battery and through out the maze of wiring, until the tube points downish and you can screw the washer and nut onto the rubber mount you just installed. It is easier if you install the silicone tube onto the aluminum tubes before putting them into your engine bay. You will have to wiggle and push them onto the aluminum, and it is easier when you can get a better grip and more leverage.
9.) The U piece comes next and installs onto the other piece and loops into your intake manifold. Tighten down all those screw clips and your tubing is in.
10.) Screw the Sensor back in, where it looks like it fits.
11.) Install your breather hose, you will have to remove your valve cover to do this. It just replace where that OEM black one was. If you like the black one, Fine be that way!
12.) Mount your highly technical metal clippie thing on the supplied post, and I Zip-tied mine down, cuz it didn’t fit as nicely as it used to, and kept popping off after driving around for a little.
13.) Pop on the air filter and tighten down the retainer clip on it, and your done.
14.) My custom Airbrushed Ebay! Cheapo intake (BOMZ). Around 3300 rpm you really hear her suck in the air, and you can definitely feel the extra kick when you step on the gas, exhaust got louder too. No word yet as to dyno results, or MPG increase / decrease.


Junior Member
Joined: Nov 2004
Posts: 1
BOMZ
My BOMZ kit doesn't see to look anything like yours...My kit didn't have any rubber stand offs or grommits, and I got a separate tiny little air filter for the breather hose. So breather intake does not even connect to the intake pipe at all now ll. 
My pipe goes straight out the side of the vehicle in front of the battery. Your pipe looks a little U Shaped to me, My Scion seems to run fine, but I am concerned a little bit about the gas mileage going down. I was averaging 32mpg. I hope that doesn't change, with gas prices on the rise. There is a minor difference in performance, and you can really hear the air intake when I get on it. Overall, the jury is still out for me.
My pipe goes straight out the side of the vehicle in front of the battery. Your pipe looks a little U Shaped to me, My Scion seems to run fine, but I am concerned a little bit about the gas mileage going down. I was averaging 32mpg. I hope that doesn't change, with gas prices on the rise. There is a minor difference in performance, and you can really hear the air intake when I get on it. Overall, the jury is still out for me.
Thread Starter
Senior Member
SL Member
Team ScioNRG
Joined: Aug 2005
Posts: 650
From: Guam (the 671)
i painted my kit? maybe that changes the apearance of it a lil. anywho. yeah mine has rubber stops and all that good stuff. ive notice about the same for gas mileage since putting it on, but the power ive gotten is great, and i can hear it as soon as i tap on the gas. its also made my exhaust louder!
for me this was a win win for the price. im thinkin eventually ill buy the AEM to get the nice finish, and the carb sticker.
for me this was a win win for the price. im thinkin eventually ill buy the AEM to get the nice finish, and the carb sticker.

Junior Member
Joined: Sep 2005
Posts: 4
Second rubber mount
...the other mount goes on top of your battery where the tie-down bracket is. Remove the bolt that is holding the bracket down and replace with your new rubber mount.
Thanks in advance.
Thread Starter
Senior Member
SL Member
Team ScioNRG
Joined: Aug 2005
Posts: 650
From: Guam (the 671)
ok i dont have camera handy so i will describe it indepth. if you still have problems (which you shouldnt) i can try and take pics tomorrow when i get my camera back.
the battery has two nuts on it. one on the right and one on the left. (as you are looking at it front the front of the engine bay) take the nut off of the left side, as it is replaced with the rubber mount. all you have to do is remove the nut, and replace it with the double threaded rubber mount. it screws right back on to the screw post that will be there. you wont need a picture.
the battery has two nuts on it. one on the right and one on the left. (as you are looking at it front the front of the engine bay) take the nut off of the left side, as it is replaced with the rubber mount. all you have to do is remove the nut, and replace it with the double threaded rubber mount. it screws right back on to the screw post that will be there. you wont need a picture.
Junior Member
Joined: Sep 2005
Posts: 4
Hey WeeMan,
I figured it out with your advice. The problem was the the mount wasn't prepped properly; there was full of rubber it in. I had to clean out the hole with a drill and it installed in perfectly. Thanks fo rthe help.
Here's a few pics:


I figured it out with your advice. The problem was the the mount wasn't prepped properly; there was full of rubber it in. I had to clean out the hole with a drill and it installed in perfectly. Thanks fo rthe help.
Here's a few pics:


Junior Member
Joined: Sep 2005
Posts: 4
nice. looks sweet
It was a b!tch to install because I never installed this type of CAI before and Bomz Racing gives you the worst instructions ever. But because of your DIY instructions it was a lot of help. The changes I made was that I took out the battery instead of unmounting the headlight and I was drinking Gatorade instead of Corona

Aside from my problems I had with my parts (drilling rubber out of the mount and buying a missing clamp), it was pretty easy. If I had to install another one it would be no problem. If anybody plans to use this DIY and needs help, I'd be willing to shed some light on what I did, i.e.: take more digipics of certain areas.
WeeMan or anybody: Do you think I would have to switch to the Short Ram during the winter to avoid getting water in the engine? We can get a lot of snow in my area and I've heard CAIs doing that to the engines. Beauty of the kit, you can remove the 2nd piece of piping and convert the CAI into a Short Ram

Thread Starter
Senior Member
SL Member
Team ScioNRG
Joined: Aug 2005
Posts: 650
From: Guam (the 671)
have your car lowered? if so. it would probably be a good idea. i have about a 2.5 inch drop.
it is the rainy season where i live (guam) and we get so much rain i cant even drive my car without getting it flooded. so i converted mine. it performs about the same.
i also got a splash guard... its a metal cover that shields the filter from heat and water... i use that when i have it on as cold air and that works great also... id recommend just getting one of those if you are running stock height still. and you probably wont have any problems, unless you try to cross water that could enter the car cabin...
it is the rainy season where i live (guam) and we get so much rain i cant even drive my car without getting it flooded. so i converted mine. it performs about the same.
i also got a splash guard... its a metal cover that shields the filter from heat and water... i use that when i have it on as cold air and that works great also... id recommend just getting one of those if you are running stock height still. and you probably wont have any problems, unless you try to cross water that could enter the car cabin...


Junior Member
Joined: Mar 2007
Posts: 5
IN TAKE PROBLEMS!!!!! HELP
i did all these steps .. my problem is that for some reason my xb is bogging down really bad and wont pass 3000rpm.. my traction control /vsc light and engine light is on ... i think i sparked my battery some how .i need help to fighure out what's wrong

Member
SL Member
Joined: May 2007
Posts: 86
From: Lake Perris, CA
 Installed the Bomz CAI yesterday
WeeMan, dunno if you're still on these forums, but thanks for making this thread back in '06. I just installed a BOMZ CAI on my '04 yesterday, and I must say, the instructions that came with the package were rather $h*tty.
When you think about it, there's really only 3 pieces that need to be put together, but it was those rubber bushings I wasn't sure where to place until I stumbled upon this thread. Thanks dude !
For all you out there who are installing this, it's a snap. The way I did it was as follows:
1. Removed plastic valve cover.
2. Detached harness from MAF sensor.
3. Detached vacuum hose from filter box.
4. Loosened clamps connecting hose between filter box and throttle body, removed hose.
5. Unclipped filter box, removed cover, removed filter, unscrewed snorkel thing at lower front of filter box, removed three bolts for filter box, took out filter box.
6. Unscrewed and removed MAF sensor, cleaned sensor.
7. Installed the largest piece of pipe that came with the BOMZ package first. By threading it down in front of the battery and turning it as you go, you can insert it without removing battery or headlight.
8. Lined up the metal tabs on the pipe so that I could screw the bushings in place, the first into the hole at the front of the battery stand, the other onto the left side of the battery.
9. Attached the MAF sensor to the U-shaped pipe.
10. Installed the U-shaped piece of pipe next. There are two rubber connectors that join the pipes. The widest one connects the two pipes together. The narrower one connects the U-shaped pipe to the throttle body.
11. The package I had came with only 4 screw-clamps. I think it needs 5 (2 for each rubber tube, and one for the filter). I ended up using one of the original clamps.
12. Tightened all clamps.
13. From under the front of the car, I attached the filter to the pipe, and screwed the clamp in place.
14. Unhooked the battery negative terminal for 5 minutes, then re-attached. And you're done.
When you think about it, there's really only 3 pieces that need to be put together, but it was those rubber bushings I wasn't sure where to place until I stumbled upon this thread. Thanks dude !
For all you out there who are installing this, it's a snap. The way I did it was as follows:
1. Removed plastic valve cover.
2. Detached harness from MAF sensor.
3. Detached vacuum hose from filter box.
4. Loosened clamps connecting hose between filter box and throttle body, removed hose.
5. Unclipped filter box, removed cover, removed filter, unscrewed snorkel thing at lower front of filter box, removed three bolts for filter box, took out filter box.
6. Unscrewed and removed MAF sensor, cleaned sensor.
7. Installed the largest piece of pipe that came with the BOMZ package first. By threading it down in front of the battery and turning it as you go, you can insert it without removing battery or headlight.
8. Lined up the metal tabs on the pipe so that I could screw the bushings in place, the first into the hole at the front of the battery stand, the other onto the left side of the battery.
9. Attached the MAF sensor to the U-shaped pipe.
10. Installed the U-shaped piece of pipe next. There are two rubber connectors that join the pipes. The widest one connects the two pipes together. The narrower one connects the U-shaped pipe to the throttle body.
11. The package I had came with only 4 screw-clamps. I think it needs 5 (2 for each rubber tube, and one for the filter). I ended up using one of the original clamps.
12. Tightened all clamps.
13. From under the front of the car, I attached the filter to the pipe, and screwed the clamp in place.
14. Unhooked the battery negative terminal for 5 minutes, then re-attached. And you're done.