


xB auto dimming mirror


Thread Starter
Senior Member


SL Member
Joined: Nov 2005
Posts: 1,282
From: SoCal
 xB auto dimming mirror
Well, I got a chance to install my Gentek mirror today. Thanks to MicroVan for giving me the "push" to do it. Most of the removal/replacement is simple, but a few things weren't as obvious.
Disclaimer: If I fubar my box, its my problem. If you fubar yours, its your problem!
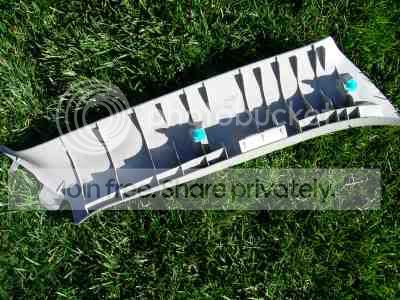
Removing the pillar cover, pull towards the center of the windshield. You can see the type and location of the clips. Right side of photo is the top.
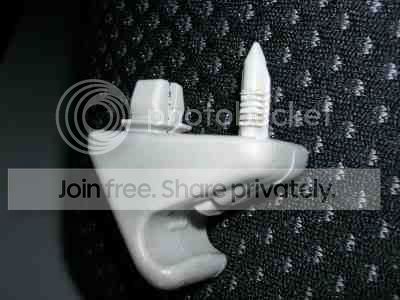
Next unknown was the visor hook. After the screw is out, pull side to side and down. It was in there fairly hard.
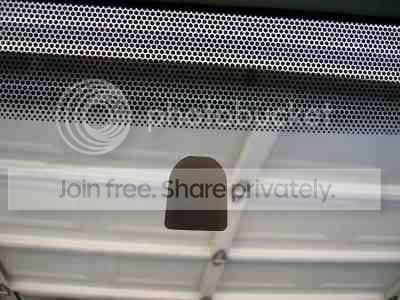
Use the included adhesive for the mounting disc.
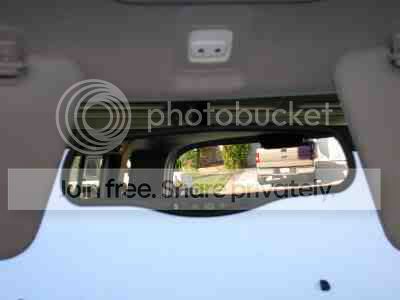
Mirror mounted. Just clears the visors perfectly! Oh, yeah be sure to have a #20 Torx bit handy. I think that they should have included one but noooooo.
Mounting and pulling wire for the temp sensor was straightforward. Clips in the grill, route the wire through the firewall (I went next to my amp wire) and up the "A" pillar. The wiring harness from the mirror goes up thru the (optional) wire channel/trim and tucks under the front edge of the headliner to the "A" pillar and then down. Popping your tweeter out makes it a lot easier! I made adapter plugs from a fuse and 1/4" female disconnects. This allows you to tap directly into the fuse box.
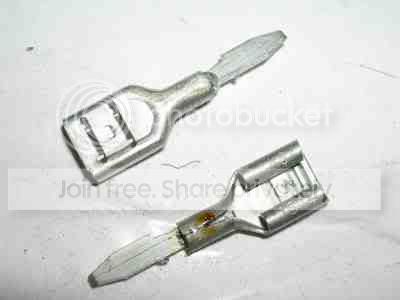
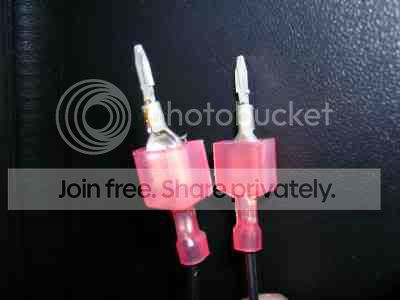
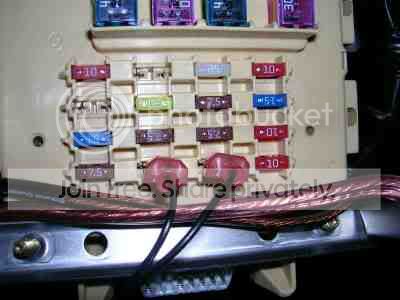
Heres the fuse box, right wire is constant 12v. Left one is switched 12v. Adapter goes into the right side "socket/leg" of each location. The ground went to an existing ground in the driver's side kick panel.
Heres the mirror normal and dimmed.
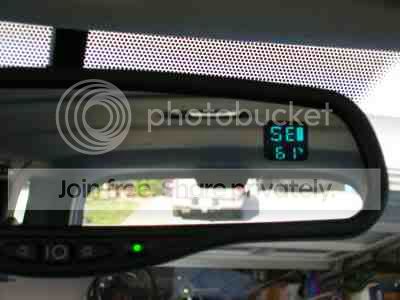
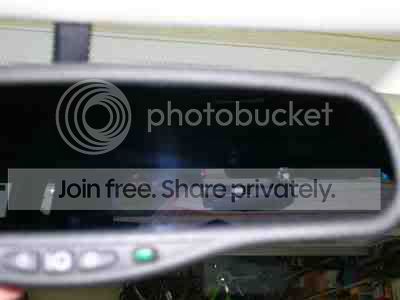
Auto dimming, map lights, compass and temp. Nice! Next "to do" is a CNC machined, polished aluminum bB logo to cover the stock mirror mount holes!
Disclaimer: If I fubar my box, its my problem. If you fubar yours, its your problem!
Removing the pillar cover, pull towards the center of the windshield. You can see the type and location of the clips. Right side of photo is the top.
Next unknown was the visor hook. After the screw is out, pull side to side and down. It was in there fairly hard.
Use the included adhesive for the mounting disc.
Mirror mounted. Just clears the visors perfectly! Oh, yeah be sure to have a #20 Torx bit handy. I think that they should have included one but noooooo.
Mounting and pulling wire for the temp sensor was straightforward. Clips in the grill, route the wire through the firewall (I went next to my amp wire) and up the "A" pillar. The wiring harness from the mirror goes up thru the (optional) wire channel/trim and tucks under the front edge of the headliner to the "A" pillar and then down. Popping your tweeter out makes it a lot easier! I made adapter plugs from a fuse and 1/4" female disconnects. This allows you to tap directly into the fuse box.
Heres the fuse box, right wire is constant 12v. Left one is switched 12v. Adapter goes into the right side "socket/leg" of each location. The ground went to an existing ground in the driver's side kick panel.
Heres the mirror normal and dimmed.
Auto dimming, map lights, compass and temp. Nice! Next "to do" is a CNC machined, polished aluminum bB logo to cover the stock mirror mount holes!

Thread Starter
Senior Member
SL Member
Joined: Nov 2005
Posts: 1,282
From: SoCal
I bought from this eBay seller:
http://cgi.ebay.com/ebaymotors/GENTE...temZ8030875291
Free ship, came in 2 days. The wire channel piece is optional, but makes for a factory quality installation. Looks OEM!
http://cgi.ebay.com/ebaymotors/GENTE...temZ8030875291
Free ship, came in 2 days. The wire channel piece is optional, but makes for a factory quality installation. Looks OEM!


 very nice mod. i'm diggin' it. this needs to be added to the tech section. tech mod!!!!!!!!!!!!

Senior Member
SL Member
Joined: Nov 2004
Posts: 506
From: McDonald, PA
I'm sporting the same mirror. I sure did like your idea of using an old fuse and making a custom fuse plug to pick up power at the fuse block. GOOD IDEA !! I looked everywhere for the "add-a-fuse" for the small fuses we have, with no luck.
My install was fairly easy also. I took a few hours though. The only thing I didn't like was the fact that you can't pick up a good wire to make the map lights come on when you open up ANY door. I mean, the map lights come on when you open the drivers door, but could not get them to work with the passenger doors. Any hints anyone??
Also with the UGLY space that was left by removing my old factory mirror, I just sacrificed it and cut it off with a hack saw just so enough of the base was left to mount back up there with the 2 screws and put the plasctic cover back on. It kinda looks like it belongs there now, or it kinda looks like a control box for the new Gentex mirror. I like the idea about the bB emblem though. Where can I get one of those ??
My install was fairly easy also. I took a few hours though. The only thing I didn't like was the fact that you can't pick up a good wire to make the map lights come on when you open up ANY door. I mean, the map lights come on when you open the drivers door, but could not get them to work with the passenger doors. Any hints anyone??
Also with the UGLY space that was left by removing my old factory mirror, I just sacrificed it and cut it off with a hack saw just so enough of the base was left to mount back up there with the 2 screws and put the plasctic cover back on. It kinda looks like it belongs there now, or it kinda looks like a control box for the new Gentex mirror. I like the idea about the bB emblem though. Where can I get one of those ??
Thread Starter
Senior Member
SL Member
Joined: Nov 2005
Posts: 1,282
From: SoCal
Davestoaster,
I bought my genuine emblems here at the scionlife rummage sale and had this repopped one just begging for a home. They are also available on eBay, but do a search here and steer clear of the knockoffsand iffy sellers. The actual mounting will be up to you and your creativity!
bellnier,
I went through the existing rubber grommet on the driver's side firewall. I went next to-not along with-the factory wiring. Its like a shifter boot/bellows kind of setup. Its double walled, so you need to go through two layers of rubber! My 4ga power wire was just too large to squeeze along with the bundle that is already there. A smaller wire *might* make it through, but it was easier to go along side. That way, theres no chance (well maybe a lesser one) of cutting/damaging the factory wires. A fubar here would be very expensive.
I bought my genuine emblems here at the scionlife rummage sale and had this repopped one just begging for a home. They are also available on eBay, but do a search here and steer clear of the knockoffsand iffy sellers. The actual mounting will be up to you and your creativity!
bellnier,
I went through the existing rubber grommet on the driver's side firewall. I went next to-not along with-the factory wiring. Its like a shifter boot/bellows kind of setup. Its double walled, so you need to go through two layers of rubber! My 4ga power wire was just too large to squeeze along with the bundle that is already there. A smaller wire *might* make it through, but it was easier to go along side. That way, theres no chance (well maybe a lesser one) of cutting/damaging the factory wires. A fubar here would be very expensive.


Member
SL Member
Joined: Nov 2006
Posts: 83
From: Nashville, TN
Re: xB auto dimming mirror
Originally Posted by tanakasan
Well, I got a chance to install my Gentek mirror today.
A couple of questions:
How far down the glass did you mount the button - and how/why did you pick that location?
Did you get the short wire (2"-3") cover or the long (3" - 5") one ? The answer may be abvious when you answer the first question :D
Thanks again!
Dennis
Thread Starter
Senior Member
SL Member
Joined: Nov 2005
Posts: 1,282
From: SoCal
I ordered the short wire channel.
Yeah, it pretty much determines the up/down location of the button. I used mine at the shortest length, as it is adjustable to go longer.
You can see the approximate final button location in the third pic of my install .
Too high, it will interfere with the visors. Too low looks goofy.
Yeah, it pretty much determines the up/down location of the button. I used mine at the shortest length, as it is adjustable to go longer.
You can see the approximate final button location in the third pic of my install .
Too high, it will interfere with the visors. Too low looks goofy.


Thread Starter
Senior Member
SL Member
Joined: Nov 2005
Posts: 1,282
From: SoCal
Wow, those are some HUGE Legos...I mean pics!  Very ingenious solution!
samhain, fuse box is by your left knee, behind that little plastic cover with the pocket in it.
Heres whats in mine...CNC mount
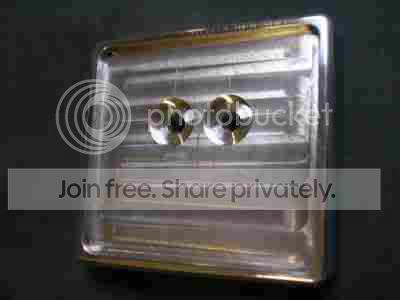
Wide shot
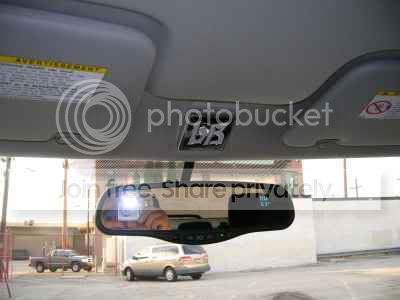
Close up, polished and installed
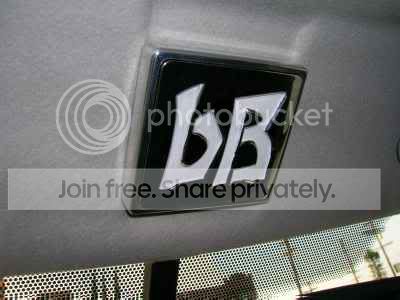
Very ingenious solution!samhain, fuse box is by your left knee, behind that little plastic cover with the pocket in it.
Heres whats in mine...CNC mount
Wide shot
Close up, polished and installed
Member
SL Member
Joined: Nov 2006
Posts: 83
From: Nashville, TN
I need a larger monitor to look at those pics :D
I don't care much for autodimming mirrors - hated them in my BMWs (can't tell if a cop is behind you at night), the one in my RX-8 has an off switch so I keep it turned off 99% of the time. In the box with the tinted window, it should be fine without one.
I was going to put a new mirror in the box to get the map lights, but I picked up a dome light/map light thing I want to try first. I am going to try to mount it to the existing miror mount using the OEM screws (or longer versions of them). My goal is to get lights up front, the auto dim is no big deal nor is the compass (I have several GPS units). If I can get it to work, I will post the details. If I can't, I will buy a mirror with map lights :D
Dennis
I don't care much for autodimming mirrors - hated them in my BMWs (can't tell if a cop is behind you at night), the one in my RX-8 has an off switch so I keep it turned off 99% of the time. In the box with the tinted window, it should be fine without one.
I was going to put a new mirror in the box to get the map lights, but I picked up a dome light/map light thing I want to try first. I am going to try to mount it to the existing miror mount using the OEM screws (or longer versions of them). My goal is to get lights up front, the auto dim is no big deal nor is the compass (I have several GPS units). If I can get it to work, I will post the details. If I can't, I will buy a mirror with map lights :D
Dennis
Thread Starter
Senior Member
SL Member
Joined: Nov 2005
Posts: 1,282
From: SoCal
Yup, really its just another toy for my box!
Temp is handy, as are the twin map lights. I have a Garmin GPS for serious use, but the compass is quick and easy for most driving.
Auto dim is almost never triggered with my limo tint. Didn't have tint when I put the mirror in!
The best part? Its that you can see across the entire back window at once!
x2 on the HUGE pics!
Temp is handy, as are the twin map lights. I have a Garmin GPS for serious use, but the compass is quick and easy for most driving.
Auto dim is almost never triggered with my limo tint. Didn't have tint when I put the mirror in!
The best part? Its that you can see across the entire back window at once!
x2 on the HUGE pics!
Member
SL Member
Joined: Nov 2006
Posts: 83
From: Nashville, TN
Re: xB auto dimming mirror
Originally Posted by tanakasan
I made adapter plugs from a fuse and 1/4" female disconnects. This allows you to tap directly into the fuse box.
Heres the fuse box, right wire is constant 12v. Left one is switched 12v. Adapter goes into the right side "socket/leg" of each location. The ground went to an existing ground in the driver's side kick panel.
Heres the fuse box, right wire is constant 12v. Left one is switched 12v. Adapter goes into the right side "socket/leg" of each location. The ground went to an existing ground in the driver's side kick panel.
If you need switched +12v or always on you can use the empty fuse slots as shown by tanakasan just DO NOT put a fuse in the 2nd slot (the one closest to the fuse box when you plug the add-a-circuit in). Put a fuse in the top slot (4 different ones are provided with the kit) and install the add-a-circuit into eithe un-used fuse slots. You may have to rotate it 180 degrees to get +12v off of it. Works just fine and no need to pull any of the working fuses to add the new circuit.
I used this to power the RADAR detector, but you could use it for the mirror install or any other constant or always on power.
Thanks,
Dennis
Thread Starter
Senior Member
SL Member
Joined: Nov 2005
Posts: 1,282
From: SoCal
^^Great idea!
My DIY taps are EZ, readily available and cheap. You should have the parts (burnt/new fuse, female/male spade connectors, soldering iron/lighter) just sitting around if you are doing any of this stuff.
Heck, in my poorer but creative younger days, we would solder the ends of the wire, flatten it with a hammer to resemble the fuse leg and push it into the fuse receptacle.
Oh, the "good old" days!
My DIY taps are EZ, readily available and cheap. You should have the parts (burnt/new fuse, female/male spade connectors, soldering iron/lighter) just sitting around if you are doing any of this stuff.
Heck, in my poorer but creative younger days, we would solder the ends of the wire, flatten it with a hammer to resemble the fuse leg and push it into the fuse receptacle.
Oh, the "good old" days!

Thread
Thread Starter
Forum
Replies
Last Post
Luisfc1972
Scion tC 1G Drivetrain & Power
1
Sep 30, 2015 12:22 PM
ScionLife Editor
Scion News Forum
0
Sep 24, 2015 10:50 PM
ScionLife Editor
Scion News Forum
0
Sep 15, 2015 04:40 AM
