
View Poll Results: is this a good write up???


Voters: 28. You may not vote on this poll
DIY: taillights take apart. lots of pics.


Thread Starter
Senior Member
SL Member
Joined: Dec 2004
Posts: 351
From: KCMO (Waldo)
well i dont think there have acually been pictures posted of this process so i took some as i took mine apart tonight. maybe sticky this in a tech section somewere???
Step 1:
is to get the lights
Step 2:
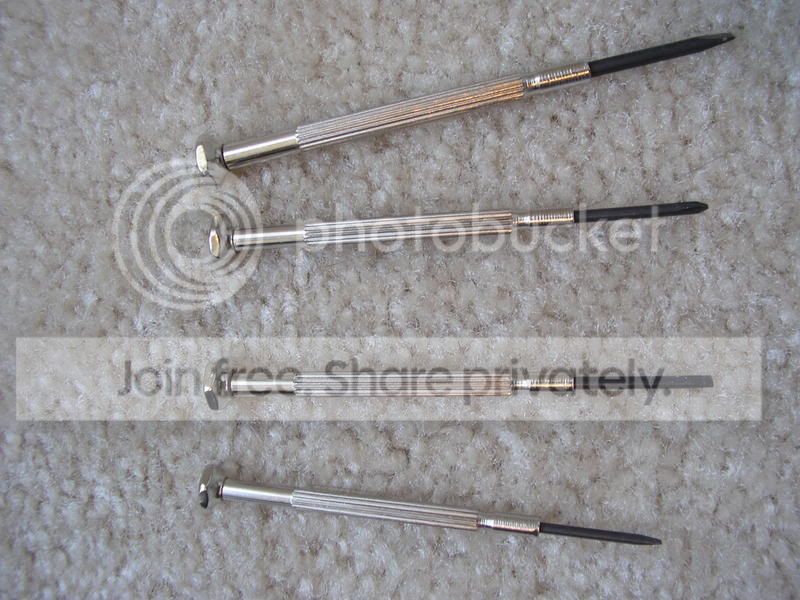
than the tools. i used 4 eye glass flathead screwdrivers small ones.
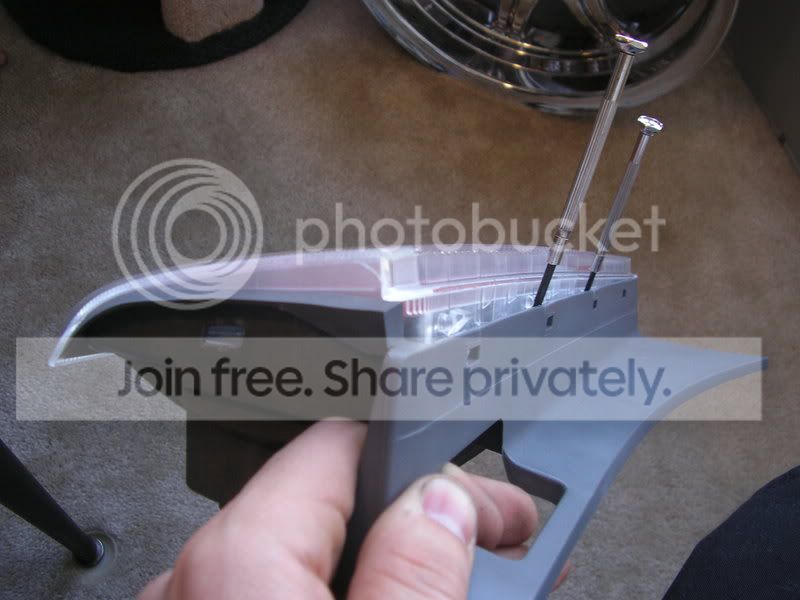
Step three
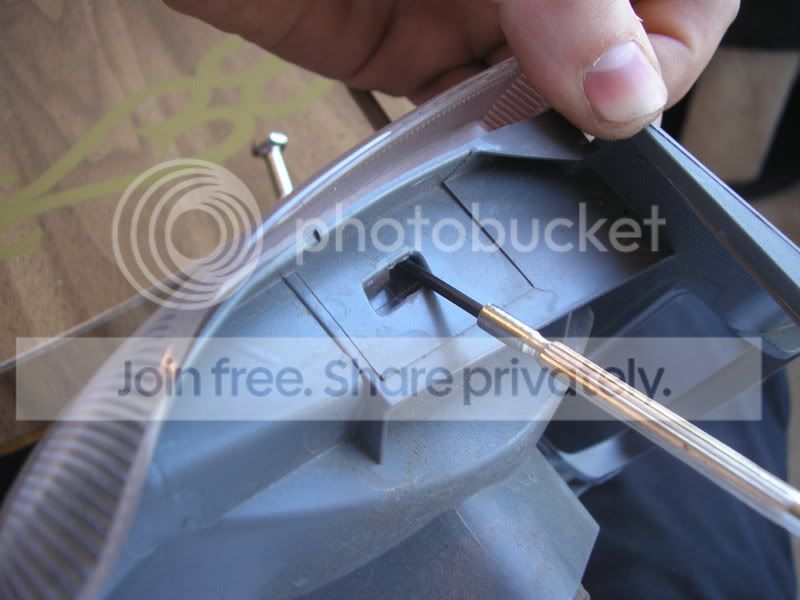
find the tabs on the side and insert flat headbetween the lens and housing and genlty pry the housing (not lens) back to make tab (in lens) move back from the hole in the housing.
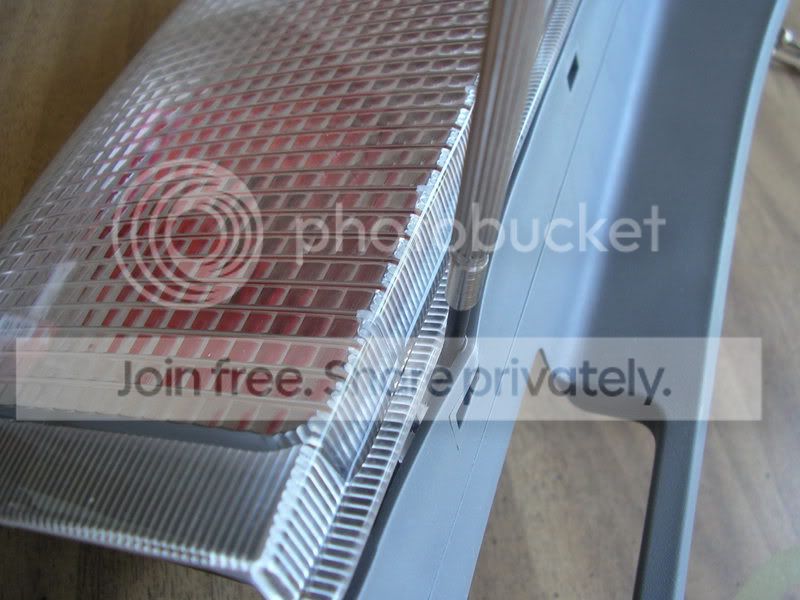
do the next two so the first three tabs are out of the holes keeping the screwdrivers in the holeswhile you move on to the next ones.
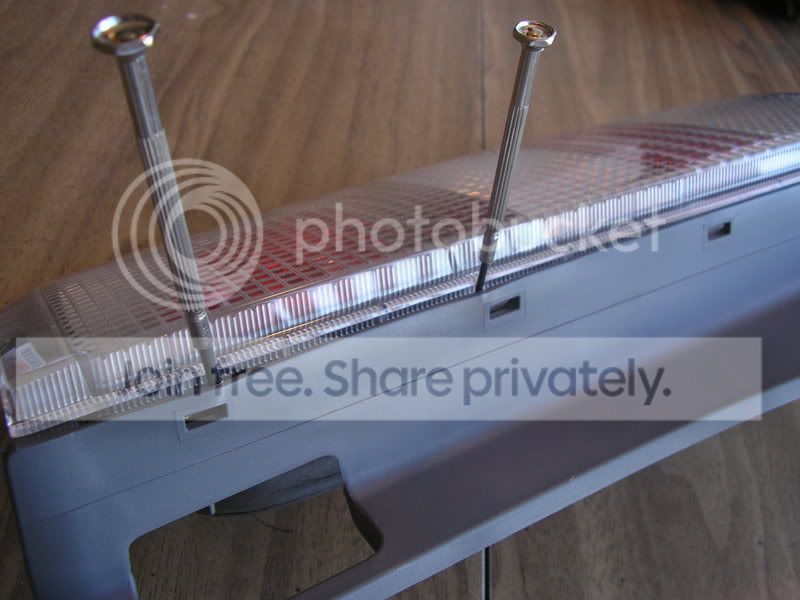
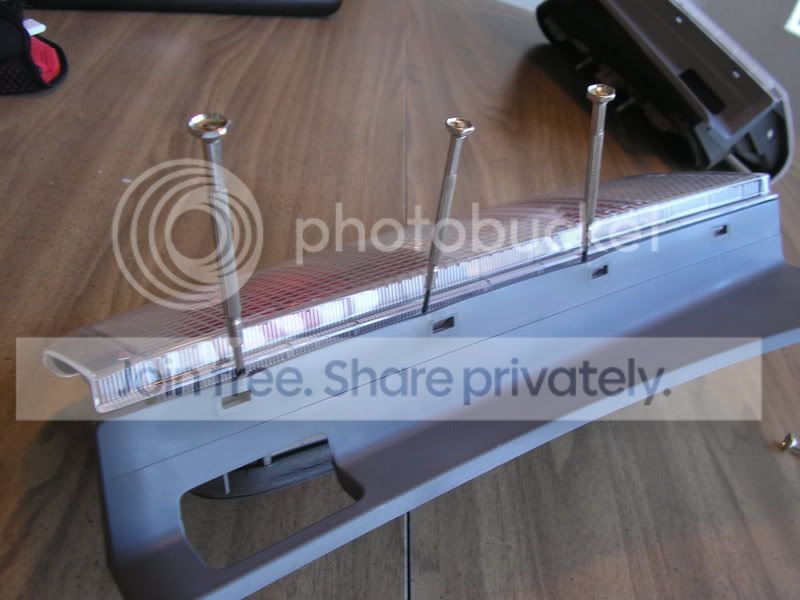
than move back up to the top of the light and there is one tab in the middle there. go on the SIDE of the tab and pry the grey housing over the tab sticking out from the lens while appling slight pressure on the lens away from the housing.
there will be a slight pop that is the lens coming out from the housing. now dont get to excited your almost there. during this time you need to be careful of the bottom outside edge of the lens it is fragle and like to break.
now from the top to the bottom the lens should be seprating from the housing. you can start taking the top 2 screwdrivers out from top to bottom leaving the bottom one in.
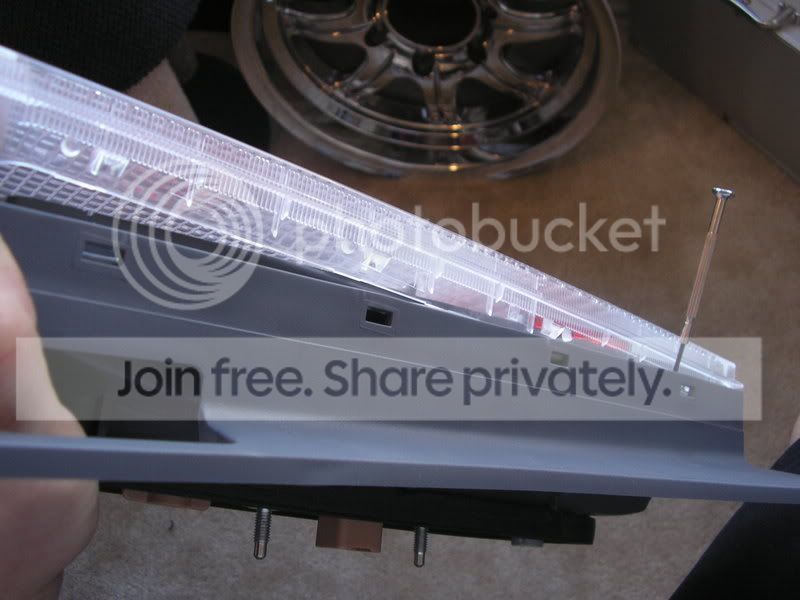
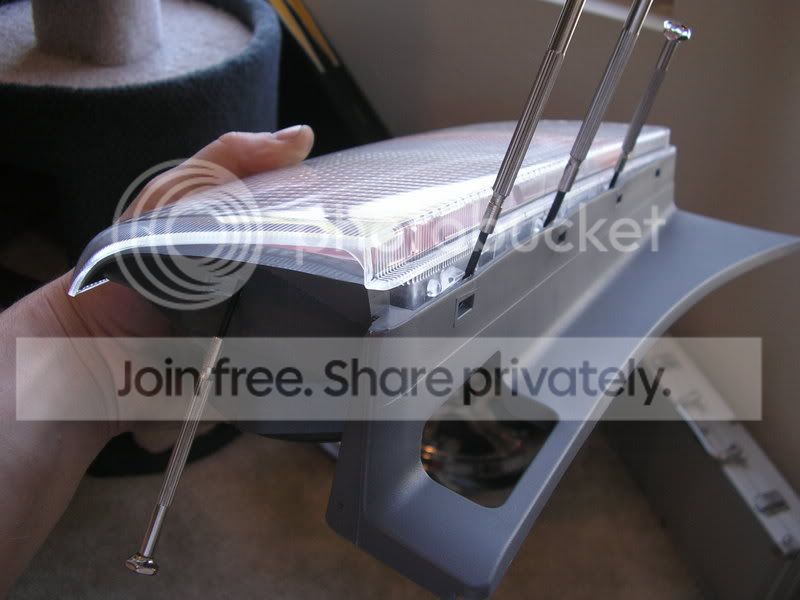
now in this picture i took the bottom screwdriver out because the lens was fully out. if it is fully out then you could take it out as well. now go to the bottom 2 tabs and do the same that you did on the top of the light.
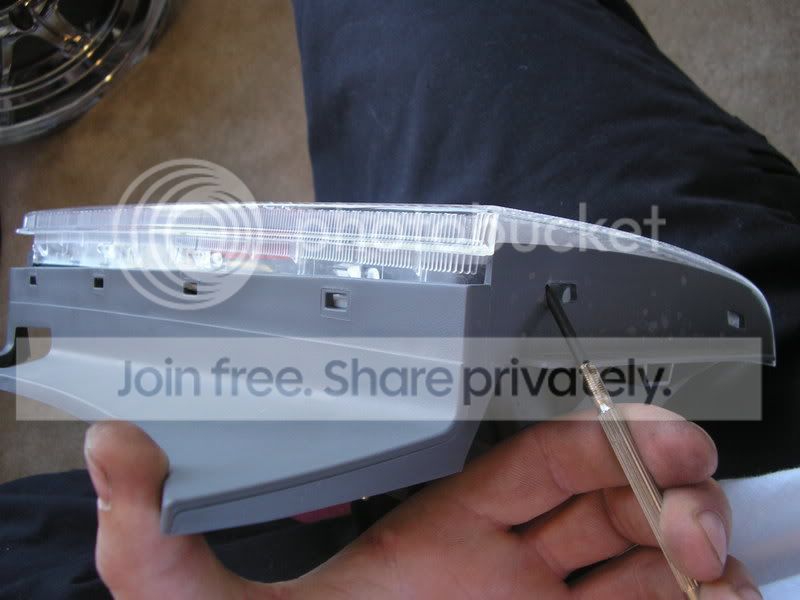
after you get that one out it should just come apart. this is another place were you have to be carefull for the outer edge of the light. they do likee to crack.
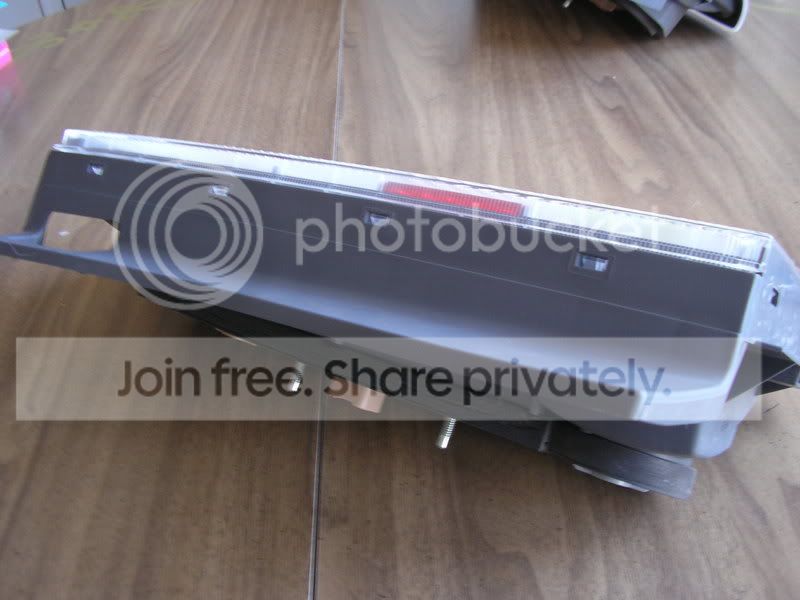
your finshed product should look like this.
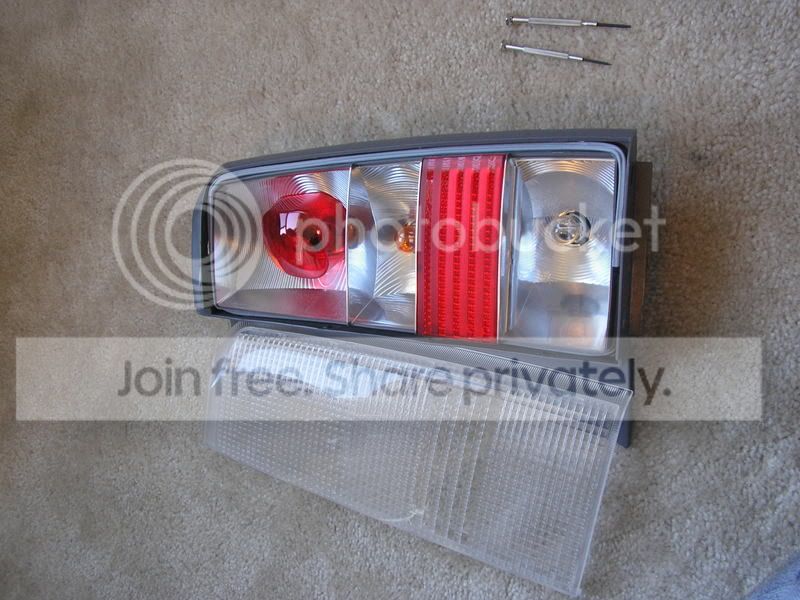
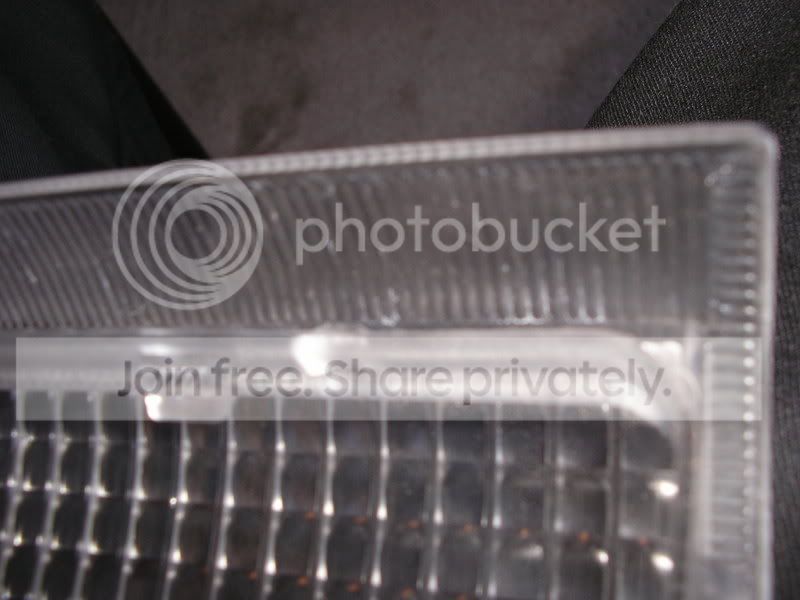
now you can do what ever you what to do to the inside of the lights. there will also be a little grey nerf type thing down the valley were the lens slides in to the housing. make sure that you put that back into the little valley that it was in or youll get water in the light. other than that have fun and i hope this helped out atleast one or two people out there.
oh and disclaimer for myself. i dont know how careful you are so i cannot be held responsible for damaged tail lights or illegal things done to lights after they have been modified.
happy modding!!!
Step 1:
is to get the lights
Step 2:
than the tools. i used 4 eye glass flathead screwdrivers small ones.
Step three
find the tabs on the side and insert flat headbetween the lens and housing and genlty pry the housing (not lens) back to make tab (in lens) move back from the hole in the housing.
do the next two so the first three tabs are out of the holes keeping the screwdrivers in the holeswhile you move on to the next ones.
than move back up to the top of the light and there is one tab in the middle there. go on the SIDE of the tab and pry the grey housing over the tab sticking out from the lens while appling slight pressure on the lens away from the housing.
there will be a slight pop that is the lens coming out from the housing. now dont get to excited your almost there. during this time you need to be careful of the bottom outside edge of the lens it is fragle and like to break.
now from the top to the bottom the lens should be seprating from the housing. you can start taking the top 2 screwdrivers out from top to bottom leaving the bottom one in.
now in this picture i took the bottom screwdriver out because the lens was fully out. if it is fully out then you could take it out as well. now go to the bottom 2 tabs and do the same that you did on the top of the light.
after you get that one out it should just come apart. this is another place were you have to be carefull for the outer edge of the light. they do likee to crack.
your finshed product should look like this.
now you can do what ever you what to do to the inside of the lights. there will also be a little grey nerf type thing down the valley were the lens slides in to the housing. make sure that you put that back into the little valley that it was in or youll get water in the light. other than that have fun and i hope this helped out atleast one or two people out there.
oh and disclaimer for myself. i dont know how careful you are so i cannot be held responsible for damaged tail lights or illegal things done to lights after they have been modified.
happy modding!!!


Senior Member
SL Member
Joined: Oct 2005
Posts: 960
From: Guam, 14.8N, 145.6E
Originally Posted by bB2NER
What's the purpose of taking them apart?

Senior Member
Music City Scions
SL Member
Joined: May 2004
Posts: 11,808
From: West TN - Land of twisty roads
Never seen OEM tails converted for LEDs so that sounds good but painting is done to the outside usually. But the right up should be quite helpful for those that want to attempt it.
BTW, The oven trick is for the headlights to clear them.
BTW, The oven trick is for the headlights to clear them.
Senior Member

SL Member
Joined: Oct 2006
Posts: 286
From: Daly City, CA
Originally Posted by bB2NER
They did... The first gen TYCs have clear lenses and I have a set.
Back on cue - It's a nice write up with a lot of pictures.. almost reminds me of taking apart an iPod just to change the battery...
Senior Member
Music City Scions
SL Member
Joined: May 2004
Posts: 11,808
From: West TN - Land of twisty roads
Not altezzas, they are just the first gen TYCs that look kinda like the alezza knock offs. The ones with clear lenses and red ones over the brake and turn part. I'm sure you've seen them. They came from Japan, I got them from bBism.
Sorry, now back on topic.
Sorry, now back on topic.

Senior Member
SL Member
Joined: Jan 2007
Posts: 2,192
very nice thanks. the only thing i could add that makes like easier here is a heat gun to soften the plastic up a bit :-)
My LED retrofits are coming along nice so far and this writeup will help other people that are possibly doing the same.
My LED retrofits are coming along nice so far and this writeup will help other people that are possibly doing the same.
Senior Member
Music City Scions
SL Member
Joined: May 2004
Posts: 11,808
From: West TN - Land of twisty roads
Originally Posted by black_sand_box
Originally Posted by bB2NER
They did... The first gen TYCs have clear lenses and I have a set.


Senior Member
SL Member
Joined: Jan 2007
Posts: 2,192
Originally Posted by bB2NER
Originally Posted by black_sand_box
Originally Posted by bB2NER
They did... The first gen TYCs have clear lenses and I have a set.
But the more and more i look at the stockers they are growing on me. Actually looks more OEM which is the look im going for but with the intensity of LED.
thanx for the pics man.

Thread Starter
Senior Member
SL Member
Joined: Dec 2004
Posts: 351
From: KCMO (Waldo)
i have looked at the clear ones both the tyc's and the newer led tail lights and they will not work.
and the reason that i took them apart is to paint them. it looks a ton cleaner if there painted from the inside instead of the out side. ill post pics when there done.
oh and the reason for the pool is; i just wanted to know if everything was easy to follow because i plan on doing more DIY write ups in the future. so no ego boost for me just want to see if im really helping people or confusing them. but thanks for all the comments and its not hard at all to do this just take your time.
Senior Member

The Family
SL Member
Joined: May 2006
Posts: 840
From: I'm Behind You
Originally Posted by Guamsilverbox671
Interesting, now if someone is willing to experiment with the clear lense of those TYC on the stock Light assembly 
Senior Member
Music City Scions
SL Member
Joined: May 2004
Posts: 11,808
From: West TN - Land of twisty roads
Xblozv , You have a nice system in your how too. Easy to follow and the pics put everything into perspective nicely. I say go for it and share with everyone.