
Pics of cleared headlights, billet grills & tint


Thread Starter
Senior Member
SL Member
Team ScioNRG
Joined: Oct 2004
Posts: 199
From: Harpers Ferry, WV
The grills are an official part and not aftermarket. Part # 00016-79045
I'll take some closer pics of the lower grills. I'm thinking of adding a Bb emblem on the upper grill so it's not so empty.
I'll take some closer pics of the lower grills. I'm thinking of adding a Bb emblem on the upper grill so it's not so empty.


Senior Member
SL Member
Joined: Mar 2004
Posts: 1,249
Originally Posted by _666_jesus_999_
nice! what method did you use to clear your corners?
https://www.scionlife.com/forums/viewtopic.php?t=33577
Thread Starter
Senior Member
SL Member
Team ScioNRG
Joined: Oct 2004
Posts: 199
From: Harpers Ferry, WV
Thanks Danger.
My recommendation to someone that wants to clear the headlights is to start with the "shatter" method, which is documented in detail in the "tech" section.
Like I said in that other thread Danger posted the link to, that method worked find for one of the headlights. But the other headlight became a problem when the amber lense broke too close to the securing tabs. At that point there was no way to remove the remaining amber lense because all that was left a long tabbed section that was in too tight.
At that point I used the oven method to loosen the silicone enough to pry open one end so I could poke out the tabs from underneath. Then the tabs just came out the bulb hole.
If you are hesitant to try to shatter the lenses and felt more comfortable with the oven method, then here's what you should do.
I would want to avoid having to seperate the entire housing just to remove the lense. Instead, just seperate the end of the housing where the amber lense is. Maybe just a 1/2" is fine. Enough to put the end of a pair of pliers in there to hold open the end while you work. Then use a thin screwdriver to poke out the tabs from the bottom. The amber lense will now be free, but too big to come out the bulb hole. Use clippers/tin snips to cut the amber lense. The lense is brittle and will break with a little clip. You'll have to repeat this on the pieces too large for the opening.
Senior Member
SL Member
Joined: Mar 2004
Posts: 1,249
yea towards the inside of the light there the plate has clips that go in...if you break must of it one good hit pops it out. Or you can do what my other friend did and use a clothes hanger to pull it out. I just cant do the oven method to scared.
Thread Starter
Senior Member
SL Member
Team ScioNRG
Joined: Oct 2004
Posts: 199
From: Harpers Ferry, WV
Here's what I did for the oven method.
Preheat to 200 degrees
Placed a piece of cardboard on the rack
Placed my headlight on the cardboard and made sure no plastic was touching the metal rack.
Watched it like a hawk. Mainly to make sure the cardboard didn't catch fire.
I removed the headlight after 2-3 minutes just to see how warm it was and if the silicone had loosened. It didn't and wasn't very warm.
Every 5 minutes I'd remove the headlight and see if I can pry open the housing. I'd estimate it took 10 minutes of heating to be able to pry open the one end.
The headlight plastic was very warm to the touch, but not hot.
Then I used my brute strength and pried open the end.
When finished, I put the headlight back in the oven for at least 5 minutes to get the silicone loose again. Then I resealed the housing and held together tightly for a few minutes while the silicone cooled and hardened again.
Preheat to 200 degrees
Placed a piece of cardboard on the rack
Placed my headlight on the cardboard and made sure no plastic was touching the metal rack.
Watched it like a hawk.
I removed the headlight after 2-3 minutes just to see how warm it was and if the silicone had loosened. It didn't and wasn't very warm.
Every 5 minutes I'd remove the headlight and see if I can pry open the housing. I'd estimate it took 10 minutes of heating to be able to pry open the one end.
The headlight plastic was very warm to the touch, but not hot.
Then I used my brute strength
When finished, I put the headlight back in the oven for at least 5 minutes to get the silicone loose again. Then I resealed the housing and held together tightly for a few minutes while the silicone cooled and hardened again.


Junior Member
Joined: Jun 2004
Posts: 17
From: 91007
Originally Posted by _666_jesus_999_
i cleared my headlights about 45 min ago using the screwdriver method, i'll try to post some pics tomorrow or the next day but for now here is one of my xb. :D :D 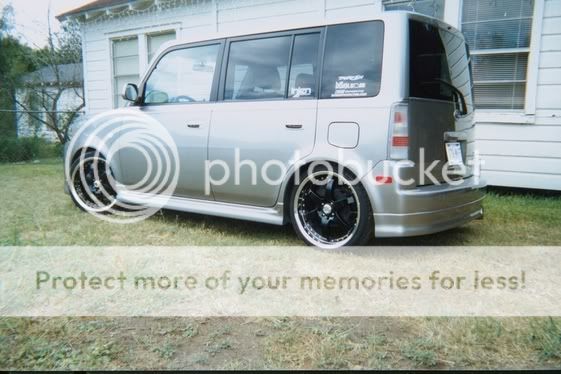
Thanks

Senior Member
SL Member
Joined: Feb 2005
Posts: 1,146
From: Alice, Texas
Originally Posted by OB936
Originally Posted by _666_jesus_999_
i cleared my headlights about 45 min ago using the screwdriver method, i'll try to post some pics tomorrow or the next day but for now here is one of my xb. :D :D
Thanks

